Italeri 1:35 Tiger Tank I Ausf. E
Scotland, United Kingdom
Joined: May 17, 2011
KitMaker: 106 posts
Armorama: 92 posts
Posted: Monday, May 23, 2011 - 07:53 AM UTC
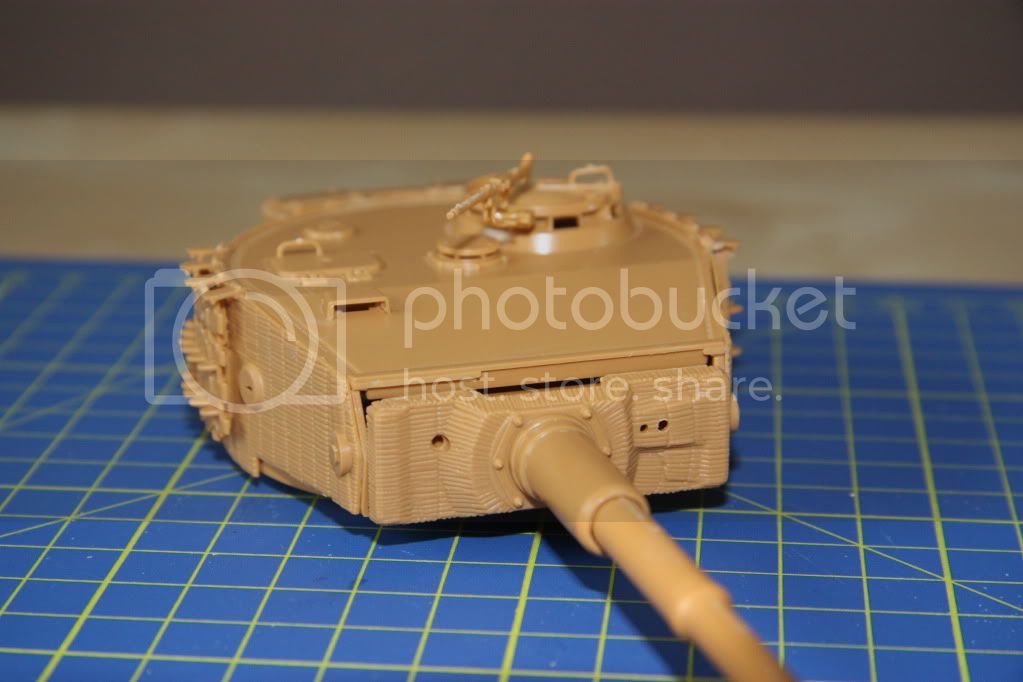
Started this a few days ago. I soooo prefer building this scale compared to 1:72! At least I can grab whole parts with my fingers!
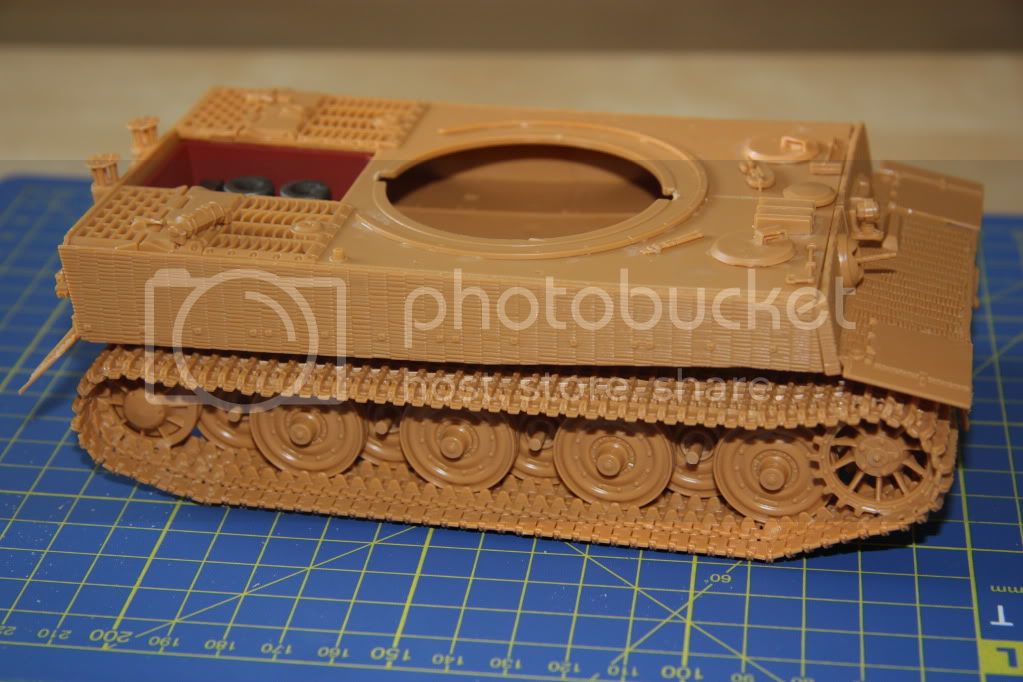
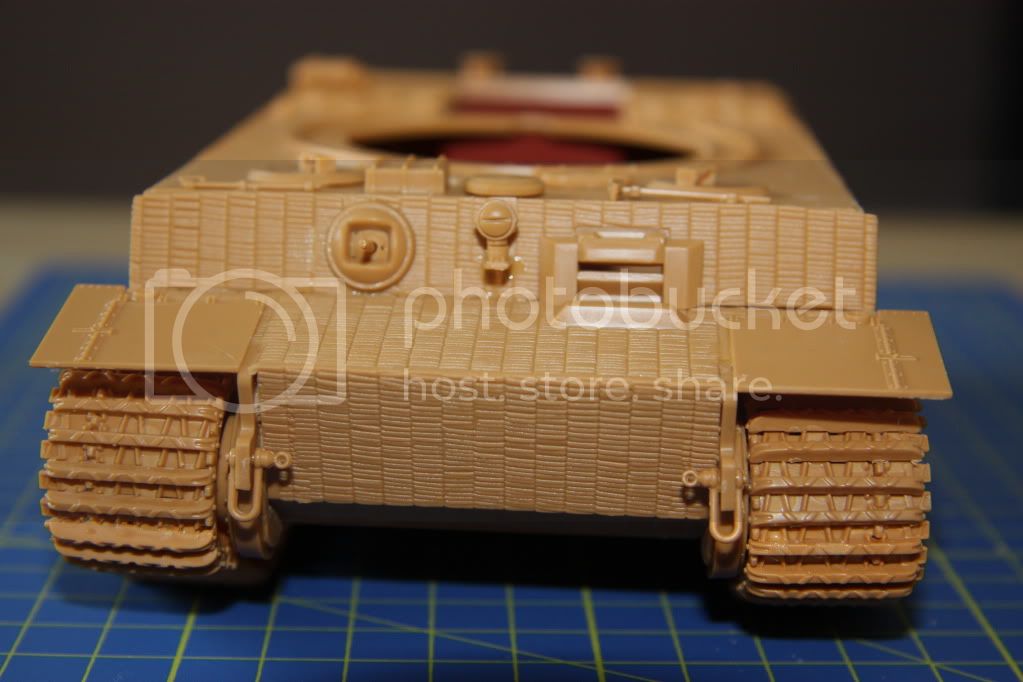
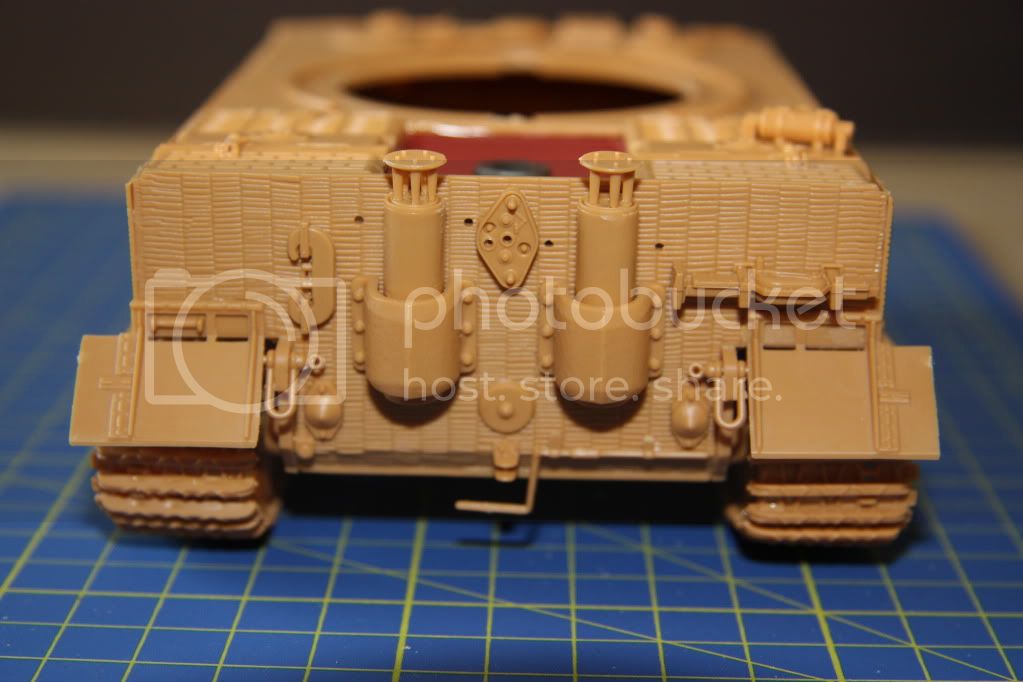
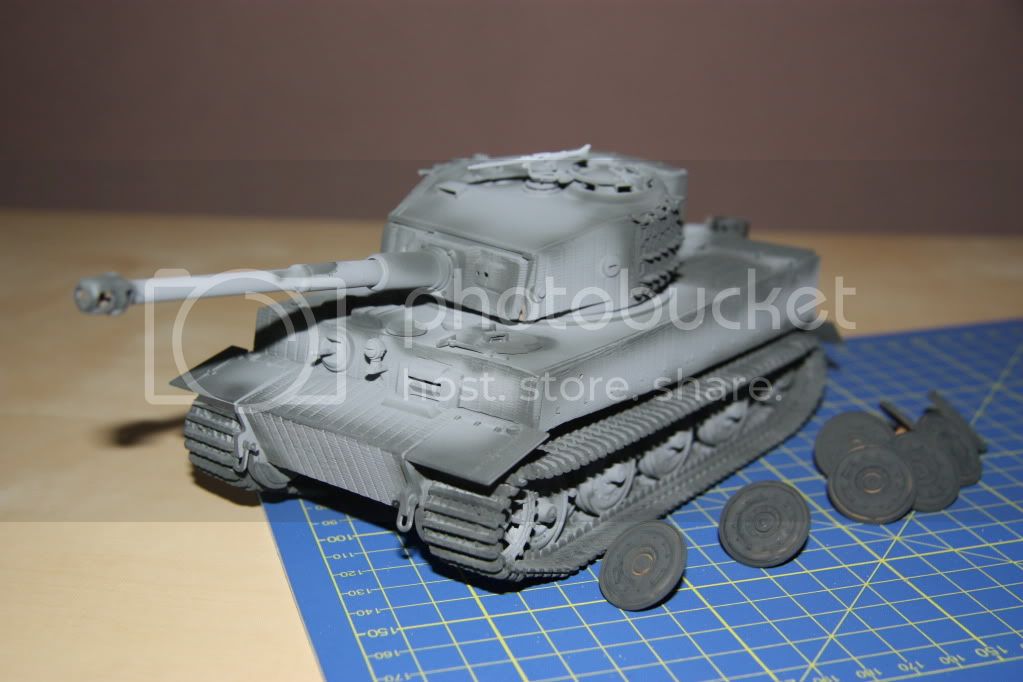
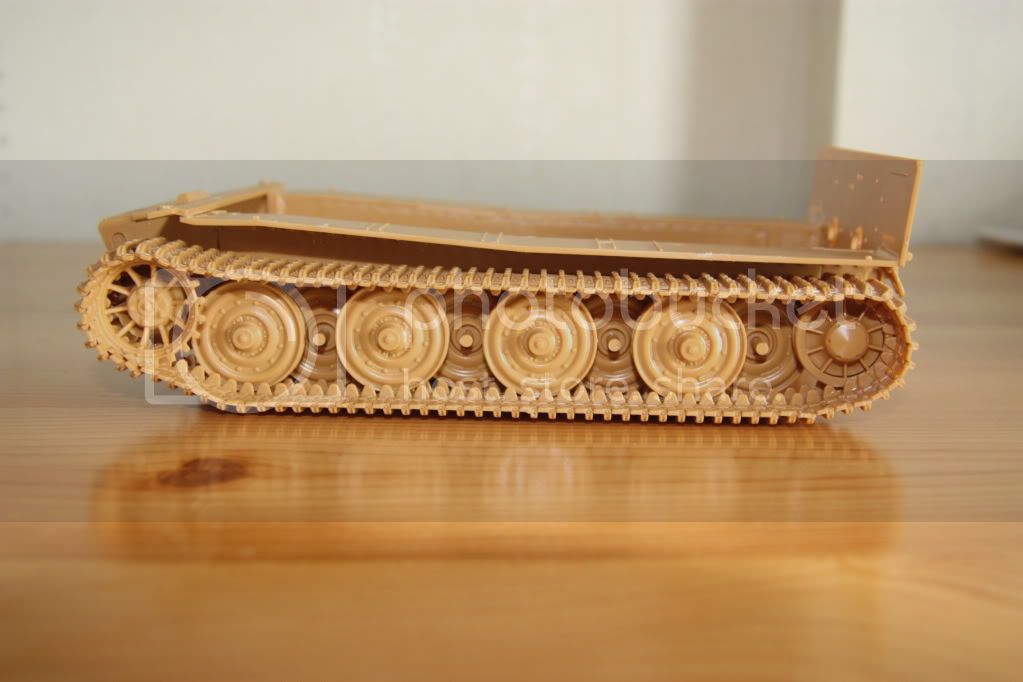
Ok, so last time I painted everything first before glueing.... didnt really like that. Got quite messy with the glue attacking the paint! So glued on the wheels and tracks to the hull. Left the outer wheels off for now. Will fix them later. It took almost 4 hours to do two sets of tracks... pernickity but once on they look better in the flesh.
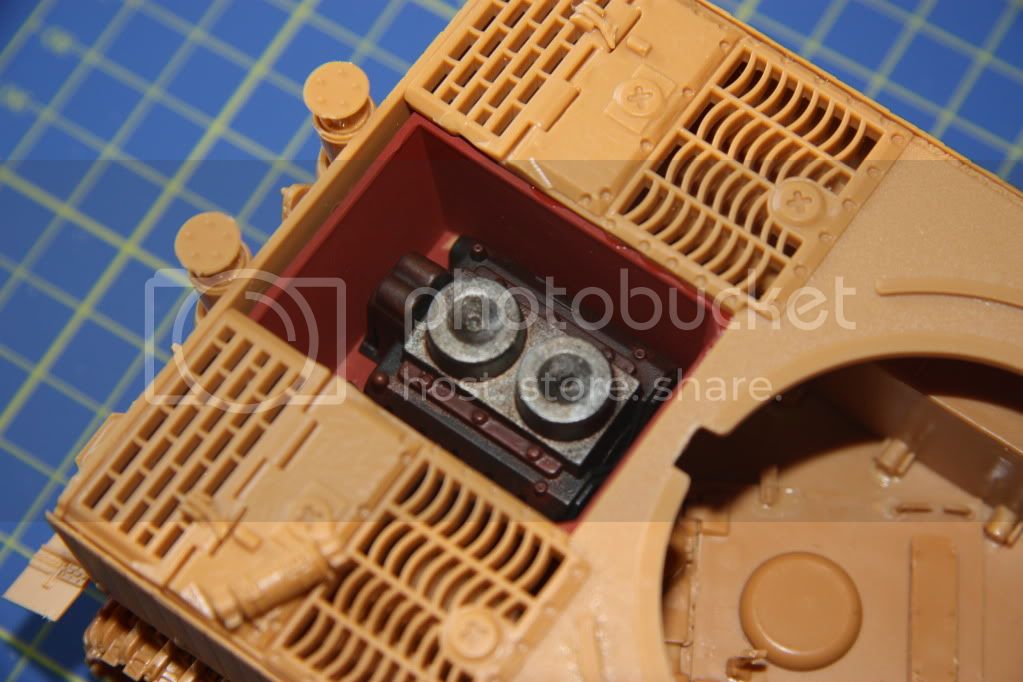
Wont be assembling the hull fully until I have painted the engine in black/browns and engine bay in red oxide.


http://www.krieg-hammer.blogspot.com
---------------------------------------------------
Current Project = Tamiya T55A
California, United States
Joined: April 28, 2011
KitMaker: 193 posts
Armorama: 188 posts
Posted: Wednesday, May 25, 2011 - 03:19 AM UTC
Looks good so far. You did a nice job with the pieces parts tracks. Those have always been hard for me. Haha. As for the paintjob, were you planning on following the paintjob on the box?
-Joe
Scotland, United Kingdom
Joined: May 17, 2011
KitMaker: 106 posts
Armorama: 92 posts
Posted: Saturday, May 28, 2011 - 04:41 AM UTC
No, I'll do my own three tone camo paint job probably. Not decided which though.
http://www.krieg-hammer.blogspot.com
---------------------------------------------------
Current Project = Tamiya T55A
Joel_W
 Associate Editor
New York, United States
Joined: December 04, 2010
KitMaker: 11,666 posts
Armorama: 1,143 posts
Posted: Saturday, May 28, 2011 - 03:09 PM UTC
Great start. I particularly like the sag you got with the tracks. How is the fit of the kit parts?.,
On my Workbench:
Monogram 1/24 scale 427 Shelby Cobra
Just Completed:
Beemax 1/24 scale BMW M3 E30 1992 Evolution II
United Kingdom
Joined: April 02, 2010
KitMaker: 234 posts
Armorama: 207 posts
Posted: Sunday, May 29, 2011 - 01:46 AM UTC
Hi
Nice work so far
I just finished one of these as well, they do make a nice simple build as every thing goes together nice and easy, once painted you will be happy whith what you have.
And at the fraction of the cost of a Tamiya or Dragon kit, I think I paid £18.99 for mine in the UK and that included some PE as well.
Paul
Scotland, United Kingdom
Joined: May 17, 2011
KitMaker: 106 posts
Armorama: 92 posts
Posted: Tuesday, May 31, 2011 - 05:49 AM UTC
http://www.krieg-hammer.blogspot.com
---------------------------------------------------
Current Project = Tamiya T55A
Utah, United States
Joined: February 15, 2008
KitMaker: 199 posts
Armorama: 136 posts
Posted: Tuesday, May 31, 2011 - 02:54 PM UTC
Very nice work so far, and great in progress photos. Keep 'em coming!
England - North, United Kingdom
Joined: February 20, 2007
KitMaker: 1,453 posts
Armorama: 1,319 posts
Posted: Wednesday, June 01, 2011 - 12:34 AM UTC
Quoted Text
Ok, so last time I painted everything first before glueing.... didnt really like that. Got quite messy with the glue attacking the paint!
I think that's called "learning from your mistakes", LoL.
Nice clean-looking build so far. Thumbs-up from me.
- Steve
I don't need you - sixty feet of bridge I can pick up almost anywhere.
Scotland, United Kingdom
Joined: May 17, 2011
KitMaker: 106 posts
Armorama: 92 posts
Posted: Wednesday, June 01, 2011 - 01:00 AM UTC
Quoted Text
Quoted Text
Ok, so last time I painted everything first before glueing.... didnt really like that. Got quite messy with the glue attacking the paint!
I think that's called "learning from your mistakes", LoL.
Nice clean-looking build so far. Thumbs-up from me.
- Steve
So true! So I'll see how it pans out this time! Going to buy some very fine brushes to paint the small intricate parts.
http://www.krieg-hammer.blogspot.com
---------------------------------------------------
Current Project = Tamiya T55A
Scotland, United Kingdom
Joined: May 17, 2011
KitMaker: 106 posts
Armorama: 92 posts
Posted: Saturday, June 11, 2011 - 04:17 AM UTC
http://www.krieg-hammer.blogspot.com
---------------------------------------------------
Current Project = Tamiya T55A
Scotland, United Kingdom
Joined: May 17, 2011
KitMaker: 106 posts
Armorama: 92 posts
Posted: Thursday, June 16, 2011 - 09:07 AM UTC
http://www.krieg-hammer.blogspot.com
---------------------------------------------------
Current Project = Tamiya T55A
Arkansas, United States
Joined: June 29, 2009
KitMaker: 11,610 posts
Armorama: 7,843 posts
Posted: Thursday, June 16, 2011 - 09:26 AM UTC
I've tried my hand at Tamiya and Academy Tigers in the past and have never completed them. Sold em as junk. Your thread has convinced me to give one last try with the Itaeri kit. Looks great, so far. I'll be leaving my tracks and road wheels as part of the final assembly, though. Looks like this will turn out to be quite a beast.
Ideals are peaceful. History is violent.

#003
Donegal, Ireland
Joined: May 14, 2002
KitMaker: 9,763 posts
Armorama: 7,444 posts
Posted: Thursday, June 16, 2011 - 10:10 AM UTC
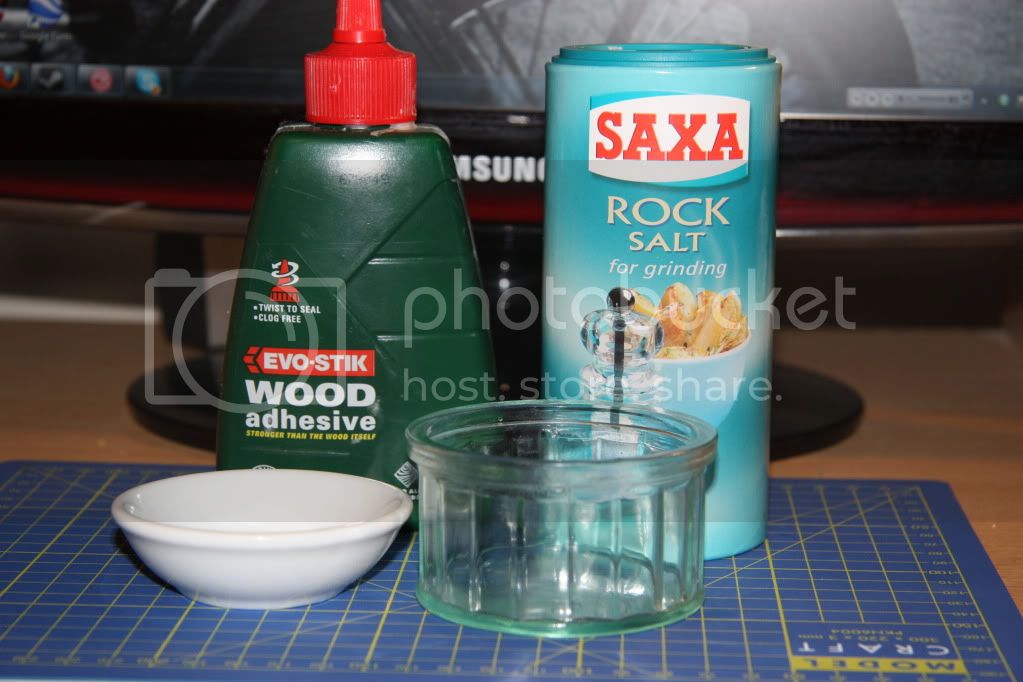
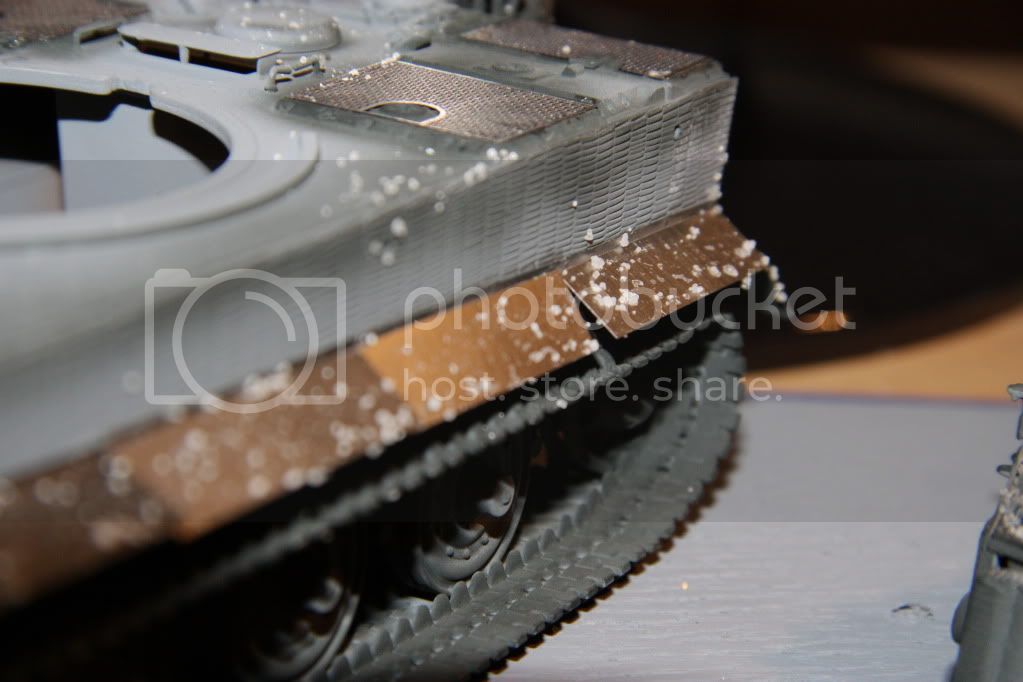
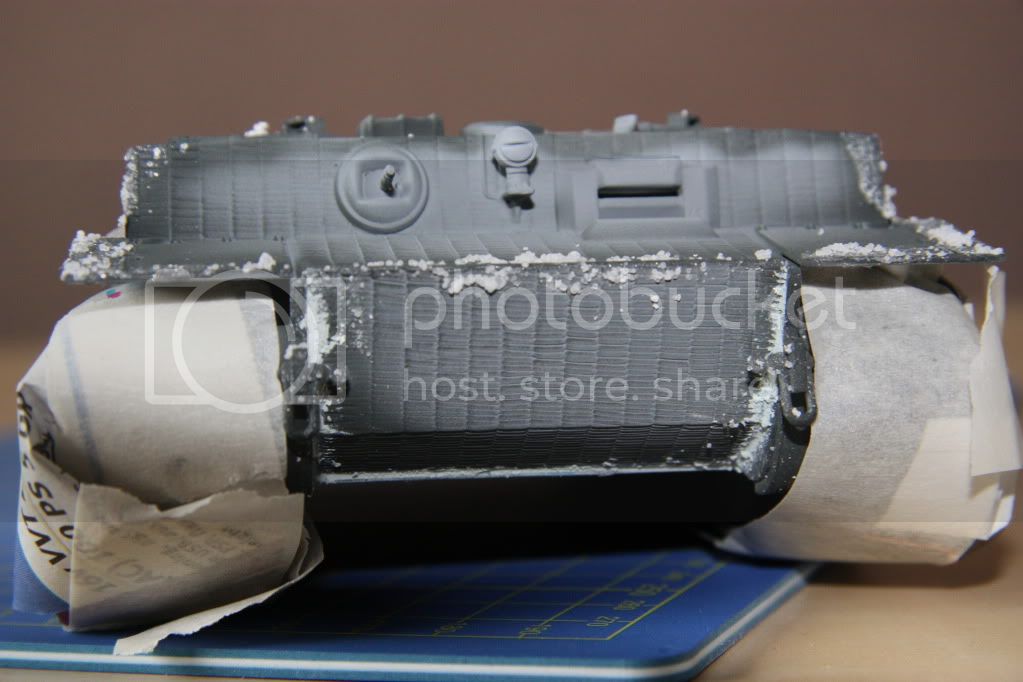
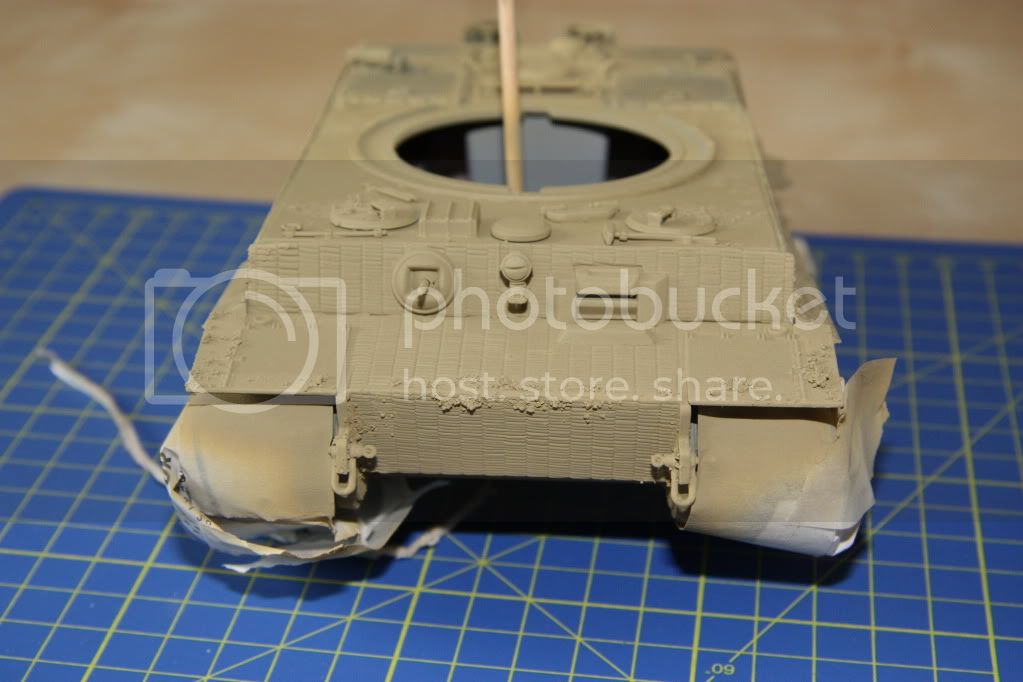
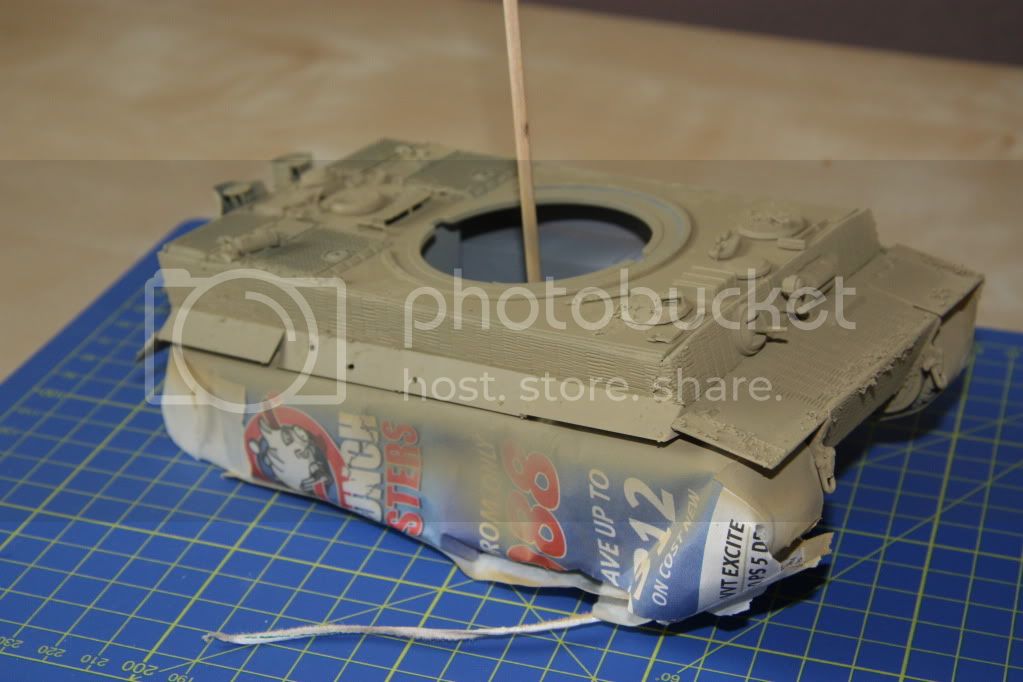
Nice job Rob. Good clean build. Will be interesting to see how the salt method works out.
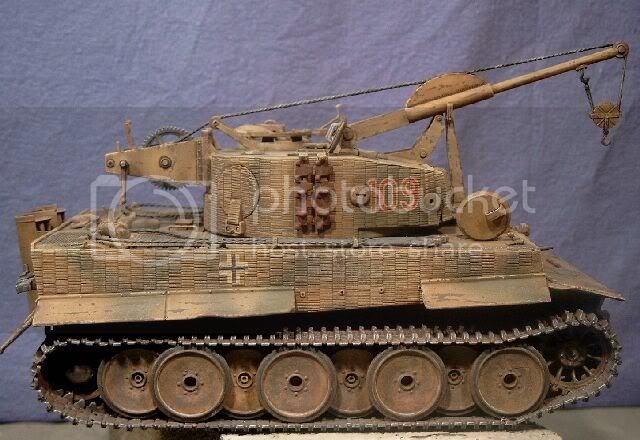
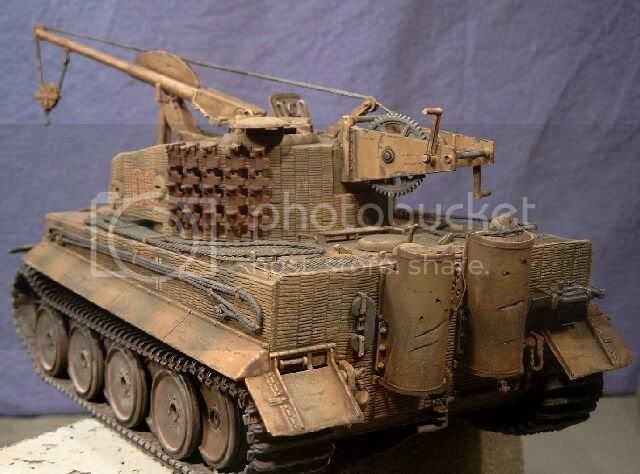
Italeri was my first introduction to zimmerit, about 7 or 8 years ago. I built the Bergetiger. I suppose compared to Dragons recent zimmerit, it didn´t stand the test of time, but was the only cheap alternative in those days.

IPMS Stockholm
"The problem with common sense, is that it is not that common"
Scotland, United Kingdom
Joined: May 17, 2011
KitMaker: 106 posts
Armorama: 92 posts
Posted: Thursday, June 16, 2011 - 11:42 AM UTC
Matt, Frank, thanks for the comments. Regarding to the tracks I've not developed the skill to build them off the hull yet.... Will be my next challenge for the next model. came across 'magic tracks' but not really sure if they can be bought separate or only come with Dragon kits.
http://www.krieg-hammer.blogspot.com
---------------------------------------------------
Current Project = Tamiya T55A
Nevada, United States
Joined: June 28, 2008
KitMaker: 26 posts
Armorama: 12 posts
Posted: Thursday, June 16, 2011 - 01:32 PM UTC
Very cool build. Alot of people don;t think tanks need a toe truck! Its cool to see modelers thinking out side the box and doing stuff thats not thought about. Tanks break down all the time and to see a recovery vech like your Tiger makes me think of a dio with a replacment engine pak being put ito a broke down tank some where in the big sand box. maybe abrams and a 88 dio! keep up the great work
BUILD!!............. Them, if you got them!
"Theirs No Action, No Booze, NO Broads, Theirs NO ACTION!!" Kellys heros!
On the bench:......
1/100 Gundam Rx-78 Physalis, 1/25 revell peterbilt wrecker
Scotland, United Kingdom
Joined: May 17, 2011
KitMaker: 106 posts
Armorama: 92 posts
Posted: Saturday, June 25, 2011 - 12:33 PM UTC
http://www.krieg-hammer.blogspot.com
---------------------------------------------------
Current Project = Tamiya T55A
Scotland, United Kingdom
Joined: May 17, 2011
KitMaker: 106 posts
Armorama: 92 posts
Posted: Saturday, June 25, 2011 - 09:53 PM UTC
http://www.krieg-hammer.blogspot.com
---------------------------------------------------
Current Project = Tamiya T55A
Scotland, United Kingdom
Joined: May 17, 2011
KitMaker: 106 posts
Armorama: 92 posts
Posted: Wednesday, June 29, 2011 - 04:49 AM UTC
http://www.krieg-hammer.blogspot.com
---------------------------------------------------
Current Project = Tamiya T55A
Scotland, United Kingdom
Joined: May 17, 2011
KitMaker: 106 posts
Armorama: 92 posts
Posted: Thursday, June 30, 2011 - 10:00 AM UTC
Looking to do an oil wash on this tank next.... To be honest, not sure if that's the best thing as last time on a 1:72 scale model I did.... Didn't turn out well, just smeared oil paint all over. Maybe the oil paint was thinned enough.
At the moment I've got 502 Abteilung wash brown. If I were to use that again, is it 50/50 or 20/80 paint to thinner ratio? Do I need to spray an acrylic clear gloss, two coats to protect the camo paint?
Thanks
http://www.krieg-hammer.blogspot.com
---------------------------------------------------
Current Project = Tamiya T55A
#155
California, United States
Joined: May 05, 2002
KitMaker: 774 posts
Armorama: 605 posts
Posted: Friday, July 01, 2011 - 07:59 AM UTC
Definitely you will want to put down something to protect your work so far, far to nice to have it messed up from the effects of the wash

. I would recommend Vallejo Satin varnish, you can't go wrong with it. The best thing about a satin varnish is it will allow your wash to flow most efficiently, a flat protective coat will tend to make the wash puddle up. After you have done your washes and filters then hit it with a nice dull coat. Hope that helps.
Rick Cooper
Scotland, United Kingdom
Joined: May 17, 2011
KitMaker: 106 posts
Armorama: 92 posts
Posted: Tuesday, July 05, 2011 - 10:37 AM UTC
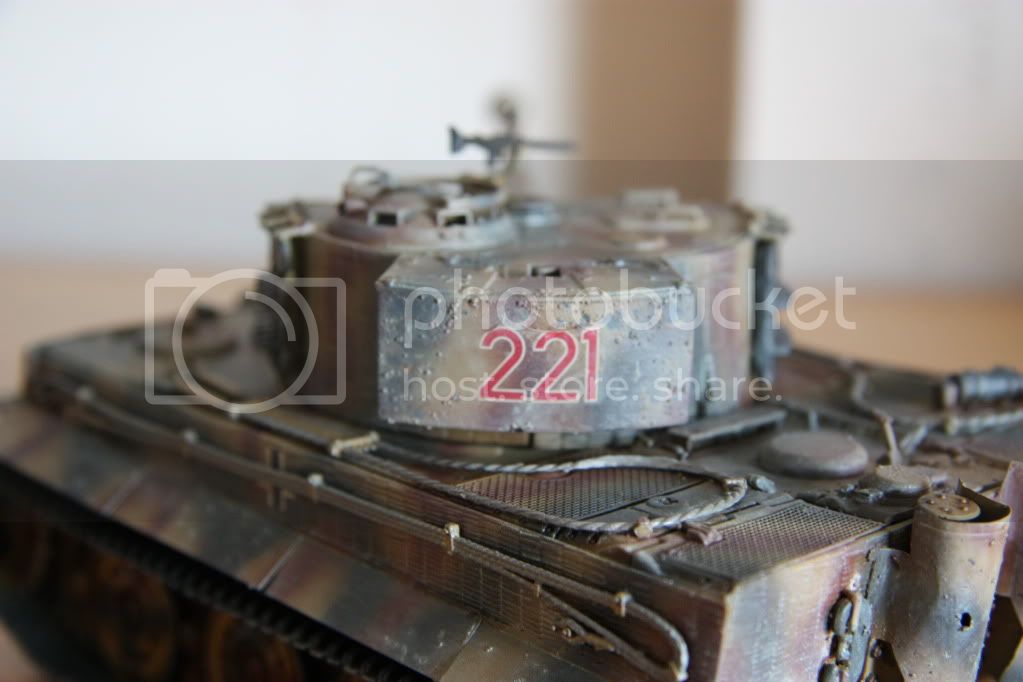
Oil wash done. Used about 80% thinner ( turpentine essence) and 20% oil paint., 502 Abteilung dark brown. Came out not too bad and no paint has run!! Will get pics up in the next couple days..... then tamiya buff and pigment time

http://www.krieg-hammer.blogspot.com
---------------------------------------------------
Current Project = Tamiya T55A
Scotland, United Kingdom
Joined: May 17, 2011
KitMaker: 106 posts
Armorama: 92 posts
Posted: Thursday, July 07, 2011 - 04:53 AM UTC
http://www.krieg-hammer.blogspot.com
---------------------------------------------------
Current Project = Tamiya T55A
Arkansas, United States
Joined: June 29, 2009
KitMaker: 11,610 posts
Armorama: 7,843 posts
Posted: Thursday, July 07, 2011 - 06:29 AM UTC
Rust. If it has been in the field long enough to pick up some bullet holes, the tracks would have some rust on them. Looks excellent.
Ideals are peaceful. History is violent.
Scotland, United Kingdom
Joined: May 17, 2011
KitMaker: 106 posts
Armorama: 92 posts
Posted: Friday, July 29, 2011 - 05:31 AM UTC
http://www.krieg-hammer.blogspot.com
---------------------------------------------------
Current Project = Tamiya T55A
Scotland, United Kingdom
Joined: May 17, 2011
KitMaker: 106 posts
Armorama: 92 posts
Posted: Sunday, August 07, 2011 - 02:55 AM UTC
http://www.krieg-hammer.blogspot.com
---------------------------------------------------
Current Project = Tamiya T55A