_GOTOBOTTOM
Armor/AFV: British Armor
Discuss all types of British Armor of all eras.
Hosted by Darren Baker
Accurate Armour - Crusader Gun Tractor
AlanL
Visit this Community
England - East Anglia, United Kingdom
Joined: August 12, 2005
KitMaker: 14,499 posts
Armorama: 11,675 posts
Posted: Saturday, June 11, 2011 - 09:44 PM UTC
Hi folks,

Well I finally got a start on the Accurate Armour Conversion for the Grusader Gun Tractor.

I'm using the old Testors Crusader Mk III as the donor kit, which was a present a few years ago, thanks Paul.

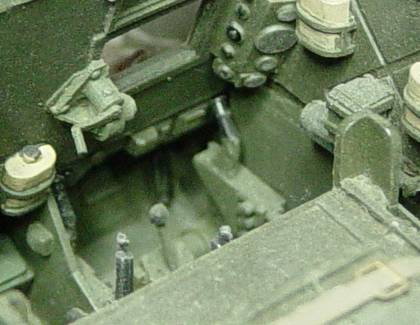
I've removed the bulkheads in the lower hull and made the cut in to remove the turret ring and top frontal plate.

I'll try a set of the Accurate Armour tracks as the kit ones are that great.


There isn't a lot of information around on this one, not sure if there is a more recent article but Phil Greenwood did an article in Military Modelcraft International in December 2001 that contains some good background infomration and some useful build pictuers.

I reviewed the Accurate Armour conversion kti kit here some time ago:

https://armorama.kitmaker.net/review/5175

Al
panzerserra
Visit this Community
Goias, Brazil
Joined: March 29, 2002
KitMaker: 730 posts
Armorama: 688 posts
Posted: Saturday, June 11, 2011 - 10:25 PM UTC
This is a good stuff !!!!

Monitoring, with attention ...

AlanL
Visit this Community
England - East Anglia, United Kingdom
Joined: August 12, 2005
KitMaker: 14,499 posts
Armorama: 11,675 posts
Posted: Sunday, June 12, 2011 - 12:06 AM UTC
Hi Marcos,

This one has been on the build list for a while now

Once you've made the cut to remove the turret ring and top front plate you need to file down the edges of the remaining turret box, in line with the sides.

The surrounding upper frame is in three parts and if you look closely at the reverse of the side parts there is a join between the front box and the rest. This is a bit of a weak point so it is easy to snap the joint when sawing off the pour stub.

I've also removed the small inner bulk heads from the lower hull. Now I need to fit the suspension and then once set remove any joint points that appear inside the hull.

I've also sanded and scraped off any injection marks on the lowevr hull and underside of the top hull.


.

You will also need to chamfer the rear of the front glacis plate a little to accept the new front superstructure. There are fixing squares on both the superstructure front sides and in the back of the front armour.

Al
AlanL
Visit this Community
England - East Anglia, United Kingdom
Joined: August 12, 2005
KitMaker: 14,499 posts
Armorama: 11,675 posts
Posted: Sunday, June 12, 2011 - 01:11 AM UTC
Hi folks,

Once you have th suspesnion arms fitted these will neeed to set and then remove the small pin ends on the inside of the hull.

Al

barkingdigger
Staff MemberAssociate Editor
ARMORAMA
#013
Visit this Community
England - East Anglia, United Kingdom
Joined: June 20, 2008
KitMaker: 3,981 posts
Armorama: 3,403 posts
Posted: Sunday, June 12, 2011 - 01:39 AM UTC
Al,

Great start! If you really want something different, you could scratch up some side extensions like this. Looking forward to the build.

Tom
AlanL
Visit this Community
England - East Anglia, United Kingdom
Joined: August 12, 2005
KitMaker: 14,499 posts
Armorama: 11,675 posts
Posted: Sunday, June 12, 2011 - 01:57 AM UTC
Hi Tom,

Yes, , I have that one on file . Do you think these are deep wading extensions or just additional protection?

Al
barkingdigger
Staff MemberAssociate Editor
ARMORAMA
#013
Visit this Community
England - East Anglia, United Kingdom
Joined: June 20, 2008
KitMaker: 3,981 posts
Armorama: 3,403 posts
Posted: Sunday, June 12, 2011 - 02:09 AM UTC
Given the way they slope down at the back, and the fact that Crusader armour wasn't much better than tissue paper , I'm willing to believe they allowed deeper fording from a landing craft. They certainly don't help lower the profile!

The high front would help with the "bow wave" effect when entering the water at a nose-down angle...

Tom
AlanL
Visit this Community
England - East Anglia, United Kingdom
Joined: August 12, 2005
KitMaker: 14,499 posts
Armorama: 11,675 posts
Posted: Sunday, June 12, 2011 - 02:42 AM UTC
Hi Tom,

My thinking too. Probably not this time though, otherwise it will turn into a long build and I'm way behind in what I had hoped to get done by this stage in the year.

Thanks

Al
AlanL
Visit this Community
England - East Anglia, United Kingdom
Joined: August 12, 2005
KitMaker: 14,499 posts
Armorama: 11,675 posts
Posted: Sunday, June 12, 2011 - 04:38 AM UTC
Hi folks,

Some pics of the Crusader trees:


Anyone ever see a Crusader Turret type German Pill Box? Might be a use for the turret.

Well fitted and painted the suspension units and the top and rear decks. Fitted the firewall, which should protrude slightly and test fitting the load and drivers compartment at the moment. There are quite a few bits to add to both of these, so don't glue them in until you have the additional bits added and painted.


I'm assuming the drivers compartment would sit as far forward as the bracing bracket which would be up against the upper plate?

AL
DaveCox
Visit this Community
England - South East, United Kingdom
Joined: January 11, 2003
KitMaker: 4,307 posts
Armorama: 2,130 posts
Posted: Sunday, June 12, 2011 - 06:29 AM UTC
I scratched this conversion many years ago in 1/76 and 1/35, I'll be watching this build with interest Alan. Will there be a 17pdr behind it?
AlanL
Visit this Community
England - East Anglia, United Kingdom
Joined: August 12, 2005
KitMaker: 14,499 posts
Armorama: 11,675 posts
Posted: Sunday, June 12, 2011 - 08:58 AM UTC
Hi Dave,

I have the Bronco 17pdr to add at some point, if all turns out well.

Any pics of the builds?

Cheers

Al
SHarjacek
Visit this Community
Croatia Hrvatska
Joined: January 29, 2011
KitMaker: 977 posts
Armorama: 553 posts
Posted: Sunday, June 12, 2011 - 09:23 AM UTC
Hello.
Another beauty from you!
I must say your WIP's are very unique and i like the a lot.
subscribed...

Kind regards,Sven.
DaveCox
Visit this Community
England - South East, United Kingdom
Joined: January 11, 2003
KitMaker: 4,307 posts
Armorama: 2,130 posts
Posted: Sunday, June 12, 2011 - 09:44 AM UTC

Quoted Text

Hi Dave,

I have the Bronco 17pdr to add at some point, if all turns out well.

Any pics of the builds?

Cheers

Al


Hi Alan

I don't know if there are any pics still - it was a long time ago! I used the 1/76 version in a CD-book that I wrote for beginners to modelling.


PS - the turret could always be used to convert a Staghound to a MK111
BigfootV
Visit this Community
Colorado, United States
Joined: December 24, 2005
KitMaker: 1,624 posts
Armorama: 994 posts
Posted: Sunday, June 12, 2011 - 11:22 AM UTC
Hey Alan,
Have any plans for the "leftovers" from the donor kit? I need some parts for the turret mainly. PM if your interested. Looking good btw.

barkingdigger
Staff MemberAssociate Editor
ARMORAMA
#013
Visit this Community
England - East Anglia, United Kingdom
Joined: June 20, 2008
KitMaker: 3,981 posts
Armorama: 3,403 posts
Posted: Sunday, June 12, 2011 - 11:34 AM UTC

Quoted Text

I'm assuming the drivers compartment would sit as far forward as the bracing bracket which would be up against the upper plate?

AL


Yup - the driver's tootsies are just behind the front hull plate! Besides, how else would they make room for so much vulnerable cordite to be piled at his back?

I scratched a complete interior for a Cromwell ARV based on plans & pics from tech manuals - it's frightening how "up front" the driver was in those beasts! Some day I'll finish the exterior of that conversion & publish it...

Tom

PS: Love that pic of the "Nobbly Knees" contest!
AlanL
Visit this Community
England - East Anglia, United Kingdom
Joined: August 12, 2005
KitMaker: 14,499 posts
Armorama: 11,675 posts
Posted: Sunday, June 12, 2011 - 08:07 PM UTC
Hi Sven, many thanks and glad you enjoy the blogs, I try to keep them interesting, but I am a sucker for interiors

Hi Dave, I have the AA Mk III Staghound, I bought it in the Widows Sale a few years ago, just before they released a plastic version

Hi Brian, PM me with what you need. I had thought about turring the turret into a pill box if I could find a reference for same, so I was just fishing for ideas.

Hi Tom, Thanks, things fell into palce when I added the front armour plate. The drivers compartment and ammo stowage seem to fit quite nicely.

You need to sand off the rivet detail on the to glacis plate and fit part G the up armoured panel.

I thight it might be a good time to start and make a driver so I've cut the Bren Carrier Commender in half and will build him up to fit, all being well.


I filled in under where the side bins will sit and need to sand/smooth the infill down but I though that would give a better base. In hindsight plastic strip might have been better and easier to work with.


When I was down at Duxford last Year I saw this model at the IPMS show, good inspiration. Sorry I don't know who build it.


Cheers

Al

AlanL
Visit this Community
England - East Anglia, United Kingdom
Joined: August 12, 2005
KitMaker: 14,499 posts
Armorama: 11,675 posts
Posted: Sunday, June 12, 2011 - 10:56 PM UTC
Hi folks,

Been test fitting the super structure. The side parts don't have a great deal of flexibility in them so in order to try and make life easier I separated them at the weak joint at the end of the seating. This will give me a front and rear end to fix and should help take account of the curve in the parts allowing a better fit and some room for adjustment rather than trying to make the rigid parts fit. (well that's the plan )

It should also mean that I don't have to worry about the weak joint snapping as had already happened on the LHS.

Al


PantherF
Visit this Community
Indiana, United States
Joined: June 10, 2005
KitMaker: 6,188 posts
Armorama: 5,960 posts
Posted: Sunday, June 12, 2011 - 11:49 PM UTC
WOW! Another interesting project from AlanL!!! You do all the unusual models!


- Jeff
AlanL
Visit this Community
England - East Anglia, United Kingdom
Joined: August 12, 2005
KitMaker: 14,499 posts
Armorama: 11,675 posts
Posted: Monday, June 13, 2011 - 04:19 AM UTC
Hi Jeff,

Thanks for dropping in. AA do some nice conversions, I prefer conversions to full resin kits, less of a fear factor .

Hi folks,

Started work on the various boxes and fitting, cans stored in the drivers compartment.. Still a couple of levers to add and a gear stick. I need a better pic of the levers, the instructions in the kit are the older style B & W pics and not always that clear how things fit.


Al
AlanL
Visit this Community
England - East Anglia, United Kingdom
Joined: August 12, 2005
KitMaker: 14,499 posts
Armorama: 11,675 posts
Posted: Monday, June 13, 2011 - 08:15 AM UTC
Hi folks.

Added the air filters this evening and shown in the pics are the large bins that sit on the side and the spare wheel.

Al


panzerserra
Visit this Community
Goias, Brazil
Joined: March 29, 2002
KitMaker: 730 posts
Armorama: 688 posts
Posted: Monday, June 13, 2011 - 08:26 AM UTC
Alan, amazing....

AlanL
Visit this Community
England - East Anglia, United Kingdom
Joined: August 12, 2005
KitMaker: 14,499 posts
Armorama: 11,675 posts
Posted: Tuesday, June 14, 2011 - 07:06 AM UTC
Hi Marcus,

Thanks . It's a nice conversion, the instruction are in the older B & W style.

I've start adding the various water bottles, cans and fittings to the front and back plate. I'm assuming I have the brackets for the hatches on the correct way and be careful of the middle picture on page 4 which is upside down lol, lol.

I've been up since 4am and as it's now 7pm I missed this completely and throught the corner instrument panel doesn't fit!! I'll file a bit off me thinks and buggered it up, so I'll either ask Derek for a replacement or make one from L Beam. Such is life.

There are marked spots where everything goes so that helps a lot.


Cheers

Al
SHarjacek
Visit this Community
Croatia Hrvatska
Joined: January 29, 2011
KitMaker: 977 posts
Armorama: 553 posts
Posted: Tuesday, June 14, 2011 - 07:59 AM UTC
Looking amazing so far!

Sven
AlanL
Visit this Community
England - East Anglia, United Kingdom
Joined: August 12, 2005
KitMaker: 14,499 posts
Armorama: 11,675 posts
Posted: Tuesday, June 14, 2011 - 08:35 AM UTC
Thanks Sven. It's an unusual looking beast.

Al
Dutchy3RTR
Visit this Community
England - South West, United Kingdom
Joined: June 28, 2009
KitMaker: 340 posts
Armorama: 337 posts
Posted: Tuesday, June 14, 2011 - 11:02 AM UTC
Looking good Alan.

I made this a while ago and may be able to help on the steering levers. They mount on the raised portion of the control boxes, pointing forward with enough room between lever and sidewall for the driver to get his hands round the lever.

A picture paints 1000 words they say...
 _GOTOTOP