Utah, United States
Joined: December 14, 2007
KitMaker: 3,389 posts
Armorama: 2,054 posts
Posted: Friday, August 12, 2011 - 04:37 AM UTC
Great nations do not fall because of external aggression; they first erode and decay inwardly, so that, like rotten fruit, they fall of themselves. The strength of a country is the sum total of the moral strength of the individuals in that country.
Ezr
Zuid-Holland, Netherlands
Joined: August 07, 2004
KitMaker: 4,808 posts
Armorama: 1,069 posts
Posted: Friday, August 12, 2011 - 11:59 AM UTC
That is one nice little (but very ugly) tank! Not the technics you used, but you know. Same as the KV II....
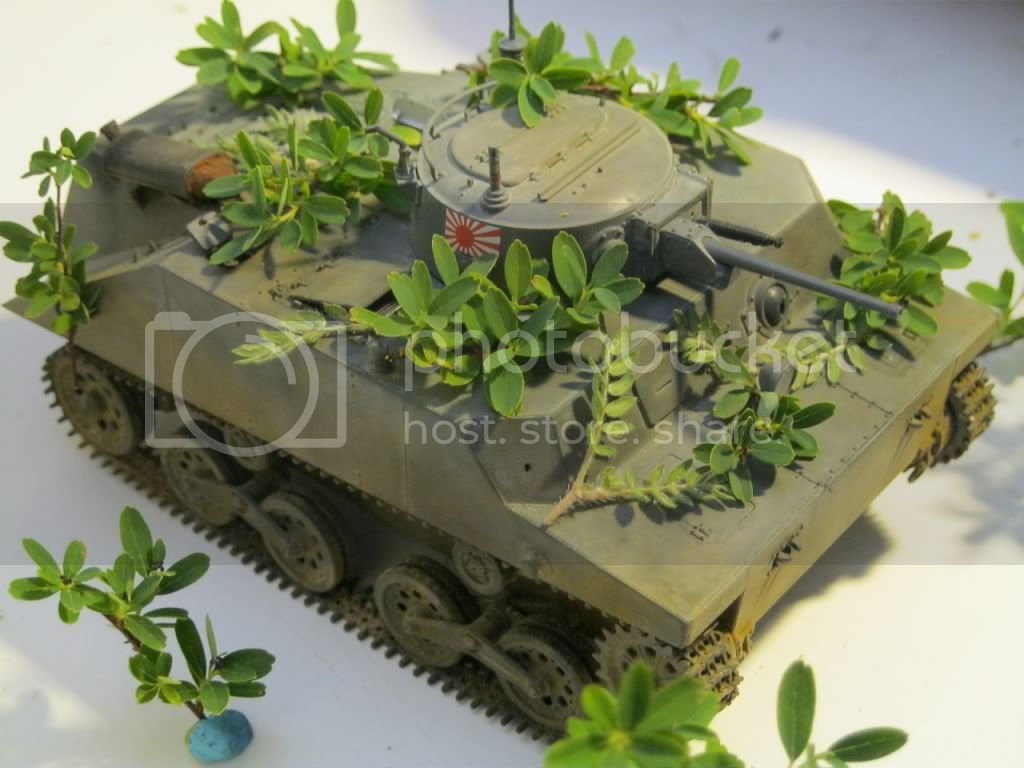
Although I do have some feedback for you. The dusting and the overall paint is done very well, but I think the model will be better if some pinwashes is applied. Tip the bolts and lines with some highly diluted (turpentine) oil paint. In this case I should use a very dark brown like van dyke brown. This will give the model much more depth and is also part of the weathering.
You are one the right track and it is done very nice indeed.
Regards,
Hilbert
Texas, United States
Joined: June 29, 2010
KitMaker: 5,854 posts
Armorama: 4,817 posts
Posted: Friday, August 12, 2011 - 12:14 PM UTC
I agree on the pinwash, and this is a beautiful kit. Yeah I know the tanks ugly, but it's beautiful

Georgia, United States
Joined: January 31, 2010
KitMaker: 2,191 posts
Armorama: 1,814 posts
Posted: Friday, August 12, 2011 - 04:11 PM UTC
Looks to me like Russ did a pin wash, but used a lighter color. And then the additional weather took the contrast away. That aspect of it doesn't bother me, and I think it looks good.
I think the vegetation in the last shot just looks out of scale. Even if the leaves were large tropical type plants, the 'stems' for those leaves are relatively small. They look pretty big on the model.
Join AMPS.
http://www.amps-armor.org/ampssite
Texas, United States
Joined: June 12, 2007
KitMaker: 1,866 posts
Armorama: 1,696 posts
Posted: Friday, August 12, 2011 - 11:23 PM UTC
I like the end result of the finish. Looks to me like it's been wet, then got dusty.
I can't say one way or another about scale of the plants, but I like the effect of the color contrast and the impression of local foliage used for camo.
Utah, United States
Joined: December 14, 2007
KitMaker: 3,389 posts
Armorama: 2,054 posts
Posted: Saturday, August 13, 2011 - 04:26 AM UTC
Thanks for the comments. I actually applied several washes, first of a light yellow oil, then burnt umber and white alternated, which blended a little, and finally a burnt umber coat on it's own. I used several pastel dustings, from homemade mixes. A pale green, faint gray, light blue/gray, yellow ochre and some reddish garden soil. The plants are just from the garden, and were thrown on for contrast. I'll invest in some etch or paper leaves when I set this on a stand.
Great nations do not fall because of external aggression; they first erode and decay inwardly, so that, like rotten fruit, they fall of themselves. The strength of a country is the sum total of the moral strength of the individuals in that country.
Ezr
Joel_W
 Associate Editor
New York, United States
Joined: December 04, 2010
KitMaker: 11,666 posts
Armorama: 1,143 posts
Posted: Sunday, August 14, 2011 - 03:41 AM UTC
Nice clean OOB build. I really like the over all weathering. Sure looks like it's been exposed to plenty of tropical sunlight and salt air. I'm not crazy about the plants nor their scale, but that's just me.

On my Workbench:
Monogram 1/24 scale 427 Shelby Cobra
Just Completed:
Beemax 1/24 scale BMW M3 E30 1992 Evolution II
Manitoba, Canada
Joined: September 04, 2007
KitMaker: 193 posts
Armorama: 132 posts
Posted: Sunday, August 14, 2011 - 03:56 AM UTC
Very nicely done!
Any issues in building the kit? I have one that I'm hoping to get onto the work bench in the near future.
Utah, United States
Joined: December 14, 2007
KitMaker: 3,389 posts
Armorama: 2,054 posts
Posted: Sunday, August 14, 2011 - 05:13 AM UTC
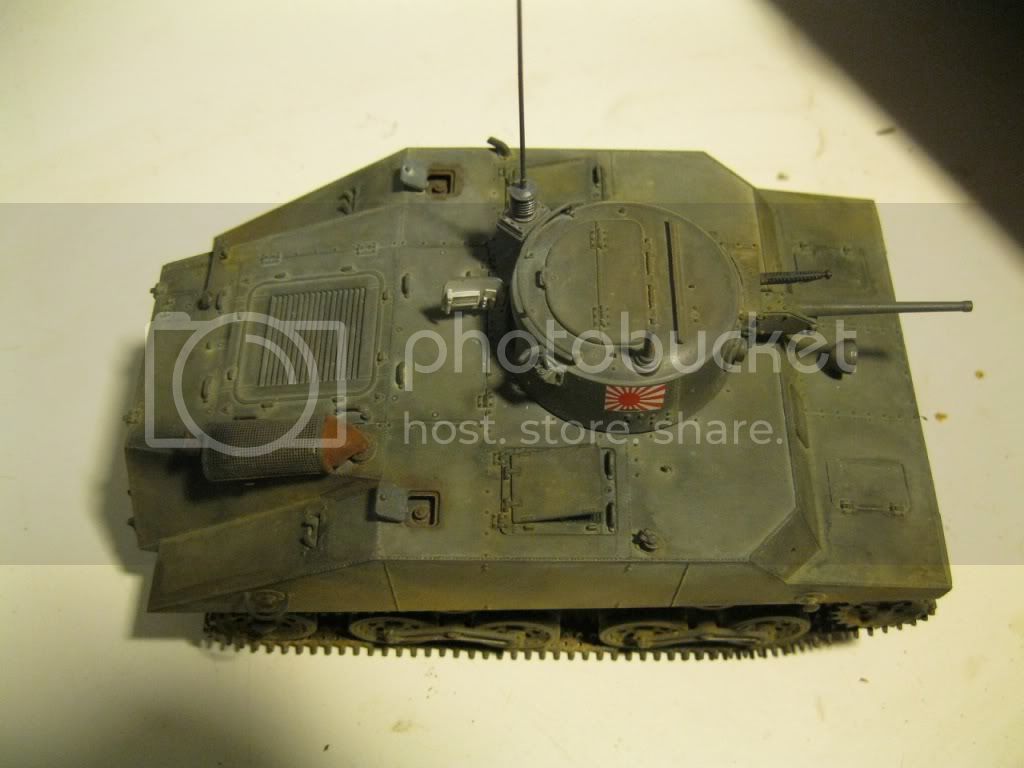
Grant, the build was very easy, with no real fit issues. Any errors in the instructions are listed in the review. I just realized that in spite of my checking and rechecking, my sporadic dyslexia struck again as the right hand naval insignia is upside-down (backwards facing).
Great nations do not fall because of external aggression; they first erode and decay inwardly, so that, like rotten fruit, they fall of themselves. The strength of a country is the sum total of the moral strength of the individuals in that country.
Ezr
Utah, United States
Joined: February 15, 2008
KitMaker: 199 posts
Armorama: 136 posts
Posted: Wednesday, August 24, 2011 - 04:19 PM UTC
Fantastic build Russ, what Tamiya color did you use?
Utah, United States
Joined: December 14, 2007
KitMaker: 3,389 posts
Armorama: 2,054 posts
Posted: Thursday, August 25, 2011 - 03:00 AM UTC
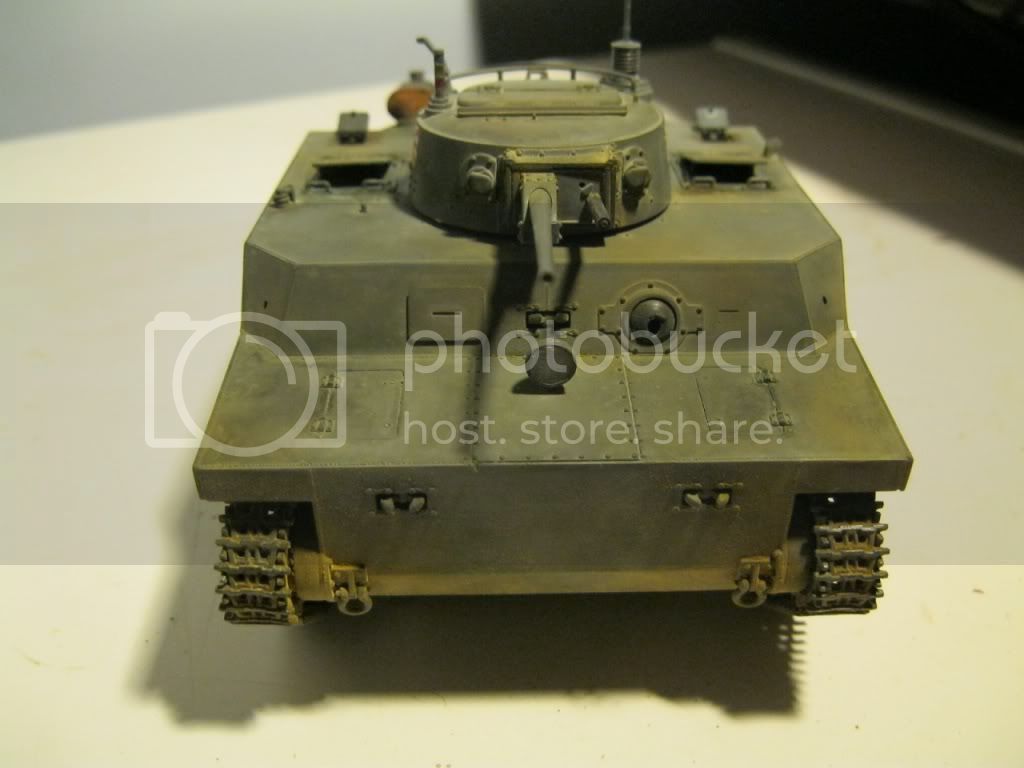
German gray. It was the only color I could get ahold of at the time. Under all the washes it's hard to tell.
Great nations do not fall because of external aggression; they first erode and decay inwardly, so that, like rotten fruit, they fall of themselves. The strength of a country is the sum total of the moral strength of the individuals in that country.
Ezr
Arkansas, United States
Joined: June 29, 2009
KitMaker: 11,610 posts
Armorama: 7,843 posts
Posted: Thursday, August 25, 2011 - 03:51 AM UTC
This is definitely a tank built for a single purpose. The paint and dusting turned out perfect. I would suggest a little more weathering to the tracks. You may want to add some brass chipping to the props. It's more likely these would have been painted brass.
Ideals are peaceful. History is violent.
Utah, United States
Joined: February 15, 2008
KitMaker: 199 posts
Armorama: 136 posts
Posted: Sunday, September 11, 2011 - 04:06 AM UTC
Quoted Text
German gray. It was the only color I could get ahold of at the time. Under all the washes it's hard to tell.
Thanks Russ, and you are right it is hard to tell it is German grey. Thanks for sharing this build, I will be adding this kit to my stash as soon as I can get my grubby little paws on one

British Columbia, Canada
Joined: March 05, 2009
KitMaker: 394 posts
Armorama: 380 posts
Posted: Wednesday, September 21, 2011 - 09:03 AM UTC
that looks really nice. I'm still waiting for one to show up at the lhs