

Hi Val
it may be causing you bucketloads of eye strain & using up oceans of patience, but the resulting slat armour must give you a rewarding feeling. It looks perfect.
cheers
Neil
Hosted by Darren Baker
Canadian Leo 2 A6M

Korpse

Joined: October 06, 2009
KitMaker: 382 posts
Armorama: 378 posts
Posted: Sunday, November 06, 2011 - 12:16 PM UTC

r2d2

Joined: April 13, 2006
KitMaker: 424 posts
Armorama: 419 posts

Posted: Sunday, November 13, 2011 - 12:33 PM UTC
Thanks fellas!
Updates:
I have managed to finish the turret's slat armours. This is difficult because of the offset of the turret slightly to the right and the small adjustments that had to be made on the angles of the armour on the right side. I have to be a bit pricise on the distance because a little bit off will throw away the balance and the natural offset, this is crucial in order to get the right appearance.
This is showing the first slats as a guide.

Next is the swing out options of the left wedge amour, a nice addition to the new Revell Leo2.

Right side elevation. Notice the correct gap of the rear bottom of the turret in relation to the hull.

Left side elevation....

Rear view.....

Front view...

Top side... Here you can clearly see the offset of the right side of the turret and the compensatory angle near the rear half of the turret. Notice also the very minute distance of the slats. This has to be accurate to get the correct placement otherwise the slats will look funny.

Quarter views...


Working at this scale is so difficult and will test your patience but the feeling is so good once you have completed it. Until next time.......

Updates:
I have managed to finish the turret's slat armours. This is difficult because of the offset of the turret slightly to the right and the small adjustments that had to be made on the angles of the armour on the right side. I have to be a bit pricise on the distance because a little bit off will throw away the balance and the natural offset, this is crucial in order to get the right appearance.
This is showing the first slats as a guide.
Next is the swing out options of the left wedge amour, a nice addition to the new Revell Leo2.
Right side elevation. Notice the correct gap of the rear bottom of the turret in relation to the hull.
Left side elevation....
Rear view.....
Front view...
Top side... Here you can clearly see the offset of the right side of the turret and the compensatory angle near the rear half of the turret. Notice also the very minute distance of the slats. This has to be accurate to get the correct placement otherwise the slats will look funny.
Quarter views...
Working at this scale is so difficult and will test your patience but the feeling is so good once you have completed it. Until next time.......
sauceman

Joined: September 28, 2006
KitMaker: 2,672 posts
Armorama: 2,475 posts

Posted: Sunday, November 13, 2011 - 01:58 PM UTC
Wow what a great job!
cheers
cheers


bison126

Joined: June 10, 2004
KitMaker: 5,329 posts
Armorama: 5,204 posts
Posted: Sunday, November 13, 2011 - 07:09 PM UTC
I second Rick, you did a stunning job on the slat.
Keep on building and posting
Keep on building and posting


abramstnkr

Joined: July 15, 2007
KitMaker: 75 posts
Armorama: 74 posts

Posted: Sunday, November 13, 2011 - 08:20 PM UTC
I have a hard of a time doing slat on 35th scale projects... but 72nd? Forget it! You're insane! Nice work!
r2d2
Joined: April 13, 2006
KitMaker: 424 posts
Armorama: 419 posts
Posted: Monday, November 14, 2011 - 10:13 AM UTC
Thanks Rick, Oliver, Jason.
Boris1991

Joined: October 13, 2009
KitMaker: 307 posts
Armorama: 278 posts
Posted: Monday, November 14, 2011 - 10:29 AM UTC
Wow, this is amazing. Specially in this scale.
You are showing top of the line scratching .
Keep it going! Must look fanastic at the end!
You are showing top of the line scratching .
Keep it going! Must look fanastic at the end!

SchoeniR6

Joined: November 21, 2010
KitMaker: 189 posts
Armorama: 189 posts
Posted: Tuesday, November 15, 2011 - 01:55 AM UTC
Great job val
A lot of work i think.
Can´t wait for next pictures. Like your detailling very much.
Outstanding.....
Cheers Daniel
A lot of work i think.
Can´t wait for next pictures. Like your detailling very much.
Outstanding.....
Cheers Daniel

PedroA

Joined: December 27, 2010
KitMaker: 324 posts
Armorama: 322 posts
Posted: Tuesday, November 15, 2011 - 05:40 AM UTC
Val, be patient, you are making and excellent work.
Regards. Pedro.
Regards. Pedro.

cetinsarf

Joined: February 20, 2007
KitMaker: 93 posts
Armorama: 44 posts

Posted: Monday, December 05, 2011 - 05:03 AM UTC
Great work Val. Keep working!... =)
Korpse
Joined: October 06, 2009
KitMaker: 382 posts
Armorama: 378 posts
Posted: Monday, December 05, 2011 - 11:43 AM UTC
Hi Val
the really fine work keeps coming, its great to see, thanks for posting the updates
cheers
Neil
the really fine work keeps coming, its great to see, thanks for posting the updates
cheers
Neil
r2d2
Joined: April 13, 2006
KitMaker: 424 posts
Armorama: 419 posts
Posted: Sunday, December 18, 2011 - 11:39 AM UTC
Thanks guys. Been off action for a short time.
Small updates on the build: Managed to do some work with the ECM, this is not done yet as I will do all the conduits and ducting to make it complete. Very difficult because of the small size.
Note the riffle/weapons box in between the commander's hatch and front sensor.


Arials, front hull armour, etc... will be next. Stay tune....
Small updates on the build: Managed to do some work with the ECM, this is not done yet as I will do all the conduits and ducting to make it complete. Very difficult because of the small size.
Note the riffle/weapons box in between the commander's hatch and front sensor.
Arials, front hull armour, etc... will be next. Stay tune....

LeoCmdr
Joined: January 19, 2005
KitMaker: 4,085 posts
Armorama: 3,917 posts
Posted: Sunday, December 18, 2011 - 02:47 PM UTC
Very impressive...keep up the outstanding work!
SchoeniR6
Joined: November 21, 2010
KitMaker: 189 posts
Armorama: 189 posts
Posted: Monday, December 19, 2011 - 02:37 AM UTC
Absolutly great!
Love the scratching....
Cheers Daniel
Love the scratching....
Cheers Daniel

Silenoz

Joined: September 06, 2011
KitMaker: 16 posts
Armorama: 15 posts
Posted: Tuesday, December 20, 2011 - 12:01 AM UTC
hey,
this one is looking really cool. De slats are simply fantastic...
I'm gathering my references to try the same (bought an aftermarket for the slats) but with a mineroller (will try to scratch this completely) in front.
Keep up the good work...
this one is looking really cool. De slats are simply fantastic...
I'm gathering my references to try the same (bought an aftermarket for the slats) but with a mineroller (will try to scratch this completely) in front.
Keep up the good work...

ModelBuildingTanks
Joined: August 05, 2010
KitMaker: 146 posts
Armorama: 143 posts
Posted: Tuesday, December 20, 2011 - 05:04 AM UTC
I've just started following this build and already am I looking forward to the painting. Keep up the good work!
ModelBuildingTanks
Joined: August 05, 2010
KitMaker: 146 posts
Armorama: 143 posts
Posted: Tuesday, December 20, 2011 - 05:11 AM UTC
OH ALSO, I seriousley need to get some pictures up of the finished product in a new thread some time, bit off topic, but....

Any chance these have been in afghanistan? I know at one point they where trying to negotiate a sale with Saudi Arabia....
http://www.defence.pk/forums/military-forum/78071-sale-more-than-200-tanks-leopard-2e-saudi-arabia.html
And from what I could gather, they're likely going to be purchasing Leopard 2A7's instead.... I'd imagine the 2E is more suited for Saudi Arabian terrain because of where it is from.
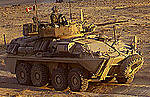
The tank is the Spanish licensed Leopard 2E.
Any chance these have been in afghanistan? I know at one point they where trying to negotiate a sale with Saudi Arabia....
http://www.defence.pk/forums/military-forum/78071-sale-more-than-200-tanks-leopard-2e-saudi-arabia.html
And from what I could gather, they're likely going to be purchasing Leopard 2A7's instead.... I'd imagine the 2E is more suited for Saudi Arabian terrain because of where it is from.
The tank is the Spanish licensed Leopard 2E.
r2d2
Joined: April 13, 2006
KitMaker: 424 posts
Armorama: 419 posts
Posted: Monday, January 02, 2012 - 10:40 AM UTC
UPDATES: Finally completed all major facelift. Small details have to be done such as arial mounts, main gun cooling ducts, slats brackets etc.
Front chassis armour.

completed the suspension, wheels, tracks.


More to come.
Front chassis armour.
completed the suspension, wheels, tracks.
More to come.
SchoeniR6
Joined: November 21, 2010
KitMaker: 189 posts
Armorama: 189 posts
Posted: Saturday, January 07, 2012 - 01:03 AM UTC
Hi val
Absolut fantastic model.
Like the scratch. Maybe you can show us how you build this slat armor so nice and clean. 2 or 3 pictures will help i think. That will be great.
Cheers and happy new year!
Daniel
Absolut fantastic model.
Like the scratch. Maybe you can show us how you build this slat armor so nice and clean. 2 or 3 pictures will help i think. That will be great.
Cheers and happy new year!
Daniel

Totalize
Joined: February 04, 2009
KitMaker: 743 posts
Armorama: 549 posts
Posted: Saturday, January 07, 2012 - 01:23 AM UTC
Val,
Incredible work. Love this scatchbuilding effort. You must have nerves of steel to pull this one off so very well.
Great effort.
Dave.
Incredible work. Love this scatchbuilding effort. You must have nerves of steel to pull this one off so very well.
Great effort.
Dave.
r2d2
Joined: April 13, 2006
KitMaker: 424 posts
Armorama: 419 posts
Posted: Saturday, January 07, 2012 - 11:49 AM UTC
Thanks Dave, Daniel.
The slats are made of precisely cut evergreen styrene number 101 (0.25 x o.75 mm). This is manually done, no jig because using a thin cement on a jig will make it more messy and will stick to the jig itself. Distance in between was done using a home made spacer calibrated to this scale, you can also use an automotive clearance gauges use to adjust tappets in the engine. This has a lot of fine depth that you can use to set the space. I have to work my way very slowly applying each slat one at a time. Very time consuming and requires a lot of patience especially working at this scale. Let it dry a bit then adjust accordingly to have a precise look. I will try to do a step by step photo shoot for this if I have the time.
The slats are made of precisely cut evergreen styrene number 101 (0.25 x o.75 mm). This is manually done, no jig because using a thin cement on a jig will make it more messy and will stick to the jig itself. Distance in between was done using a home made spacer calibrated to this scale, you can also use an automotive clearance gauges use to adjust tappets in the engine. This has a lot of fine depth that you can use to set the space. I have to work my way very slowly applying each slat one at a time. Very time consuming and requires a lot of patience especially working at this scale. Let it dry a bit then adjust accordingly to have a precise look. I will try to do a step by step photo shoot for this if I have the time.
r2d2
Joined: April 13, 2006
KitMaker: 424 posts
Armorama: 419 posts
Posted: Monday, March 12, 2012 - 12:43 PM UTC
Its been a while since I touch this build and been out of action for a while. Managed to do a couple of hours on the kit and have been focusing on the slats mounting bracket particularly on the turret. I know this is one of the hardest part to do as this is so tiny and keeping this accurate for scale is breaking my nerves. The work is slow and takes time to align it properly but the end result is satisfying and getting a very good alignment makes all worth it. Here are several pictures showing you the brackets and how it should look like in the actual tank. tiny details such as the bolt heads are also added.


Turret brackets and slats. Alignment is crucial because if its not align properly it looks awful!


Size of the whole project compared to a ballpen.

Long way to go but i'm chipping it one bracket at a time, stay tune folks!
Turret brackets and slats. Alignment is crucial because if its not align properly it looks awful!
Size of the whole project compared to a ballpen.
Long way to go but i'm chipping it one bracket at a time, stay tune folks!
IrishGreek
Joined: October 17, 2010
KitMaker: 627 posts
Armorama: 571 posts

Posted: Monday, March 12, 2012 - 02:09 PM UTC
Val,
This is fabulous. I am really impressed. Wow.
John
This is fabulous. I am really impressed. Wow.
John
recceboy
Joined: July 20, 2006
KitMaker: 706 posts
Armorama: 665 posts

Posted: Monday, March 12, 2012 - 04:52 PM UTC
Val
Job well done.
Anthony
Job well done.
Anthony
bison126
Joined: June 10, 2004
KitMaker: 5,329 posts
Armorama: 5,204 posts
Posted: Monday, March 12, 2012 - 08:58 PM UTC
When will it turn into a resin conversion set?
It is worth it.
Olivier
It is worth it.
Olivier
 |

WEB HOSTING BY


Copyright ©2021 Armorama and Kitmaker Network, a subsidiary of Silver Star Enterprises
All Rights Reserved. Please read our Conditions of Use and Privacy Policy.
All Rights Reserved. Please read our Conditions of Use and Privacy Policy.