_GOTOBOTTOM
Constructive Feedback
For in-progress or completed build photos. Give and get contructive feedback!
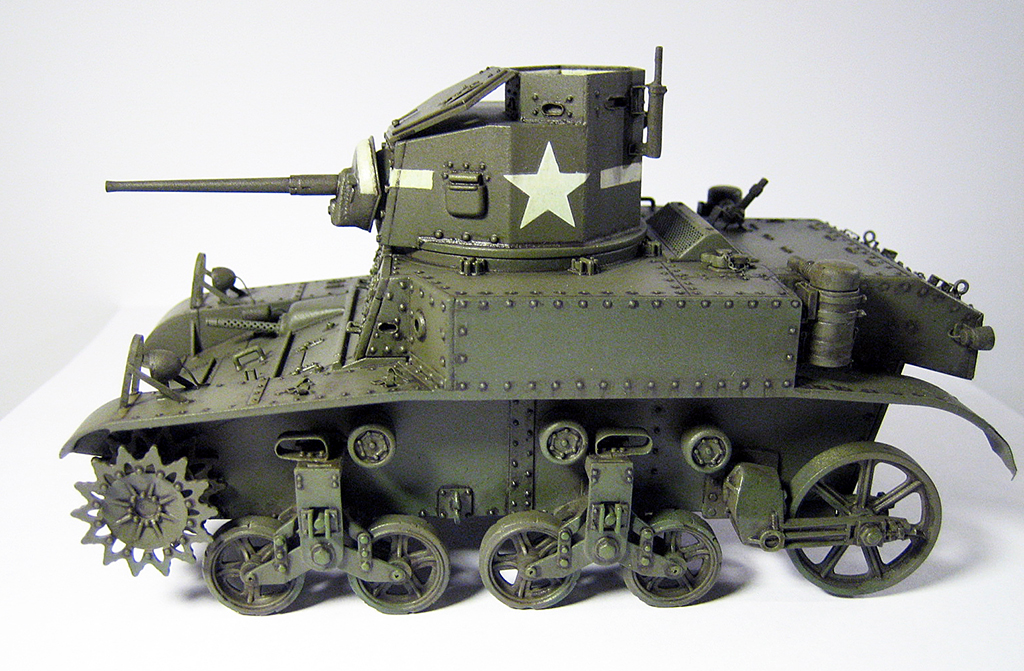
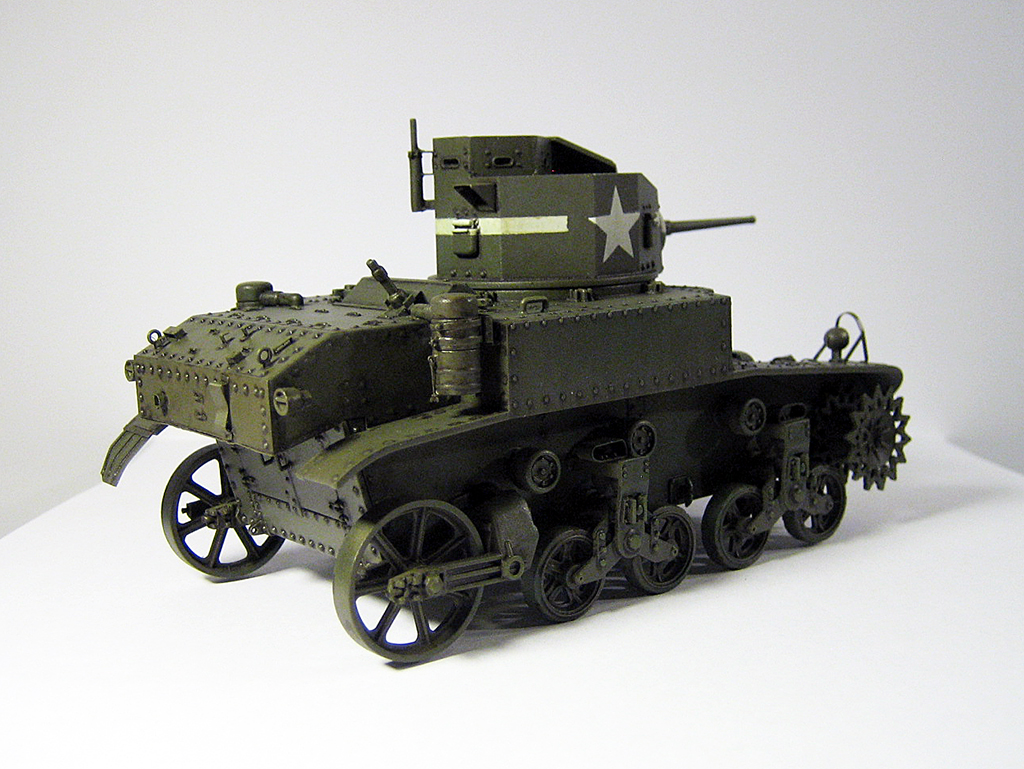
M3 Light Tank "Stuart" 80th Armored Regiment
Stampede
Visit this Community
Østfold, Norway
Joined: December 06, 2007
KitMaker: 109 posts
Armorama: 107 posts
Posted: Friday, December 09, 2011 - 05:22 AM UTC
Been quite a while since I posted anything in here. So I'm trying once again to get out of the build drought with this build and post.
Found an Academy M3 on the shelf at the local styrene pusher. Nostalgia caught up with me and I just had to buy it. I built the old and not so very correct Tamiya kit back in the day, and I think this little tank is kinda cool.

It's not the most complicated kit in the world, but it needs some corrections since Academy hasn't quite done their "homework". Some shortcuts here and there, a mix of M3, M3A1 og M5 on the sprues. The interior included in the kit is all wrong for an M3, it's for an M3A1, and I will not use it on this model. Some PE from Eduard will also come in handy to replace some of parts that are both too large and too thick.

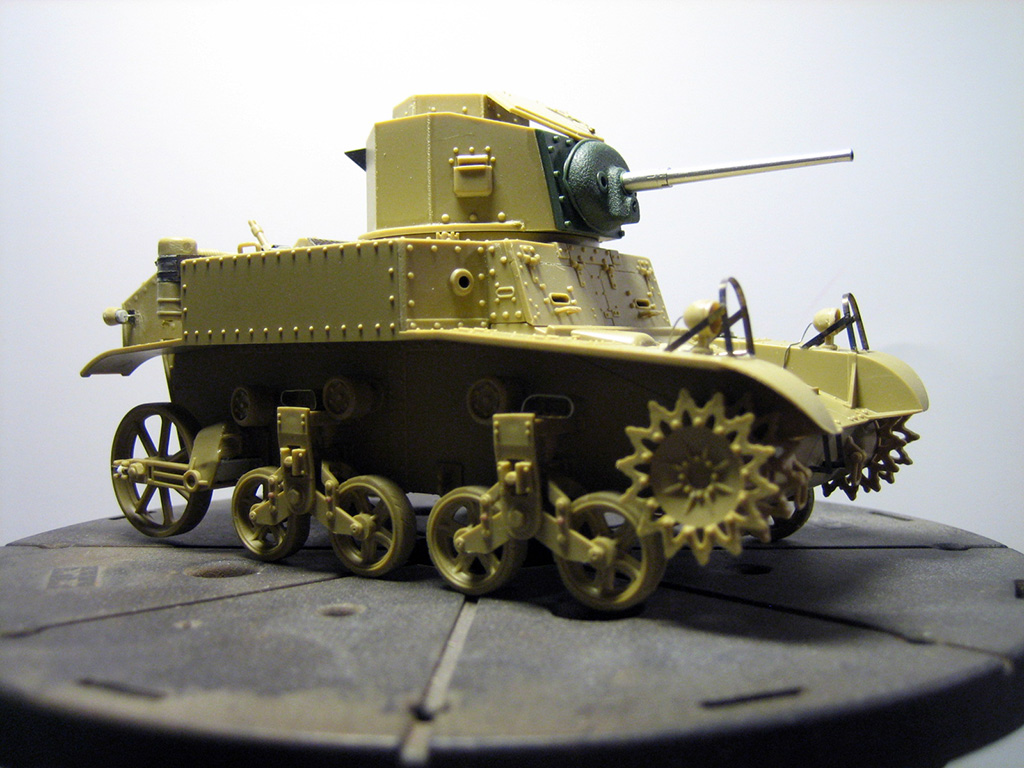
I'm bulding this one as a training vehicle from the 80th Armored Regiment, The Armored Force School, Fort Knox, KY, around 1942-43. No on vehicle tools or other field equipment will be included in this build. These training vehicles was stripped for any unnecessary equipment on the training fields. But it'll get olive drab and white stars.  ;)

Started the lower hull.
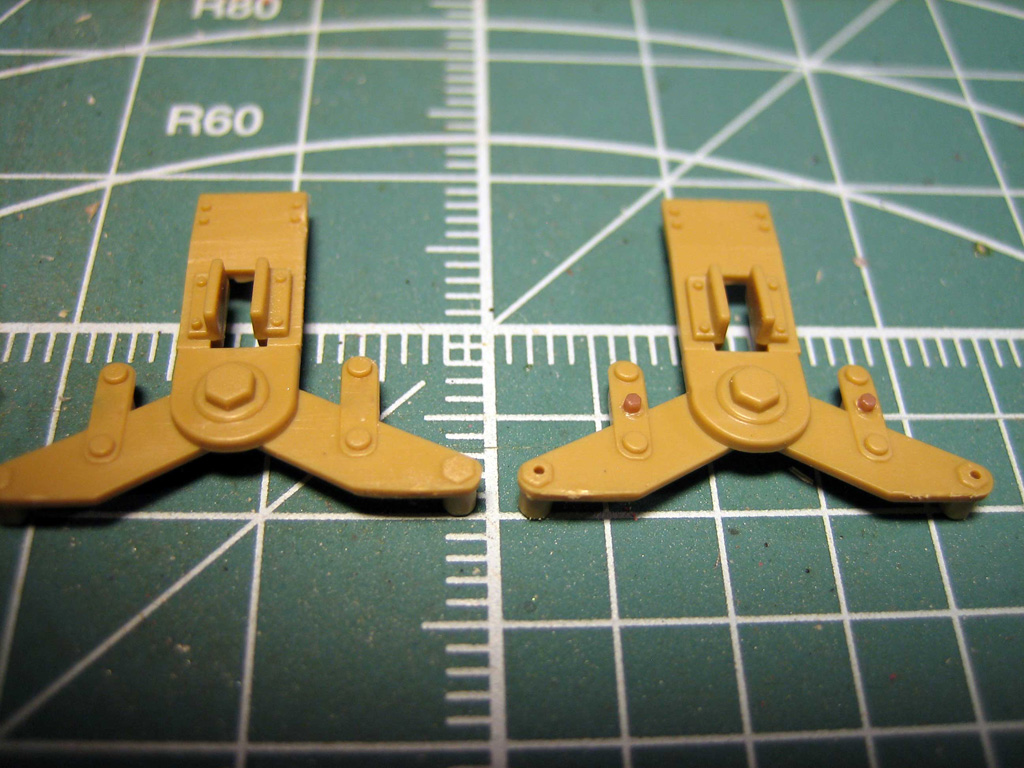
Some bolts are missing on the bogeys, and Academy has taken short cuts, that I chose to address.

Front of the bogeys. OOB to the left, and modified with extra bolts and holes to the right.

On the idler suspension it's kind of a mix of versions. To the left OOB which is almost correct for an M5A1. To the right after modification to what is correct for an M3.
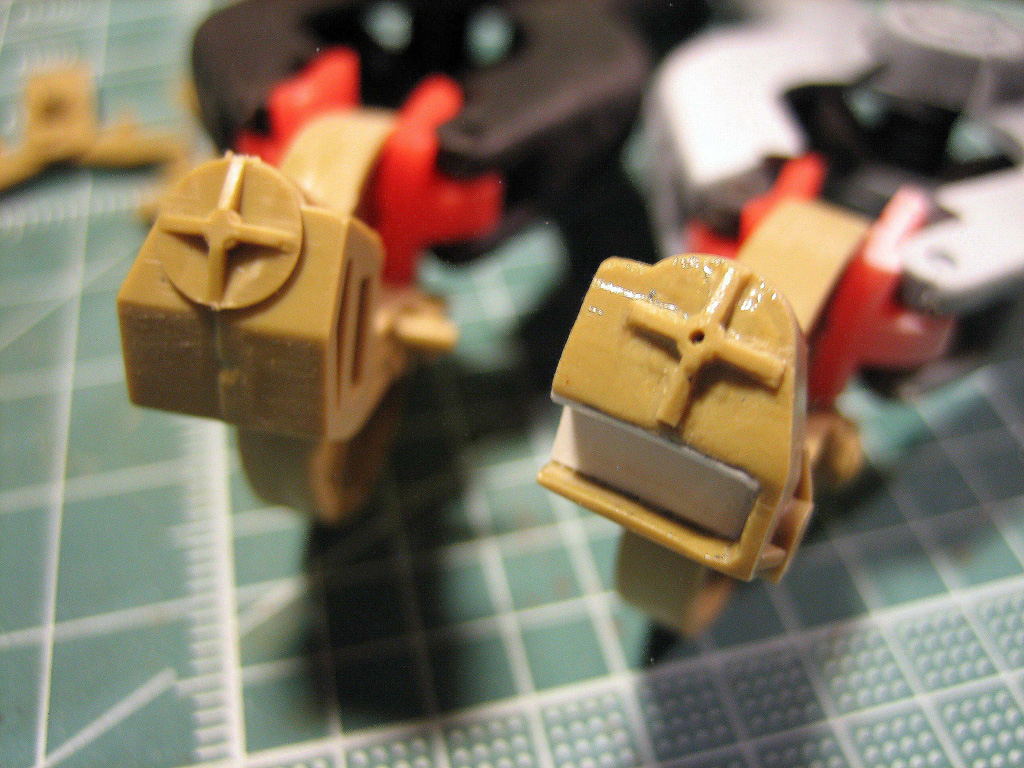

Academy has also taken a short cut where the idler arm bolts to the lower hull. It's supposed to be open at the end facing forward with two extra bolts, but they've made this part solid. I grinded out the closed piece of the part and used some Evergreen to make it more correct. I also added the two missing bolts after connecting the idler arm to the lower hull.
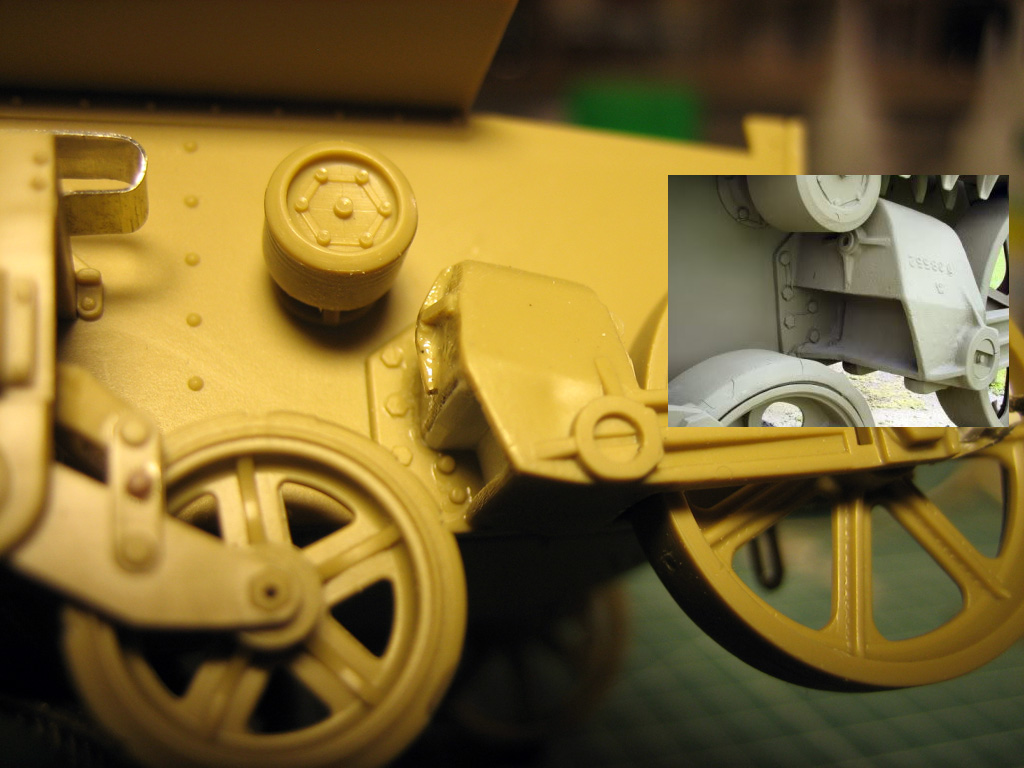

Kinda sloppy idler tensioner mechanism OOB, so I cut it of and replaced it with some brass rod and Evergreen.
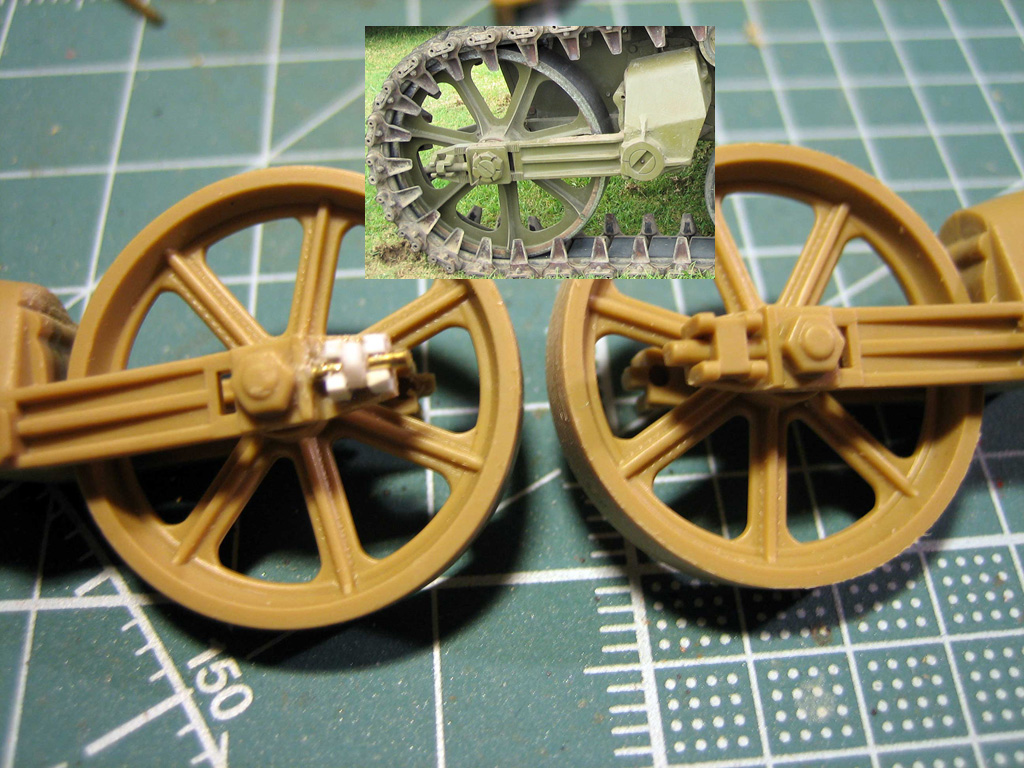

Made new track guides out of 0.15 aluminium to replace the way to thick ones in the kit, "bolted" them to the bogeys with 3 bolts as the original.
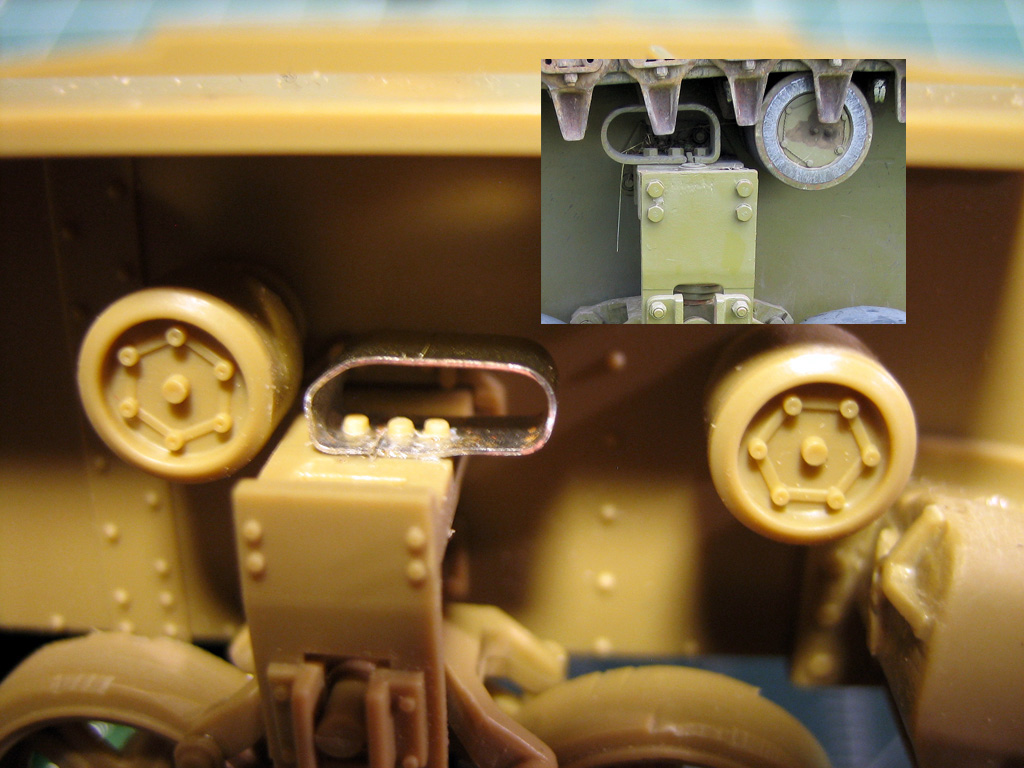

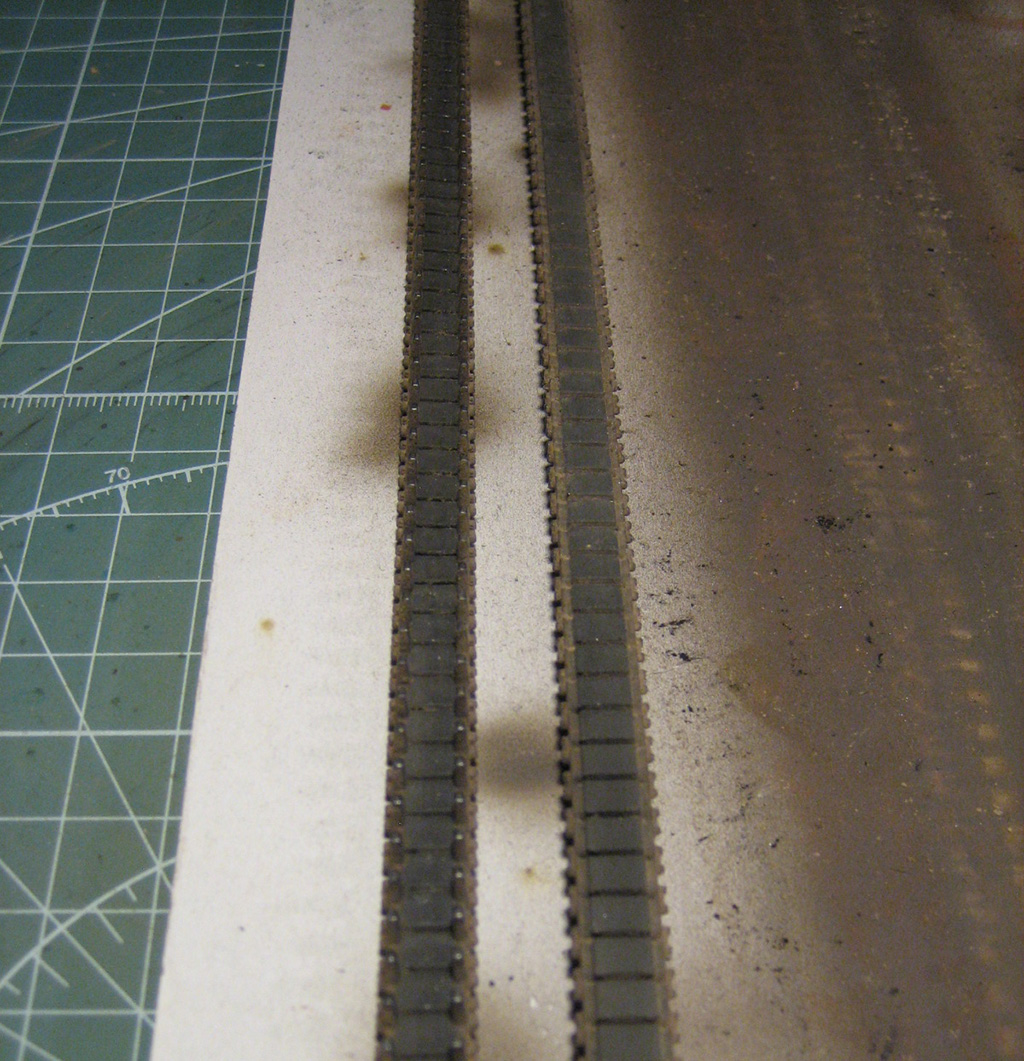
Complete lower hull ready for the tracks. Not sure if I'm gonna use the individual links in the kit or take a short cut and use the vinyl tracks. The vinyl tracks has got a very nice detail, and they are also correct...time will show.
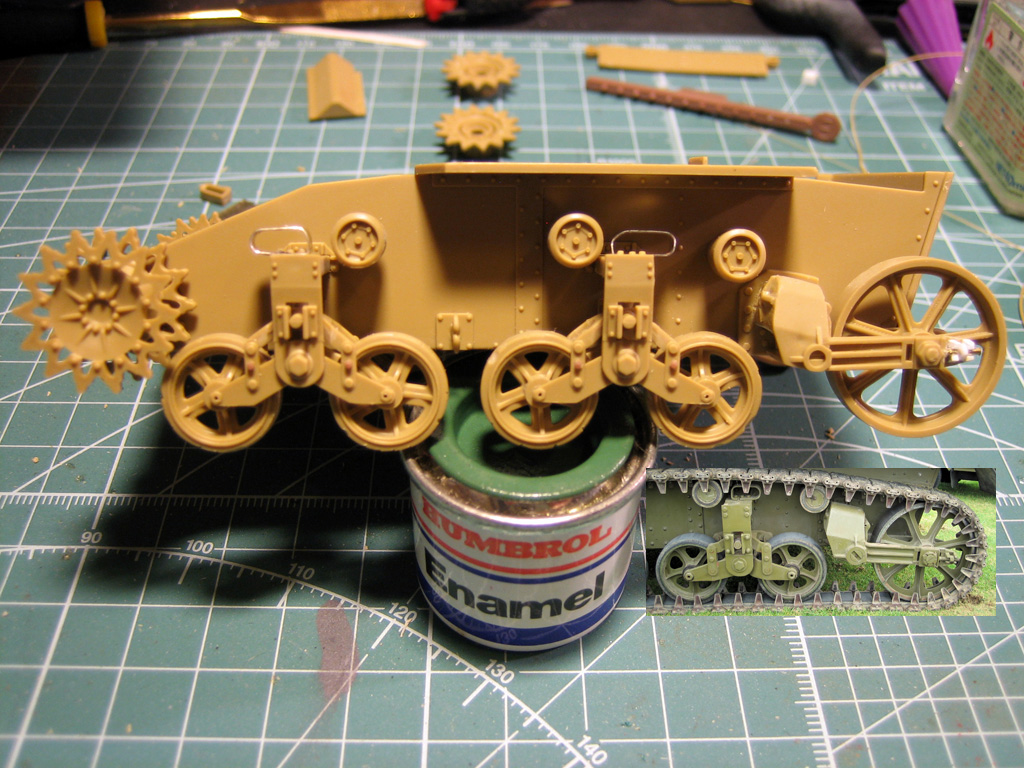

Starting the upper hull

Academy has missed out about 40 rivets on the rear of the tank and fenders. I added these with white glue and a tooth pick.
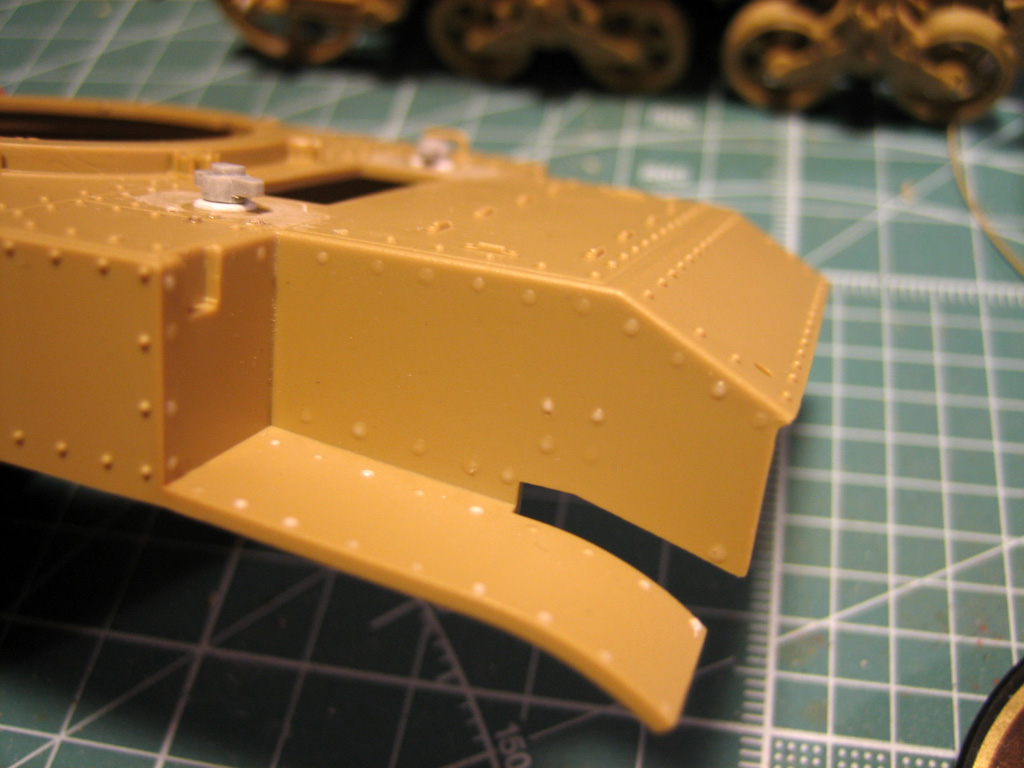

Poor research on some other details as well. The gas caps included in the kit is for the M3A1, so I had to scratch new ones from sprue an Evergreen. Just a small chain on each of the caps to be mounted before they are complete, and correct.
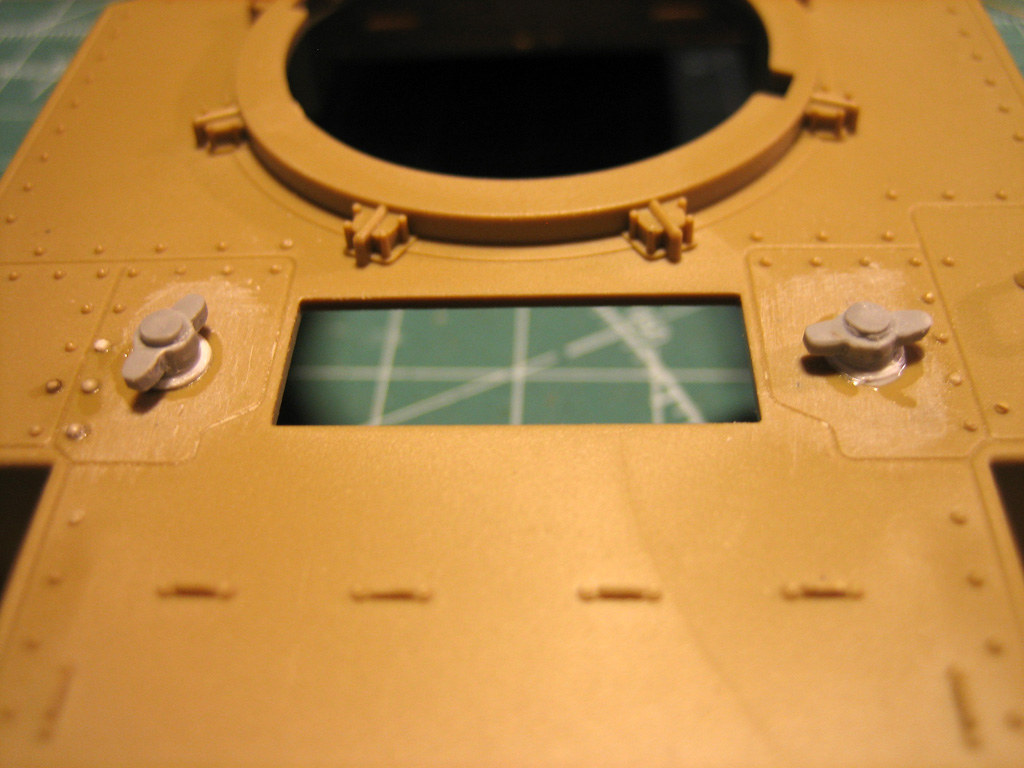

The Headlights are also wrong for an M3, but correct for an M3A1. I modified these and chose to update them slightly. No clear lenses are included in the kit and that doesn't look good. I mounted the "glass" that came with the kit and grinded out the internals. Found a couple of lenses with the correct pattern that will be mounted after paint. Looks way better that silver painted glass.


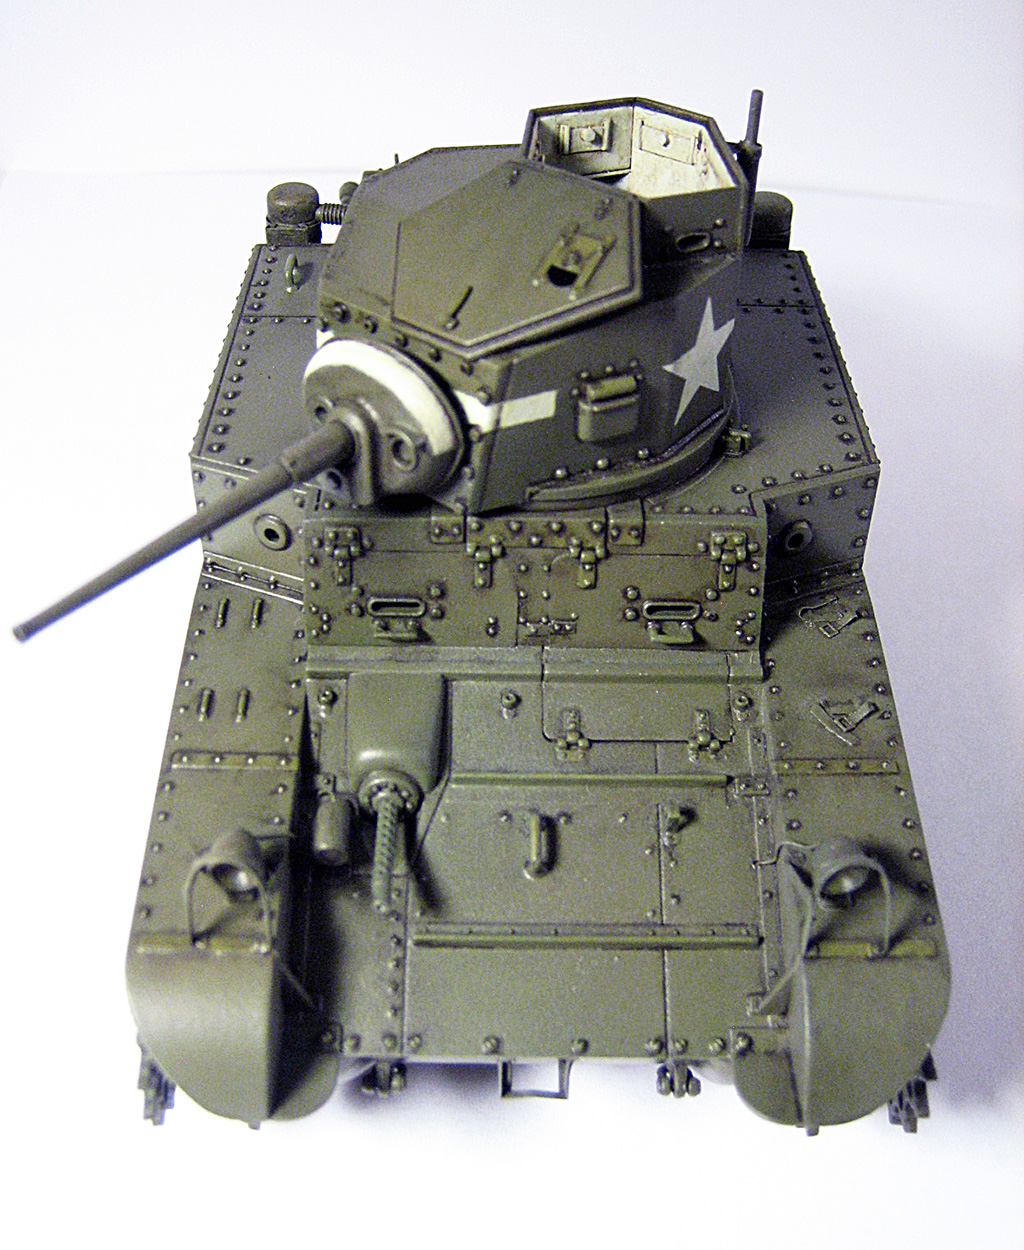
I've also added some wires for the lamps and siren up front, and added Aber Browning M1919 brass barrel.
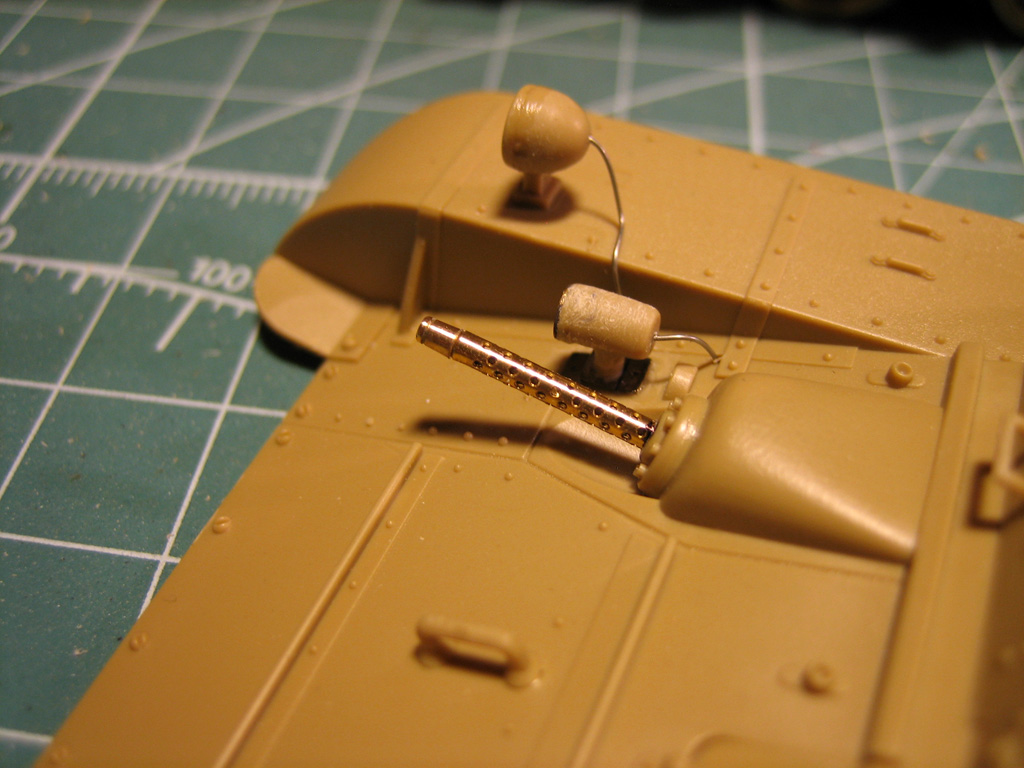

I'm kinda uncontrolable when it comes to detailing a kit, so this one got a bit more details than I opted for when I decided to build this model. It was supposed to be a "get out of the building drought model", but that thought got cancelled fairly quickly.

Well, down to business.
A small piece of chain, and a PE antenna bracket, plus an air intake mesh found it's way to the engine deck.
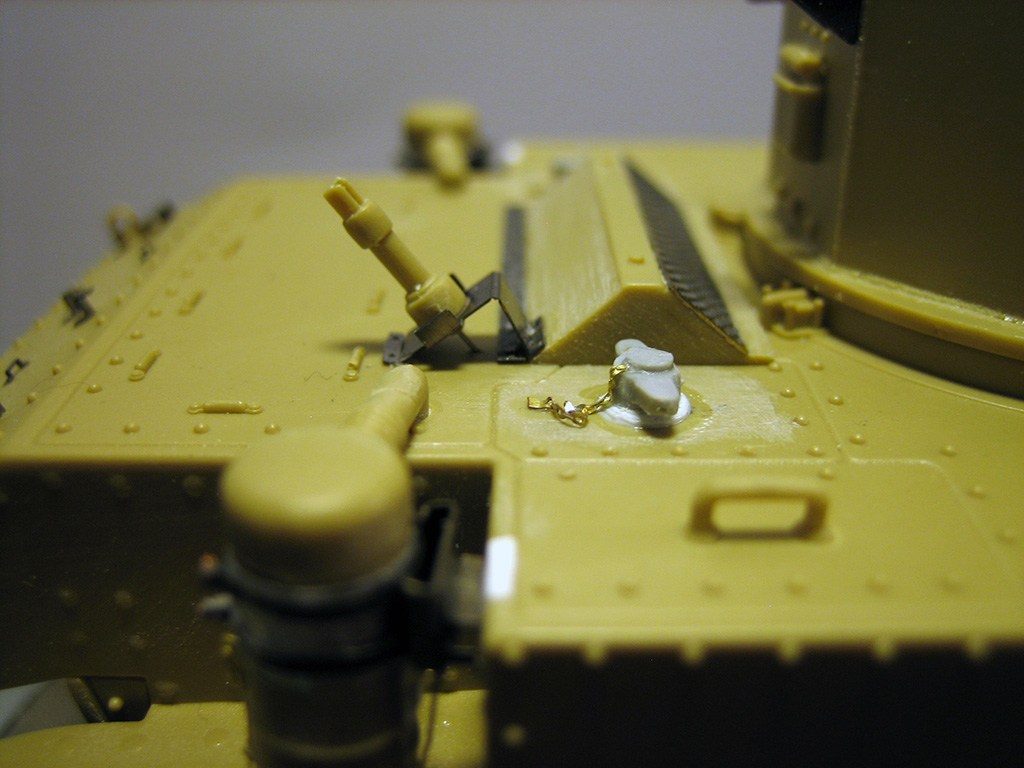

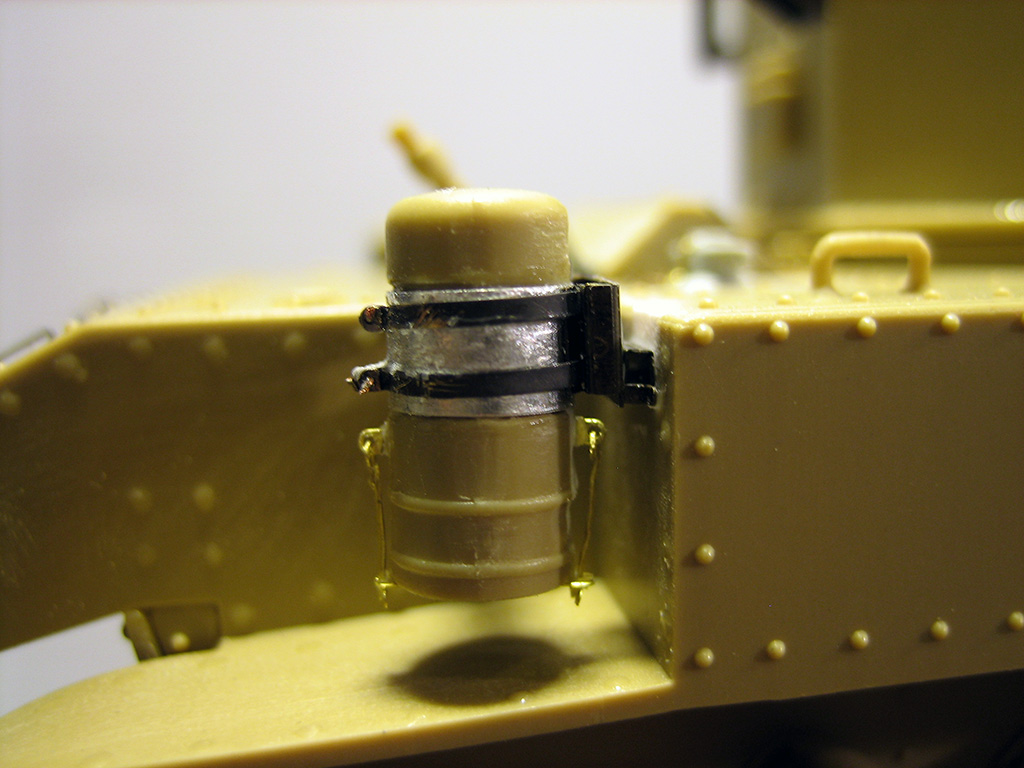
Some details on the air filters. Swapped the fastener bands and the attachement bracket with PE and banged up the air filter canister a little bit. I also made the bottom fasteners on the canister of some left over PE. A bit of clean up now and it's ready for paint.

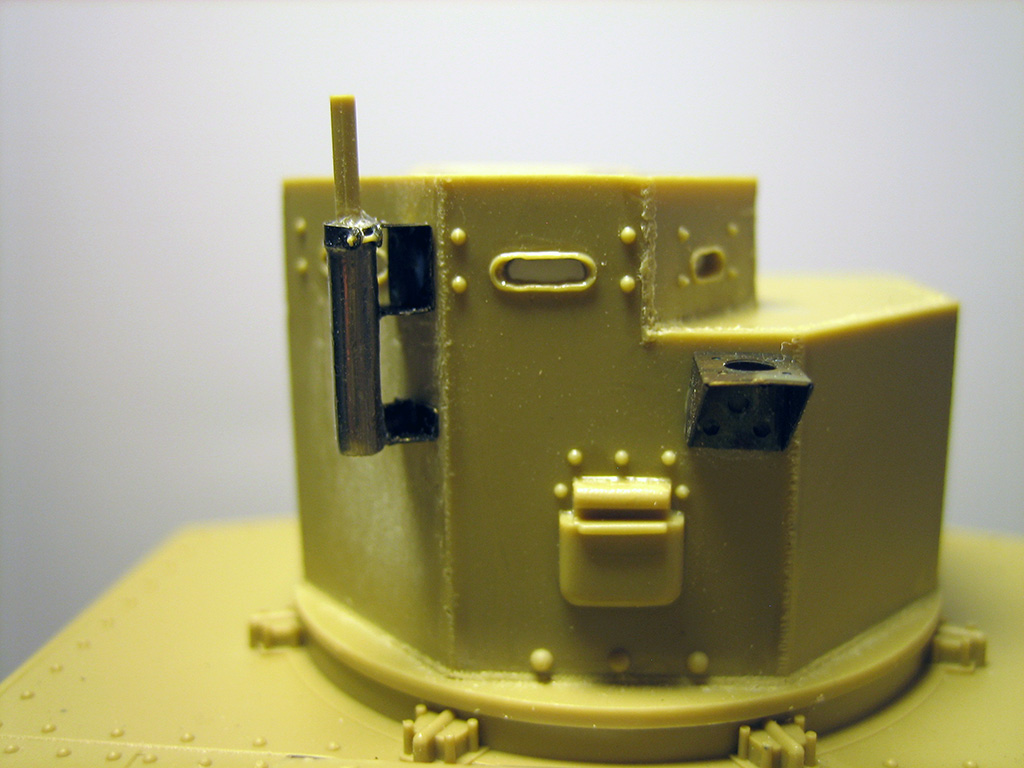
The weld seams on the M3 turret was grinded almost flush with the turret walls, according to the reference pictures I've got. I tried to simulate this with stretched sprue, Tamiya glue and an X-acto knife.
Applied stretched sprue, bombed it with glue and made the seams with the knife. Left it to dry thoroughly and used a Flexi-file to round of and sand down the seams.
The mounting bracket for the M1919 machinegun are made up of a piece of solder, some PE and stretched sprue. Drilled open all vision port on the cupola and made rain covers for all of them.

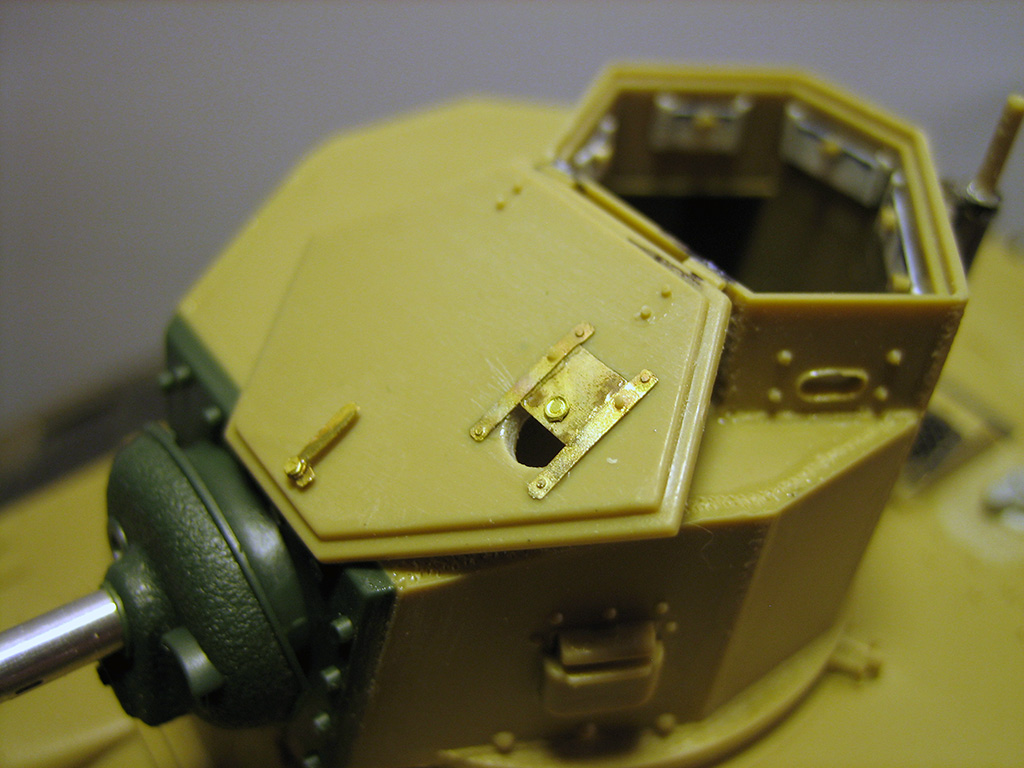
The turret hatch got it's share of detailing too. I drilled open the ventilation hole on top and made the rain cover from some left over PE from my Sherman project, I also made the internal handle for the hatch of some PE from this project. The four mounting bolts for the hatch are made from stretched sprue.

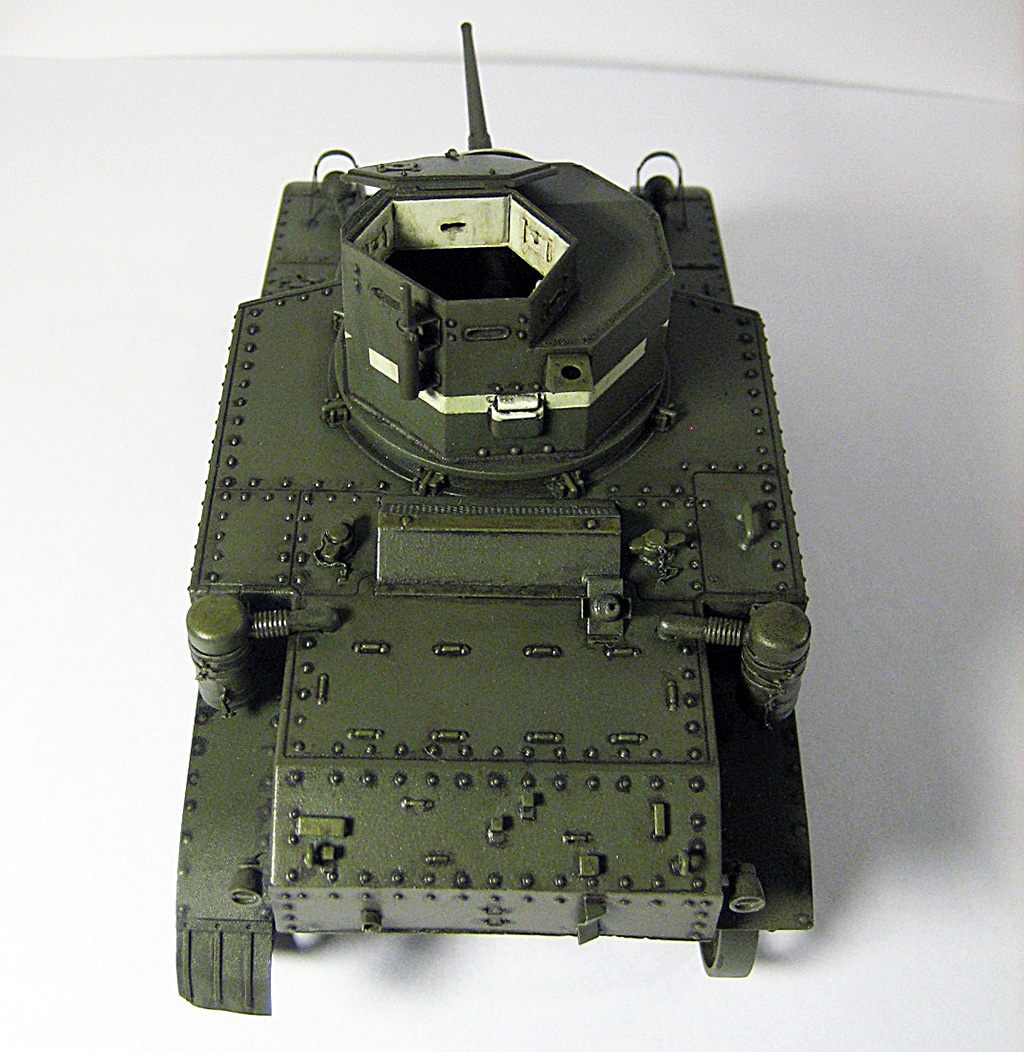
The on vehicle tools are omitted on this one because it's a training vehicle, but all the fasteners and brackets should be there. These were mounted on the engine deck and rear plate . The bracket for the shovel was banged up a bit, as per a reference picture from Fort Knox.


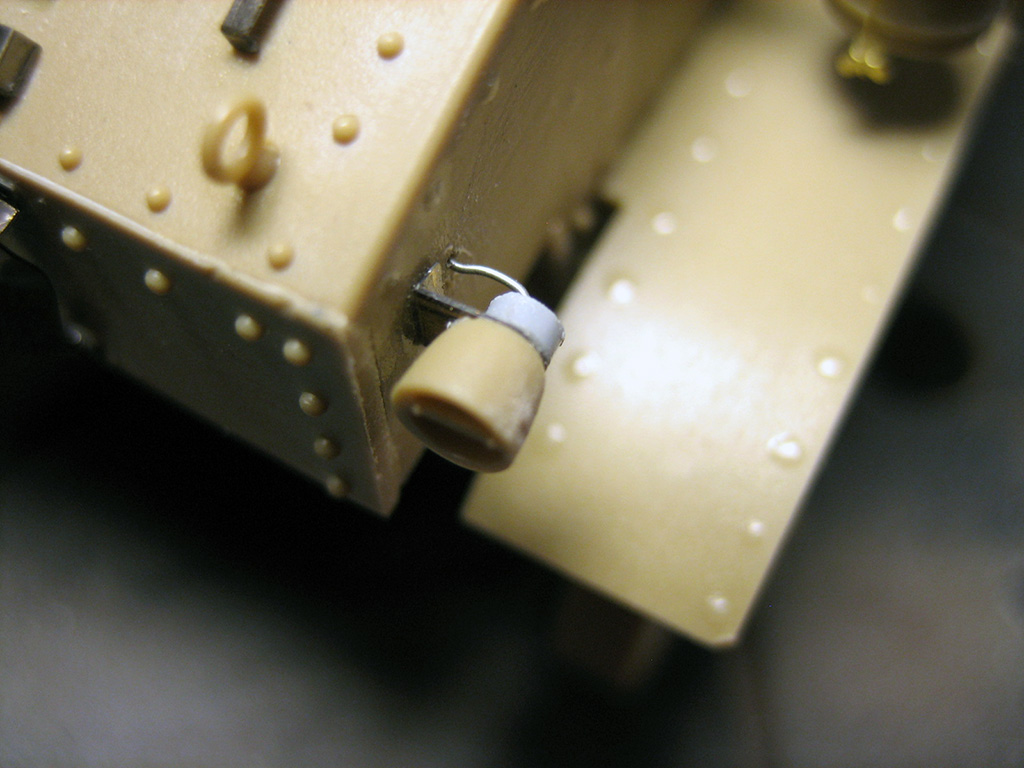
Some detail on the rear lamps. A PE bracket, some plastic tubing to make up the rear of the lamp and a piece of wire.

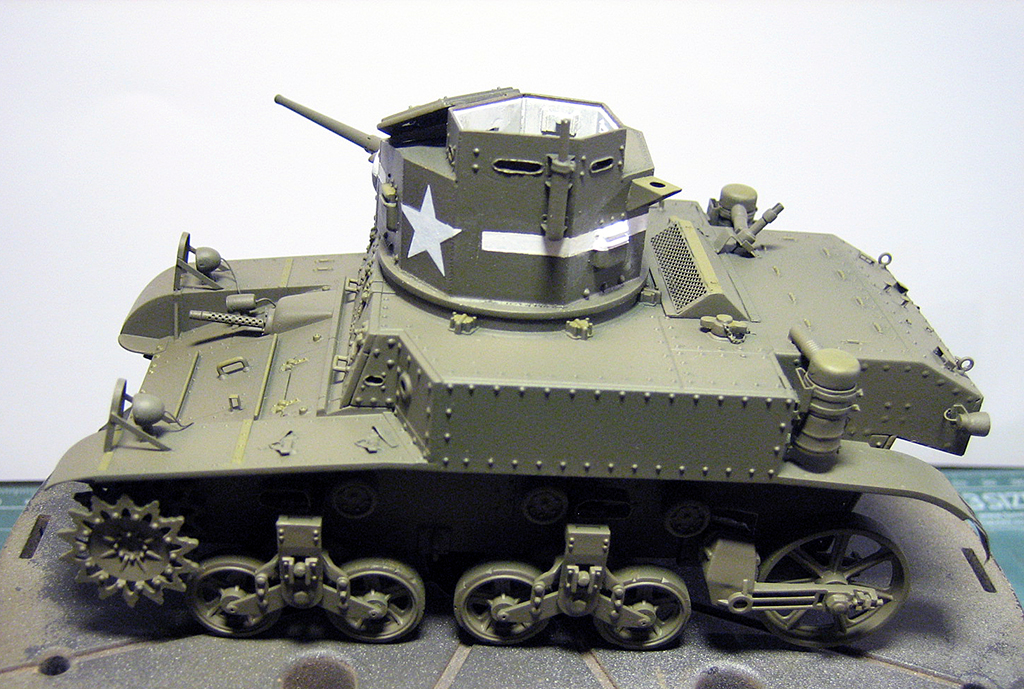
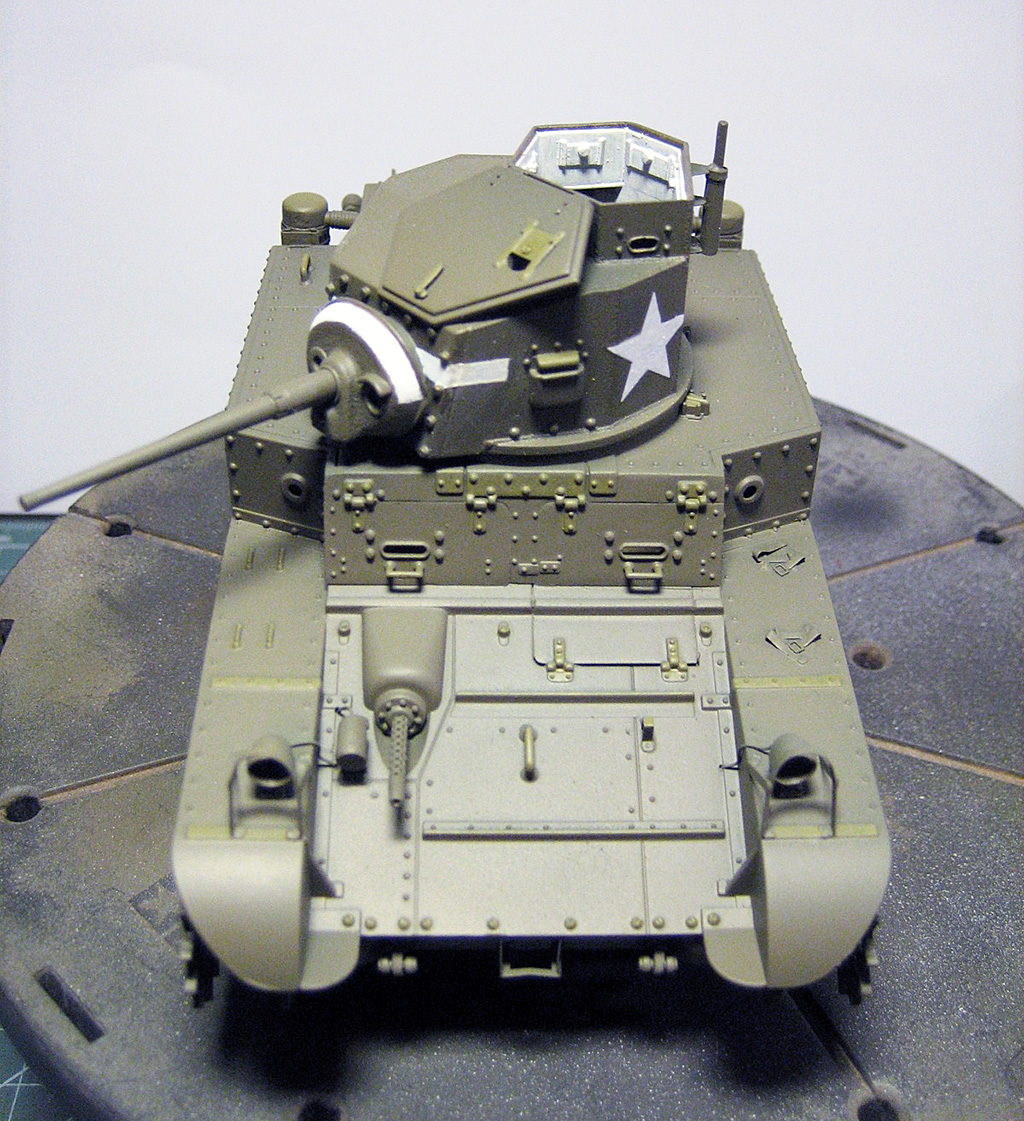
A couple of "full figure" shots from right, left and above.


I this picture the rain cover I made for the cupola are visible. The ejection marks on the air filters are filled with CA-glue and sanded, if anybody should comment on that they are visible.  ;)


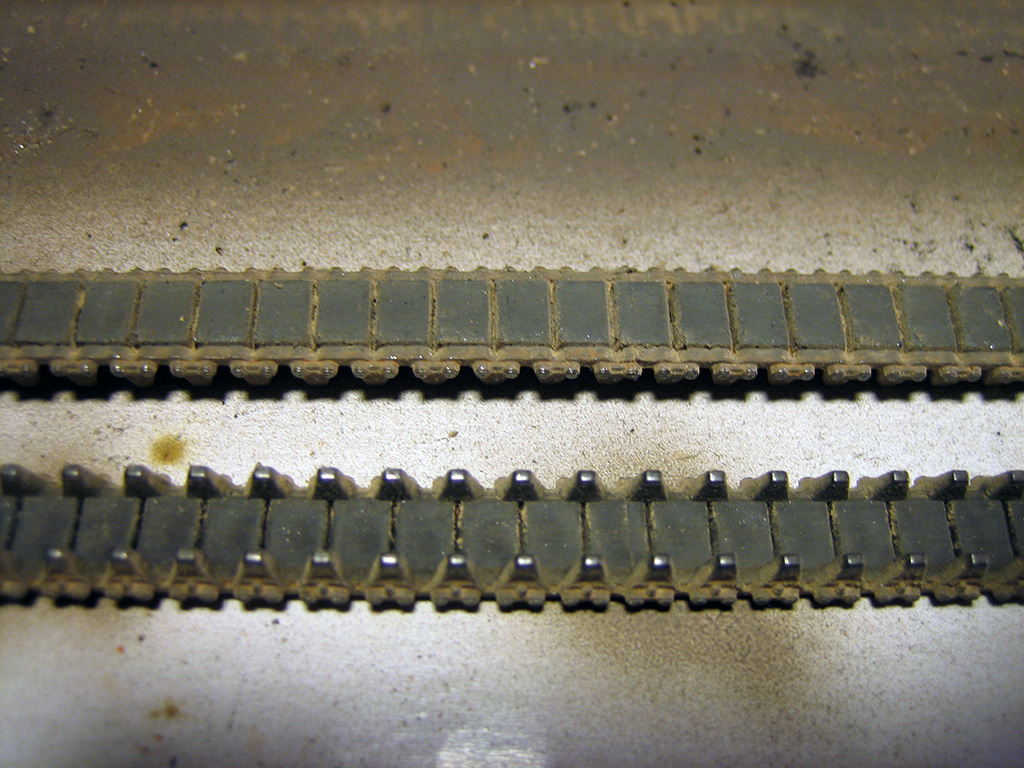
Some clean up on the whole vehicle and the tracks are in order now, before it's time for the OD.

The tracks are initially painted and weathered. The rest of the weathering will be performed once mounted to the vehicle so I can blend it all togheter.

Some pics...


Per-Erik
TimStreeter
Visit this Community
Minnesota, United States
Joined: October 19, 2008
KitMaker: 91 posts
Armorama: 80 posts
Posted: Saturday, December 10, 2011 - 04:07 AM UTC
Very nice work and attention to the details. I've built both the Academy Honey and the Tamiya M3 so I appreciate the efforts you're putting into this. You're going to have a fine looking build when you're done.

http://usarmymodels.com/MANUFACTURERS/Academy/Academy%201399/Academy%201399.html

http://usarmymodels.com/MANUFACTURERS/Tamiya/Tamiya%2035042/tamiya35042str.html

Cheers,

Tim
Grumpyoldman
Staff MemberConsigliere
KITMAKER NETWORK
Visit this Community
Florida, United States
Joined: October 17, 2003
KitMaker: 15,338 posts
Armorama: 7,297 posts
Posted: Saturday, December 10, 2011 - 04:41 AM UTC
Looking great so far.
Totalize
Visit this Community
Ontario, Canada
Joined: February 04, 2009
KitMaker: 743 posts
Armorama: 549 posts
Posted: Wednesday, December 14, 2011 - 11:51 PM UTC
Per-Erik,

Very nice build so far. Your detailing of this M3 is very nice. I don't have an M3 in my collection of kits so I will be following along on this one.

I noticed that in your picture of the rear idler correction the main bolt for the idler wheel is different on the kit versus the picture you provided. The picture has a slotted bolt while the kit does not. If the one in the picture is more accurate you might want to consider adding some slots around the bolt or purchase a set from Masterclub which are very nice.

Here's a link to a set of the masterclub bolts. I don't know the size you would be looking for but the link is to a 1.6mm set,

http://www.hobbyeasy.com/en/data/44402.html?t=1323947625

Looking forward to seeing more.

David.
Stampede
Visit this Community
Østfold, Norway
Joined: December 06, 2007
KitMaker: 109 posts
Armorama: 107 posts
Posted: Wednesday, December 21, 2011 - 08:47 AM UTC
Thank you for the kind words guys, it's very much appreciated.

David: Thanx for the tip regarding the slotted hex nuts, but I'll skip them on this build. This vehicle is going to be so very dirty that these nuts will be barely visible.

************************************************************************************

Finally started the painting and weathering process, and that's always the fun part.

First a coat of Tamiya primer.


Applied a preshade coat of Tamiya XF-61 Dark Green. Applied this color to get adark base for the shadow areas of the vehicle. I'll subsequently try to lighten and fade this base coat. The first step was a coat of OD from above. Trying to get it to blend into the darker base color on the lower areas of the vehicle.

Then I masked of the areas on the turret for the white band and the star. To paint this I used Panzer Aces #313 Stencil. Reversed the masking, applied two thin coats of Vallejo Air Olive Drab and two thin coats of OD and Vallejo Flat Yellow mixed to a shade I tought looked ok. Applied this lighter color along the edges and other places where the ligt would fall naturally. I mixed an even lighter shade that I applied with a brush to some of the parts "sticking out", like the gas caps, hinges, tie-downs and so on.


I then airbrushed two coats of MIG filters, first Green for Light Green and then Grey for Bright Green. I applied the grey filter to try to fade the OD even more.
Then I made my own filter of Abteilung Faded Grey and Odourless Turpentine which I applied with a brush on the entire vehicle.
Applied a coat of Vallejo Satin Varnish as a sealant of the filters.

Used MIG Dark Wash kinda like a rough pin wash. Jeez, there's a lot of rivets on this little tank!
When this job was done and dry I applied another coat of Vallejo Satin. So now she's ready for the next step of the weathering process.


Next in line are painting of the rubber on the running gear, and som other minor details before the rest of the weathering continues.

What's cool about these Fort Knox vehicles, according to the pictures I've seen, are that they are really dirty. They're loaded with some kind of "light-beige-brownish-earth-sand-mud-mix".
That should be a real treat to start with. Me like very much!
Stampede
Visit this Community
Østfold, Norway
Joined: December 06, 2007
KitMaker: 109 posts
Armorama: 107 posts
Posted: Wednesday, October 17, 2012 - 11:46 AM UTC
Jeez! Last update on this thread was just before christmas LAST year, shame on me!

Thanx for the kind words regarding my build, even though you all wrote them almost a year ago.

My building motivation this year has been way low, so I'll blame it on that, plus some building and redecorating projects on our home. And it's been summer and motorcycle riding season.

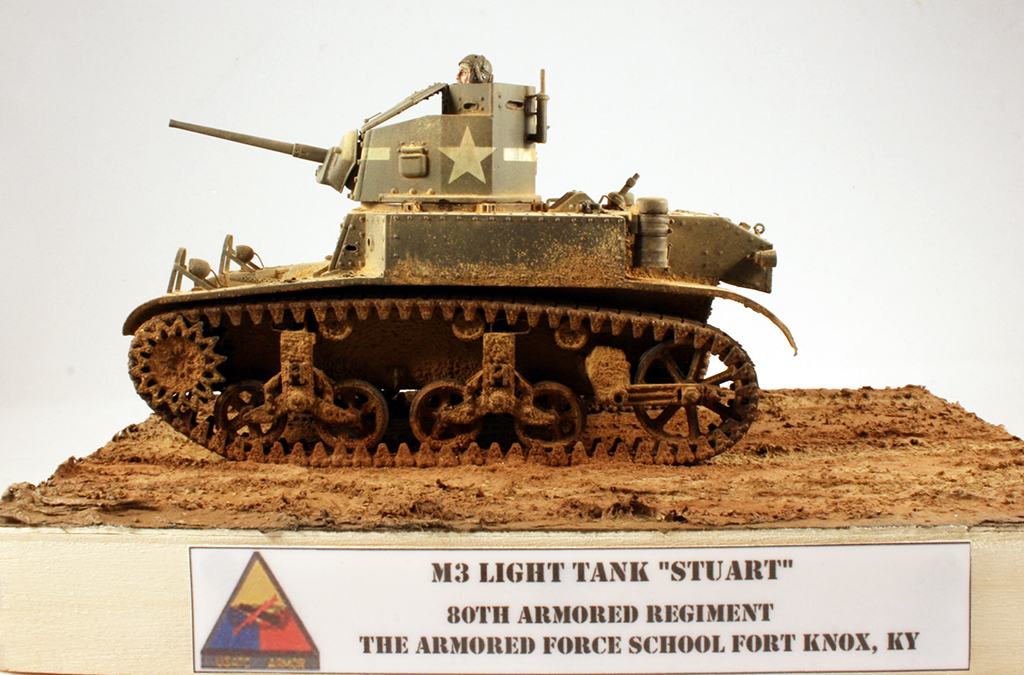
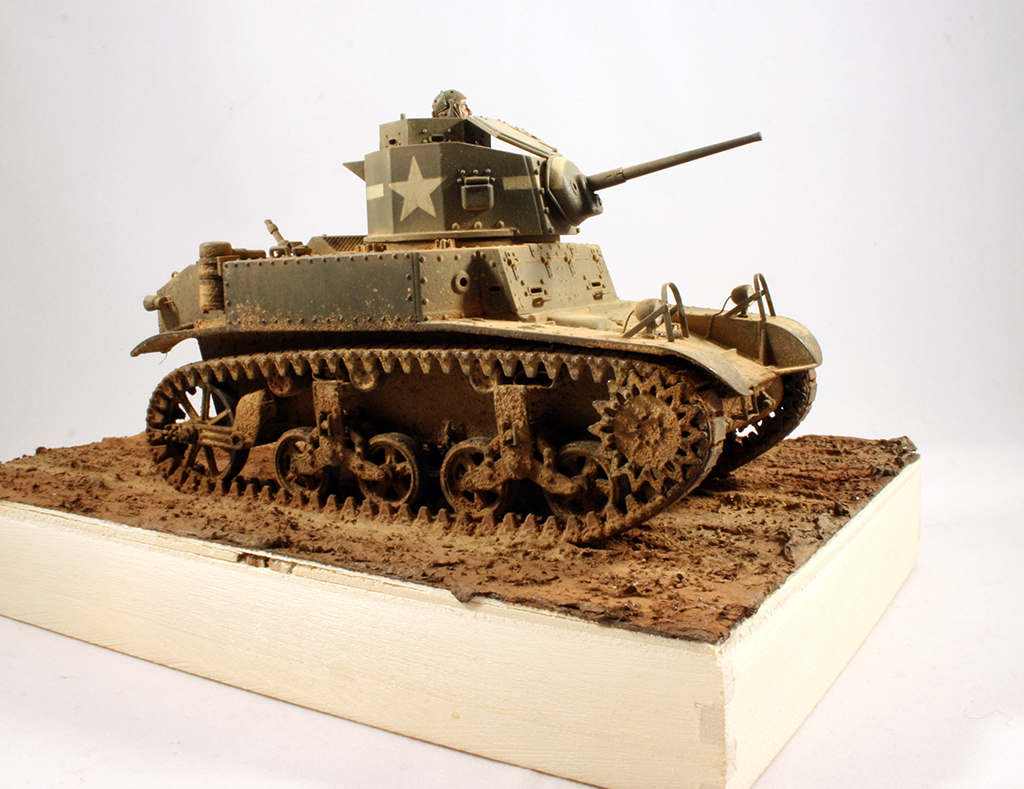
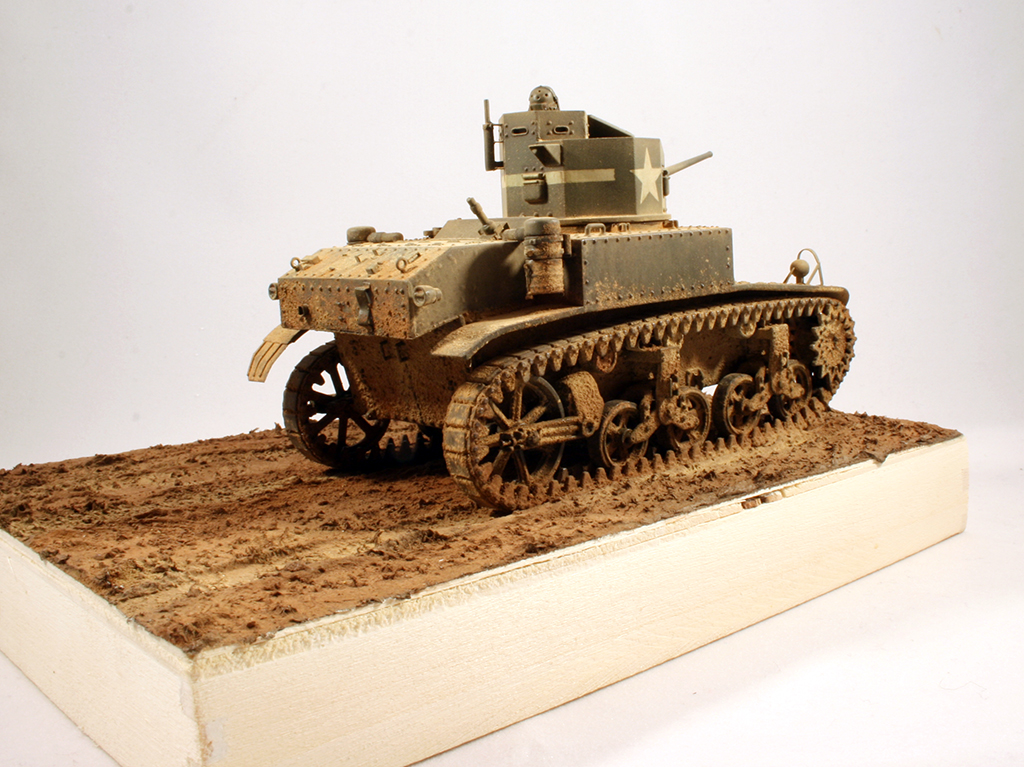
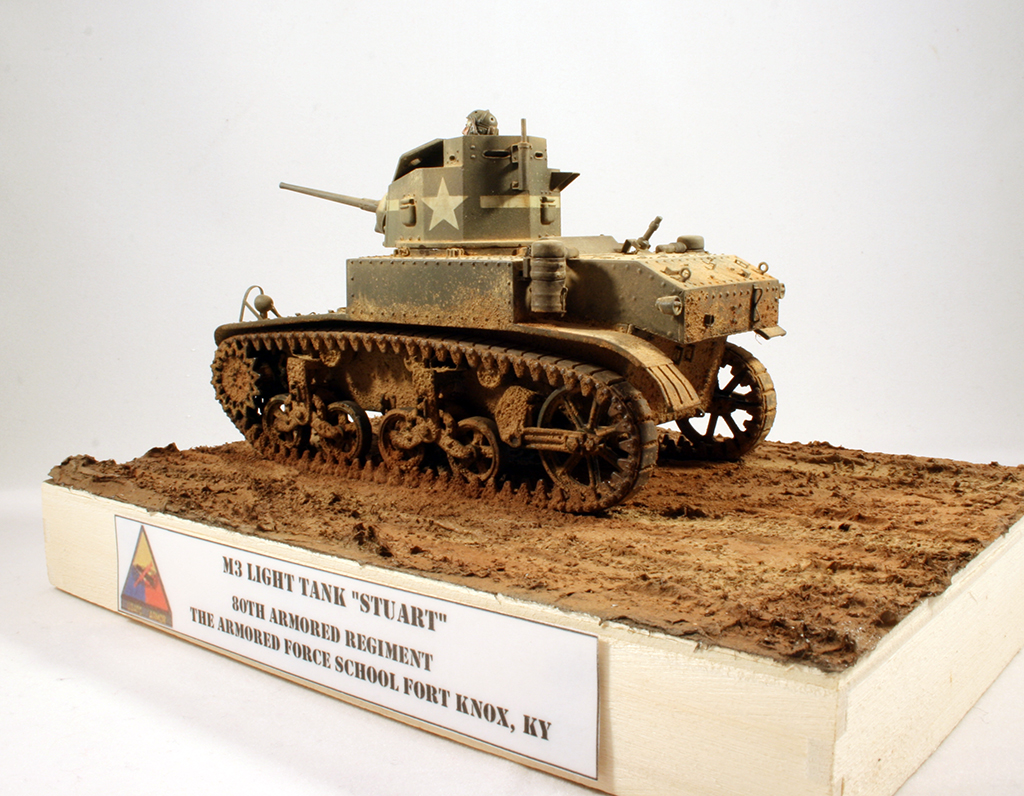
The thing that were missing on this build were some filters, washes and of course the weathering. I used MIG products for these stages, and my trusted pigment layering technique described in this thread http://www.militarymodelling.com/forums/postings.asp?th=27460.

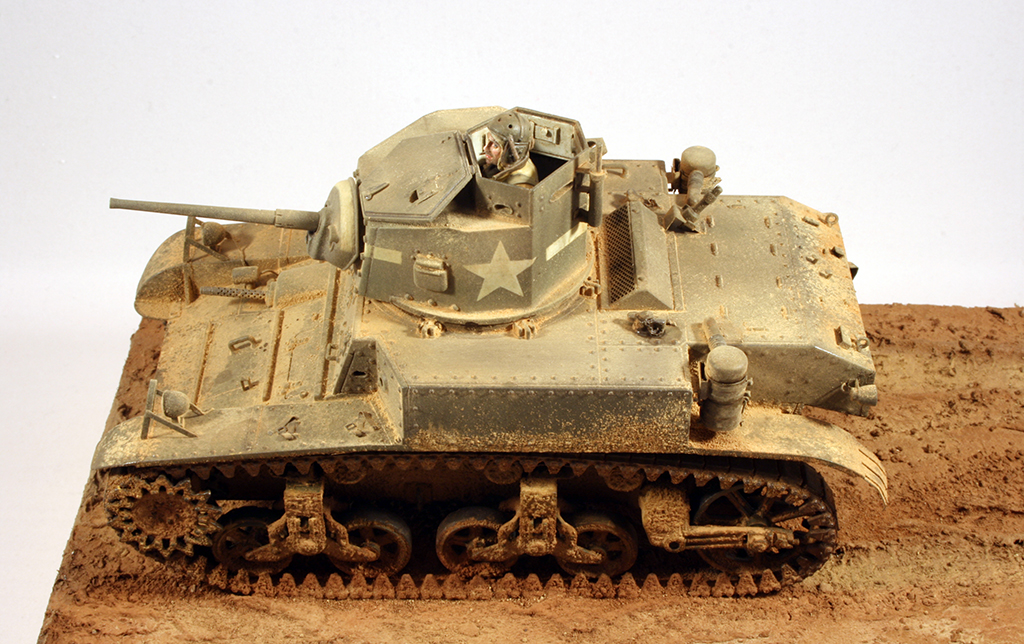
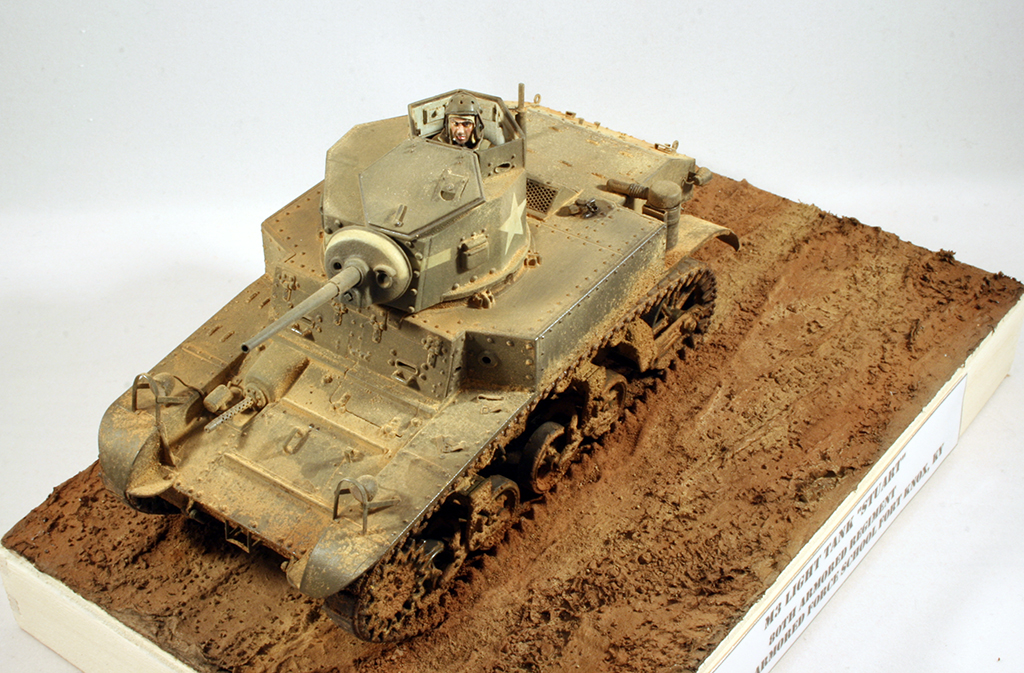
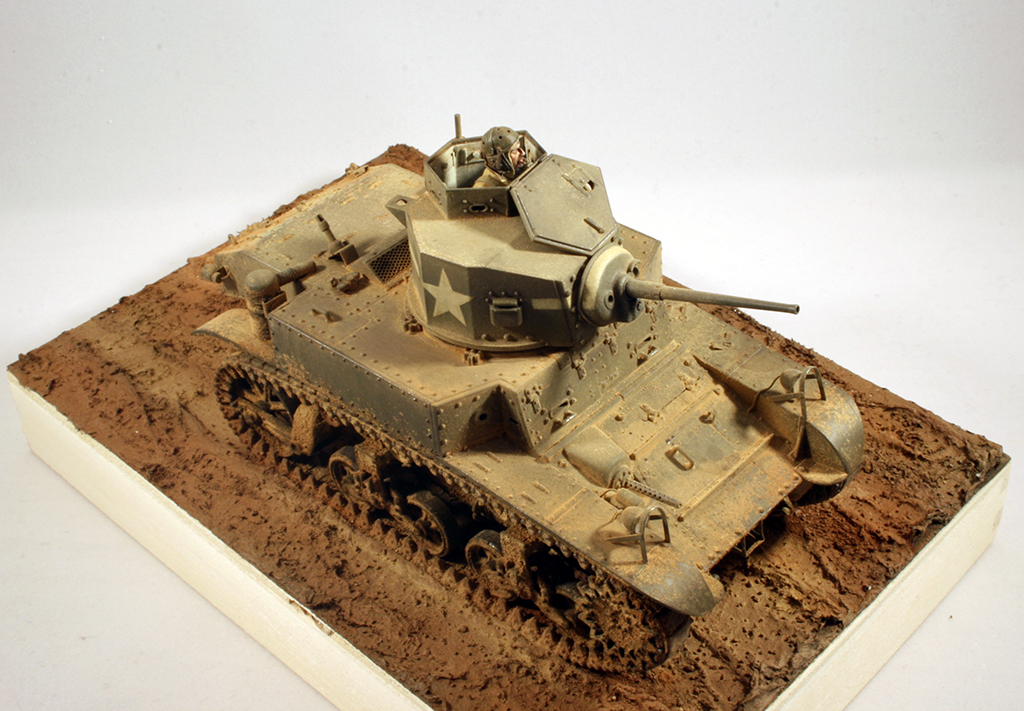
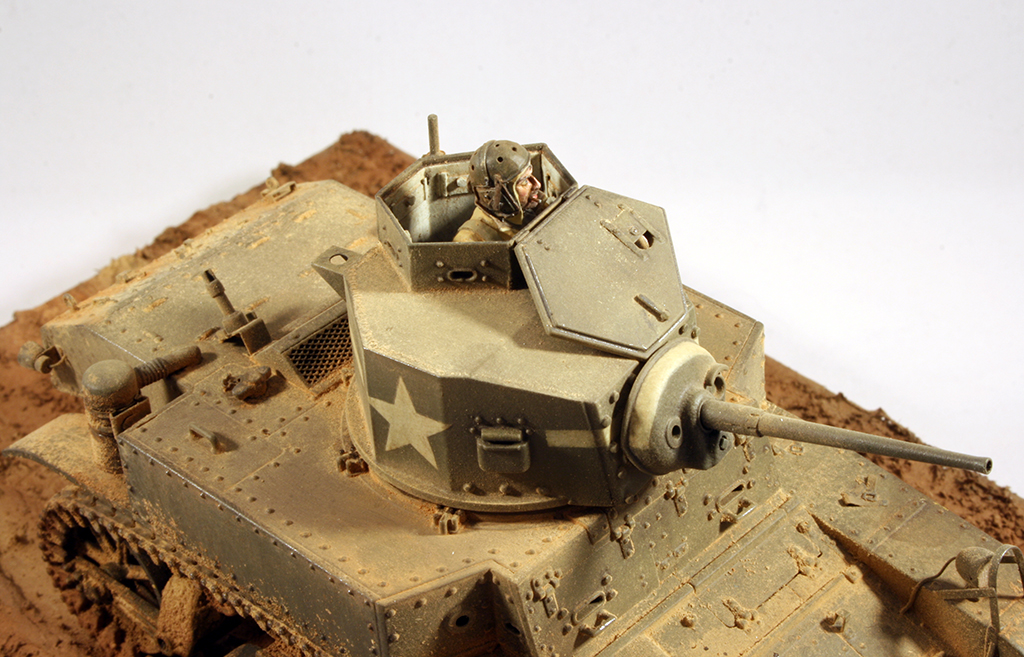
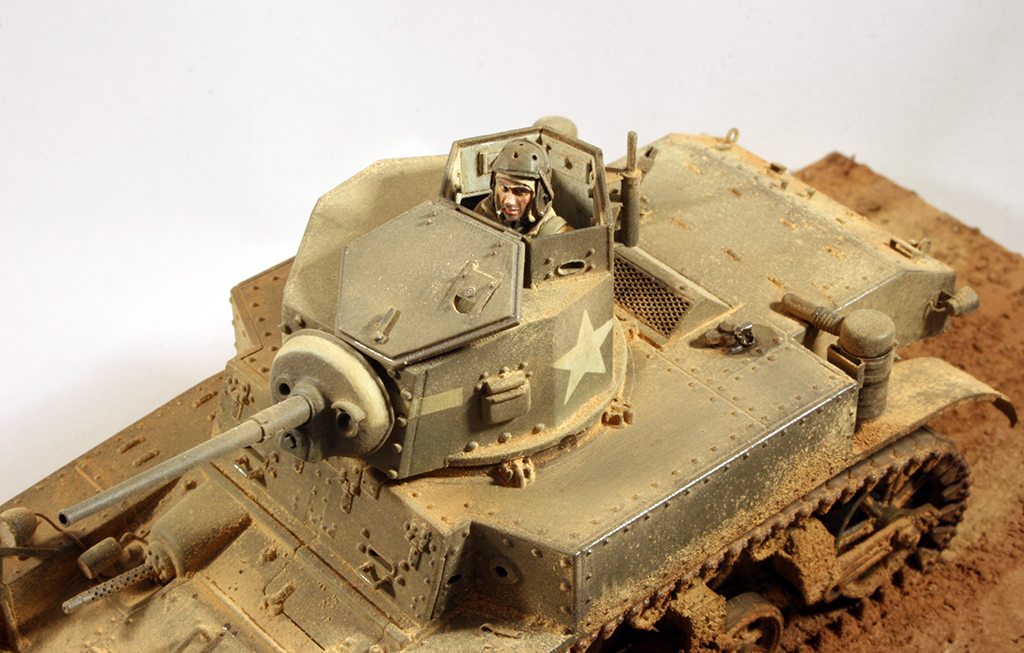
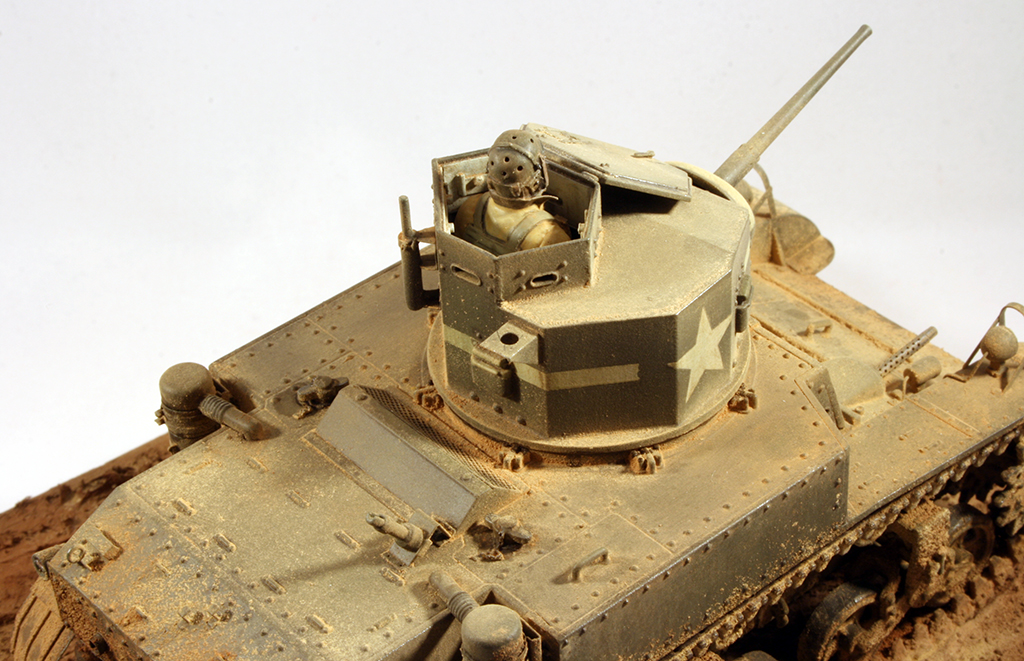
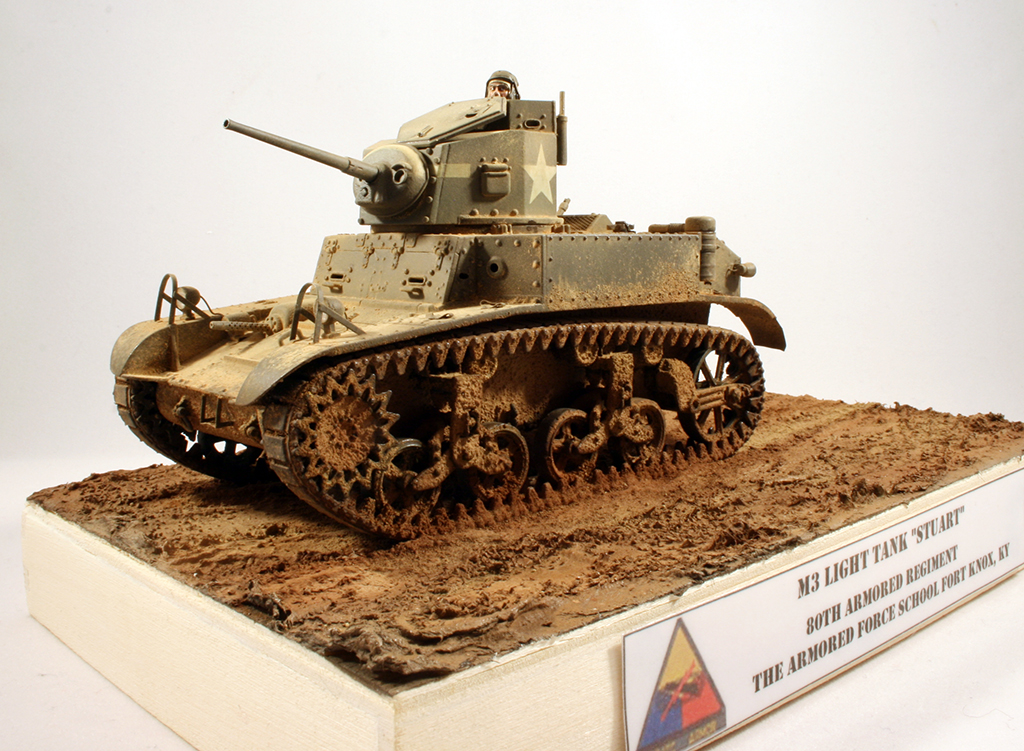
I also dropped a little "tanker-dude" in the tower too. I got this kinda "rusty" feeling when I painted him up; "Ooh it's been a while since I painted something this small".

I've also done my first attempt on a small base for this little tank. The training facilities at Fort Knox in the 40's were quite dusty/muddy, at least so I've read, and hopefully I've captured that look somehow on my base. Critisism is of course welcome since this is my first attempt at making a base.

Well, enough talking. Here are some pictures of the finished little tank.


Thanx for looking!

Per-Erik
captfue
Visit this Community
Texas, United States
Joined: September 02, 2006
KitMaker: 785 posts
Armorama: 44 posts
Posted: Wednesday, October 17, 2012 - 01:29 PM UTC
Fantastic build,with great details.
terrybarrett
Visit this Community
North Carolina, United States
Joined: November 20, 2010
KitMaker: 195 posts
Armorama: 180 posts
Posted: Wednesday, October 17, 2012 - 05:16 PM UTC
Beautiful job. Tank, base and mud look great and the figure is superb! Thanks for posting!

Terry
trahe
Visit this Community
Virginia, United States
Joined: April 03, 2006
KitMaker: 1,158 posts
Armorama: 950 posts
Posted: Wednesday, October 17, 2012 - 11:36 PM UTC
Looks great! With the detail you put in, I'm expecting it to drive right off that base! Great job blending the ground work and the weathering on the tank. Thanks for sharing!
Stampede
Visit this Community
Østfold, Norway
Joined: December 06, 2007
KitMaker: 109 posts
Armorama: 107 posts
Posted: Thursday, October 25, 2012 - 05:31 PM UTC
Thanx for the nice comments, guys! Highly appreciated.
Plasticbattle
#003
Visit this Community
Donegal, Ireland
Joined: May 14, 2002
KitMaker: 9,763 posts
Armorama: 7,444 posts
Posted: Thursday, October 25, 2012 - 06:40 PM UTC
Hi Per-Erik
Lovely little Stuart. Great attention to details. Turned out great.
retiredyank
Visit this Community
Arkansas, United States
Joined: June 29, 2009
KitMaker: 11,610 posts
Armorama: 7,843 posts
Posted: Thursday, October 25, 2012 - 11:02 PM UTC
Very well done! My first kit, upon returning to the hobby, was Academy's M3A1 Stuart. Very relaxing to build a light tank and you have made it shine! Was the base kit the M3A1 or the M3?
Bodeen
#026
Visit this Community
Pennsylvania, United States
Joined: June 08, 2002
KitMaker: 1,744 posts
Armorama: 1,359 posts
Posted: Friday, October 26, 2012 - 01:38 AM UTC
WOW!!!! Very nicely done. It's a beautiful tank...looks like it just came in from the range. Great job.

Jeff
SgtRam
Staff MemberContributing Writer
AEROSCALE
#197
Visit this Community
Ontario, Canada
Joined: March 06, 2011
KitMaker: 3,971 posts
Armorama: 2,859 posts
Posted: Friday, October 26, 2012 - 02:06 AM UTC
Great looking light tank. Nice job.

HEINE-07
Visit this Community
Ohio, United States
Joined: February 28, 2007
KitMaker: 392 posts
Armorama: 198 posts
Posted: Friday, October 26, 2012 - 03:31 AM UTC
Yes, this is beautiful.. The tanker's helmet really sparks the spirit of this delightful stateside source of force.
Stampede
Visit this Community
Østfold, Norway
Joined: December 06, 2007
KitMaker: 109 posts
Armorama: 107 posts
Posted: Wednesday, October 31, 2012 - 03:18 AM UTC
Thanx again for the nice comments guys, much appreciated!

@Matt: The base for the kit was the M3.

Per-Erik
BBD468
Visit this Community
Texas, United States
Joined: March 08, 2010
KitMaker: 2,465 posts
Armorama: 2,383 posts
Posted: Wednesday, October 31, 2012 - 05:41 AM UTC
Man, that is a splendid Stuart right there!!! Well done.
 _GOTOTOP