South Carolina, United States
Joined: September 28, 2005
KitMaker: 778 posts
Armorama: 763 posts
Posted: Wednesday, December 28, 2011 - 07:18 AM UTC
hay scott i just got one as well can't wait to see what you do with this one
dave

Scotland, United Kingdom
Joined: December 07, 2007
KitMaker: 2,096 posts
Armorama: 1,983 posts
Posted: Wednesday, December 28, 2011 - 07:40 AM UTC
WOW on to the second page already and i have not even started to build it yet

gess I better get a move on! I Have some sprue shots if anyone wants to see them?
CUIDICH 'N RIGH
life is a river, it always runs.
England - North West, United Kingdom
Joined: March 30, 2006
KitMaker: 195 posts
Armorama: 175 posts
Posted: Wednesday, December 28, 2011 - 09:50 AM UTC
I have already made the Boxer, goes together well only hitch, i think was the parts C17-18 were labeled the wrong way round.
the tub needs to be put together squarely or it may not go into the bay correctly, tacked mine together first for a check fit.
the painting of the rear tub area did push up the tub, but a little filing helped place the tub back into position,
So do-not paint the underside of the tub or the bay area for a good installation.
cannot think of any other problems, I will attach photos soon, made the model at the start of November still need to finish the weathering.
Enjoy the build,
this ones marked up as a British trials vehicle from Bovington ?.
Scotland, United Kingdom
Joined: December 07, 2007
KitMaker: 2,096 posts
Armorama: 1,983 posts
Posted: Thursday, December 29, 2011 - 05:41 AM UTC
Hay gang Finally got some building done today.
Step 1 in the instruction, the hull sides and bottom plate and the section that separates the driver and the module.

By
sudzonic at 2011-12-29

By
sudzonic at 2011-12-29

By
sudzonic at 2011-12-29

By
sudzonic at 2011-12-29
Step 2 is adding the floor section in the rear area and some details on the bottom and a section on the front of the hull.

By
sudzonic at 2011-12-29

By
sudzonic at 2011-12-29

By
sudzonic at 2011-12-29
Step 3, the drivers compartment not glued in yet as it will need painting.

By
sudzonic at 2011-12-29
That's it for now if I get anymore finished I will post it up later this evening.
CUIDICH 'N RIGH
life is a river, it always runs.
South Carolina, United States
Joined: September 28, 2005
KitMaker: 778 posts
Armorama: 763 posts
Posted: Thursday, December 29, 2011 - 10:57 PM UTC
looking good scott. how is the fit and have you ran into any problems yet
dave

England - North West, United Kingdom
Joined: March 30, 2006
KitMaker: 195 posts
Armorama: 175 posts
Posted: Friday, December 30, 2011 - 08:03 AM UTC


hope this works, not sent in photos before,
the British army tested the boxer in another format, so I have put this one as the Infantry version, from the tests?
Pennsylvania, United States
Joined: October 16, 2006
KitMaker: 3,374 posts
Armorama: 3,126 posts
Posted: Friday, December 30, 2011 - 08:17 AM UTC
Wow that was fast! Looks great
Scotland, United Kingdom
Joined: December 07, 2007
KitMaker: 2,096 posts
Armorama: 1,983 posts
Posted: Friday, December 30, 2011 - 08:54 AM UTC
Frank nice work!
Here is today's progress.
Starting work on the suspension components. 16 springs in total 2 per wheel.

By
sudzonic at 2011-12-30
Front and rear wish bones and steering components.

By
sudzonic at 2011-12-30
I have assembled the rear module, here it is on and off the main hull.

By
sudzonic at 2011-12-30

By
sudzonic at 2011-12-30
I have also built up the parts for the RWS.

By
sudzonic at 2011-12-30

By
sudzonic at 2011-12-30
That's it for today, I will update again over the next few days.

CUIDICH 'N RIGH
life is a river, it always runs.
Arkansas, United States
Joined: June 29, 2009
KitMaker: 11,610 posts
Armorama: 7,843 posts
Posted: Saturday, December 31, 2011 - 12:34 AM UTC
Nice clean build. And, it looks like Revell didn't skimp on the details.
Ideals are peaceful. History is violent.
California, United States
Joined: January 31, 2008
KitMaker: 274 posts
Armorama: 251 posts
Posted: Monday, January 02, 2012 - 04:58 AM UTC
Looking good Scott. Do you know or does anyone know if anyone is "rumored" to be doing an interior set for the module? It's always frustrating that Revell molds the rear hatches in the closed position.....
Bayern, Germany
Joined: October 14, 2008
KitMaker: 4,099 posts
Armorama: 4,067 posts
Posted: Tuesday, January 03, 2012 - 01:34 AM UTC
Hi Kurt,
it is possible that we might see an interior from an Eastern Europe company. But this would require a new rear plate with open hatch and a new roof with open hatches, too. Also the interior is more complex, compared e.g. with a Stryker.
So far, the Boxer has a great potential for AM companies, but I guess the necesary details photos are still lacking.
Just my 2 cents
Hans-Hermann
CAD Images mean nothing.
What does a rivet counter count on a cast or welded tank hull?
Scotland, United Kingdom
Joined: December 07, 2007
KitMaker: 2,096 posts
Armorama: 1,983 posts
Posted: Friday, January 06, 2012 - 03:16 AM UTC
CUIDICH 'N RIGH
life is a river, it always runs.
Scotland, United Kingdom
Joined: December 07, 2007
KitMaker: 2,096 posts
Armorama: 1,983 posts
Posted: Tuesday, January 10, 2012 - 12:26 AM UTC
Hay gang, The bulk of the construction is finished.


Had a bit of a disaster right after I had finished glue some of the last parts on I managed to knock over the bottle of plastic cement

. It ended up all over my top, trousers, and my slippers! I now have to wait for payday to get more, then wait till it arrives through mail order since I live on an island and my nearest LHS is boat trip and a 3 hour drive away

.
CUIDICH 'N RIGH
life is a river, it always runs.
England - West Midlands, United Kingdom
Joined: June 21, 2011
KitMaker: 87 posts
Armorama: 83 posts
Posted: Tuesday, January 10, 2012 - 12:48 AM UTC
of course the boxer would be a good choise for the British Army as the drivers position is on the correct side of the vehicle.

Nice build Scott it won't hert you to have a break from building for a while.
Pete
If you have a question about having something etched please send me an E-mail through my web site. Click here to visit my site:
Thank you
South Carolina, United States
Joined: September 28, 2005
KitMaker: 778 posts
Armorama: 763 posts
Posted: Wednesday, January 11, 2012 - 06:36 PM UTC
looking good scott did you have any fit problems ?
dave


#284
Northern Ireland, United Kingdom
Joined: October 04, 2006
KitMaker: 3,094 posts
Armorama: 2,942 posts
Posted: Thursday, January 12, 2012 - 04:45 AM UTC
Nice clean build Scott, nice to see it all built up. How does the module roof look with the moulded shut hatches?
On The Bench:
Ethiopian BMP-1 (Trumpeter 1/35)
AMX-13/75 (Takom 1/35)
Arkansas, United States
Joined: June 29, 2009
KitMaker: 11,610 posts
Armorama: 7,843 posts
Posted: Thursday, January 12, 2012 - 09:10 AM UTC
Looking good Scott. I'm still trying to figure out how to work one of these in with my other builds. Keep 'em coming.
Ideals are peaceful. History is violent.
Scotland, United Kingdom
Joined: December 07, 2007
KitMaker: 2,096 posts
Armorama: 1,983 posts
Posted: Monday, January 16, 2012 - 07:53 AM UTC
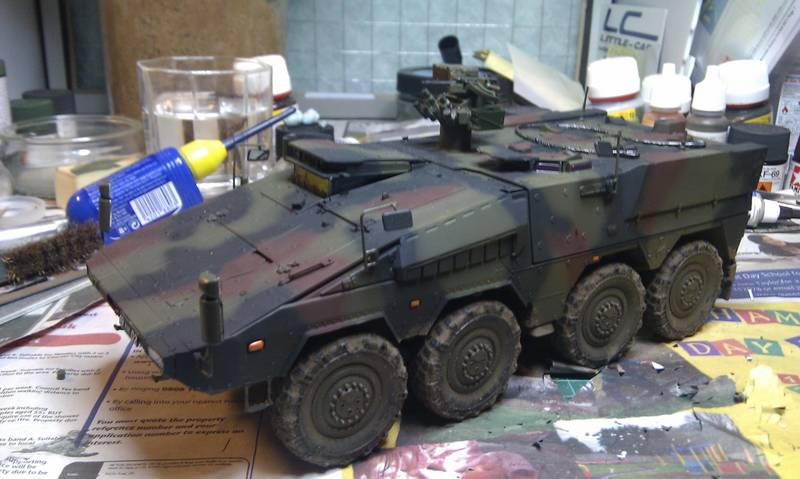
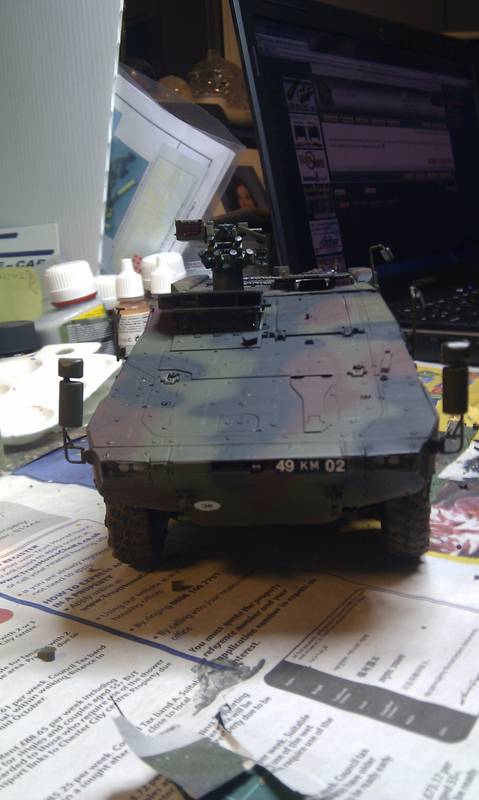
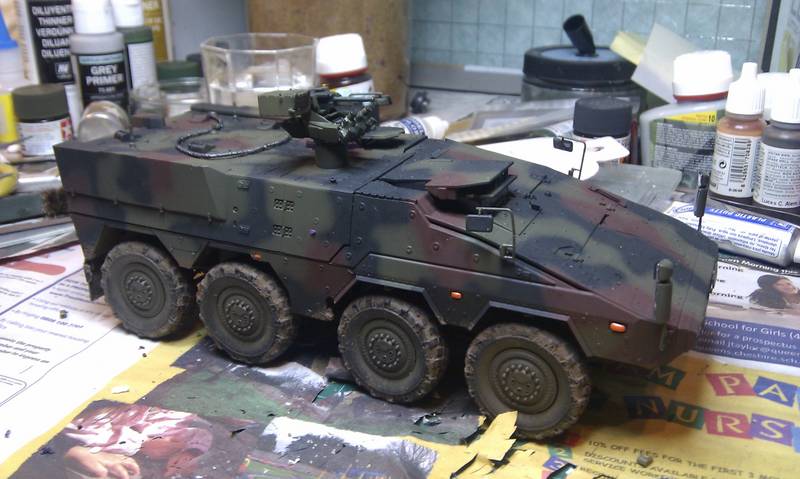
Thanks for the positive feed back guys, I have to say the kit go's together with no real fit problem the only thing I would say is that the module sits a bit high? i have tried to sand down the bottom of it but I cant seem to figure out were it is binding on the hull?
Any way I have got the first coat of paint on and ruffed out the camo pattern still have to tidy it up a bit.

This is one BIG vehicle! here is a pic with a M113 FSV for comparison.

CUIDICH 'N RIGH
life is a river, it always runs.
Bayern, Germany
Joined: October 14, 2008
KitMaker: 4,099 posts
Armorama: 4,067 posts
Posted: Monday, January 16, 2012 - 09:41 AM UTC
Hi guys,
I think the fit problems lies in the angled hull sides. I solved this problem by removing the the base plate of the module, except for the last 1/2 inch. Then the fit is perfect.
I really wonder why Revell made a seperate module, They should have provided the kit with open troop hatches instead.

Hans-Hermann
CAD Images mean nothing.
What does a rivet counter count on a cast or welded tank hull?
Scotland, United Kingdom
Joined: December 07, 2007
KitMaker: 2,096 posts
Armorama: 1,983 posts
Posted: Monday, January 16, 2012 - 10:33 AM UTC
Quoted Text
Hi guys,
I think the fit problems lies in the angled hull sides. I solved this problem by removing the the base plate of the module, except for the last 1/2 inch. Then the fit is perfect.
I really wonder why Revell made a separate module, They should have provided the kit with open troop hatches instead. 
Hans-Hermann
Thanks for the tip Hans, I will try that if I do another one? I am sure the AM company's are working on new modules for it or maybe revell are working on alternative ones?
CUIDICH 'N RIGH
life is a river, it always runs.
Kildare, Ireland
Joined: November 21, 2007
KitMaker: 3,212 posts
Armorama: 2,807 posts
Posted: Monday, January 16, 2012 - 11:27 AM UTC
Looks good Scott....I love the style of that nose!
Scotland, United Kingdom
Joined: December 07, 2007
KitMaker: 2,096 posts
Armorama: 1,983 posts
Posted: Tuesday, January 24, 2012 - 08:13 AM UTC
CUIDICH 'N RIGH
life is a river, it always runs.
Texas, United States
Joined: September 04, 2010
KitMaker: 289 posts
Armorama: 257 posts
Posted: Tuesday, January 24, 2012 - 09:17 AM UTC
Nice!
I cant wait to do this one myself (in Afghanistan colors)
whats your overall impression of the kit? would you build it again?
My ShapeWays Designer Page

#284
Northern Ireland, United Kingdom
Joined: October 04, 2006
KitMaker: 3,094 posts
Armorama: 2,942 posts
Posted: Wednesday, January 25, 2012 - 03:44 AM UTC
On The Bench:
Ethiopian BMP-1 (Trumpeter 1/35)
AMX-13/75 (Takom 1/35)
Arkansas, United States
Joined: June 29, 2009
KitMaker: 11,610 posts
Armorama: 7,843 posts
Posted: Wednesday, January 25, 2012 - 04:10 AM UTC
Looks great! That is a huge vehicle. I'll stick with my m113s for now, while I wait for some am goodies to come out for the Revell kit.
Ideals are peaceful. History is violent.


 gess I better get a move on! I Have some sprue shots if anyone wants to see them?


 . It ended up all over my top, trousers, and my slippers! I now have to wait for payday to get more, then wait till it arrives through mail order since I live on an island and my nearest LHS is boat trip and a 3 hour drive away
  .
.


