Noord-Brabant, Netherlands
Joined: January 26, 2012
KitMaker: 20 posts
Armorama: 19 posts
Posted: Thursday, January 26, 2012 - 06:32 AM UTC
Quoted Text
i have tried to sand down the bottom of it but I cant seem to figure out were it is binding on the hull?
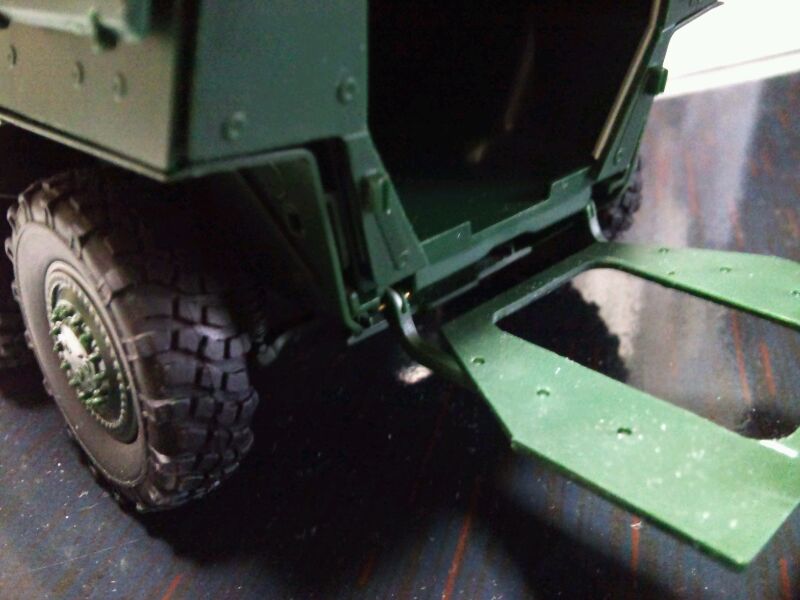
That is the correct way, the front part of the floor of the mission module touches the drive module well in some places. If you sand the floor of the mission module on a flat piece of sanding paper and chamfer the leading edges a bit, the fit will be perfect. Preferably, make the floor part of the mission module fit correctly into the drive module before glueing the entire mission module together.
I like your finished model. Keep up the good work.
Erik
Noord-Brabant, Netherlands
Joined: January 26, 2012
KitMaker: 20 posts
Armorama: 19 posts
Posted: Thursday, January 26, 2012 - 06:37 AM UTC
Quoted Text
Looking good Scott. Do you know or does anyone know if anyone is "rumored" to be doing an interior set for the module? It's always frustrating that Revell molds the rear hatches in the closed position.....
Well, here's a rumor for you:


#195
Texas, United States
Joined: May 03, 2007
KitMaker: 349 posts
Armorama: 232 posts
Posted: Friday, January 27, 2012 - 10:20 AM UTC
This is looking amazing!
I have one question, since I am looking at getting this kit, Are there any aftermarket wheel sets for the Revell Boxer?
On the Bench:
Tamiya 1/32 F4U "Birdcage" Corsair
Trumpeter 1/35 Fennek LGS
DML 1/35 Sherman Mk III
Bayern, Germany
Joined: October 14, 2008
KitMaker: 4,099 posts
Armorama: 4,067 posts
Posted: Friday, January 27, 2012 - 04:32 PM UTC
CAD Images mean nothing.
What does a rivet counter count on a cast or welded tank hull?
Noord-Brabant, Netherlands
Joined: January 26, 2012
KitMaker: 20 posts
Armorama: 19 posts
Posted: Saturday, January 28, 2012 - 12:43 AM UTC
Quoted Text
This is looking amazing!
I have one question, since I am looking at getting this kit, Are there any aftermarket wheel sets for the Revell Boxer?
Well, there seems to be a set of wheels included in the aftermarket set shown in the ET models advertisment at the bottom of this page. I don't see why they would not fit the Revell model.
E
Noord-Brabant, Netherlands
Joined: January 26, 2012
KitMaker: 20 posts
Armorama: 19 posts
Posted: Saturday, January 28, 2012 - 12:47 AM UTC
Hm, the advertisment is gone now. I guess it changes regularly. Here's the link:
http://www.etmodeller.com/ linkname Scotland, United Kingdom
Joined: December 07, 2007
KitMaker: 2,096 posts
Armorama: 1,983 posts
Posted: Saturday, January 28, 2012 - 02:26 AM UTC
Quoted Text
Quoted Text
Looking good Scott. Do you know or does anyone know if anyone is "rumored" to be doing an interior set for the module? It's always frustrating that Revell molds the rear hatches in the closed position.....
Well, here's a rumor for you:


Oh you tease!
Any way here is an update, I have touched up the paint and finished building the RWS.


CUIDICH 'N RIGH
life is a river, it always runs.
Noord-Brabant, Netherlands
Joined: January 26, 2012
KitMaker: 20 posts
Armorama: 19 posts
Posted: Saturday, January 28, 2012 - 04:18 AM UTC
It's starting to come together nicely Scott. Are you planning to do any weathering?
Erik.
Scotland, United Kingdom
Joined: December 07, 2007
KitMaker: 2,096 posts
Armorama: 1,983 posts
Posted: Saturday, January 28, 2012 - 04:27 AM UTC
Quoted Text
It's starting to come together nicely Scott. Are you planning to do any weathering?
Erik.
Thanks Erik, I am going to do some subtle weathering I think i don't want to over do it to much and I am going to replace the wheels.
CUIDICH 'N RIGH
life is a river, it always runs.
California, United States
Joined: January 31, 2008
KitMaker: 274 posts
Armorama: 251 posts
Posted: Saturday, January 28, 2012 - 12:01 PM UTC
Now that's what I'm talking about! Thanks for sharing that Erik.
This is looking real good Scott. Can you tell me if you had an alignment problem with the aft part of the module? Specifically the roof mating to the back bulkhead?
Noord-Brabant, Netherlands
Joined: January 26, 2012
KitMaker: 20 posts
Armorama: 19 posts
Posted: Saturday, January 28, 2012 - 12:02 PM UTC
Aichi-ken, Japan / 日本
Joined: February 14, 2012
KitMaker: 4 posts
Armorama: 3 posts
Posted: Tuesday, February 14, 2012 - 10:51 AM UTC
I LIKE GTK BOXER


Scotland, United Kingdom
Joined: December 07, 2007
KitMaker: 2,096 posts
Armorama: 1,983 posts
Posted: Thursday, March 01, 2012 - 05:15 AM UTC
Hay gang thought Id better do some work on the boxer since it has been awhile.
It dose not look like I have done much it is really just tiding up and small details really, like the sights on the module and such.


CUIDICH 'N RIGH
life is a river, it always runs.
France
Joined: February 20, 2012
KitMaker: 1,932 posts
Armorama: 1,907 posts
Posted: Thursday, March 01, 2012 - 06:03 AM UTC
Quoted Text
Quoted Text
Looking good Scott. Do you know or does anyone know if anyone is "rumored" to be doing an interior set for the module? It's always frustrating that Revell molds the rear hatches in the closed position.....
Well, here's a rumor for you:


Could you tell me who is building this upgrade set, please ? I can't see the name of the manufacturer on your photo.
Scotland, United Kingdom
Joined: December 07, 2007
KitMaker: 2,096 posts
Armorama: 1,983 posts
Posted: Friday, March 02, 2012 - 03:54 AM UTC
CUIDICH 'N RIGH
life is a river, it always runs.
Scotland, United Kingdom
Joined: December 07, 2007
KitMaker: 2,096 posts
Armorama: 1,983 posts
Posted: Saturday, March 03, 2012 - 07:09 AM UTC
CUIDICH 'N RIGH
life is a river, it always runs.
Noord-Brabant, Netherlands
Joined: January 26, 2012
KitMaker: 20 posts
Armorama: 19 posts
Posted: Saturday, March 03, 2012 - 08:04 AM UTC
Hey Scott,
Looking better all the time! :-)
What type of paint did you use on the rubber mudguards? I have tried to get a similar result on my model (to represent actual paint chipping) but I actually had a hard time getting the paint off.
I had added the mudguards after airbrushing so I had to paint them with a brush. I used Vallejo acrylic, which adhered quite well.
I suspect that spraying the paint onto the mudguards gives it insufficient possibility to adhere to the surface, whereas painting it on actually soakes the surface and improves adherence.
I have built another Boxer version you might like to check:
boxer By the way, I have a tip for replacing the awful Revell towing cable for you. I am not sure what is called in English though. Over here it is called "hat elastic", in German it's "hat band". It's basically thin black woven elastic wire. It's available anywhere where they sell elastic bands to sow into clothes. Just a light silver drybrushing makes it look just like a towing cable.
Cheers,
Erik
Arkansas, United States
Joined: June 29, 2009
KitMaker: 11,610 posts
Armorama: 7,843 posts
Posted: Saturday, March 03, 2012 - 09:10 AM UTC
Great job on the decals. Poor decals are my bane. The camo blends together very nicely. The small details are what really make a model.
Ideals are peaceful. History is violent.
Scotland, United Kingdom
Joined: December 07, 2007
KitMaker: 2,096 posts
Armorama: 1,983 posts
Posted: Saturday, March 03, 2012 - 10:15 AM UTC
Thanks for the feed back guys, I have just finished picking out some of the small details, on to the wethering next it will be very simple and light I think?


CUIDICH 'N RIGH
life is a river, it always runs.
Bayern, Germany
Joined: April 12, 2008
KitMaker: 88 posts
Armorama: 87 posts
Posted: Saturday, March 03, 2012 - 10:39 AM UTC
Dear Scott,
please double check your reference as the markings you have used are for a vehicle of the 3./Jägerbataillon 292 at the Gefechtsübungszentrum Heer. These vehicles were GTK Boxer A0 Gruppentransportfahrzeuge but only the A1 version has the 30cm higher FLW 200 RWS.
AK-Interactive will release a full reference DVD with 600+ photos of the GTK Boxer A0 and A1 in a few days.
Regards,
Ralph
England - North East, United Kingdom
Joined: January 25, 2010
KitMaker: 247 posts
Armorama: 247 posts
Posted: Saturday, March 03, 2012 - 10:56 AM UTC
Quoted Text
Jason,
looking at pics of the real beast a gap is normal.
here are the Boxers I shot at eurosatory in 2010


Hey Oliver! Nice Pics...do you have more pics about this hybird of Boxer and Puma? I thinks it is a hybird....
Olivier
Noord-Brabant, Netherlands
Joined: January 26, 2012
KitMaker: 20 posts
Armorama: 19 posts
Posted: Saturday, March 03, 2012 - 12:53 PM UTC
Those have nothing to do with the Puma. The Eurosatory pictures show two Boxers, each with a different gun turret. Just for the show, the one with the Lance turret had it's mission module positioned higher than usual.
E
Scotland, United Kingdom
Joined: December 07, 2007
KitMaker: 2,096 posts
Armorama: 1,983 posts
Posted: Sunday, March 04, 2012 - 11:26 AM UTC
Quoted Text
Dear Scott,
please double check your reference as the markings you have used are for a vehicle of the 3./Jägerbataillon 292 at the Gefechtsübungszentrum Heer. These vehicles were GTK Boxer A0 Gruppentransportfahrzeuge but only the A1 version has the 30cm higher FLW 200 RWS.
AK-Interactive will release a full reference DVD with 600+ photos of the GTK Boxer A0 and A1 in a few days.
Regards,
Ralph
I was using the painting guide in the instrutions, I think it is to late to change it now as the decals are sealed under a gloss coat and 3 flat coats

CUIDICH 'N RIGH
life is a river, it always runs.
Noord-Brabant, Netherlands
Joined: January 26, 2012
KitMaker: 20 posts
Armorama: 19 posts
Posted: Sunday, March 04, 2012 - 12:19 PM UTC
Well, you could turn it into the A0 version by lowering the weapon station but personally I would leave it as it is.
Don't forget to paint the front mudguards gray/black. I mean the rubber strips over the front wheel arches.
E
Aichi-ken, Japan / 日本
Joined: February 14, 2012
KitMaker: 4 posts
Armorama: 3 posts
Posted: Sunday, March 11, 2012 - 02:40 PM UTC


