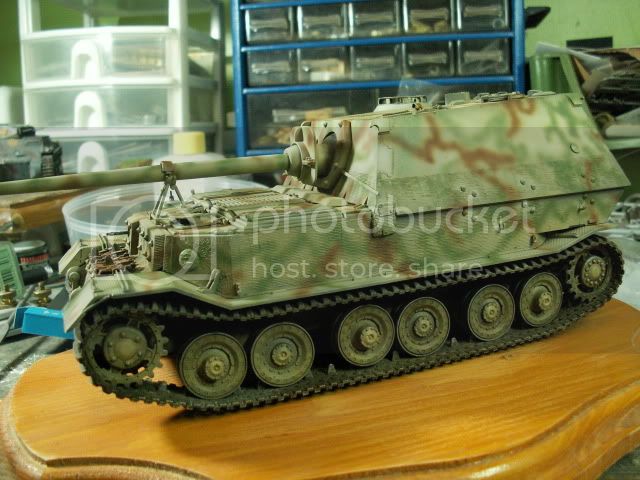
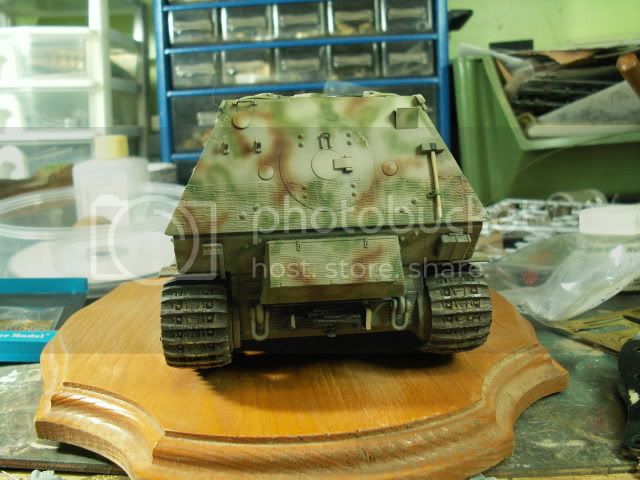
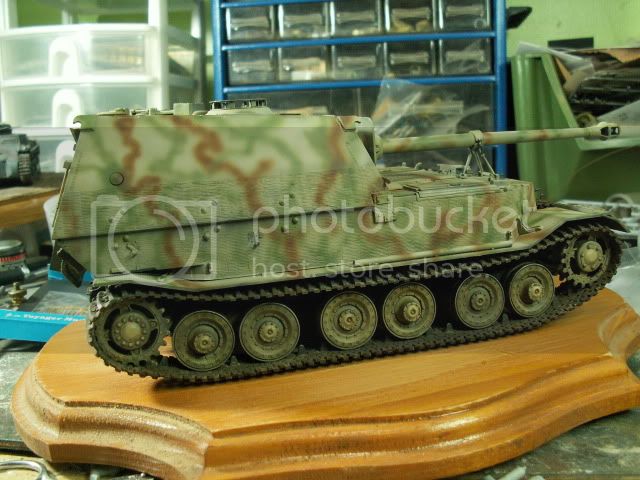
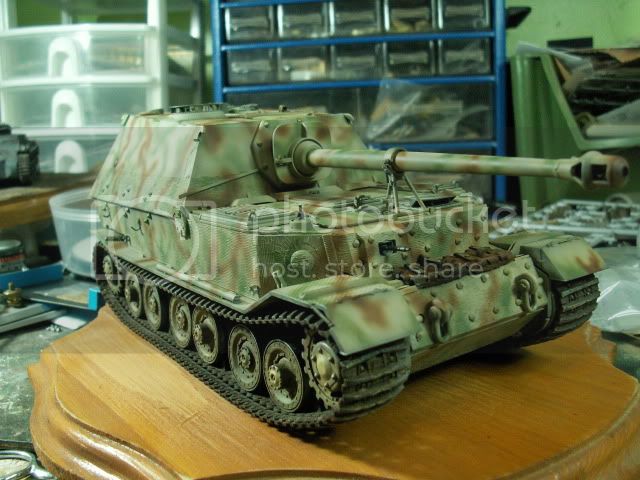
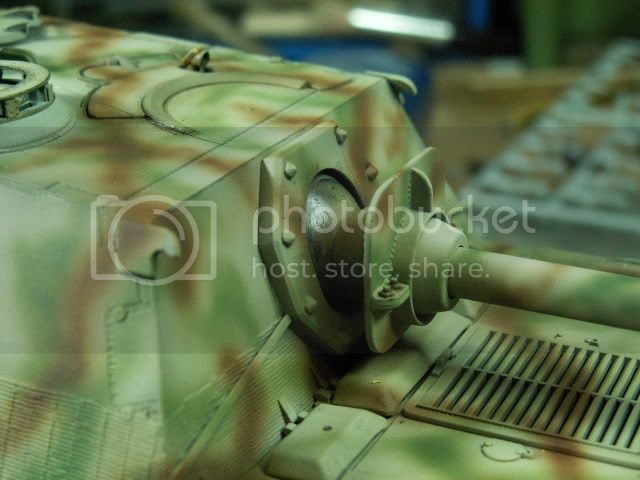
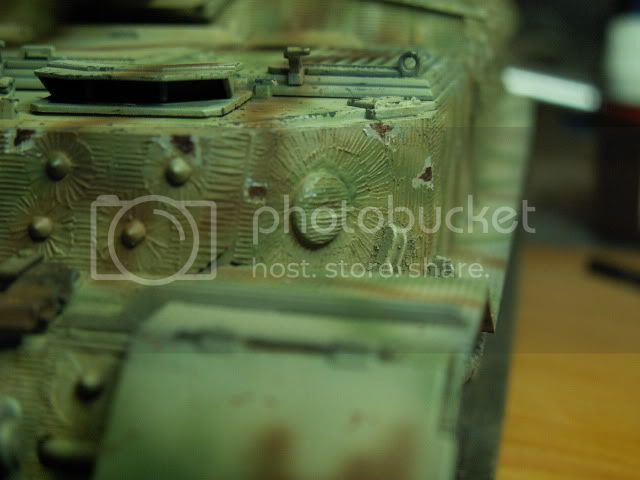
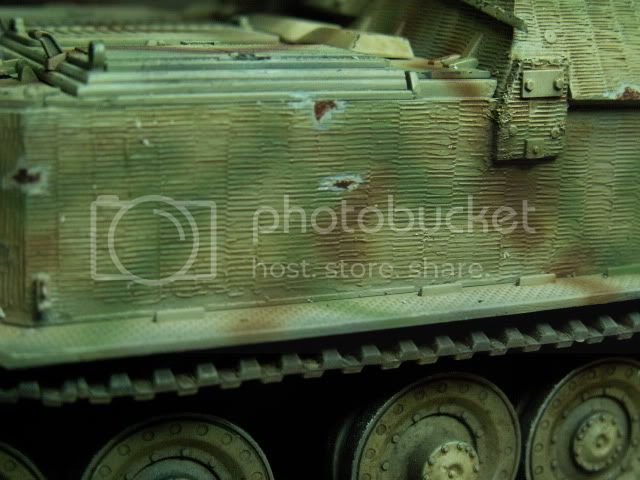
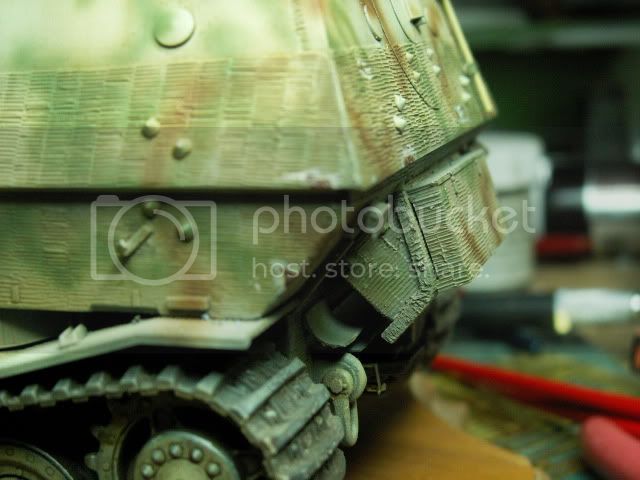
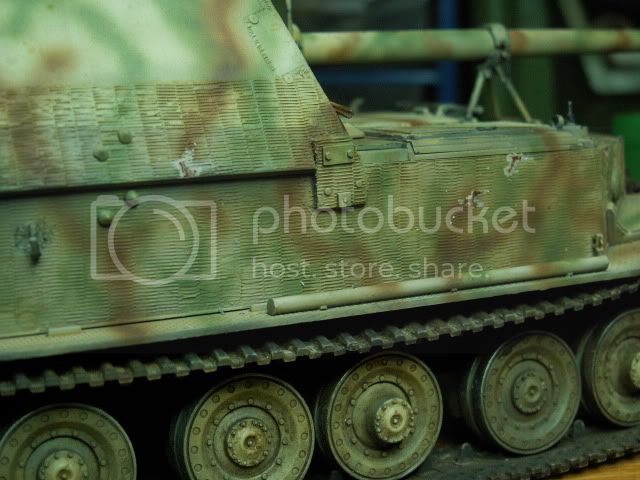
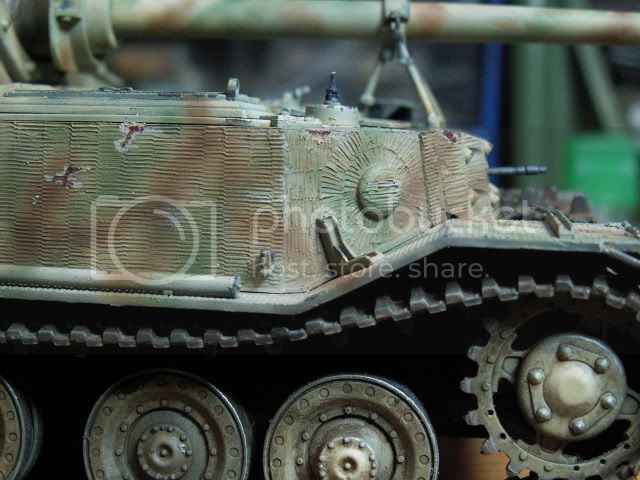
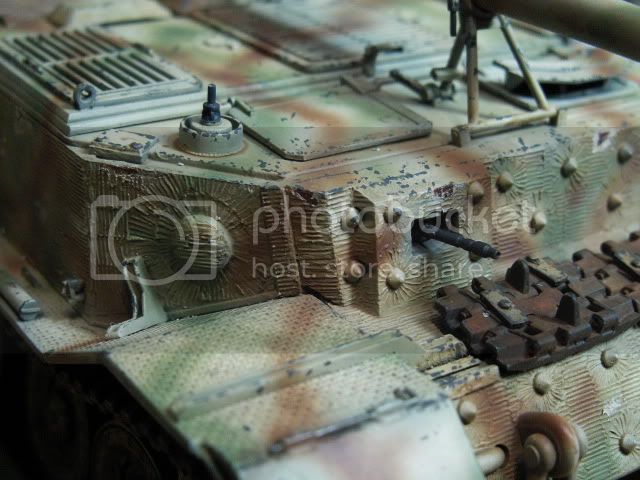
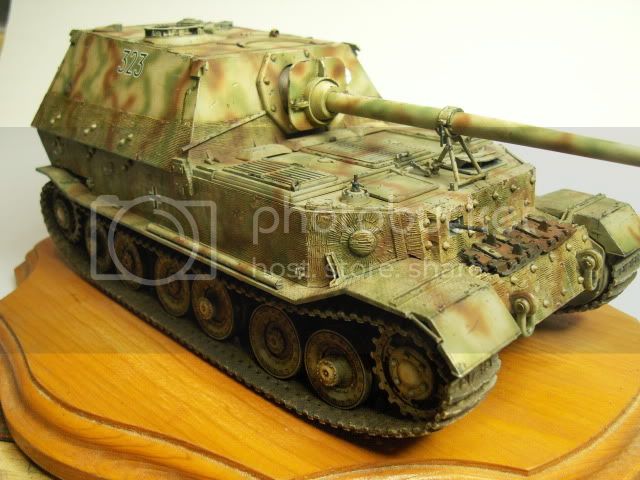
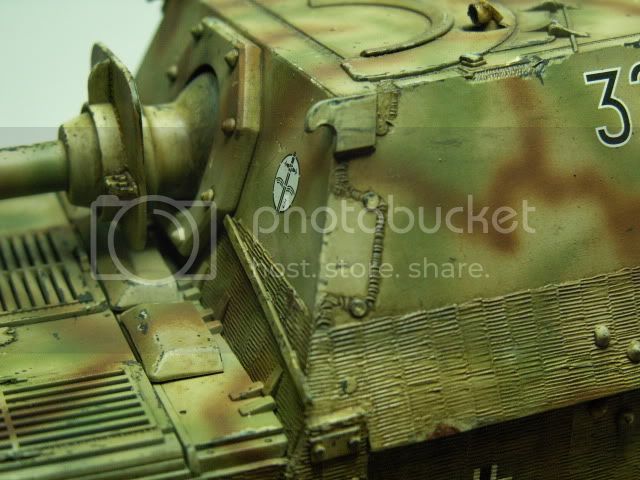
Elephant ready for weathering
Quebec, Canada
Joined: November 15, 2002
KitMaker: 3,960 posts
Armorama: 3,579 posts
Posted: Saturday, February 04, 2012 - 08:31 AM UTC
SgtRam
 Contributing Writer
#197
Ontario, Canada
Joined: March 06, 2011
KitMaker: 3,971 posts
Armorama: 2,859 posts
Posted: Saturday, February 04, 2012 - 08:53 AM UTC
What a beast, looks great. can't wait to see the weathering complete.
Missouri, United States
Joined: July 01, 2006
KitMaker: 614 posts
Armorama: 601 posts
Posted: Saturday, February 04, 2012 - 08:54 AM UTC
Well Rick since you ask.
You might want to consider sending that to me and starting over on another one.
Then again you might not.
How you doin my friend? I think you can finish her up cause I don't see any reason not to.
Nice job
Tony the Mutt
Quebec, Canada
Joined: November 15, 2002
KitMaker: 3,960 posts
Armorama: 3,579 posts
Posted: Saturday, February 04, 2012 - 09:11 AM UTC
Thanks guys ..hey Tony ,haven't seen you around much on the other site ..Hope you're still building away as much as you used to..keep in touch bud!
Rick
North Carolina, United States
Joined: June 06, 2006
KitMaker: 4,691 posts
Armorama: 3,509 posts
Posted: Saturday, February 04, 2012 - 09:59 AM UTC
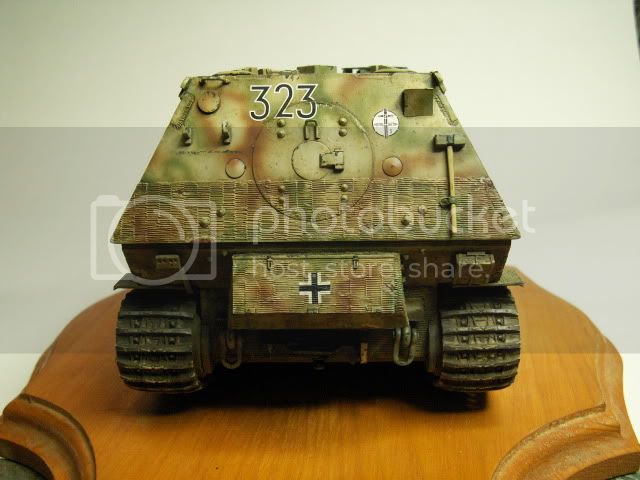
Looks really good,looks like the Aberdeen Elefant
#003
Donegal, Ireland
Joined: May 14, 2002
KitMaker: 9,763 posts
Armorama: 7,444 posts
Posted: Saturday, February 04, 2012 - 10:35 AM UTC
Looks great Richard ... the perfect canvass for weathering. The metal effects stand out nicely as they are ... whichs adds some contrast to the flat camo. Looking forward to seeing this dirtied up!!

IPMS Stockholm
"The problem with common sense, is that it is not that common"
Wales, United Kingdom
Joined: January 22, 2003
KitMaker: 8 posts
Armorama: 1 posts
Posted: Saturday, February 04, 2012 - 10:39 AM UTC
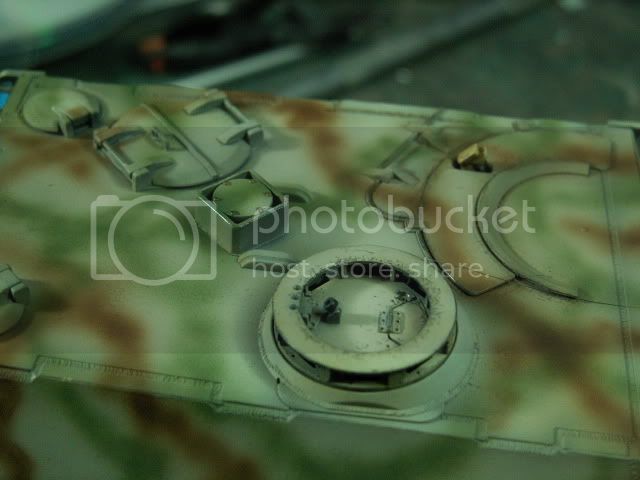
Great looking build and great painting and Zimmerite application . Can I ask what tool and putty you used please.
Great work looking forward to seeing more from you . Thanks

Arkansas, United States
Joined: June 29, 2009
KitMaker: 11,610 posts
Armorama: 7,843 posts
Posted: Saturday, February 04, 2012 - 10:44 AM UTC
That's a beauty. Looks spot on. Waiting to see how you do the weathering. Sometimes, less is more.
Ideals are peaceful. History is violent.
New York, United States
Joined: March 08, 2010
KitMaker: 3,662 posts
Armorama: 3,078 posts
Posted: Saturday, February 04, 2012 - 01:35 PM UTC
Richard, you did an outstanding job with the zimmerit, way better then I will ever be able to do, but it looks so good that it looks like it just came out of the show room

Maybe but a nick in it in a couple of spot or bypass the weathering and show it rolling out of the factory

Great jop love the camo too

Active Campaigns on the bench:
Operation Fall Gelb - Pz.Kpfw. IV Ausf. C
Engineering the Future - M-26 Recovery Vehicle
115 Campaigns completed
Quebec, Canada
Joined: November 15, 2002
KitMaker: 3,960 posts
Armorama: 3,579 posts
Posted: Sunday, February 05, 2012 - 10:22 AM UTC
Thanks for the comments ,,,,I can`t take credit for the zimmerit ...this is the zimmerited kit from dragon...I might scrape off a few spots here and there ..
Rick
Quebec, Canada
Joined: November 15, 2002
KitMaker: 3,960 posts
Armorama: 3,579 posts
Posted: Monday, February 06, 2012 - 07:22 AM UTC
Washington, United States
Joined: October 25, 2009
KitMaker: 133 posts
Armorama: 97 posts
Posted: Tuesday, February 07, 2012 - 06:37 AM UTC
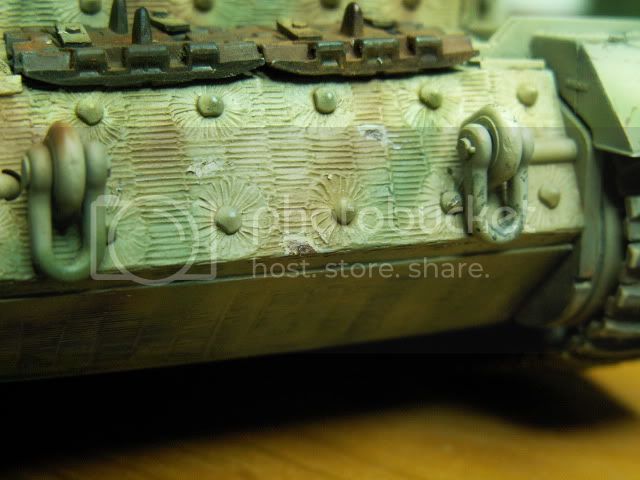
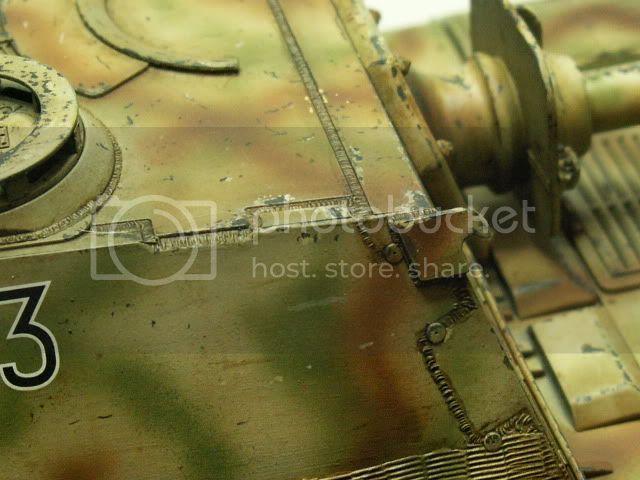
Very nice. The damaged zimmerit is really affective. Did you just scrape it off with a blade?
Quebec, Canada
Joined: November 15, 2002
KitMaker: 3,960 posts
Armorama: 3,579 posts
Posted: Tuesday, February 07, 2012 - 07:36 AM UTC
Hi Albert ..Yeah I just used a #17 exacto blade and slowly removed to zimmerit being careful not to go too deep. Quite easy to do ..

Rick
Quebec, Canada
Joined: November 15, 2002
KitMaker: 3,960 posts
Armorama: 3,579 posts
Posted: Friday, February 10, 2012 - 10:01 AM UTC
Arkansas, United States
Joined: June 29, 2009
KitMaker: 11,610 posts
Armorama: 7,843 posts
Posted: Friday, February 10, 2012 - 10:12 AM UTC
Weathering seems perfect to me.
Ideals are peaceful. History is violent.
Quebec, Canada
Joined: November 15, 2002
KitMaker: 3,960 posts
Armorama: 3,579 posts
Posted: Wednesday, February 15, 2012 - 06:51 AM UTC
Washington, United States
Joined: October 25, 2009
KitMaker: 133 posts
Armorama: 97 posts
Posted: Wednesday, February 15, 2012 - 07:24 AM UTC
Looks great to me. I am ready to try chipping and some scratches for the first time and your project has given me some inspiration.
You did say "so far". What's next on your beast?
New York, United States
Joined: March 08, 2010
KitMaker: 3,662 posts
Armorama: 3,078 posts
Posted: Wednesday, February 15, 2012 - 10:10 AM UTC
Richard, outstanding job there, it don't have the showroom look any more

The chipped up Zimm looks great and the paint chipping is assume, I can never get that right whenever I try that

Active Campaigns on the bench:
Operation Fall Gelb - Pz.Kpfw. IV Ausf. C
Engineering the Future - M-26 Recovery Vehicle
115 Campaigns completed
Michigan, United States
Joined: October 21, 2007
KitMaker: 96 posts
Armorama: 89 posts
Posted: Wednesday, February 15, 2012 - 03:44 PM UTC
Very nice Richard, I plan to tackle that beast some day.
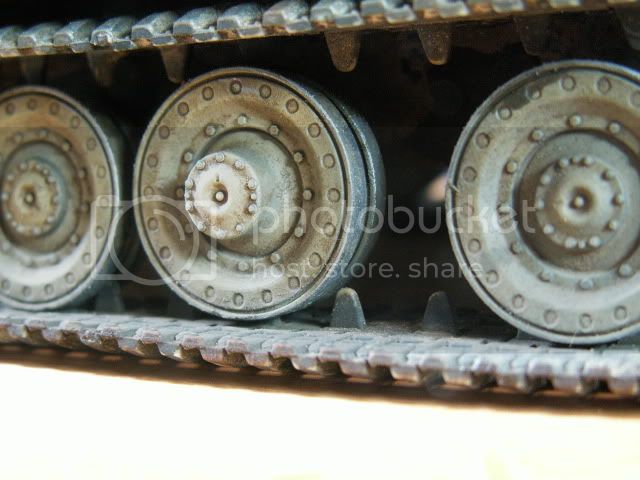
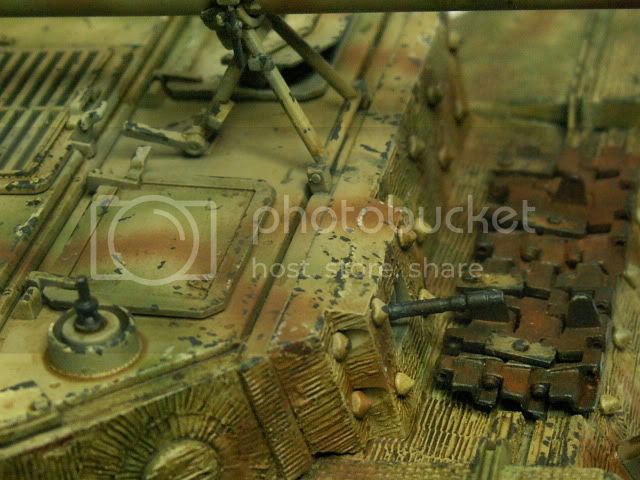
I love the weathering very nice, the tracks look great too. I have a question what color paint did you use for the dark chipping?
My only criticism is that the decals need to be faded and chipped to match the rest of the tank.
Great job, one of the best elephants I've seen.
Quebec, Canada
Joined: November 15, 2002
KitMaker: 3,960 posts
Armorama: 3,579 posts
Posted: Wednesday, February 15, 2012 - 06:10 PM UTC
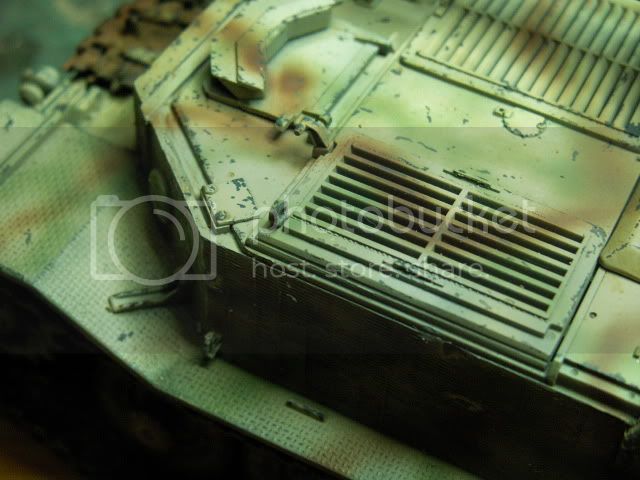
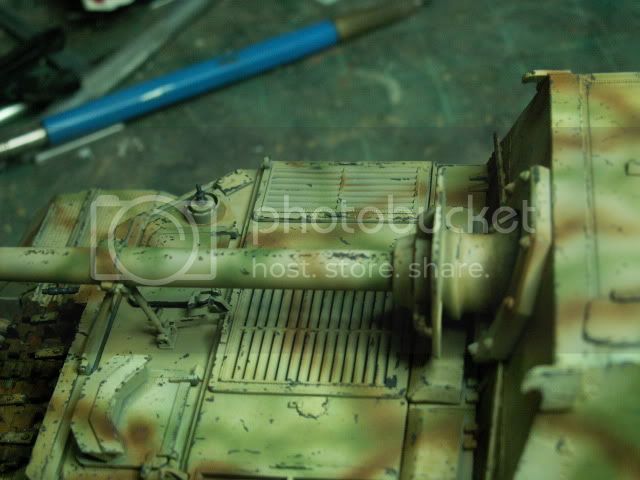
Thanks for the kind words guys ...Nathan I used Model Color`s Black Grey for the chipping.. And as for the decals ..well that`s where I`m at ..The next stage is another filter to blend in the decals and then some oil dot streaking on the sides without the zimmerit..
more pictures soon..
Rick


