_GOTOBOTTOM
Constructive Feedback
For in-progress or completed build photos. Give and get contructive feedback!
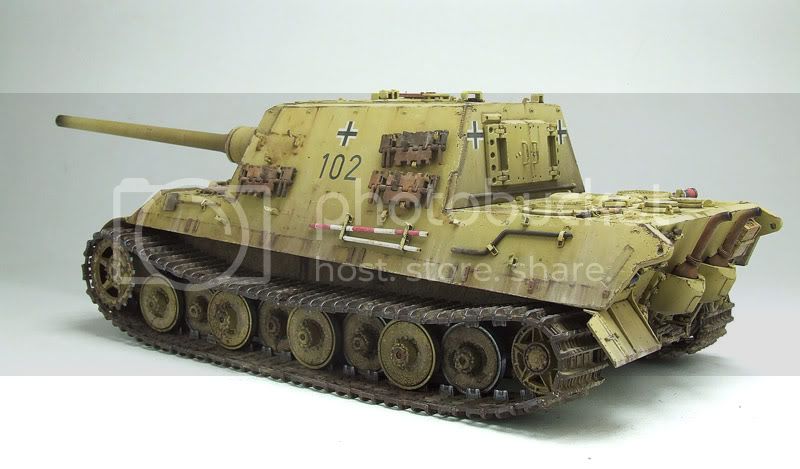
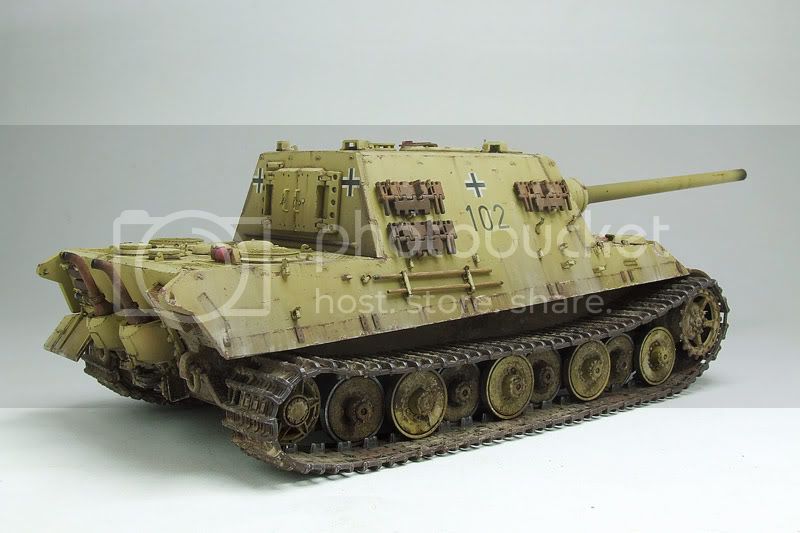
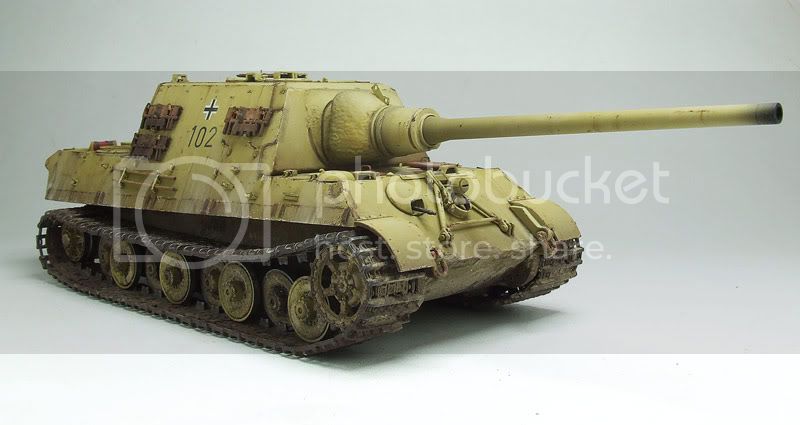
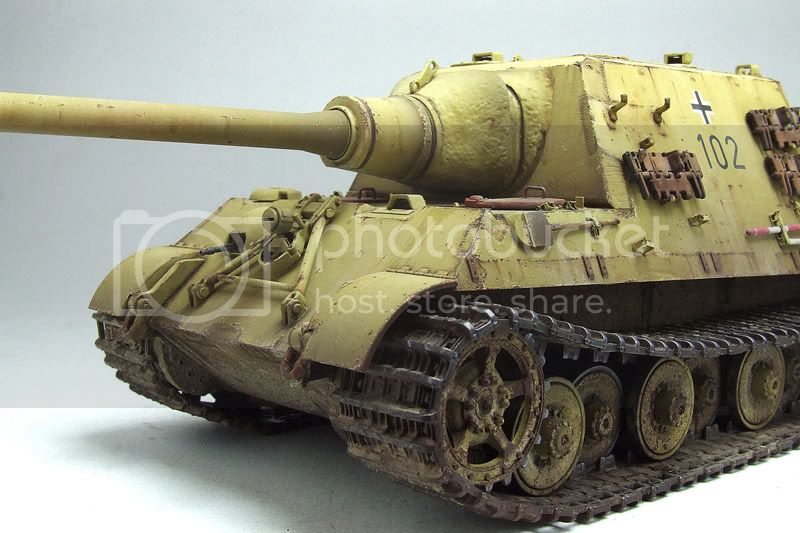
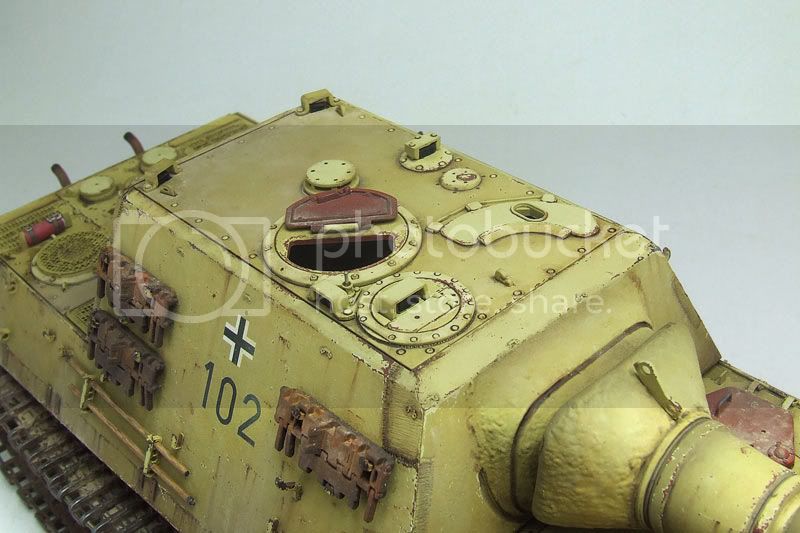
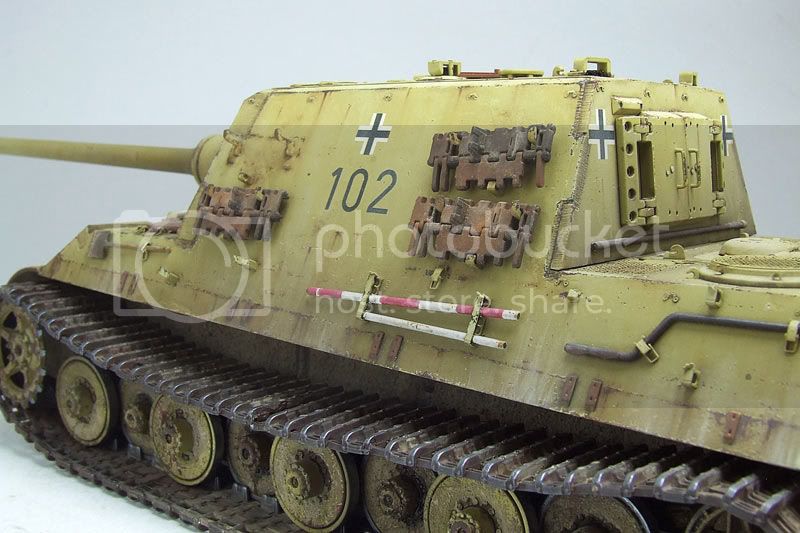
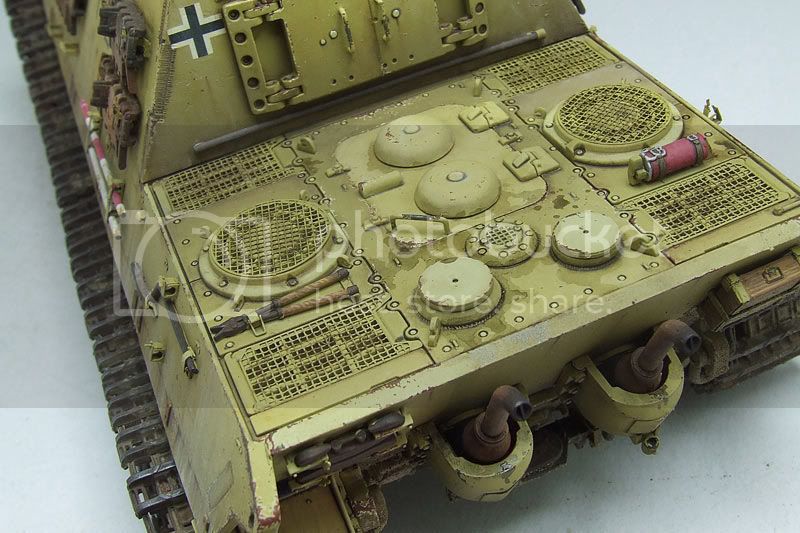
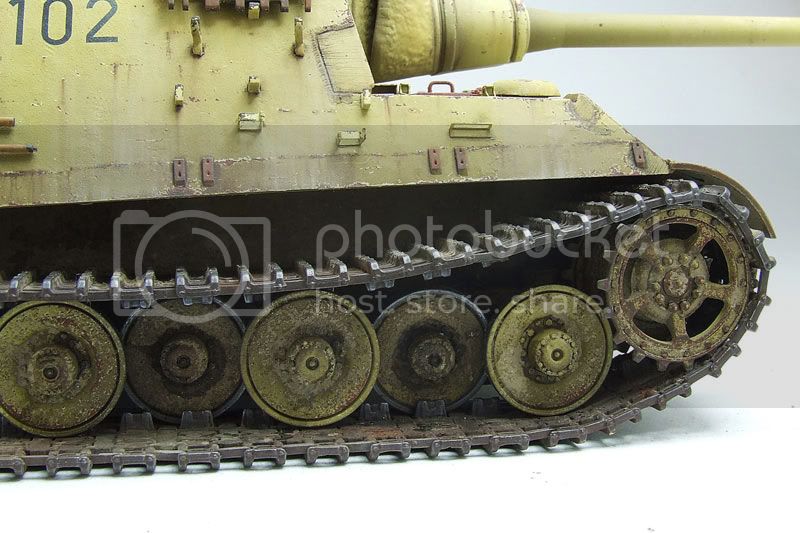
Jagdtiger ....Finish!!
Oishi
Visit this Community
Chiang Mai, Thailand / ไทย
Joined: March 06, 2005
KitMaker: 40 posts
Armorama: 10 posts
Posted: Wednesday, February 15, 2012 - 11:34 PM UTC
Hi all
i'm come back again with Jagdtiger,Kit from Dragon + PE Eduard
i hope you like it.all comments are welcome ..

Cheers
Nataphong(Oishi)


www.bustfactory.com
nathan211
Visit this Community
Michigan, United States
Joined: October 21, 2007
KitMaker: 96 posts
Armorama: 89 posts
Posted: Thursday, February 16, 2012 - 01:13 AM UTC
Great job! Weathering is very nice, I love the modulation that you did with the different sections. The chipping is very well done too.
Im loving the heavy german tanks that are being done these days, just need a sturmtiger now!
ltb073
Visit this Community
New York, United States
Joined: March 08, 2010
KitMaker: 3,662 posts
Armorama: 3,078 posts
Posted: Thursday, February 16, 2012 - 01:21 AM UTC
Great job the weathering is outstanding and the chipping looks execllent as well
BillGorm
Visit this Community
New Jersey, United States
Joined: November 02, 2009
KitMaker: 609 posts
Armorama: 433 posts
Posted: Thursday, February 16, 2012 - 02:14 AM UTC
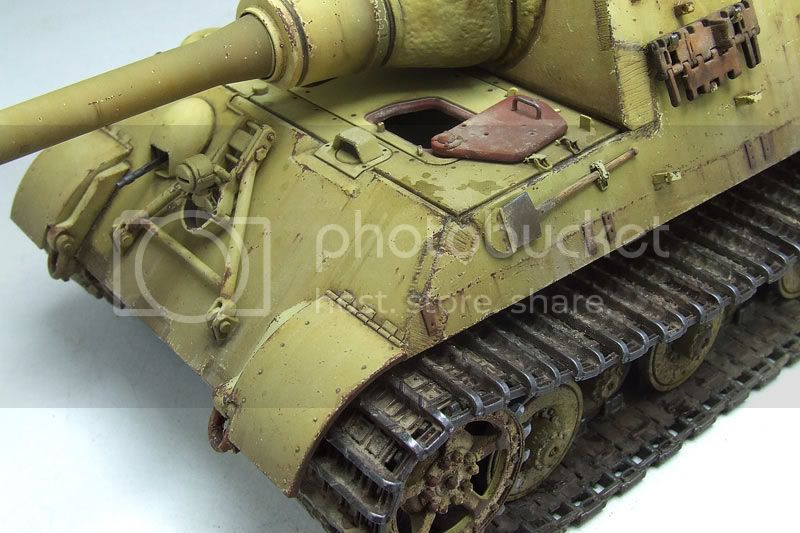
Nattapong - I don't know much about the Jagdtiger, but your model is beautiful. Really, really nice. What did you use for the wet areas near the driver's position. Also, can you describe how you weathered the tracks?

Pops53
Visit this Community
United States
Joined: November 05, 2011
KitMaker: 100 posts
Armorama: 98 posts
Posted: Thursday, February 16, 2012 - 02:37 AM UTC
Marvelous! What I find especially impressive about the weathering is that, if you copy these images as JPEGs and then enlarge them, they just look even more genuine! The dull glint of the metal at the edges of the tracks, the staining, chipping and pale trails of rust, the heavy wear on the central access hatch handle for the engine compartment, all look as you feel they should.

One of my favorite details is a tiny one: the misaligned placement of the top aiming stake on the left side of the tank. There are notches in place to store the two rods in parallel fashion. However, I imagine that the November wind and rain, the shouts and gunfire from approaching Red Army troops, and perhaps a touch of dysentery combined to convince the Panzer trooper who locked the rod down that getting them parallel really just didn't matter much any more!

Incidentally, an Armorama discussion five years ago questioned whether aiming stakes would have any place on a tank destroyer, or whether they should be finished as cleaning rods instead: http://tinyurl.com/732npck
I add this note for the purpose of completeness --- not to suggest that I have any knowledge on the subject one way or the other.
BBD468
Visit this Community
Texas, United States
Joined: March 08, 2010
KitMaker: 2,465 posts
Armorama: 2,383 posts
Posted: Thursday, February 16, 2012 - 02:41 AM UTC
hi Nattapong,

I have seen lots of Jagdtigers finished in german dark yellow. and while they might look good they didnt look realistic. its difficult IMO to make something that big and that light of a color look realy interesting. you have pulled it of nicely. great job!

Gary
ivanhoe6
Visit this Community
Wisconsin, United States
Joined: April 05, 2007
KitMaker: 2,023 posts
Armorama: 1,234 posts
Posted: Thursday, February 16, 2012 - 04:22 AM UTC
WOW Oishi ! This is one of the best tanks I have ever seen on Armorama ! IMHO the weathering & chipping, perfect !
Great photography too ! Thank you for sharing with us.
Tojo72
Visit this Community
North Carolina, United States
Joined: June 06, 2006
KitMaker: 4,691 posts
Armorama: 3,509 posts
Posted: Thursday, February 16, 2012 - 04:23 AM UTC
Real nice job with the one color scheme
vonHengest
Visit this Community
Texas, United States
Joined: June 29, 2010
KitMaker: 5,854 posts
Armorama: 4,817 posts
Posted: Thursday, February 16, 2012 - 04:47 AM UTC
Excellent choice using color modulation. I think this was really necessary for making a single color paint scheme stand out the way yours does. The calculated use of the white streaking really helps to enhance it as well.

If you ever have the opportunity to make a step-by-step log/feature displaying your painting process and techniques on one of your future projects it would be really beneficial to those of us who are still learning advanced painting and weathering techniques. Just something for you to consider if you're interested in it.
dlesko
Visit this Community
Alabama, United States
Joined: January 08, 2003
KitMaker: 124 posts
Armorama: 106 posts
Posted: Thursday, February 16, 2012 - 05:18 AM UTC
I agree with Jeremy. This is an awesome model and the paint and weathering is top notch. I would love to see a step by step on how you do this.
hofpig
Visit this Community
England - South East, United Kingdom
Joined: March 04, 2007
KitMaker: 1,330 posts
Armorama: 1,017 posts
Posted: Thursday, February 16, 2012 - 05:26 AM UTC
This is amongst the greatest models I have ever seen.

well done.

paul
Battleship_Al
Visit this Community
Washington, United States
Joined: October 25, 2009
KitMaker: 133 posts
Armorama: 97 posts
Posted: Thursday, February 16, 2012 - 05:45 AM UTC
The is stunning work. It is one of the best armor models I have ever seen. Thank you for sharing your work.
BBD468
Visit this Community
Texas, United States
Joined: March 08, 2010
KitMaker: 2,465 posts
Armorama: 2,383 posts
Posted: Thursday, February 16, 2012 - 06:00 AM UTC

Quoted Text

I agree with Jeremy. This is an awesome model and the paint and weathering is top notch. I would love to see a step by step on how you do this.


Same here! i would love to see a step by step. lots of great stuff to learn from you Nattapong!

Gary
thewrongguy
Visit this Community
Ontario, Canada
Joined: October 17, 2002
KitMaker: 448 posts
Armorama: 306 posts
Posted: Thursday, February 16, 2012 - 08:18 AM UTC
+1 for another interested in seeing a step by step. Amazing work.

Cheers

Jeff
zontar
Visit this Community
Hawaii, United States
Joined: August 27, 2006
KitMaker: 1,646 posts
Armorama: 1,557 posts
Posted: Thursday, February 16, 2012 - 08:59 AM UTC
Very nice model. The finish and weathering are outstanding.

Happy Modelling, -zon
Oishi
Visit this Community
Chiang Mai, Thailand / ไทย
Joined: March 06, 2005
KitMaker: 40 posts
Armorama: 10 posts
Posted: Thursday, February 16, 2012 - 09:49 PM UTC
Thank you for all comments. I am build and paint this kit with CM and my style not too strict to the historical or any reference for 100%. This is a model and I think no one can seen it in the real battlefield now. I use imagine and possibility to compose the components on the tank.

For the tutorial of painting that you friends request, I will make it and publish in my team site.
My team site is http://www.bustfactory.com and my team FB page is http://www.facebook.com/bustfactory
Thank you again.

PS. For the tutorial, I will post the link to our site tutorial page after I finish upload.
bizzychicken
Visit this Community
Wales, United Kingdom
Joined: September 06, 2008
KitMaker: 967 posts
Armorama: 842 posts
Posted: Friday, February 17, 2012 - 12:57 AM UTC
Great Kit .lovely finish. The cast tex on mantlet is spot on. Well done cheers Geraint
cabasner
Visit this Community
Nevada, United States
Joined: February 12, 2012
KitMaker: 1,083 posts
Armorama: 1,014 posts
Posted: Monday, February 27, 2012 - 12:26 PM UTC
Regarding a tutorial, I am REALLY interested! I think the entire model is amazing, the weathering, incredible! In addition, someone said something in particular about the chipping, and I agree, the chipping/rusting edges at the welds and at the edges of the panels looks absolutely real. If I could learn how to do what you did on this model, I'd be a VERY HAPPY CAMPER!!! Great job!
Battleship_Al
Visit this Community
Washington, United States
Joined: October 25, 2009
KitMaker: 133 posts
Armorama: 97 posts
Posted: Monday, February 27, 2012 - 02:22 PM UTC

Quoted Text

Regarding a tutorial, I am REALLY interested! I think the entire model is amazing, the weathering, incredible! In addition, someone said something in particular about the chipping, and I agree, the chipping/rusting edges at the welds and at the edges of the panels looks absolutely real. If I could learn how to do what you did on this model, I'd be a VERY HAPPY CAMPER!!! Great job!

I agree. I have never seen a model look so much like a big heavy hunk of steel. These pictures inspired me to get a Dragon Jagdtiger kit. Please do a tutorial for us mortals.
bmikk1
Visit this Community
Utah, United States
Joined: February 15, 2008
KitMaker: 199 posts
Armorama: 136 posts
Posted: Monday, February 27, 2012 - 02:43 PM UTC
Beautiful work. I look forward to seeing more of your builds!!
Losboz
Visit this Community
England - North West, United Kingdom
Joined: February 22, 2012
KitMaker: 17 posts
Armorama: 16 posts
Posted: Monday, February 27, 2012 - 09:05 PM UTC
Fantastic work, you have created an amazing piece of work. Thank you for sharing it. I am inspired
sgtSprue
Visit this Community
Nevada, United States
Joined: June 28, 2008
KitMaker: 26 posts
Armorama: 12 posts
Posted: Wednesday, March 07, 2012 - 06:51 PM UTC
I have always loved this tank! the heavy Tank tread with the right sag! well done. the weathering and chipping is great like others have stated. I hope you Diorama this. That would really make it come to life!!
Il_Colonnello
Visit this Community
Modena, Italy
Joined: March 08, 2012
KitMaker: 140 posts
Armorama: 140 posts
Posted: Tuesday, March 13, 2012 - 09:53 AM UTC

Quoted Text


Oishi ... fantastic! Really nice! The tank is not too much nor too little aged and worn.
Superb!
The only thing that does not convince me too is the color of the extinguisher. From historic pictures, I always see that extinguishers that were fixed out were painted the same color of the tank or in neutral colors, while the fire extinguishers that were stowed inside were, in some cases, painted in red.
In your case, have you intentionally wanted to simulate that the crew has put out a fire extinguisher that was once inside?
Great!!
Removed by original poster on 03/13/12 - 21:56:31 (GMT).
 _GOTOTOP