Gdańsk, Poland
Joined: February 25, 2012
KitMaker: 130 posts
Armorama: 127 posts
Posted: Thursday, March 01, 2012 - 10:30 PM UTC
Dublin, Ireland
Joined: November 27, 2004
KitMaker: 6,048 posts
Armorama: 4,619 posts
Posted: Friday, March 02, 2012 - 12:32 AM UTC
I do like it

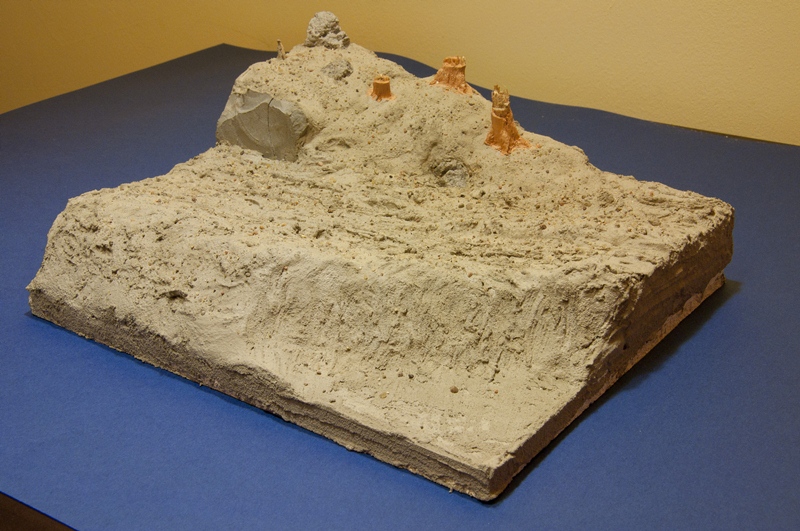
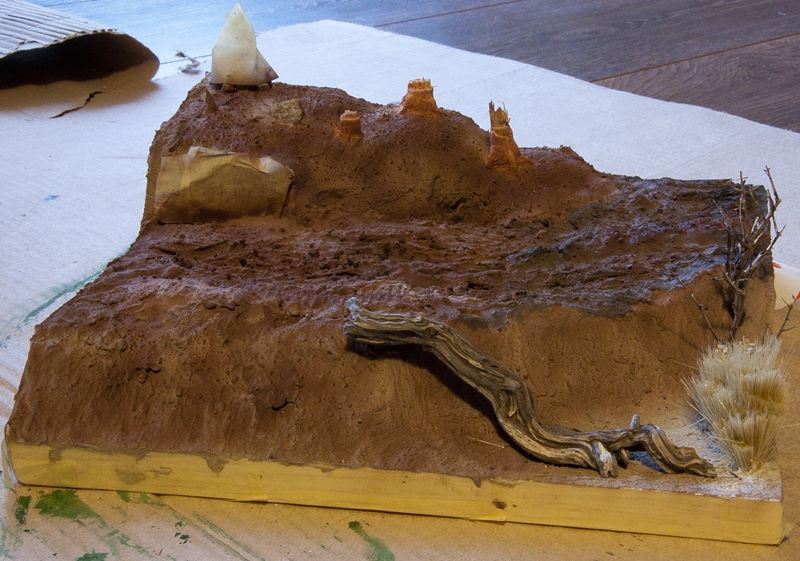
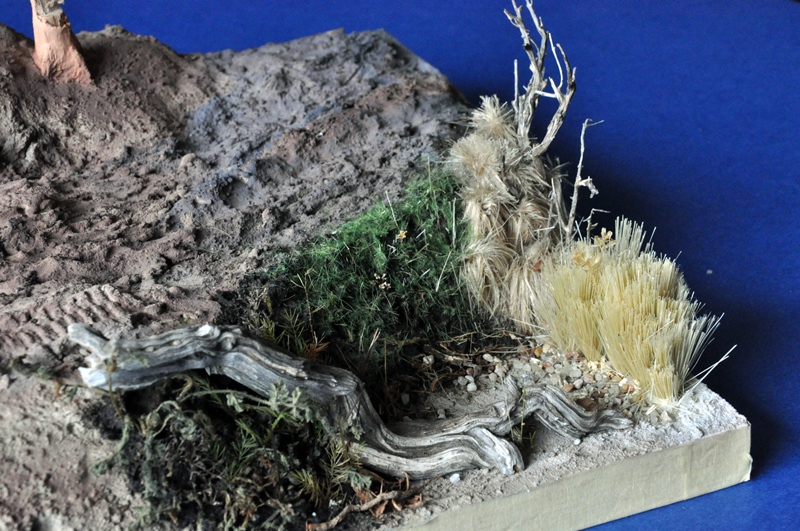
Great animation in the figures and super groundwork. I look forward to seeing more of this
Pat
work to become not to acquire

#284
Northern Ireland, United Kingdom
Joined: October 04, 2006
KitMaker: 3,094 posts
Armorama: 2,942 posts
Posted: Friday, March 02, 2012 - 12:38 AM UTC
I have to agree with Pat- the figure animation is first class and they are detailed nicely aswell. I'm looking forward to seeing the scene come together.
On The Bench:
Ethiopian BMP-1 (Trumpeter 1/35)
AMX-13/75 (Takom 1/35)
#110
Florida, United States
Joined: September 20, 2005
KitMaker: 248 posts
Armorama: 224 posts
Posted: Friday, March 02, 2012 - 01:16 AM UTC
Pawel -
Excellent work. The groundwork is coming along nicely and the figure animation is very good. I look forward to your next update.
Thanks,
Stephen (Minas-Ithil)
Milano, Italy
Joined: October 24, 2009
KitMaker: 134 posts
Armorama: 133 posts
Posted: Friday, March 02, 2012 - 01:46 AM UTC
I really like your figures-
Which heads are you using ? They don't seem Hornet....
Gdańsk, Poland
Joined: February 25, 2012
KitMaker: 130 posts
Armorama: 127 posts
Posted: Friday, March 02, 2012 - 02:24 AM UTC
Thanks a lot guys for a good word. This weekend I'm planning to finish StuG (those PE parts are such time-eaters) Then I will continue works on base.
Quoted Text
Which heads are you using ? They don't seem Hornet....
to be honest I really don't know the producer of heads. I buy some modeller's leftovers and heads were among it.
Texas, United States
Joined: March 08, 2010
KitMaker: 2,465 posts
Armorama: 2,383 posts
Posted: Friday, March 02, 2012 - 03:18 AM UTC
Hi Pawel,
nice ground work, and those figuers are very good. really looking forward to more of your project. well done Pawel!
Gary

Victoria, Australia
Joined: August 06, 2011
KitMaker: 1,314 posts
Armorama: 1,217 posts
Posted: Friday, March 02, 2012 - 02:33 PM UTC
Hi Pawel,
Your figure pose's are fantastic & the base is looking really good too!! How did you make the tree trunks?? What was this kit of the Stug III like as i have it in my stash to make
Cheers Mike

On the work bench: To many started & nothing finished!!
T55 ( Libyan)
S-Boat
BRDM 2 (Syrian)
BM21-Grad (Iraqi)
Gdańsk, Poland
Joined: February 25, 2012
KitMaker: 130 posts
Armorama: 127 posts
Posted: Friday, March 02, 2012 - 09:12 PM UTC
hi everyone, thanks for commenting.
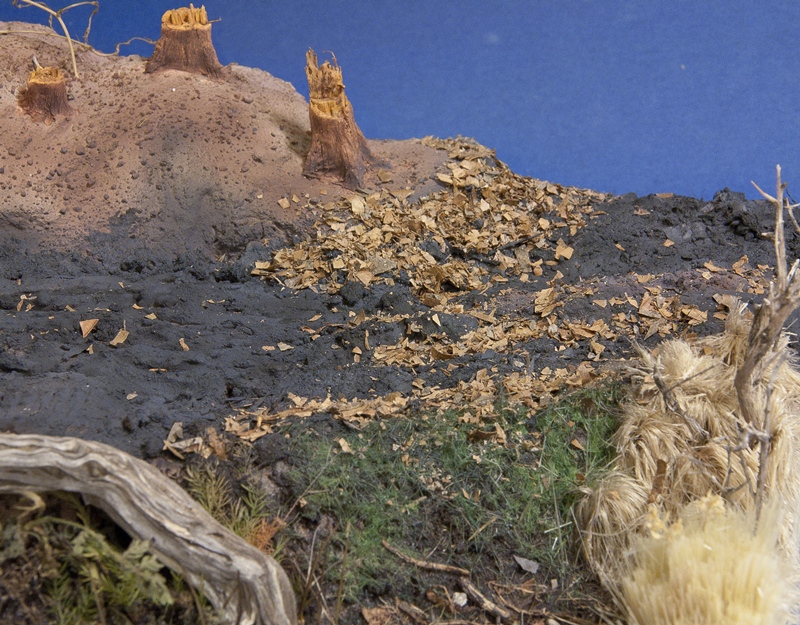
About the trunks I've made them like this:
I put a toothpick into the base and used it as a framework. Then I form a shape of clay around it, I made a bark-texture with a use of a needle. And into the upper flat part I dig some splinters.
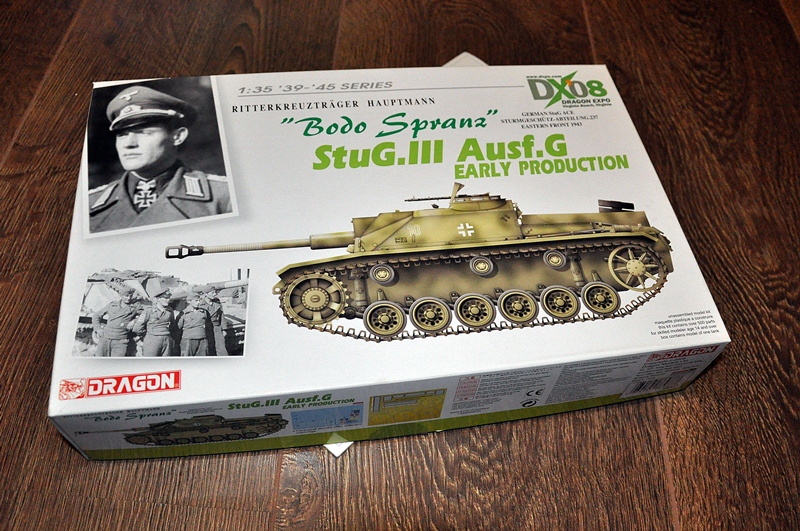
StuG itself is a very good kit in my opinion, the worst part was this, where I have to use putty:

and this, where I couldn't joined superstructure to the chasis
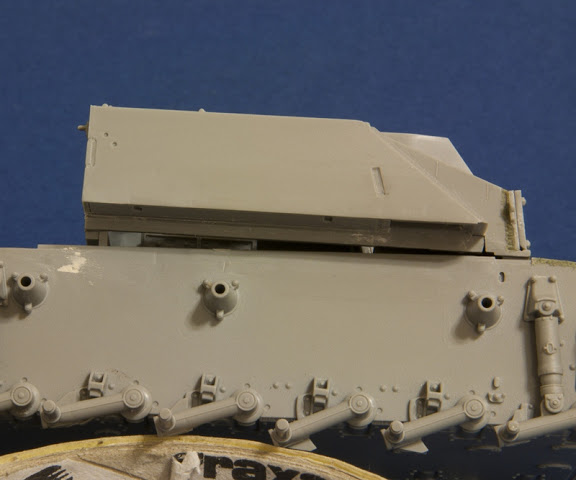
Except this little problems details are very good and I can frankly recommend this kit.
Gdańsk, Poland
Joined: February 25, 2012
KitMaker: 130 posts
Armorama: 127 posts
Posted: Friday, March 02, 2012 - 11:10 PM UTC
I've one question:
I'm planning to put this wheel on the rear part of the superstructure. I've removed tire myself, does it look good?

England - West Midlands, United Kingdom
Joined: July 09, 2011
KitMaker: 51 posts
Armorama: 49 posts
Posted: Friday, March 02, 2012 - 11:37 PM UTC
Looking good goin to follow this nice work
Please could you tell me what set did you get the guy with the mp 40 who looks like he had been shot
Arkansas, United States
Joined: June 29, 2009
KitMaker: 11,610 posts
Armorama: 7,843 posts
Posted: Friday, March 02, 2012 - 11:43 PM UTC
With the detail of the groundwork and figures, I will be watching closely. Subscribed.
Ideals are peaceful. History is violent.
Gdańsk, Poland
Joined: February 25, 2012
KitMaker: 130 posts
Armorama: 127 posts
Posted: Saturday, March 03, 2012 - 12:31 AM UTC
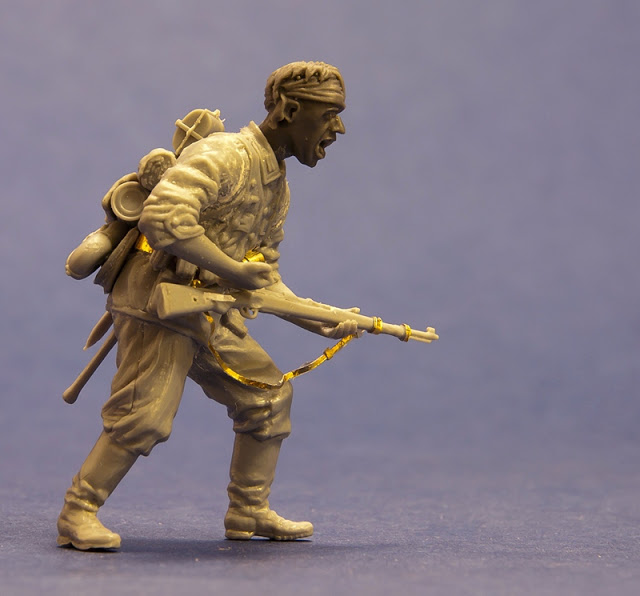
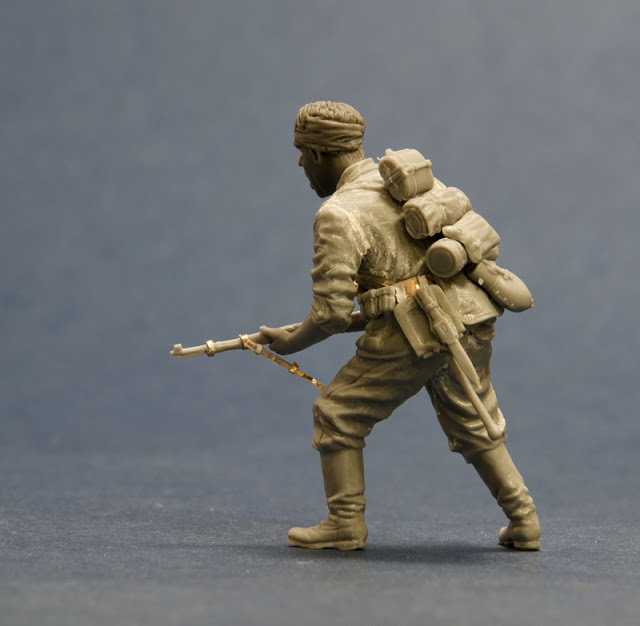
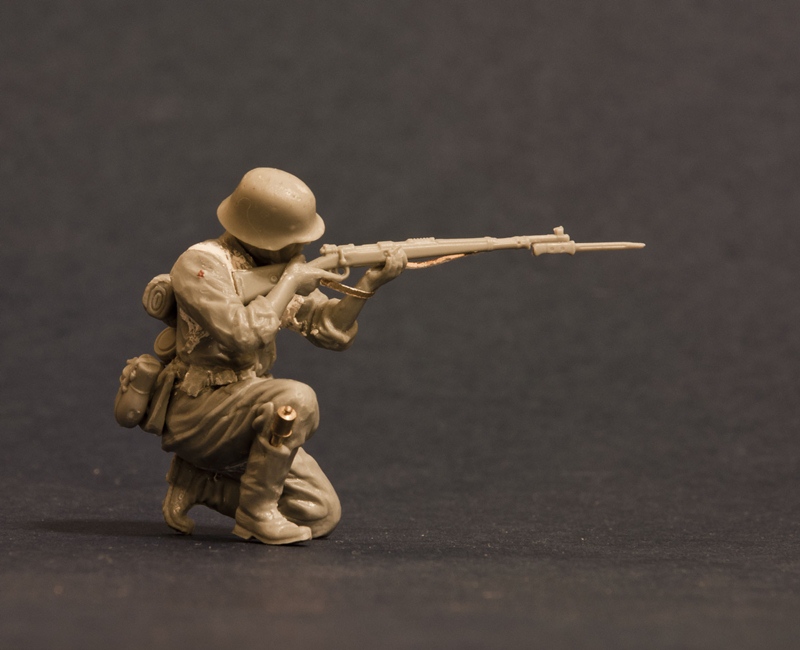
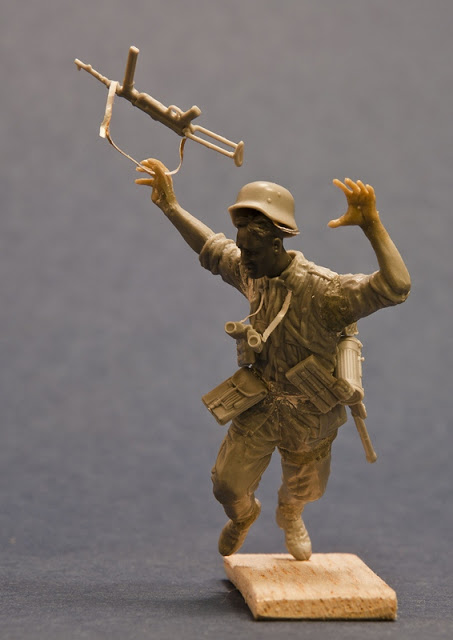
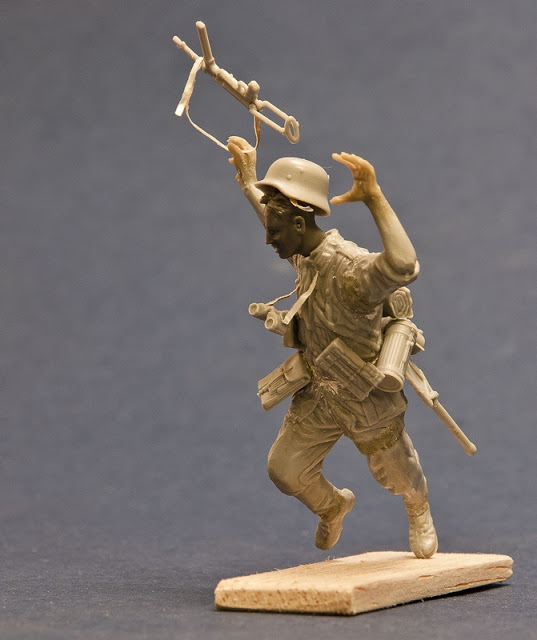
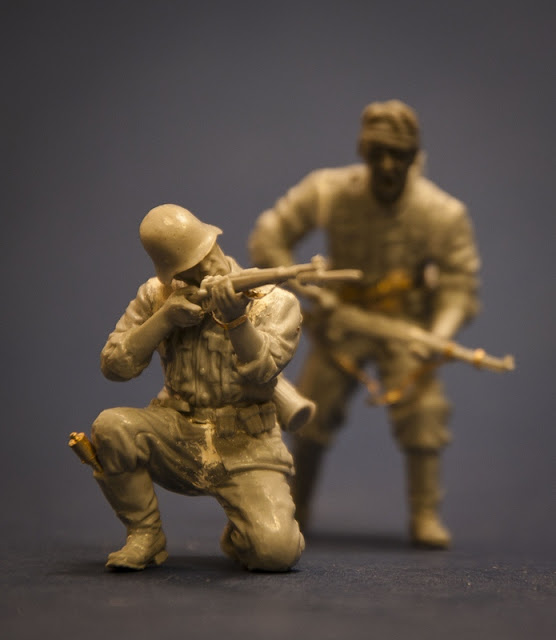
The falling man is from Dragon 6580 Barbarossa Infantry kit like the others soldiers. I've reworked him from the lying guy with hand up.

England - West Midlands, United Kingdom
Joined: July 09, 2011
KitMaker: 51 posts
Armorama: 49 posts
Posted: Saturday, March 03, 2012 - 12:50 AM UTC
Thanks and wow that's a brilliant conversion
Pennsylvania, United States
Joined: April 10, 2011
KitMaker: 7,941 posts
Armorama: 7,934 posts
Posted: Saturday, March 03, 2012 - 02:35 AM UTC
I agree with all the other posts. I love the guy that just got hit. You really captured that well. I love what you did with the equipment on his body,posing it just right. Excellent!
J
England - North West, United Kingdom
Joined: September 20, 2008
KitMaker: 365 posts
Armorama: 283 posts
Posted: Saturday, March 03, 2012 - 10:05 AM UTC
The guy whose been hit is outstanding..... Which figure set is he from? Groundwork looks good too...
Singapore / 新加坡
Joined: December 05, 2011
KitMaker: 8 posts
Armorama: 7 posts
Posted: Saturday, March 03, 2012 - 11:19 PM UTC
Quoted Text
The guy whose been hit is outstanding..... Which figure set is he from?
Its from the set above. The figure thats lying on the ground.
Massachusetts, United States
Joined: February 08, 2012
KitMaker: 1,271 posts
Armorama: 1,253 posts
Posted: Sunday, March 04, 2012 - 10:06 AM UTC
How did you mold the prone soldier into the "shot" position? All four of the figures look amazing & I just wondered how you got them like that. Do you use putty for them or something?
Conor
I'm doin' stuff. Lotta stuff.
Virginia, United States
Joined: October 14, 2007
KitMaker: 317 posts
Armorama: 307 posts
Posted: Sunday, March 04, 2012 - 11:00 AM UTC
Very nice work, I'll be following this build.
Current Projects -
"Der Panzerknacker"
"Clearing the Trench" diorama
I Love the smell of styrene in the morning - smells like ......victory.
Arkansas, United States
Joined: June 29, 2009
KitMaker: 11,610 posts
Armorama: 7,843 posts
Posted: Sunday, March 04, 2012 - 12:24 PM UTC
Quoted Text
How did you mold the prone soldier into the "shot" position? All four of the figures look amazing & I just wondered how you got them like that. Do you use putty for them or something?
Conor
Looks like A+B epoxy.
Ideals are peaceful. History is violent.
Gdańsk, Poland
Joined: February 25, 2012
KitMaker: 130 posts
Armorama: 127 posts
Posted: Sunday, March 04, 2012 - 09:02 PM UTC
hello!
Quoted Text
How did you mold the prone soldier into the "shot" position?
I've cut his arms and legs in joints, drilled a hole and joined it again with wire in a new position. Then I used, just like Matt said, A+B putty to recreate a missing flesh. Palms are from different kit. I used also a milling cutter to drill a hole in his neck, to show his uniform collar more realistic. This heads have fairly long necks so they can be used to gain dynamic pose.
Victoria, Australia
Joined: August 06, 2011
KitMaker: 1,314 posts
Armorama: 1,217 posts
Posted: Sunday, March 04, 2012 - 09:29 PM UTC
Hi Pawel,
I think it is all coming along great & that your damaged wheels look great, did you put them in milling cutter & use a scapel blade to remove the "rubber" off the rim
On the work bench: To many started & nothing finished!!
T55 ( Libyan)
S-Boat
BRDM 2 (Syrian)
BM21-Grad (Iraqi)
Gdańsk, Poland
Joined: February 25, 2012
KitMaker: 130 posts
Armorama: 127 posts
Posted: Monday, March 05, 2012 - 07:28 PM UTC
Christchurch, New Zealand
Joined: January 11, 2006
KitMaker: 438 posts
Armorama: 359 posts
Posted: Monday, March 05, 2012 - 08:22 PM UTC
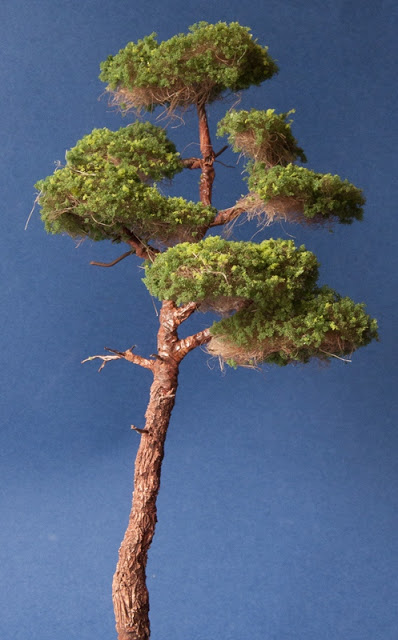
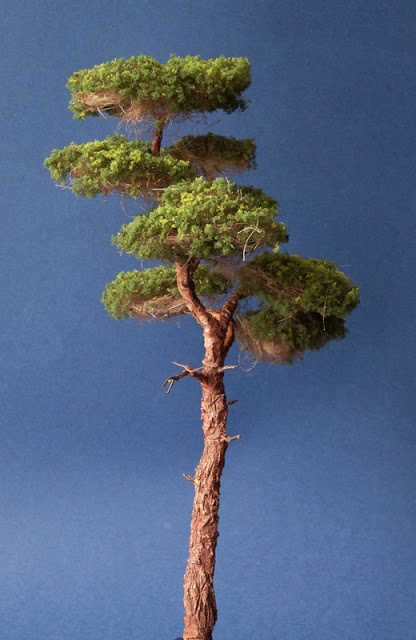
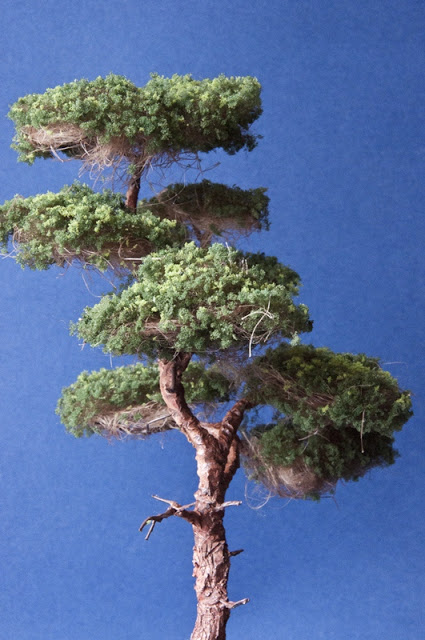
Awesome, how did you make the tree
Cheers
Thomo
On the Workbench
Verlinden 120mm Red Devil, Arnhem
Academy 1/35 "Honey"
Dragon 1/35 Tank Riders
NZ M5 Recce
Gdańsk, Poland
Joined: February 25, 2012
KitMaker: 130 posts
Armorama: 127 posts
Posted: Tuesday, March 06, 2012 - 08:17 AM UTC
Tree is just a wire-frame covered with clay. Texture of the bark, I did just like with the trunks above - with needle. The foliage is a plumber's tow (fibre I mean) and onto this I glued some Faller 181391. I still have to work on the shape and colour of this pine.
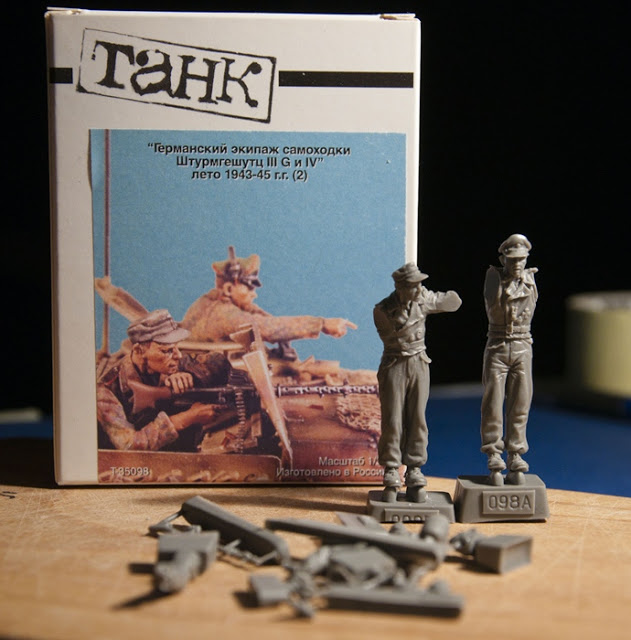
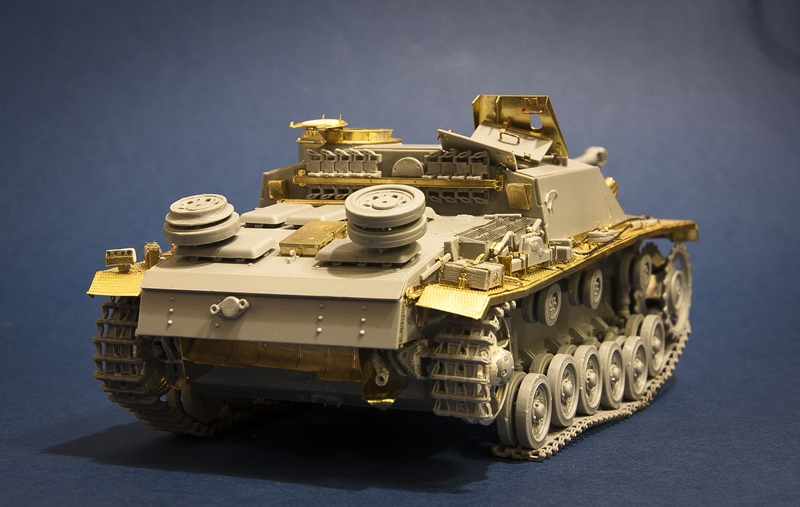
here are some photos of almost finished Stug. This is my first PE brass, so please about your understanding. Stug also fall me down, so some parts just glue off and I had to glue them again - it might be seen to much glue in some places.
Trucks (some part of them) are put only to make a photo. I am still wondering if I should glue them now or after painting, but I think I will glue it later.
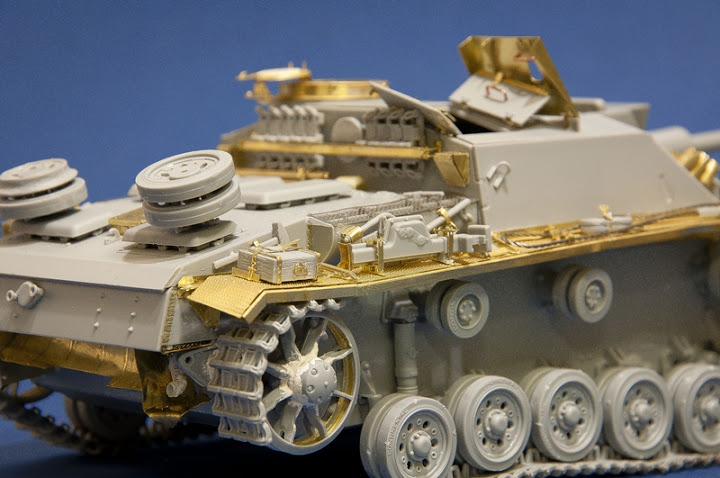
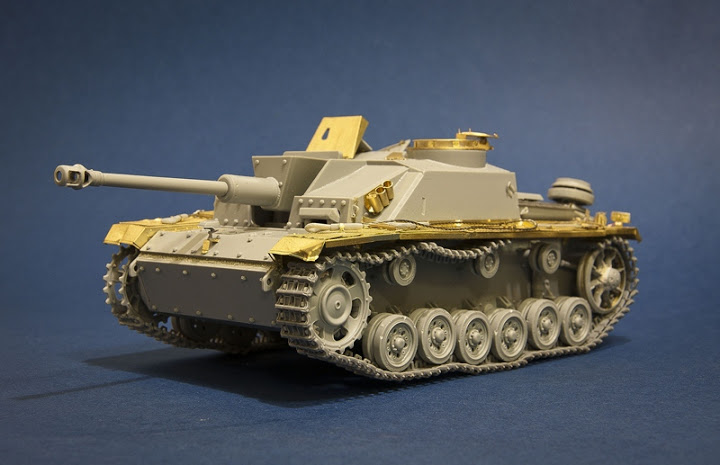
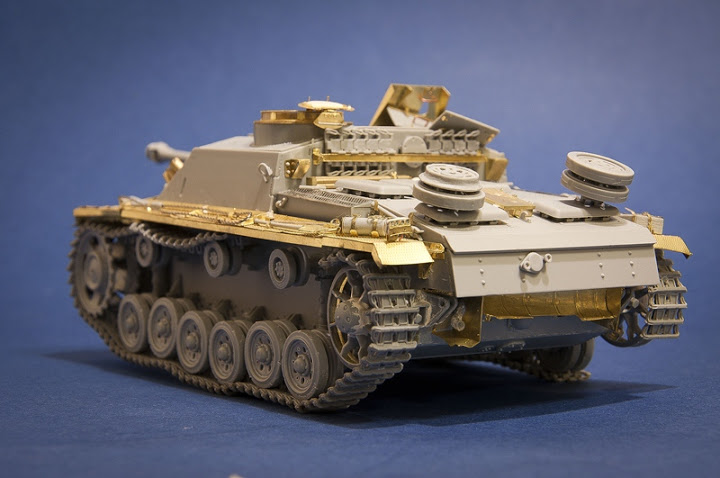
and some details:
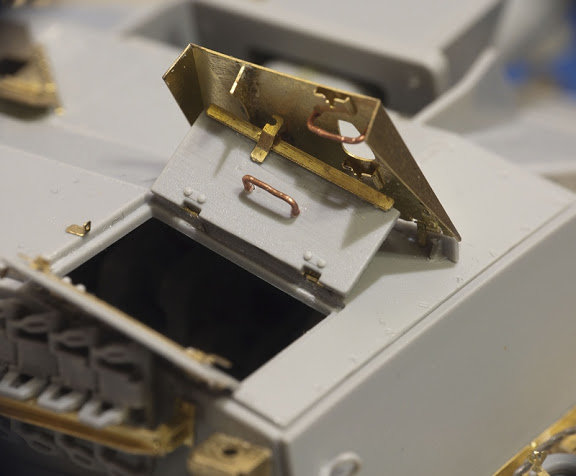
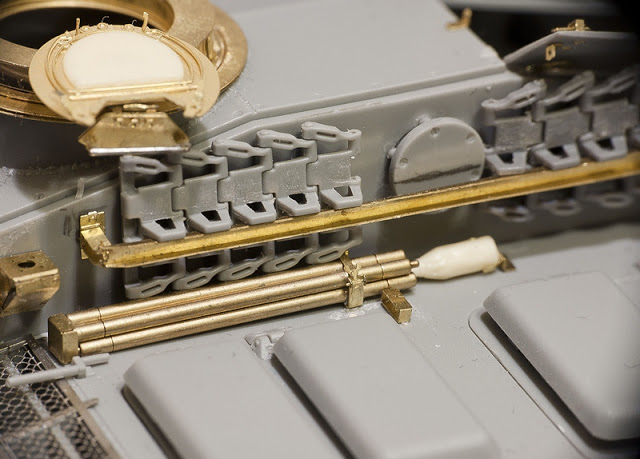
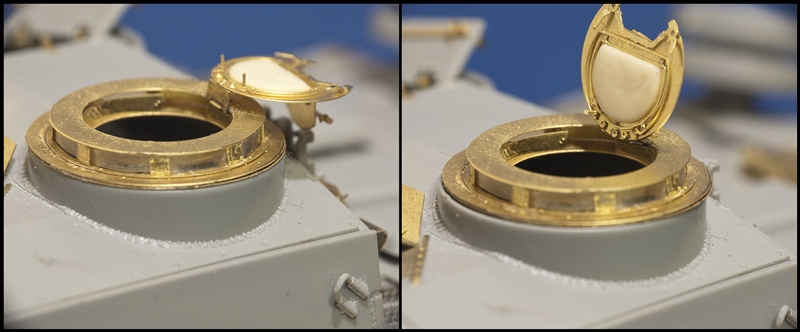
hope you like it