Maine, United States
Joined: February 11, 2011
KitMaker: 1,654 posts
Armorama: 1,565 posts
Posted: Thursday, June 20, 2013 - 10:32 PM UTC
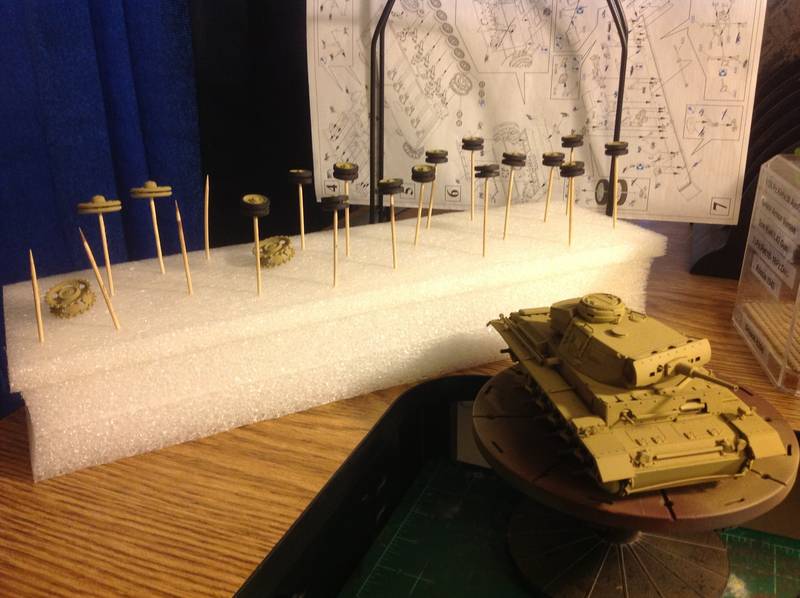
And now,a real update from me,it's good to get back to the bench.
I know it's not much,but it is progress
Roadwheels and track dry fitted on one side with the Upper Hull in place to check the fit.
Sorry about the pic quality, low batteries

Jeff T.
The building lamp is lit.Build'em if you got'em.
Louisiana, United States
Joined: March 06, 2010
KitMaker: 3,128 posts
Armorama: 2,959 posts
Posted: Friday, June 21, 2013 - 01:16 AM UTC
Rodolfo;
Great-looking StuG you have going there, Pard!
The shiny wrapping-paper is a neat idea. I've used the "pearlescent" color and also milar wrapping-ribbon for this similar effect on periscopes. The only thing I might raise for you (and others) regards this is that blue really seems the wrong color! The glass was somewhat greenish, and the modern prismatic refractive coatings did not exist back then... so a dark green paper may be a better color-choice, IMO - specially if you are portraying a cupola with a closed hatch (dark inside and so dark greenish could be a seemingly good choice?).
Howsomever, the shiny paper treatment looks good!

Bob

Canelones, Uruguay
Joined: December 27, 2006
KitMaker: 773 posts
Armorama: 765 posts
Posted: Friday, June 21, 2013 - 05:55 AM UTC
Hi Jeff,
Well, I think that I can add some drums and the pumper.Also, have some figures playing soccer.....
Maybe a dio called "out of order".

#136
Distrito Federal, Mexico
Joined: April 06, 2002
KitMaker: 437 posts
Armorama: 391 posts
Posted: Friday, June 21, 2013 - 07:40 AM UTC

Hello friends!
@ Jeff, , thanks for your kind comment, I not finished the hatches, I painted in white because for a little mistake I passed some of brown on it, I will paint it with Vallejo again..
@ Matt.- thanks for your kind comment, yes, is a nice trick and cheap, hee,hee.
@ Bob.- Thanks for your kind comments. I saw in the last books of Restayn thet the periscopes were blue and in another cases dark-green. Based in last informations too, some Art-box of Dragon shown blue periscopes.
I am working the tools, soon I will start the weathering.
Regards!
Rodolfo
Current Project:
I am building a Kingtiger Ausf. B, Version: March 1945 - AMMO/MIG, 1/35
Maine, United States
Joined: February 11, 2011
KitMaker: 1,654 posts
Armorama: 1,565 posts
Posted: Friday, June 21, 2013 - 11:39 AM UTC
Quoted Text
Hi Jeff,
Well, I think that I can add some drums and the pumper.Also, have some figures playing soccer.....
Maybe a dio called "out of order".
That's a great idea,I like it.Just make sure there are no Red Cards
The building lamp is lit.Build'em if you got'em.
Texas, United States
Joined: December 23, 2007
KitMaker: 54 posts
Armorama: 54 posts
Posted: Friday, June 21, 2013 - 01:24 PM UTC
Jeff the Emil is looking good, looking forward to see the interior.
Rodolfo the Stug IV is looking good, like what you have done with the visors. May try that trick on my next build.
A lot of good kits on this campaign. A lot of themi have in my stash. Make me want to build all at the same time!
Finally got a coat of primer on. Found some small holes on the side of the finders that I will have to add putty. Tomorrow start on the base coat and go from there.
Mike
Texas, United States
Joined: March 08, 2010
KitMaker: 2,465 posts
Armorama: 2,383 posts
Posted: Friday, June 21, 2013 - 02:33 PM UTC
Hey Fellas,
Jeff, you actually did some modeling?

j/k my friend! Looking good bro.
Mike, lookin forward to that paint job! Nice build.
Im on a bit of a tear right now as the kit is goin together very nicely. May not get much done this weekend though....got STUFF to do. Anyhoo....


Cheers,
Gary

England - North East, United Kingdom
Joined: June 22, 2010
KitMaker: 1,224 posts
Armorama: 1,207 posts
Posted: Friday, June 21, 2013 - 07:41 PM UTC
Maine, United States
Joined: February 11, 2011
KitMaker: 1,654 posts
Armorama: 1,565 posts
Posted: Friday, June 21, 2013 - 08:39 PM UTC
Mike:Primer looks sweet Man.What did you use?
Gary:What are you saying,that I am slow,and don't have STUFF to do too?Well,I will have you know that is not the caes.The problem is,I'm slow AND have stuff to do
 Rob W.:
There's a whole lot of scratching going on with your build
It's gonna look B.A. when you're done Man,it looks great so far.

. Jeff T
The building lamp is lit.Build'em if you got'em.
Texas, United States
Joined: December 23, 2007
KitMaker: 54 posts
Armorama: 54 posts
Posted: Saturday, June 22, 2013 - 02:15 AM UTC
Hey Jeff, I used tamyia hull red. It's closet thing I can find without mixing paint. Will putty the small holes on the side of the finders. I guess I cut them too close from the spurs. Hard to see when it's not painted I guess.
Robert your Stug is look great. I like the scratch building you doing. Looking forward to the final product.
Gary you panzer IV is looking great as well. This kit was my first dragon build and fell in love. Hope she treat you well...lol!
Pennsylvania, United States
Joined: May 14, 2007
KitMaker: 219 posts
Armorama: 217 posts
Posted: Saturday, June 22, 2013 - 02:51 AM UTC
Mike: your Pz III is looking good. Clean build with a good base coat. I'm looking forward to seeing the final paint job and the other Pz III N in the background looks like a winner as well.
Gary: Your Pz IV is making good progress. You're a better man than I for building both tracks as removable sections. That never works for me so I build and glue everything in place and then paint it as it sits. Good luck.
Hopefully I'll get both fenders completed this weekend.
Later.
On the workbench:
Dragon SdKfz 251/9 Stummel
Visit Kingfisher models from Schuylkill Haven on FB
Lisboa, Portugal
Joined: March 04, 2008
KitMaker: 5,386 posts
Armorama: 4,727 posts
Posted: Saturday, June 22, 2013 - 11:34 AM UTC
Nice work guys, those PzIII are looking great.
Again Magic Gary's !! I have to try your method for doing those tracks, it seems easy..
Active Builds: 0
Active Campaigns: 0
Arkansas, United States
Joined: June 29, 2009
KitMaker: 11,610 posts
Armorama: 7,843 posts
Posted: Saturday, June 22, 2013 - 12:52 PM UTC
Mike: That fender looks great! Nice scratch work.
Ideals are peaceful. History is violent.
Niedersachsen, Germany
Joined: May 12, 2013
KitMaker: 128 posts
Armorama: 125 posts
Posted: Saturday, June 22, 2013 - 01:02 PM UTC
Some really great Panzers being born in this thread.
RobW Nice scratchwork on that Stug, I deffinitely want to build one soon, keep it up.
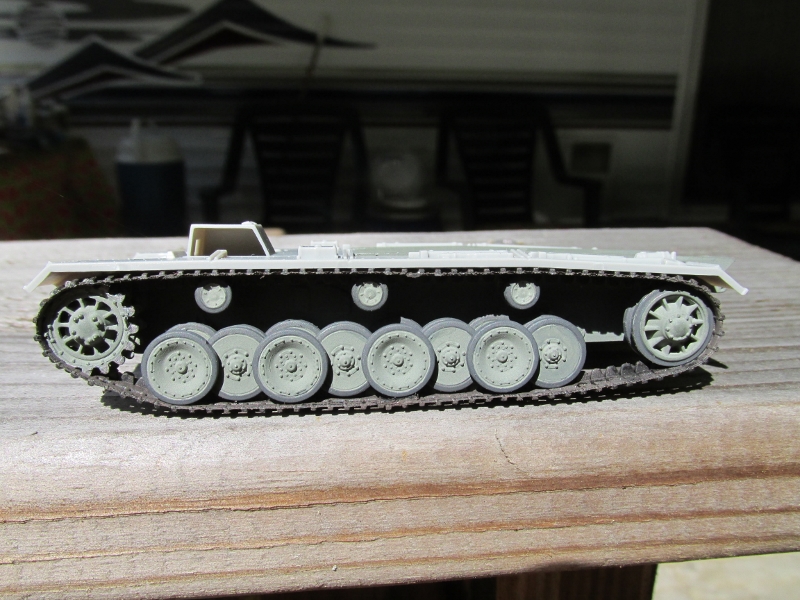
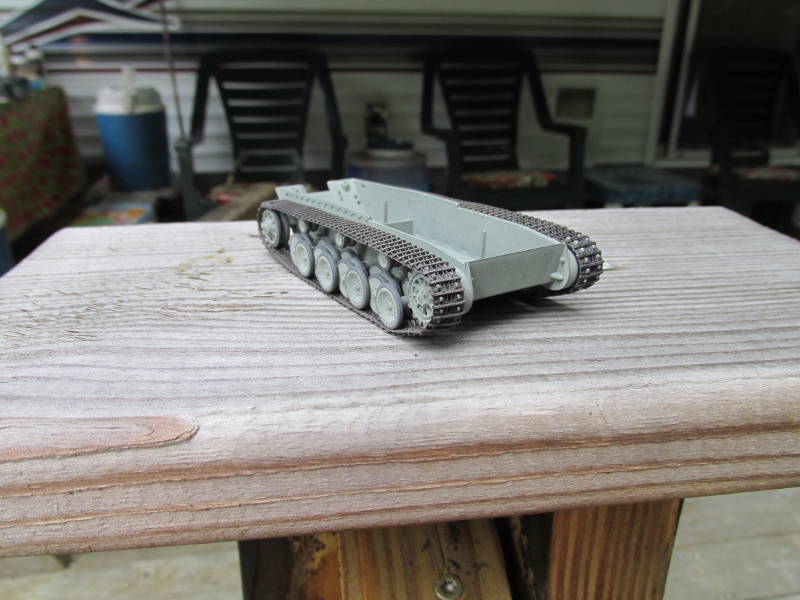
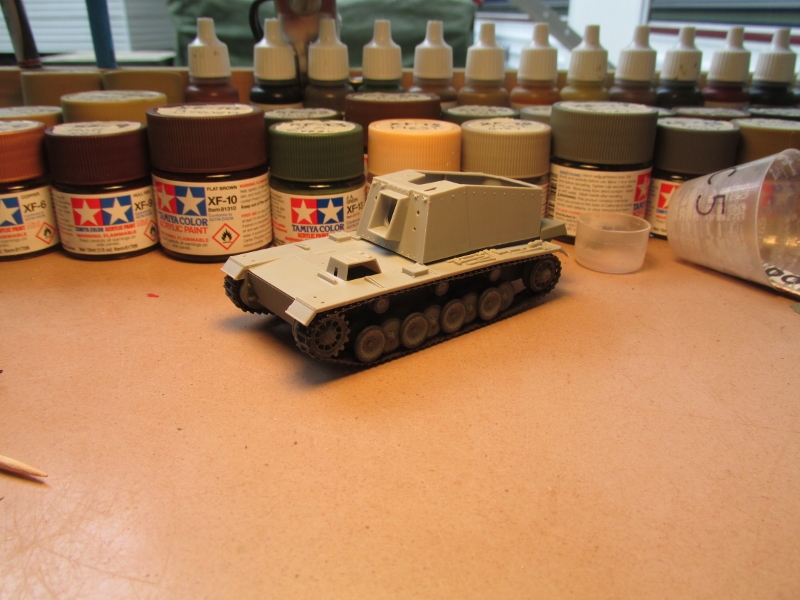
I finally started work on my Brummbär this weekend, here's a few first photos:

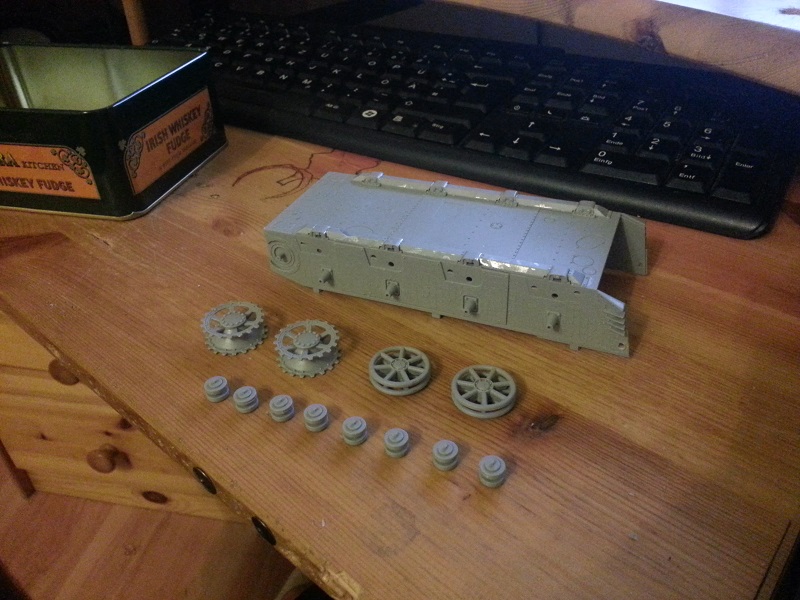
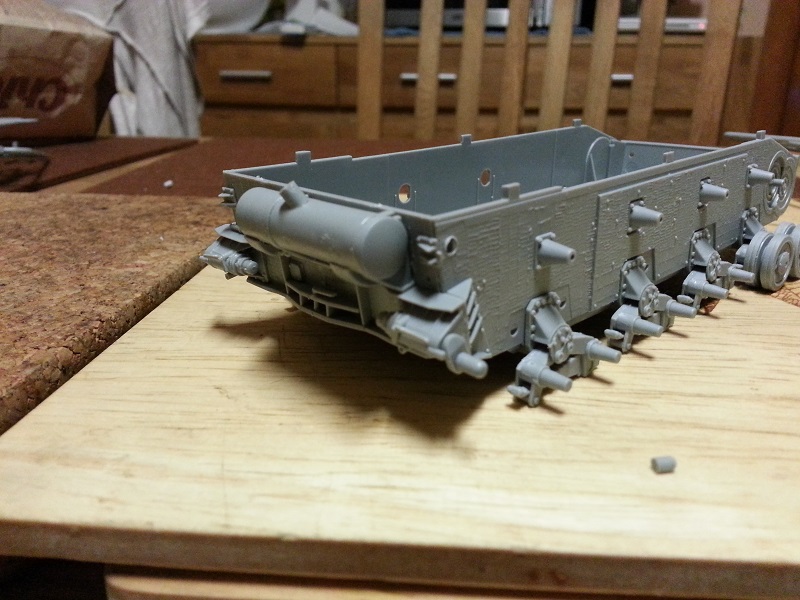
I've built the suspension up so that it's still fully workable for now, until I decide on how I want the Panzer to stand when finished.
Tristan

Currently Building:
too many kits to list hehe
#136
Distrito Federal, Mexico
Joined: April 06, 2002
KitMaker: 437 posts
Armorama: 391 posts
Posted: Saturday, June 22, 2013 - 06:41 PM UTC
Great Work friends!
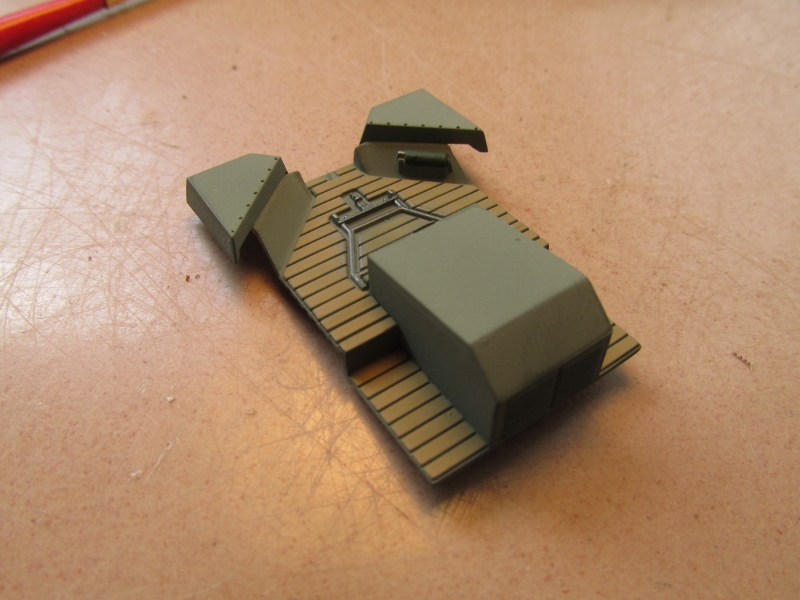
More updates:
The tools, tow cable and machine gun are ready!.
Regards!
Rodolfo
Current Project:
I am building a Kingtiger Ausf. B, Version: March 1945 - AMMO/MIG, 1/35
Arkansas, United States
Joined: June 29, 2009
KitMaker: 11,610 posts
Armorama: 7,843 posts
Posted: Saturday, June 22, 2013 - 07:41 PM UTC
Rodolfo; Don't forget the wooden butt, on the mg.
Ideals are peaceful. History is violent.
Texas, United States
Joined: December 23, 2007
KitMaker: 54 posts
Armorama: 54 posts
Posted: Sunday, June 23, 2013 - 05:50 AM UTC
Tristan nice start on the brummbar, goodmclean build.
Rodolfo nice tools.
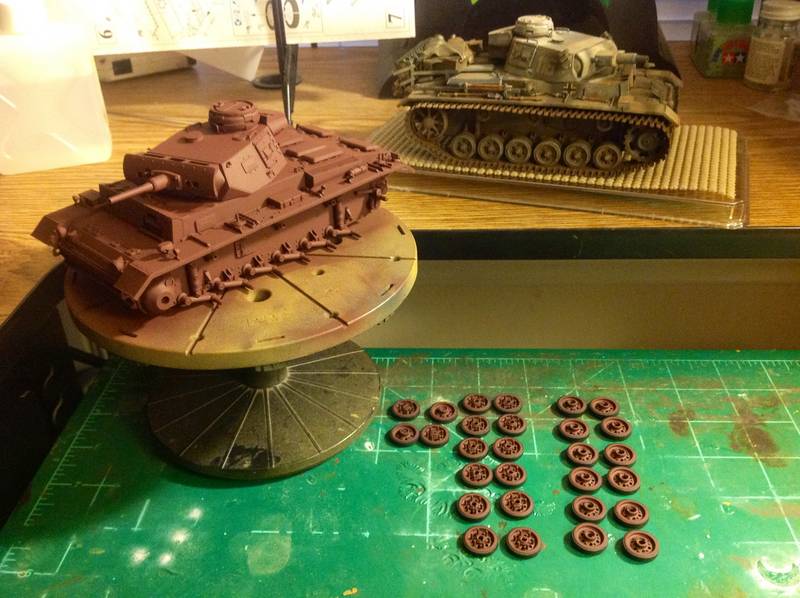
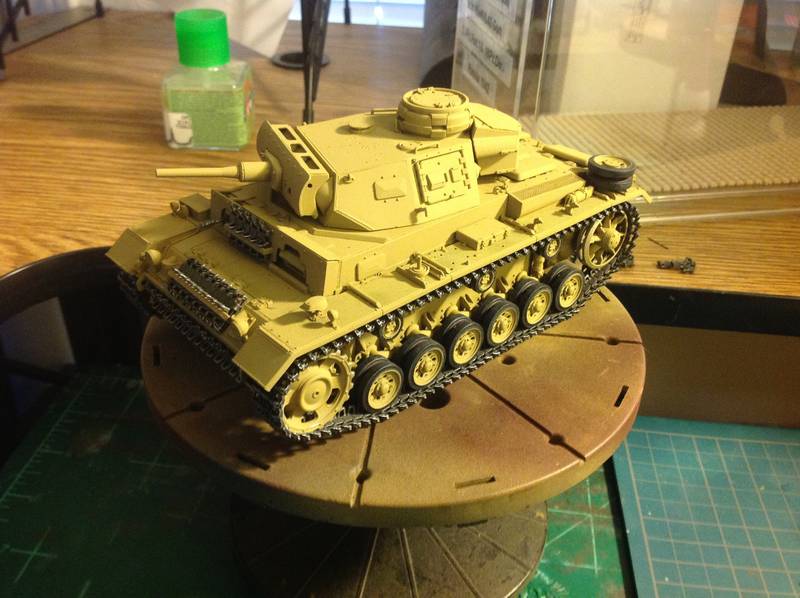
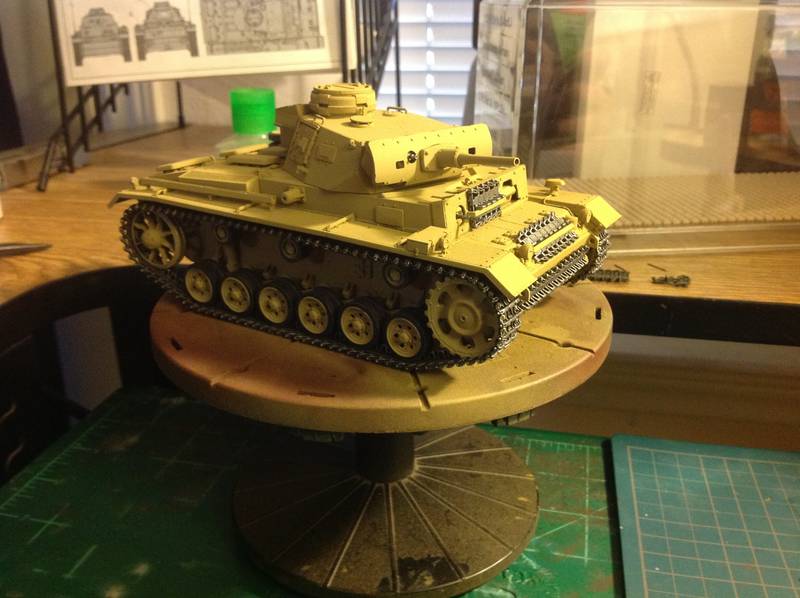
I got the base paint on but was let down on the front of the tank. Some how I manage to got something on the front. It looks like sandpaper. I cleaned it before I painted it so not sure how it got there. Turret, rear, sides, and underneath came out perfect. See below!
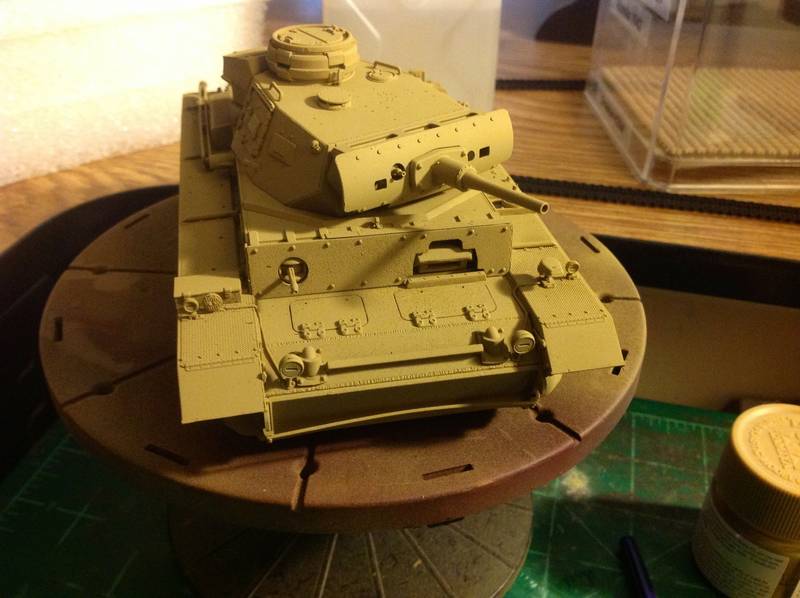
So I had two choices, strip off the paint and redo it or scratch build brackets and place tracks as added armor. Not really sure on how to strip off paint so I choose tracks with bracket. I think it will hide the rough looking texture.
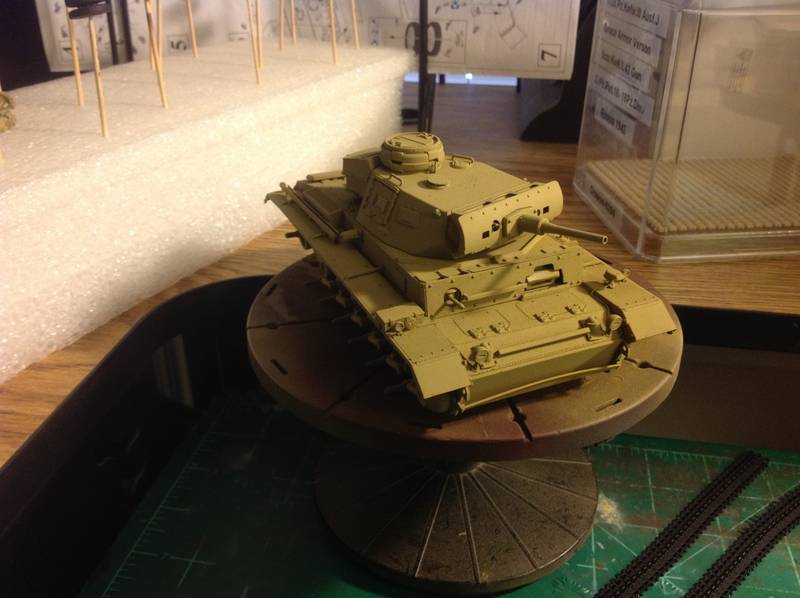
Here a pic with road wheels.
Now on to the tools and tracks. Not to mention fading the rubber portion of the road wheels.
Mike

Louisiana, United States
Joined: March 06, 2010
KitMaker: 3,128 posts
Armorama: 2,959 posts
Posted: Sunday, June 23, 2013 - 06:01 AM UTC
Wooden butt on the MG:
There are some really cool pics to bee seen by Googling German WWII MG 42 and looking in the "images" tab! While many WWII -42 had butts which were variably reddish and deeper brown-stained wood, many were painted (apparently black enamel, and some in dark green enamel) and there were also butts made from the German "Bakelite-like plastic" called "Tufnell" - which appeared reddish brown like the grips on German tank-mounted wire-cutter. And you'll see in some pics that many war-time butts were actually pretty shiny... Others looked rather crudely-made...
.
Bob
#226
British Columbia, Canada
Joined: February 20, 2012
KitMaker: 1,909 posts
Armorama: 1,066 posts
Posted: Sunday, June 23, 2013 - 06:48 AM UTC
Guys,
Look closely at the gun, the butt is painted a red brown.
Cheers Rob.
Anything without guns is a target!
27 completed campaigns and counting :)
#136
Distrito Federal, Mexico
Joined: April 06, 2002
KitMaker: 437 posts
Armorama: 391 posts
Posted: Sunday, June 23, 2013 - 08:15 AM UTC
Hello friends!
@ Matt, thanks!, yes, the MG it have a red brown, but I will to give a final retouch in the MG, spare tracks and the "gun cleaners"
@ Mike, nice work, yes paint the wheels is tedious
@ Bob, I agree with you , the MG it have some variants of color
@ Rob, thanks!
Regards!
Rodolfo
Current Project:
I am building a Kingtiger Ausf. B, Version: March 1945 - AMMO/MIG, 1/35
Pennsylvania, United States
Joined: May 14, 2007
KitMaker: 219 posts
Armorama: 217 posts
Posted: Sunday, June 23, 2013 - 09:27 AM UTC
Mike,
Your Pz III is looking good and if you are looking to strip the paint for one reason or another, use spray on oven cleaner. You can spray it on, leave it sit for 10 min and then wash off the paint. It will strip down to the plastic but won't hurt the glued joints, unless you really put on a lot of cleaner.
Good luck.
On the workbench:
Dragon SdKfz 251/9 Stummel
Visit Kingfisher models from Schuylkill Haven on FB
#136
Distrito Federal, Mexico
Joined: April 06, 2002
KitMaker: 437 posts
Armorama: 391 posts
Posted: Sunday, June 23, 2013 - 07:40 PM UTC
Hello friends!
More updates:
I added the tools in the tank. Was applied a coat of matt varnish "True Film" and decals were applied with "decalfix" of Humbrol. I will retouch the hatches.
Next step: Decals in the skirts and weathering


Regards!
Rodolfo
Current Project:
I am building a Kingtiger Ausf. B, Version: March 1945 - AMMO/MIG, 1/35
England - North East, United Kingdom
Joined: June 22, 2010
KitMaker: 1,224 posts
Armorama: 1,207 posts
Posted: Sunday, June 23, 2013 - 08:25 PM UTC
@Rodolfo... looking good... is it gonna get battered?
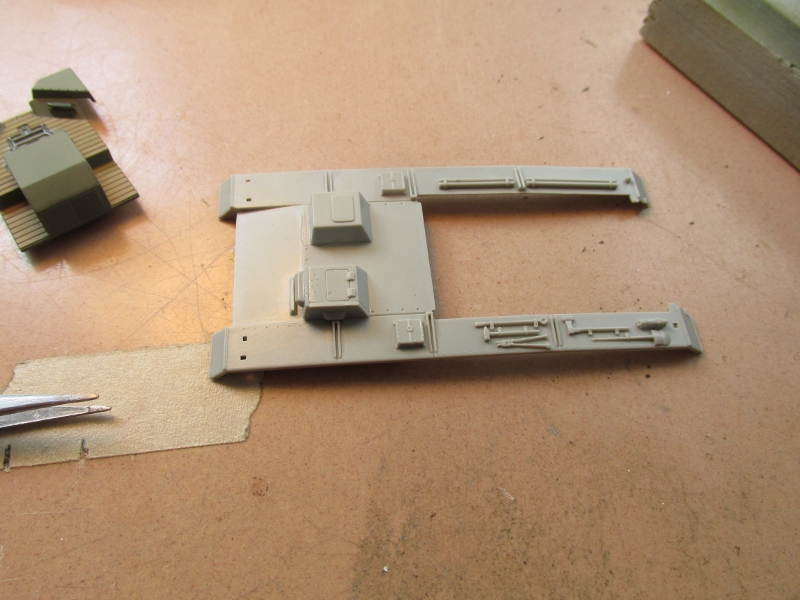
latest from me.... the main construction is almost complete so thought I would see what load I can add. do like heavily laden StuGs so added a fuel drum, some boxes, tarps (from Value Gear) some extra track links and some fuel/water cans (one will be done a s water probably). Used a coffee stick as the wooden backboard (seen a few photos of StuGs with that setup. May also add some sandbags either side of the gun and perhaps more spare links.


the payload may change somewhat (apart form the tracks draped over the box of course)
Maine, United States
Joined: February 11, 2011
KitMaker: 1,654 posts
Armorama: 1,565 posts
Posted: Sunday, June 23, 2013 - 09:07 PM UTC
Great work Gents
Here's where I'm at.....
Tracks and lower hull done
Floor based and detailed
parts added to upper hull
upper hull and "turret" dry fitted
That's all for now.

Model on,Jeff T.
The building lamp is lit.Build'em if you got'em.
Texas, United States
Joined: December 23, 2007
KitMaker: 54 posts
Armorama: 54 posts
Posted: Monday, June 24, 2013 - 11:00 AM UTC
Jeff the sturer is looking good, make me want to do on in 1/35 scale.
Robert your Stug III is looking good with the stowage. Can't wait to see it painted up!
Well finally got the tracks and road wheels done and mounted them on the panzer iii. Before I get on with the tools I still have to do some highlights and some minor starches. Hope to be done with the tools by this weekend do I can start to future it and weathering it.
Mike