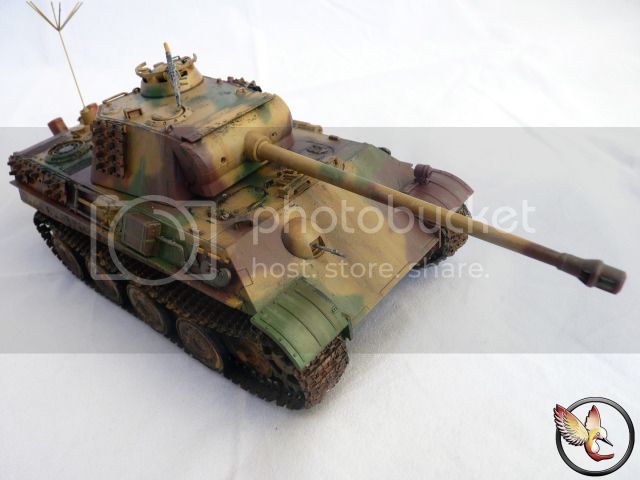
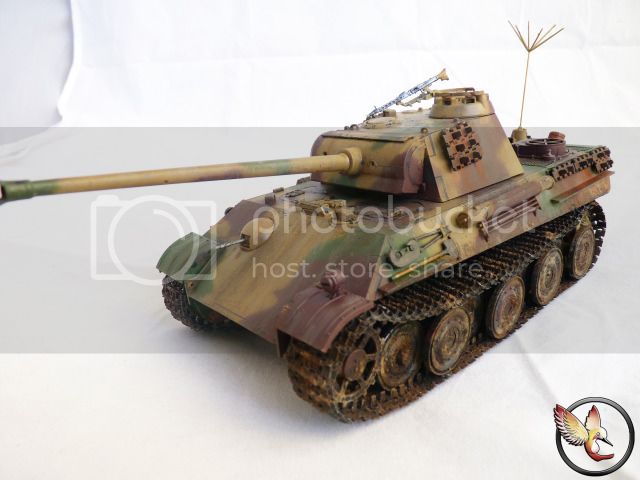
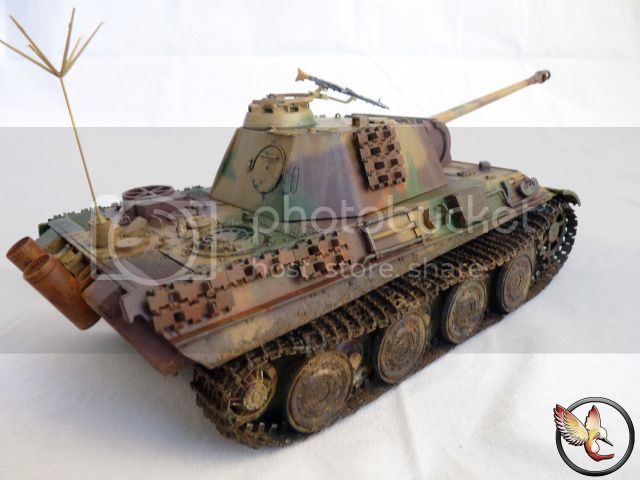
1/35 DML Panther Ausf G Command version
England - East Anglia, United Kingdom
Joined: March 06, 2012
KitMaker: 120 posts
Armorama: 118 posts
Posted: Wednesday, January 02, 2013 - 01:39 PM UTC
I want to share my recently finished kit with you guys... Im striving to improve myself and would appreciate feedback, comments, tips and advices ( just be gentle LOOL )


The whole story regarding this build can be found on my blog post.
http://modeller-innovation.blogspot.co.uk/2013/01/dml-135-panther-ausf-g-command-version.html I don't want to fill the forum with so many pics. Please do have a look. Thanks in advance for any feed back you guys might have.
I am honor-bound to my principles and morals, abiding by the quote ''to thine own heart be true or die a hypocrite''.Karma will come around.What have been done in what best way I could, in the name of love and friendship, I will reap what I have sown
California, United States
Joined: August 10, 2012
KitMaker: 1,510 posts
Armorama: 1,443 posts
Posted: Wednesday, January 02, 2013 - 02:15 PM UTC
Looks very good Gary. Only thing is I think it looks a bit 'heavy' though that's likely just the picture.
Did you airbrush or hand-paint the camouflage?
What cheek! Let them have it!
England - East Anglia, United Kingdom
Joined: March 06, 2012
KitMaker: 120 posts
Armorama: 118 posts
Posted: Wednesday, January 02, 2013 - 05:43 PM UTC
Quoted Text
Looks very good Gary. Only thing is I think it looks a bit 'heavy' though that's likely just the picture.
Did you airbrush or hand-paint the camouflage?
If you mean heavy in term of weight-heavy, NO .. the thing is really really light, I have to careful to not just brush it off by accident. Must be the picture.
I airbrushed on the Camo
I am honor-bound to my principles and morals, abiding by the quote ''to thine own heart be true or die a hypocrite''.Karma will come around.What have been done in what best way I could, in the name of love and friendship, I will reap what I have sown
California, United States
Joined: August 10, 2012
KitMaker: 1,510 posts
Armorama: 1,443 posts
Posted: Wednesday, January 02, 2013 - 06:10 PM UTC
I meant heavy as in dark. It's the lighting, I can see quite a bit of shadow. No big deal though; hope to see more of your work.

What cheek! Let them have it!
England - East Anglia, United Kingdom
Joined: March 06, 2012
KitMaker: 120 posts
Armorama: 118 posts
Posted: Wednesday, January 02, 2013 - 06:21 PM UTC
Quoted Text
I meant heavy as in dark. It's the lighting, I can see quite a bit of shadow. No big deal though; hope to see more of your work. 
Ah .. Lighting .. for that, I have no explaination. I'm a point and shoot guy when it comes to photography .. LOL
I am honor-bound to my principles and morals, abiding by the quote ''to thine own heart be true or die a hypocrite''.Karma will come around.What have been done in what best way I could, in the name of love and friendship, I will reap what I have sown
North Carolina, United States
Joined: May 17, 2012
KitMaker: 1,980 posts
Armorama: 1,571 posts
Posted: Thursday, January 03, 2013 - 03:45 AM UTC
Looks pretty good to me Gary. There are only two things I noticed that kind of bother me. First, while it looks like you added the square screens on the rear deck, the round fan screens are noticibly missing. The other point is that the rusting on the spare track links and mufflers looks a bit too uniform.
Indiana, United States
Joined: June 10, 2005
KitMaker: 6,188 posts
Armorama: 5,960 posts
Posted: Thursday, January 03, 2013 - 08:27 AM UTC
I see nothing that leaps out at me other than the spare tracks are a bit too rusty and the machine guns are too silver in color.
The overall image looks great as I like the camo and the weathering is spot on.
Nice work Gary!!
~ Jeff
Joel_W
 Associate Editor
New York, United States
Joined: December 04, 2010
KitMaker: 11,666 posts
Armorama: 1,143 posts
Posted: Friday, January 04, 2013 - 11:12 AM UTC
Gary, Overall a really solid build. I like your weathering as it shows some heavy use. While a newbie when it comes to German armor, I did notice the missing screens.
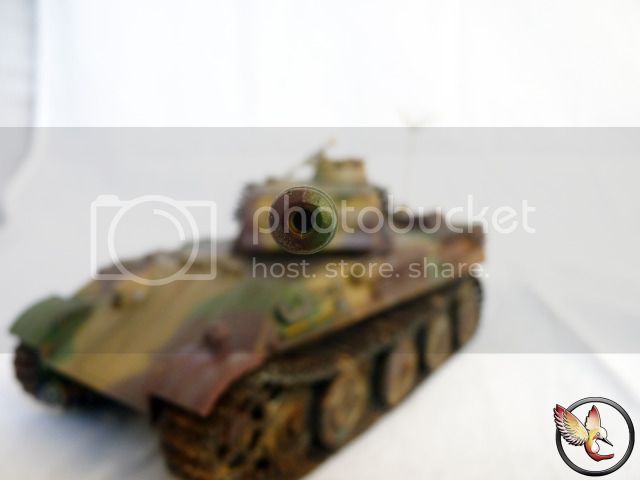
The one picture looking down the barrel is nicely done.
Joel
On my Workbench:
Monogram 1/24 scale 427 Shelby Cobra
Just Completed:
Beemax 1/24 scale BMW M3 E30 1992 Evolution II
South Carolina, United States
Joined: July 12, 2012
KitMaker: 72 posts
Armorama: 70 posts
Posted: Sunday, January 06, 2013 - 06:05 AM UTC
I love the last photo on this. It looks great. I love the whole thing. What did you do to the road wheels?
AMPS Central SC
AMPS #2904
England - East Anglia, United Kingdom
Joined: March 06, 2012
KitMaker: 120 posts
Armorama: 118 posts
Posted: Monday, January 07, 2013 - 05:28 PM UTC
Quoted Text
Looks pretty good to me Gary. There are only two things I noticed that kind of bother me. First, while it looks like you added the square screens on the rear deck, the round fan screens are noticibly missing. The other point is that the rusting on the spare track links and mufflers looks a bit too uniform.
Thank you sir. For the grille, the kit never gave me so I had to dig into my spare box for a mesh .. and I have purposely opted out the meshes over the FANS as I see some panther with the grille and some, without
I am honor-bound to my principles and morals, abiding by the quote ''to thine own heart be true or die a hypocrite''.Karma will come around.What have been done in what best way I could, in the name of love and friendship, I will reap what I have sown
England - East Anglia, United Kingdom
Joined: March 06, 2012
KitMaker: 120 posts
Armorama: 118 posts
Posted: Monday, January 07, 2013 - 05:30 PM UTC
Quoted Text
I see nothing that leaps out at me other than the spare tracks are a bit too rusty and the machine guns are too silver in color.
The overall image looks great as I like the camo and the weathering is spot on.
Nice work Gary!!
~ Jeff
Agreed... I went a little bit overboard with the rust ... hehe... and the MG, I still sucks at drybrushing and that's how it came out
I am honor-bound to my principles and morals, abiding by the quote ''to thine own heart be true or die a hypocrite''.Karma will come around.What have been done in what best way I could, in the name of love and friendship, I will reap what I have sown
England - East Anglia, United Kingdom
Joined: March 06, 2012
KitMaker: 120 posts
Armorama: 118 posts
Posted: Monday, January 07, 2013 - 05:31 PM UTC
Quoted Text
Gary, Overall a really solid build. I like your weathering as it shows some heavy use. While a newbie when it comes to German armor, I did notice the missing screens.
The one picture looking down the barrel is nicely done.
Joel
I have to admit, I FORGOT to put on the scopes ( Screens ) LOL .... Thank you for the feed back sir
I am honor-bound to my principles and morals, abiding by the quote ''to thine own heart be true or die a hypocrite''.Karma will come around.What have been done in what best way I could, in the name of love and friendship, I will reap what I have sown
England - East Anglia, United Kingdom
Joined: March 06, 2012
KitMaker: 120 posts
Armorama: 118 posts
Posted: Monday, January 07, 2013 - 05:32 PM UTC
Quoted Text
I love the last photo on this. It looks great. I love the whole thing. What did you do to the road wheels?
Im not really sure what do u mean by '' what did I do to the road wheels '' sir.. if you are talking about the messy tracks -
hose tracks are just $%^$&%^&*£%$"£. and the wheels assembly just messed up so much. Like I said in my blog post, the wheels didn't come out perfectly aligned which effect the tracks assembly. That is the most Disgusting parts of the whole building process and I HATE THEM .. I almost threw away this kit on account of those stupid wheels and tracks but I tried to see this through just for the sake of improving myself.
I am honor-bound to my principles and morals, abiding by the quote ''to thine own heart be true or die a hypocrite''.Karma will come around.What have been done in what best way I could, in the name of love and friendship, I will reap what I have sown
Arkansas, United States
Joined: June 29, 2009
KitMaker: 11,610 posts
Armorama: 7,843 posts
Posted: Monday, January 07, 2013 - 07:38 PM UTC
That looks awesome! I believe the metal parts of the guns should be black.
Ideals are peaceful. History is violent.
England - East Anglia, United Kingdom
Joined: March 06, 2012
KitMaker: 120 posts
Armorama: 118 posts
Posted: Sunday, January 13, 2013 - 06:08 PM UTC
Quoted Text
That looks awesome! I believe the metal parts of the guns should be black.
Thank you sir ... I actually painted black but I was trying out a method I read in a magazine and I over did the silver dry brushing

I am honor-bound to my principles and morals, abiding by the quote ''to thine own heart be true or die a hypocrite''.Karma will come around.What have been done in what best way I could, in the name of love and friendship, I will reap what I have sown
Kentucky, United States
Joined: May 27, 2007
KitMaker: 327 posts
Armorama: 259 posts
Posted: Sunday, January 13, 2013 - 07:58 PM UTC
Gary Great build

Nova Scotia, Canada
Joined: July 26, 2012
KitMaker: 454 posts
Armorama: 281 posts
Posted: Monday, January 14, 2013 - 02:30 AM UTC
Quoted Text
Quoted Text
That looks awesome! I believe the metal parts of the guns should be black.
Thank you sir ... I actually painted black but I was trying out a method I read in a magazine and I over did the silver dry brushing 
Excellent job! I understand you totally. I'm in the same boat as you. Maybe paint it black. Let it dry. Then dry brush the sliver on, very little amounts. Slowly build up the layers. Make sure you wipe off the access paint off the paint prior to dry brushing. It's building a model, not a quick sprint. Take it slow... like sweet love.

Cheers,
Tom


