_GOTOBOTTOM
Armor/AFV: Allied - WWII
Armor and ground forces of the Allied forces during World War II.
Hosted by Darren Baker
DML M2 Halftrack Build
stef29
Visit this Community
New Jersey, United States
Joined: October 10, 2012
KitMaker: 124 posts
Armorama: 102 posts
Posted: Monday, January 14, 2013 - 05:41 AM UTC
Hi all, this is just my second project since restarting the hobby. Thanks to everyone who commented on my Tiger I, lots to learn, lots of new tools, techniques, and stuff out there to try. I didn't do a lot of historical research on this project, lots and lots of these buggers were built so I figured fitting into a historical setting would be easy. I am focusing on getting the details to where I'm happy, so spent a lot of time pouring over photos. Between usarmymodels and halftracks.com, there were plenty. Also, thanks to bluegrayrenegades.org for posting a pdf summarizing the errors in the kit.

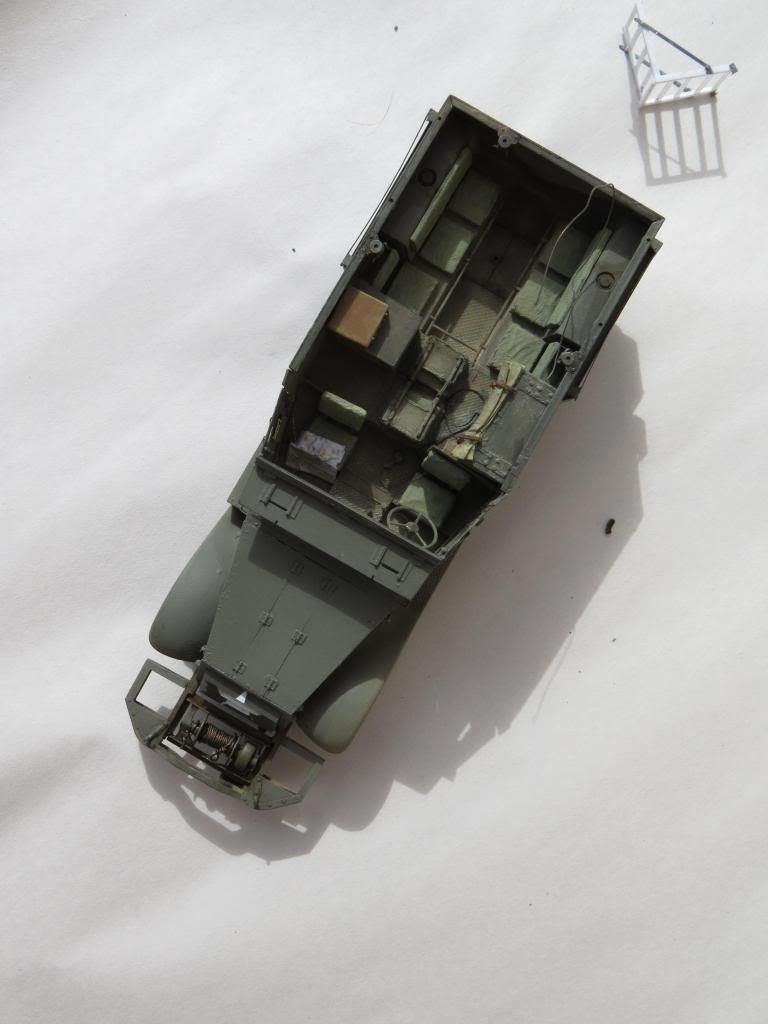
Below shows the chassis with scratch built idler spring.


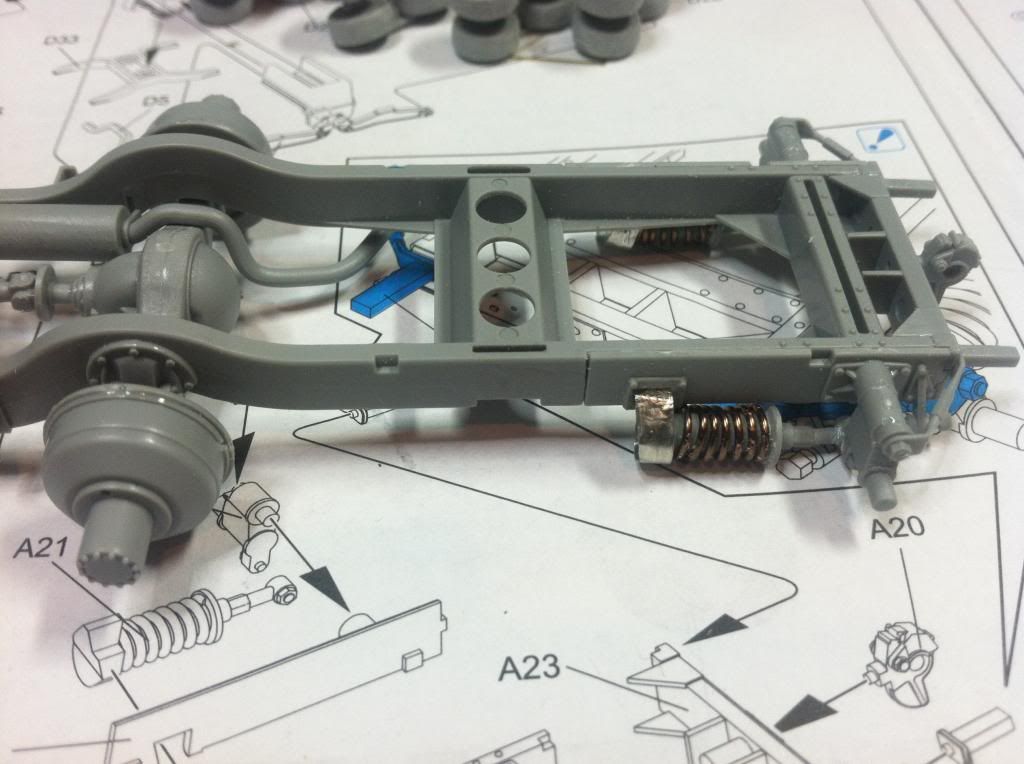
This shows the k59 resin upgrade to the suspension, and scratch exhaust pipe support.


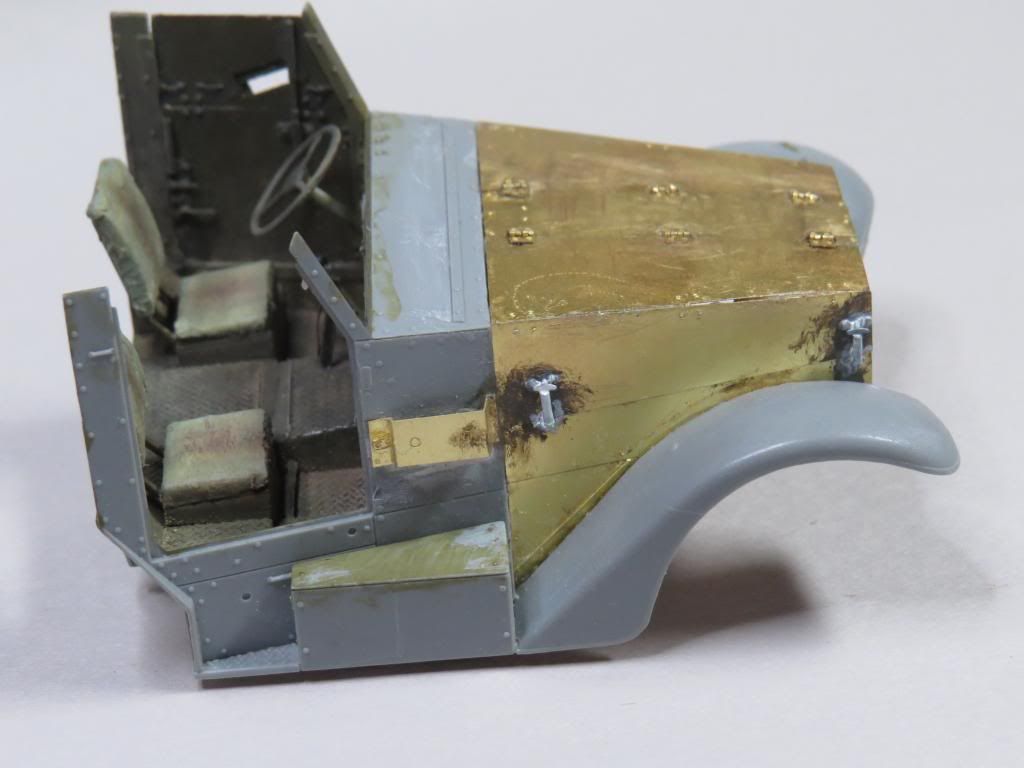
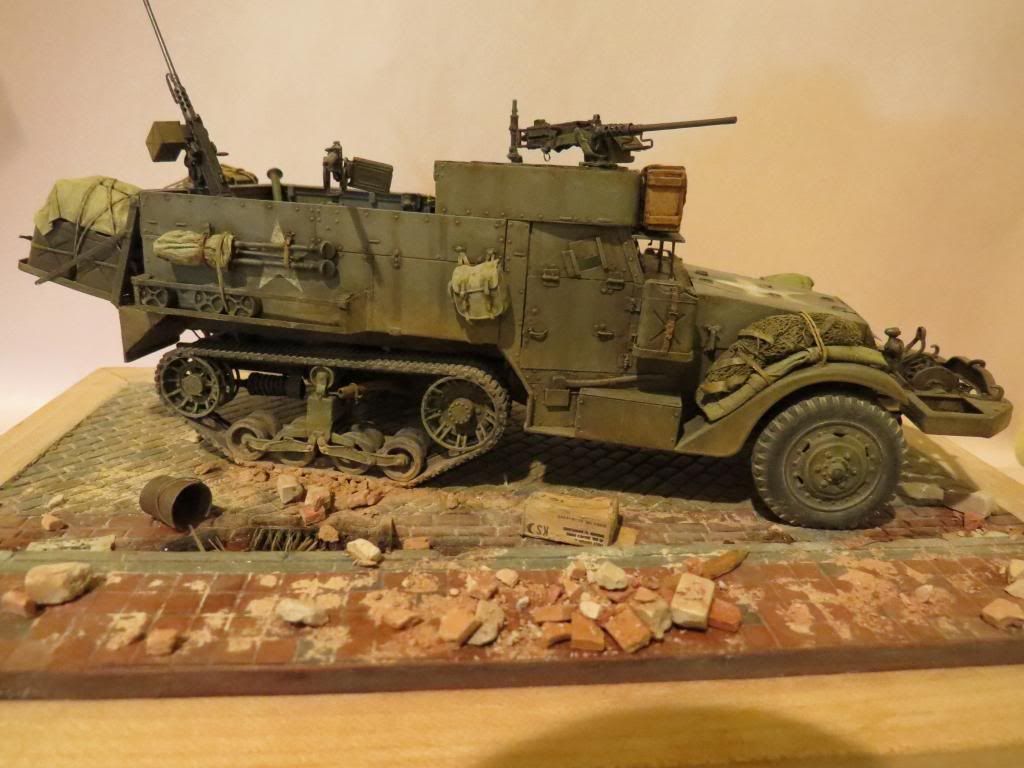
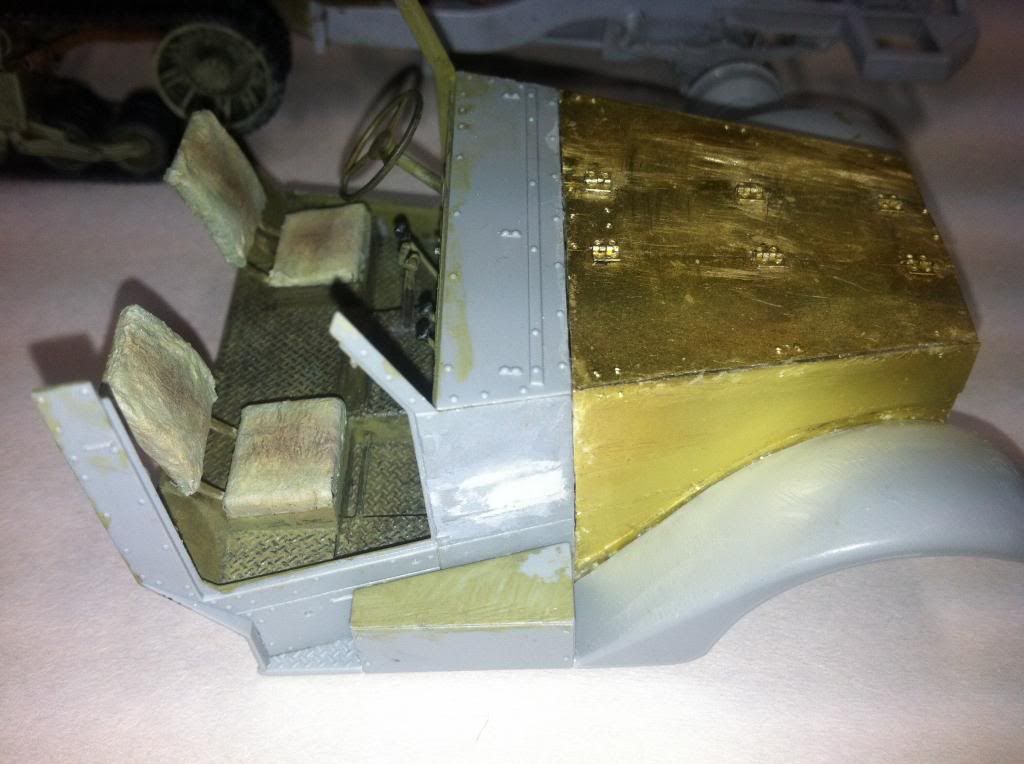
I spent a lot of time studying and attempting to create refined doors. When all said-and-done, they don't look much better than the kit doors at scale! Well, I know what's in there


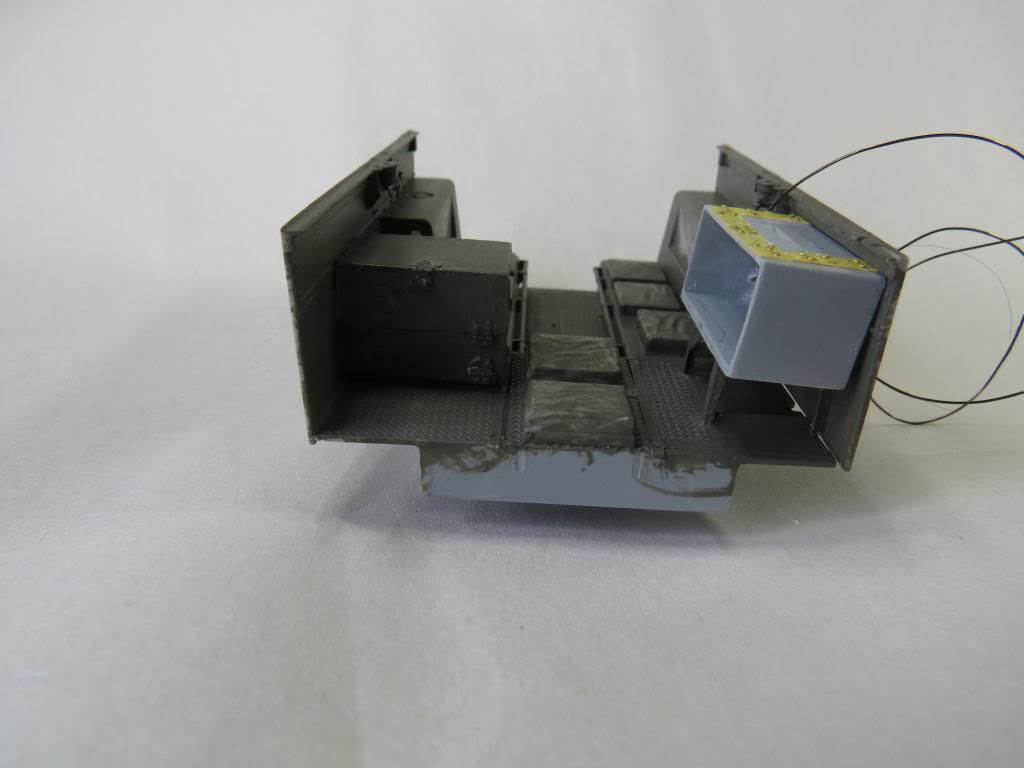
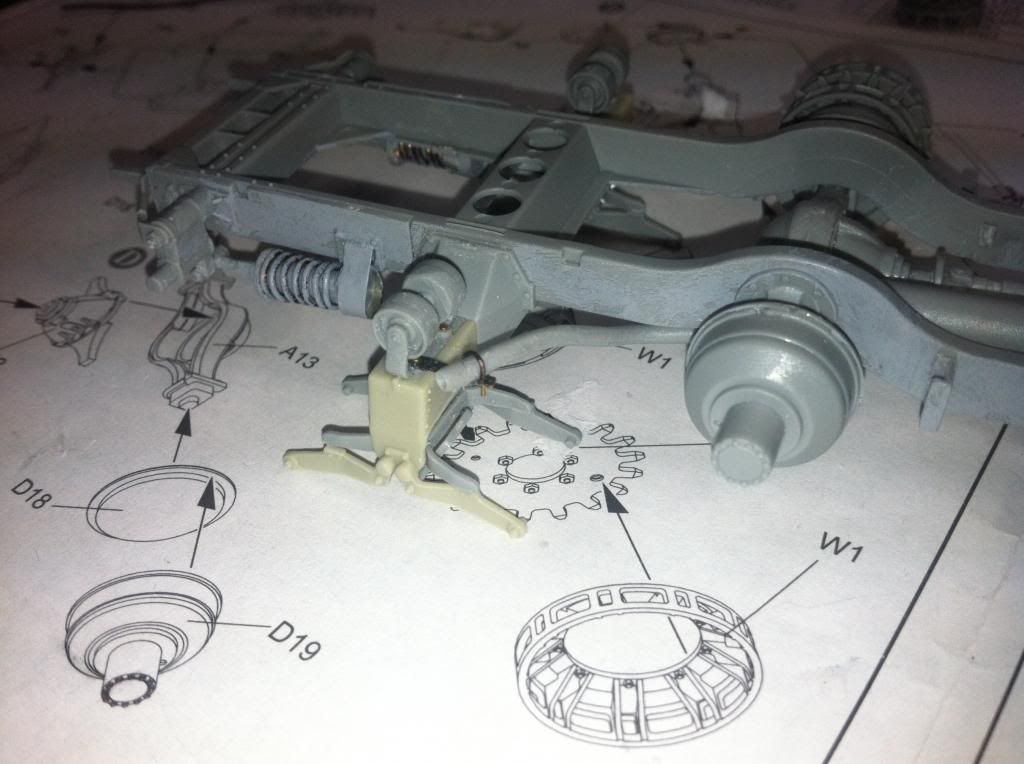
Here's the back chassis painted and what I like to call metalized before actual detailing/weathering.


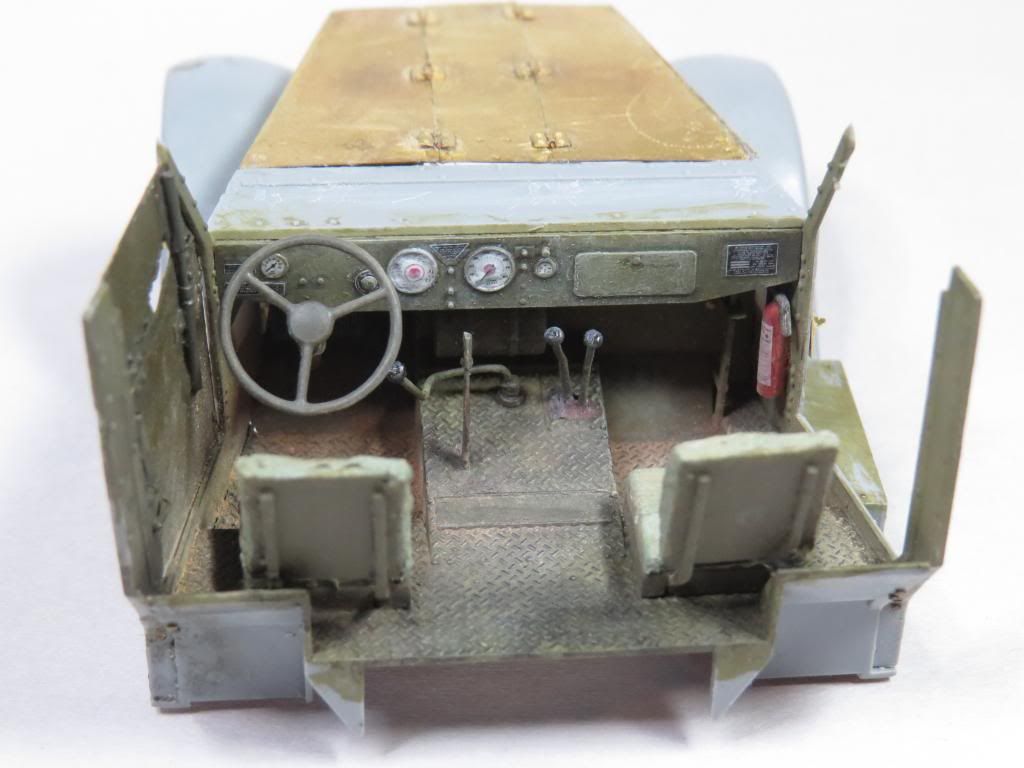
Finally some of the cab, upgrades here are from Voyager's M2A1 upgrade kits. I also purchased the Eduard kit, wasnt overly impressed by it. Some initial painting has been done here as well.


Ok, I'll try to keep this updated if folks are interested. Again, I am new here and hope this wasn't too wordy or too lengthy!

Bill

Tiger_213
Visit this Community
California, United States
Joined: August 10, 2012
KitMaker: 1,510 posts
Armorama: 1,443 posts
Posted: Monday, January 14, 2013 - 06:02 AM UTC
All ready started on a new project? Hope it turns out as well as the Tiger I.
stef29
Visit this Community
New Jersey, United States
Joined: October 10, 2012
KitMaker: 124 posts
Armorama: 102 posts
Posted: Tuesday, February 05, 2013 - 03:00 PM UTC
Well, I was a bit delayed by semi-emergency surgery, fusion of C6 & C7 in my neck. 3rd time I've had it, my neck is now one solid bone! Makes close up work harder, but as with all things you adjust. During recovery I did a lot more reading and discovered that the DML M2A1 isn't as accurate as I had hoped, a lot of flaws major and minor. So I've ordered Toadman's walkaround of an M2A1 so that I can correct the bigger ones that weren't easily corrected from normal research. Here are some pictures of where I've progressed, all are work-in progress. The hood clamps are scratch, none of the aftermarket ones I've seen are more than 2-dimensional, the M2 .50 cal is from K59 and is Superb, my painting skills do not do it justice. Also painting the SCR508 radio set and scratch built the windshield armor posts. So, in a semi holding pattern until I get the DVD and can fix some of the big issues, like the forward ammo locker being the wrong size for the M2A1, the radio box being inaccurate, ahd the .50 cal pintle is wrong for m49 ring/pulpit.


Also, I'm happy with the scratch work on the interior of the door, somewhat visible here. Started some of the weathering on the interior obviously.


Dangeroo
#023
Visit this Community
Zurich, Switzerland
Joined: March 13, 2009
KitMaker: 2,058 posts
Armorama: 1,656 posts
Posted: Tuesday, February 05, 2013 - 10:33 PM UTC
Bill, nice work on the M2, welcome to the allied side! Looking forward to further progress!

Cheers!
Stefan
ericadeane
Visit this Community
Michigan, United States
Joined: October 28, 2002
KitMaker: 4,021 posts
Armorama: 3,947 posts
Posted: Wednesday, February 06, 2013 - 04:20 AM UTC
Is the M2 going to have the winch up front? Is so, DML omitted the power take off lever. Something to add if you are adding the winch.
robw_uk
Visit this Community
England - North East, United Kingdom
Joined: June 22, 2010
KitMaker: 1,224 posts
Armorama: 1,207 posts
Posted: Thursday, February 07, 2013 - 10:50 PM UTC
nice work so far. Am 50% through a German Halftrack (Sd.Kfz 10) with Eduard PE... its not "too bad" - probably its flaws are down to my sausage-fingers and only, at this time, having superglue to stick it... need to learn to solder me-thinks....

by the sounds of it I should also go look at your Tiger but will keep an eye on this one too
Joel_W
Staff MemberAssociate Editor
AUTOMODELER
Visit this Community
New York, United States
Joined: December 04, 2010
KitMaker: 11,666 posts
Armorama: 1,143 posts
Posted: Friday, February 08, 2013 - 01:00 PM UTC
Bill, judging by the work on your Tiger 1,and now the M2A1, your skills are way above average, certainly miles above mine. I'm just at the level of trying to build a near perfect OOB build. Looking forward to following your build.
Joel
stef29
Visit this Community
New Jersey, United States
Joined: October 10, 2012
KitMaker: 124 posts
Armorama: 102 posts
Posted: Monday, February 11, 2013 - 03:37 PM UTC
Roy, yes it will have the winch so thanks for that advice! I just received Toadman's DVD for the M2A1 and have a dilemma. How can I find a real M2A1 "blue print"? Maybe there are many variations? The area of largest concern is the front ammo locker under the pulpit. I've seen documentation that it's smaller on the M2A1, yet I've seen rebuilds that have the full size version, like the DML kit. Is this a rebuilders flaw? Anyone have any thoughts on where to research further? I am trying some of rebuilders sites like halftracks.com, halftrackinfo.com, g503, etc. Striking out.

Robert, regards your PE work - it's hard for everyone, I do not love it. By flaws what I am finding is the kits are often not any more accurate than the OOB version, just look it because of thinner / smaller pieces. So you do need to be careful. Seems the newer resin upgrades are far better, but resin isnt the easiest medium to work with either! As far as soldering, it does have its benefits for larger pieces for sure. Order the DVD from Adam Wilder, www.wilder.su. You won't be sorry you did! Fantastic tips, and not just soldering but PE in general.

Again, thanks to all for looking and your feedback. I love getting back into this hobby and any work that you do, if you enjoy doing it, then the results are perfect!

stef29
Visit this Community
New Jersey, United States
Joined: October 10, 2012
KitMaker: 124 posts
Armorama: 102 posts
Posted: Thursday, February 14, 2013 - 07:57 AM UTC
After hounding 1:1 "modelers" i.e. restorers, I have the info I needed and decided to modify the passenger side stowage bin to 1/2 size, and adjust the radio box significantly. This work left a lot of floor space empty so I filled it with Archer anti-skid surface. Not fun to work with but really nice. Below are some pictures, started painting just to help ensure I was getting the stuff right, a lot more to do. Thanks for looking.


stef29
Visit this Community
New Jersey, United States
Joined: October 10, 2012
KitMaker: 124 posts
Armorama: 102 posts
Posted: Friday, March 01, 2013 - 06:14 AM UTC
Hi everyone, just a quick update on progress for anyone who is interested. Most of the kit is together, mods made per previous posts to adjust to research on M2A1's that would have been field modified to make more room for the gunner. These changes plus using brass for the engine compartment made fitting the thing together a bear, I used CA glue so that allowed me to take it apart 2 times to get the best fit. Still not thrilled with it, but that's the price for change. Interior weathering is almost done, and just started the outside by painting on a slurry made from MIG European earth mixed with Light Dust and thinner. At this point I need to stop for decals and an overcoat, then finish with front wheels, tools, and rear stowage racks. These I fabricated from styrene and pieces from an Eduard PE kit. The included racks were just too small and inaccurate. The random wire you see will eventually be the antenna wire. The map on the passenger seat was found on the army historical website, shrunk down using a free online tool and then painted a bit. Thanks for looking!


stef29
Visit this Community
New Jersey, United States
Joined: October 10, 2012
KitMaker: 124 posts
Armorama: 102 posts
Posted: Wednesday, April 10, 2013 - 12:05 PM UTC
I finally have something to update. A lot has been done since I updated so just sharing some pics. It's 99% done but some touching up to do, and will add a figure. But going to put this aside and start another project.


ElCapitan
Visit this Community
Pennsylvania, United States
Joined: May 14, 2007
KitMaker: 219 posts
Armorama: 217 posts
Posted: Wednesday, April 10, 2013 - 12:16 PM UTC
Bill,


Nice job on the halftrack. Keep up the good work and make sure you post some photos after you get a figure done.

thanks

yeahwiggie
Visit this Community
Dalarnas, Sweden
Joined: March 24, 2006
KitMaker: 2,093 posts
Armorama: 1,359 posts
Posted: Wednesday, April 10, 2013 - 05:58 PM UTC
That sure is a job well done!
Nice inspiration for someone who's making an effort to come back to the hobby too; me.
Love the details in and on the vehicle as well as the ones on the base.
stef29
Visit this Community
New Jersey, United States
Joined: October 10, 2012
KitMaker: 124 posts
Armorama: 102 posts
Posted: Friday, April 12, 2013 - 11:40 AM UTC
Thanks for the kind feedback gents! Ron, glad its somewhat of an inspiration, I'm really happy I started back up.
bat-213
Visit this Community
Canada
Joined: December 30, 2011
KitMaker: 902 posts
Armorama: 788 posts
Posted: Friday, April 12, 2013 - 05:38 PM UTC
great work on your build,love the paint and dio work.
WARCLOUD
Visit this Community
Jihocesky Kraj, Czech Republic
Joined: March 31, 2012
KitMaker: 280 posts
Armorama: 274 posts
Posted: Saturday, April 27, 2013 - 08:50 PM UTC
Brilliant. Absolutely brilliant. Fantastic work my friend!
I hesitate to bring up anything, considering how great this looks overall..but is there a reason that the rear armor body is not seated down onto the chassis completely?? I know from experience, this is a tricky business..it doesn't fit real well OOB and takes a bit of fitting and adjusting to get it right. There is not supposed to be any air visible between the body and chassis.
The finishing is outstanding, and I'm a huge fan of K59 resin kits for weapons..I use the M2 .50 from them all the time. Your weathering and in-the-field dirt are excellent! Quite impressive..
Plasticbattle
#003
Visit this Community
Donegal, Ireland
Joined: May 14, 2002
KitMaker: 9,763 posts
Armorama: 7,444 posts
Posted: Sunday, April 28, 2013 - 01:37 AM UTC
Very nice build Bill. The stowage adds a lot of life to the vehicle ... as will the figure. I like this a lot.
stef29
Visit this Community
New Jersey, United States
Joined: October 10, 2012
KitMaker: 124 posts
Armorama: 102 posts
Posted: Sunday, May 12, 2013 - 01:32 AM UTC
Thanks again for the kind words! Gary, yes you got the major flaw that had me cursing and screaming, the gap between the body and cab. Worse on one side than the other. Partly due to using PE for the front end, some of my cutting seems to have thrown off the entire fit (because of damage I caused). I fit, refit, refit again and finally said "time to move on". I was more interested in the stowage, painting and weathering, wanted to try my hand at a basic city scene w/cobblestone and rubble. The other major flaw is less noticeable, the positional mount on the m2 machine gun ring was botched. I've ordered a brass version. Someday I will go back and fix the flaws, but lord knows when. This kit was a headache, lots of miss-fits and bad instructions. I had always read Dragon was fantastic, not true in all cases. I am working on their Abrams AIM kit now, its much nicer/better fit (though still some errors in the instructions).
SgtRam
Staff MemberContributing Writer
AEROSCALE
#197
Visit this Community
Ontario, Canada
Joined: March 06, 2011
KitMaker: 3,971 posts
Armorama: 2,859 posts
Posted: Sunday, May 12, 2013 - 01:36 AM UTC
Bill

Great looking Halftrack, great work.

Kevin
Hederstierna
#247
Visit this Community
Nordjylland, Denmark
Joined: January 03, 2008
KitMaker: 1,102 posts
Armorama: 1,018 posts
Posted: Sunday, May 12, 2013 - 02:17 AM UTC
Stunning work Bill. This is a true winner.
Best regards
Jacob
 _GOTOTOP