_GOTOBOTTOM
Constructive Feedback
For in-progress or completed build photos. Give and get contructive feedback!
Italeri #222 1/35 PzKpfw I Ausf B
Pytagoras
Visit this Community
Møre og Romsdal, Norway
Joined: December 03, 2012
KitMaker: 300 posts
Armorama: 285 posts
Posted: Monday, February 18, 2013 - 10:37 AM UTC
Time for a new build , and this is the first part of a series. My plan is to make a tank from each of the roman numbered designs the German made before and during WWII.

First out is the Italeri #222 Panzerkampfwagen I Ausf B in 1/35 scale:


I got the kit cheap off eBay and it was basically the only one I could find that was priced under the VAT-limit for imports to Norway. It's quite old as well, and I've noticed quite a few things that irks me, mostly regarding details on the smallest bits and pieces.

Regardless, the kit has turned out nicely and it helps me practice on my airbrushing for when I decide to take on more expensive and detailed kits.

Would like to get some feedback on the jack block though; I forgot what color paint I used with the nice jack base on my previous build, the PzKpfw IV Ausf D.
Joel_W
Staff MemberAssociate Editor
AUTOMODELER
Visit this Community
New York, United States
Joined: December 04, 2010
KitMaker: 11,666 posts
Armorama: 1,143 posts
Posted: Monday, February 18, 2013 - 11:20 AM UTC
Really nicely painted and with a touch of weathering for the used but not abused look. I really like the wood handles on your tools. But the wood box just looks a little to bright red.

Can't help you with the color of the Jack block, as I have been concentrating on USA Armor since I got back into the hobby nearly 3 years ago.
Joel
AFVFan
Visit this Community
North Carolina, United States
Joined: May 17, 2012
KitMaker: 1,980 posts
Armorama: 1,571 posts
Posted: Monday, February 18, 2013 - 04:27 PM UTC
I'll agree with Joel that the block is too red. Try more the color of your tool handles with a dark wash to bring out the grain.

The rest of the kit is looking good.
Pytagoras
Visit this Community
Møre og Romsdal, Norway
Joined: December 03, 2012
KitMaker: 300 posts
Armorama: 285 posts
Posted: Monday, February 18, 2013 - 11:11 PM UTC
Yeah, I'll try to reduce the color red in the jack block by weathering. I was trying to experiment with the AK Rotbraun as a base coat, but it's obviously not working well.

Another question: I've been looking for a metal replacement of the MG13 barrels for this kit, but I've had some trouble finding anything on eBay. Ordered a few MG34 barrels and wondering if it would be too historically far fetched to use MG34 barrels instead?
retiredyank
Visit this Community
Arkansas, United States
Joined: June 29, 2009
KitMaker: 11,610 posts
Armorama: 7,843 posts
Posted: Tuesday, February 19, 2013 - 12:28 AM UTC
The muzzle of the mg13 is quite different than that of the mg34. IMHO, you could modify the muzzle with some plastic rod and make it look acceptable.
I disagree, about the jack block. Having studied photos of the different finishes, on wood, the jack block could be a more reddish brown. This was certainly true of German weapons, during WWII.
Pytagoras
Visit this Community
Møre og Romsdal, Norway
Joined: December 03, 2012
KitMaker: 300 posts
Armorama: 285 posts
Posted: Tuesday, February 19, 2013 - 06:45 AM UTC
I'll have to see the difference in the barrels when they get here. Hoping there won't be much difference since they're the same caliber.

Added decals to the hull and turret and finished drybrushing wear on the tracks just now. Will apply another layer of gloss varnish in a few hours to seal those decals in.
robw_uk
Visit this Community
England - North East, United Kingdom
Joined: June 22, 2010
KitMaker: 1,224 posts
Armorama: 1,207 posts
Posted: Wednesday, February 20, 2013 - 02:24 AM UTC
nice work on Pz I. I had a similar notion on doing the roman numeral Panzers. Started with a II, have a I to build next (actually its the Flak conversion so may have to get a "proper" I) and a IV in the stash...

look forward to seeing it weathered....
pseudorealityx
Visit this Community
Georgia, United States
Joined: January 31, 2010
KitMaker: 2,191 posts
Armorama: 1,814 posts
Posted: Wednesday, February 20, 2013 - 03:18 AM UTC
The jack block was a big chunk of wood banded together to use as a, well, jack block. To compare it to the finish on a rifle is kinda silly... It wasn't mean to be a finely finished thing.

The wire cutter handles were "bakelite", and should be more of a red-brown/terracotta color IMO.
Pytagoras
Visit this Community
Møre og Romsdal, Norway
Joined: December 03, 2012
KitMaker: 300 posts
Armorama: 285 posts
Posted: Wednesday, February 20, 2013 - 06:56 AM UTC
Thanks for the tip on the wire cutters, Jesse. Will take note of this as well.

Received the batch of barrels I had ordered and the MG34 barrels are so similar to the MG13 barrels included in the kit that I'll replace them. They look better, and nobody that will see the finished model will ever know the difference anyways

Included a pic with a side-by-side comparison:


Progress on the tank itself is going great. Right now I'm working on applying the filter to the hull and turret. Almost done with that bit and will continue with pigments and weathering tomorrow.

Oh, and some filter on the jack block reduced the brightness a bit, so now it has a darker brown tone to it.
TRM5150
Visit this Community
Massachusetts, United States
Joined: January 03, 2010
KitMaker: 2,159 posts
Armorama: 707 posts
Posted: Wednesday, February 20, 2013 - 07:18 AM UTC
What a great clean build!!! Well done Vegard!
Pytagoras
Visit this Community
Møre og Romsdal, Norway
Joined: December 03, 2012
KitMaker: 300 posts
Armorama: 285 posts
Posted: Thursday, February 21, 2013 - 08:17 AM UTC
Thanks for the kind words, Todd!

A small update for you all:


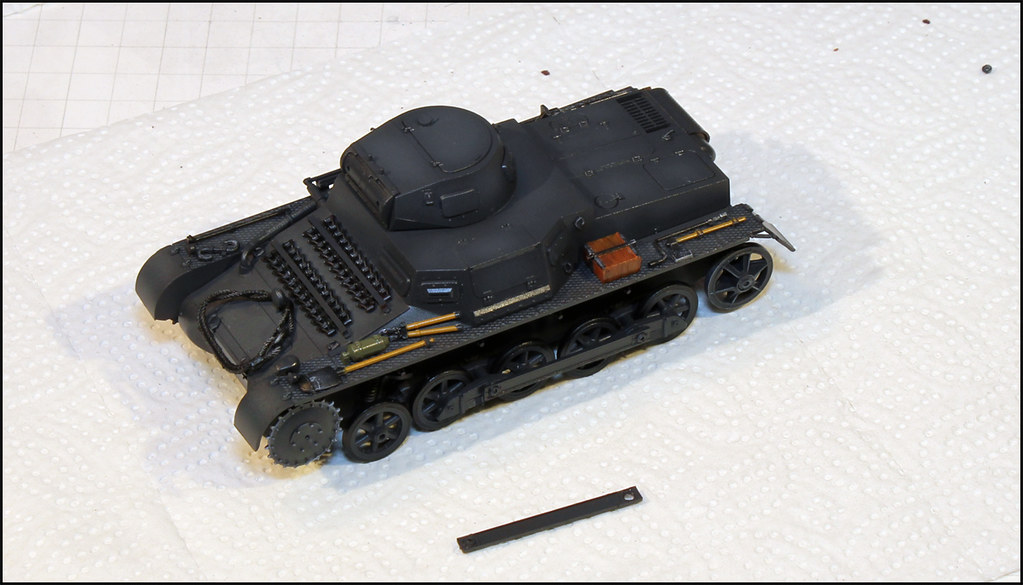
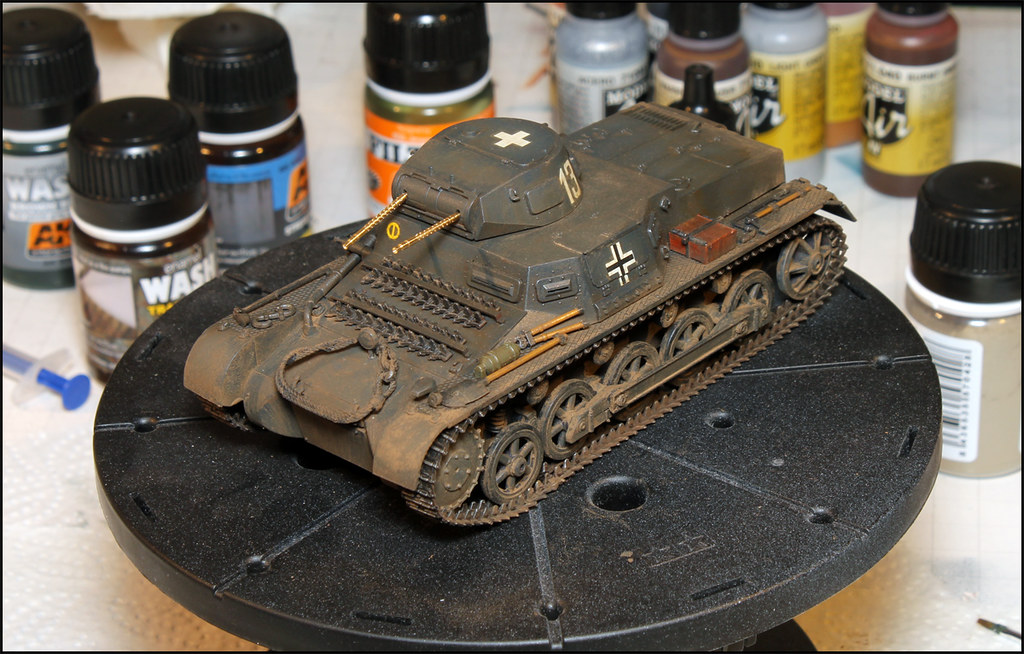
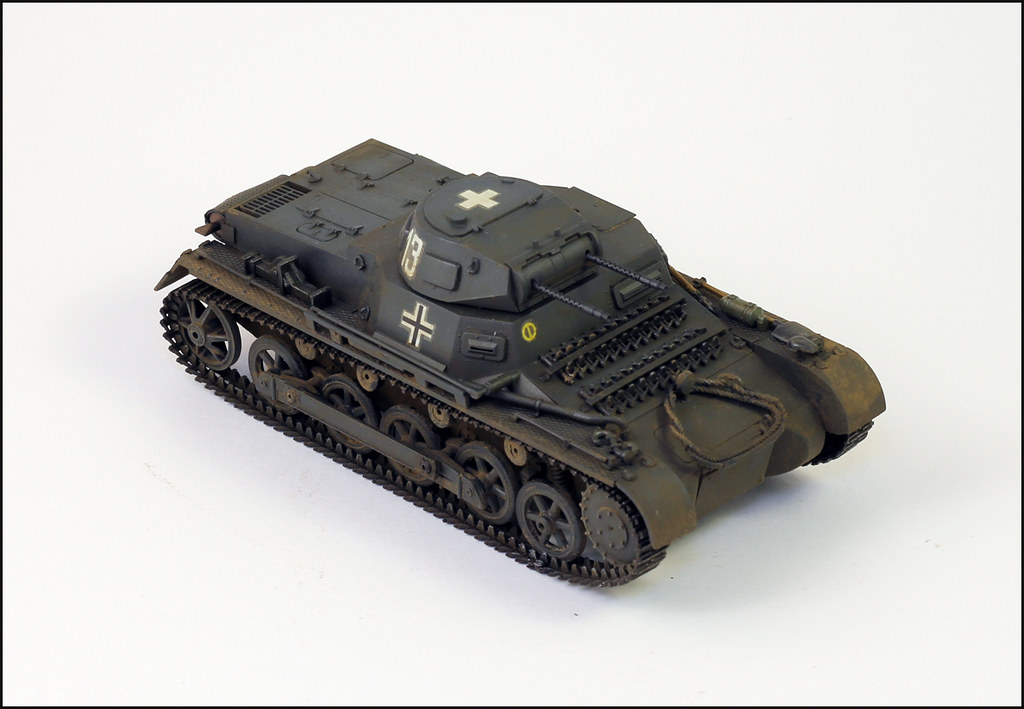
Applied a pin wash and filter yesterday, with good results. Used AK Interactive washes and filter by brush and adjusted the finished with a broad brush damped with AK thinner/white spirit. The filter works great to reduce the shine from the gloss varnish that I use.

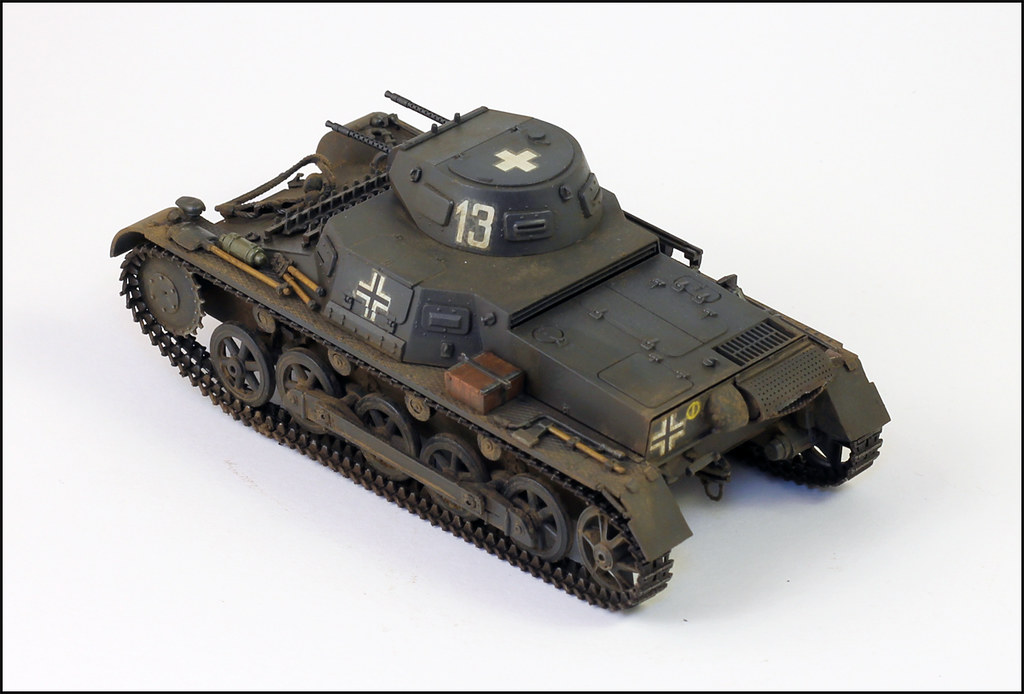
Today was weathering with pigments and washes. Again, AK Interactive is my go-to products for this part of the process. I give the whole hull and turret a light application of AK dry mud wash. I adjust the finish with a brush damped in thinner. For the lower parts of the hull and suspension, I mix in AK European Earth pigments with the wash and apply it liberally where needed.
Typically in the front and the back of the hull where dust would typically accumulate more than the rest of the hull and turret.

The tracks were given a treatment with AK Track Wash before mixing in some AK European Earth pigments to simulate accumulated dust.

Also experienced that the washes would dissolve the glue on some of the parts of the model. The upper hull, some tools and other bits came loose/off while I did the weathering. Did not happen on my previous build, so I'm hoping it's a combination of the relative small size of the tank and a old kit with design faults.

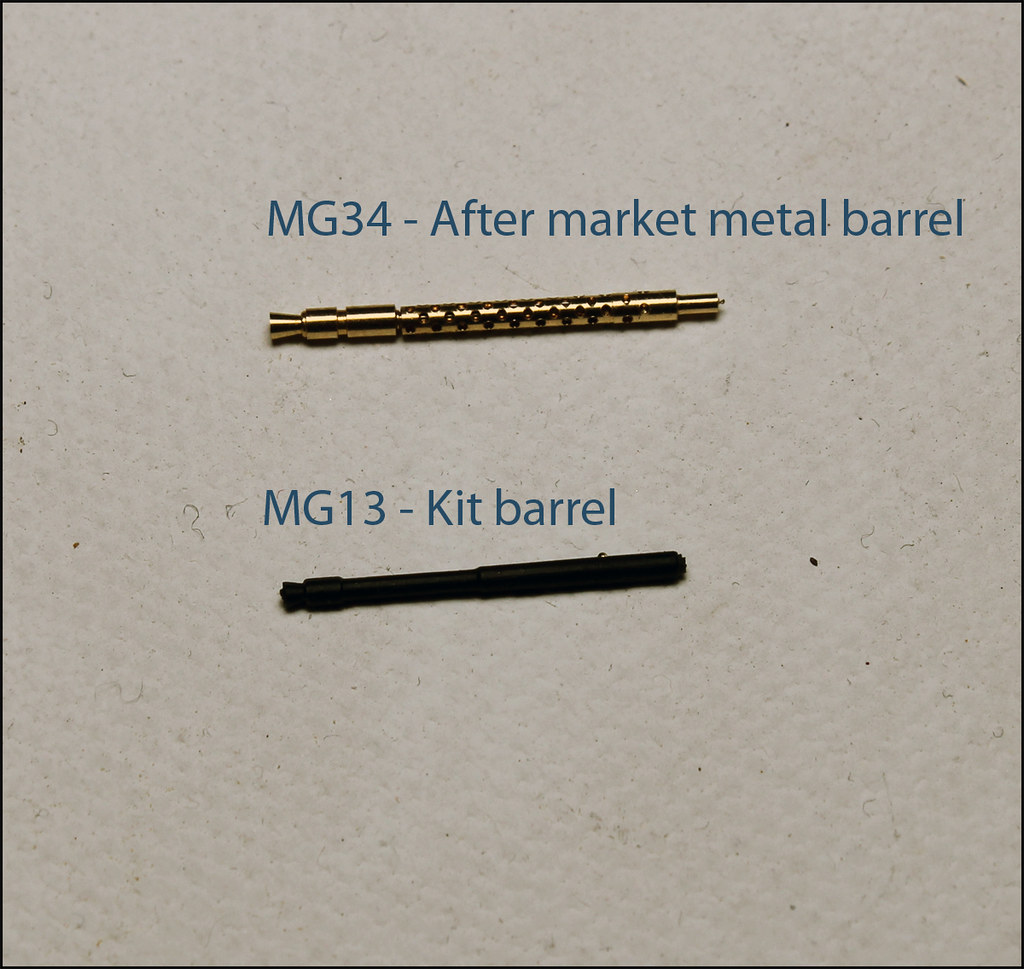
Next up is the barrels and final adjustments to the weathering, which I hope to be finished with tomorrow.
AFVFan
Visit this Community
North Carolina, United States
Joined: May 17, 2012
KitMaker: 1,980 posts
Armorama: 1,571 posts
Posted: Thursday, February 21, 2013 - 05:03 PM UTC
Looking good!
Pytagoras
Visit this Community
Møre og Romsdal, Norway
Joined: December 03, 2012
KitMaker: 300 posts
Armorama: 285 posts
Posted: Friday, February 22, 2013 - 09:54 AM UTC
Almost there!


Adjusted some of the weathering and put on the tracks this evening. I swear I will never use one-piece tracks ever again. So much fiddling with the small taps on a material that bends in every other direction besides where you want it. Ugh.. I'd rather spend the extra time and money on metal tracks.

Test-fitted the metal barrels after drilling some new horizontal holes. That didn't go so well with the right mounting and I probably need to use some putty to fix that.
Painted the barrels after I took the picture and I'm hoping to have the build finished by tomorrow or Sunday.

Please post any feedback and critique on the model and weathering. This is pretty new to me, so I'll appreciate if someone could point out any really bad screw-ups.
retiredyank
Visit this Community
Arkansas, United States
Joined: June 29, 2009
KitMaker: 11,610 posts
Armorama: 7,843 posts
Posted: Friday, February 22, 2013 - 10:00 AM UTC
That's looking great! The weathering is spot on!
Pytagoras
Visit this Community
Møre og Romsdal, Norway
Joined: December 03, 2012
KitMaker: 300 posts
Armorama: 285 posts
Posted: Saturday, February 23, 2013 - 05:45 AM UTC
...and it is done!


And boy am I happy to be finished with it. So many quirks and oddities in this very old kit. Reasonably happy with the final result, although the upper hull detached from the lower hull during weathering. Not quite sure how I'll fix that, but I might use some putty.

The replaced look great compared to the ones in the kit. Not quite historically correct, but close enough for me.

Jack block looks decent now, too. Managed to reduce the overly red tone by weathering it with washes.

Decals were quite thick, and the edges are visible even after 3 layers of decal fix. They were very easy to apply though.
AFVFan
Visit this Community
North Carolina, United States
Joined: May 17, 2012
KitMaker: 1,980 posts
Armorama: 1,571 posts
Posted: Sunday, February 24, 2013 - 04:23 PM UTC
The tank looks pretty good. I'll agree with you on the MG barrels. They may not be quite right, but they look good.

Since you asked, here are a few minor constructive comments. Someone else mentioned earlier that the handles on the wire cutters were bakelite, these should have a more burnt sienna finish. The jack block still looks too red (in fact, that's a good color for the cutter handles), though I guess someone could have actually painted it that color for some reason. The tie down straps on the fire extinguisher should be dark grey to match the body color. It may be just the photos but the return rollers look a lot dustier than the rest of the suspension (though it looks good in the "almost there" pic). The silvering on the decals is bothersome (as you mentioned). For the hull seperation problem, you might be able to use a needle and put some CA glue in the crack to hold it together.

Pretty much just little minor things, but these are points judges will look at if this ever goes to a show. Like I said at the beginning, overall, a pretty nice job.
Pytagoras
Visit this Community
Møre og Romsdal, Norway
Joined: December 03, 2012
KitMaker: 300 posts
Armorama: 285 posts
Posted: Monday, February 25, 2013 - 10:04 AM UTC
Thanks for the feedback Bob. I've reduced the dust on the return rollers so they match the rest of the lower hull.

Tried glueing the top hull using glue on through a needle, but the gap is too narrow. All I do is getting glue on the outer sides and none where it is needed.

Taking notes on the colors for the pioneer tools and clamps on the extinguisher.

Appreciate your comments and critique!
retiredyank
Visit this Community
Arkansas, United States
Joined: June 29, 2009
KitMaker: 11,610 posts
Armorama: 7,843 posts
Posted: Monday, February 25, 2013 - 10:38 AM UTC
Have you tried Tamiya thin cement, for attaching the upper to lower hull half? For thick decals, I run some diluted white glue or clear plastic cement along the edges. I have had great results with this method, on Academy's decals.
AgentG
Visit this Community
Nevada, United States
Joined: December 21, 2008
KitMaker: 1,109 posts
Armorama: 1,095 posts
Posted: Monday, February 25, 2013 - 12:22 PM UTC
Nicely done!

G
Pytagoras
Visit this Community
Møre og Romsdal, Norway
Joined: December 03, 2012
KitMaker: 300 posts
Armorama: 285 posts
Posted: Monday, February 25, 2013 - 08:48 PM UTC

Quoted Text

Have you tried Tamiya thin cement, for attaching the upper to lower hull half? For thick decals, I run some diluted white glue or clear plastic cement along the edges. I have had great results with this method, on Academy's decals.


I can't get glue to where I want it, so I've given up on that. Just have to make sure to use more glue in the future.

The decals were so thick that they didn't curl up when separated from the other layer.
Steel_Spektor
Visit this Community
Queensland, Australia
Joined: December 19, 2012
KitMaker: 74 posts
Armorama: 68 posts
Posted: Tuesday, March 05, 2013 - 08:02 PM UTC
Looks great. The paint and weathering is spot on. Well done.
retiredyank
Visit this Community
Arkansas, United States
Joined: June 29, 2009
KitMaker: 11,610 posts
Armorama: 7,843 posts
Posted: Tuesday, March 05, 2013 - 08:11 PM UTC
For bakelite, Testors brown is a very close match IMHO.
Pytagoras
Visit this Community
Møre og Romsdal, Norway
Joined: December 03, 2012
KitMaker: 300 posts
Armorama: 285 posts
Posted: Tuesday, March 05, 2013 - 09:55 PM UTC
@Luke: Thanks, I'm actually pretty happy with the result.

@Matt: I ordered $100 worth of Vallejo paint on Monday, including a wood colors and various shades of brown. That should cover me in future builds.
 _GOTOTOP