Constructive Feedback
For in-progress or completed build photos. Give and get contructive feedback!
For in-progress or completed build photos. Give and get contructive feedback!
Hosted by Darren Baker, Dave O'Meara
Cyber Hobby 1/35 Stug III ausf E
robw_uk

Joined: June 22, 2010
KitMaker: 1,224 posts
Armorama: 1,207 posts

Posted: Wednesday, June 12, 2013 - 07:39 AM UTC
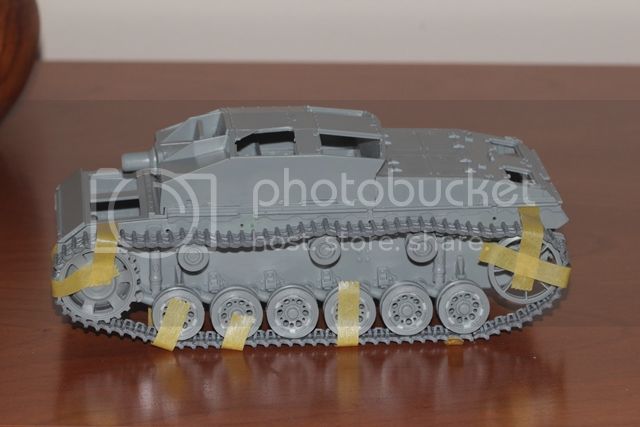
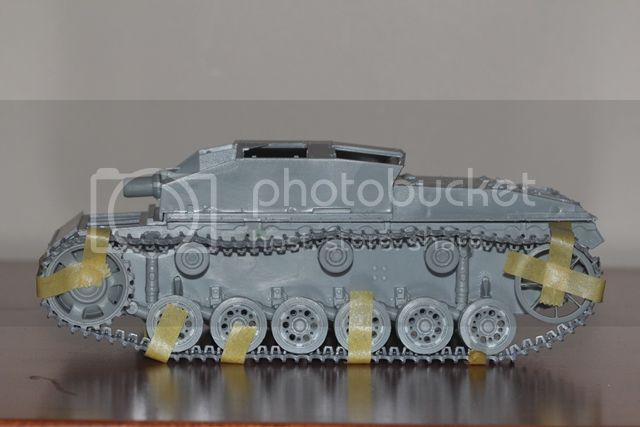
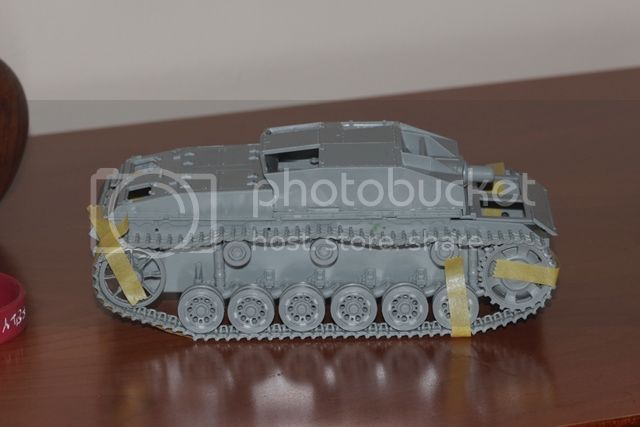
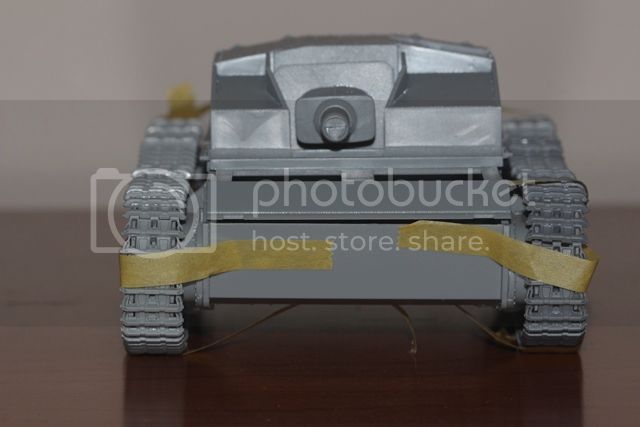
Executive decision, tubes only in 3 spare wheels. All wheels done apart from return rollers, suspension fitted. Photos later...
robw_uk

Joined: June 22, 2010
KitMaker: 1,224 posts
Armorama: 1,207 posts

Posted: Wednesday, June 12, 2013 - 09:20 AM UTC
Quoted Text
Talking about the scale I think you went little bit overboard with those wheels:

And changing E into F will require much more work than just changing the barrel.
Only just seen this, probably explains why the welding is not often modes. And yes my tubes are a little fat. It gives the impression tho. And that last picture gives me thoughts for work on mounting brackets, will try to do that a little more accurately ....
robw_uk

Joined: June 22, 2010
KitMaker: 1,224 posts
Armorama: 1,207 posts

Posted: Thursday, June 13, 2013 - 08:41 PM UTC
not much progress recently. Suspension on (had the last wheel suspension fitted wrong but corrected, rear plate, exhausts and started on upper hull. this will be OOB for now, going to look to do more detail on fenders (damage, tool clasps, wheel mounts etc....
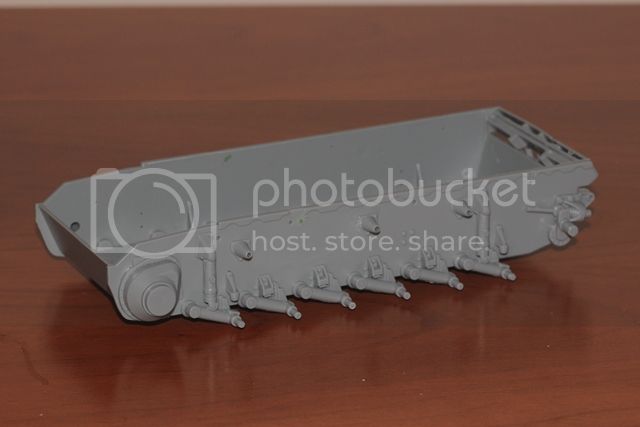
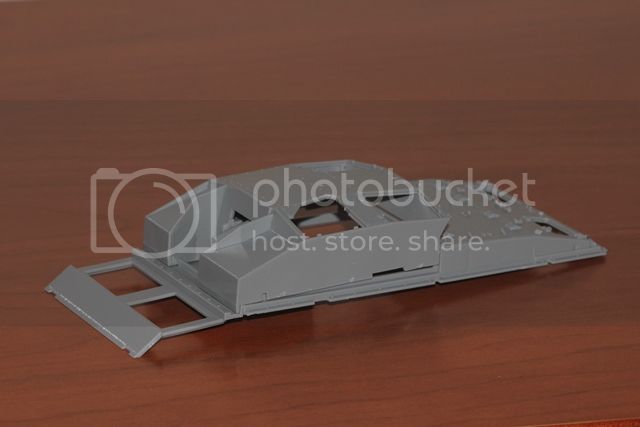
(note - upper hull just placed on - thats why there is a gap ;-))


(note - upper hull just placed on - thats why there is a gap ;-))

PantherF

Joined: June 10, 2005
KitMaker: 6,188 posts
Armorama: 5,960 posts

Posted: Thursday, June 13, 2013 - 11:37 PM UTC
Alright... progress pictures! 
~ Jeff

~ Jeff
robw_uk

Joined: June 22, 2010
KitMaker: 1,224 posts
Armorama: 1,207 posts

Posted: Thursday, June 13, 2013 - 11:56 PM UTC
Quoted Text
Alright... progress pictures!
~ Jeff
yeah I know been slow this week.. one thing I did find out AFTER I had glued them together, some of the wheels done fit on the axles ;-)... think the wheel holes are slightly too small so that is toniughts job (only so I can do the indi-links over the weekend (something I sadly enjoy)
robw_uk

Joined: June 22, 2010
KitMaker: 1,224 posts
Armorama: 1,207 posts

Posted: Sunday, June 16, 2013 - 07:47 PM UTC
robw_uk

Joined: June 22, 2010
KitMaker: 1,224 posts
Armorama: 1,207 posts

Posted: Tuesday, June 18, 2013 - 11:34 PM UTC
Drone04

Joined: July 03, 2010
KitMaker: 51 posts
Armorama: 48 posts

Posted: Wednesday, June 19, 2013 - 12:20 AM UTC
Hi Rob,
It really looks great so far! Just for these Magic Tracks -- at least the ones I've got on my models have two *&%^$ pin marks on the inside of every single track, on the two sides of the guiding horn. Even after painting/weathering the tracks, these remain clearly visible, my bitter experience shows. I hope yours don't have them -- but if they do, I'd really recommend cleaning these up.
It really looks great so far! Just for these Magic Tracks -- at least the ones I've got on my models have two *&%^$ pin marks on the inside of every single track, on the two sides of the guiding horn. Even after painting/weathering the tracks, these remain clearly visible, my bitter experience shows. I hope yours don't have them -- but if they do, I'd really recommend cleaning these up.
robw_uk

Joined: June 22, 2010
KitMaker: 1,224 posts
Armorama: 1,207 posts

Posted: Wednesday, June 19, 2013 - 12:26 AM UTC
Quoted Text
Hi Rob,
It really looks great so far! Just for these Magic Tracks -- at least the ones I've got on my models have two *&%^$ pin marks on the inside of every single track, on the two sides of the guiding horn. Even after painting/weathering the tracks, these remain clearly visible, my bitter experience shows. I hope yours don't have them -- but if they do, I'd really recommend cleaning these up.
they did... and i cleaned them up... someone else pointed out the same... might not've got got all of them tho - will check again before painting and do my best to clean up
panzerbob01

Joined: March 06, 2010
KitMaker: 3,128 posts
Armorama: 2,959 posts

Posted: Wednesday, June 19, 2013 - 02:50 AM UTC
Ivan, Rob;
Those pin-marks on the inside of links can be ugly. But you really don't have to clean all of those links. The ONLY ones which have pin-marks that are visible on the build will be those on the bottom run from below the sprocket to below the idler. And even those I typically only clean the outer pin-mark off - that mark behind the horn (closer to the hull) is unlikely to be seen. IMHO, the magic tracks will in every other way look extremely real and can be sagged to whatever extent a guy wishes.
Take a look at this - an old Tamiya Wirbelwind kit I added some D Magic Tracks to. These are tracks from some D Pz. IV kit - very likely the same set you may be talking of. I actually didn't even do most of those pin marks when I put this together. You CAN see a couple pin-marks between a couple of the road-wheels. My point here being it is really hard to see anything the other side of those horns between those wheels.

As an added detail-note: I graphite the "bearing surfaces" of my tracks to show the polishing that metal-on-rubber road wheels will create. This is done with a standard lead pencil rubbed along the track-run when assembled and painted. It actually "picks-out" and hi-lites those pin-marks! They still were and are not very obvious...!
Cheers!
Bob
Those pin-marks on the inside of links can be ugly. But you really don't have to clean all of those links. The ONLY ones which have pin-marks that are visible on the build will be those on the bottom run from below the sprocket to below the idler. And even those I typically only clean the outer pin-mark off - that mark behind the horn (closer to the hull) is unlikely to be seen. IMHO, the magic tracks will in every other way look extremely real and can be sagged to whatever extent a guy wishes.
Take a look at this - an old Tamiya Wirbelwind kit I added some D Magic Tracks to. These are tracks from some D Pz. IV kit - very likely the same set you may be talking of. I actually didn't even do most of those pin marks when I put this together. You CAN see a couple pin-marks between a couple of the road-wheels. My point here being it is really hard to see anything the other side of those horns between those wheels.

As an added detail-note: I graphite the "bearing surfaces" of my tracks to show the polishing that metal-on-rubber road wheels will create. This is done with a standard lead pencil rubbed along the track-run when assembled and painted. It actually "picks-out" and hi-lites those pin-marks! They still were and are not very obvious...!
Cheers!
Bob

robw_uk

Joined: June 22, 2010
KitMaker: 1,224 posts
Armorama: 1,207 posts

Posted: Wednesday, June 19, 2013 - 08:54 PM UTC
cheers Bob, nice work
last night I attached the first fender. decided it was time to break out the plastic and copper sheets and see just how bad I can ruin this... first fender lost rear "mudflap", had a bit of damage on the sides (dont like that part - just looks like someone attacjked it with a hammer) and the front part replaced with copper and damaged (same - loosk more haphazard but i guess months of abuse may give this). 2nd fender will be missing the full front and be a bit damaged at the rear....


(like I said, not happy with this last one.....)
last night I attached the first fender. decided it was time to break out the plastic and copper sheets and see just how bad I can ruin this... first fender lost rear "mudflap", had a bit of damage on the sides (dont like that part - just looks like someone attacjked it with a hammer) and the front part replaced with copper and damaged (same - loosk more haphazard but i guess months of abuse may give this). 2nd fender will be missing the full front and be a bit damaged at the rear....


(like I said, not happy with this last one.....)
panzerbob01

Joined: March 06, 2010
KitMaker: 3,128 posts
Armorama: 2,959 posts

Posted: Thursday, June 20, 2013 - 02:32 AM UTC
Rob;
Take a look at the StuG III "walk-around" pics posted on:
http://www.primeportal.net/tanks/dmitry_kiyatkin/stug_iii_fk/
There are a couple of nice detail / close-up photos of that fender-edge, and of a couple of mangled and dented-up mud-flaps at the ends. Could be inspirational for "the look"!
The edge piece may be made from a strip of brass, copper, alum of even lead foil. I am thinking of cutting the styrene edge off and replacing it with a strip as seen in these pics. The add-on strip would need to be folded over a little at the top, and actually the fender top plate bolted or welded down onto that strip. (The curved upper lip was actually a ledge onto which the pebble-plate fitted on top.)
The big boon from the pics might be to see how that strip sustained some bends and dents.
Hope this helps!
Bob

robw_uk

Joined: June 22, 2010
KitMaker: 1,224 posts
Armorama: 1,207 posts

Posted: Thursday, June 20, 2013 - 02:46 AM UTC
Quoted Text
Rob;
Take a look at the StuG III "walk-around" pics posted on:
http://www.primeportal.net/tanks/dmitry_kiyatkin/stug_iii_fk/
There are a couple of nice detail / close-up photos of that fender-edge, and of a couple of mangled and dented-up mud-flaps at the ends. Could be inspirational for "the look"!
The edge piece may be made from a strip of brass, copper, alum of even lead foil. I am thinking of cutting the styrene edge off and replacing it with a strip as seen in these pics. The add-on strip would need to be folded over a little at the top, and actually the fender top plate bolted or welded down onto that strip. (The curved upper lip was actually a ledge onto which the pebble-plate fitted on top.)
The big boon from the pics might be to see how that strip sustained some bends and dents.
Hope this helps!
Bob
cheers Bob.. not sure I could take the strip off now with the one fitted - guess I could... may have a look later... there is some serious rust on that one - guess it has a long history ;-)
panzerbob01

Joined: March 06, 2010
KitMaker: 3,128 posts
Armorama: 2,959 posts

Posted: Thursday, June 20, 2013 - 07:56 AM UTC
Rob;
We all LOVE a good challenge now and again!

[quote]... there is some serious rust on that one - guess it has a long history ;-) [quote]
Show me a StuG which doesn't and I'll maybe have to eat it!
IF you have a pretty sharp knife, I think you could probably safely saw or scrape that edge away and be able to attach the strip in its place with the fenders on as they are. Just a thought. Mine is in almost exactly the same state-of-assembly, and now that this topic has emerged, I'm getting eager to have a go at doing this to mine tonight!
Bob
We all LOVE a good challenge now and again!


[quote]... there is some serious rust on that one - guess it has a long history ;-) [quote]
Show me a StuG which doesn't and I'll maybe have to eat it!

IF you have a pretty sharp knife, I think you could probably safely saw or scrape that edge away and be able to attach the strip in its place with the fenders on as they are. Just a thought. Mine is in almost exactly the same state-of-assembly, and now that this topic has emerged, I'm getting eager to have a go at doing this to mine tonight!
Bob

robw_uk

Joined: June 22, 2010
KitMaker: 1,224 posts
Armorama: 1,207 posts

Posted: Friday, June 21, 2013 - 07:39 PM UTC
Posted: Friday, June 21, 2013 - 09:49 PM UTC
Looks good so far Robert. Including a new technique or skill in every new model is the right way to go. Very soon you build the toolbox of these so that you have experience when needed. The welds look good, and will get better. I prefer the putty method (I use magic sculpt) and use a shaped hypodrmic needle to produce the rounded weld pattern. I also go along the welds vertically with a chisel blade and scrape away the welds that stick out too far. this both tidys up the welding and also makes it neater and thinner. See how it looks in the image below


AFVFan

Joined: May 17, 2012
KitMaker: 1,980 posts
Armorama: 1,571 posts

Posted: Sunday, June 23, 2013 - 08:15 AM UTC
Good work so far. Just a quick comment on the pin marks. If you're building this for yourself, don't worry to much, but if you're going to enter this in a show, I suggest cleaning up every one of them. Those judge's flashlights reveal a lot! 

robw_uk

Joined: June 22, 2010
KitMaker: 1,224 posts
Armorama: 1,207 posts

Posted: Sunday, June 23, 2013 - 08:55 AM UTC
Quoted Text
Good work so far. Just a quick comment on the pin marks. If you're building this for yourself, don't worry to much, but if you're going to enter this in a show, I suggest cleaning up every one of them. Those judge's flashlights reveal a lot!
Purely for me... waaaaaaaay off competition stanard
AFVFan

Joined: May 17, 2012
KitMaker: 1,980 posts
Armorama: 1,571 posts

Posted: Sunday, June 23, 2013 - 01:43 PM UTC
Quoted Text
Purely for me... waaaaaaaay off competition stanard
I don't know about that. You have a good start, especially with the extra work you're putting into it.
robw_uk

Joined: June 22, 2010
KitMaker: 1,224 posts
Armorama: 1,207 posts

Posted: Sunday, June 23, 2013 - 08:18 PM UTC
Quoted Text
Quoted TextPurely for me... waaaaaaaay off competition stanard
I don't know about that. You have a good start, especially with the extra work you're putting into it.
well thank you... but I know how to "hide" a multitude of sins in a photo, they wont be hidden when you look at it ;-)with the naked eye ;-)
right, well the main construction is almost complete so thought I would see what load I can add. do like heavily laden StuGs so added a fuel drum, some boxes, tarps (from Value Gear) some extra track links and some fuel/water cans (one will be done a s water probably). Used a coffee stick as the wooden backboard (seen a few photos of StuGs with that setup. May also add some sandbags either side of the gun and perhaps more spare links.


the payload may change somewhat (apart form the tracks draped over the box of course)
robw_uk

Joined: June 22, 2010
KitMaker: 1,224 posts
Armorama: 1,207 posts

Posted: Wednesday, June 26, 2013 - 09:30 PM UTC
more spare track added... last little bits too.... only thing stopping me finishing the build is indecision on leaving the hatches open... just not sure if it looks better open or closed... there is no interior but you cant see in anyway, guess it "might" kick me in to looking yet again at figure painting... keep trying, getting so far and abandoning it....
anyway this is where it sits (ignore the long sticks on the front - they were there just to pin the track in place while they set... will use the kit pins when its all painted up.


anyway this is where it sits (ignore the long sticks on the front - they were there just to pin the track in place while they set... will use the kit pins when its all painted up.


Drone04

Joined: July 03, 2010
KitMaker: 51 posts
Armorama: 48 posts

Posted: Sunday, June 30, 2013 - 10:08 PM UTC
Hi Rob,
Looks really good to me, I also really like the "luggage" on the rear deck!
The only think is, I'm thinking there's perhaps a bit too much spare track length at the front, it will shake around and catch all sorts of garbage.
Ivan
Looks really good to me, I also really like the "luggage" on the rear deck!
The only think is, I'm thinking there's perhaps a bit too much spare track length at the front, it will shake around and catch all sorts of garbage.
Ivan
robw_uk

Joined: June 22, 2010
KitMaker: 1,224 posts
Armorama: 1,207 posts

Posted: Sunday, June 30, 2013 - 10:18 PM UTC
Quoted Text
Hi Rob,
Looks really good to me, I also really like the "luggage" on the rear deck!
The only think is, I'm thinking there's perhaps a bit too much spare track length at the front, it will shake around and catch all sorts of garbage.
Ivan
Ivan,
thats what I was wondering, it seemed to be the length needed to get between the 2 hardpoints. Not 100% certain I will include it in the final model, will see
Drone04

Joined: July 03, 2010
KitMaker: 51 posts
Armorama: 48 posts

Posted: Sunday, June 30, 2013 - 10:21 PM UTC
If you bend the two track links (the one entering the hardpoint and the one next to it) to the maximum angle allowed by the guiding horns, I believe you'll be able to significantly shorten the length.
robw_uk

Joined: June 22, 2010
KitMaker: 1,224 posts
Armorama: 1,207 posts

Posted: Tuesday, July 02, 2013 - 06:39 PM UTC
Wahey, all parts mounted on cocktail sticks, let the painting commence...
 |


