Pennsylvania, United States
Joined: April 10, 2011
KitMaker: 7,941 posts
Armorama: 7,934 posts
Posted: Saturday, September 21, 2013 - 06:58 AM UTC
While my chronic eye problem has returned and I can't paint right now I have started on my next dios' figures.
The scene will cover some of the very hard men from the Ramcke Brigade as they make their epic escape across the desert after El Alamein. The Army Group Afrika had written them off but they appeared at friendly lines weeks later after quite an adventure. Gotta love Paras.
I am still trying to get better at depicting weight. Who amoungst us that has ever toted a heavy load remembers trying to get just that right position for the shoulder straps(always impossible)!! I tried to show this guy adjusting his Y straps. I did the usual undercutting and a lot of work on the hat. The plastic tropical hats never seen to capture the right look so I reshaped the top and really thinned the brim and then bent the brim in the middle as per a lot of ref pix I have.

I carved out hollow spots for the bread bag and then the canteens and added the straps for the bag and tabs,etc for the Y straps and the top rings of the A frame carrier.
The paras raided some Commonwealth supply columns and so he sports a captured flask as well.

Here you see the kit ammo cans on the right and my version on the left with a spare MG42 barrel case. The cans are Gen2 Dragon and all PE is from Alliance

And here it is attached
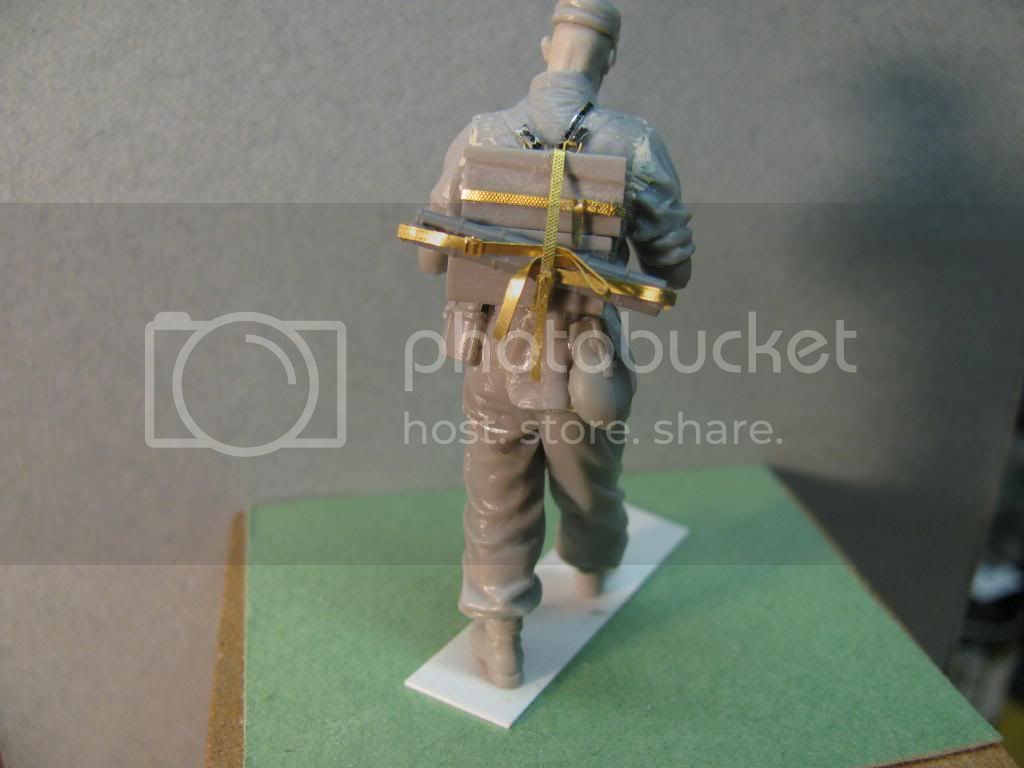
The head is Hornet. I am still messin around with the hat and its' sit on the head so it is just placed on top for now. Questions? Did I miss anything?
J
Colorado, United States
Joined: December 25, 2004
KitMaker: 3,770 posts
Armorama: 2,263 posts
Posted: Saturday, September 21, 2013 - 07:14 AM UTC
Looks very good Jerry. I think you've done an excellent job of putting the straps across the shoulders in an "off kilter" way. Can't really tell from the pictures, but do you feel the straps have "dug into" the shoulders enough? I'm sure these guys would have looked at "padding" those straps some (I know I did on ruck-marches). Maybe you can do that for the next Figgie or two?
Mike

EDIT: Uggh. One foot in front of the other, one foot in front of the other......repeat...pain....
Pennsylvania, United States
Joined: April 10, 2011
KitMaker: 7,941 posts
Armorama: 7,934 posts
Posted: Saturday, September 21, 2013 - 08:20 AM UTC
Quoted Text
Looks very good Jerry. I think you've done an excellent job of putting the straps across the shoulders in an "off kilter" way. Can't really tell from the pictures, but do you feel the straps have "dug into" the shoulders enough? I'm sure these guys would have looked at "padding" those straps some (I know I did on ruck-marches). Maybe you can do that for the next Figgie or two?
Mike 
EDIT: Uggh. One foot in front of the other, one foot in front of the other......repeat...pain....
Ahh yes,lovely memories. During Spec Ops phase one training I was once awake for 3 days and remember the third night bumping off the side of bushes along the trail. At that point I didn't even feel the ruck any more!! LOL
As far as these straps go,I see your point. The Brass tops of the straps will be faired in to the plastic body with putty to join the straps already molded into the shoulders. I forgot to mention that step.
J
West-Vlaaderen, Belgium
Joined: August 22, 2009
KitMaker: 1,491 posts
Armorama: 997 posts
Posted: Saturday, September 21, 2013 - 08:44 AM UTC
first of all Jerry, I hope your eye gets better.
you did an excellent job with the hat and the figure, it looks more realistic.
Also the belts are excellent done.
However , i have just a little problem with his warm pants or trousers for the Africa scene.
Maybe an idea ,to make a cloth to put it behind the hat for protecting the neck against sunburn ?
Greets Kurt
Pennsylvania, United States
Joined: April 10, 2011
KitMaker: 7,941 posts
Armorama: 7,934 posts
Posted: Saturday, September 21, 2013 - 11:03 AM UTC
Quoted Text
first of all Jerry, I hope your eye gets better.
you did an excellent job with the hat and the figure, it looks more realistic.
Also the belts are excellent done.
However , i have just a little problem with his warm pants or trousers for the Africa scene.
Maybe an idea ,to make a cloth to put it behind the hat for protecting the neck against sunburn ?
Greets Kurt
Thanks Kurt,for your kind words. My eye problems are another gift from the Army but hey,I would do it all over again if I had the chance.
Long pants in the desert is not unusual. I was in Iraq and Saudi Arabia and never once wore shorts. Long pants and sleeves rolled down was the uniform along with Kevlar helmet for the whole 8 months I was there. Also lots of pix from Afrika Korp with long pants. I intend to make this guy very tan,copying other pics I have of the Ramcka Bde. The cloth over the back of the neck is actually very hot and not worth it. These guys made their escape mostly at night but obviously I can't show that in my dio.
Thanks for looking in and for the good points,
J

#284
Northern Ireland, United Kingdom
Joined: October 04, 2006
KitMaker: 3,094 posts
Armorama: 2,942 posts
Posted: Saturday, September 21, 2013 - 09:43 PM UTC
Jerry- very sorry to hear about your eye problems returning again- I hope it clears up for you soon. I think this is a great story to tell in a dio and I'm liking this first guy on the bench- the thinning of the brim on the cap is a small job but I think it gives a much better impression of the DAK issue hat. The kit and ammo cans are sitting nicely on his back- slightly further down than a ruck would be which suggests how heavy they are. I think if you have his thumbs hooked under his front Y straps then they will likely be digging in deeper around the shoulder. I like the inclusion of the British water bottle- that helps tell the story. Good luck with this mate, its off to a great start!
On The Bench:
Ethiopian BMP-1 (Trumpeter 1/35)
AMX-13/75 (Takom 1/35)
Pennsylvania, United States
Joined: April 10, 2011
KitMaker: 7,941 posts
Armorama: 7,934 posts
Posted: Sunday, September 22, 2013 - 04:22 AM UTC
Quoted Text
Jerry- very sorry to hear about your eye problems returning again- I hope it clears up for you soon. I think this is a great story to tell in a dio and I'm liking this first guy on the bench- the thinning of the brim on the cap is a small job but I think it gives a much better impression of the DAK issue hat. The kit and ammo cans are sitting nicely on his back- slightly further down than a ruck would be which suggests how heavy they are. I think if you have his thumbs hooked under his front Y straps then they will likely be digging in deeper around the shoulder. I like the inclusion of the British water bottle- that helps tell the story. Good luck with this mate, its off to a great start!
Thanks as always for looking in Karl. It has been a challenging build so far. Don't loose hope on the shoulder straps though as I said earlier in the thread. The brass parts will be faired into the plastic straps still in place over the shoulders and will then make more sense(I hope)
I took a shot of it with primer on last night and should post that soon and it will look clearer,my intent,anyway.
Beautiful weather here today,makes me almost forget my eyes.
J
Wien, Austria
Joined: May 20, 2011
KitMaker: 1,744 posts
Armorama: 1,727 posts
Posted: Sunday, September 22, 2013 - 05:00 AM UTC
Your eye (sorry, no pun intended) for detail is legendary m8!
I like your "heavy load straps" a bunch as you know. You are one of the very few to take this into account! Cheers to that!!!
The cap looks a lot better indeed!!
The brim looks folded.....because it actually is. Troops would store them in a pocket, after folding them in 2.
I know because we had (partly have) the problem in the austrian army as well.
The folded look was highly unpopular with the big shots, but nothing would prevent the rank and file from carrying the caps in a pocket or under a shoulder strap.
Wish you a prompt recovery bro!
R.
un pour tous et tous pour un!
Massachusetts, United States
Joined: February 08, 2012
KitMaker: 1,271 posts
Armorama: 1,253 posts
Posted: Sunday, September 22, 2013 - 09:15 AM UTC
I was hoping to see you build some paras. Not much to say that hasn't been said already. Awesome stuff, can't wait for more

-Conor
I'm doin' stuff. Lotta stuff.
South Carolina, United States
Joined: May 07, 2010
KitMaker: 2,238 posts
Armorama: 2,158 posts
Posted: Sunday, September 22, 2013 - 10:55 AM UTC
Oh yea, he has that "pack mule" look - head down, trying to slide his hands under his shoulder straps looking for a bit of relief... wondering when Der Spiess is gonna call "Pause machen!"
I had the same headgear problem with the helmet on the gunner for my Bren Gun Carrier. I had to snap it off today and grind it out some more to fit down on his head better.
I agree the hat on this guy would look a little more natural down closer to the tops of his ears.
Did you intend to leave the gas mask canister strap across his chest? Just asking since you've fitted the rest of his kit I wasn't sure if you were going to add that to poor guy's load too. ("Genug ist genug!")
I don't know how you do these guys so fast. You have a veritable army of figgies you're working on...
Mike Roof
AMPS #1632
Chapter Contact
AMPS Central SC
Visit us at http://www.ampscentralsouthcarolina.org
Pennsylvania, United States
Joined: April 10, 2011
KitMaker: 7,941 posts
Armorama: 7,934 posts
Posted: Monday, September 23, 2013 - 01:58 AM UTC
Quoted Text
Your eye (sorry, no pun intended) for detail is legendary m8!
I like your "heavy load straps" a bunch as you know. You are one of the very few to take this into account! Cheers to that!!!
The cap looks a lot better indeed!!
The brim looks folded.....because it actually is. Troops would store them in a pocket, after folding them in 2.
I know because we had (partly have) the problem in the austrian army as well.
The folded look was highly unpopular with the big shots, but nothing would prevent the rank and file from carrying the caps in a pocket or under a shoulder strap.
Wish you a prompt recovery bro!
R.
Thanks for the kind words buddy.
I remembered the hat thing from when I was a leg and used to fold the patrol cap to stick in my cargo pocket. Of course there is a lot of pix of the Afrika Korps guys with this feature as well. Thinning the brim was pretty easy. It was reshaping the rest of the hat that tried my patience. All of the plastic mutzes that I have seen are too"squared off" on top and don't have "the look".
A good rule is to follow the box art if you trust the artist.
J
Pennsylvania, United States
Joined: April 10, 2011
KitMaker: 7,941 posts
Armorama: 7,934 posts
Posted: Monday, September 23, 2013 - 01:59 AM UTC
Quoted Text
I was hoping to see you build some paras. Not much to say that hasn't been said already. Awesome stuff, can't wait for more 
-Conor
Thanks little bro,alway nice to see you checkin in,
J
Pennsylvania, United States
Joined: April 10, 2011
KitMaker: 7,941 posts
Armorama: 7,934 posts
Posted: Monday, September 23, 2013 - 02:06 AM UTC
Quoted Text
Oh yea, he has that "pack mule" look - head down, trying to slide his hands under his shoulder straps looking for a bit of relief... wondering when Der Spiess is gonna call "Pause machen!"
I had the same headgear problem with the helmet on the gunner for my Bren Gun Carrier. I had to snap it off today and grind it out some more to fit down on his head better.
I agree the hat on this guy would look a little more natural down closer to the tops of his ears.
Did you intend to leave the gas mask canister strap across his chest? Just asking since you've fitted the rest of his kit I wasn't sure if you were going to add that to poor guy's load too. ("Genug ist genug!")
I don't know how you do these guys so fast. You have a veritable army of figgies you're working on...
No rest for these guys!! All they took with them were weapons,ammo and water. Even Ramcka showed up at friendly lines looking thin!.
The hat is just placed on there right now so I can paint the face later. I learned the hard way about painting a decent face with the hat on! LOL
The strap across the front is supposed to be for the British water bottle he picked up from the supply convoy they luckily ran into on the egress(true story)
A lot of figs goin' I will admit. But with my back problem recurring again I can't move much and now the eye thing...OYE!!
Not complaining,just stating facts. It leaves me a lot of time to sit at the bench. I also get to look at your cool Bren Carrier build more as well!
Thanks for looking in Smadg.
J
Pennsylvania, United States
Joined: April 10, 2011
KitMaker: 7,941 posts
Armorama: 7,934 posts
Posted: Monday, September 23, 2013 - 02:07 AM UTC
Quoted Text
I was hoping to see you build some paras. Not much to say that hasn't been said already. Awesome stuff, can't wait for more 
-Conor
Thanks little bro,alway nice to see you checkin in,
J
Pennsylvania, United States
Joined: April 10, 2011
KitMaker: 7,941 posts
Armorama: 7,934 posts
Posted: Monday, September 23, 2013 - 05:16 AM UTC
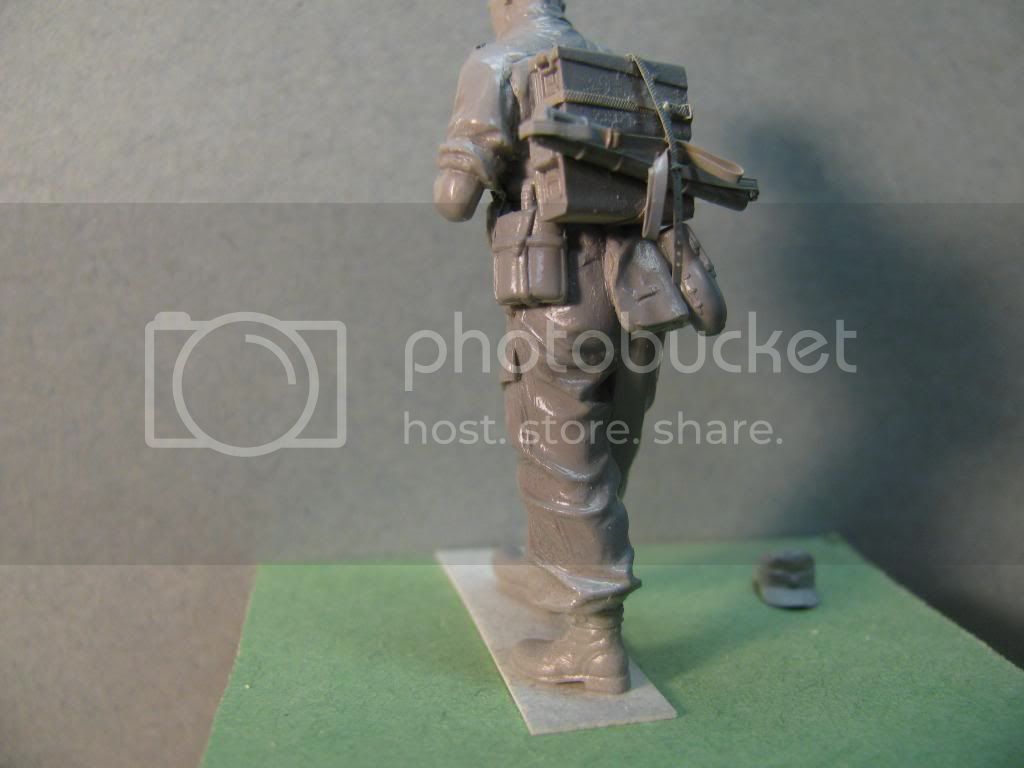
Shot some primer on the first guy. Maybe it makes more sense now? I see from this pic the area under the pistol holster needs attention.

Back view
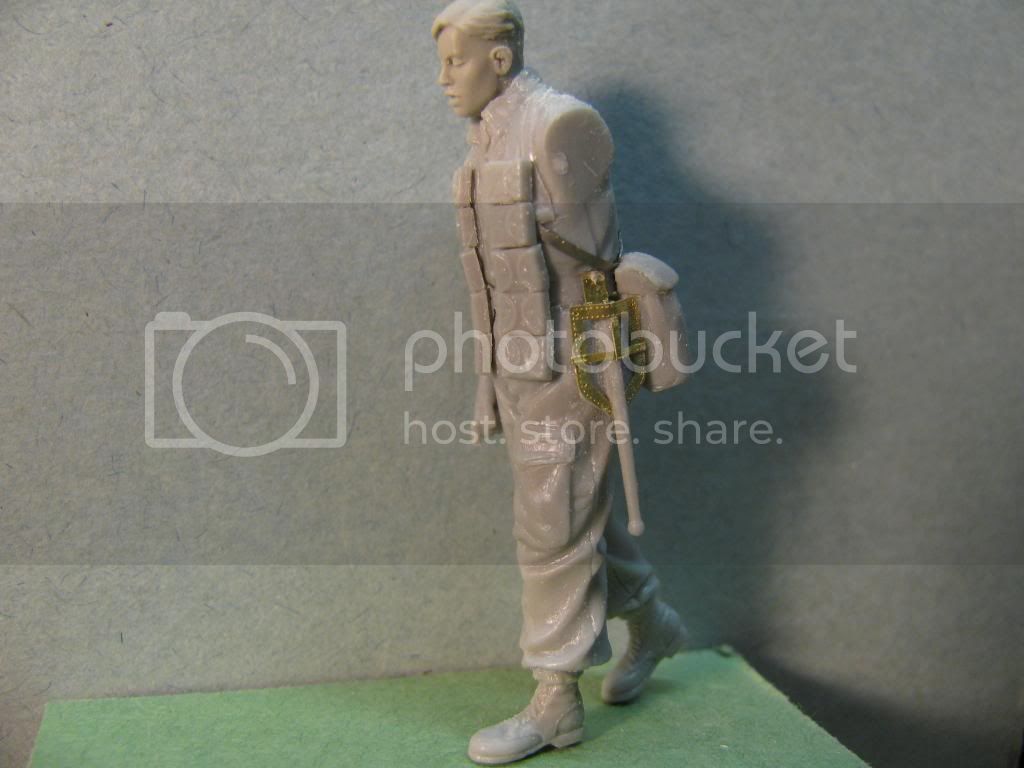
Next guy up. Young guy,asleep at the wheel. You get so used to walking that you can actually doze off for a bit. Very proud of myself for wrestling the e tool carrier together from Alliance.
South Carolina, United States
Joined: May 07, 2010
KitMaker: 2,238 posts
Armorama: 2,158 posts
Posted: Monday, September 23, 2013 - 10:13 AM UTC
Oh yea, I understand the water bottle strap now. I missed picking up on how the strap you added from foil merged into the strap molded on the front. (Shoulda known...)
Better keep an eye on that second guy, though, or he'll be trying to stick his klein Geld into the nearest cactus thinking he's buying an ice-cold Coke! That or he's a break-in-contact waiting to happen... You know it, too: he'll stop for the guy in front to step over a wait-a-minute vine (do they have those in the desert?) and fall asleep standing up. Before you know it, the front half will be a thousand meters farther on before they realize the back half ain't there!
Lookin' good, old friend!
Mike Roof
AMPS #1632
Chapter Contact
AMPS Central SC
Visit us at http://www.ampscentralsouthcarolina.org
Pennsylvania, United States
Joined: April 10, 2011
KitMaker: 7,941 posts
Armorama: 7,934 posts
Posted: Tuesday, September 24, 2013 - 02:19 AM UTC
Quoted Text
Oh yea, I understand the water bottle strap now. I missed picking up on how the strap you added from foil merged into the strap molded on the front. (Shoulda known...)
Better keep an eye on that second guy, though, or he'll be trying to stick his klein Geld into the nearest cactus thinking he's buying an ice-cold Coke! That or he's a break-in-contact waiting to happen... You know it, too: he'll stop for the guy in front to step over a wait-a-minute vine (do they have those in the desert?) and fall asleep standing up. Before you know it, the front half will be a thousand meters farther on before they realize the back half ain't there!
Lookin' good, old friend!
Ah yes,the good ol' break in contact. The job of the PL and the APL is never easy and never ends. Nothing like squeezing by the line of brain dead guys along the thin path in the bush to try to get the whole cluster f--- moving again and all on one page.
I see this guy and I am thinking these para ammo pouches from Dragon look was too big. Or is it just me? Doesn't even match the box art or pics I have. I may have to pry them off and use Tamiya or Miniart versions.
J
Massachusetts, United States
Joined: February 08, 2012
KitMaker: 1,271 posts
Armorama: 1,253 posts
Posted: Tuesday, September 24, 2013 - 03:08 AM UTC
Looks good! The ammo pouches might be a bit on the large side, but if you've got any newer FJ kits the pouches are likely to match up better. I wouldn't worry about it though.
I remember reading about these guys in Hans Von Lucks memoirs, when they just sort of appeared out of the desert. Iron men for sure.
-Conor
I'm doin' stuff. Lotta stuff.
Wien, Austria
Joined: May 20, 2011
KitMaker: 1,744 posts
Armorama: 1,727 posts
Posted: Tuesday, September 24, 2013 - 03:45 AM UTC
Jerry, you are right about the ammo pouches. They are too big and I would take old Tamiya ones (if you still have some).
Marching and dozing..easy enough, if you have the right partner!

We managed quite well!
Eager to see more buddy! How's your eye condition??
Best wishes!
Cheers
Romain
P.S.: oh yes, managed to escape from hospital today!


un pour tous et tous pour un!
Pennsylvania, United States
Joined: April 10, 2011
KitMaker: 7,941 posts
Armorama: 7,934 posts
Posted: Tuesday, September 24, 2013 - 05:34 AM UTC
Conor,
Yes,I read about Von Lucks' experience as well. Great stuff.
Here you see I used the newer Miniart pouches and they scale out much better to me than the DML ones(which were the brand new ones btw)
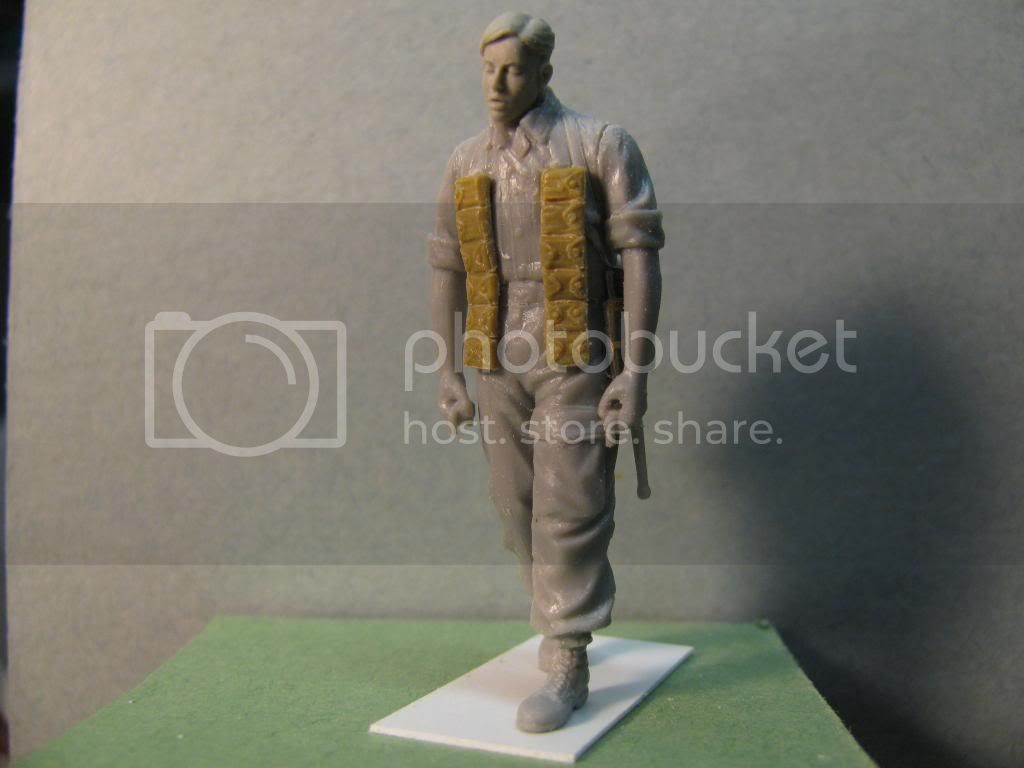
I also moved the arms closer to the body. Dragon tends to have the arms too far out from the side and there is no way a person would carry heavy crap for long in that position IMHO
Here is the next guy before I make any alterations. He is from a pretty old Dragon set and you can see how soft the detail is. I chose the head(warriers) because of the facial expression
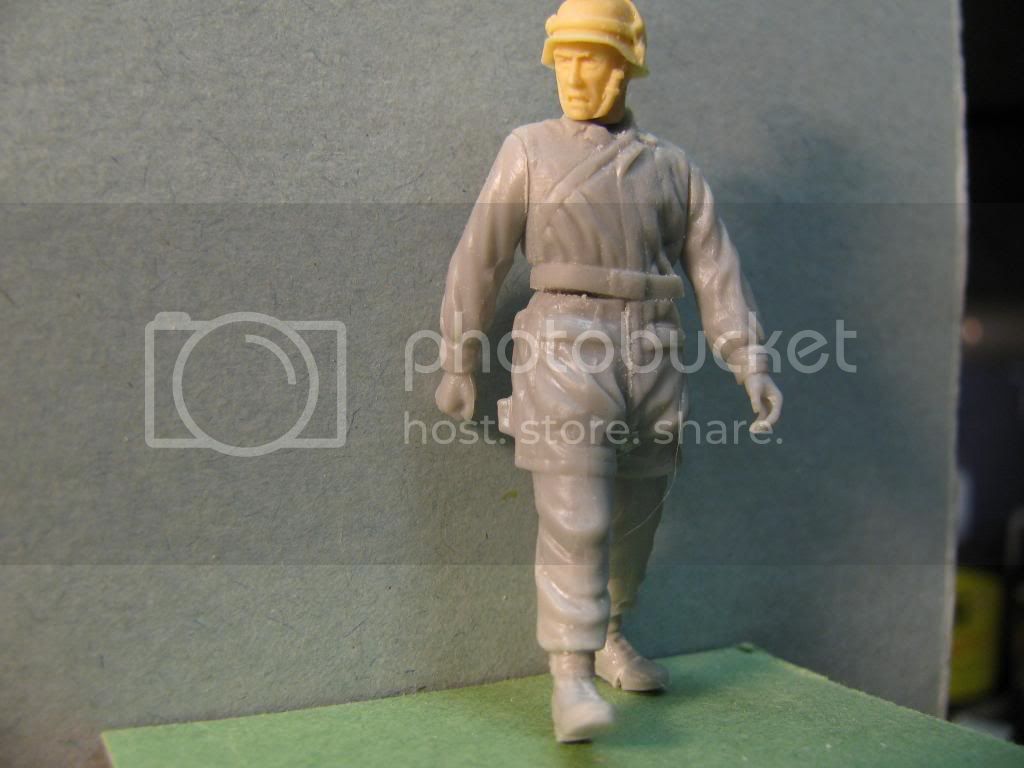
Romain,thanks for asking. My eye is getting better for sure. Don't want to push my luck and go right back to misery so a few more days off.
I hope your Krankenhaus stay was for nothing too serious?
Meine herzlichen wunschen fur seine gutes gesund,
J
Pennsylvania, United States
Joined: April 10, 2011
KitMaker: 7,941 posts
Armorama: 7,934 posts
Posted: Thursday, September 26, 2013 - 06:37 AM UTC
Here is the number two gunner all ready for paint. The hat is just tacked on for now.
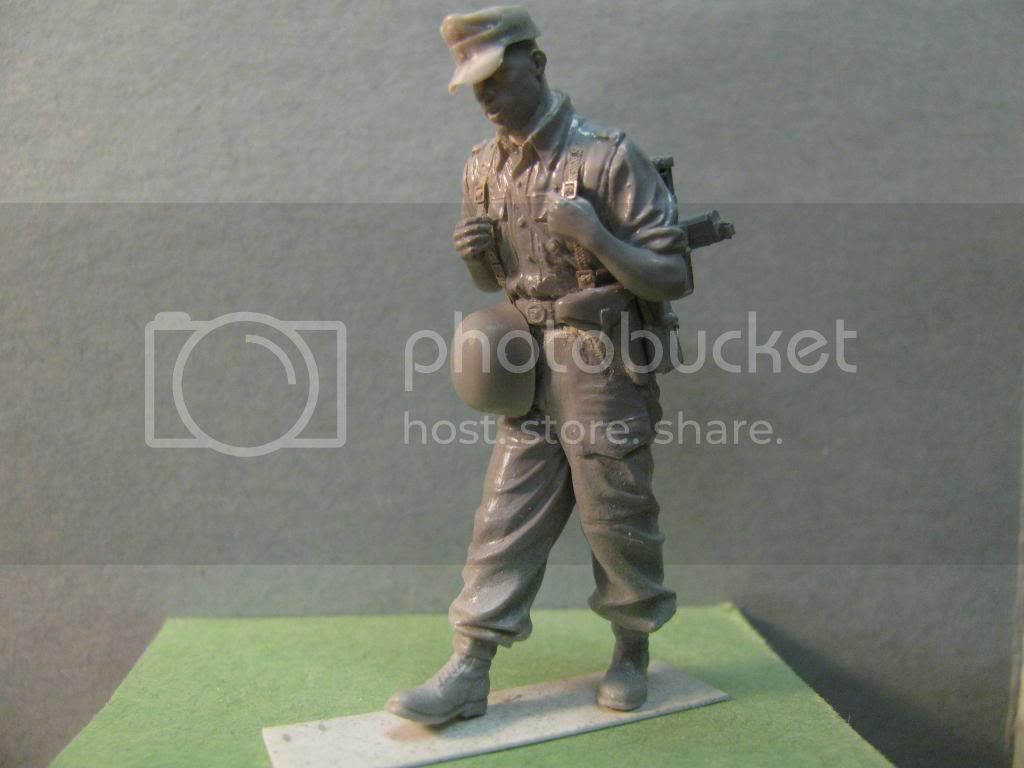
Got a bit done on the number 3 gunner as well. He received his flat head in prep for the cap and one ammo box. His other hand has the drum magazine carrier. I have to make a choice. The Gen2 Dragon carrier is on the right in grey and the wonderfully detailed K59 kit is in resin and PE. It has more detail and parts than a whole tank kit from the 60s.

Did the initial cleanup and undercutting on the number one gunner and took a lot of care,carving and adjusting to get the MG42 "sitting" just right. I have lifted these weapons and they are heavy so of course he is...panting.
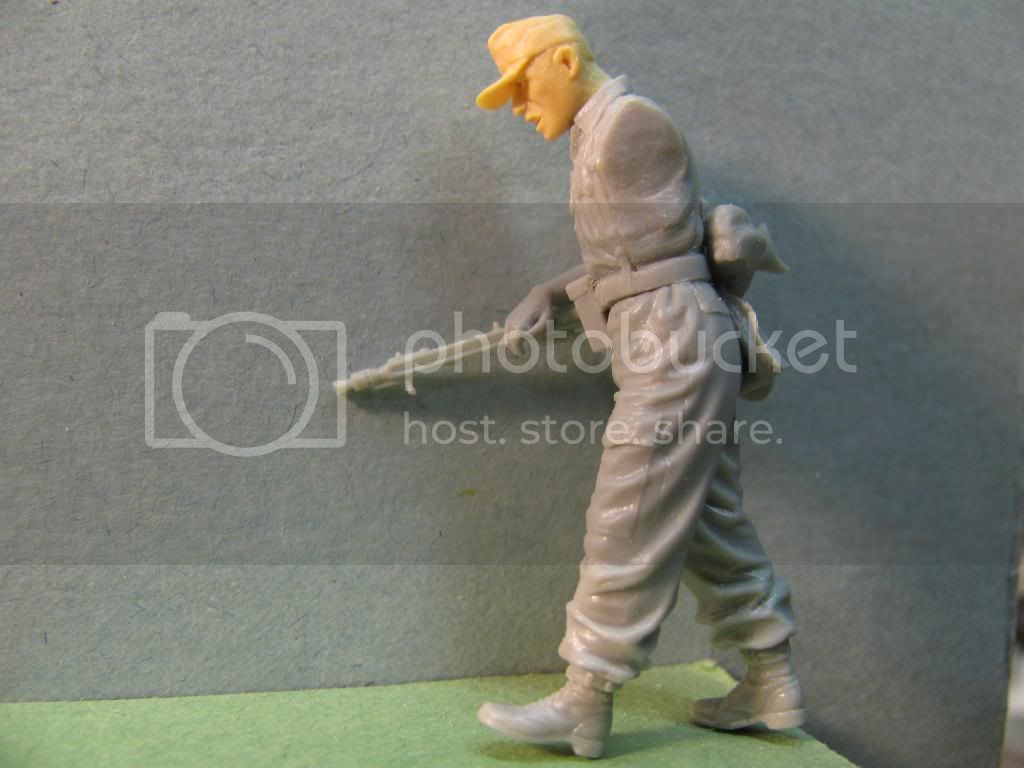
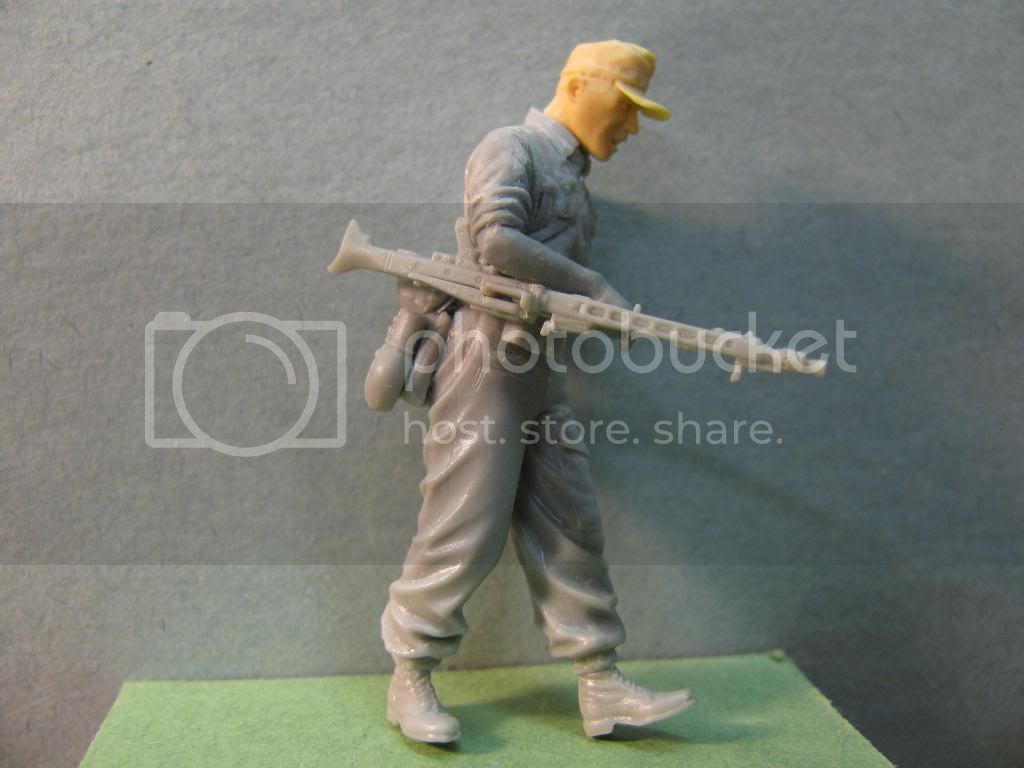
Warriers resin head that I had to convert the hat from the bergemutze to the afrika version.
Wish I could paint because it is the thing I need to improve on the most and so could use all of the practice I can get. Patience patience.
J
Oost-Vlaanderen, Belgium
Joined: May 14, 2006
KitMaker: 3,829 posts
Armorama: 881 posts
Posted: Thursday, September 26, 2013 - 08:36 AM UTC
love the figs,
hope your eyes improve for painting!

Rest in peace my dearest of friends, Mike I 'll miss ya a lot
fastest way to get killed,
messing with the man with a gun.
modelling is life, anything before or after is waiting...
Pennsylvania, United States
Joined: April 10, 2011
KitMaker: 7,941 posts
Armorama: 7,934 posts
Posted: Friday, September 27, 2013 - 01:39 AM UTC
Quoted Text
love the figs,
hope your eyes improve for painting! 
Thanks "Pit"
It is a bit better today. I always feel better in the morning so we'll see what happens as the day goes by.
J
Wien, Austria
Joined: May 20, 2011
KitMaker: 1,744 posts
Armorama: 1,727 posts
Posted: Friday, September 27, 2013 - 03:33 AM UTC
Quoted Text
Conor,
Yes,I read about Von Lucks' experience as well. Great stuff.
Here you see I used the newer Miniart pouches and they scale out much better to me than the DML ones(which were the brand new ones btw)

I also moved the arms closer to the body. Dragon tends to have the arms too far out from the side and there is no way a person would carry heavy crap for long in that position IMHO
Here is the next guy before I make any alterations. He is from a pretty old Dragon set and you can see how soft the detail is. I chose the head(warriers) because of the facial expression

Romain,thanks for asking. My eye is getting better for sure. Don't want to push my luck and go right back to misery so a few more days off.
I hope your Krankenhaus stay was for nothing too serious?
Meine herzlichen wunschen fur seine gutes gesund,
J
Thanks a lot my friend! It was something, but now I'm OK!
How's your eyesight coming along?? I'm worried!
One question regarding the figs....the 3rd one sports a helmet that I cannot fully identify! Looks more like a US Kevlar to me than anything else!


Apart from that...super!! The second cap looks great too.
The MG42 is d..n heavy indeed. We are still using them here in the austrian army (calibre adapted of course).
Get well soon bro!!
Cheers
Romain
un pour tous et tous pour un!
South Carolina, United States
Joined: May 07, 2010
KitMaker: 2,238 posts
Armorama: 2,158 posts
Posted: Friday, September 27, 2013 - 04:14 AM UTC
Jerry,
That guy with the MG42 looks like he's really suckin' and gasping for air. Great choice with the head selection and posing. The re-positioning of the arms on the ammo bearer was well done, too. He has that saggin' shoulders and tired arms look now that was missing.
Funny you don't even see how those little things can make such a big difference until after they're done.
This little vignette is coming along very nicely!
Hope your eyes clear up soon so that you can get back to painting. I'm looking forward to some up-dates on the Battle of the Bulge .50 cal group.
Mike Roof
AMPS #1632
Chapter Contact
AMPS Central SC
Visit us at http://www.ampscentralsouthcarolina.org


