Lisboa, Portugal
Joined: March 04, 2008
KitMaker: 5,386 posts
Armorama: 4,727 posts
Posted: Thursday, October 03, 2013 - 06:08 AM UTC
Hi guys,
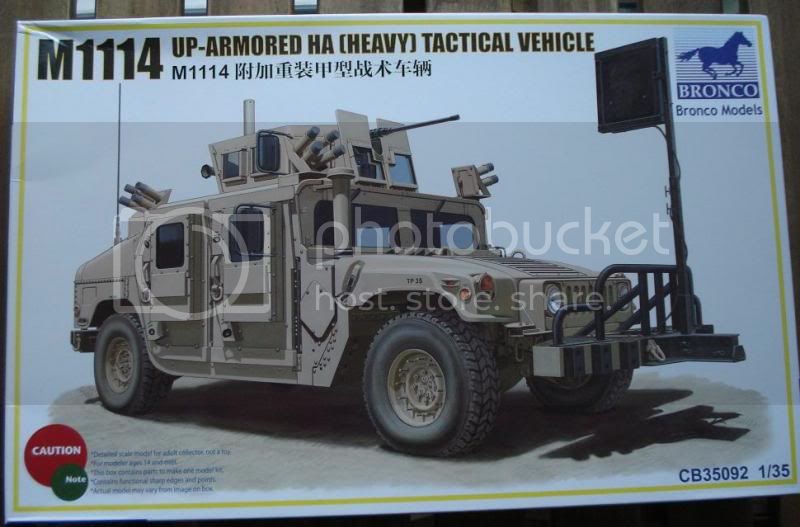
I will try to do this small project for the Armoured Car Campaign.
But for those that aren't in "Campaign Mood", I will do a Build Log as detailed as possible.
Box
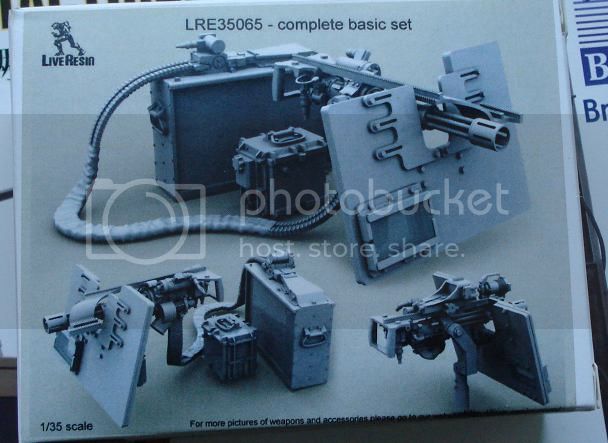
Extras

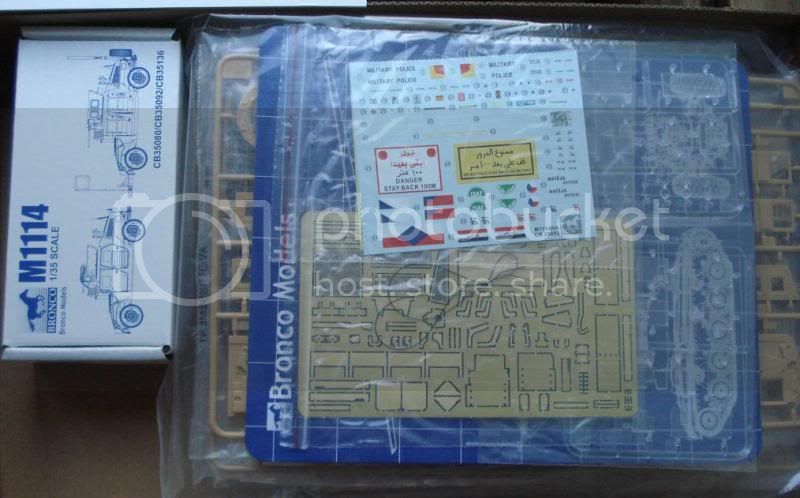
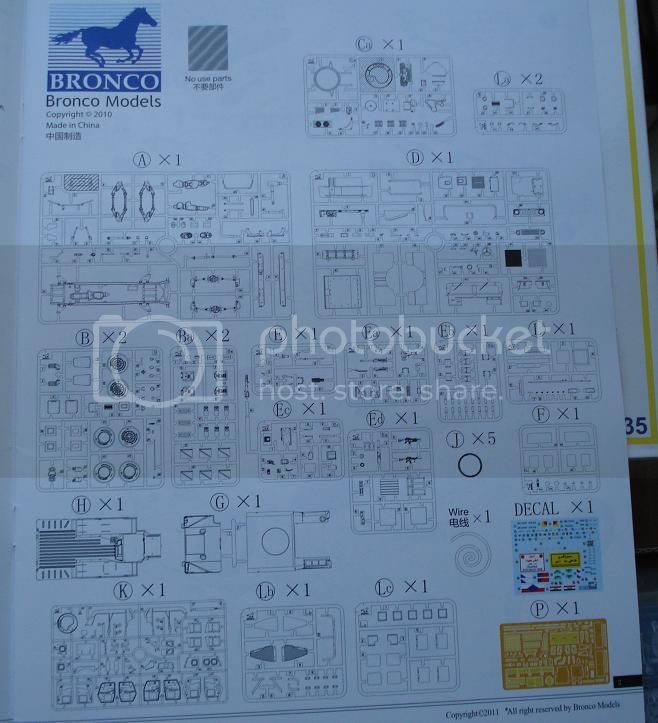
Parts
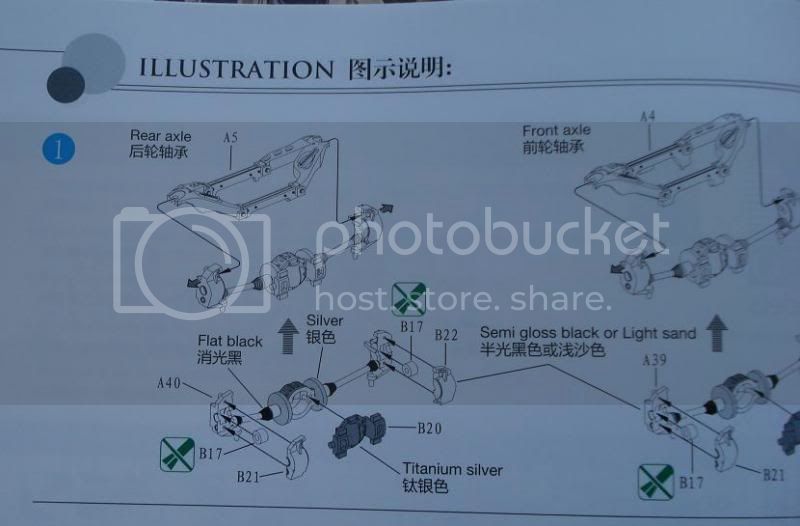
Step 1:
Thanks for watching !!

Active Builds: 0
Active Campaigns: 0
Sao Paulo, Brazil
Joined: January 24, 2012
KitMaker: 1,054 posts
Armorama: 1,050 posts
Posted: Thursday, October 03, 2013 - 07:08 AM UTC
I will follow, for sure!
Good luck!
Marco
Lisboa, Portugal
Joined: March 04, 2008
KitMaker: 5,386 posts
Armorama: 4,727 posts
Posted: Thursday, October 03, 2013 - 08:20 AM UTC
Thanks Marco !!

Active Builds: 0
Active Campaigns: 0
Kildare, Ireland
Joined: November 21, 2007
KitMaker: 3,212 posts
Armorama: 2,807 posts
Posted: Thursday, October 03, 2013 - 08:49 PM UTC
Hi John, nice to see you're getting to build something at last! Nice choice too....will look savage with the extras.
Wojewodztwo Slaskie, Poland
Joined: February 18, 2007
KitMaker: 978 posts
Armorama: 977 posts
Posted: Thursday, October 03, 2013 - 09:44 PM UTC
I'll be a regular visitor here
Nice set of aftermarkets

What is this blue pad in the Bronco's box? This one under decals and PE fret.
Overijssel, Netherlands
Joined: September 30, 2005
KitMaker: 1,080 posts
Armorama: 1,064 posts
Posted: Thursday, October 03, 2013 - 10:19 PM UTC
maby a cuting board from bronco ?????????????????
Virginia, United States
Joined: April 03, 2006
KitMaker: 1,158 posts
Armorama: 950 posts
Posted: Thursday, October 03, 2013 - 11:06 PM UTC
Quoted Text
I'll be a regular visitor here Nice set of aftermarkets
What is this blue pad in the Bronco's box? This one under decals and PE fret.
I believe that is just a piece of cardboard the PE and decal bags are taped to...
Lisboa, Portugal
Joined: March 04, 2008
KitMaker: 5,386 posts
Armorama: 4,727 posts
Posted: Saturday, October 05, 2013 - 04:46 AM UTC
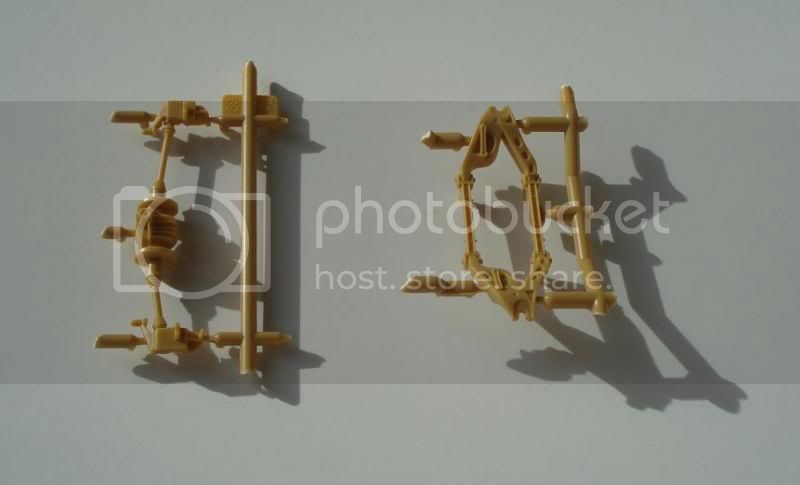
Small update, Rear axle done. Working no front axle.
Rear :
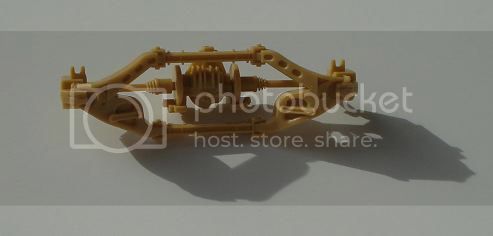
::The detailing is good, plastic is soft and easy to work::
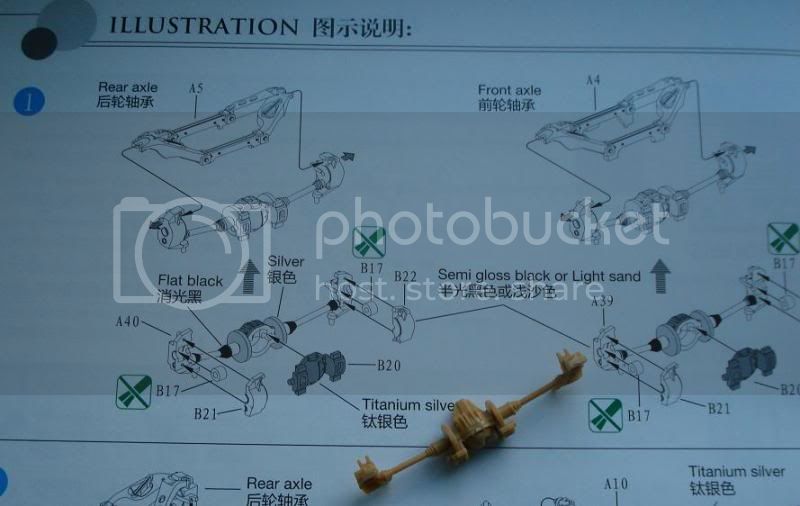
Front axle
@Sean
Thanks for the support

I hoping to get that effect, anything with a MiniGun & a Mine Roller looks savage

@Kuba
Thanks for checking Kuba, your Hummvee Collection inspired me !
@Henk
I believe Thomas is right, but I haven't opened that bag, I'm afraid I might lose some parts in the process..
Active Builds: 0
Active Campaigns: 0
Lisboa, Portugal
Joined: March 04, 2008
KitMaker: 5,386 posts
Armorama: 4,727 posts
Posted: Sunday, October 06, 2013 - 07:02 AM UTC
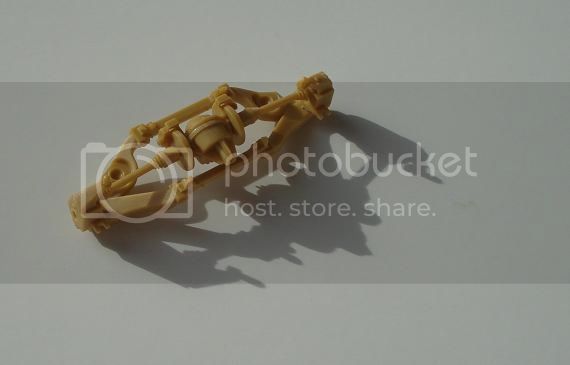
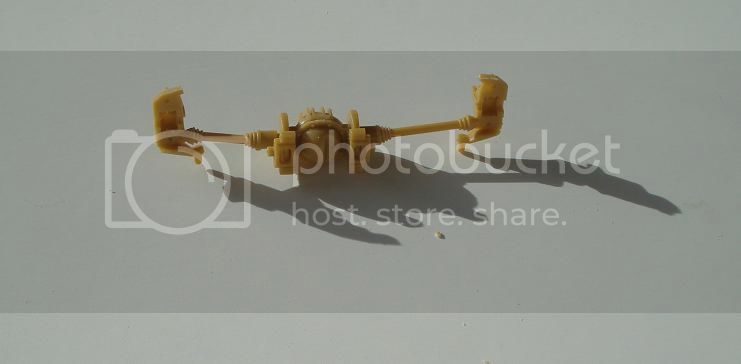
Here's the front axle finished.

Active Builds: 0
Active Campaigns: 0
Lisboa, Portugal
Joined: March 04, 2008
KitMaker: 5,386 posts
Armorama: 4,727 posts
Posted: Saturday, October 12, 2013 - 07:09 AM UTC
Update:


I think I'll start painting some of the details during these steps, the acess to those detail painting will be harder.
The front axle wasn't perfect but it worked out.
Active Builds: 0
Active Campaigns: 0
Lisboa, Portugal
Joined: March 04, 2008
KitMaker: 5,386 posts
Armorama: 4,727 posts
Posted: Sunday, October 13, 2013 - 12:33 PM UTC
Today's work


More to come ..
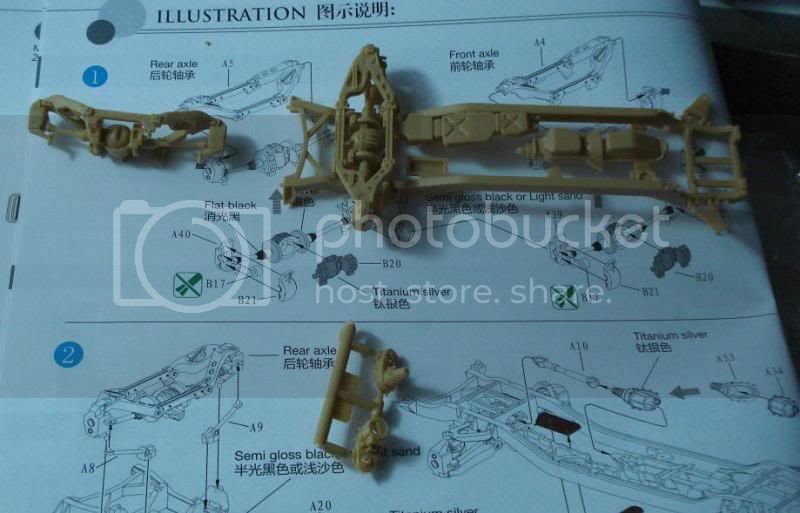
Step 5

Those bolts on the shock absorbers ..

those small parts will fly off the tweezers for sure..
A small question, the instructions have some base colours for the lower chassis, semi-gloss black or light sand, that depends on the vehicle ? war theatre ?
Active Builds: 0
Active Campaigns: 0

#065
Missouri, United States
Joined: March 30, 2002
KitMaker: 2,605 posts
Armorama: 1,814 posts
Posted: Sunday, October 13, 2013 - 01:29 PM UTC
Theater of operation doesn't dictate chassis color. I have not been able to determine what dictates chassis color. I've seen all sorts of combinations. You can pick one and you will be fine. I've seen sand vehicles with sand chassis and black chassis. On a majority of vehicles I have looked at, the springs have been black.
IPMS # 41155
Current Campaigns:
Lisboa, Portugal
Joined: March 04, 2008
KitMaker: 5,386 posts
Armorama: 4,727 posts
Posted: Monday, October 14, 2013 - 01:45 AM UTC
Quoted Text
Theater of operation doesn't dictate chassis color. I have not been able to determine what dictates chassis color. I've seen all sorts of combinations. You can pick one and you will be fine. I've seen sand vehicles with sand chassis and black chassis. On a majority of vehicles I have looked at, the springs have been black.
Thanks Brent !
ok, I might go for the semi-gloss black .
Active Builds: 0
Active Campaigns: 0
California, United States
Joined: May 14, 2008
KitMaker: 534 posts
Armorama: 344 posts
Posted: Monday, October 14, 2013 - 05:37 PM UTC
Wow, another build log on 1114. I'll be following this one as well. I've got the same kit and just saw few Live resin stuff to see the detail. I'll be getting some of their stuff soon. Very nice work so far. Keep it going.
Mike
Lisboa, Portugal
Joined: March 04, 2008
KitMaker: 5,386 posts
Armorama: 4,727 posts
Posted: Saturday, October 19, 2013 - 05:48 AM UTC
Quoted Text
Wow, another build log on 1114. I'll be following this one as well. I've got the same kit and just saw few Live resin stuff to see the detail. I'll be getting some of their stuff soon. Very nice work so far. Keep it going.
Mike
Thanks for watching & following Mike !!
Today's work,
Some more details added.
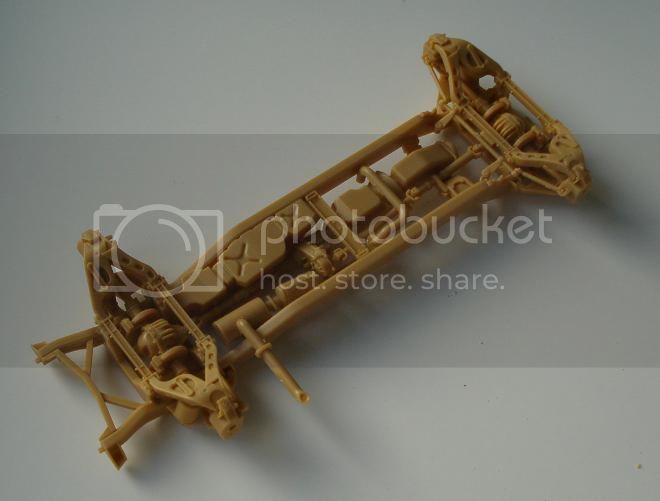
This will be next:


Active Builds: 0
Active Campaigns: 0
Ho Chi Minh City, Vietnam
Joined: October 20, 2013
KitMaker: 5 posts
Armorama: 5 posts
Posted: Sunday, October 20, 2013 - 12:17 AM UTC
i hope you finish this kit soon , good work to you !!!

Lisboa, Portugal
Joined: March 04, 2008
KitMaker: 5,386 posts
Armorama: 4,727 posts
Posted: Sunday, October 20, 2013 - 01:37 PM UTC
Quoted Text
i hope you finish this kit soon , good work to you !!!
Thanks ! I will do my best !
Active Builds: 0
Active Campaigns: 0
Wojewodztwo Slaskie, Poland
Joined: February 18, 2007
KitMaker: 978 posts
Armorama: 977 posts
Posted: Sunday, October 20, 2013 - 05:45 PM UTC
John, if it's not too late, You should change a frame to the proper one for M1114 version. In all versions, when rear bumper is factory made, there are different inner supports of such bumper. You have to remove elements which are marked with red at the photo above. You have to replace it with new supports marked with green (bumper is this blue line).
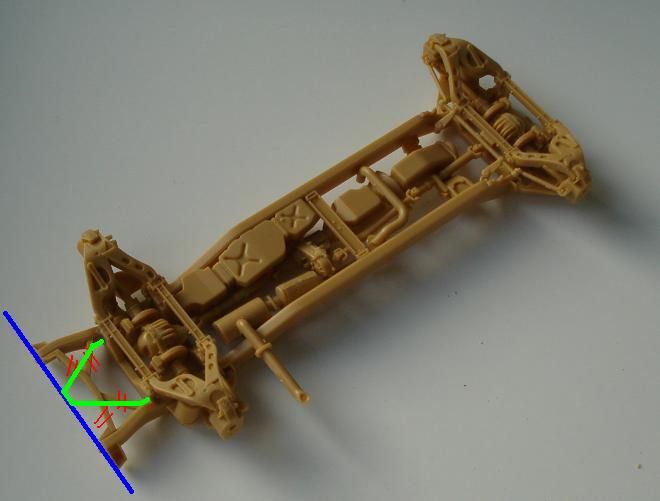
In original it looks like that:


At the first photo (source unknown) there is a M1025A2, but it should look in the same way. At the second photo (made by
Brent Sauer) there is M1151 and You can see, where these supports should 'meet' the bumper.
After corrections it should looks like that:

Photo borrowed from
this Academy's M1151 WIP thread of
Sebastian, a colleague of mine.
The same frame mistake is in all Bronco's M1114s, in Academy's M1151, and if You make a A2 variant (f.e. upgrading Tamiya's M1025 to M1025A2) You should make the same corrections.
Lisboa, Portugal
Joined: March 04, 2008
KitMaker: 5,386 posts
Armorama: 4,727 posts
Posted: Tuesday, October 22, 2013 - 03:05 AM UTC
Thanks Kuba !!
You are right, there's still time to correct it.

I will try my best to do it correctly.
Active Builds: 0
Active Campaigns: 0
Louisiana, United States
Joined: October 20, 2008
KitMaker: 1,069 posts
Armorama: 1,062 posts
Posted: Monday, October 28, 2013 - 08:54 AM UTC
Man I'm keeping an eye on this build log!!!!

Building the impossible is my main goal. Build baby build never sleep!!
Lisboa, Portugal
Joined: March 04, 2008
KitMaker: 5,386 posts
Armorama: 4,727 posts
Posted: Monday, October 28, 2013 - 09:55 AM UTC
Quoted Text
Man I'm keeping an eye on this build log!!!!
Thanks Caveman !
I'll try to get an update this week !
Active Builds: 0
Active Campaigns: 0
Lisboa, Portugal
Joined: March 04, 2008
KitMaker: 5,386 posts
Armorama: 4,727 posts
Posted: Saturday, November 02, 2013 - 01:11 AM UTC
Working slowly..

Next step is to correct the inner supports that Kuba pointed with his great reference photos.
Active Builds: 0
Active Campaigns: 0
Lisboa, Portugal
Joined: March 04, 2008
KitMaker: 5,386 posts
Armorama: 4,727 posts
Posted: Monday, November 11, 2013 - 11:59 AM UTC
Here's my progress :


I was very happy until I looked at the photos Kuba provided, damn ... have to redo it again..
Active Builds: 0
Active Campaigns: 0
Lisboa, Portugal
Joined: March 04, 2008
KitMaker: 5,386 posts
Armorama: 4,727 posts
Posted: Wednesday, December 18, 2013 - 06:18 AM UTC
Ok !
Here's my progress on the M1114:


Then


Almost done...
Last parts before starting painting the lower structure / chassis / transmission etc..

Note: I didn't redo the surgery after noticing my mistake (see previous posts w/ Kuba's needed upgrade ) because I noticed the plastic frame was getting quite fragile after my attempted efforts and was afraid to break some major parts and ending up with a bigger problem .
Anyway stay tuned for more updates soon !
Active Builds: 0
Active Campaigns: 0
Lisboa, Portugal
Joined: March 04, 2008
KitMaker: 5,386 posts
Armorama: 4,727 posts
Posted: Thursday, December 19, 2013 - 06:46 AM UTC
Painted the chassis / structure details.


Much of it won't be visible. Also I can see lots of dirt & dust ending up there too...
Active Builds: 0
Active Campaigns: 0


