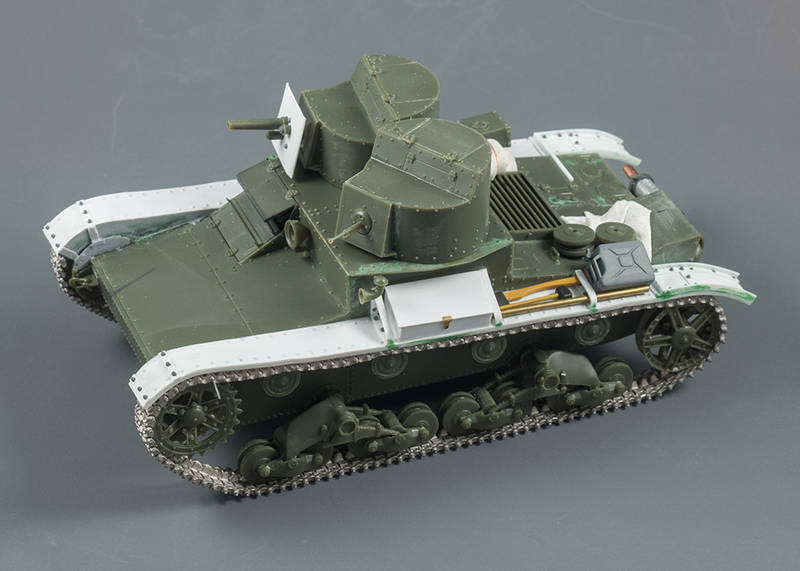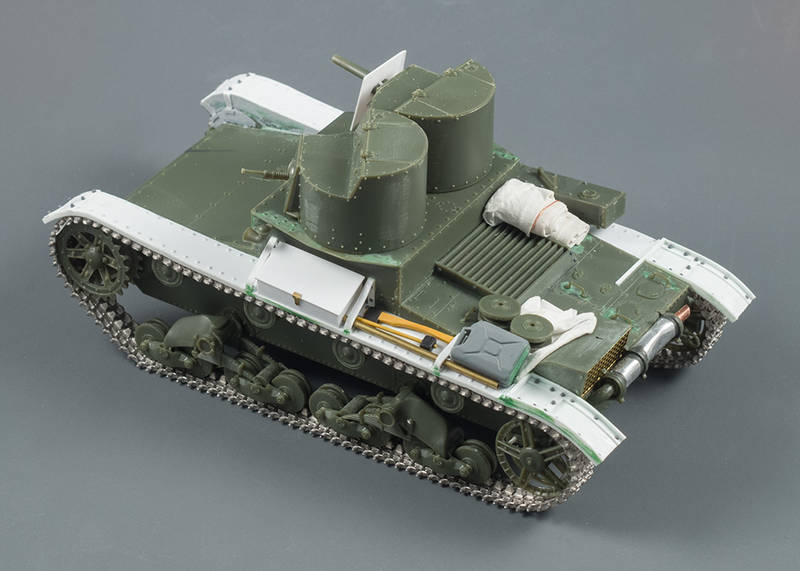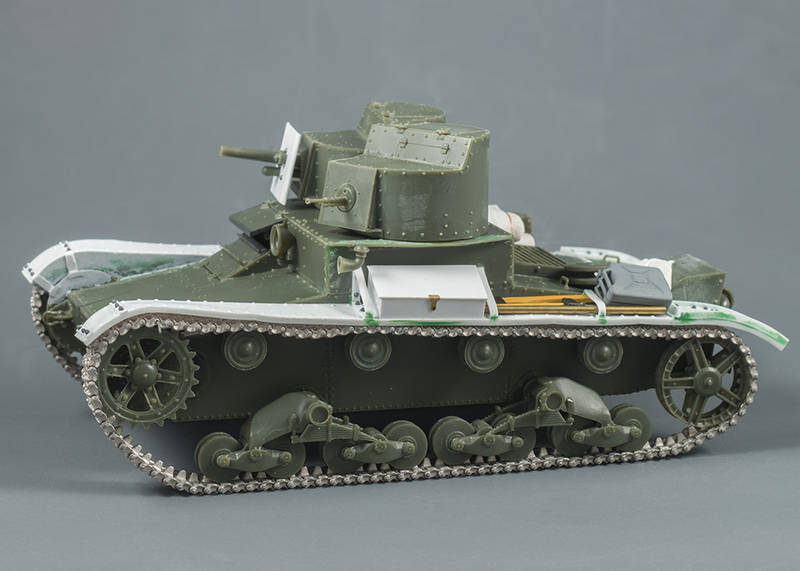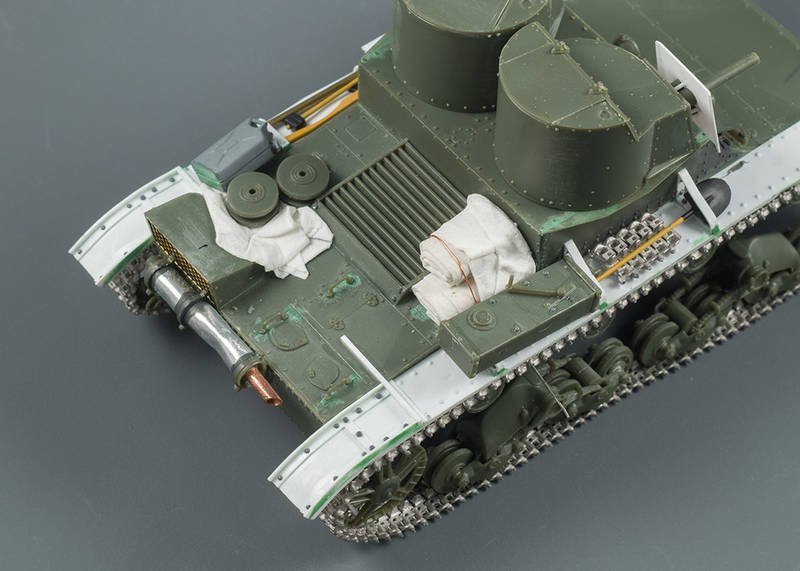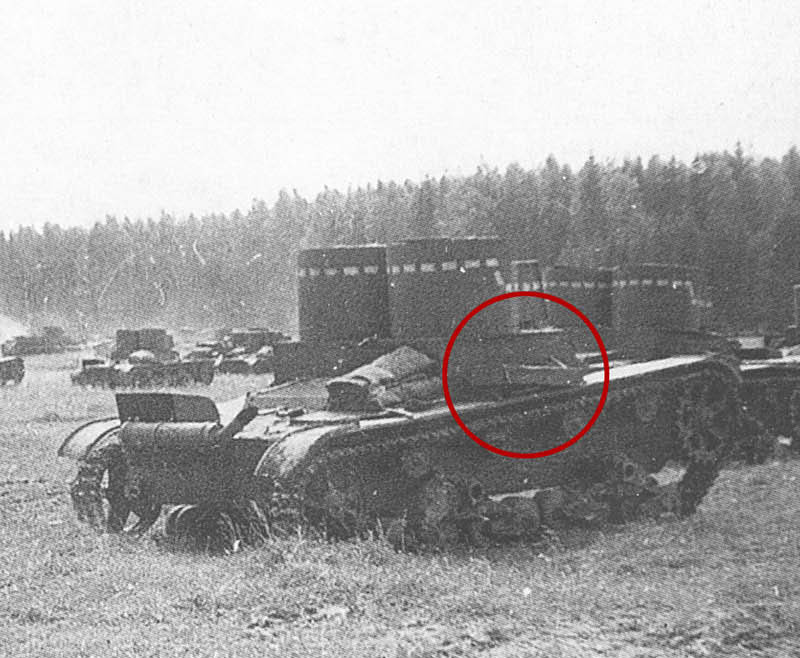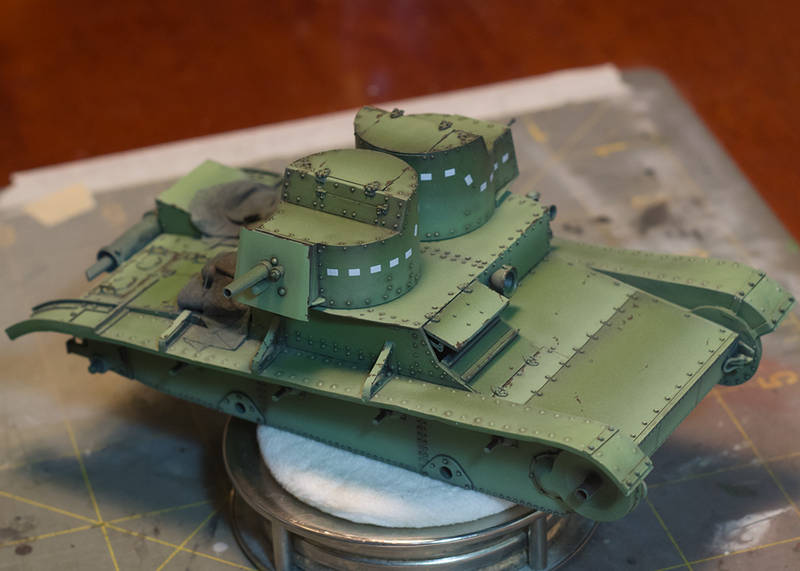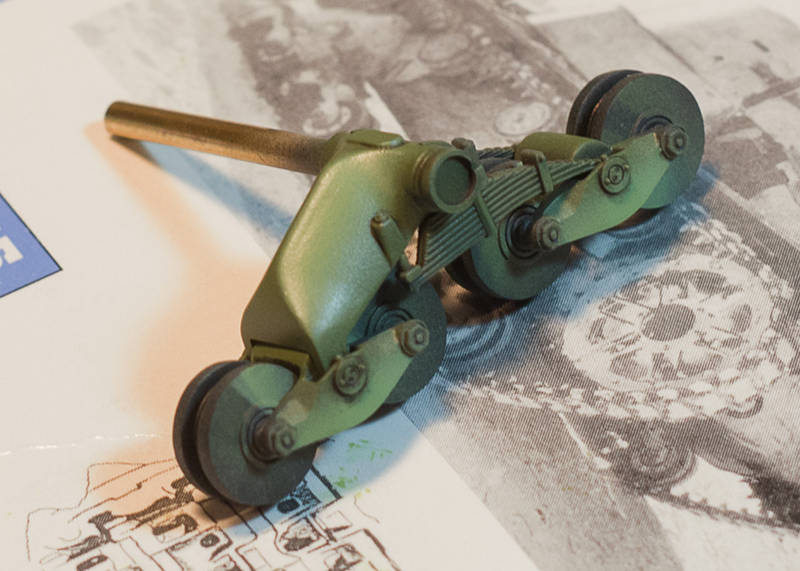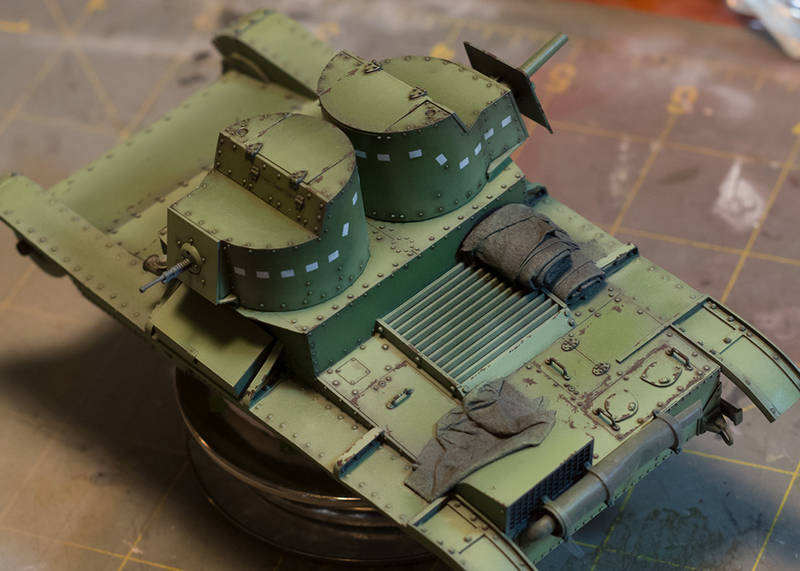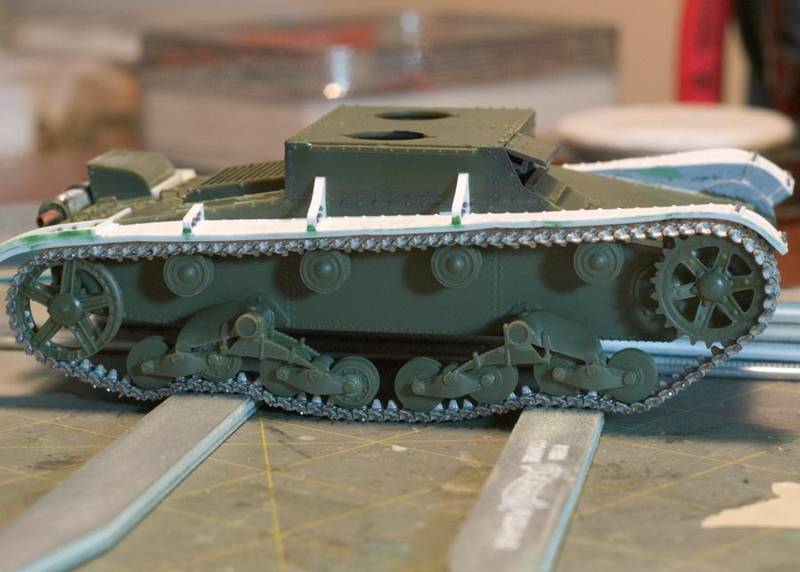
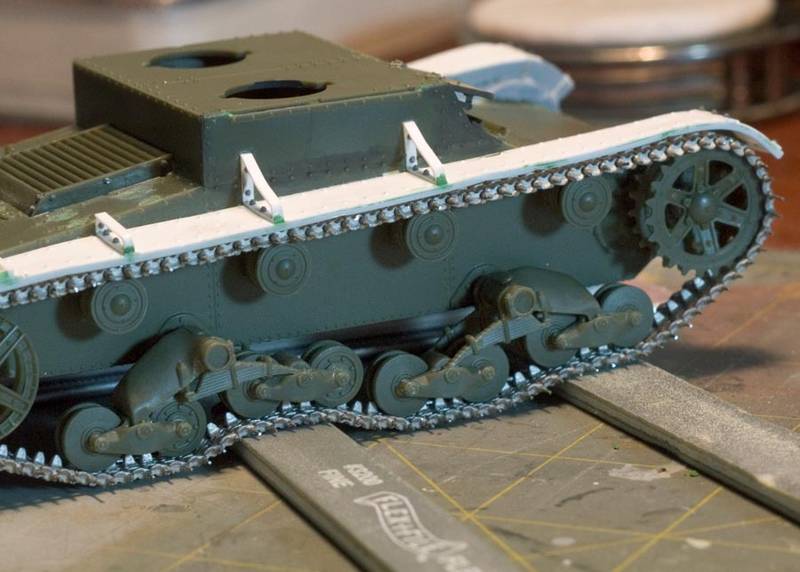
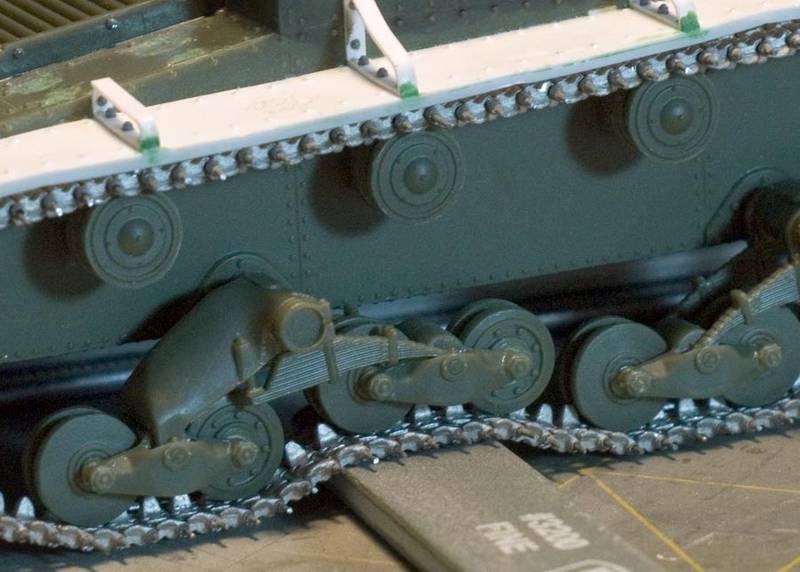
Track length for the right side has been completed. Only thing that needs to be done is trimming and sanding the excess wire sticking out of each link. Photos below show an accurate amount of links with not too much track sag. My hard work articulating the suspension/road wheels will open wide possibilities for groundwork. The tracks conform well to contours.
This detail pic is a tighter crop of the photo above.
Constructive Feedback
For in-progress or completed build photos. Give and get contructive feedback!
Hosted by Darren Baker, Dave O'Meara
Hobby Boss T-26
Calahan
Kansas, United States
Joined: October 09, 2005
KitMaker: 89 posts
Armorama: 85 posts
Joined: October 09, 2005
KitMaker: 89 posts
Armorama: 85 posts
Posted: Wednesday, January 01, 2014 - 11:37 AM UTC
Calahan
Kansas, United States
Joined: October 09, 2005
KitMaker: 89 posts
Armorama: 85 posts
Joined: October 09, 2005
KitMaker: 89 posts
Armorama: 85 posts
Posted: Sunday, March 02, 2014 - 05:02 AM UTC
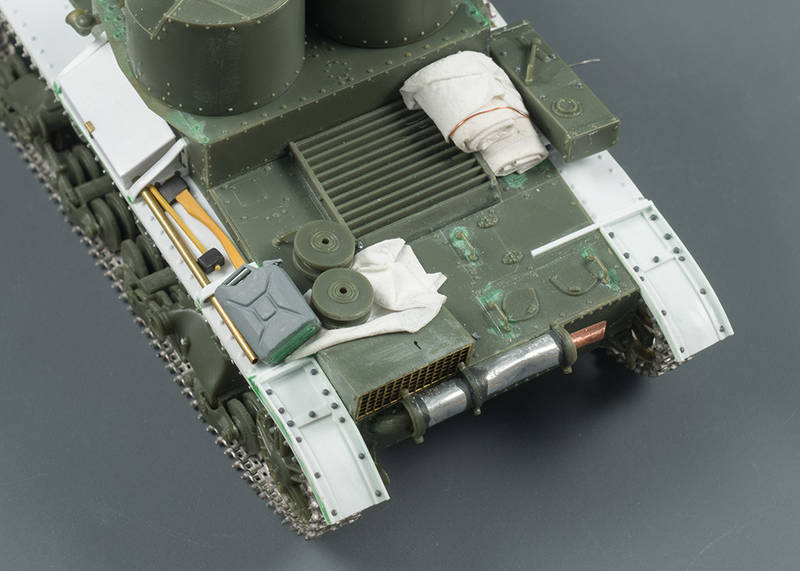
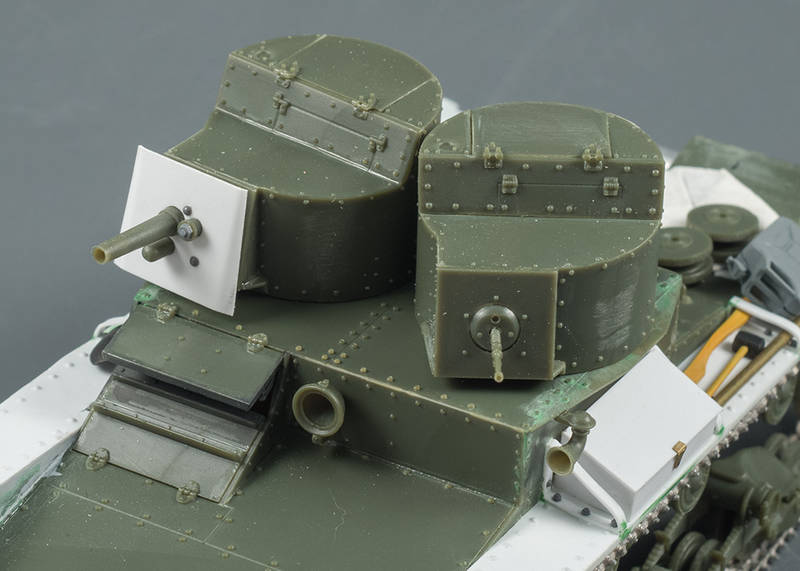
Construction work is complete. I took these beauty shots of my T-26 before airbrushing the base coat. Detail shots of the deck show the stowage in final configuration. I scratch built a hammer and modified a shovel from a pioneer tool set I had available.
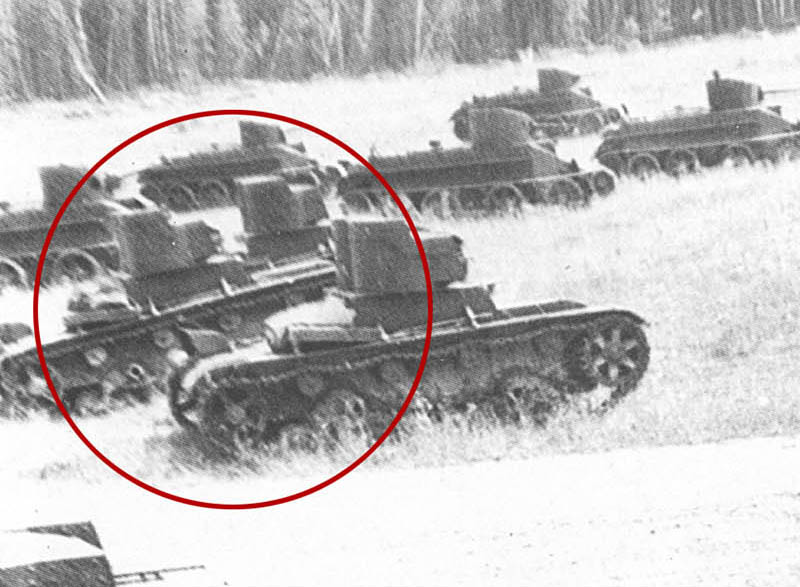
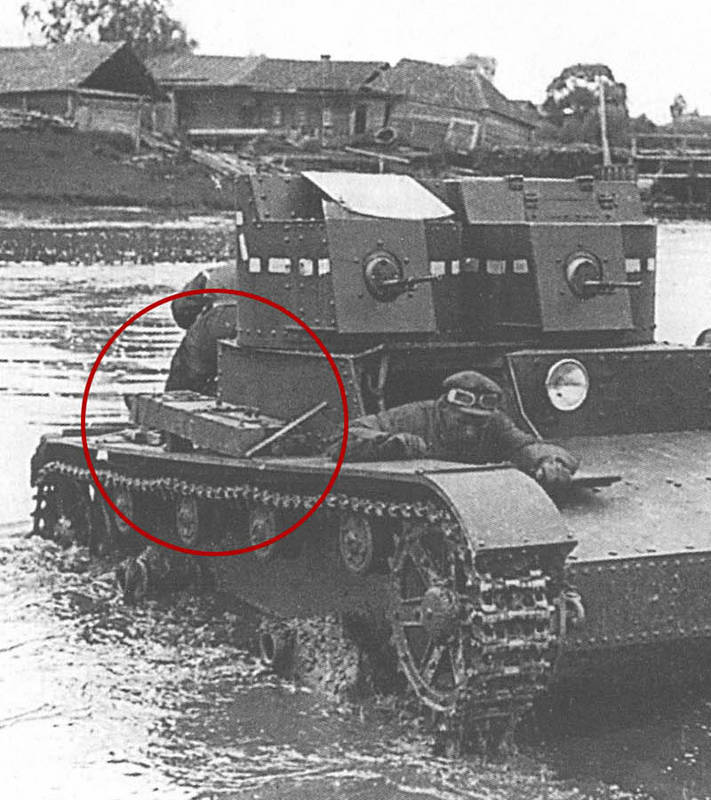
The bed roll, blanket and tarps were made with the 'tissue paper and latex-plus-silicone caulk' method (learned from a feature on Armorama). That rectangular box on the right skirt is an engine starting mechanism I believe. I found this detail in many B&W photographs in this location on the tank.
I scratch built the cannon's shield from styrene sheet and rod. The PE set that came in the box had this shield. Unfortunately it lacks any sort of tangible way of connecting it to the cannon barrel. I consulted reference photos to make a pretty accurate shield assembly.
Thudius
Uusimaa, Finland
Joined: October 22, 2012
KitMaker: 1,194 posts
Armorama: 1,077 posts
Joined: October 22, 2012
KitMaker: 1,194 posts
Armorama: 1,077 posts
Posted: Sunday, March 02, 2014 - 05:06 AM UTC
Looking good
Kimmo
Kimmo
panzerbob01
Louisiana, United States
Joined: March 06, 2010
KitMaker: 3,128 posts
Armorama: 2,959 posts
Joined: March 06, 2010
KitMaker: 3,128 posts
Armorama: 2,959 posts
Posted: Sunday, March 02, 2014 - 06:17 AM UTC
Looks great!
I keep looking at this kit and thinking about getting it... But I doubt I'll do all of the fix-ups you have done... maybe that gun-shield and likely some of the braces and that l-fender box would be candidates for my lesser efforts!
That "rectangular box" on the R fender may actually be the jack - I THINK the original jacks used on these were rather large and bulky boxy things. IF it is not the jack, seems that one would really be needed if one wanted to actually use those spares you have provided!
I have not gone back into your thread... so I don't know your back-story on this tank. So, that jerrycan...? Where does it come in on most T-26?
Can't wait to see this guy get all painted-up!
Bob
designv2000
Taiwan / 台灣
Joined: March 02, 2014
KitMaker: 4 posts
Armorama: 4 posts
Joined: March 02, 2014
KitMaker: 4 posts
Armorama: 4 posts
Posted: Sunday, March 02, 2014 - 09:47 AM UTC
that's a nice looking T-26 Paul
I'm working on a hobbyboss T-26 too,
almost ready to be painted and notice something that really bothers me.
The front hatch (where the driver is located) doesn't seems to have a view optics (not even a hole ). Is this normal for T-26? I'm not a military expert or a bolt counter, but if this is a error then it can really bothers me.
Hope someone here knows the answer.
Victor
Removed by original poster on 03/02/14 - 22:56:28 (GMT).
Removed by original poster on 03/02/14 - 23:00:27 (GMT).
designv2000
Taiwan / 台灣
Joined: March 02, 2014
KitMaker: 4 posts
Armorama: 4 posts
Joined: March 02, 2014
KitMaker: 4 posts
Armorama: 4 posts
Posted: Sunday, March 02, 2014 - 11:03 AM UTC
Try to post a photo of the problem ( newbie here )
I just couldn't figure out how the driver can see when the
hatch is closed.
some sort of view optics (or at least a viewing hole) are shown on hobbyboss box art, but not on the
kit.(The same with hobbyboss's mod. 1931 too)
Is there a possibility of two kinds of hatches?
Victor
I just couldn't figure out how the driver can see when the
hatch is closed.
some sort of view optics (or at least a viewing hole) are shown on hobbyboss box art, but not on the
kit.(The same with hobbyboss's mod. 1931 too)
Is there a possibility of two kinds of hatches?
Victor
Thudius
Uusimaa, Finland
Joined: October 22, 2012
KitMaker: 1,194 posts
Armorama: 1,077 posts
Joined: October 22, 2012
KitMaker: 1,194 posts
Armorama: 1,077 posts
Posted: Sunday, March 02, 2014 - 11:12 AM UTC
Quoted Text
that's a nice looking T-26 Paul
I'm working on a hobbyboss T-26 too,
almost ready to be painted and notice something that really bothers me.
The front hatch (where the driver is located) doesn't seems to have a view optics (not even a hole ). Is this normal for T-26? I'm not a military expert or a bolt counter, but if this is a error then it can really bothers me.
Hope someone here knows the answer.
Victor
I'm no expert, but after a quick google, it seems that some of the earlier models did not have any slots or optics for the driver, just a small gap between the plates. A couple of examples:
http://www.wwiivehicles.com/ussr/tanks-light/t-26-light-tank/t-26-model-1931/t-26-1931-light-tank-01.png
http://www.historyofwar.org/Pictures/t-26_model_1931.jpg
Most pictures show a slot so I suspect they would have been upgraded at some point to something like this:
http://www.andreaslarka.net/ps163033/2006_16303302.jpg
Hope that helps.
Kimmo
designv2000
Taiwan / 台灣
Joined: March 02, 2014
KitMaker: 4 posts
Armorama: 4 posts
Joined: March 02, 2014
KitMaker: 4 posts
Armorama: 4 posts
Posted: Monday, March 03, 2014 - 12:23 AM UTC
Thanks of the kind reply Kimmo
The photos you found really interests me, so I dig in to search for more. I found out there is a kind of hatch that are close to your first two photos
a smaller slot is located on the lower part of the hatch.
I can't find a clear photo of a kind of hatch that doesn't
have any slot or optics at all(which are shown on the hobbyboss kit). Is it really possible for a tank driver to look through the gap of two metal plates ?
Isn't that a little bit too dangerous ?
Thudius
Uusimaa, Finland
Joined: October 22, 2012
KitMaker: 1,194 posts
Armorama: 1,077 posts
Joined: October 22, 2012
KitMaker: 1,194 posts
Armorama: 1,077 posts
Posted: Monday, March 03, 2014 - 12:57 AM UTC
Quoted Text
Isn't that a little bit too dangerous ?
I would think so, but then the Russians always did have interesting designs. I had a look at the Tank Power book, and that feature might just be a carry over from the Vickers, copied by the Russians and obviously deemed unsatisfactory because later models show a slit for the driver, presumably with armoured glass as well.
Kimmo

designv2000
Taiwan / 台灣
Joined: March 02, 2014
KitMaker: 4 posts
Armorama: 4 posts
Joined: March 02, 2014
KitMaker: 4 posts
Armorama: 4 posts
Posted: Monday, March 03, 2014 - 03:30 AM UTC
Quoted Text
I would think so, but then the Russians always did have interesting designs. I had a look at the Tank Power book, and that feature might just be a carry over from the Vickers, copied by the Russians and obviously deemed unsatisfactory because later models show a slit for the driver, presumably with armoured glass as well.
Kimmo
I guess it could work out that way.
(Bad luck for the driver who tried on the old hatch)
Thanks Kimmo.
Will follow this thread for Paul to finish his T-26.
Thudius
Uusimaa, Finland
Joined: October 22, 2012
KitMaker: 1,194 posts
Armorama: 1,077 posts
Joined: October 22, 2012
KitMaker: 1,194 posts
Armorama: 1,077 posts
Posted: Monday, March 03, 2014 - 04:07 AM UTC
Quoted Text
Quoted Text
I would think so, but then the Russians always did have interesting designs. I had a look at the Tank Power book, and that feature might just be a carry over from the Vickers, copied by the Russians and obviously deemed unsatisfactory because later models show a slit for the driver, presumably with armoured glass as well.
Kimmo
I guess it could work out that way.
(Bad luck for the driver who tried on the old hatch)
Thanks Kimmo.
Will follow this thread for Paul to finish his T-26.
Me too. Hope he doesn't mind a slight threadjack
Kimmo
panzerbob01
Louisiana, United States
Joined: March 06, 2010
KitMaker: 3,128 posts
Armorama: 2,959 posts
Joined: March 06, 2010
KitMaker: 3,128 posts
Armorama: 2,959 posts
Posted: Monday, March 03, 2014 - 04:30 AM UTC
The colored plate showing the vision slot in the lower position suggests to me what was likely going on...
That lower position slot would have been a rectangular notch cut into the lower edge of the upper hatch-piece. A simpler process step to create some sort of vision-slit cut-out in the upper hatch cover than doing a central "broach" of the plate. I can certainly "see" this as being an early (and admittedly crude) simplification which would have appealed to the Russian designers of the times - (and simplification and sometimes crude simplification at that, has long been a practice in the "no frills" approach seen in lots of earlier Russian equipment - do the stuff needing to be done "right" - creature-comforts and other stuff... "phaw!")
The trade-off of using this lower slit position, of course, would be that the driver, unless he was quite short, would have to hunch down to see out of that lower slit - probably to his huge discomfort and leading to "bad driving". Later versions having the slit moved up the hatch-cover would realistically acknowledge this problem and fix it, albeit with incurring a slightly more complex manufacturing step. "You do what you have to do".
I seriously doubt that many, if any at all, of these tanks actually came with no vision slit whatsoever - leaving the upper cover up "just a bit" to allow the driver to peek out beneath it would be the same bad "hunched-over" poor driving position and also probably just more risky business from bullet-splash, etc. But of course this is all just my opinion!
IF the HB kit does not provide the centered slit, I would be tempted indeed to add the lower slit at the bottom of that upper cover - per the colored plate (and several photos of T-26).
Bob
Calahan
Kansas, United States
Joined: October 09, 2005
KitMaker: 89 posts
Armorama: 85 posts
Joined: October 09, 2005
KitMaker: 89 posts
Armorama: 85 posts
Posted: Monday, March 03, 2014 - 10:05 AM UTC
Guys thanks for keeping up on this blog.
@Bob, ditton on the jack. That never did cross my mind the entire time during construction. That makes more sense than an external starter... Now I finally understand the molded-in details on the back side of that jack. I'm still wondering how this thing didn't fall off during driving by the way...
As far as the jerry can as you can see that's a spare German can. I haven't seen any photos with gas cans on them. I accumulated a good couple hours just trying to figure out how to store the stowage. This layout is the most fail-proof as far as stowage falling off during driving.
@Victor, awesome I'm glad you're building a T-26 as well. Be sure to post it sometime. We all wanna see it :}
I never did notice the lack of a vision port on this. That is kinda jank that those darn Russian designers pulled!
*********************
This tank is looking real good. I've already sprayed base green on my usual black base coat. I'm doing something new this time - spraying Vellejo Model Color! Awesome stuff by the way! Thin it with distilled water. Get the paint/water/PSI mix right and you have a real cheap, but fantastic alternative to bottled acrylic paints!
panzerbob01
Louisiana, United States
Joined: March 06, 2010
KitMaker: 3,128 posts
Armorama: 2,959 posts
Joined: March 06, 2010
KitMaker: 3,128 posts
Armorama: 2,959 posts
Posted: Monday, March 03, 2014 - 10:13 AM UTC
I would sort of "bet" that the jack sat in some sort of "fence" or railing or shallow tray and had a strap over it.
Having been to this one, I'm pretty sure that I'll do just that when I do this kit! And likewise about the driver's slit...
The jerrycan... Yes, I sort of figured that it was a German item... LoL! and if this is some tank appears later (OK later means for T-26 after 1941!) in the war, such an item might appear stashed on it. I STILL haven't read back to see when this one is supposed to be, so...!
Let's see it all green and stuff!
Bob
Having been to this one, I'm pretty sure that I'll do just that when I do this kit! And likewise about the driver's slit...
The jerrycan... Yes, I sort of figured that it was a German item... LoL! and if this is some tank appears later (OK later means for T-26 after 1941!) in the war, such an item might appear stashed on it. I STILL haven't read back to see when this one is supposed to be, so...!
Let's see it all green and stuff!
Bob
Calahan
Kansas, United States
Joined: October 09, 2005
KitMaker: 89 posts
Armorama: 85 posts
Joined: October 09, 2005
KitMaker: 89 posts
Armorama: 85 posts
Posted: Tuesday, March 04, 2014 - 07:51 AM UTC
Bob, I agree on the jack strapped or fenced in some how. These are scans I took from a reference book of mine. Thought this might clarify the placement of this jack piece. That box art that Victor posted earlier on this post shows how these tanks came fresh out of the factory. This is how Hobby Boss molded this jack down to the securing bands.
If my tank was going to be well-used I though this might seem too neat. That's when I began scouring B&W photos with how crews rolled in their tanks.
My German jerry can may or may not be accurate with this tank/variant. However, I try not to get too deep with accuracy. I had an extra can so I decided it would look great on that rear skirt.
panzerbob01
Louisiana, United States
Joined: March 06, 2010
KitMaker: 3,128 posts
Armorama: 2,959 posts
Joined: March 06, 2010
KitMaker: 3,128 posts
Armorama: 2,959 posts
Posted: Tuesday, March 04, 2014 - 09:43 AM UTC
Very neat pics!
From what they show... the jack stowed on the right fender. Sometimes between the 2 fender-braces to the hull, and sometimes to the rear of the rear brace to the raised hull portion. Clearly, if it were stowed between those braces, it would end up being raised at one end, as in the photos - perhaps some sort of wood block or such? The jack was retained with some strap(s). Looks like there are options for where to sow the jack, and whether one wants it tilted or level on the fender. Food for thought!
Bob
Calahan
Kansas, United States
Joined: October 09, 2005
KitMaker: 89 posts
Armorama: 85 posts
Joined: October 09, 2005
KitMaker: 89 posts
Armorama: 85 posts
Posted: Sunday, March 30, 2014 - 02:15 PM UTC
Because modeling is more fun than WIP shots I have been late posting an update to this blog of mine. Seen here is my first try at color modulation. Its fun! I mixed a few Vellejo acrylics to get a Russian green. The modulation style isn't really too difficult. The key to success I believe is masking. I spent a fair amount of time masking with Tamiya tape prior to highlight spraying.
In the next following sessions I pinwashed, sprayed Future and applied decals. Then a satin varnish followed with chipping after. Vellejo #70.822 German Camo Black Brown works great for chipping color. Thanks to Mig Jimenez for posting this color suggestion on his own blog...
Thudius
Uusimaa, Finland
Joined: October 22, 2012
KitMaker: 1,194 posts
Armorama: 1,077 posts
Joined: October 22, 2012
KitMaker: 1,194 posts
Armorama: 1,077 posts
Posted: Sunday, March 30, 2014 - 07:47 PM UTC
Looking good. I know what you mean about building/painting rather than taking photos
Kimmo
Kimmo
AFVFan
North Carolina, United States
Joined: May 17, 2012
KitMaker: 1,980 posts
Armorama: 1,571 posts
Joined: May 17, 2012
KitMaker: 1,980 posts
Armorama: 1,571 posts
Posted: Monday, March 31, 2014 - 02:04 AM UTC
That paint's looking really good.
Calahan
Kansas, United States
Joined: October 09, 2005
KitMaker: 89 posts
Armorama: 85 posts
Joined: October 09, 2005
KitMaker: 89 posts
Armorama: 85 posts
Posted: Sunday, May 18, 2014 - 04:09 AM UTC
This model has been all about trying new techniques and improving upon others. My skills with Mig Pigments have improved with the purchase of a few DVDs explaining their basic usage and also a few Mig products that aid in their application. I highly recommend buying DVDs: F.A.Q. Vol. 1 & 2 by Night Vision Creations to understand weathering, modulation and detail painting a lot more.
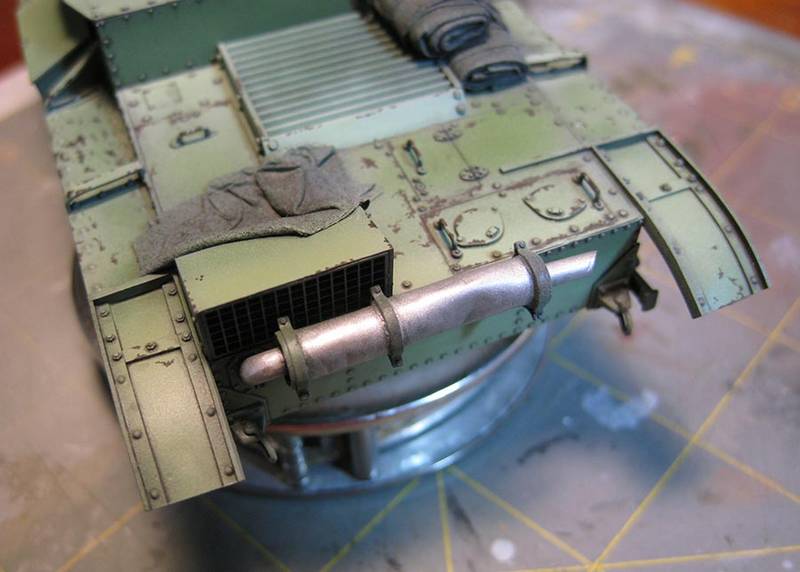
This photo of the muffler shows it in its final stage. I used an old bottle of SNJ metal powder to get this nice metallic sheen. Also, I shyed away from an over-rusted look and instead finished the muffler in an unexpected way (in comparison to other models).
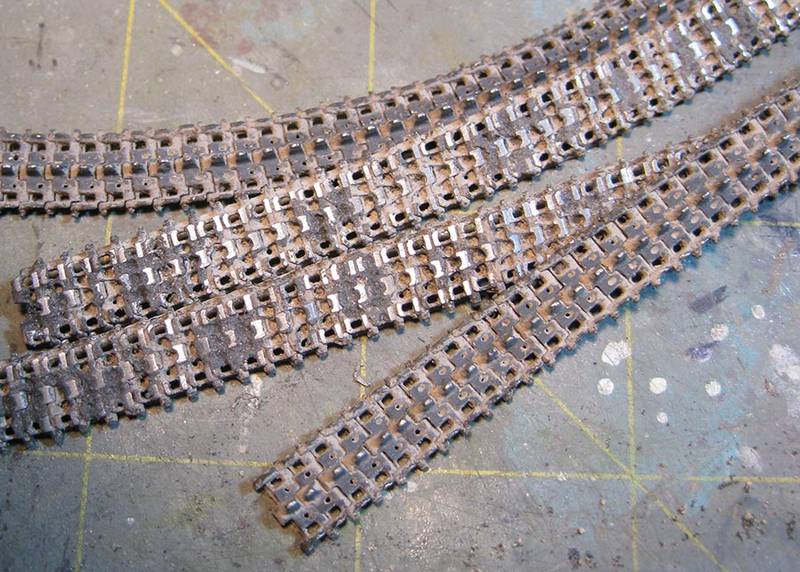
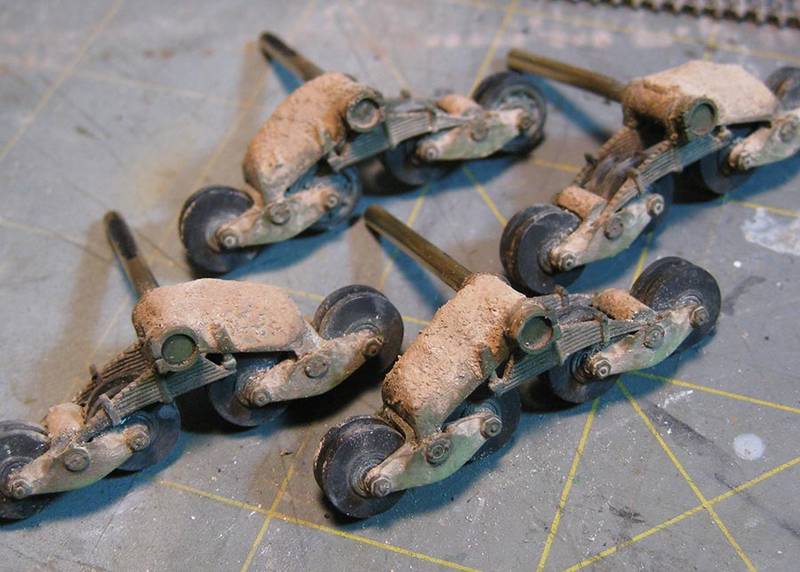
These tracks were the result of 2 weeks of work both during lunch breaks and in the evening. Not much work can be done when you gotta let things dry! I started with a base coat of black then after several applications of Mig Pigments I got pretty much what you see now. Wetter mud was made and applied sparingly. Finally, sanding sticks uncovered the high points of the tracks that are always in contact with the ground.
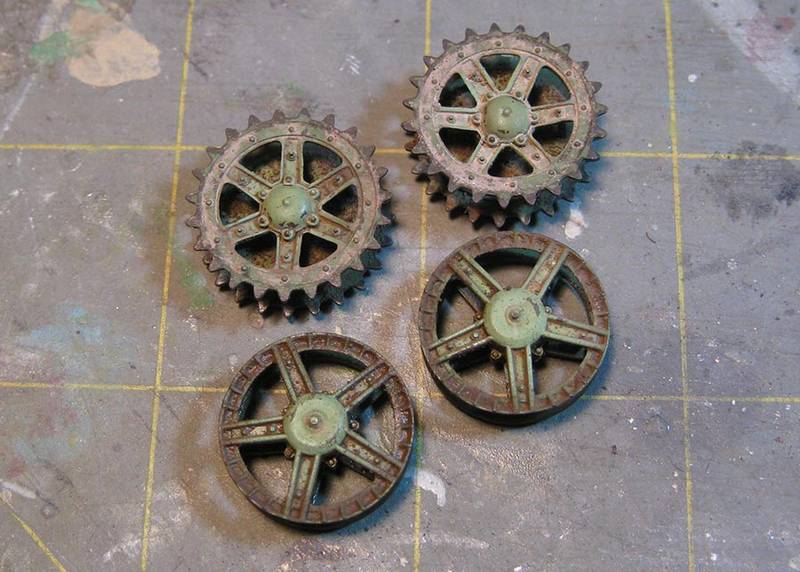
These last two pictures show in-progress weathering. This is the result of several applications and techniques applying Mig Pigments.
Thudius
Uusimaa, Finland
Joined: October 22, 2012
KitMaker: 1,194 posts
Armorama: 1,077 posts
Joined: October 22, 2012
KitMaker: 1,194 posts
Armorama: 1,077 posts
Posted: Sunday, May 18, 2014 - 04:42 AM UTC
An interesting twist with the muffler. The dirt on the bogies looks nice. Trying new techniques and materials don't always pay off immediately but do in the long run. Experimentation and finding what works best for you keeps things fresh if not frustrating sometimes. Can't wait to see some finished shots.
Kimmo
Kimmo
Calahan
Kansas, United States
Joined: October 09, 2005
KitMaker: 89 posts
Armorama: 85 posts
Joined: October 09, 2005
KitMaker: 89 posts
Armorama: 85 posts
Posted: Sunday, June 15, 2014 - 12:58 PM UTC
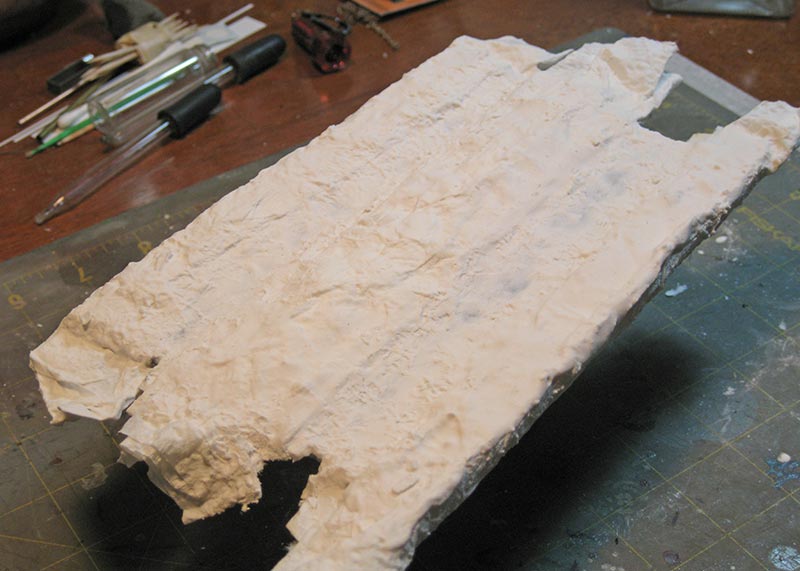
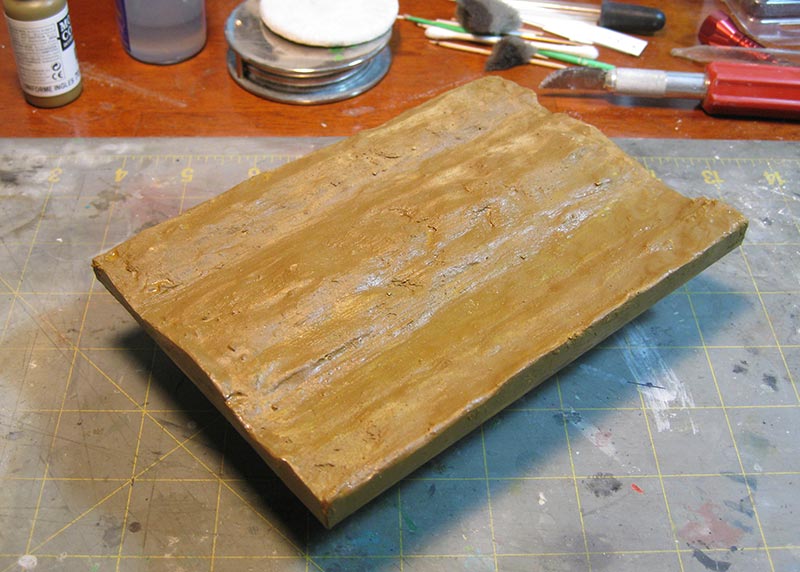
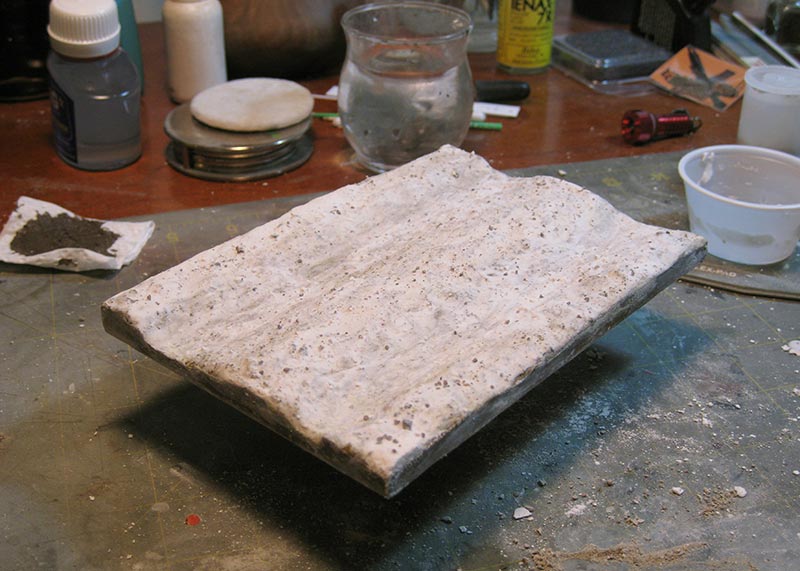
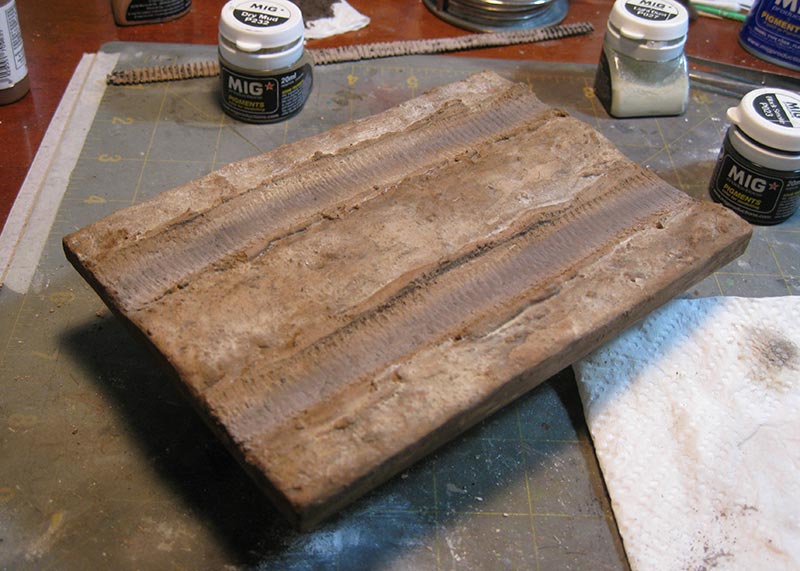
Since my last post I've been working on the vignette to display my T-26. Designing and constructing this base was a challenge because I have very little experience in groundwork. Unfortunately there isn't no 'definitive' site to go to (that I could find) that clearly breaks down the process to make groundwork... I found out why - it's because there are so many ways to make groundwork! Each modeler has their own method I came to understand.
To help out fellow modelers I took step-by-step photos illustrating the process. These numbers correspond to the order of photos below:
*The substrate used for this base was a cheap board bought at Walmart*
1) Groundwork relief made entirely out of paper towels and plaster
2) Refined base with more plaster/paper towels, then applied wash of vellejo paint
3) Made a mixture of plaster of paris and Oil Dry clay pieces (or cat litter) then brushed mixture on base to represent rocks
4) Created mud from MIG Pigments, MIG Acrylic Resin, water, sifted sand and plaster. Formed into muddy ruts. Then with a spare rubber track I worked-in track prints. I wanted to achieve dry ruts that were once quite muddy and wet...
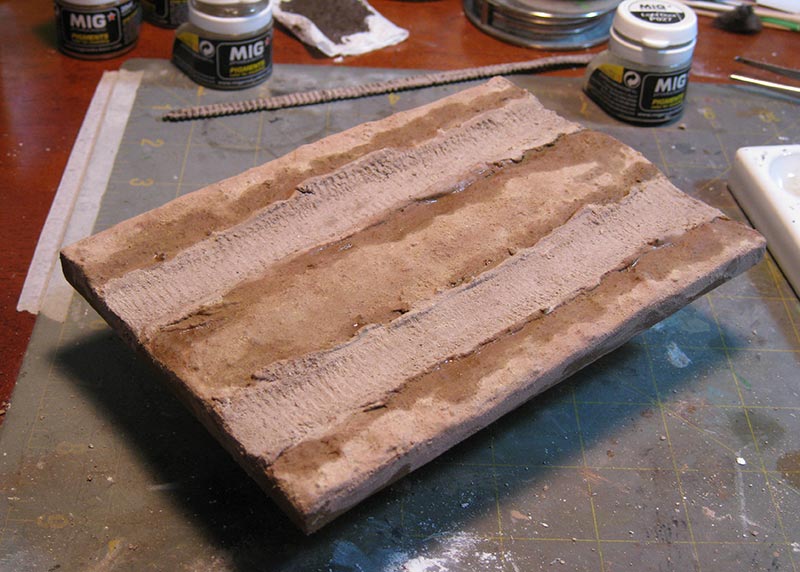
5) This painting step involved a dark brown wash to unify the colors and textures of the base
6) After the dark brown Vellejo acrylic wash I dusted on more Pigments to create different shades of dirt. I also rubbed black Pigment into the ruts to suggest a well traveled piece of ground
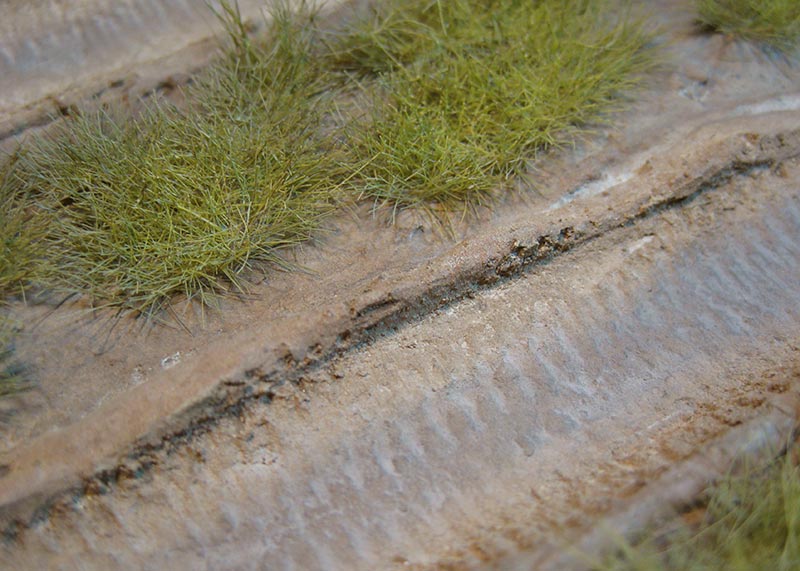
7) Glued tufts of grass on with mixture of wood glue and water. I then airbrushed "shadows" around and in the grass. Afterwords, shades of sand and light yellow were sprayed on to desaturate the almost neon green stock grass. The paint airbrushed was very thin Vellejo.
Any questions on this process just ask.
To help out fellow modelers I took step-by-step photos illustrating the process. These numbers correspond to the order of photos below:
*The substrate used for this base was a cheap board bought at Walmart*
1) Groundwork relief made entirely out of paper towels and plaster
2) Refined base with more plaster/paper towels, then applied wash of vellejo paint
3) Made a mixture of plaster of paris and Oil Dry clay pieces (or cat litter) then brushed mixture on base to represent rocks
4) Created mud from MIG Pigments, MIG Acrylic Resin, water, sifted sand and plaster. Formed into muddy ruts. Then with a spare rubber track I worked-in track prints. I wanted to achieve dry ruts that were once quite muddy and wet...
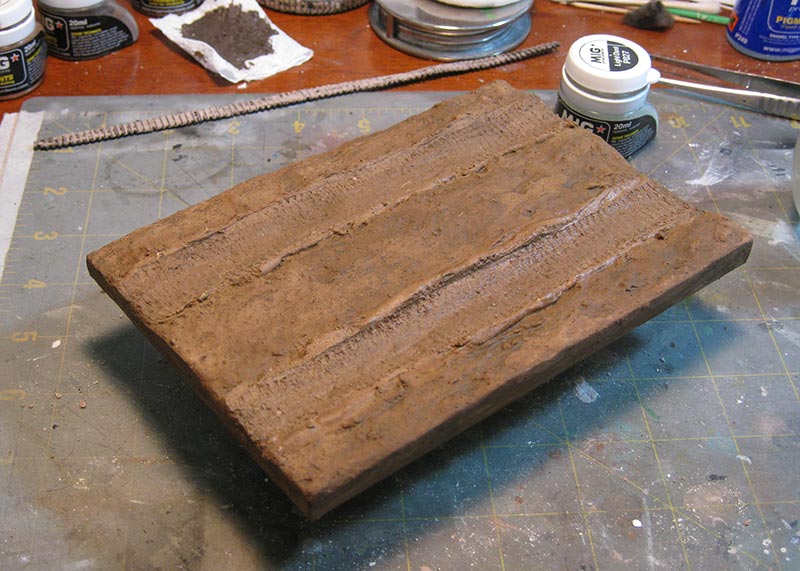
5) This painting step involved a dark brown wash to unify the colors and textures of the base
6) After the dark brown Vellejo acrylic wash I dusted on more Pigments to create different shades of dirt. I also rubbed black Pigment into the ruts to suggest a well traveled piece of ground
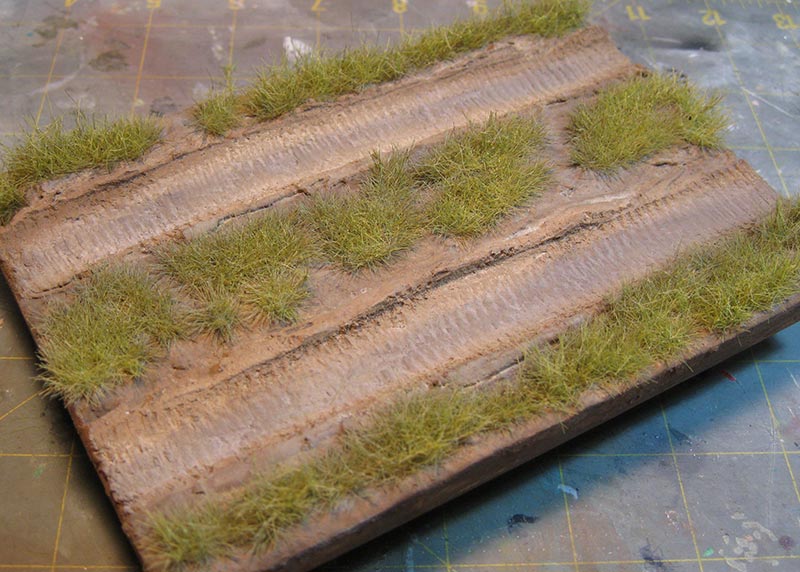
7) Glued tufts of grass on with mixture of wood glue and water. I then airbrushed "shadows" around and in the grass. Afterwords, shades of sand and light yellow were sprayed on to desaturate the almost neon green stock grass. The paint airbrushed was very thin Vellejo.
Any questions on this process just ask.
Thudius
Uusimaa, Finland
Joined: October 22, 2012
KitMaker: 1,194 posts
Armorama: 1,077 posts
Joined: October 22, 2012
KitMaker: 1,194 posts
Armorama: 1,077 posts
Posted: Sunday, June 15, 2014 - 08:33 PM UTC
That's a new one for me. Did you dip, slather or sprinkle the plaster onto the paper towels?
Kimmo
Kimmo