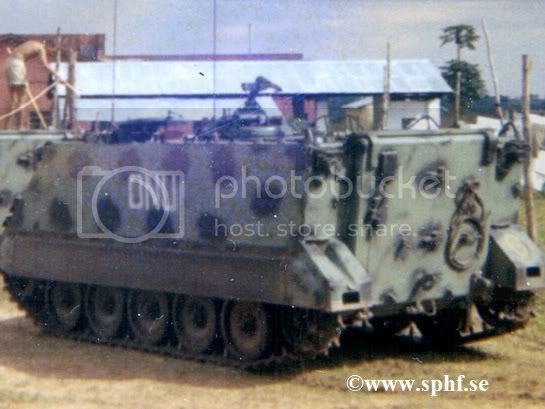
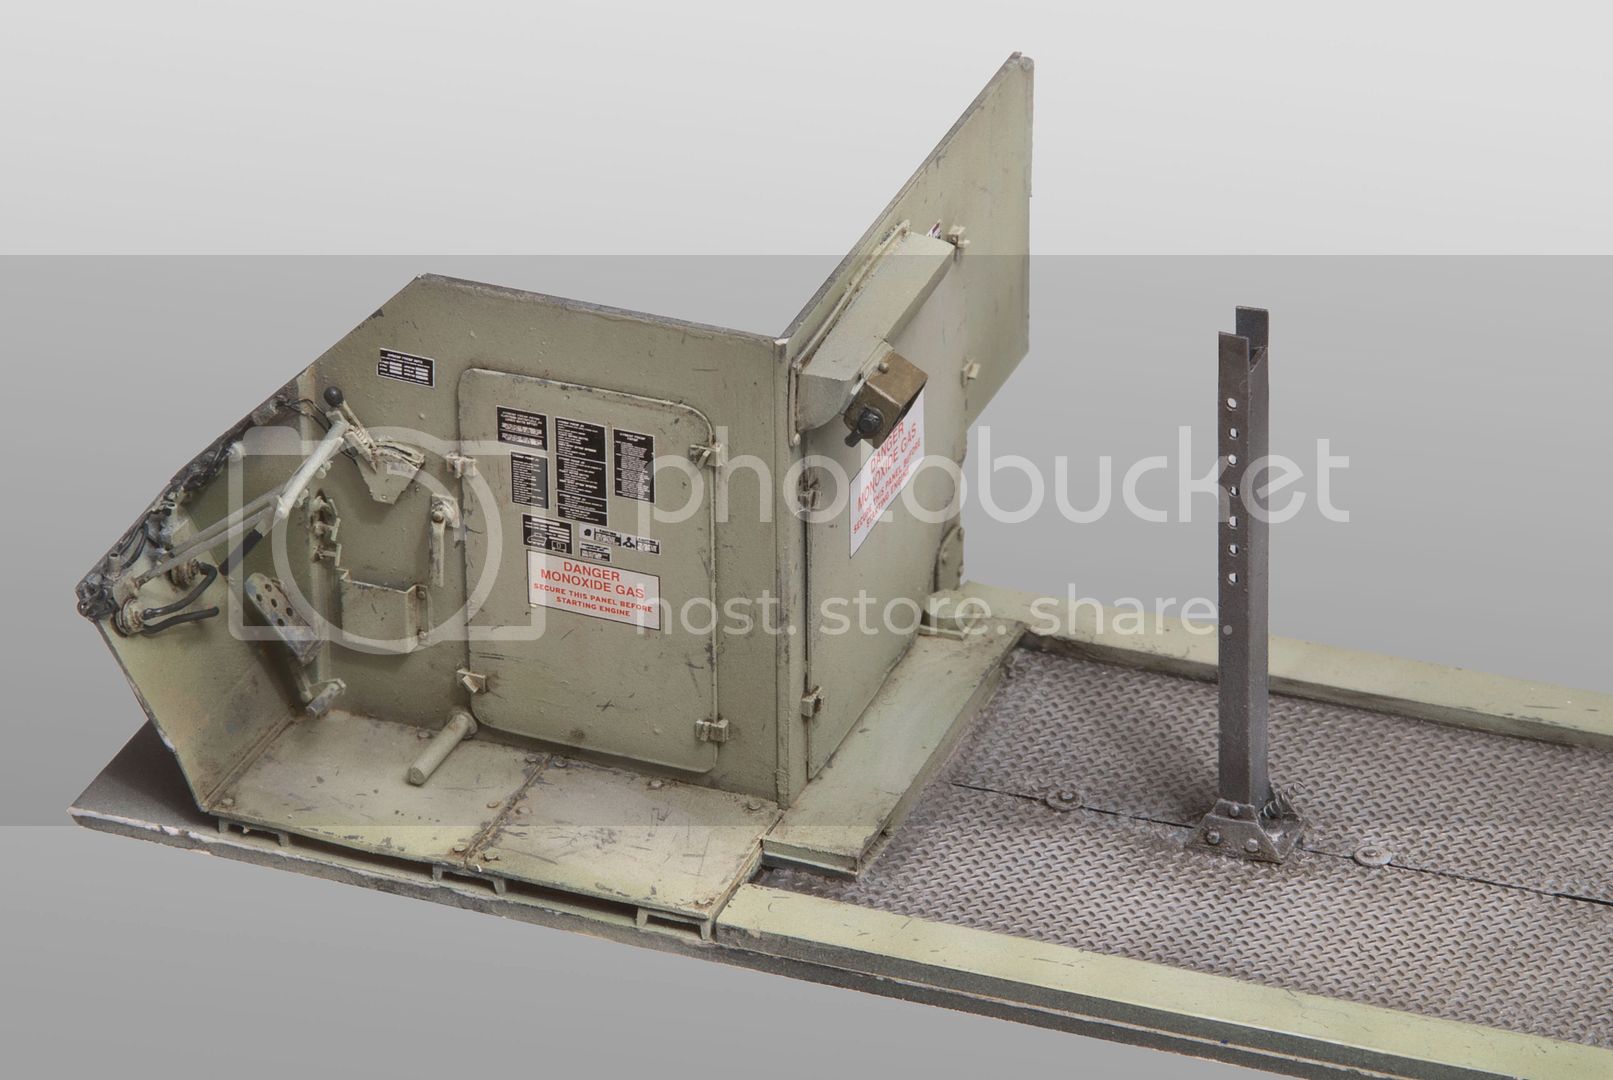
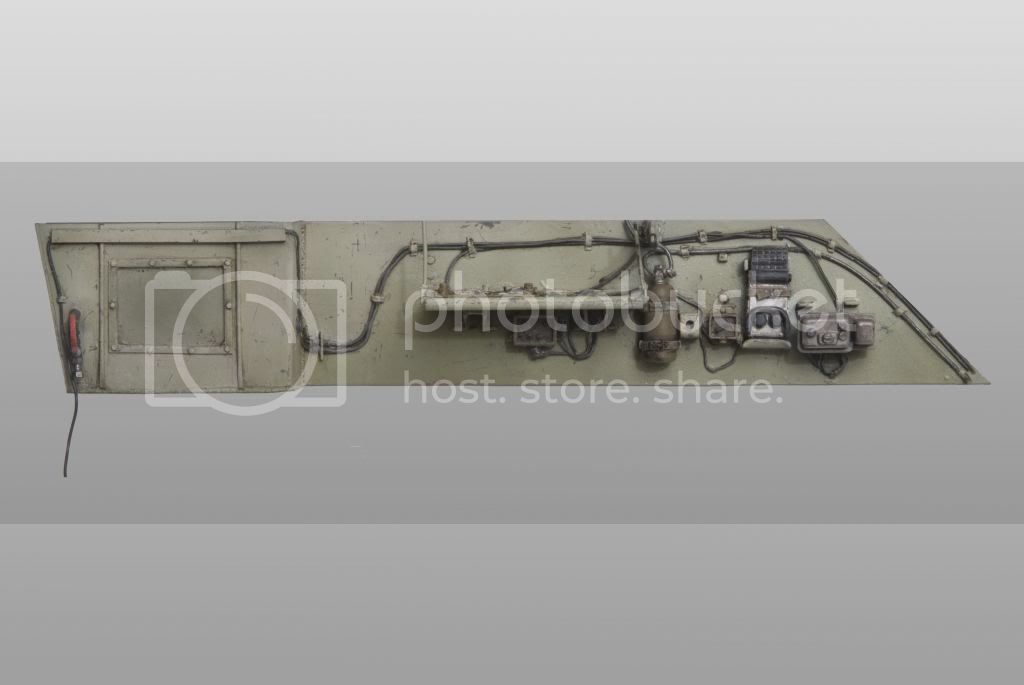
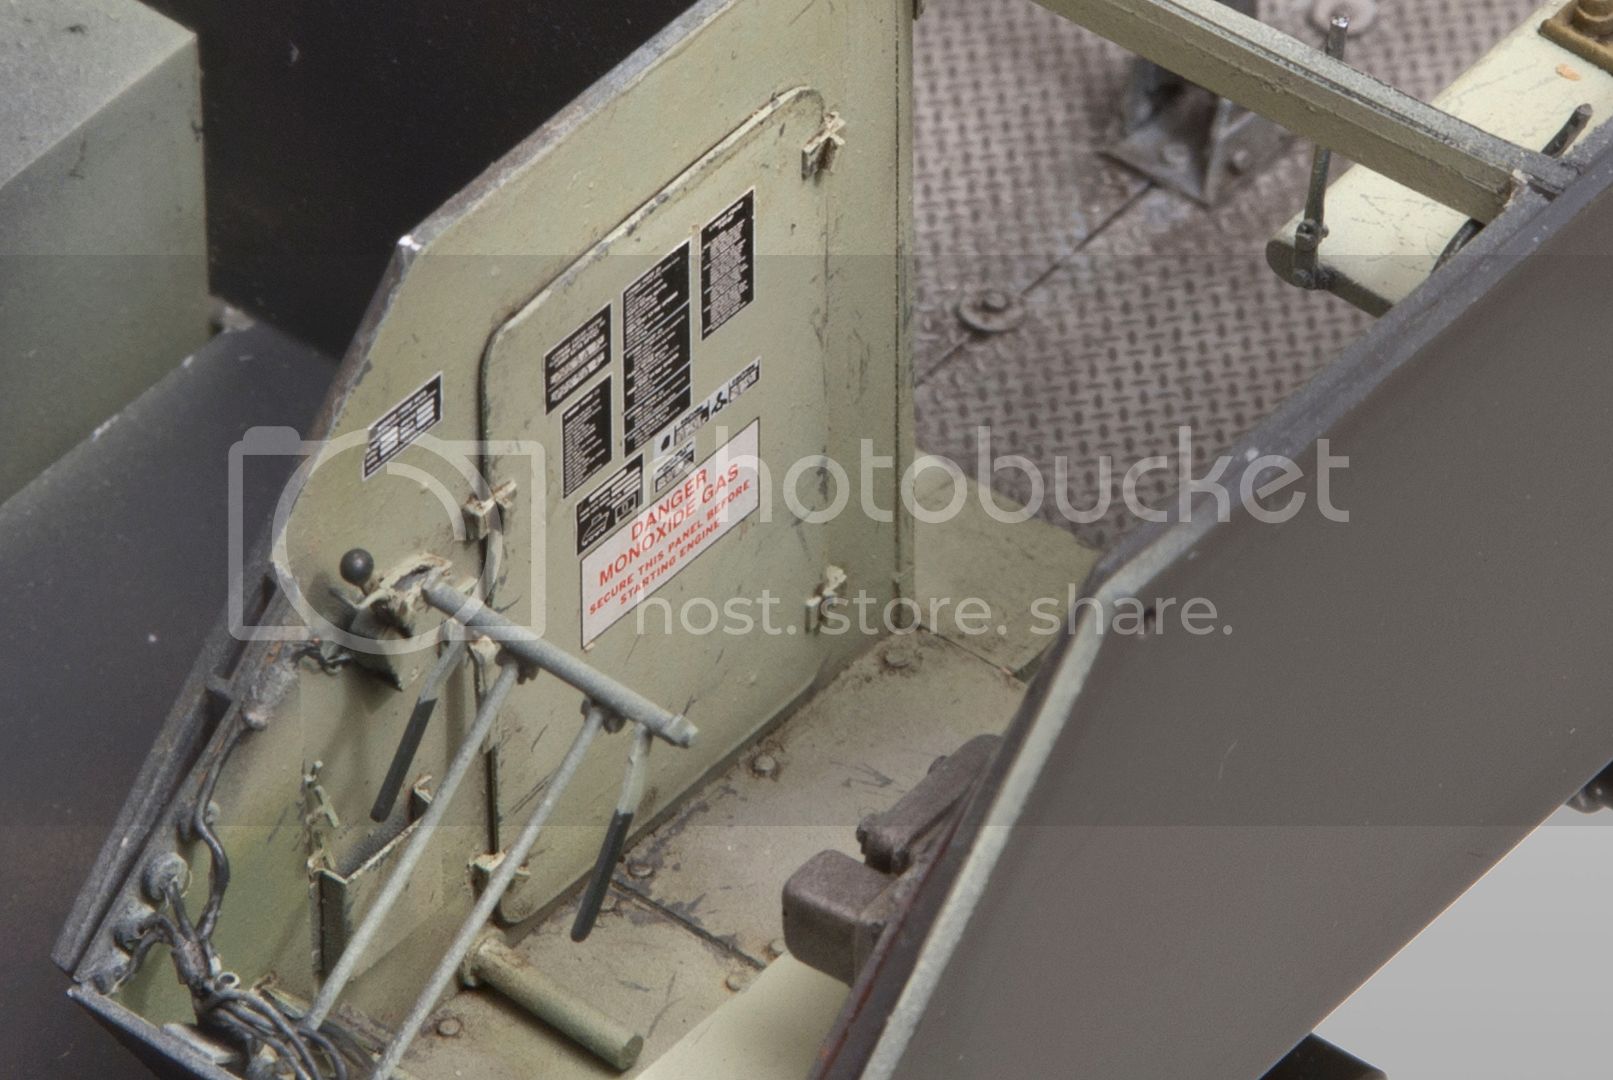
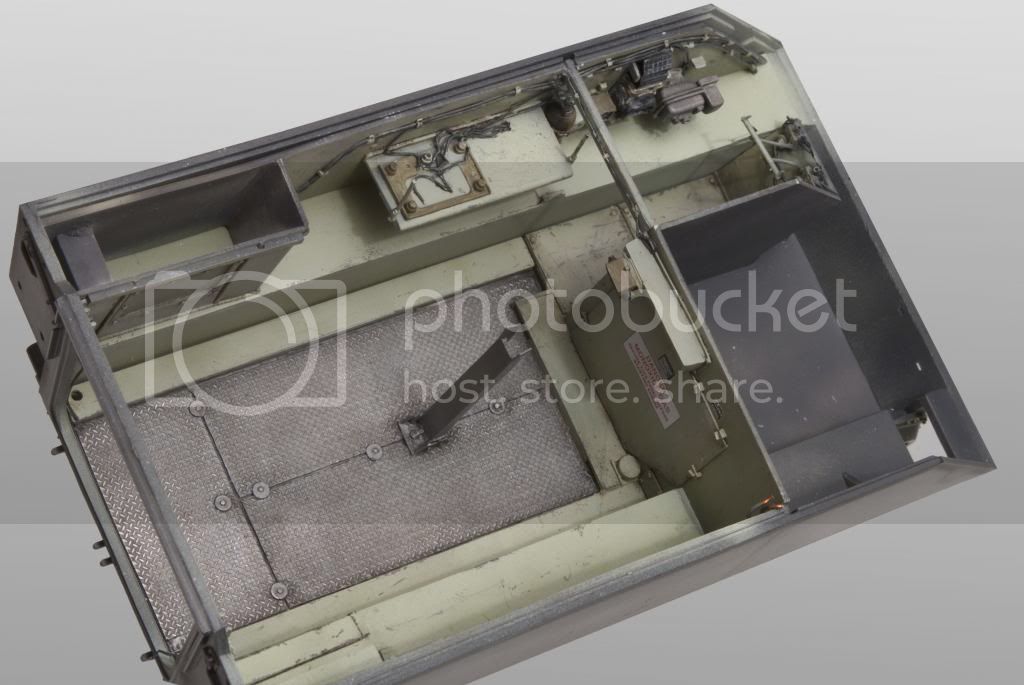
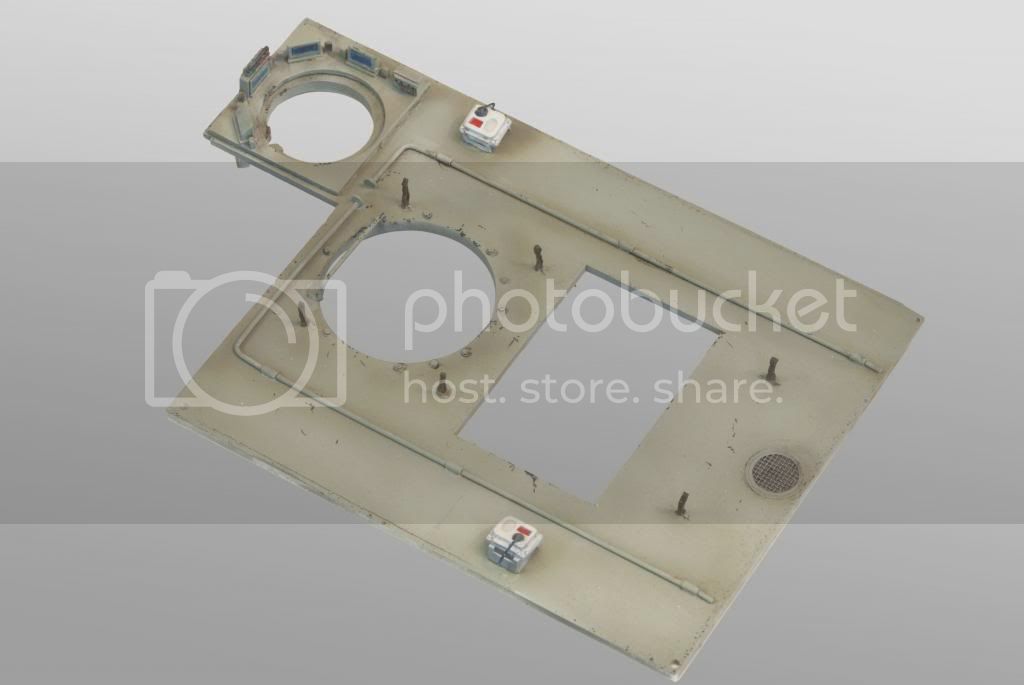
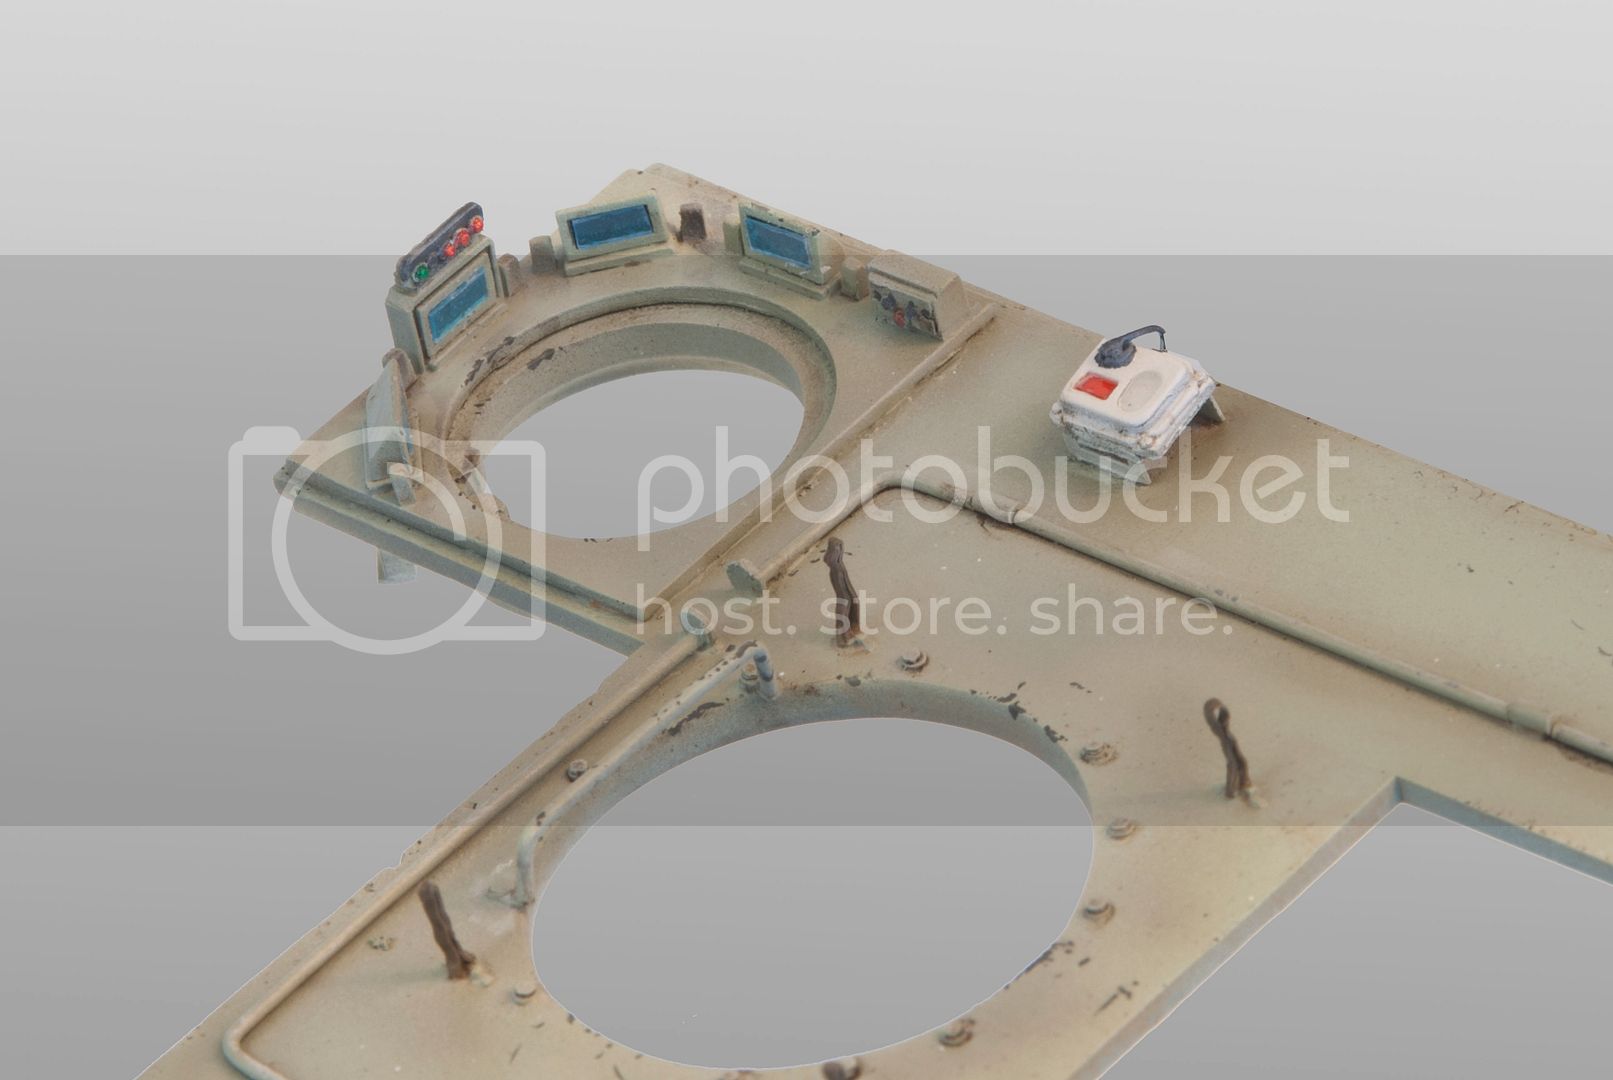
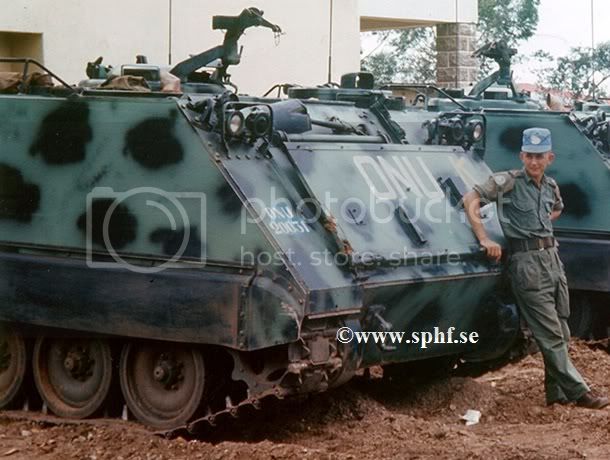
Yes, you read this correctly, a Swedish M113. :-)
It is not commonly known that the Swedish UN contingent in the Congo in the 60's had a number of M113's at their disposal. The Swedes used pretty much any vehicle they could get ther hands on, for example M8 Greyhounds, M3 Scout Cars - amongst many others.
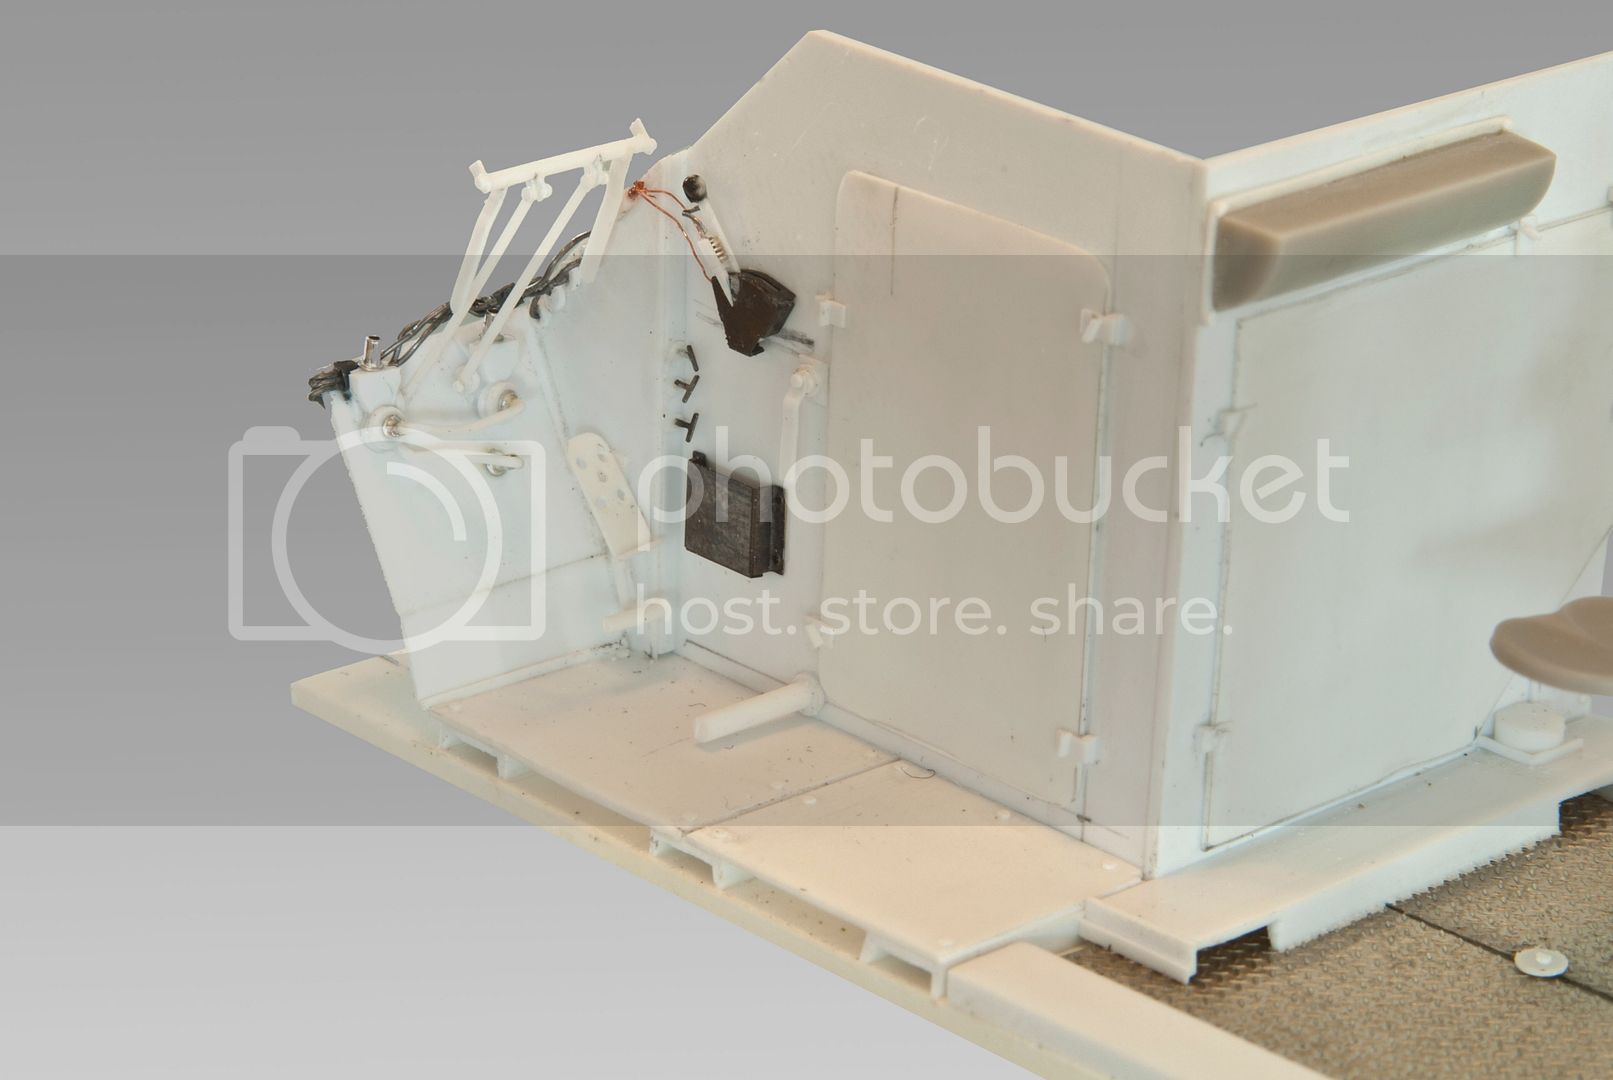
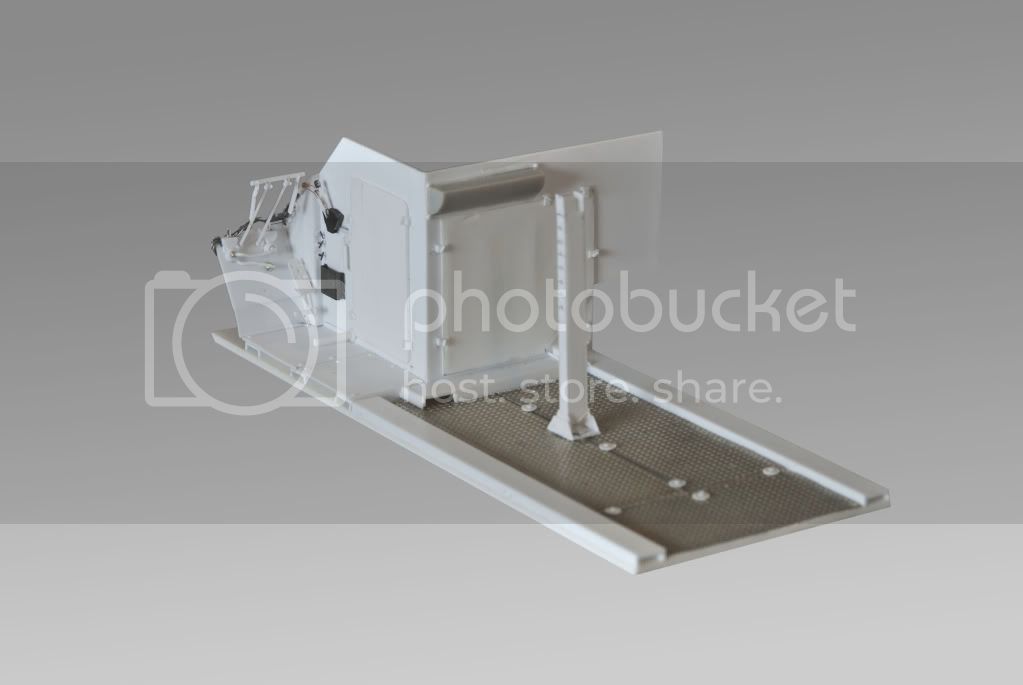
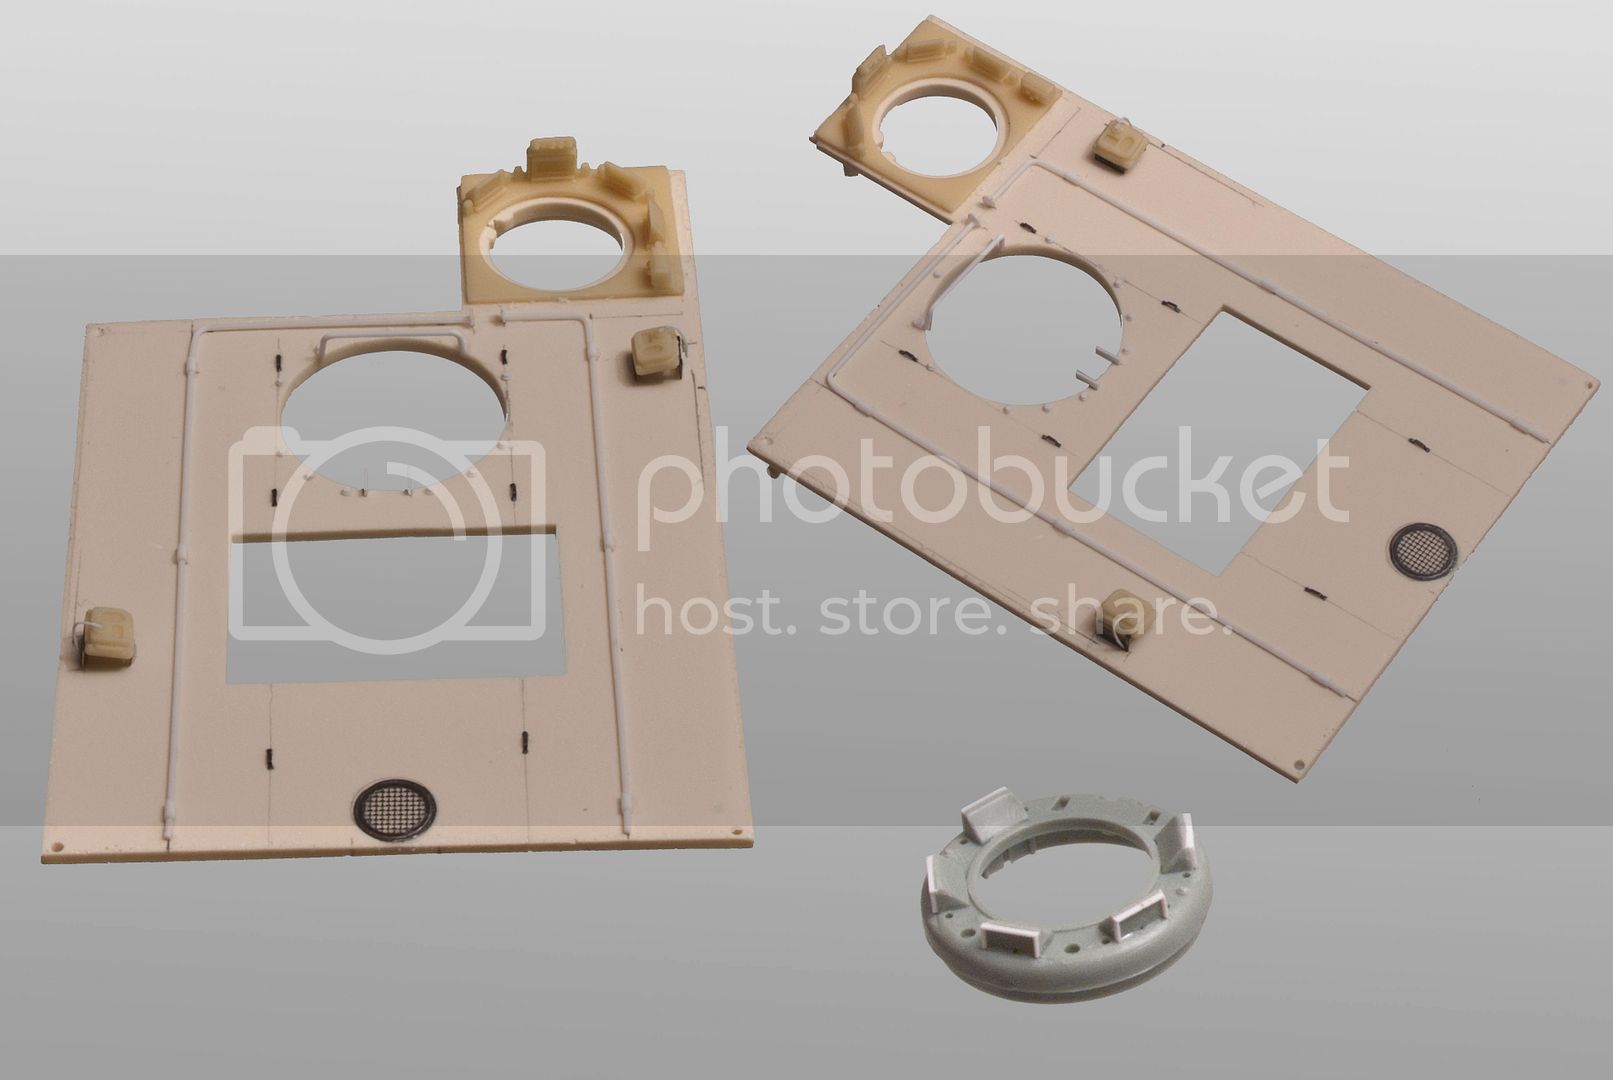
This project started a couple of years ago, and I decided to try and spruce up the interior of the old Tamiya/Academy kits with some scratchbuilding. As my build progressed, Miliminis (more recently produced by Iron Division) and Verlinden both released update sets for the interior and exterior of this vehicle, and these sets were quickly purchased. These sets will save a lot of scratchbuilding in future M113 projects, they are very nice.
Since this model depicts an early M113 with the petrol engine, I scratchbuilt the fuel tank, since only the later (diesel) fuel tank is included in both the resin update sets.
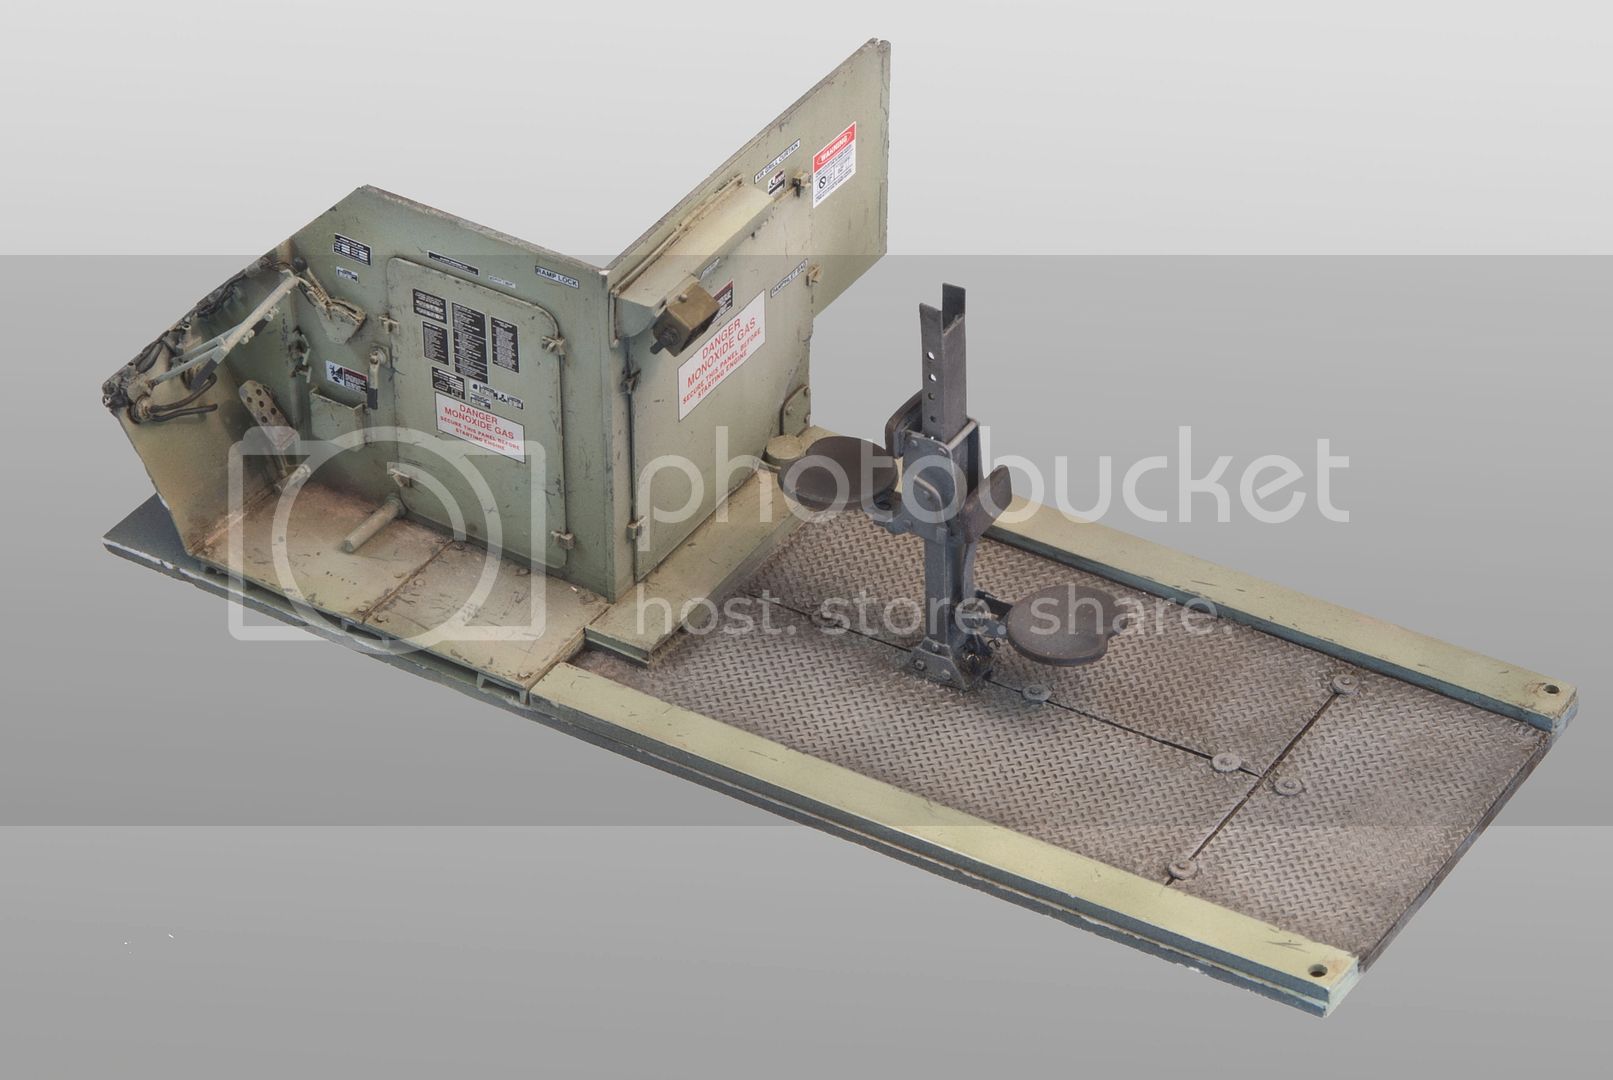
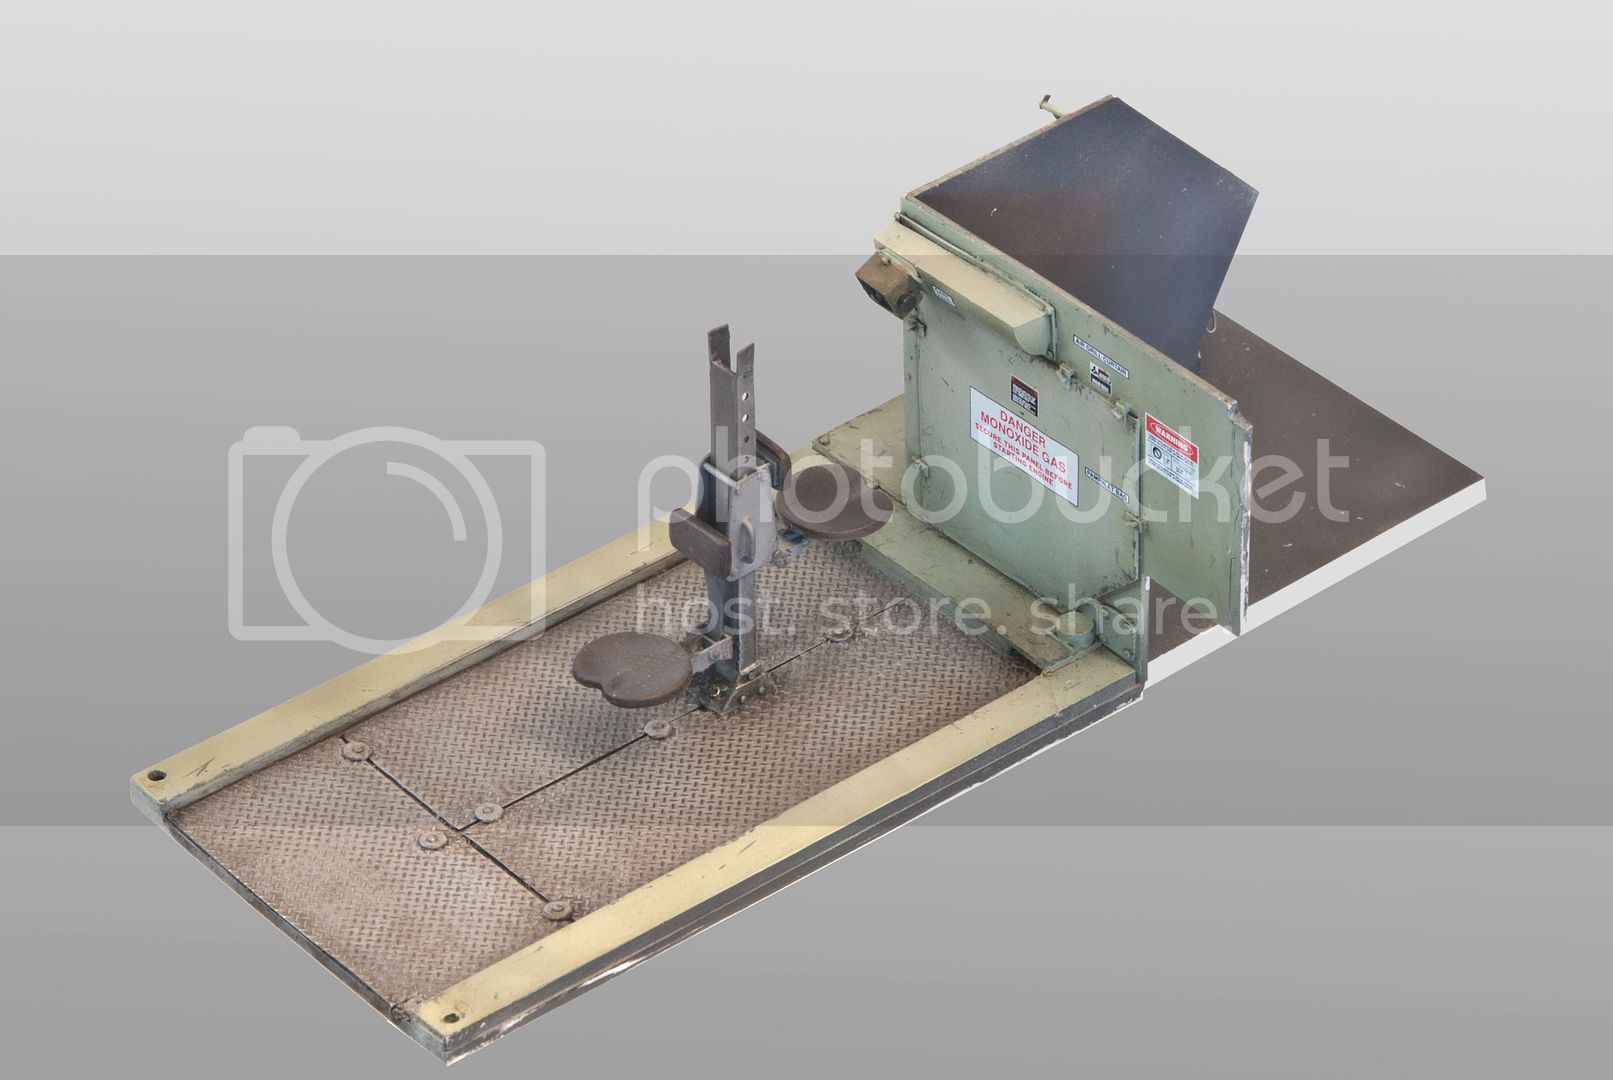
The model has been sitting on the shelf for over a year now, awaiting for a new injection of inspiration, and last week that inspiration came back to me. The past few days have been spent painting and chipping the interior.
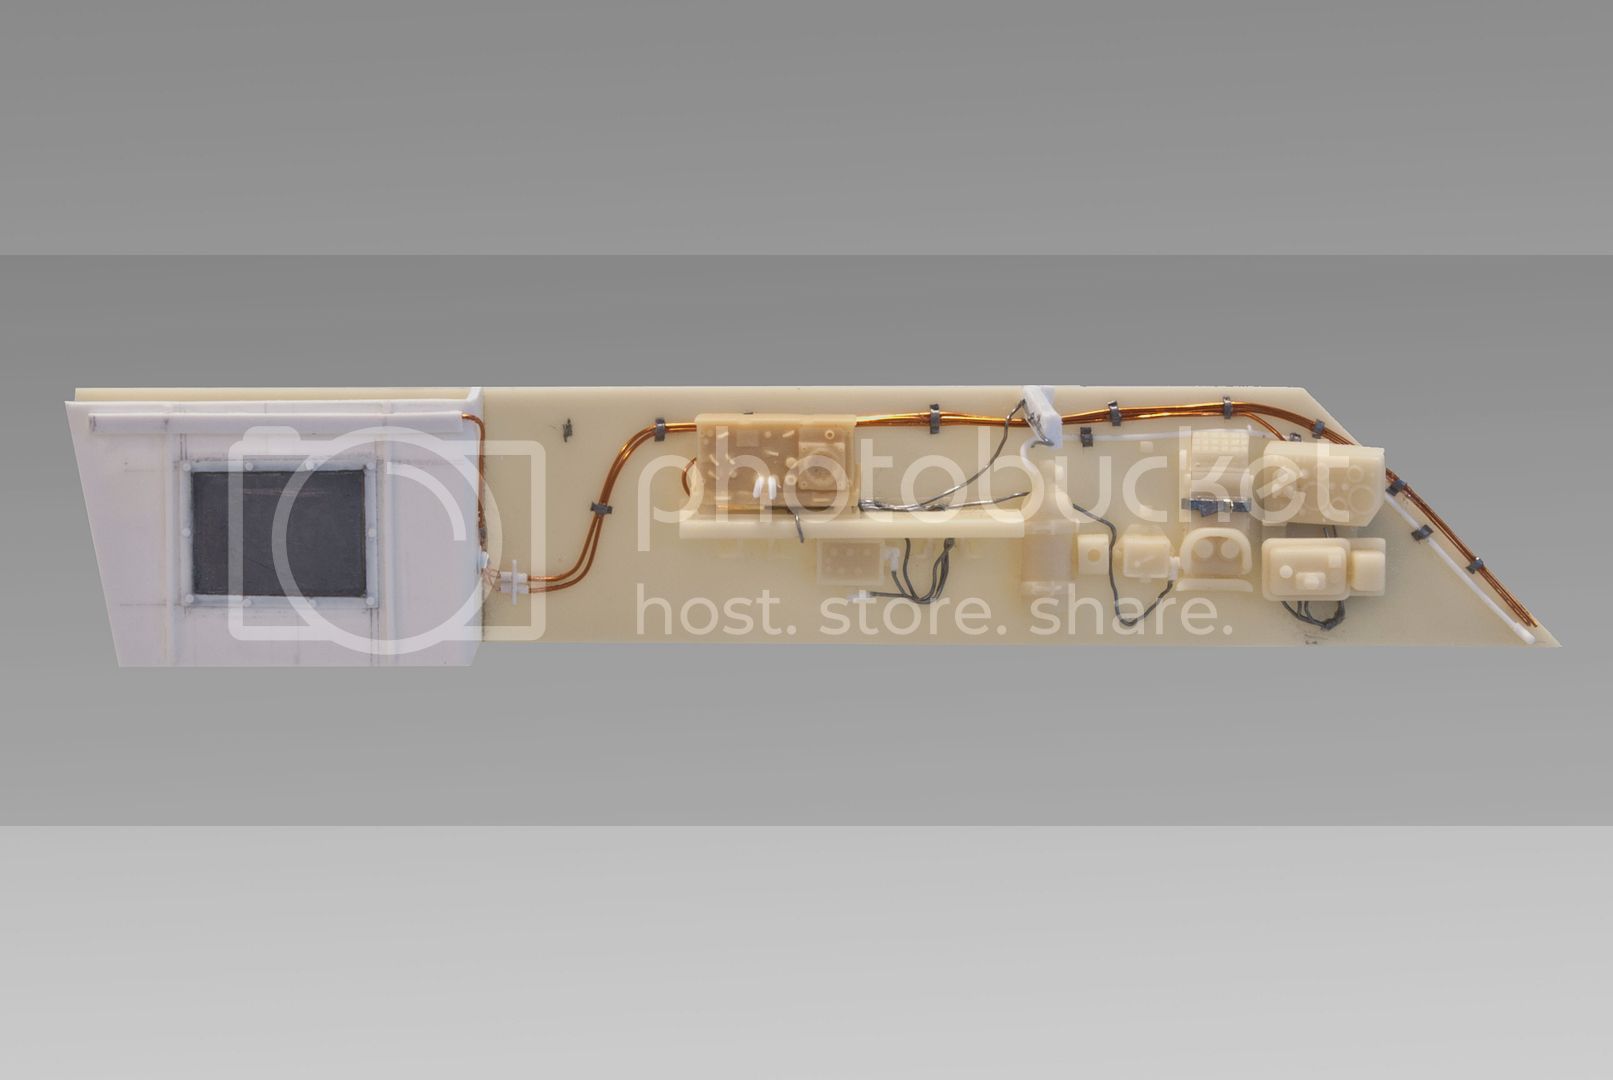
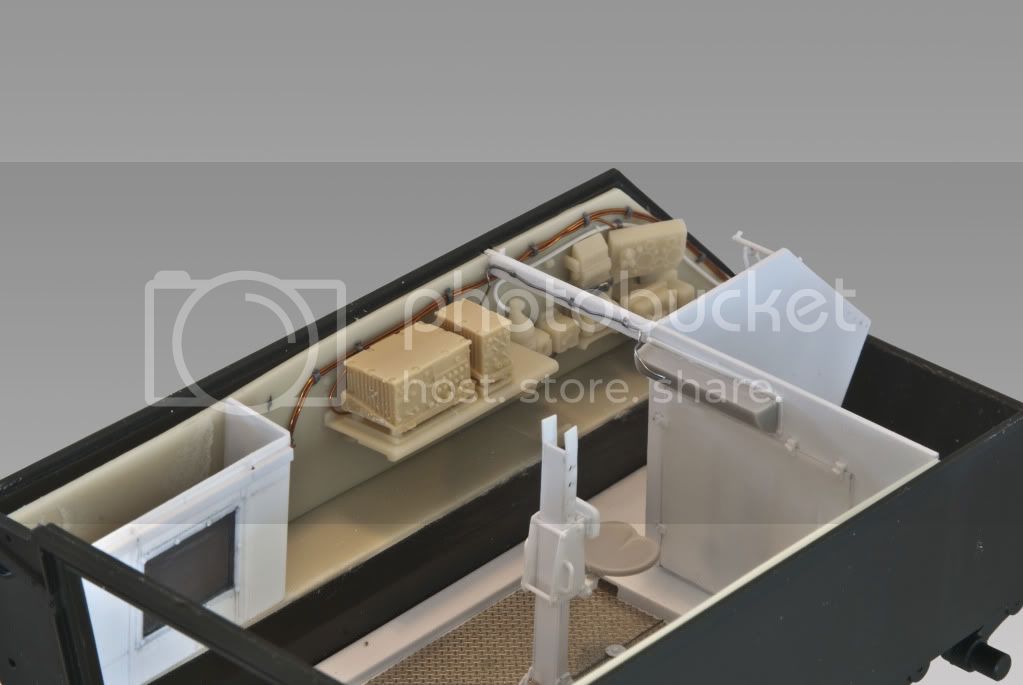
The interior is almost complete now, and more or less ready to be glued in to the Tamiya tub, remaining items soon to be added are the bench and crew seats, radio set-up, instrument cluster, a few more decals etc. Some weathering (dirt) and stowage will also be added before the resin roof from Milimiis/Iron Division is glued on.
Thanks for looking, constructive comments are welcome and appreciated.
Cheers,
Sven
(Images of the real vehicle are copyrighted and used by kind permission from SPHF (Swedish Armour Historical Society).
Constructive Feedback
For in-progress or completed build photos. Give and get contructive feedback!
Hosted by Darren Baker, Dave O'Meara
Swedish M113
young_sven
Skåne, Sweden
Joined: May 14, 2010
KitMaker: 749 posts
Armorama: 743 posts
Joined: May 14, 2010
KitMaker: 749 posts
Armorama: 743 posts
Posted: Monday, November 11, 2013 - 12:10 AM UTC
Maki
Senior Editor
Croatia Hrvatska
Joined: February 13, 2002
KitMaker: 5,579 posts
Armorama: 2,988 posts
Joined: February 13, 2002
KitMaker: 5,579 posts
Armorama: 2,988 posts
Posted: Monday, November 11, 2013 - 12:18 AM UTC
Very nice... I like all the wiring you added. Miliminis set looks really good, how is their resin?
Keep it up and keep us posted on the progress.
Mario
Keep it up and keep us posted on the progress.
Mario
young_sven
Skåne, Sweden
Joined: May 14, 2010
KitMaker: 749 posts
Armorama: 743 posts
Joined: May 14, 2010
KitMaker: 749 posts
Armorama: 743 posts
Posted: Monday, November 11, 2013 - 12:23 AM UTC
Thank you Mario, glad you like it this far! :-)
Actually, the resin you see in the pics is the Verlinden interior, but most of the interior was scratchbuilt. I did not use the Milimini interior parts. Nothing at all wrong with the Milimini resin, my choice just happened to fall upon the Verlinden set for this interior since I had that set first.
I will be using the Milimini resin interior parts in other projects.
I will also be using all the Milimini exterior update parts on this model, which replace basically all the plastic with really nice resin updates.
I can highly recommend the Iron Division (formerly Miliminis) and Verlinden updates. Just take note that the interior of the resin roof panel does not have any detail, so this needs to be scratchbuilt (not a huge problem). I will show this and more in a future post once it is done.
Cheers,
Sven
Maki
Senior Editor
Croatia Hrvatska
Joined: February 13, 2002
KitMaker: 5,579 posts
Armorama: 2,988 posts
Joined: February 13, 2002
KitMaker: 5,579 posts
Armorama: 2,988 posts
Posted: Monday, November 11, 2013 - 01:26 AM UTC
Thanks for the info. I didn't know Verlinden does the interior for M113, can you tell me the kit # please?
I liked Miliminis kits for the M113 interior, but unfortunately they were not available when I did my M163, so I also scratched some of the interior. Actually, I never saw Miliminis kits actually used in a M113 and thought your model is the one. Their exterior sets also look very nice, perhaps I should try them one day.
Anyway, I must congratulate you on your work with styrene... it is exceptional and very clean. Can't wait to see more.
Mario
young_sven
Skåne, Sweden
Joined: May 14, 2010
KitMaker: 749 posts
Armorama: 743 posts
Joined: May 14, 2010
KitMaker: 749 posts
Armorama: 743 posts
Posted: Monday, November 11, 2013 - 01:43 AM UTC
Hello Mario,
Thanks for your kind comments, much appreciated.
The Verlinden interior is number 2731 and includes a full diesel engine and compartment. Very nice.
https://www.verlindenonline.com/1-35-scale-m113-full-interior-2731.html
Cheers,
Sven
Thanks for your kind comments, much appreciated.
The Verlinden interior is number 2731 and includes a full diesel engine and compartment. Very nice.
https://www.verlindenonline.com/1-35-scale-m113-full-interior-2731.html
Cheers,
Sven
Maki
Senior Editor
Croatia Hrvatska
Joined: February 13, 2002
KitMaker: 5,579 posts
Armorama: 2,988 posts
Joined: February 13, 2002
KitMaker: 5,579 posts
Armorama: 2,988 posts
Posted: Monday, November 11, 2013 - 02:28 AM UTC
Thank you for the link, I had no clue of this set... it seems pretty comprehensive, but unfortunately I'm not sure what's included as the pics do not show all the pieces of the kit.
Thanks again, and sorry to go off-topic here.
Mario
Thanks again, and sorry to go off-topic here.
Mario
young_sven
Skåne, Sweden
Joined: May 14, 2010
KitMaker: 749 posts
Armorama: 743 posts
Joined: May 14, 2010
KitMaker: 749 posts
Armorama: 743 posts
Posted: Monday, November 11, 2013 - 02:56 AM UTC
No problem, Mario, I am happy to help.
The set includes everything you need to pimp up the interior and engine compartment. It replaces all interior parts in the Tamiya/Academy kits, including:
Entire floor
Engine compartment walls
Side walls with separate details.
Radio shelf and radio.
Battery box
Bench seats, with seat belts molded on (they look great).
Crew seats and posts.
Entire engine compartment and engine/transmission.
The set does not include a new roof or any parts for the exterior of the vehicle, and no etched parts.
A very comprehensive set.
Cheers,
Sven
Maki
Senior Editor
Croatia Hrvatska
Joined: February 13, 2002
KitMaker: 5,579 posts
Armorama: 2,988 posts
Joined: February 13, 2002
KitMaker: 5,579 posts
Armorama: 2,988 posts
Posted: Monday, November 11, 2013 - 06:23 AM UTC
Thanks Sven. Actually I managed to find two reviews of the set on AMPS and Modelers Social Club with shots of the kit contents. It looks pretty nice.
Mario
Mario
young_sven
Skåne, Sweden
Joined: May 14, 2010
KitMaker: 749 posts
Armorama: 743 posts
Joined: May 14, 2010
KitMaker: 749 posts
Armorama: 743 posts
Posted: Sunday, November 24, 2013 - 08:40 PM UTC
Hello again!
Well, slowly but surely the work continues on this project, and I think I can say that the interior is more or less done and reaady to be mounted into the "bucket".
Since my previous (first) post, the following has happened:
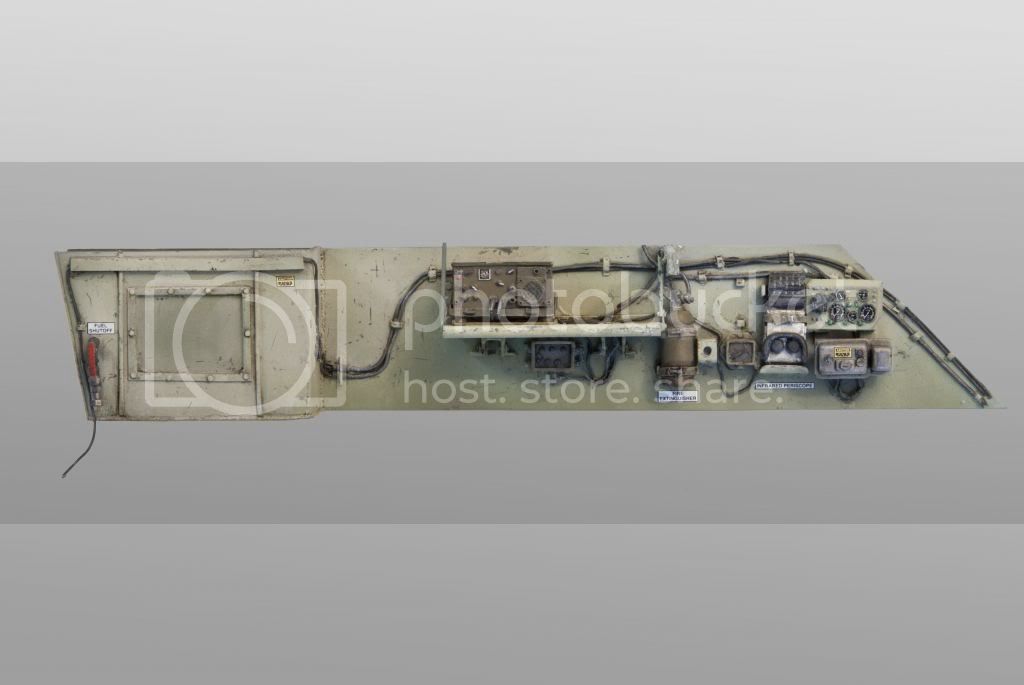
1. Roof interior has been completed (Miliminis roof is void of any detail, so this was added using scratchbuilt as well as Verlinden interior parts). The vision blocks are thin transparant pc rectangles airbrushed with a thin layer of Tamiya clear blur and green from behind before gluing them in place with white glue. They look bluer in the pics, and they are more transparant in real life on the model. The wiring for the interior lighting on the roof interior is incorrect in the pics, and has since been corrected.
2. All Archer decals are in place.
3. Radio and instrument cluster mounted.
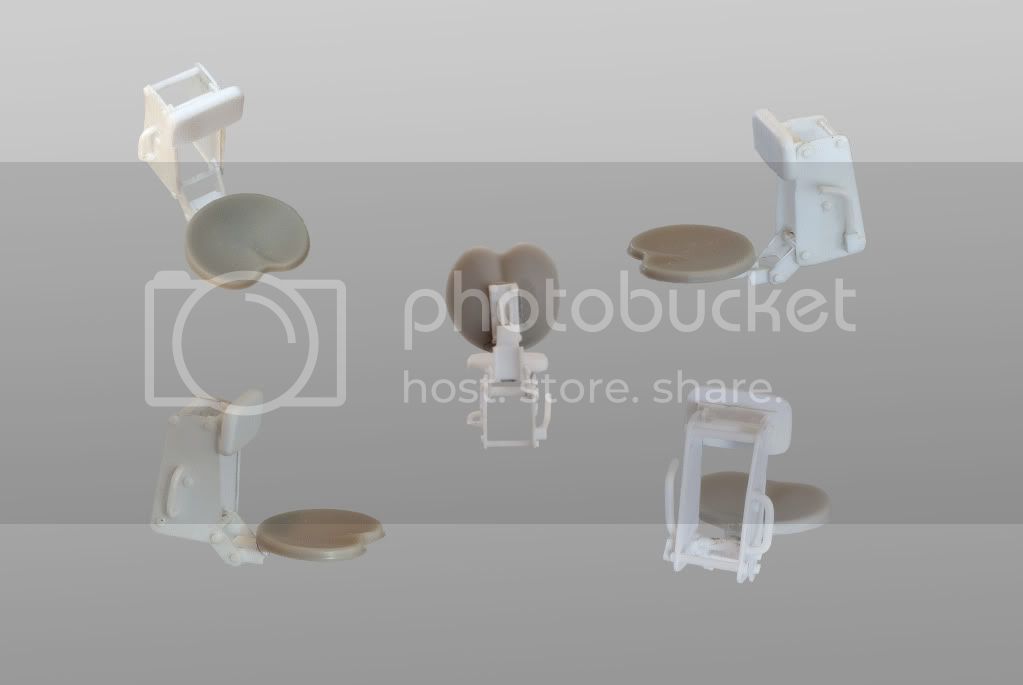
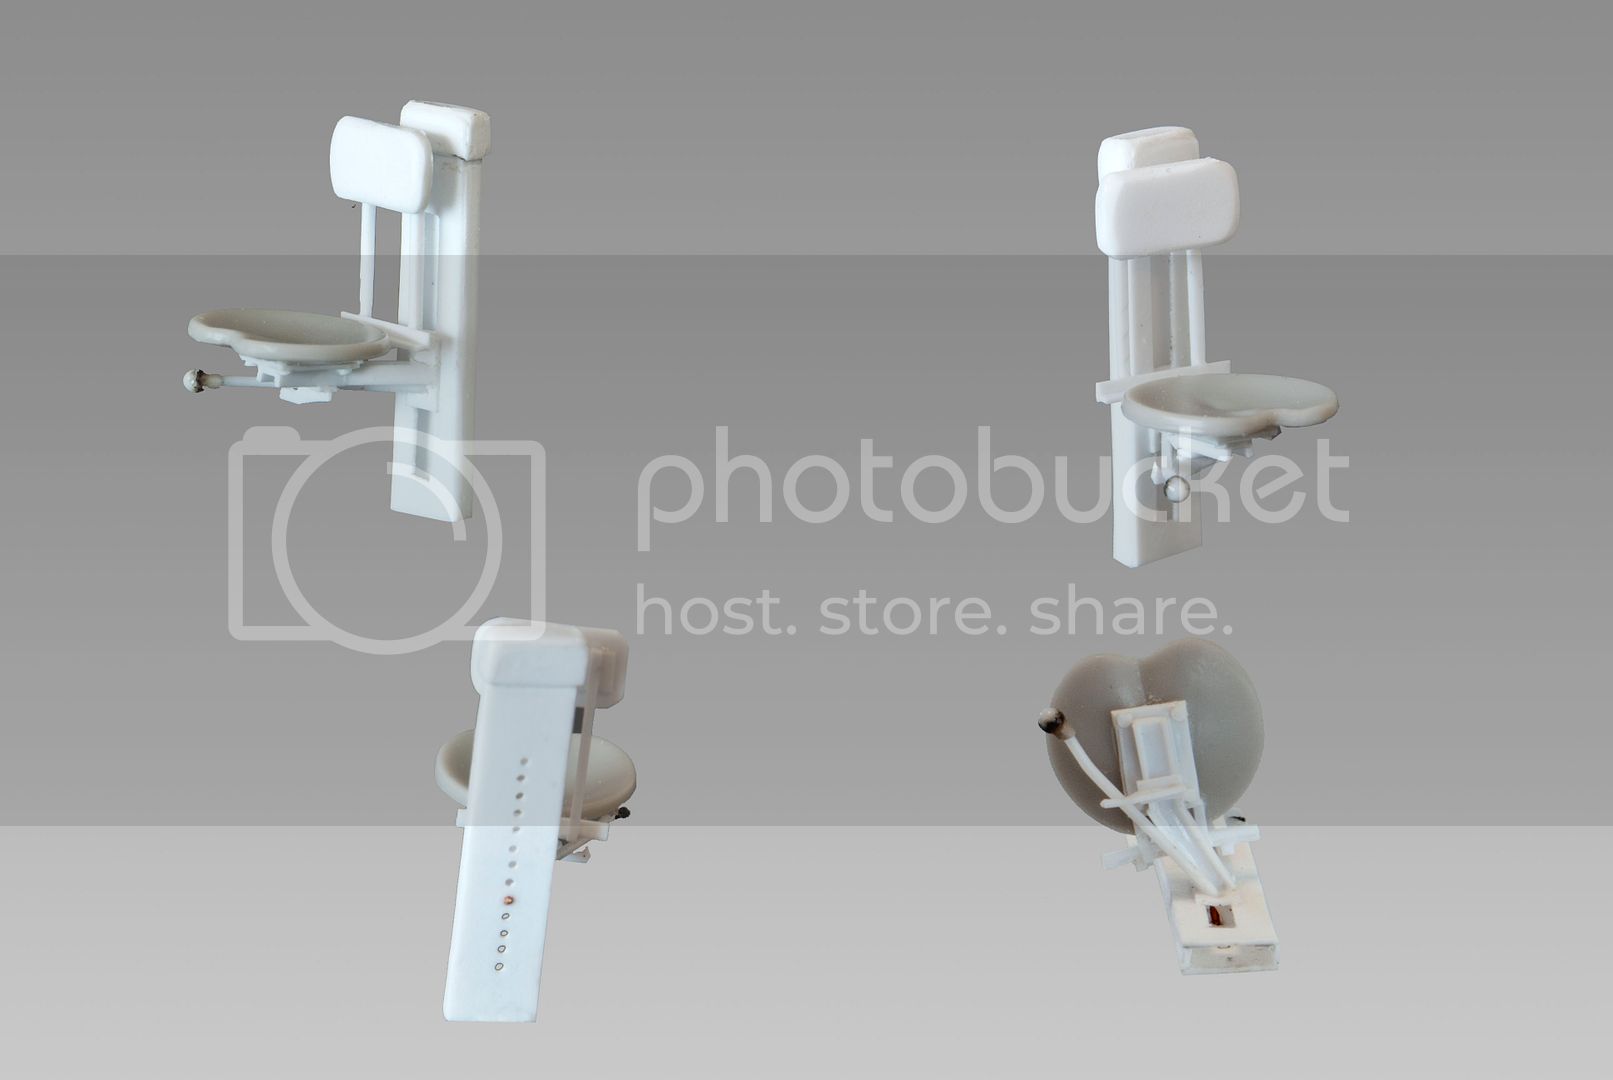
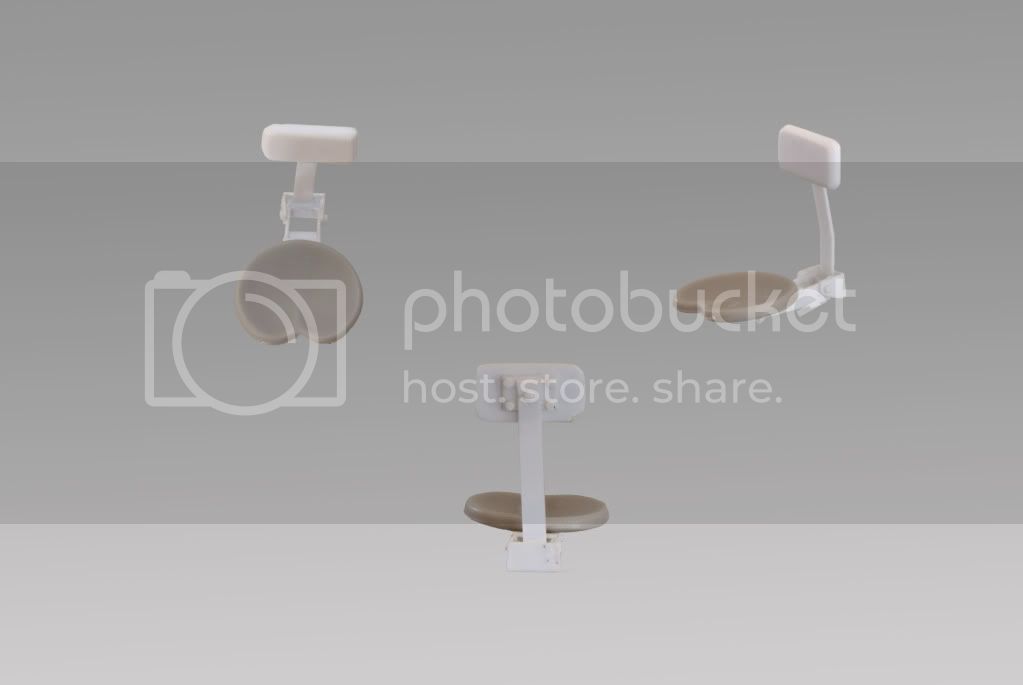
4. Commander's and squad leader's seats in place on center post.
I am considering putting some interior lighting (LEDs) in place before closing her down, it is rather dark inside the model with the roof on (even with the hatches open).
Here are the in progress pics:
Maki
Senior Editor
Croatia Hrvatska
Joined: February 13, 2002
KitMaker: 5,579 posts
Armorama: 2,988 posts
Joined: February 13, 2002
KitMaker: 5,579 posts
Armorama: 2,988 posts
Posted: Sunday, November 24, 2013 - 09:23 PM UTC
Nice, I like the details on the roof. The interior looks great and I can't wait to see it finished. Will you be adding all the crew equipment inside for the "busy look" of the vehicle?
Mario
Mario
young_sven
Skåne, Sweden
Joined: May 14, 2010
KitMaker: 749 posts
Armorama: 743 posts
Joined: May 14, 2010
KitMaker: 749 posts
Armorama: 743 posts
Posted: Sunday, November 24, 2013 - 11:13 PM UTC
Thanks Mario, it great to have you following this build! :-)
Yes, I will be adding some crew stowage as well, but will be keeping in mind that the Swedish M113's in the Congo were used mainly for shorter patrols and as such were not overloaded with gear as often seen on Vietnam and OIF M113's.
Some personal stowage inside will definitely be added, but very little on the outside of the vehicle.
I will also be weathering the interior a little more with dirt and dust.
18Bravo
Colorado, United States
Joined: January 20, 2005
KitMaker: 7,219 posts
Armorama: 6,097 posts
Joined: January 20, 2005
KitMaker: 7,219 posts
Armorama: 6,097 posts
Posted: Monday, November 25, 2013 - 04:37 AM UTC
VERY nice work so far. The weathering is pleasantly restrained as well.
The Archer decals are nice too. I actually took the photos for those - it's good to see what they look like as I have never used the set.
young_sven
Skåne, Sweden
Joined: May 14, 2010
KitMaker: 749 posts
Armorama: 743 posts
Joined: May 14, 2010
KitMaker: 749 posts
Armorama: 743 posts
Posted: Monday, November 25, 2013 - 05:22 AM UTC
Hi Robert,
Many thanks for your kind comments, much appreciated!
The Archer decals are superb, and the tiny print is fully legible on most of them. I am really impressed. Nice job on your part with the reference images! :-)
Many thanks for your kind comments, much appreciated!
The Archer decals are superb, and the tiny print is fully legible on most of them. I am really impressed. Nice job on your part with the reference images! :-)
chnoone
Armed Forces Europe, United States
Joined: January 01, 2009
KitMaker: 1,036 posts
Armorama: 1,033 posts
Joined: January 01, 2009
KitMaker: 1,036 posts
Armorama: 1,033 posts
Posted: Monday, November 25, 2013 - 07:10 PM UTC
WOW !
Very detailed, very reserved weathering ... very realistic !
May I say I believe you found a perfect balance in producing a very, very realistic appearance !
Wish I would sometime have that patience/talent
Cheers
Christopher
Very detailed, very reserved weathering ... very realistic !
May I say I believe you found a perfect balance in producing a very, very realistic appearance !
Wish I would sometime have that patience/talent
Cheers
Christopher
young_sven
Skåne, Sweden
Joined: May 14, 2010
KitMaker: 749 posts
Armorama: 743 posts
Joined: May 14, 2010
KitMaker: 749 posts
Armorama: 743 posts
Posted: Monday, November 25, 2013 - 08:46 PM UTC
Thank you for your very kind comments, Christopher, I am glad that you like it.
I am really pleased that several people have commented positively on the weathering, since I have tried very hard to keep it somewhat subdued, and not covered in chips and stains.
Granted, there will be a little more dust and dirt on the floor areas when I am done, but that's about it.
Thanks again..!
Cheers
Sven
Maki
Senior Editor
Croatia Hrvatska
Joined: February 13, 2002
KitMaker: 5,579 posts
Armorama: 2,988 posts
Joined: February 13, 2002
KitMaker: 5,579 posts
Armorama: 2,988 posts
Posted: Monday, November 25, 2013 - 09:10 PM UTC
Quoted Text
I am really pleased that several people have commented positively on the weathering, since I have tried very hard to keep it somewhat subdued, and not covered in chips and stains.
I think the weathering looks very realistic. People tend to go crazy with the chipping, it is great to see you in control. With some more dirt on the floor, it will be just right. BTW, here is how I did the interior on my IDF M163: link
Mario
young_sven
Skåne, Sweden
Joined: May 14, 2010
KitMaker: 749 posts
Armorama: 743 posts
Joined: May 14, 2010
KitMaker: 749 posts
Armorama: 743 posts
Posted: Monday, November 25, 2013 - 10:20 PM UTC
Thank you Mario!
Your build is stunning and I will definitely be using it as inspiration for my work. I love the way you have stowed your vehicle. Where did the IDF decals come from? (my apologies if you mentioned that in your blogg).
I would very much like to build a M-163 with the Hobbyfan interior, but as I understand it this conversion is quite difficult to find these days, as is the base model of the M-163 from Academy.
Maki
Senior Editor
Croatia Hrvatska
Joined: February 13, 2002
KitMaker: 5,579 posts
Armorama: 2,988 posts
Joined: February 13, 2002
KitMaker: 5,579 posts
Armorama: 2,988 posts
Posted: Tuesday, November 26, 2013 - 02:32 AM UTC
Thanks Sven, it was (and still is) a long project. I did my own decals for this build.
HobbyFan conversion is a gem, although some things could be upgraded as well. I got my set from Lucky Models, and it appears on eBay regularly as well. I built it on Academy's M113 from Vietnam, no need to go with M163 model.
But we are going off-topic now. Let's stay on the subject of your model and if you want to talk more about the M163 we can do it via PMs.
Cheers,
Mario
young_sven
Skåne, Sweden
Joined: May 14, 2010
KitMaker: 749 posts
Armorama: 743 posts
Joined: May 14, 2010
KitMaker: 749 posts
Armorama: 743 posts
Posted: Tuesday, November 26, 2013 - 04:23 AM UTC
No problem, Mario, we'll stay on topic and discuss M-163's at another time :-)
rfbaer
Texas, United States
Joined: June 12, 2007
KitMaker: 1,866 posts
Armorama: 1,696 posts
Joined: June 12, 2007
KitMaker: 1,866 posts
Armorama: 1,696 posts
Posted: Wednesday, December 04, 2013 - 04:12 AM UTC
Very, very nice work so far!
young_sven
Skåne, Sweden
Joined: May 14, 2010
KitMaker: 749 posts
Armorama: 743 posts
Joined: May 14, 2010
KitMaker: 749 posts
Armorama: 743 posts
Posted: Wednesday, December 25, 2013 - 08:12 PM UTC
Hi Russel,
Sorry for a very late reply, I have not checked in on this post for a while.
Many thanks for your kind comment.
Hope you had a great Christmas and all the best in the New Year!
Sven
Sorry for a very late reply, I have not checked in on this post for a while.
Many thanks for your kind comment.
Hope you had a great Christmas and all the best in the New Year!
Sven
rfbaer
Texas, United States
Joined: June 12, 2007
KitMaker: 1,866 posts
Armorama: 1,696 posts
Joined: June 12, 2007
KitMaker: 1,866 posts
Armorama: 1,696 posts
Posted: Thursday, December 26, 2013 - 04:32 AM UTC
I had a most excellent Christmas, thanks. I also started Academy's M113 IDF Fitter kit, and I have to say, it's given me an entirely new appreciation for the work you're putting into this build.
I'm slapping mine together compared to what you're doing, mainly because I don't plan on having the interior featured in the dio it'll end up in, but also because I need a pretty quick build. I will however continue to watch this thread just for the sheer entertainment, as well as inspiration.
young_sven
Skåne, Sweden
Joined: May 14, 2010
KitMaker: 749 posts
Armorama: 743 posts
Joined: May 14, 2010
KitMaker: 749 posts
Armorama: 743 posts
Posted: Friday, December 27, 2013 - 06:40 PM UTC
Hi Russel,
Very pleased to hear you have had a great holiday so far.
Many thanks again for your kind feedback, hopefully I can get back to the bench soon and continue, I have been lacking drive and inspiration for modelling these past weeks for some reason.
Hopefully someone will soon release a new state of the art M113 model to save a lot of the extra work. Its surprising that none of the big boys have done it yet, I would have thought that kitting a new M113 would be good business as well.
Look forward to seeing pics of your build.
Sven
1stjaeger
Wien, Austria
Joined: May 20, 2011
KitMaker: 1,744 posts
Armorama: 1,727 posts
Joined: May 20, 2011
KitMaker: 1,744 posts
Armorama: 1,727 posts
Posted: Saturday, December 28, 2013 - 03:25 AM UTC
Hi Sven,
your job on the interior is truly inspirational!!! Well done!
And your "/review" of the resin kits is useful indeed!!
Thanks for sharing!
Cheers
Romain
young_sven
Skåne, Sweden
Joined: May 14, 2010
KitMaker: 749 posts
Armorama: 743 posts
Joined: May 14, 2010
KitMaker: 749 posts
Armorama: 743 posts
Posted: Wednesday, January 01, 2014 - 08:17 PM UTC
Hello Romain, and Happy New Year!
I am sorry for taking such a long time to respondto your post.
Many thanks for your very kind feedback, I am glad if this build can inspire and also provide an insite to what is included in the resin sets I am using.
Cheers,
Sven
I am sorry for taking such a long time to respondto your post.
Many thanks for your very kind feedback, I am glad if this build can inspire and also provide an insite to what is included in the resin sets I am using.
Cheers,
Sven