lots of Detail work on that landy
looking Forward to the updates
Hosted by Darren Baker
SAS Green Hornet Build Log.
rotxxyyzz

Joined: September 05, 2006
KitMaker: 43 posts
Armorama: 37 posts

Posted: Saturday, February 08, 2014 - 01:47 AM UTC
joegrafton

Joined: October 04, 2009
KitMaker: 1,209 posts
Armorama: 1,143 posts

Posted: Monday, February 24, 2014 - 02:06 AM UTC
Next update:
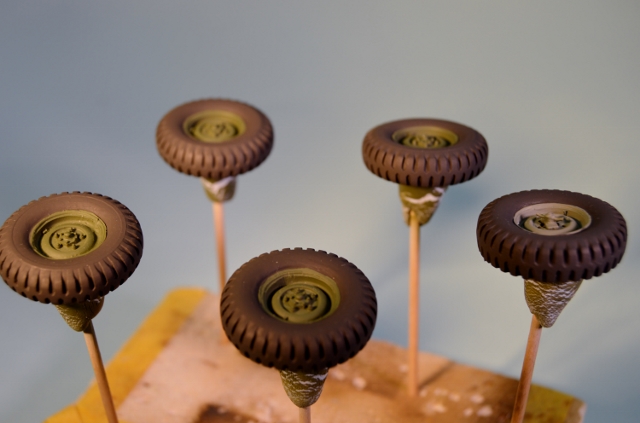
So now all the vehicles' details, weapons & equipment have been painted.
Here are some photos below of my progress up to this point:
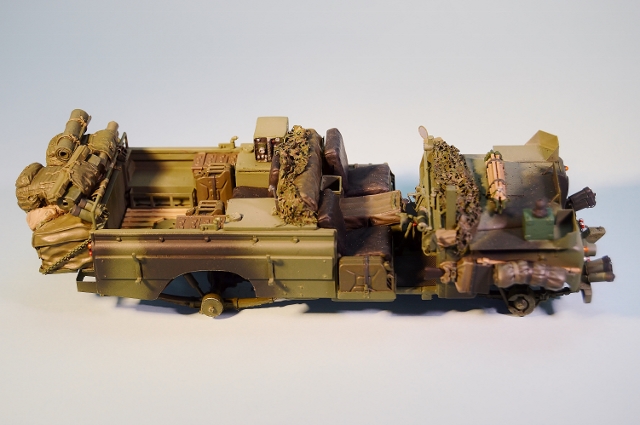
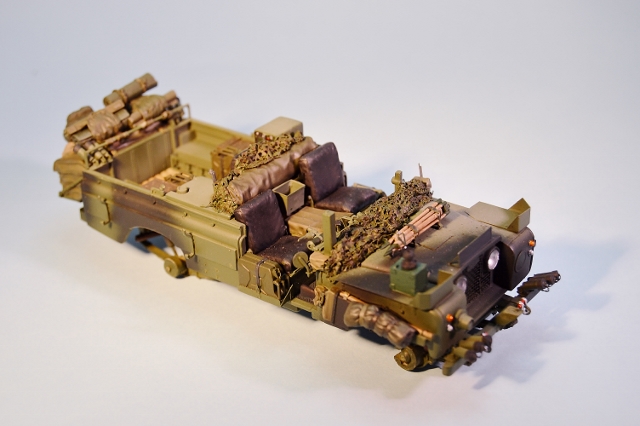
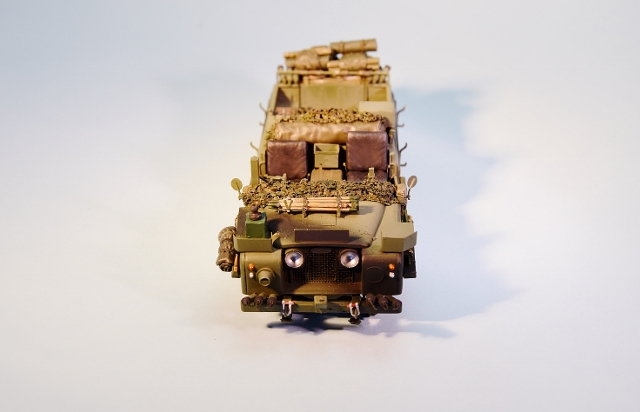
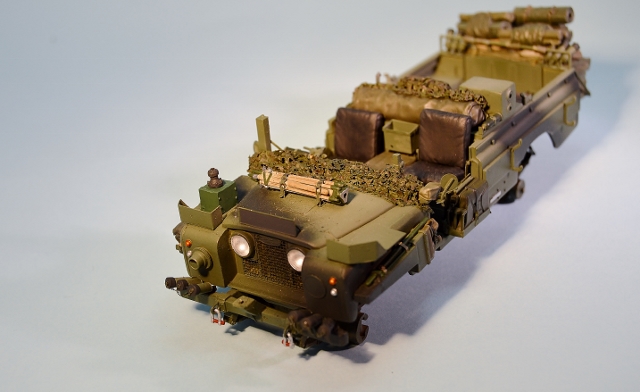
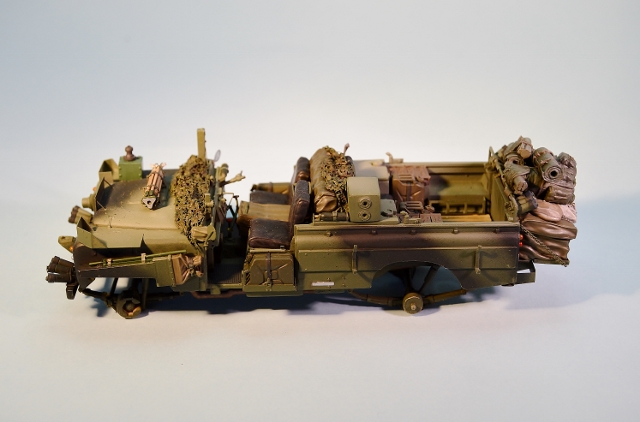
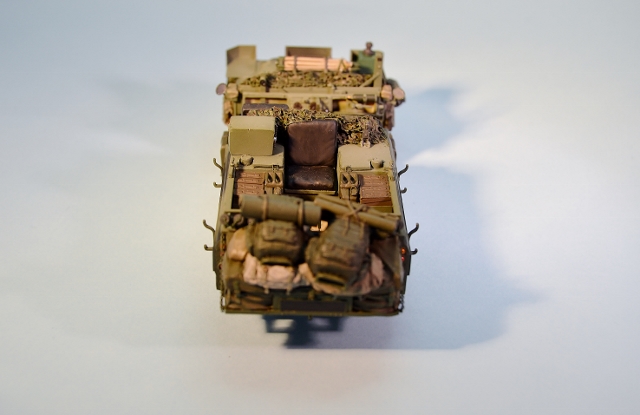
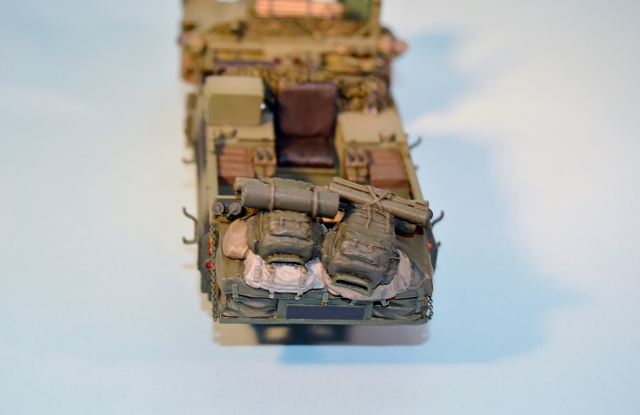
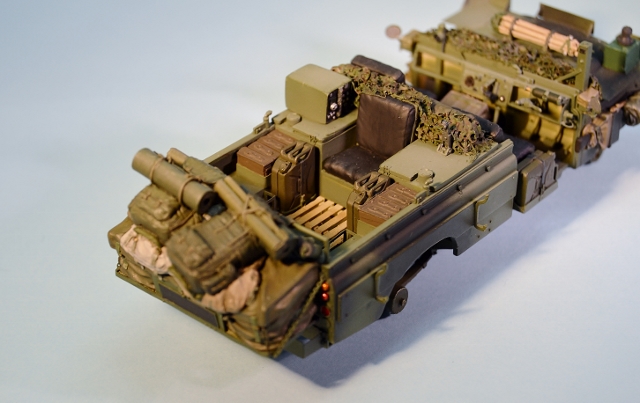
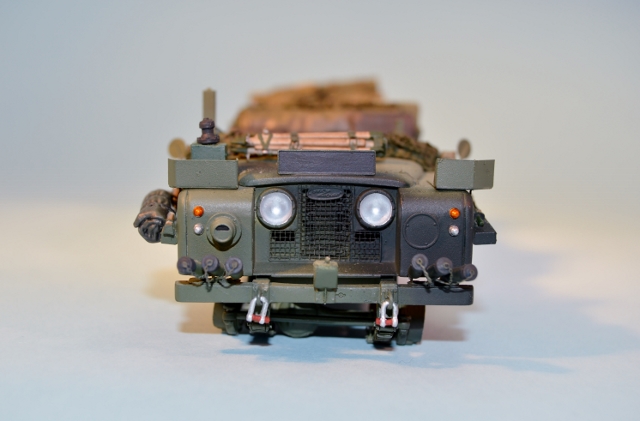
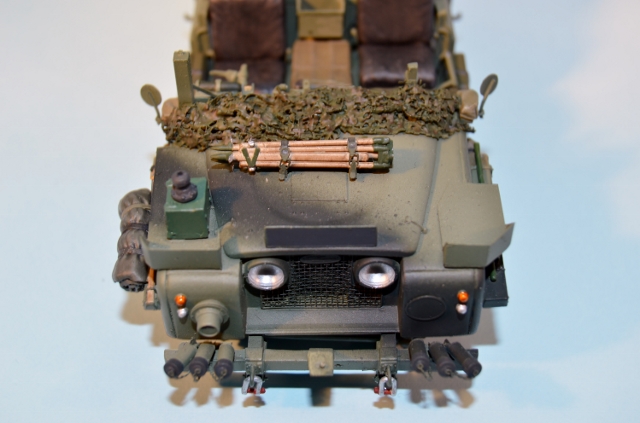
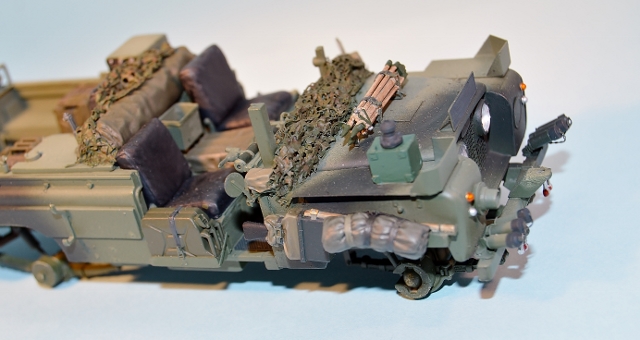
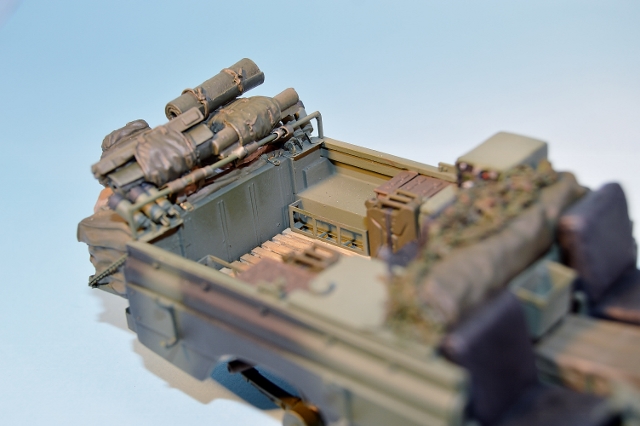
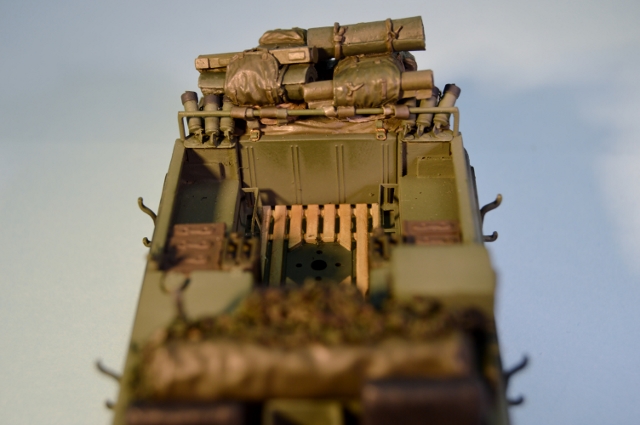
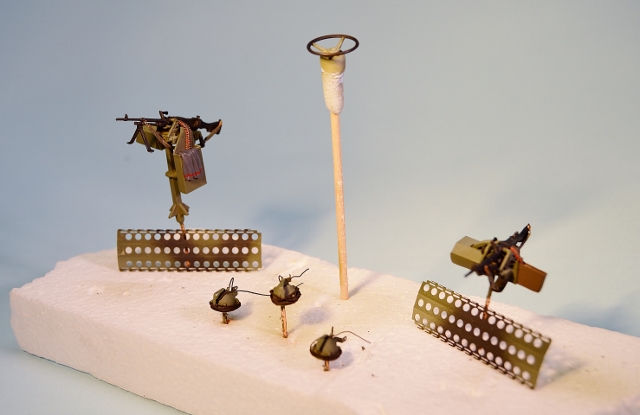
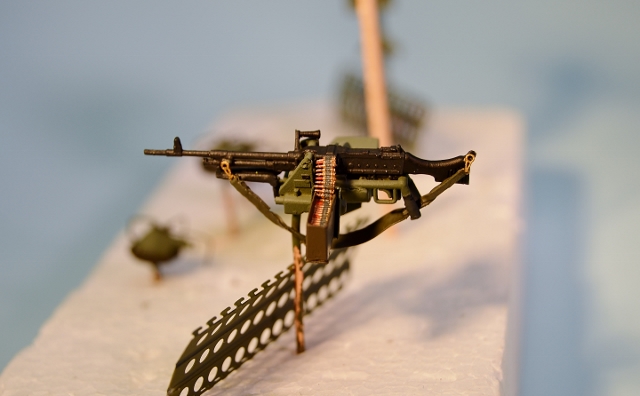
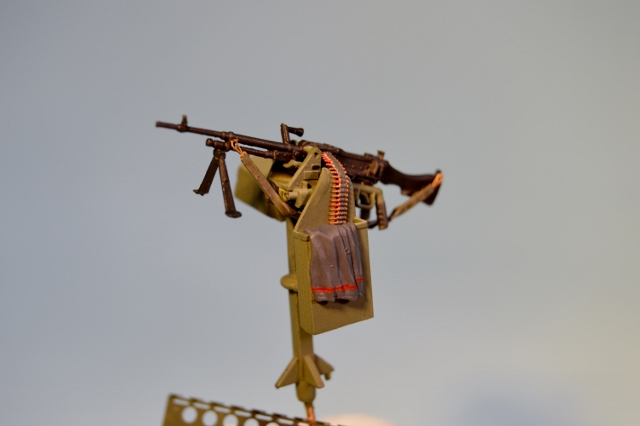
Look closely & you will see that every 5th round on the ammo belts are painted red to depict tracer rounds. Apparently, this is the standard setup for NATO belt ammo.
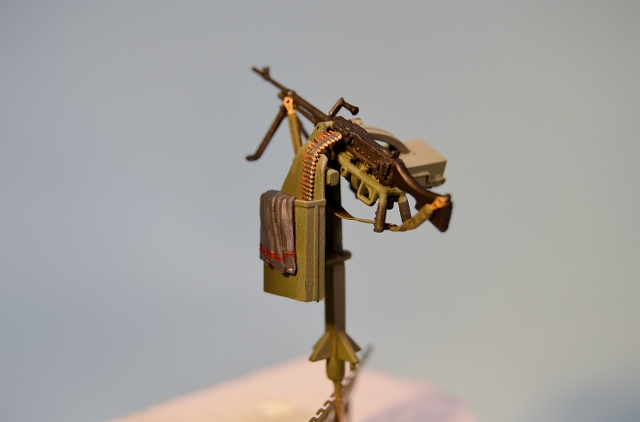
To paint in the detail I used an extensive range of Vallejo Model Color acrylics.
Also used were various mixes of the Lifecolor black rubber shades set for tyres, smoke grenade launcher lids, electrical wiring, etc.
Hobby Color brass & gold were used for GPMG sling clips, ammo belts, & brass buckles on equipment.
The lights were first painted with Floquil Old Silver & then overpainted with Tamiya Clear Orange & Clear Red where appropriate.
The mirrors & D shackles were also painted with Floquil Old Silver.
All the "wood" was painted with a mix of Vallejo Model Color paints & then dry brushed with W&N Raw Umber.
The next step is to prepare the model ready for the decals...
So now all the vehicles' details, weapons & equipment have been painted.
Here are some photos below of my progress up to this point:


Look closely & you will see that every 5th round on the ammo belts are painted red to depict tracer rounds. Apparently, this is the standard setup for NATO belt ammo.

To paint in the detail I used an extensive range of Vallejo Model Color acrylics.
Also used were various mixes of the Lifecolor black rubber shades set for tyres, smoke grenade launcher lids, electrical wiring, etc.
Hobby Color brass & gold were used for GPMG sling clips, ammo belts, & brass buckles on equipment.
The lights were first painted with Floquil Old Silver & then overpainted with Tamiya Clear Orange & Clear Red where appropriate.
The mirrors & D shackles were also painted with Floquil Old Silver.
All the "wood" was painted with a mix of Vallejo Model Color paints & then dry brushed with W&N Raw Umber.
The next step is to prepare the model ready for the decals...
Posted: Monday, February 24, 2014 - 10:13 AM UTC
Hi Joe,
Hadn't looked in on this one for a while. Excellent progress. Detail is looking good and I'm pretty sure you'll end up with another terrific model. Great work.
Al

Hadn't looked in on this one for a while. Excellent progress. Detail is looking good and I'm pretty sure you'll end up with another terrific model. Great work.
Al


joegrafton

Joined: October 04, 2009
KitMaker: 1,209 posts
Armorama: 1,143 posts

Posted: Thursday, March 06, 2014 - 08:33 AM UTC
Sorry for the delay but I had to re-order some decal sheets direct from Archer Transfers as the type I needed aren't stocked over here in the UK. Do you believe that?
Thanks Woody, for getting them to me so quickly!
Okay, so to prepare the model for the placement of the decals I gave it a liberal coat of this:
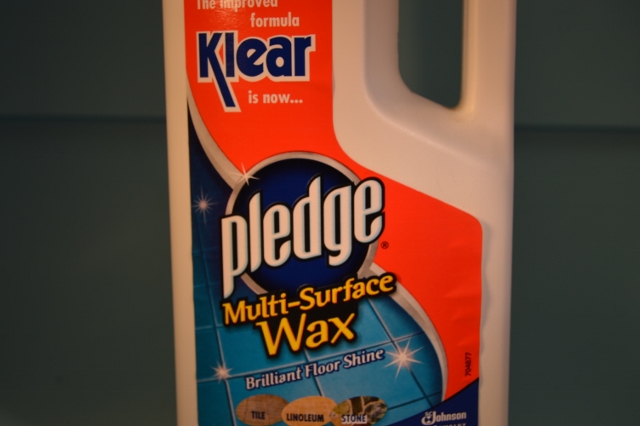
Pledge Multi Surface Wax which is called Future, I believe, in the States.
It really helps when applying the decals as it makes the surface of the model really smooth.
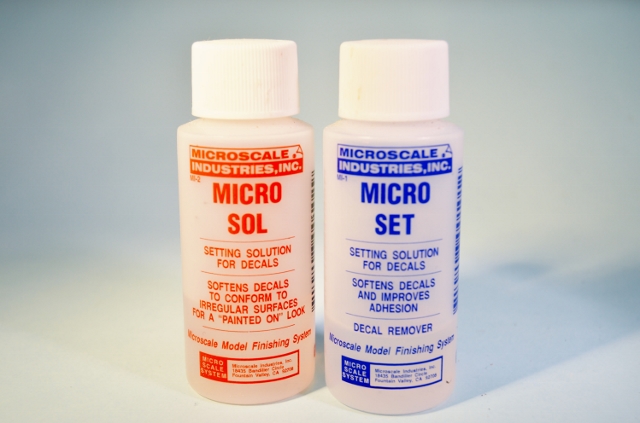
I then applied the decals to the model using these products:
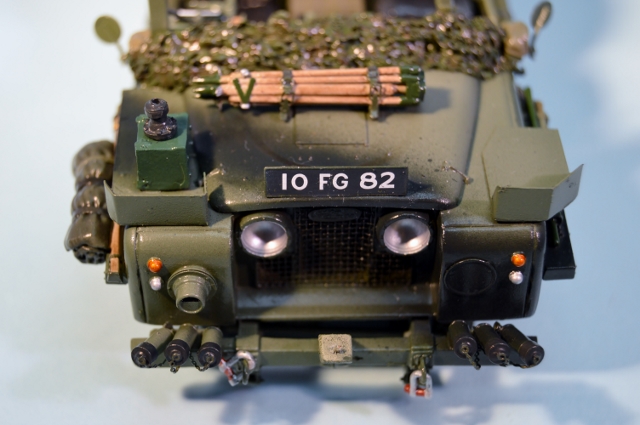
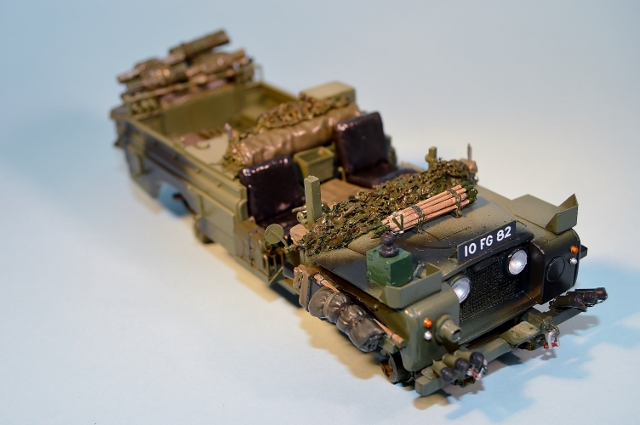
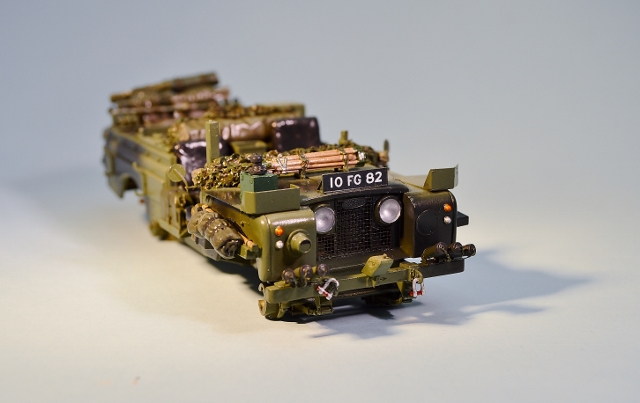
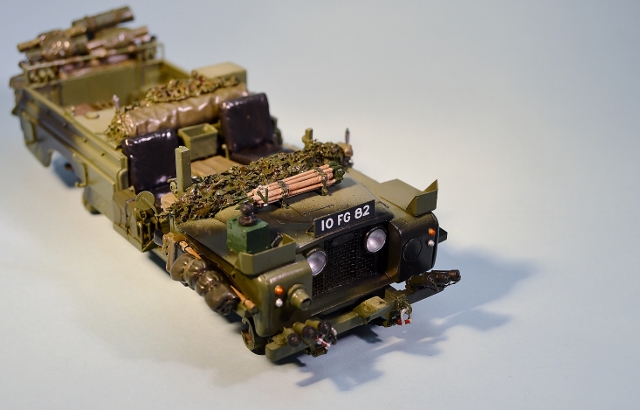
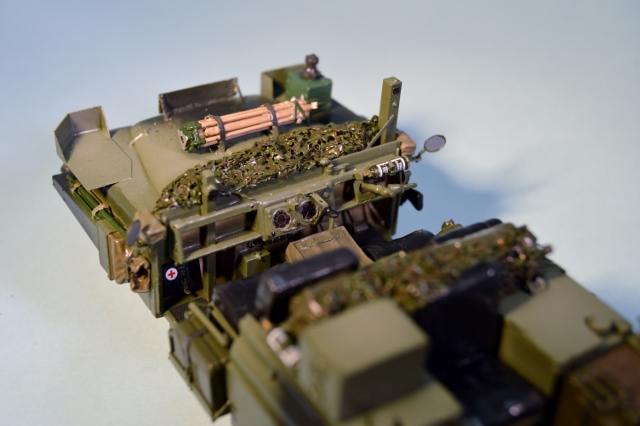
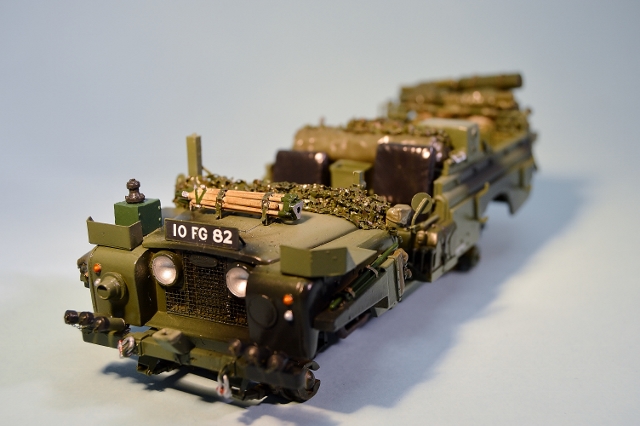
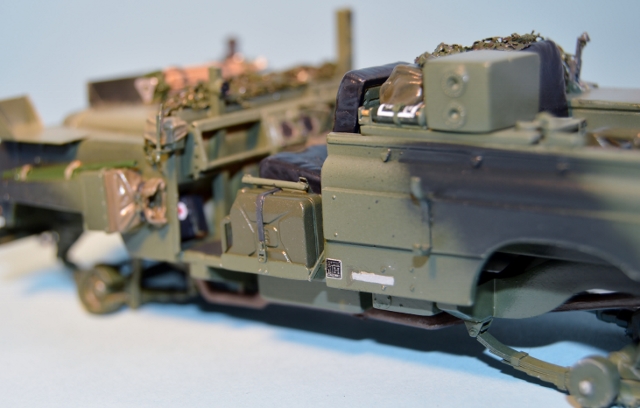
The decal at the bottom front left of the rear side panel shown in the photo above is taken from the Archer Transfers generic placards sheet.
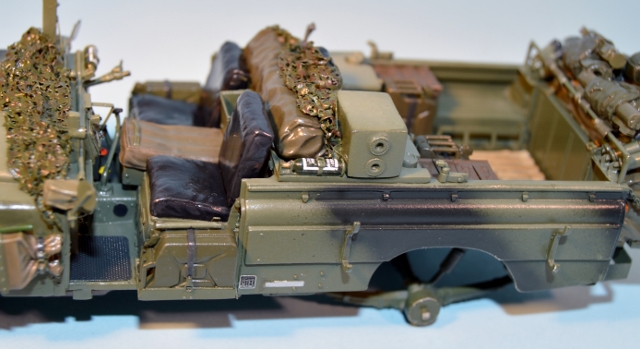
The decals on the fire extinguishers, like the one shown in the photograph above, have been improvised. I cut some white lines from various other Archer decal sheets & used them for the white outline around the 'instructions for use' wording. Luckily the words are unreadable as they came from some 155mm shell decals I had spare!
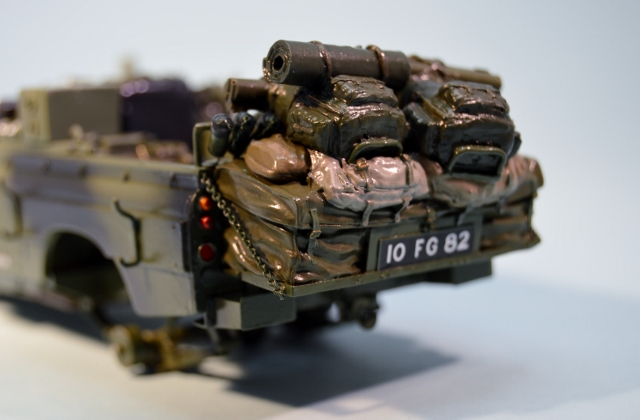
After the decals had dried out overnight I added an overspray of Pledge/Future on top of the decals to provide a little protection to them.
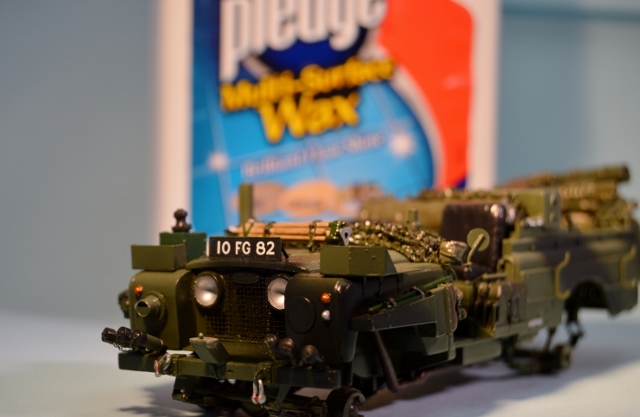
I will allow this Future coat to again dry overnight & then get the coats of varnish on.
Back soon...
Thanks Woody, for getting them to me so quickly!
Okay, so to prepare the model for the placement of the decals I gave it a liberal coat of this:

Pledge Multi Surface Wax which is called Future, I believe, in the States.
It really helps when applying the decals as it makes the surface of the model really smooth.
I then applied the decals to the model using these products:


The decal at the bottom front left of the rear side panel shown in the photo above is taken from the Archer Transfers generic placards sheet.

The decals on the fire extinguishers, like the one shown in the photograph above, have been improvised. I cut some white lines from various other Archer decal sheets & used them for the white outline around the 'instructions for use' wording. Luckily the words are unreadable as they came from some 155mm shell decals I had spare!

After the decals had dried out overnight I added an overspray of Pledge/Future on top of the decals to provide a little protection to them.

I will allow this Future coat to again dry overnight & then get the coats of varnish on.
Back soon...
Keef1648

Joined: January 23, 2008
KitMaker: 1,240 posts
Armorama: 1,192 posts

Posted: Friday, March 07, 2014 - 12:16 AM UTC
Looking good Sir, really good.
Keith.
Keith.

joegrafton

Joined: October 04, 2009
KitMaker: 1,209 posts
Armorama: 1,143 posts

Posted: Sunday, March 09, 2014 - 10:17 AM UTC
The next step was to apply the varnish to the model.
I used Vallejo acrylic varnish throughout...
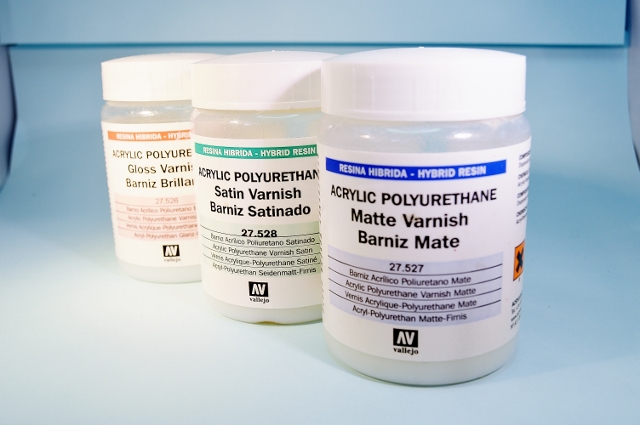
Here is the work done so far...
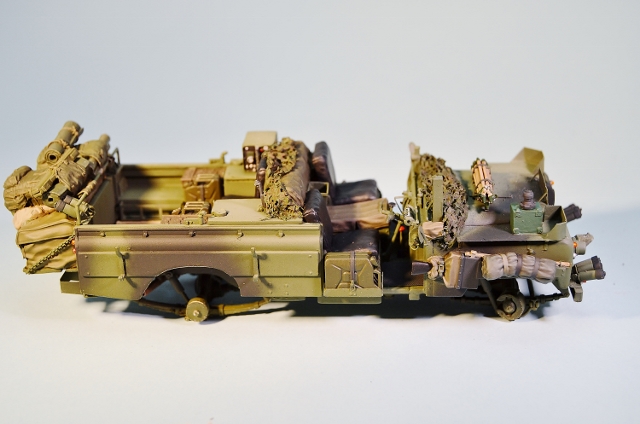
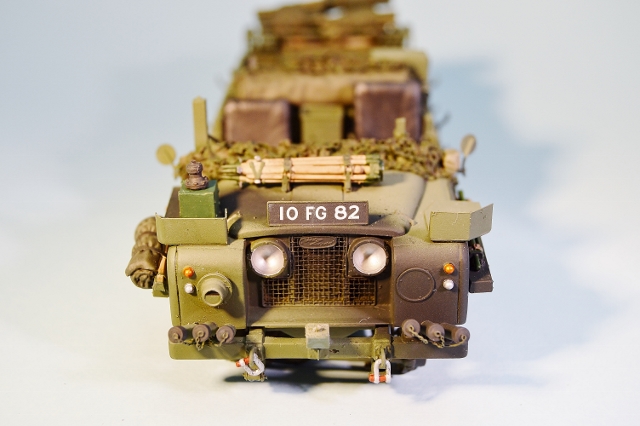
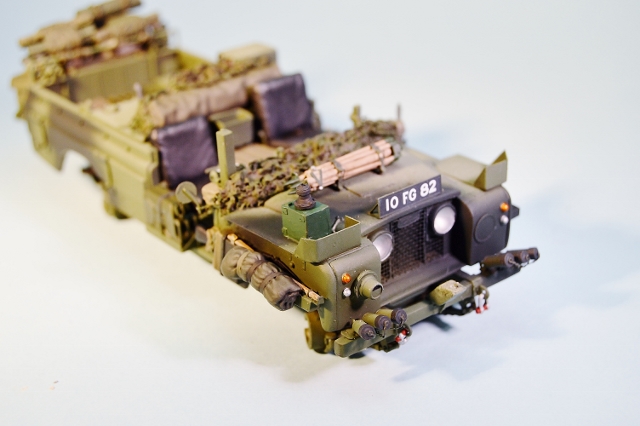
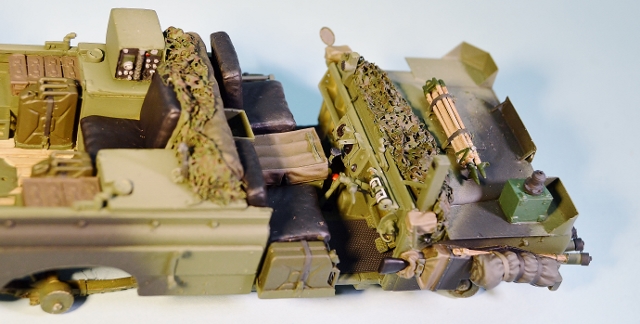
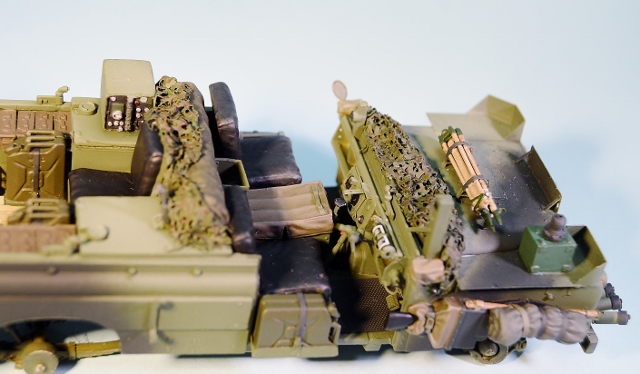
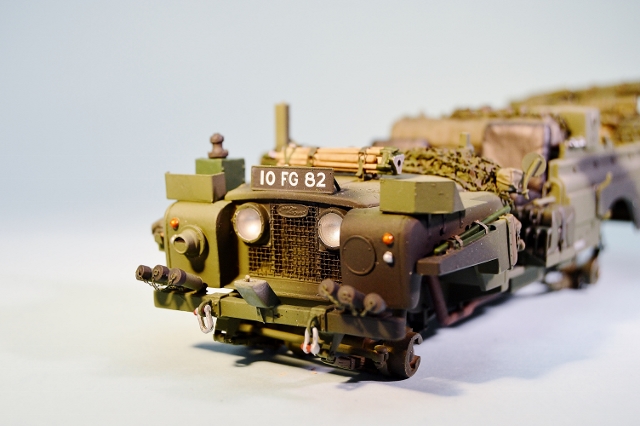
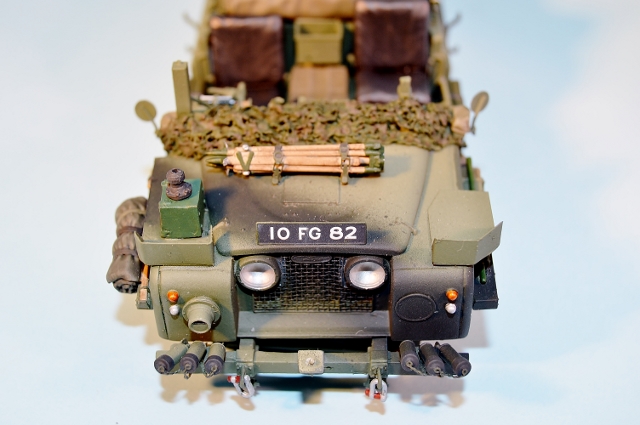
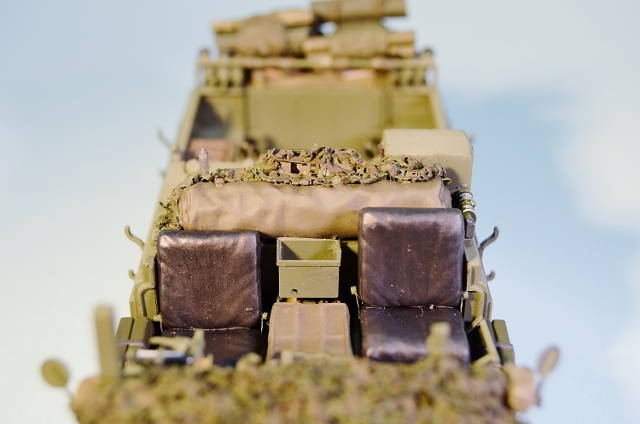
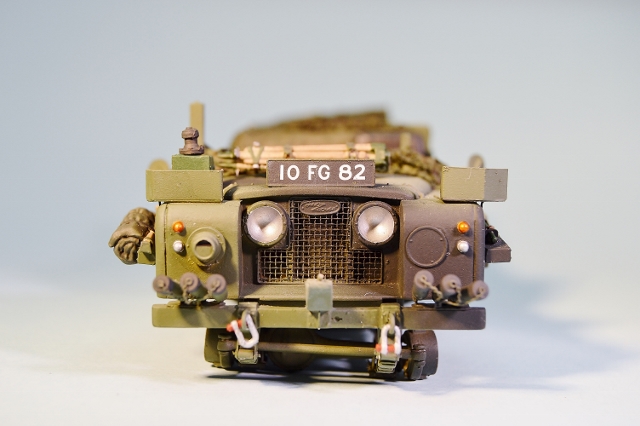
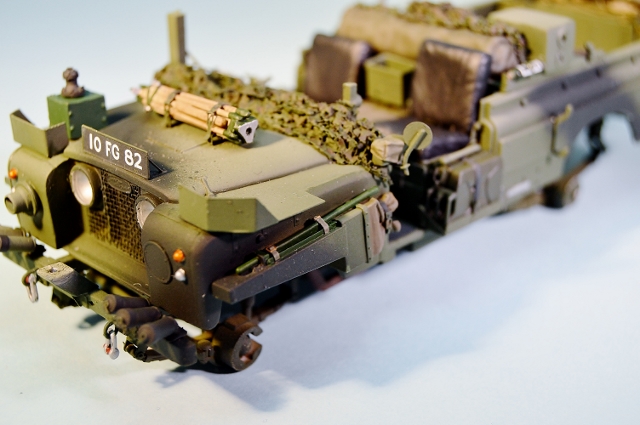
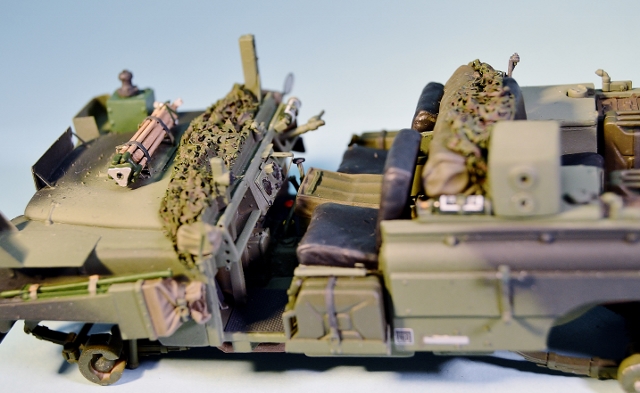
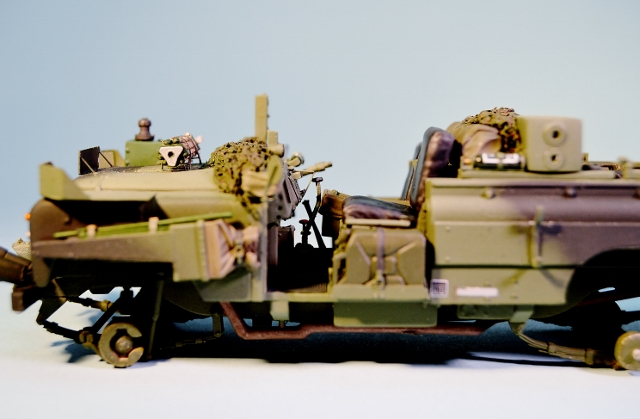
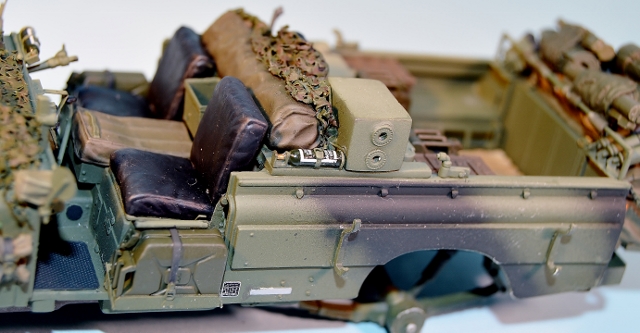
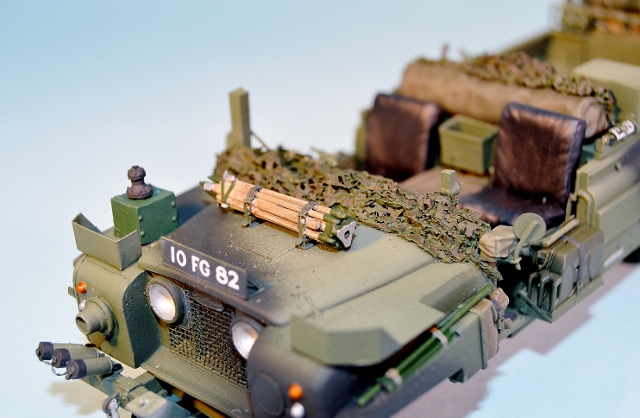
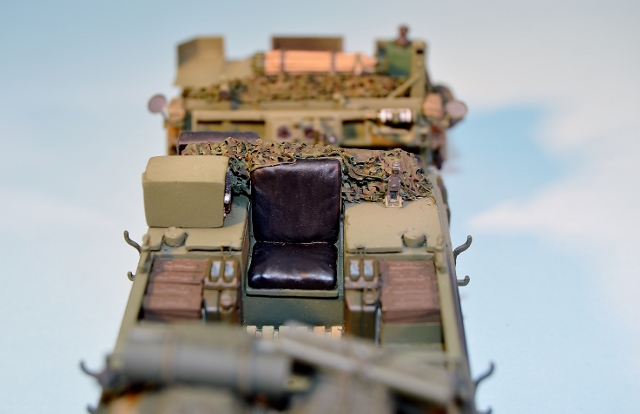
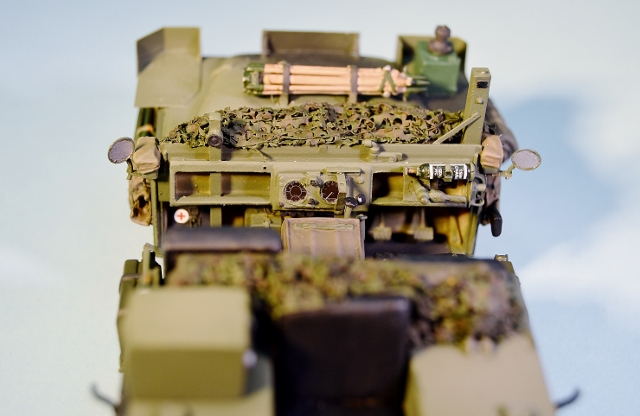
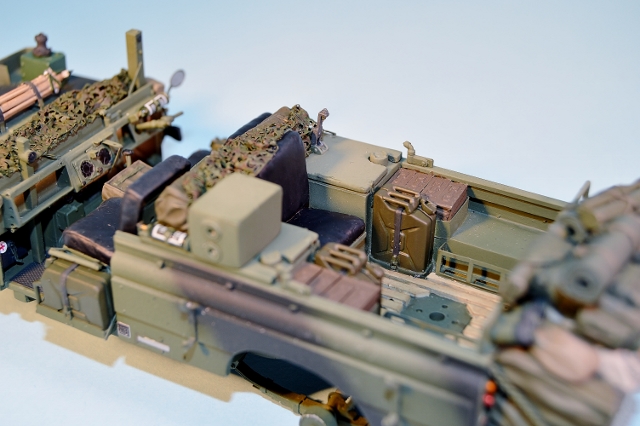
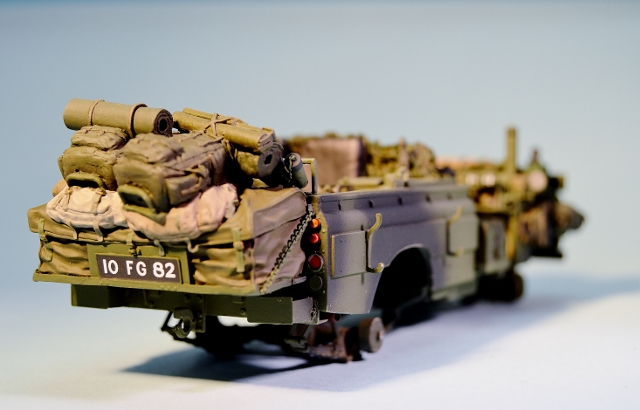
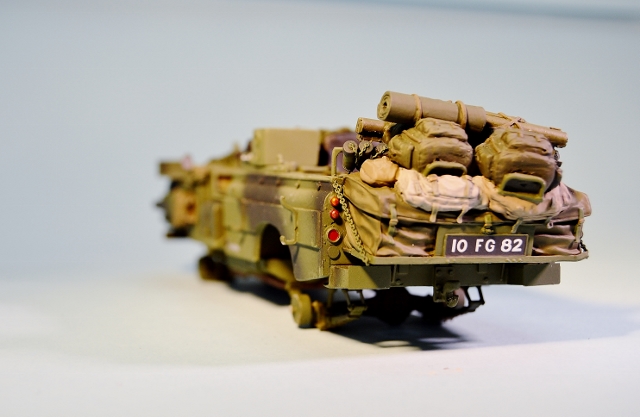
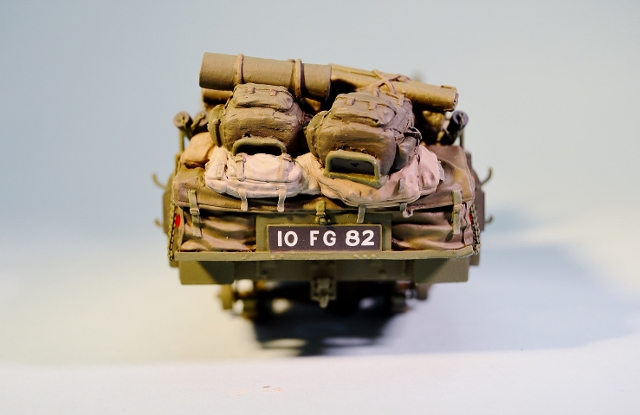
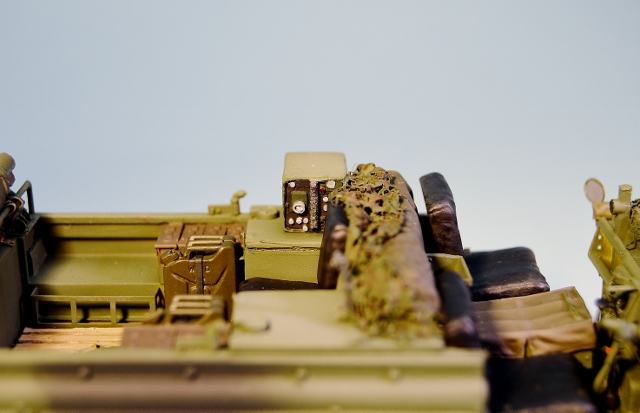
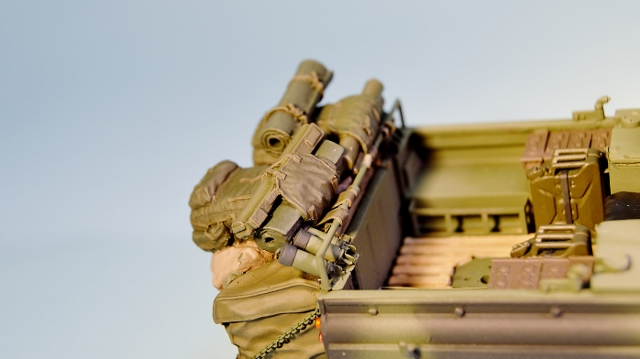
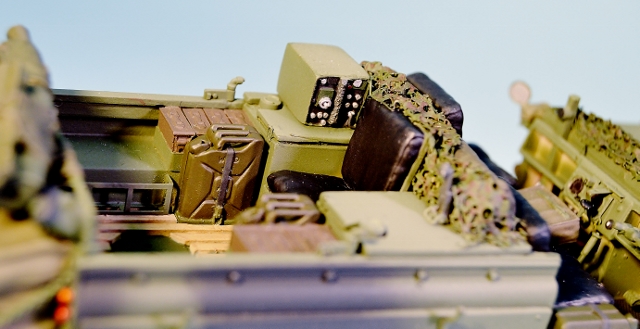
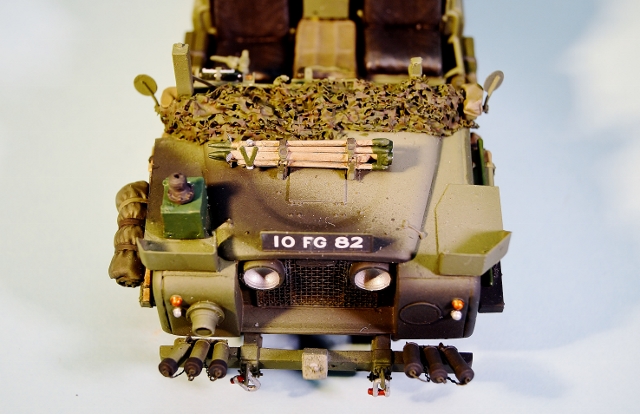
I gave the model two fairly thick coats of the Vallejo Matte Varnish giving a minimum of four hours between coats.
After this had dried I went back in with the gloss & satin.
The details I glossed were all the lights, mirrors, speedo dials, fire extinguishers, bare metal on the theodolite, red light on the Clansman radio, the dial face on the drivers compass stack & the ammo belts.
Satin was applied to the TUAAM box, painted metal on the theodolite, gear stick knobs, seats, jerry cans, rifle butt in the starboard rifle case over front wheel, M72 LAAW's in bergans on rear shelf, all of the GPMG, hand grips on the weapons cradles & steering wheel grip.
A few more pictures to follow...
I used Vallejo acrylic varnish throughout...

Here is the work done so far...


I gave the model two fairly thick coats of the Vallejo Matte Varnish giving a minimum of four hours between coats.
After this had dried I went back in with the gloss & satin.
The details I glossed were all the lights, mirrors, speedo dials, fire extinguishers, bare metal on the theodolite, red light on the Clansman radio, the dial face on the drivers compass stack & the ammo belts.
Satin was applied to the TUAAM box, painted metal on the theodolite, gear stick knobs, seats, jerry cans, rifle butt in the starboard rifle case over front wheel, M72 LAAW's in bergans on rear shelf, all of the GPMG, hand grips on the weapons cradles & steering wheel grip.
A few more pictures to follow...
joegrafton

Joined: October 04, 2009
KitMaker: 1,209 posts
Armorama: 1,143 posts

Posted: Sunday, March 09, 2014 - 10:25 AM UTC
Some photos of the GPMG's...
Front GPMG:
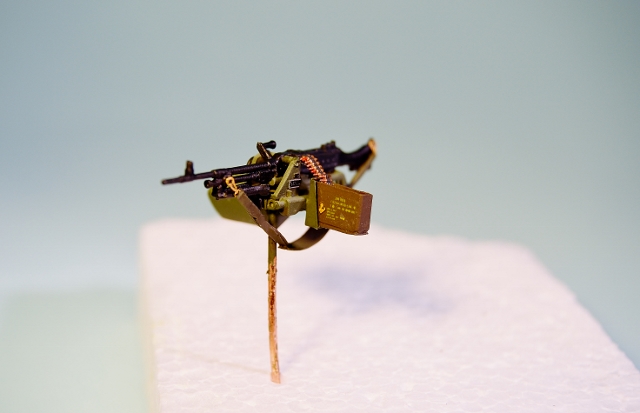
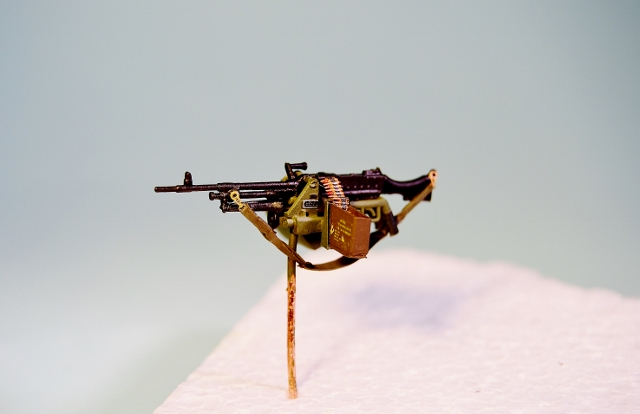
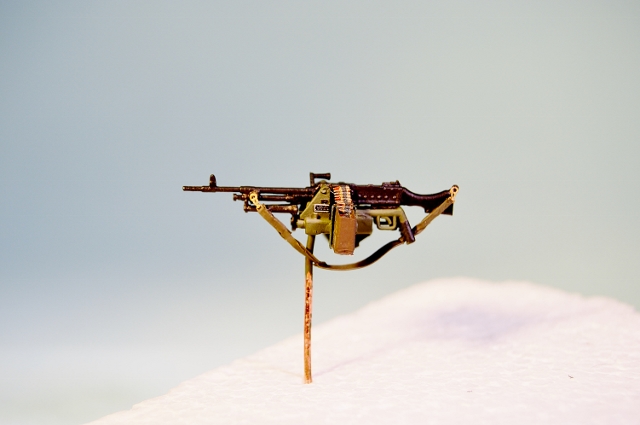
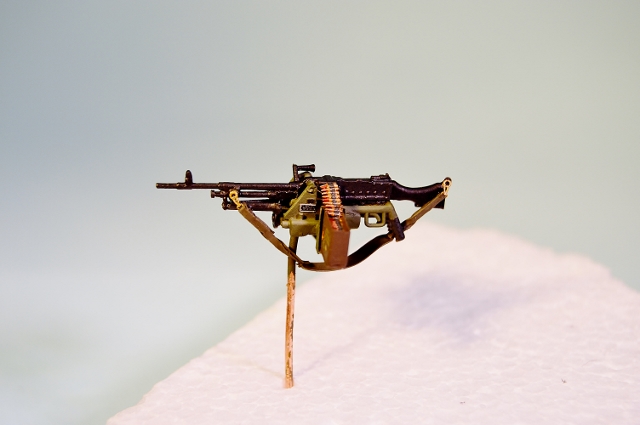
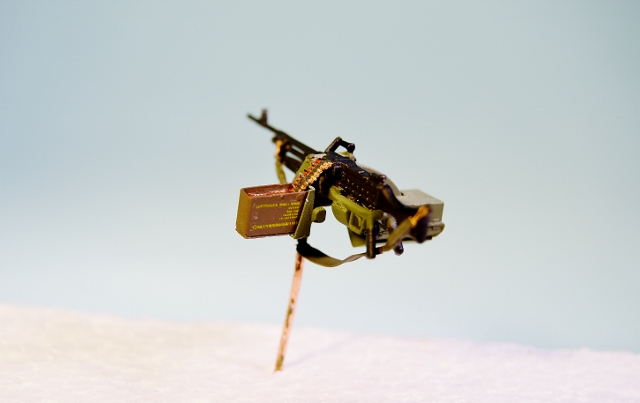
Rear GPMG:
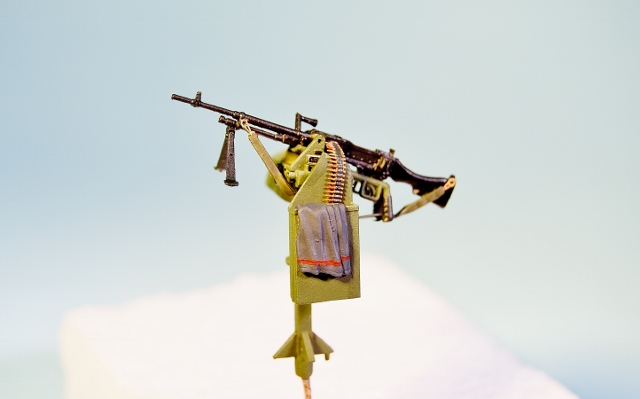
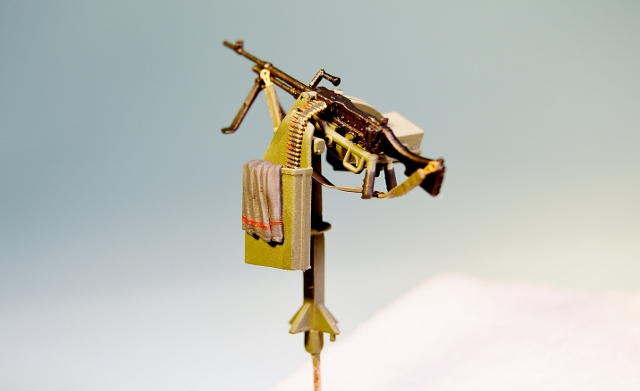
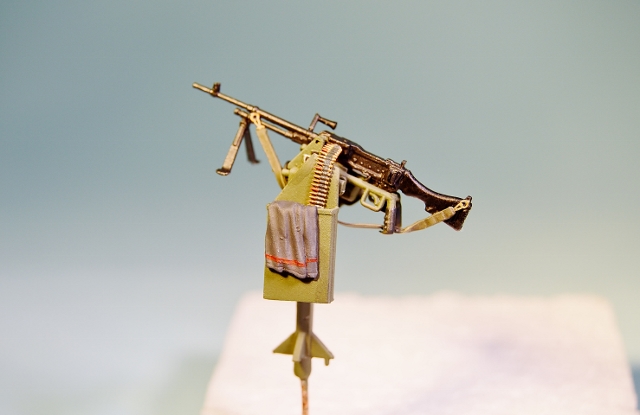
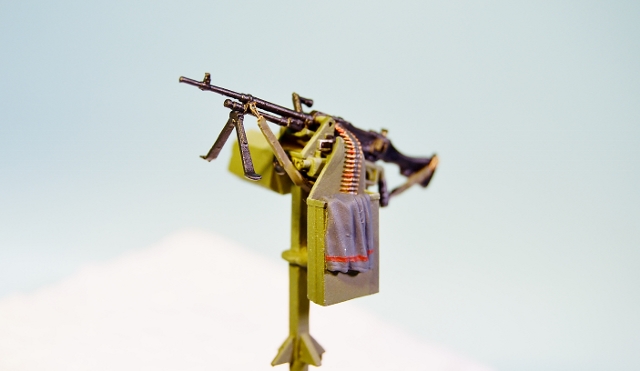
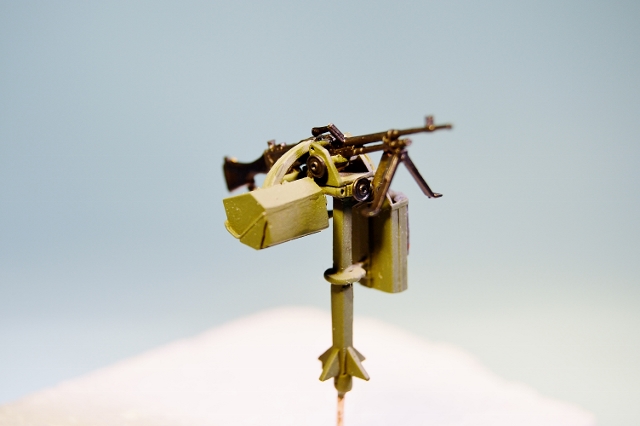
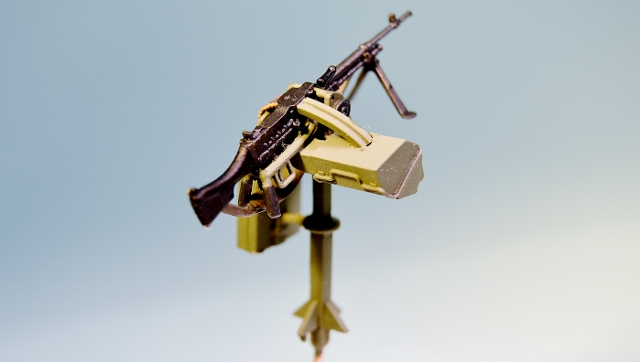
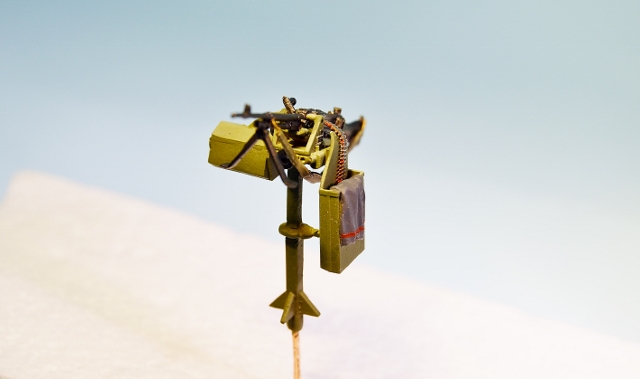
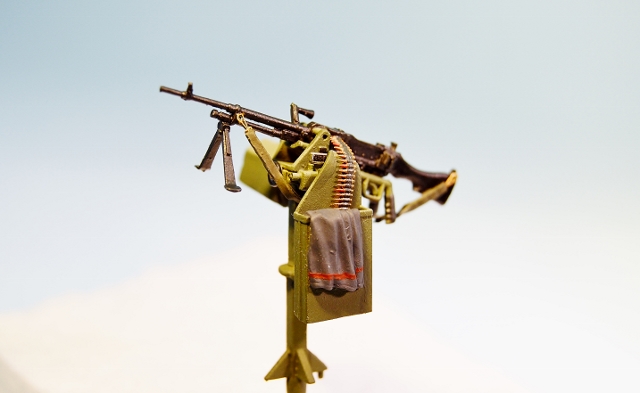
The varnish was then allowed to dry for 48 hours.
Next step: Weathering!!!
Front GPMG:


Rear GPMG:


The varnish was then allowed to dry for 48 hours.
Next step: Weathering!!!
Posted: Sunday, March 09, 2014 - 11:18 PM UTC
Hi Joe,
This is looking the Bees Knees, great work on the GPMG and the rest of the build.
Excellent work indeed.
Cheers
Al


This is looking the Bees Knees, great work on the GPMG and the rest of the build.
Excellent work indeed.
Cheers
Al


joegrafton

Joined: October 04, 2009
KitMaker: 1,209 posts
Armorama: 1,143 posts

Posted: Wednesday, March 12, 2014 - 05:25 AM UTC
For the first stage of the weathering process I gave the entire model an over all oil wash using W&N Raw Umber...
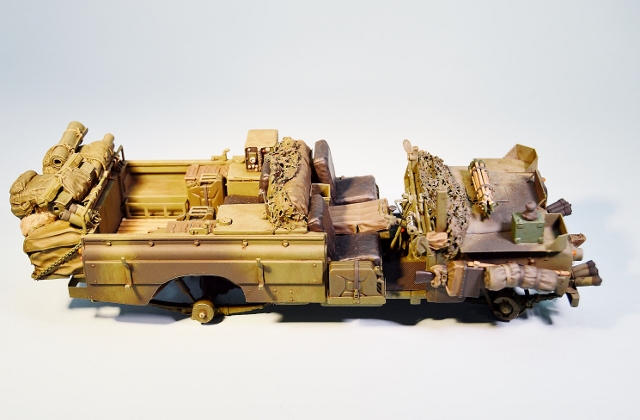
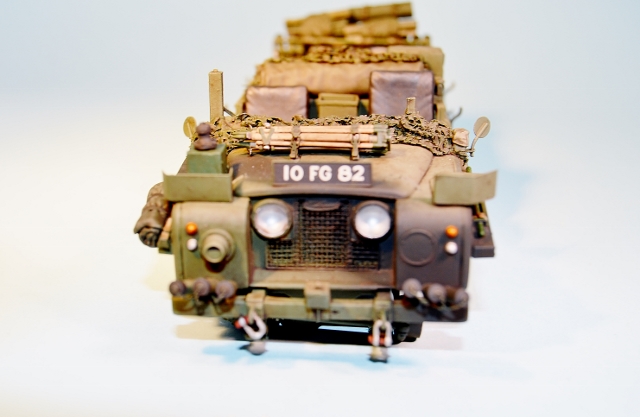
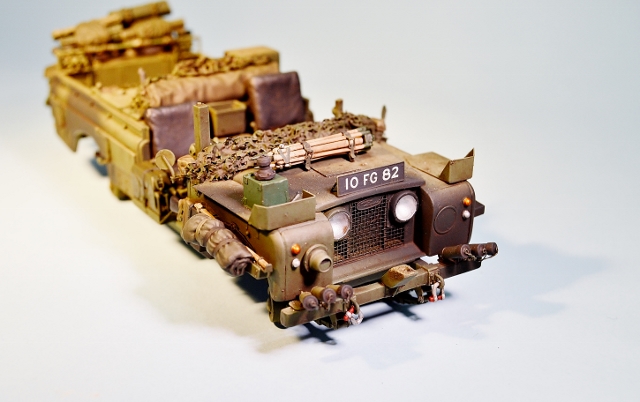
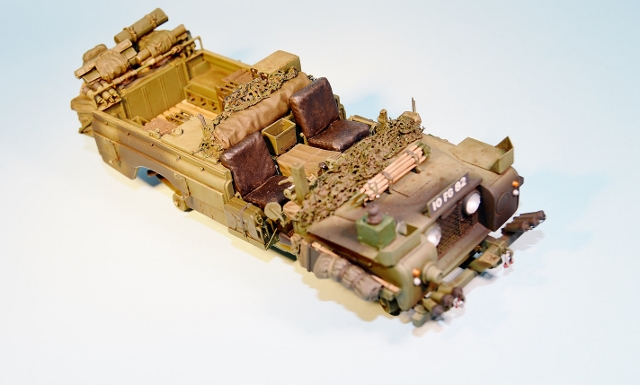
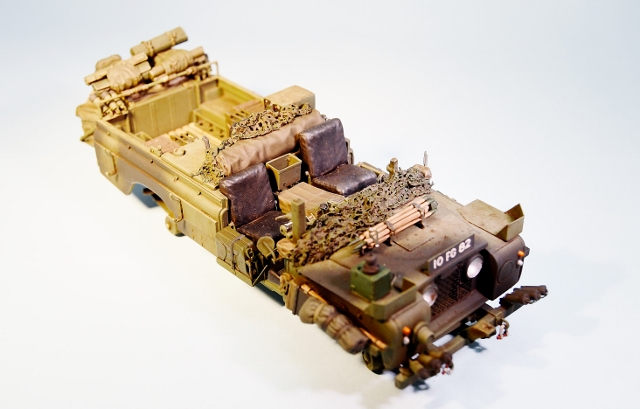
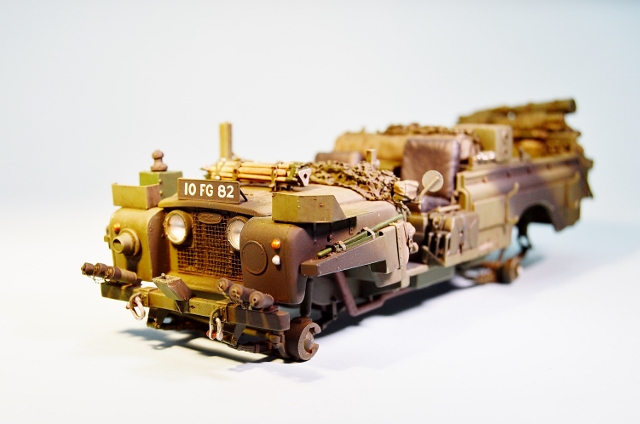
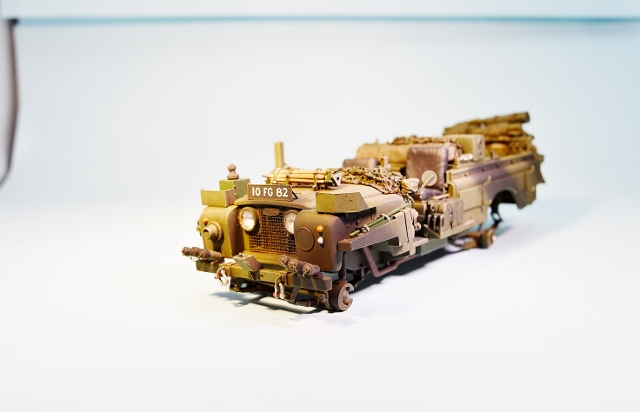
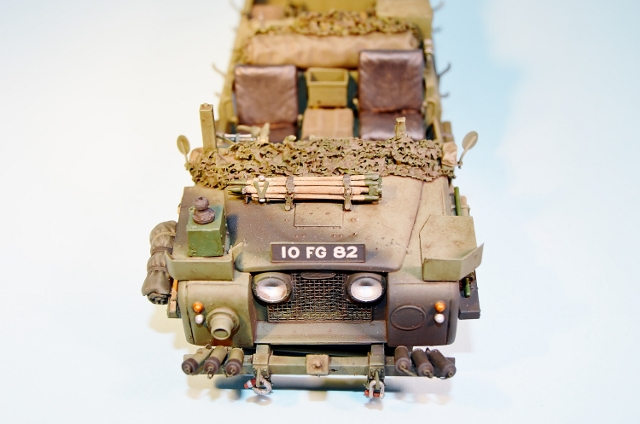
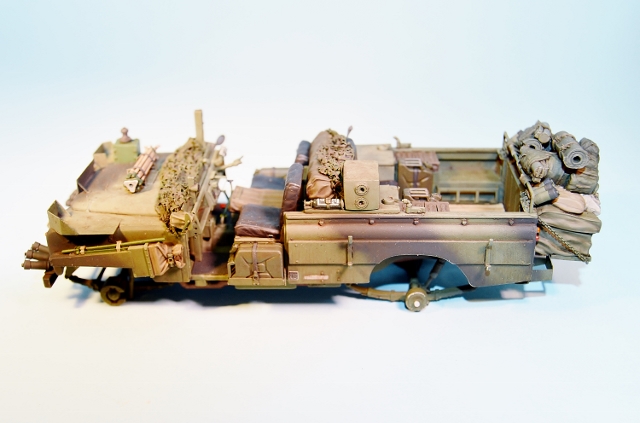
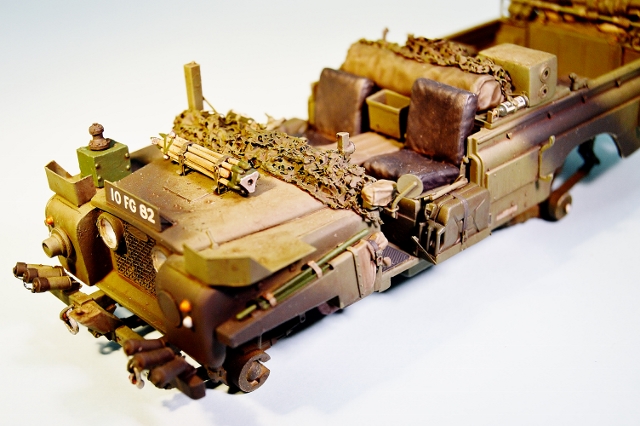
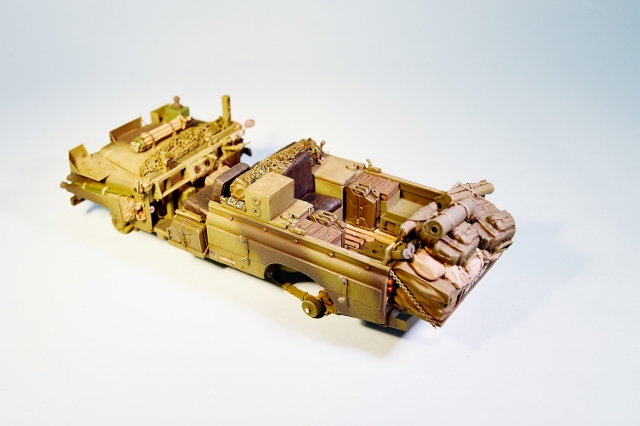
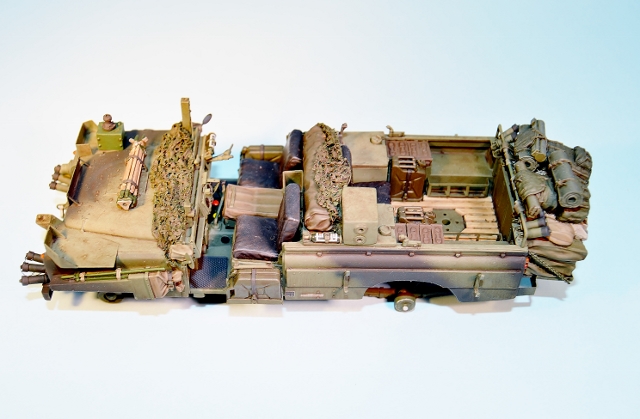
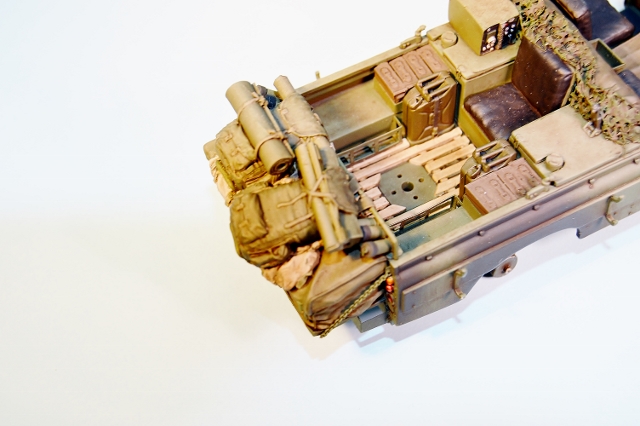
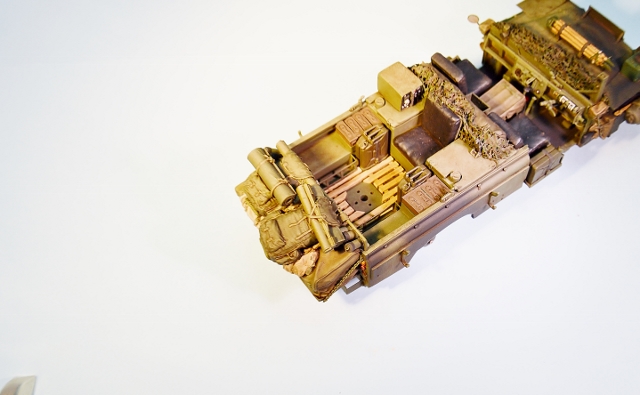
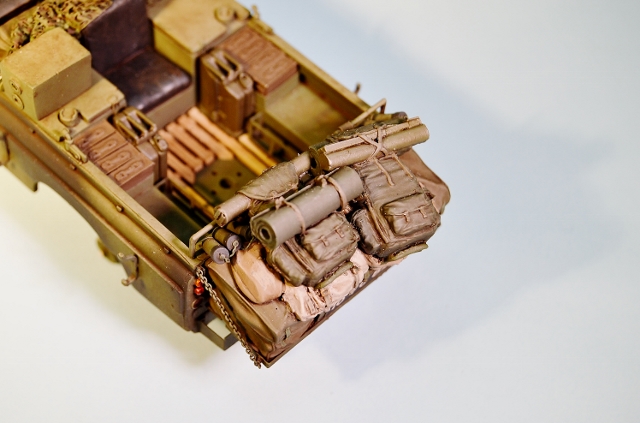
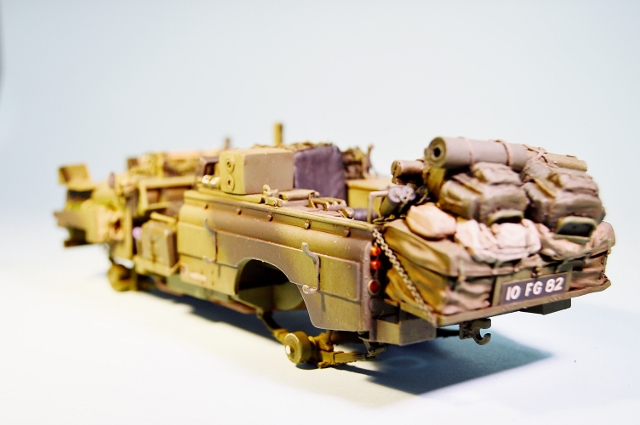
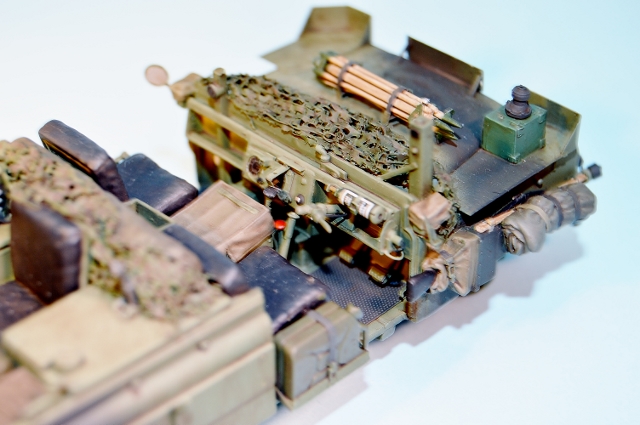
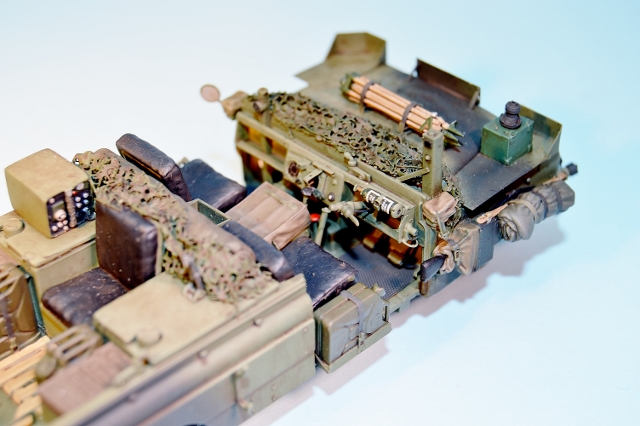
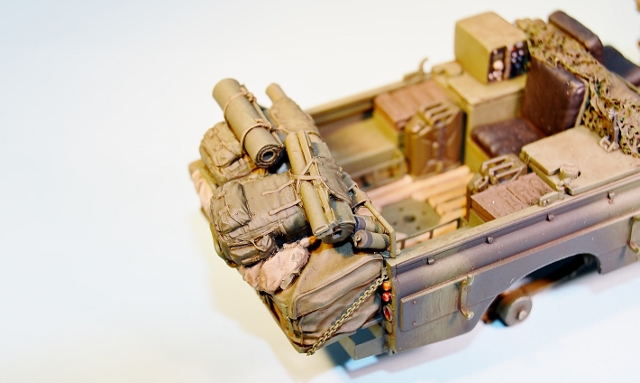
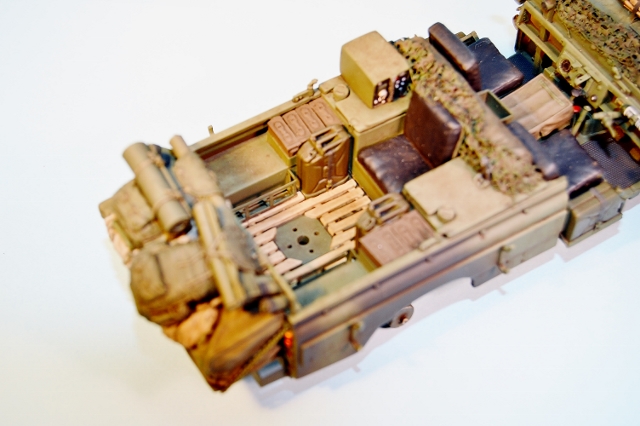
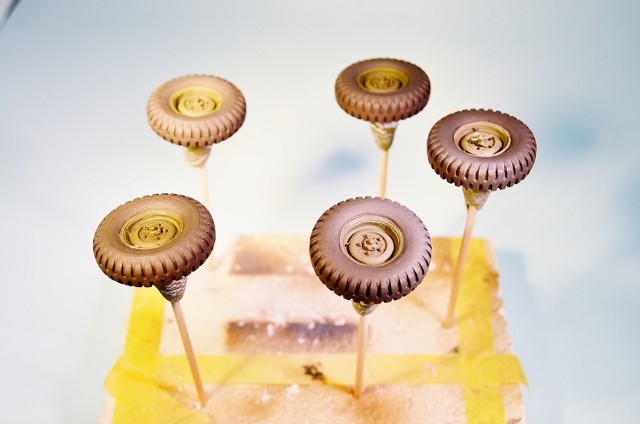
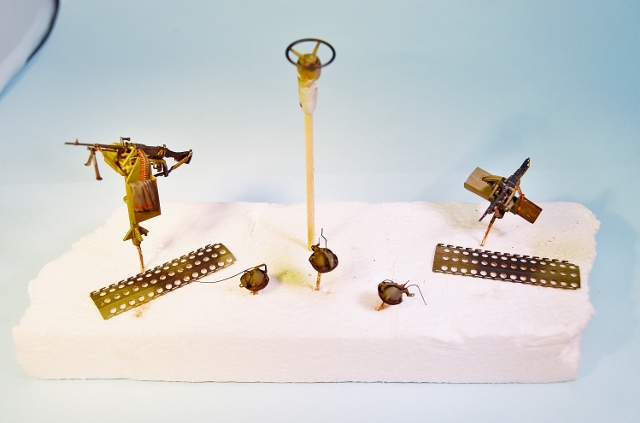
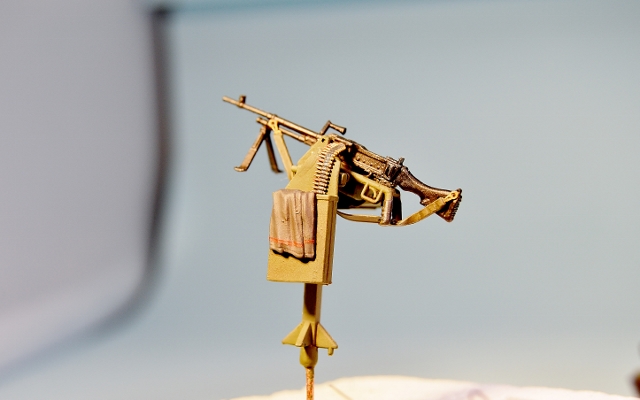
I will allow the oil wash to dry & then apply the filters.


I will allow the oil wash to dry & then apply the filters.
joegrafton

Joined: October 04, 2009
KitMaker: 1,209 posts
Armorama: 1,143 posts

Posted: Monday, March 17, 2014 - 06:27 AM UTC
I needed to add the VRC-351 Clansman radio on the port side radio mount but was putting it off for ages.
My weakest point in modelling is scratch building & didn't have the confidence to build one so I turned to a fellow modeller on Armorama to help.
Unfortunately, he was very busy with other commitments so I turned to my dad for help. Even he couldn't do it!
I therefore had to bite the bullet & try to build the darn thing myself!
After lots of bad language & temper tantrums I finally came up with something that I was happy with. It's not totally 100% correct but it's adequate for my needs.
Here are a couple of photos to show the built radio pre painting...
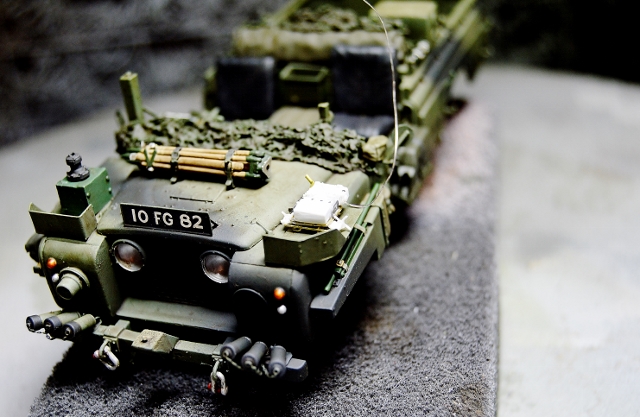
I then painted it & glued it to the model.
My weakest point in modelling is scratch building & didn't have the confidence to build one so I turned to a fellow modeller on Armorama to help.
Unfortunately, he was very busy with other commitments so I turned to my dad for help. Even he couldn't do it!
I therefore had to bite the bullet & try to build the darn thing myself!
After lots of bad language & temper tantrums I finally came up with something that I was happy with. It's not totally 100% correct but it's adequate for my needs.
Here are a couple of photos to show the built radio pre painting...


I then painted it & glued it to the model.
Dannyd

Joined: March 27, 2007
KitMaker: 803 posts
Armorama: 793 posts

Posted: Monday, March 17, 2014 - 07:00 AM UTC
Cracking build Joe, looks really well fella.
Regards
Dan
Regards
Dan
joegrafton

Joined: October 04, 2009
KitMaker: 1,209 posts
Armorama: 1,143 posts

Posted: Monday, March 17, 2014 - 10:58 AM UTC
The next step was to add filters to the model. I used the following W&N oil colours for this job...
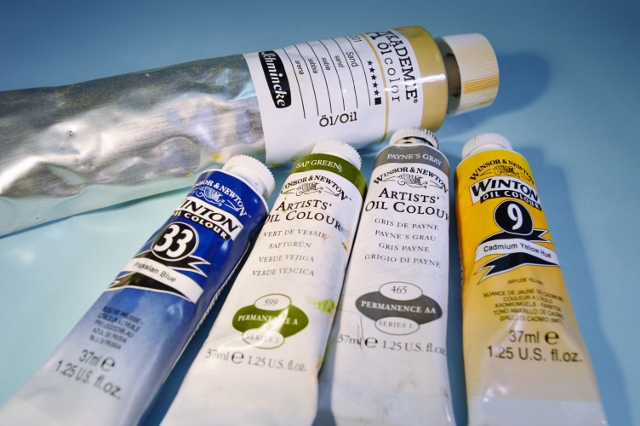
Unfortunately, I forgot to take any photographs of this step so I apologize for that.
So, once these were dry I continued by applying this Mig product as a pin wash, cleaning up with their thinners for washes...
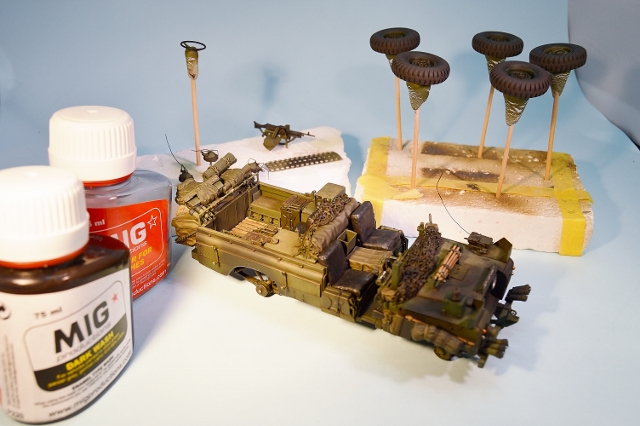
This was applied to all the nooks & crannies, around rivets, into details, etc, & then feathered in giving the model a more 'detailed' dirty appearance.
Here are some photos of the work so far...
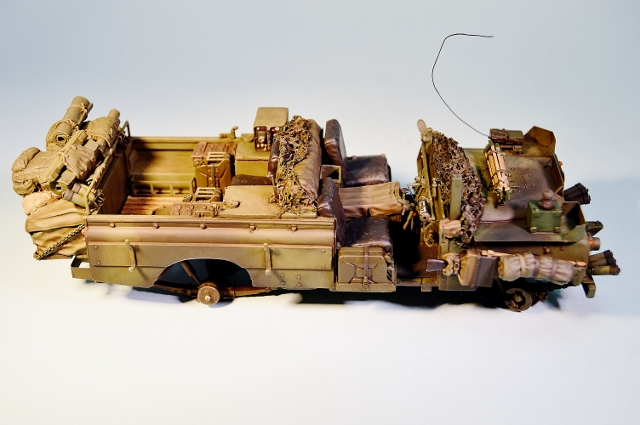
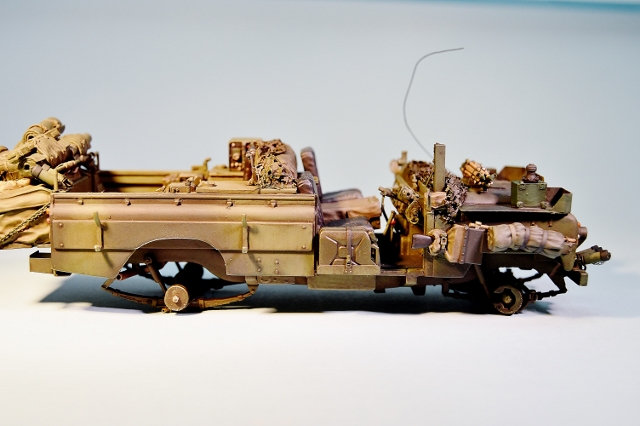
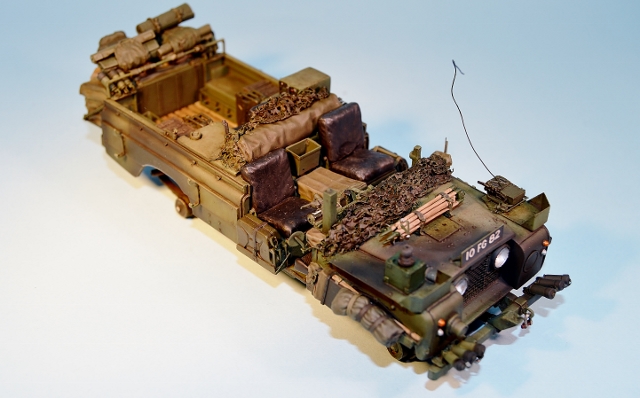
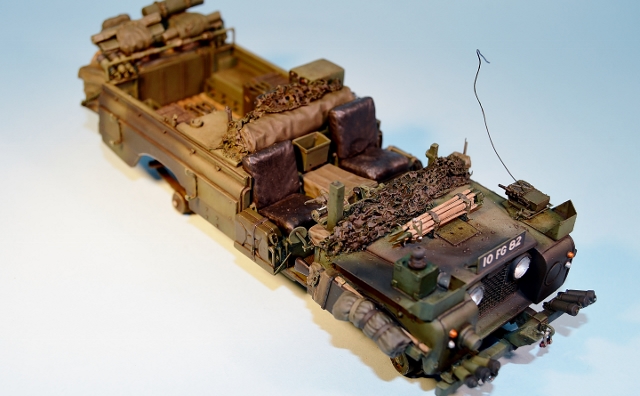
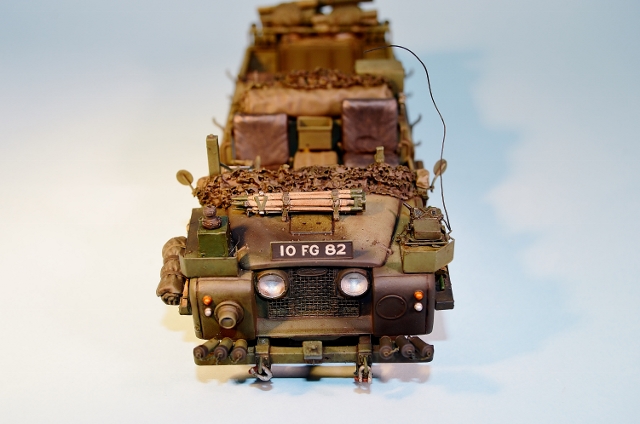
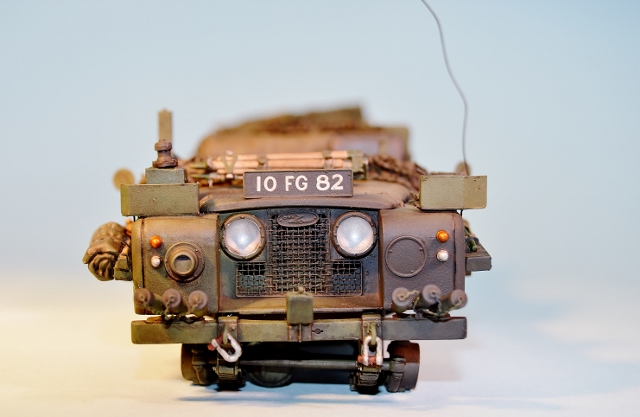
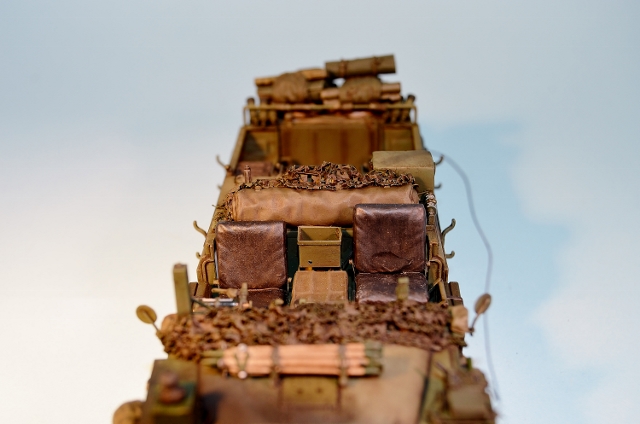
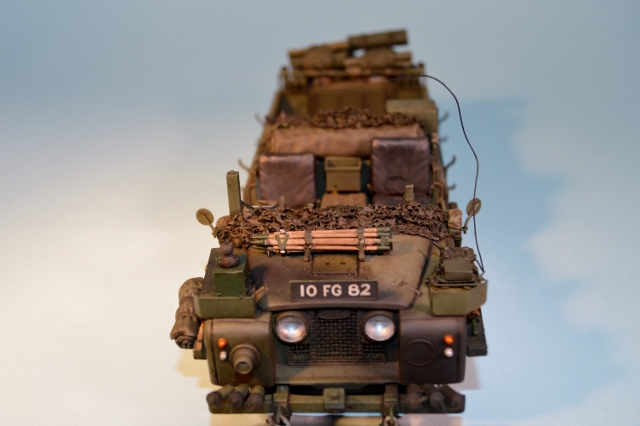
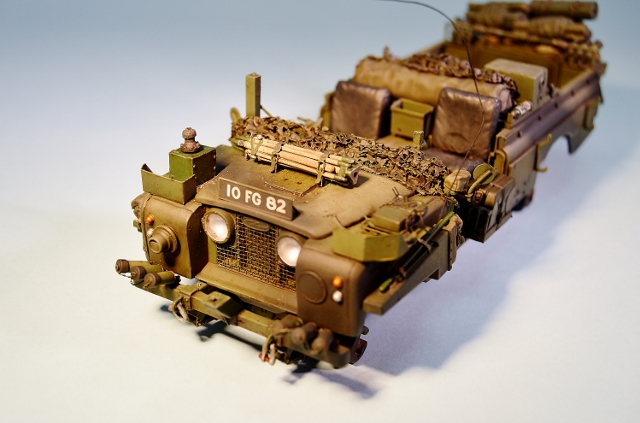
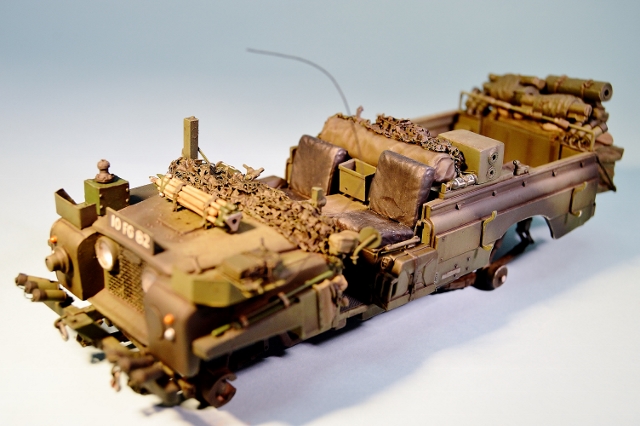
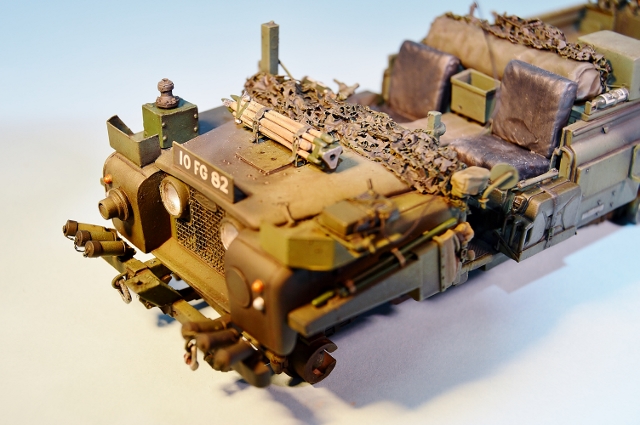
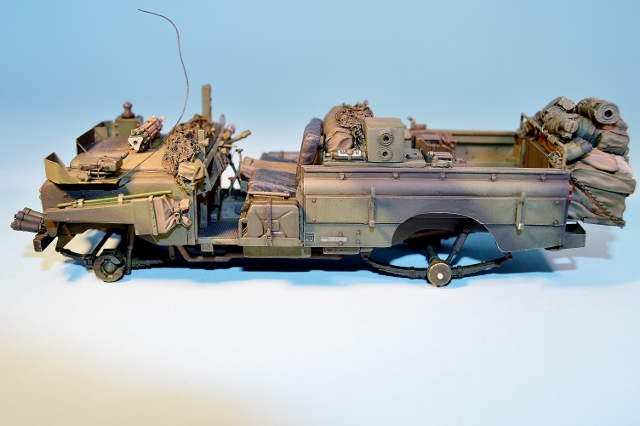
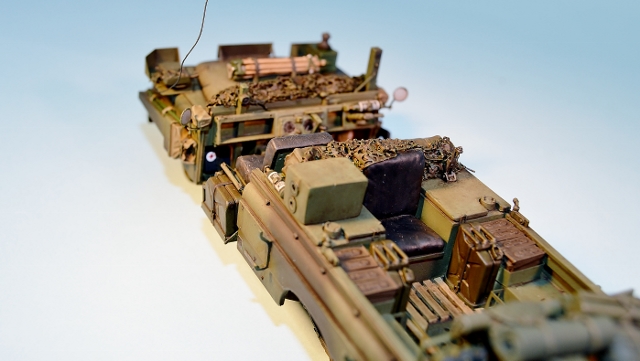
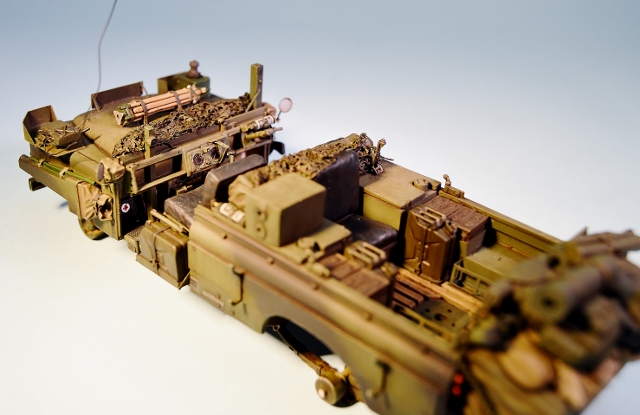
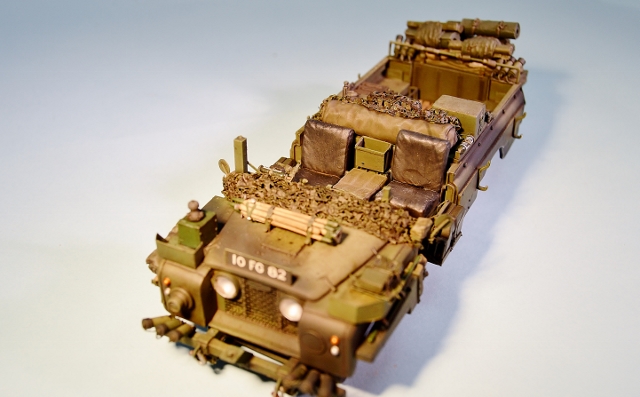
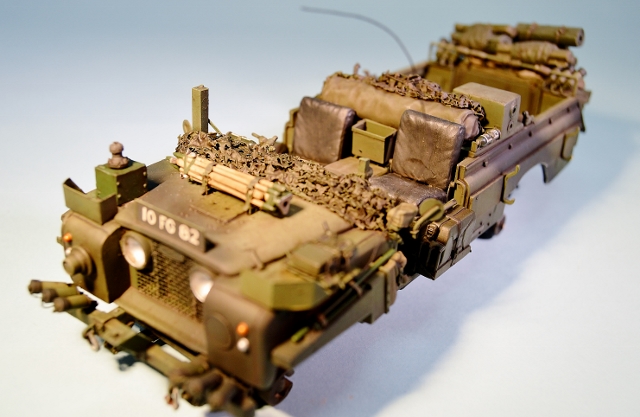
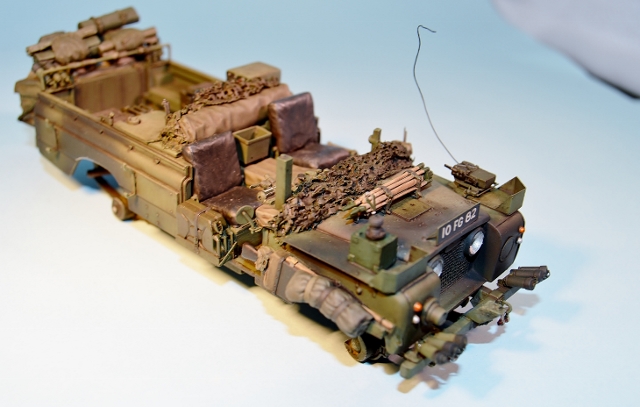
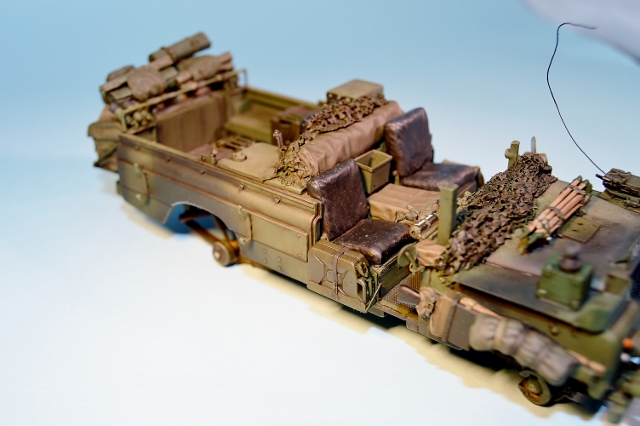
PS What do you think of the painted & fitted VRC-351 radio?
Ignore the wire coming from it as there will be a phone on the end of it near the commander figure on the finished piece!

Unfortunately, I forgot to take any photographs of this step so I apologize for that.
So, once these were dry I continued by applying this Mig product as a pin wash, cleaning up with their thinners for washes...

This was applied to all the nooks & crannies, around rivets, into details, etc, & then feathered in giving the model a more 'detailed' dirty appearance.
Here are some photos of the work so far...


PS What do you think of the painted & fitted VRC-351 radio?

Ignore the wire coming from it as there will be a phone on the end of it near the commander figure on the finished piece!
Dannyd

Joined: March 27, 2007
KitMaker: 803 posts
Armorama: 793 posts

Posted: Monday, March 17, 2014 - 11:02 PM UTC
Hi Joe,
The 351 looks the business fella, you have got it just right, one question though,
Are you going to wire up the 353 in the back, if you are then you'll need the power cable and the control cable along with the coax. The control and coax runs to the antenna box on the wing and plugs into the TUAAM and ARFAT that live in the box.
They would probably of been hard wired on the initial fit out.
Picture of my twin 353 fit, not the best photo as its a scan, the left set is the working set and the right hand set is a spare. Above is the HF VRC321.

Regards
Dan
(ex British Army Radio operator, 12 years)
The 351 looks the business fella, you have got it just right, one question though,
Are you going to wire up the 353 in the back, if you are then you'll need the power cable and the control cable along with the coax. The control and coax runs to the antenna box on the wing and plugs into the TUAAM and ARFAT that live in the box.
They would probably of been hard wired on the initial fit out.
Picture of my twin 353 fit, not the best photo as its a scan, the left set is the working set and the right hand set is a spare. Above is the HF VRC321.

Regards
Dan
(ex British Army Radio operator, 12 years)
joegrafton

Joined: October 04, 2009
KitMaker: 1,209 posts
Armorama: 1,143 posts

Posted: Wednesday, March 19, 2014 - 10:25 AM UTC
Thanks for the image Dan!
Yes, I will be wiring up the 353 so I will be in touch with you soon as I have a couple of questions for you.
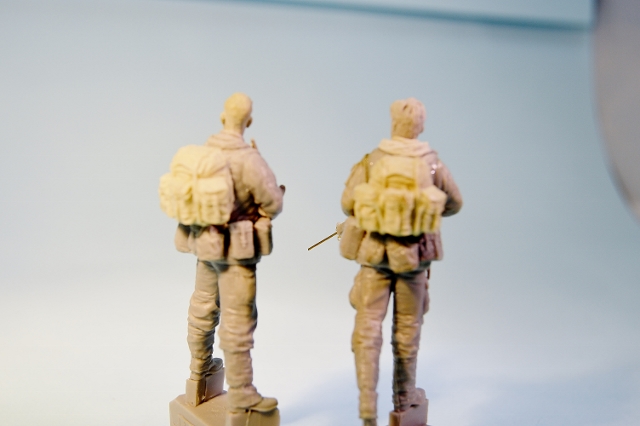
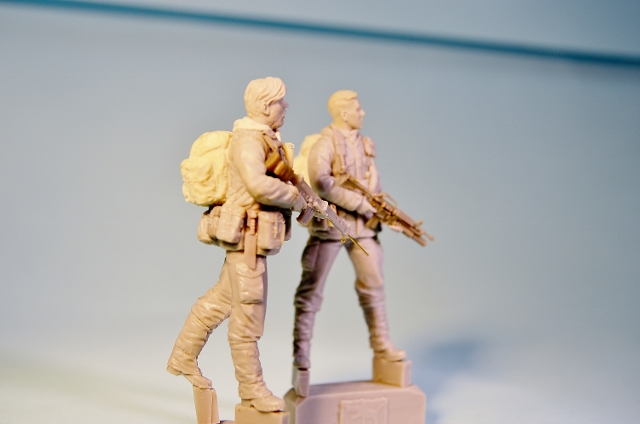
Anyway, while I have been waiting for the oils to dry on the model I thought I'd put those Black Dog figures to good use. The figures that I took the bergans from to place on the rear rack way back in the build stage.
I didn't want them to go to waste so I added some new heads, weapons, smoke grenades & rucks & put them all together for painting.
These guys will be used on the finished dio.
Here are some pictures of them...
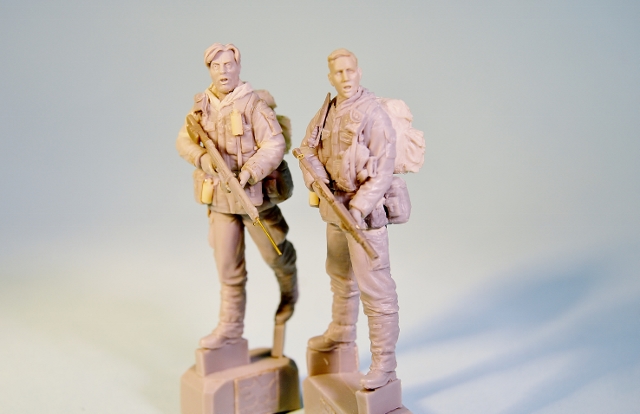
I added a new hood to the guy with the FN SLR as the Black Dog original is modelled with the hood up.
By the way, don't you think he looks better toting the SLR here than the heavy GPMG which Black Dog prefers & just doesn't look right. In my opinion, he looks much more natural like this. I had to reconfigure his arms slightly but I'm much happier with the overall look of him now.
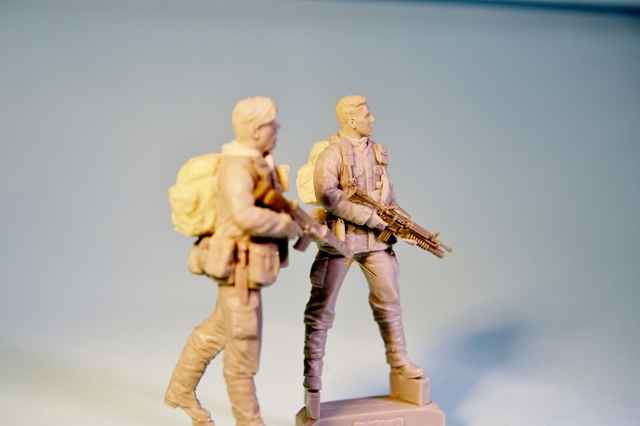
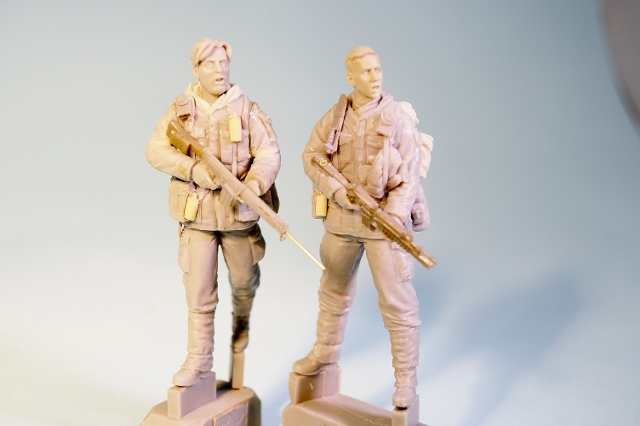
As you can see, I did a little conversion on the SLR. The main body is from Firestorm. However, the butt with the First Field Dressing taped to it is from one of the Aussie Bravo6 figures. I removed the resin barrel & replaced it with some brass rod as I felt the resin barrel was too thick. I also added a brass swivel clip for the rifle sling underneath the barrel. As I am lead to believe, the SAS don't use slings.
Now all I've got to do is paint them!
Yes, I will be wiring up the 353 so I will be in touch with you soon as I have a couple of questions for you.
Anyway, while I have been waiting for the oils to dry on the model I thought I'd put those Black Dog figures to good use. The figures that I took the bergans from to place on the rear rack way back in the build stage.
I didn't want them to go to waste so I added some new heads, weapons, smoke grenades & rucks & put them all together for painting.
These guys will be used on the finished dio.
Here are some pictures of them...

I added a new hood to the guy with the FN SLR as the Black Dog original is modelled with the hood up.
By the way, don't you think he looks better toting the SLR here than the heavy GPMG which Black Dog prefers & just doesn't look right. In my opinion, he looks much more natural like this. I had to reconfigure his arms slightly but I'm much happier with the overall look of him now.


As you can see, I did a little conversion on the SLR. The main body is from Firestorm. However, the butt with the First Field Dressing taped to it is from one of the Aussie Bravo6 figures. I removed the resin barrel & replaced it with some brass rod as I felt the resin barrel was too thick. I also added a brass swivel clip for the rifle sling underneath the barrel. As I am lead to believe, the SAS don't use slings.
Now all I've got to do is paint them!
joegrafton

Joined: October 04, 2009
KitMaker: 1,209 posts
Armorama: 1,143 posts

Posted: Thursday, March 20, 2014 - 01:51 AM UTC
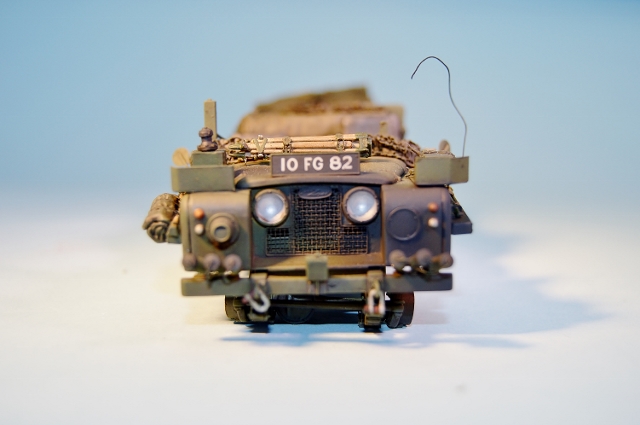
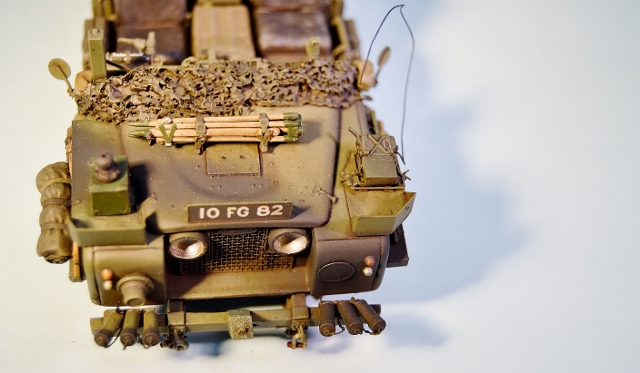
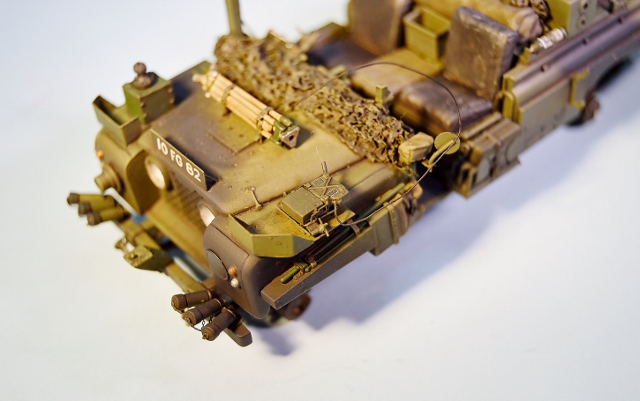
The next step was to dry brush the model using oil colours.
I mixed up a green & a dark grey colour using W&N oil paints.
These colours were just a little lighter than the green/NATO black base colours on the model.
Using a #2 flat brush I dry brushed the entire model (including weapons, wheels, etc). This step makes all the little details pop out.
Here are some photographs of this step...
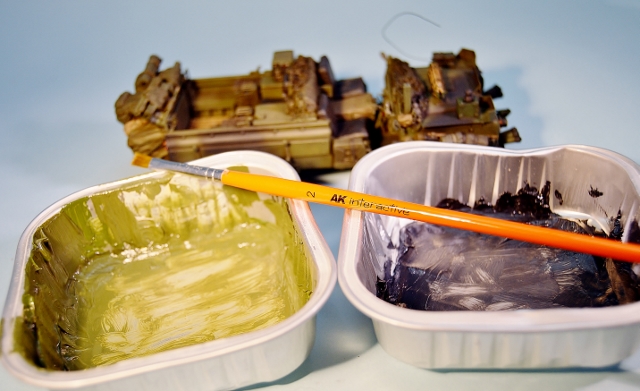
For the green I used Sap Green, Sand, Flake White, Paines Grey & for the black I used Paines Grey, Flake White & Ivory Black.
I mixed up a green & a dark grey colour using W&N oil paints.
These colours were just a little lighter than the green/NATO black base colours on the model.
Using a #2 flat brush I dry brushed the entire model (including weapons, wheels, etc). This step makes all the little details pop out.
Here are some photographs of this step...

For the green I used Sap Green, Sand, Flake White, Paines Grey & for the black I used Paines Grey, Flake White & Ivory Black.


joegrafton

Joined: October 04, 2009
KitMaker: 1,209 posts
Armorama: 1,143 posts

Posted: Saturday, March 22, 2014 - 12:11 AM UTC
The next step was to do the oil dot staining method. I used the following W&N oil colours for this step...
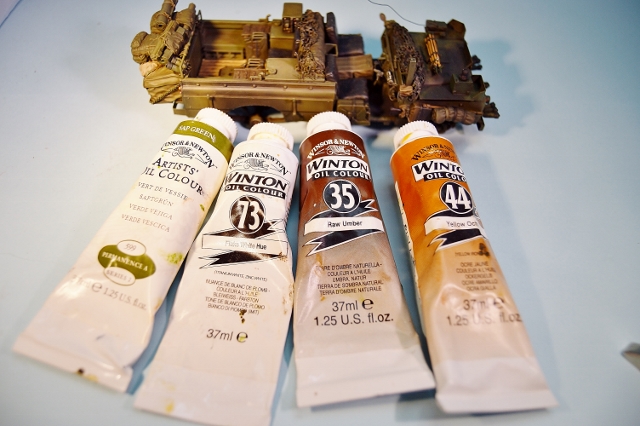
...Sap Green, Flake White, Raw Umber & Yellow Ochre.
The paint was applied in very small dots with a toothpick & placed about 1/4" apart on all surfaces of the model.
Using a #2 flat brush very lightly moistened with White Spirit the oil paint was dragged downwards & feathered in.
In my opinion it gives the base colour added depth.
After allowing this oil step to dry overnight I slightly lightened my green drybrush mix with a little more W&N Flake White & highlighted some of the more prominent areas of the model, like the tops of the radio mounts; the curve at the front wing, etc...
Following this I mixed up some of these two products...
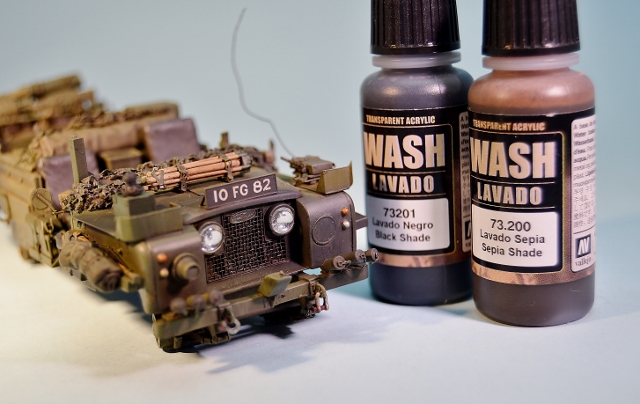
...and painted this wash over the engine grill. This step gives it a nice dirty colour.
I also fixed the 5mm AK White Lenses into place here.
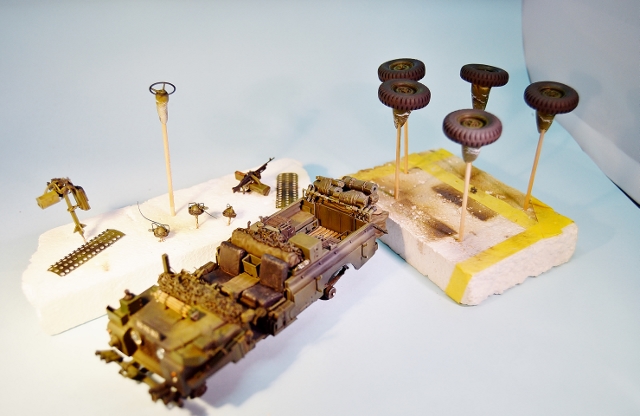
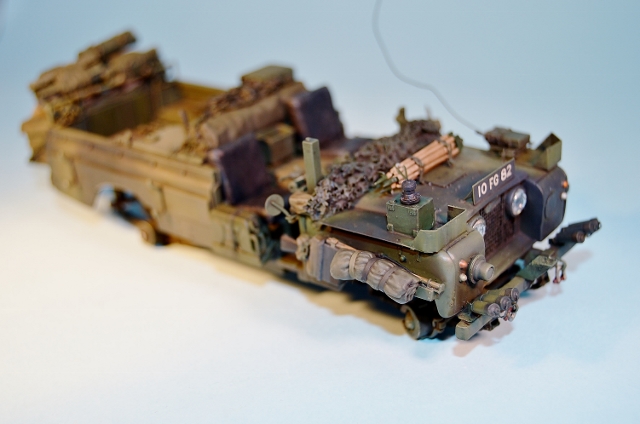
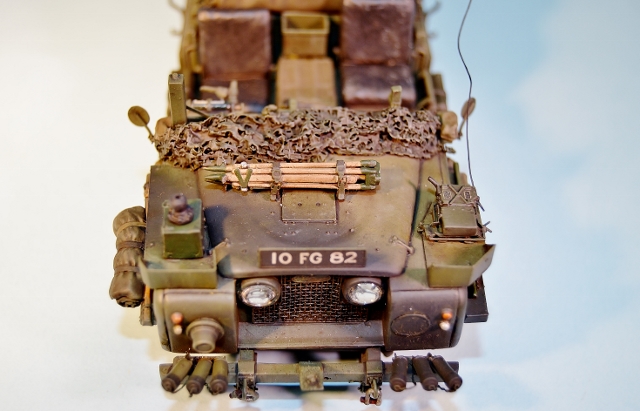
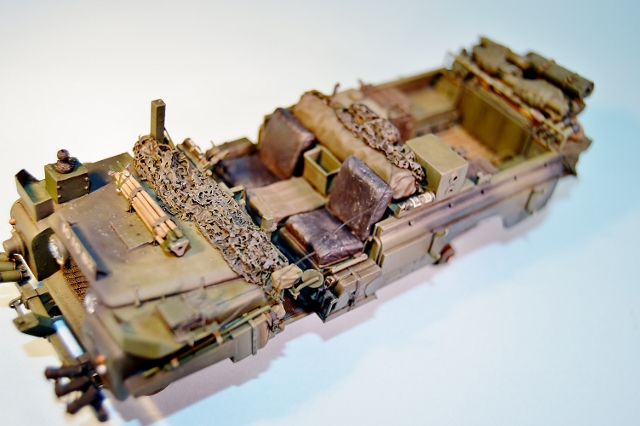
Here are some photos of the work so far...
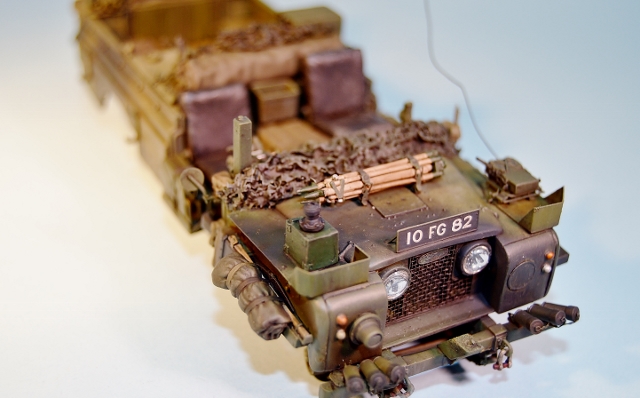
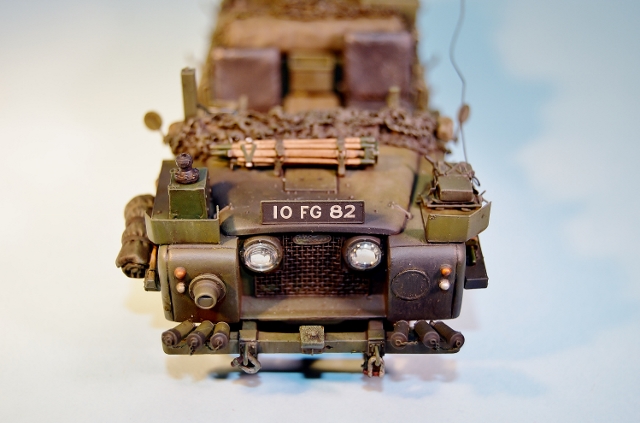
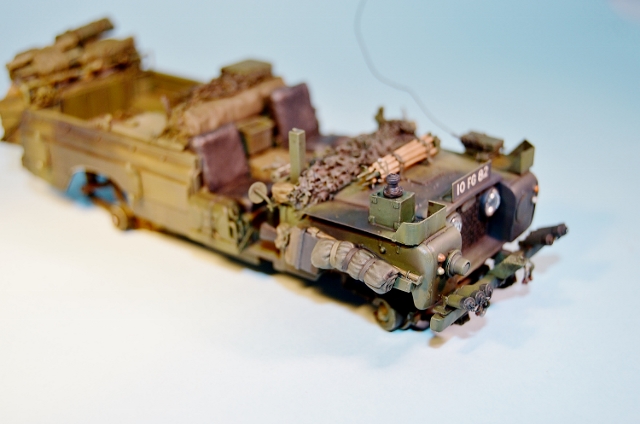
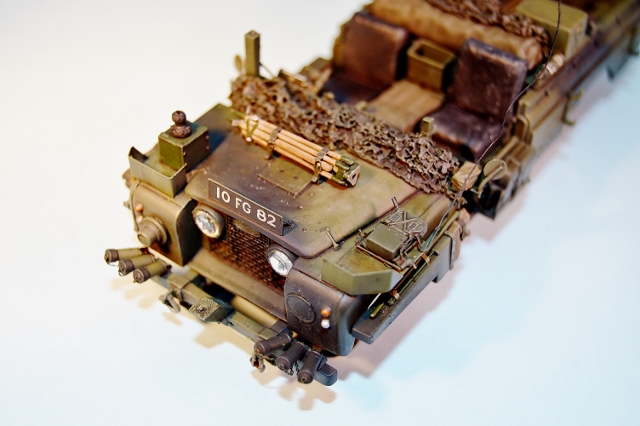
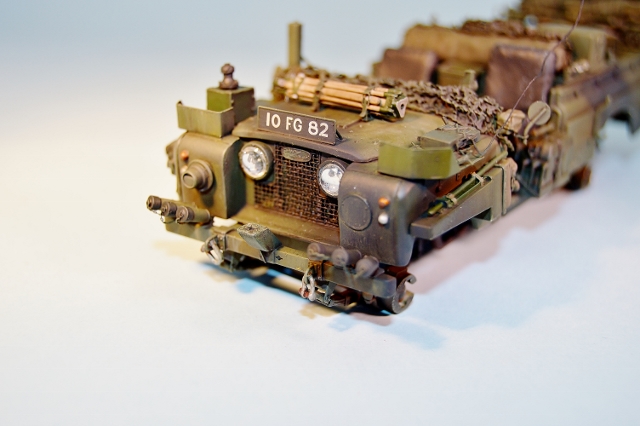
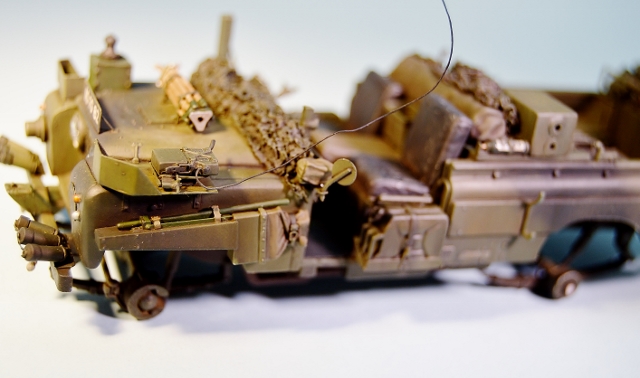
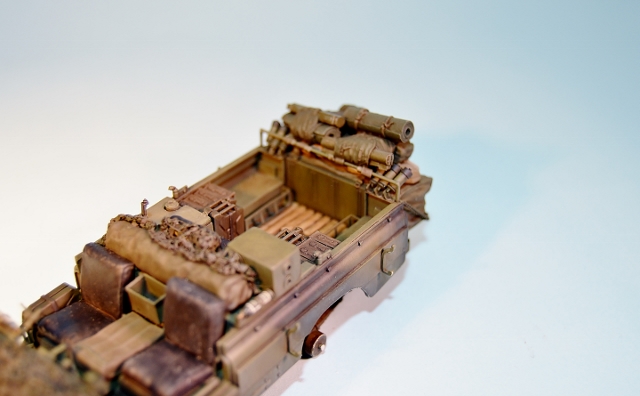
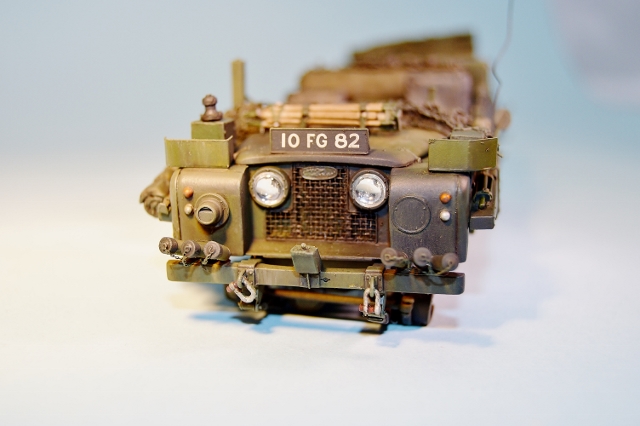
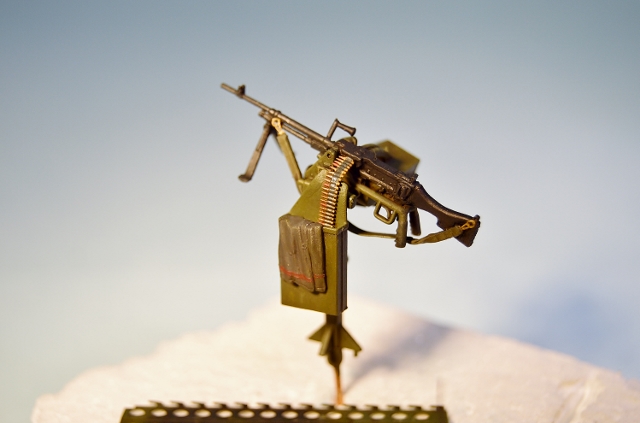
And the machine guns...

...Sap Green, Flake White, Raw Umber & Yellow Ochre.
The paint was applied in very small dots with a toothpick & placed about 1/4" apart on all surfaces of the model.
Using a #2 flat brush very lightly moistened with White Spirit the oil paint was dragged downwards & feathered in.
In my opinion it gives the base colour added depth.
After allowing this oil step to dry overnight I slightly lightened my green drybrush mix with a little more W&N Flake White & highlighted some of the more prominent areas of the model, like the tops of the radio mounts; the curve at the front wing, etc...
Following this I mixed up some of these two products...

...and painted this wash over the engine grill. This step gives it a nice dirty colour.
I also fixed the 5mm AK White Lenses into place here.
Here are some photos of the work so far...


And the machine guns...

joegrafton

Joined: October 04, 2009
KitMaker: 1,209 posts
Armorama: 1,143 posts

Posted: Sunday, March 23, 2014 - 02:12 AM UTC
Okay, major update here:
WHEELS!!!
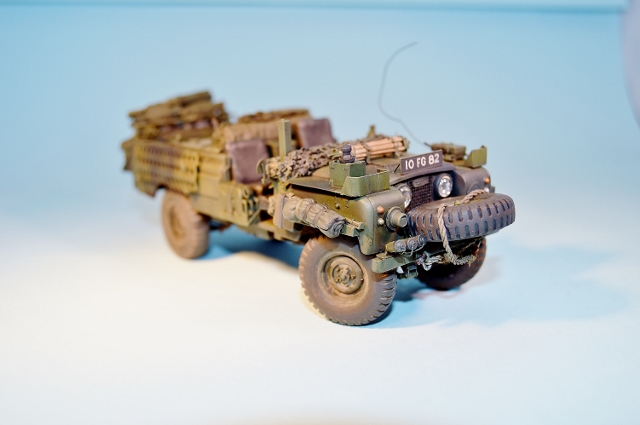
I glued the wheels into place & gave them an initial weathering with pigments (not including the spare wheel). The "damp" areas have been touched up with Future. They will be weathered further at a later stage.
I have also added the tow rope around the spare wheel & the PSP Plates along the sides of the vehicle.
Here are some photographs of the work thus far...
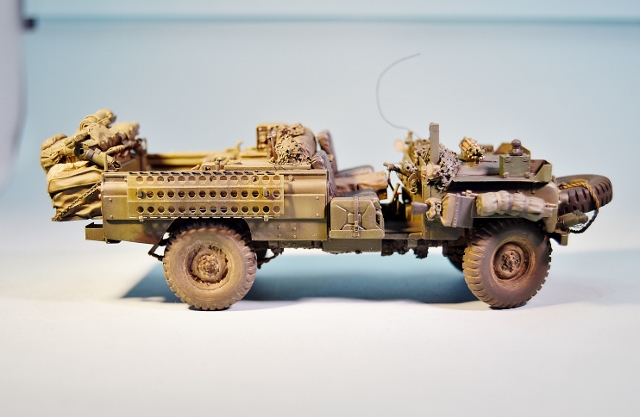
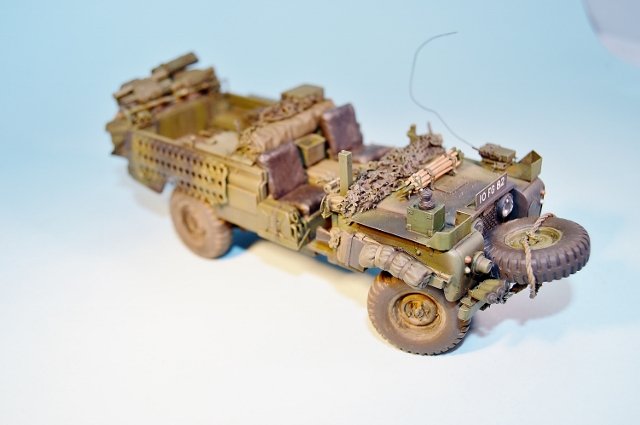
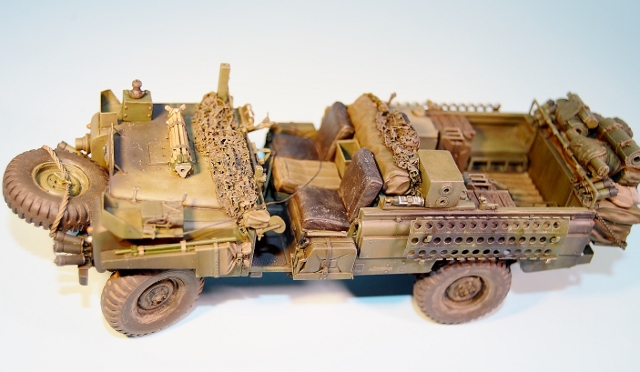
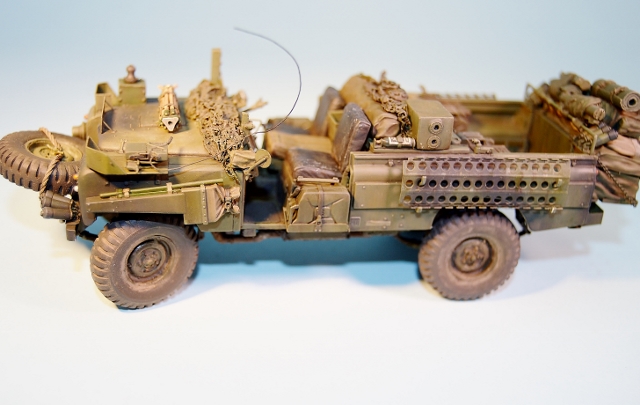
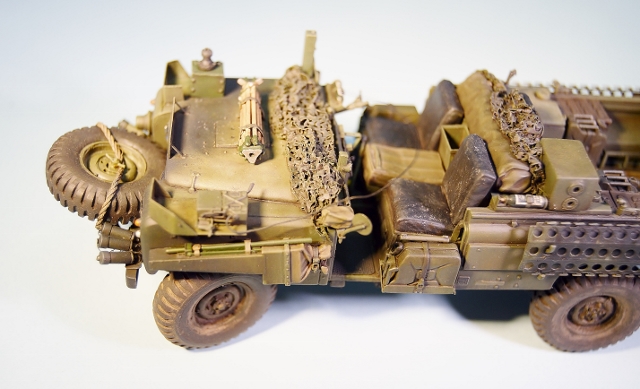
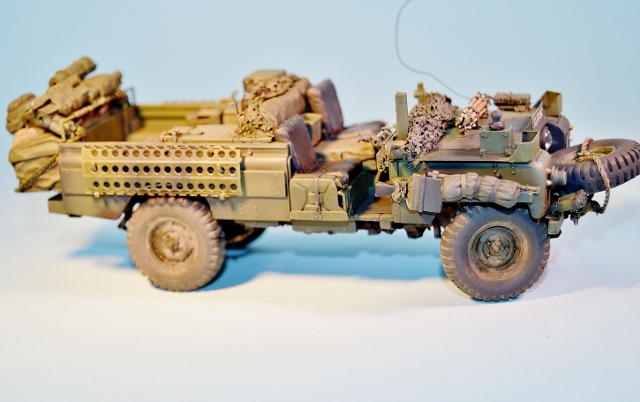
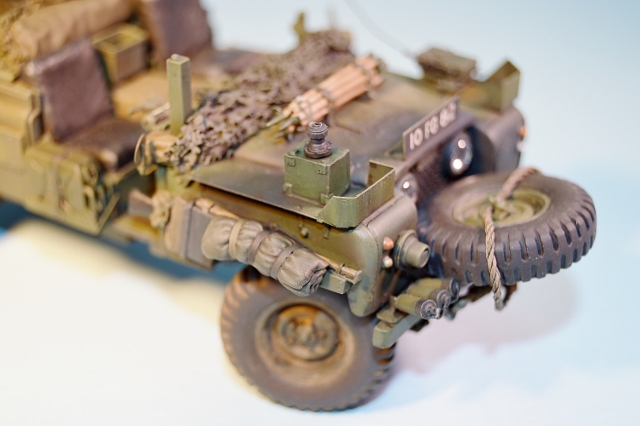
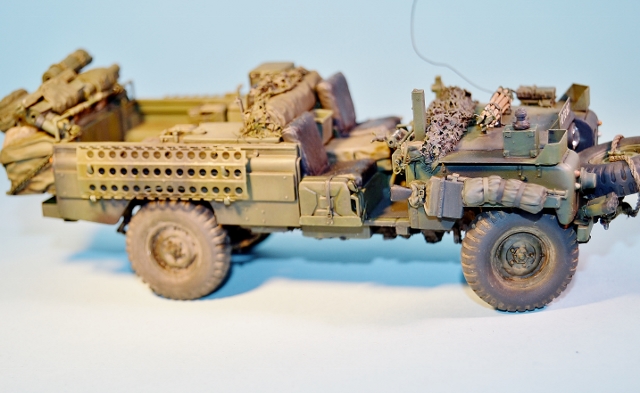
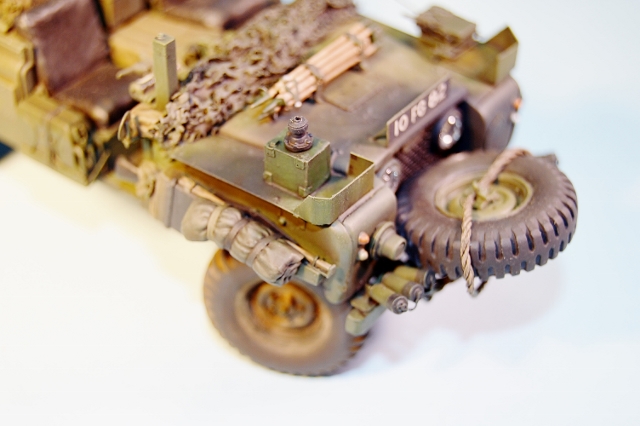
Now the model is beginning to really take shape.
I'm really pleased with the way the wheels have turned out.
Next step...equipment & stowage!
WHEELS!!!

I glued the wheels into place & gave them an initial weathering with pigments (not including the spare wheel). The "damp" areas have been touched up with Future. They will be weathered further at a later stage.
I have also added the tow rope around the spare wheel & the PSP Plates along the sides of the vehicle.
Here are some photographs of the work thus far...


Now the model is beginning to really take shape.
I'm really pleased with the way the wheels have turned out.
Next step...equipment & stowage!
9504cheffy

Joined: November 16, 2010
KitMaker: 129 posts
Armorama: 128 posts

Posted: Sunday, March 23, 2014 - 06:56 AM UTC
Hat off to you ! this is another fantastic build by you .
With regards to the figures they look great to and I also am building them and have replaced the GPMG with the SLR as it does just fit better with the stance of the figure.
Keep up the good work.
Neil.
With regards to the figures they look great to and I also am building them and have replaced the GPMG with the SLR as it does just fit better with the stance of the figure.
Keep up the good work.
Neil.
joegrafton

Joined: October 04, 2009
KitMaker: 1,209 posts
Armorama: 1,143 posts

Posted: Sunday, April 06, 2014 - 09:28 PM UTC
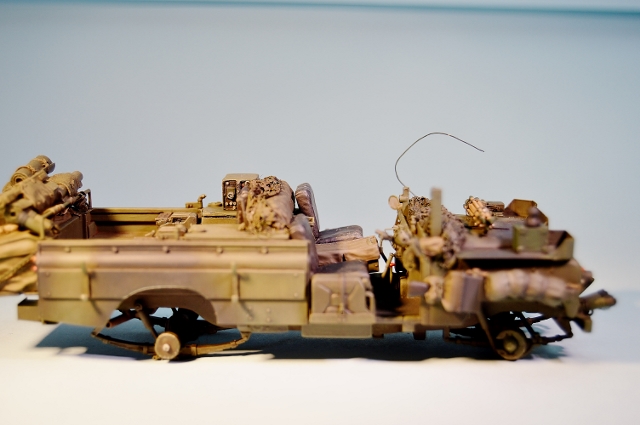
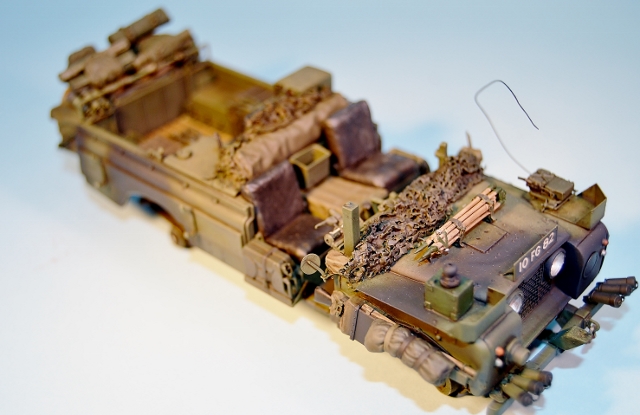
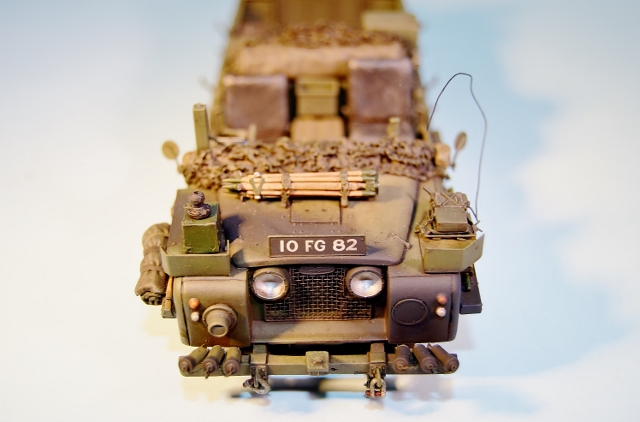
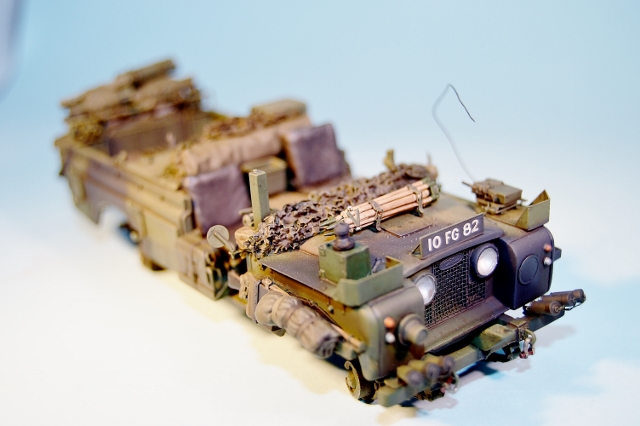
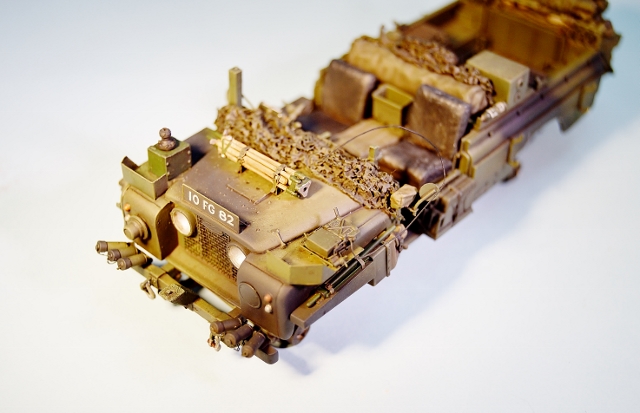
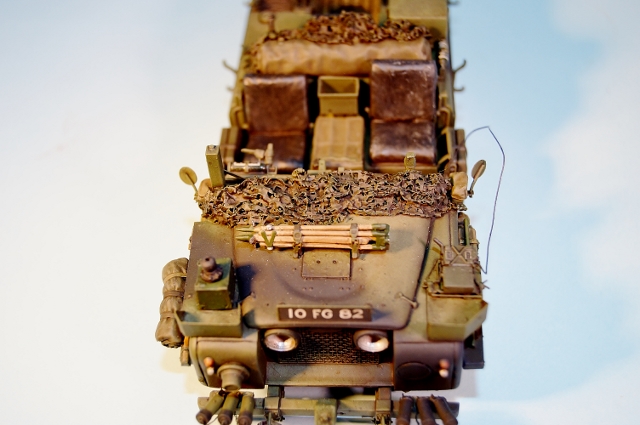
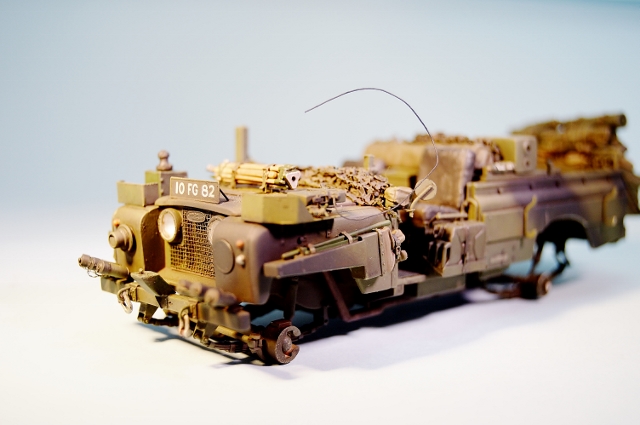
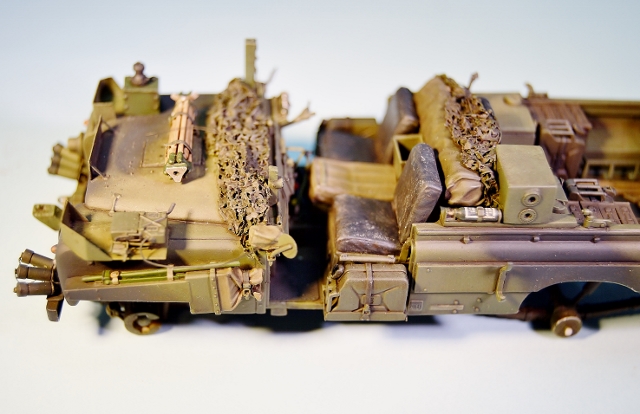
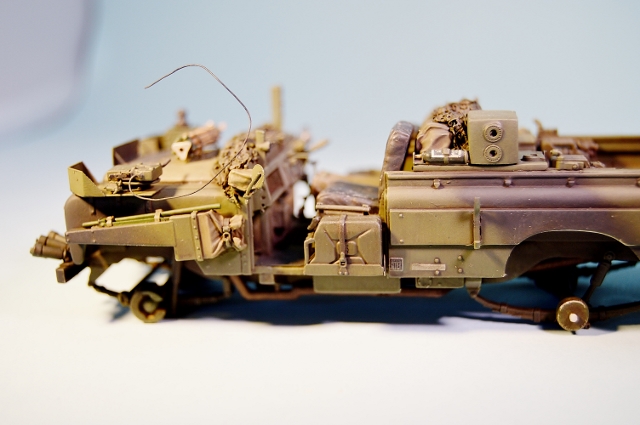
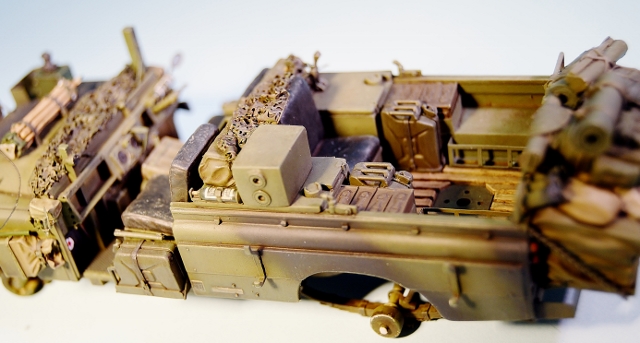
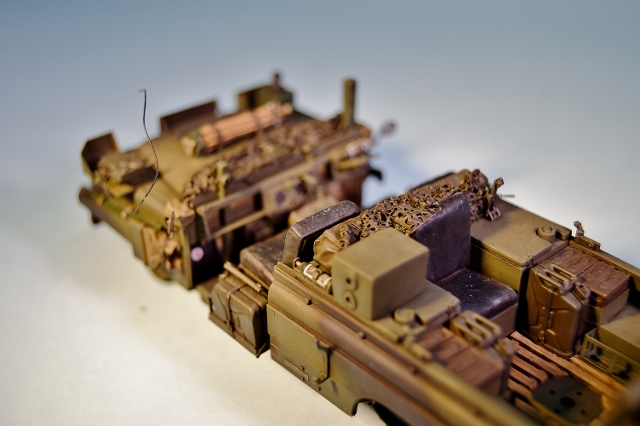
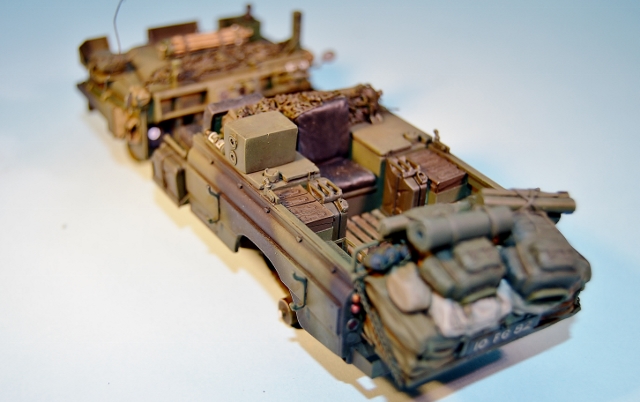
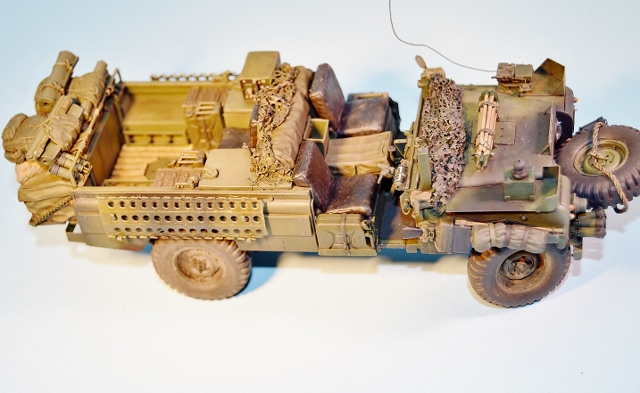
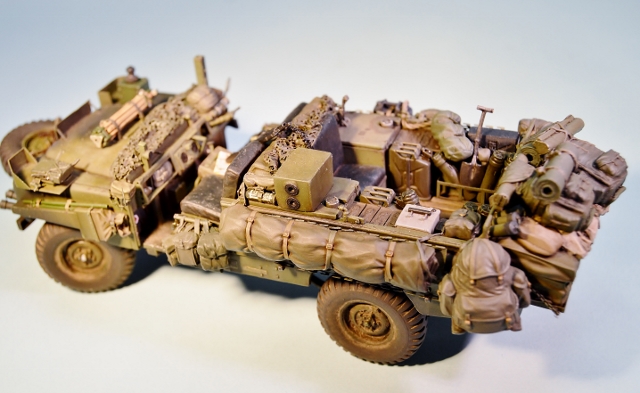
Okay, so now all the equipment has been added.
I didn't want to swamp the vehicle in kit like the desert Pinkie I built previously. I hope I've added just enough for a prolonged stay in the field in some undisclosed European Theatre of Operations.
Note the M18 smoke grenades hooked to the radio bracket in the crew cab. The M18 grenade decals are from Arms Corps Models, Australia.
Here are some photographs to bring you up to date...
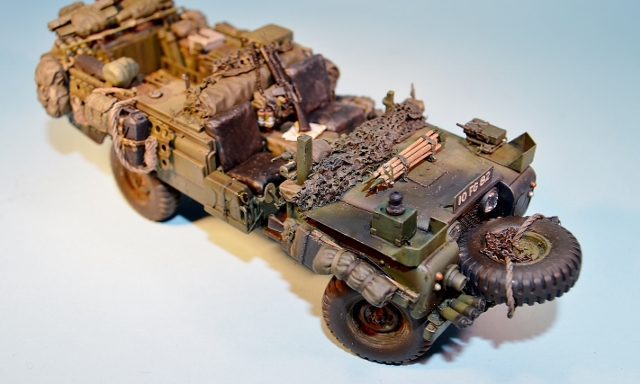
I also completed a few more weathering steps at this stage.
Chipping & scuffing was added around the vehicle using Vallejo Model Color #822 German Camouflage Black Brown.
A graphite pencil was also used in various places to bring out the 'metal' underneath.
The chain on the front spare wheel is from the Legend set, painted German Camouflage Black Brown, highlighted with rust tone oils, followed by some rust coloured pigments & finally touched up with the graphite pencil.
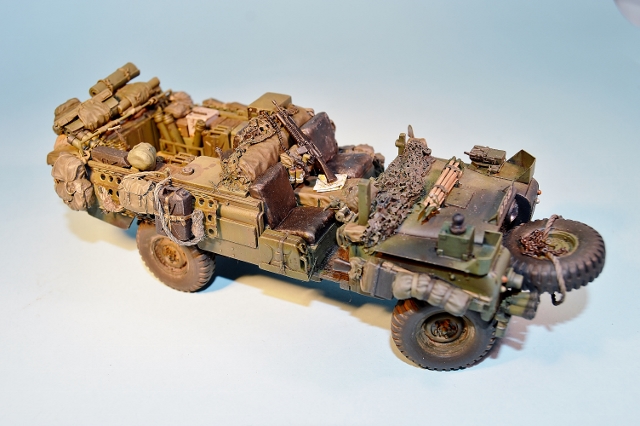
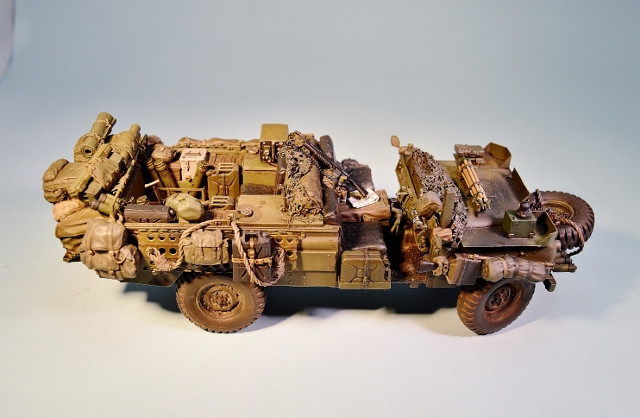
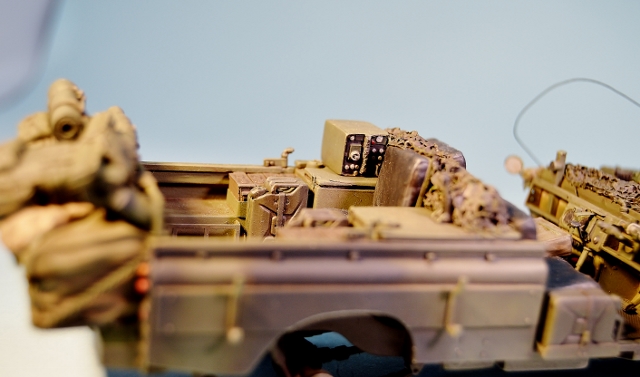
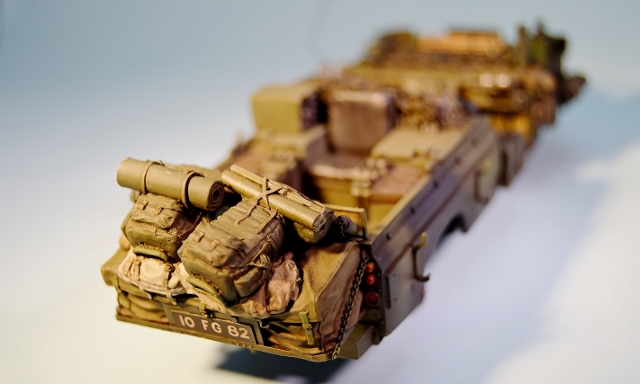
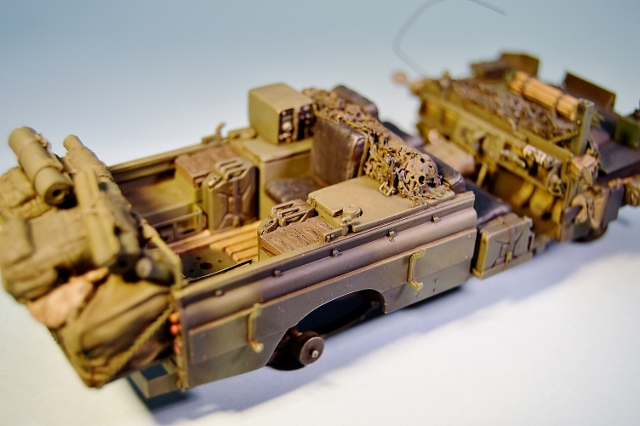
Along the side of the vehicle here we have a British water jerry can from Accurate Armour strapped on with scratch built straps; '58 pattern large pack taken from the back of a Bravo6 Australian SAS figure & the Bergen that was cut off the Legend update set rear stowage ledge earlier in the build.
The length of rope is from the Legend set, cut to size & some loops fashioned into it.
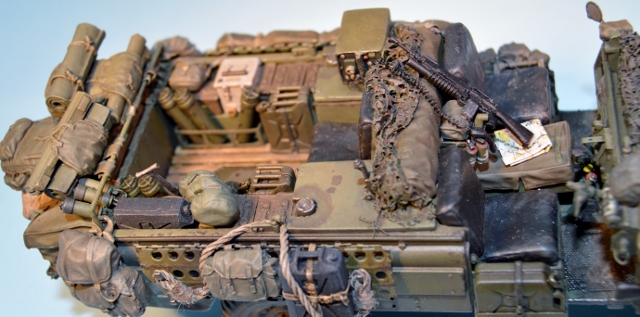
A little difficult to see but I've weathered the crew compartment by 'muddying' up the floor pan using Vallejo matte varnish, various colour pigments & some Johnsons Clear to obtain a wet muddy look before placing the figures.
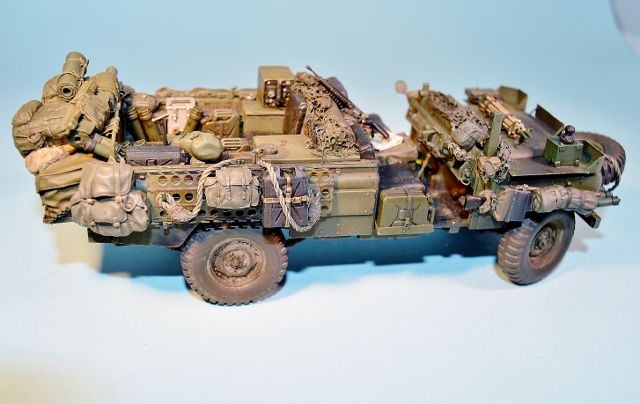
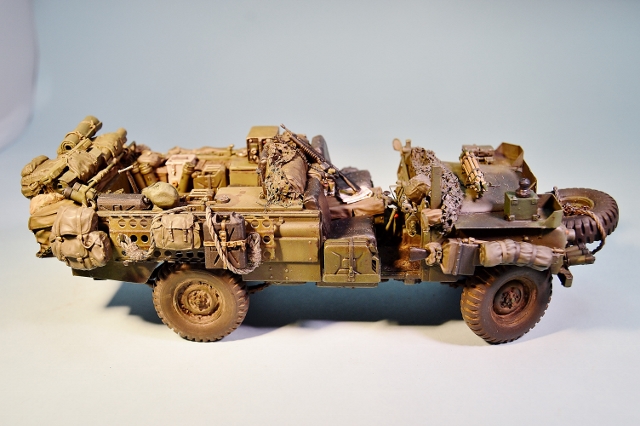
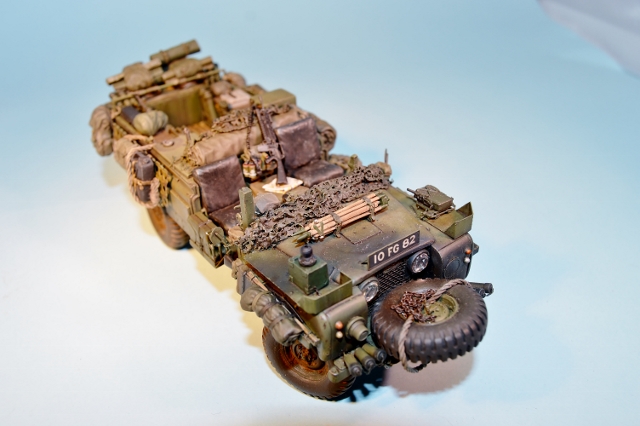
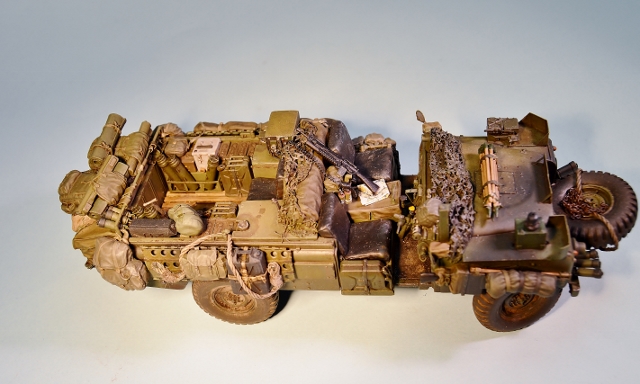
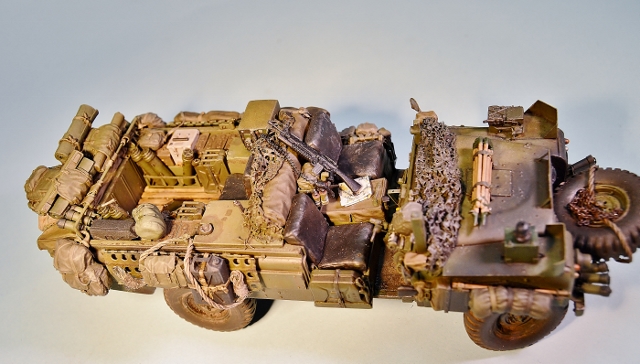
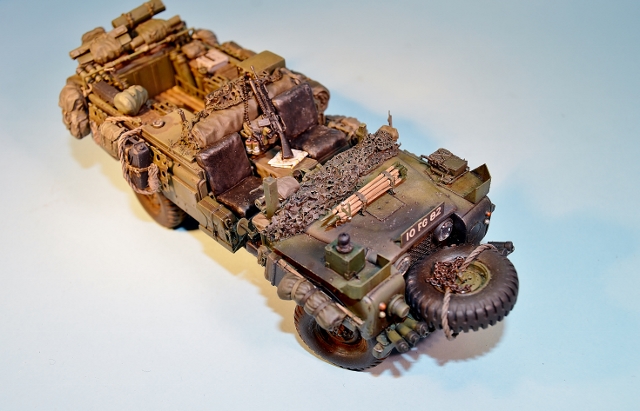
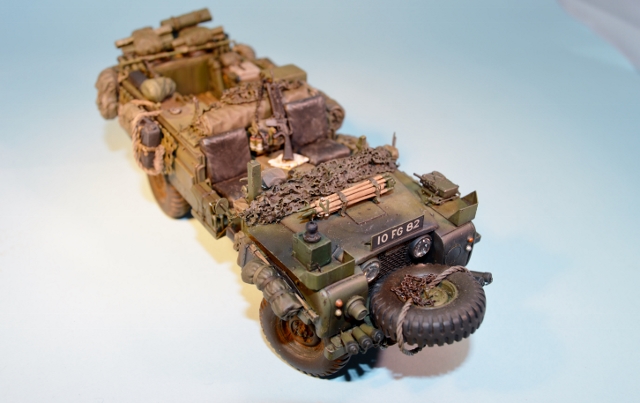
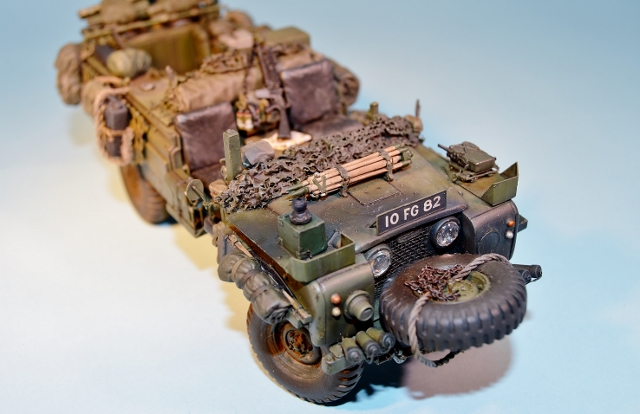
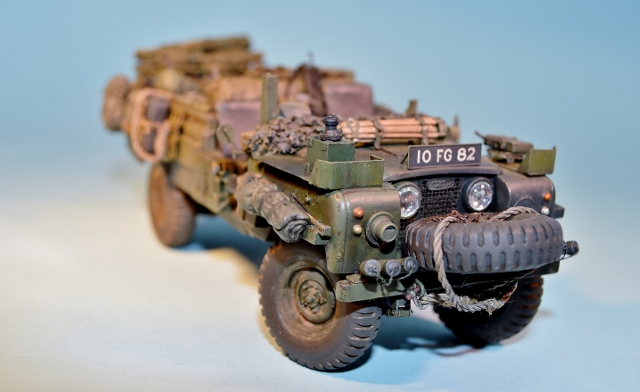
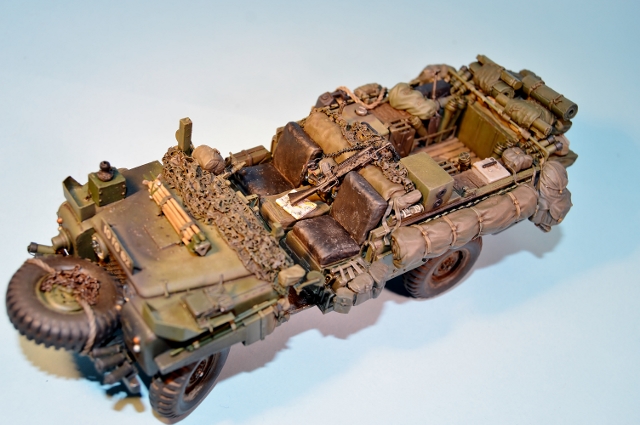
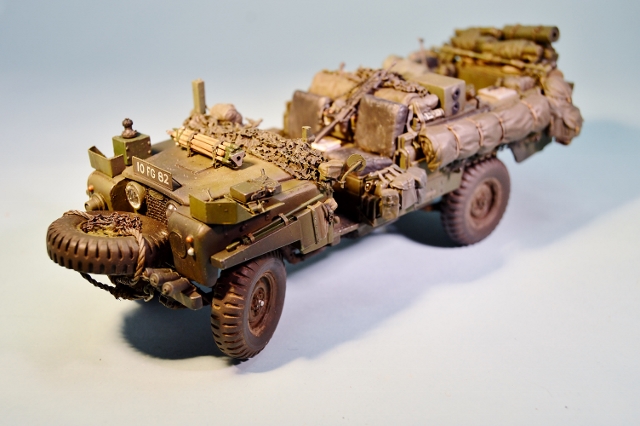
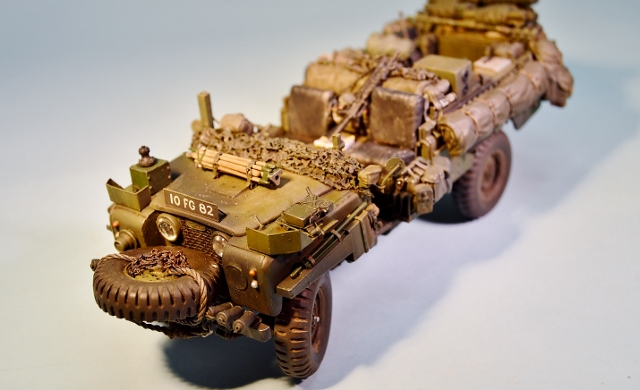
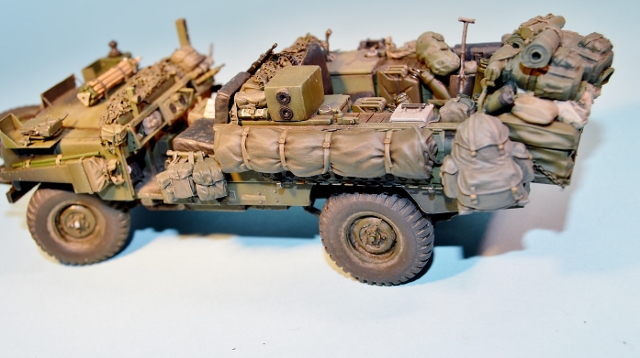
Along this side we have various kit added. The large tarp is from the Legend set, the WWII SAS Bergen & one of the pouches near the crew commanders position is from a Mantis Figurines French Resistance figure; the '58 pattern respirator case is from a Wee Friends modern British figure.
Note the cooling fan covers on the rear of the Clansman 353 radio. I have repainted these to a black colour following some expert advice. More on the radio shortly...
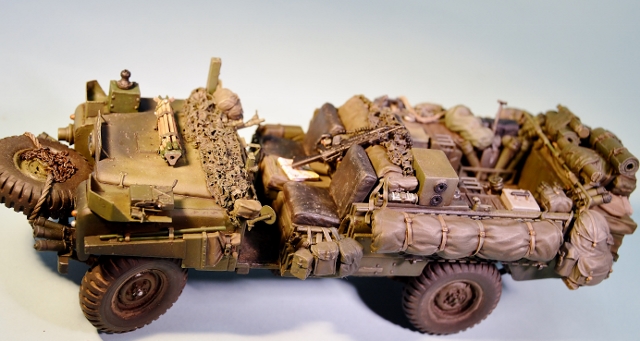
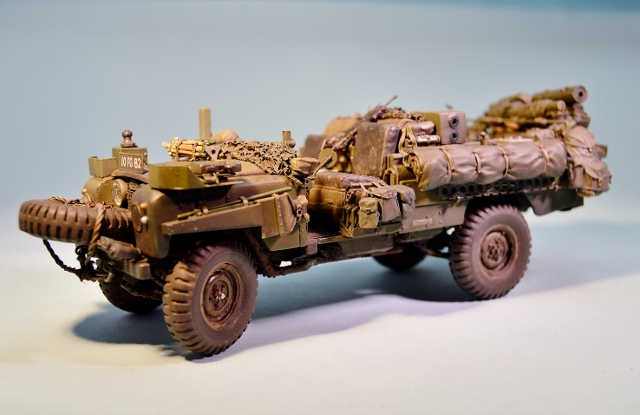
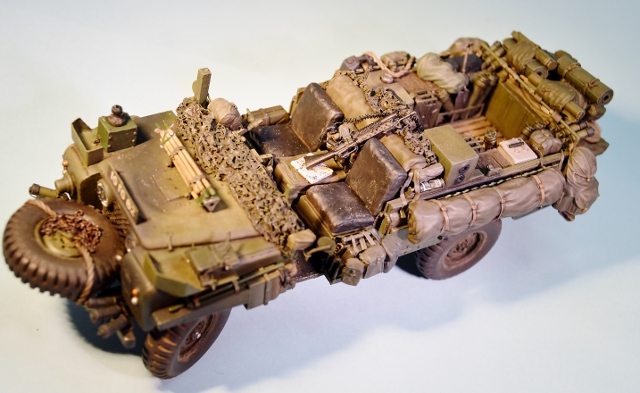
The M16/M203 is from TANK Models, Russia & the map is from Reality in Scale.
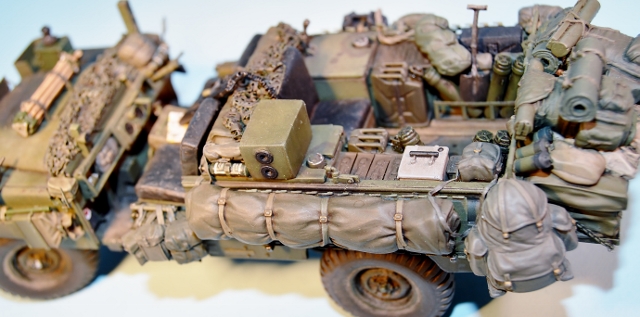
The shovel in the rear is from the Wee Friends figure. I thought I needed to add a shovel somewhere as the two that should go on the front of the vehicle had to be removed to allow for the radio equipment to be added.
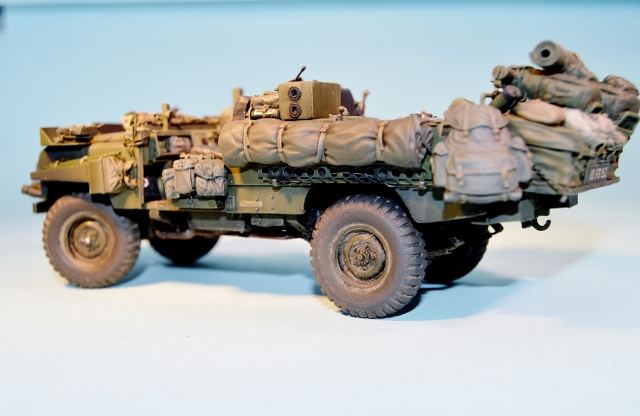
Note the fuel stains in this photograph. I have always been under the assumption that these Landies had diesel engines but I was put straight on that fact (cheers Terry!). They ran on petrol! So I used a mixture of Fuel, Kerosene & Smoke from the Lifecolor Tensocrom range to achieve more of a translucent petrol colour, darkening the outside edges further by adding more paint as further spillages tend to wash previous stains away.
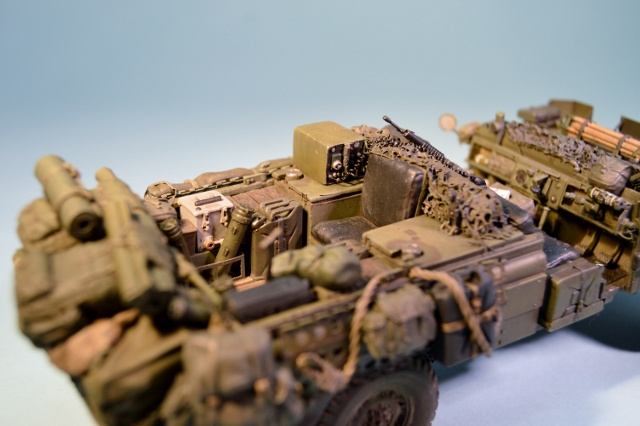
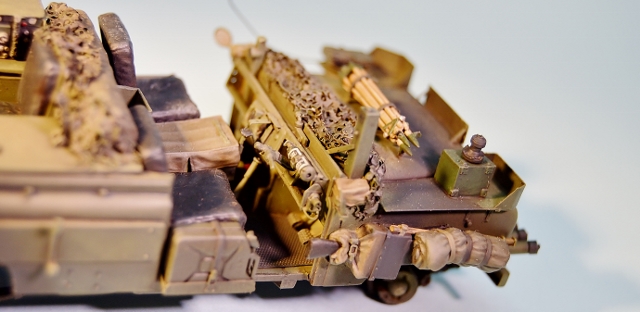
I love the British Boiling Vessel situated on the portside shelf here, available from Accurate Armour. It is the grey object, for those who don't know.
This is a British vehicle, after all, & one must have a cup of tea, mustn't one?
This is also a good photo to show the 'wired in' Clansman 353.
Following expert advice on British Army radio equipment, all radio equipment featured on the model had a major update at this point.
The Clansman 353 set you see in the picture above had various wires added to it together with the coiled wire for the handset which disappears off into the crew cab for the commander.
As previously stated, the cooling fan covers at the rear of this set were repainted black; the TUAAM box on the starboard front wing was wired in & the top half of its' aerial mount was repainted a darker black & satin varnished as it is a type of Bakelite material.
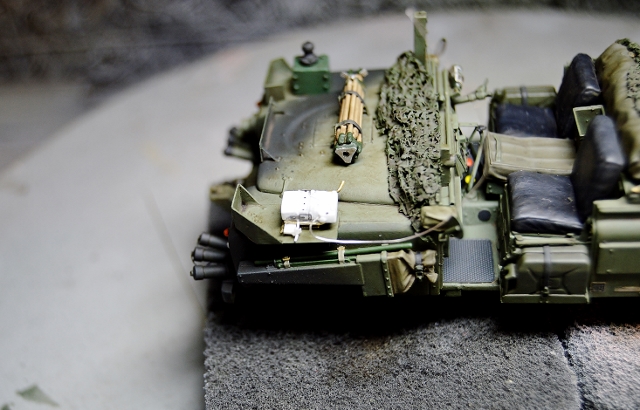
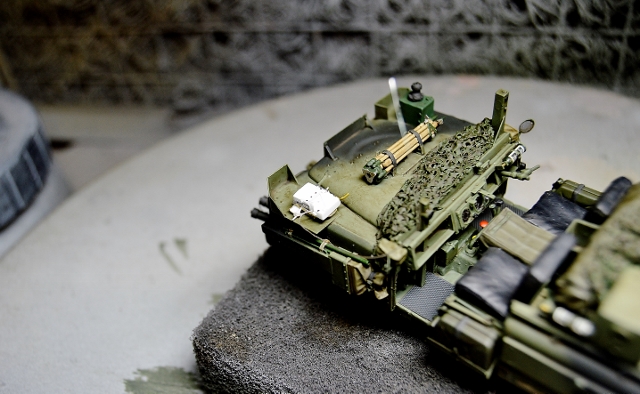
However, I should point out clearly here that the Clansman 353 set would have stood on a mount where it is situated behind the commander, near to the fuel filler cap. I didn't know this during the build stage & stuck it down very well to the top of the fuel tank. This was later pointed out to me so I did try to remove the radio set to add this mount but would have probably smashed the model to pieces if I had succeeded in doing so. Oh well, maybe next time, Dan!
I would very much like to thank Dan Daddow, Royal Signals Regt. (Retd) for all his wonderful help & patience in explaining the details & intricacies I needed to know to achieve a near accurate rendition of the Clansman 353 & Clansman 351 & all ancillary equipment. Cheers mate!
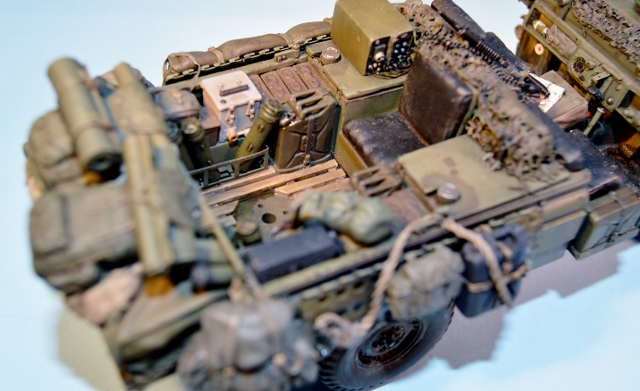
Note here I added a puddle of 'water' in the floor well where the GPMG stanchion is situated using Future Clear.
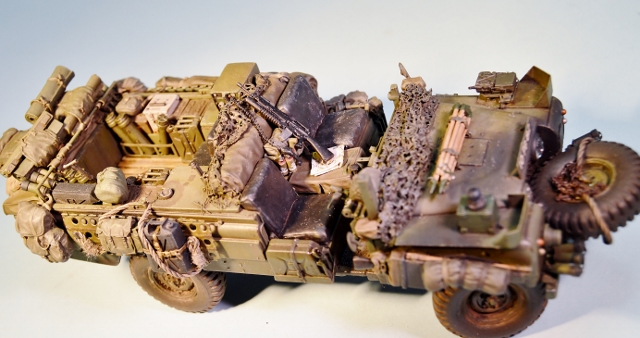
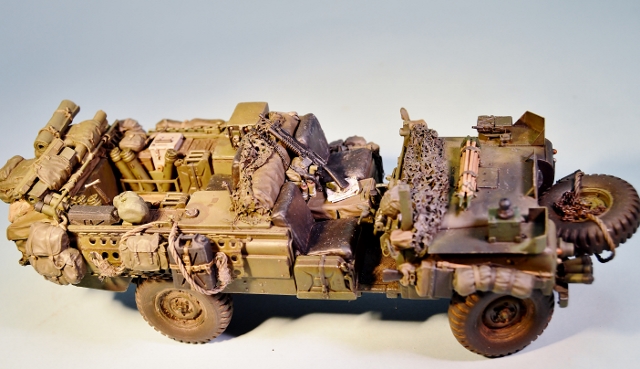
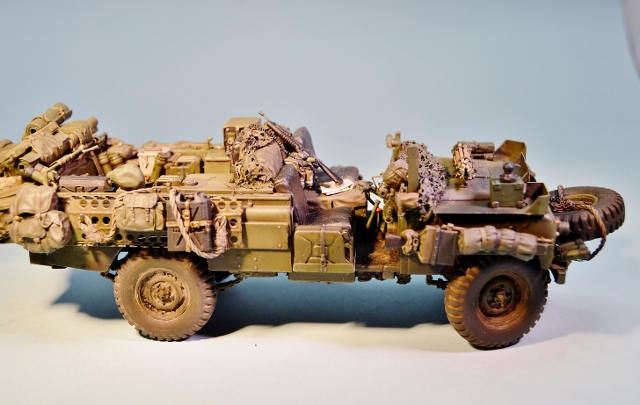
So that's that step done.
Now on to the figures...where I'm having a torrid time trying to paint the British DPM pattern!
UGH!!!!
I didn't want to swamp the vehicle in kit like the desert Pinkie I built previously. I hope I've added just enough for a prolonged stay in the field in some undisclosed European Theatre of Operations.
Note the M18 smoke grenades hooked to the radio bracket in the crew cab. The M18 grenade decals are from Arms Corps Models, Australia.
Here are some photographs to bring you up to date...

I also completed a few more weathering steps at this stage.
Chipping & scuffing was added around the vehicle using Vallejo Model Color #822 German Camouflage Black Brown.
A graphite pencil was also used in various places to bring out the 'metal' underneath.
The chain on the front spare wheel is from the Legend set, painted German Camouflage Black Brown, highlighted with rust tone oils, followed by some rust coloured pigments & finally touched up with the graphite pencil.


Along the side of the vehicle here we have a British water jerry can from Accurate Armour strapped on with scratch built straps; '58 pattern large pack taken from the back of a Bravo6 Australian SAS figure & the Bergen that was cut off the Legend update set rear stowage ledge earlier in the build.
The length of rope is from the Legend set, cut to size & some loops fashioned into it.
A little difficult to see but I've weathered the crew compartment by 'muddying' up the floor pan using Vallejo matte varnish, various colour pigments & some Johnsons Clear to obtain a wet muddy look before placing the figures.


Along this side we have various kit added. The large tarp is from the Legend set, the WWII SAS Bergen & one of the pouches near the crew commanders position is from a Mantis Figurines French Resistance figure; the '58 pattern respirator case is from a Wee Friends modern British figure.
Note the cooling fan covers on the rear of the Clansman 353 radio. I have repainted these to a black colour following some expert advice. More on the radio shortly...


The M16/M203 is from TANK Models, Russia & the map is from Reality in Scale.


The shovel in the rear is from the Wee Friends figure. I thought I needed to add a shovel somewhere as the two that should go on the front of the vehicle had to be removed to allow for the radio equipment to be added.


Note the fuel stains in this photograph. I have always been under the assumption that these Landies had diesel engines but I was put straight on that fact (cheers Terry!). They ran on petrol! So I used a mixture of Fuel, Kerosene & Smoke from the Lifecolor Tensocrom range to achieve more of a translucent petrol colour, darkening the outside edges further by adding more paint as further spillages tend to wash previous stains away.

I love the British Boiling Vessel situated on the portside shelf here, available from Accurate Armour. It is the grey object, for those who don't know.
This is a British vehicle, after all, & one must have a cup of tea, mustn't one?
This is also a good photo to show the 'wired in' Clansman 353.
Following expert advice on British Army radio equipment, all radio equipment featured on the model had a major update at this point.
The Clansman 353 set you see in the picture above had various wires added to it together with the coiled wire for the handset which disappears off into the crew cab for the commander.
As previously stated, the cooling fan covers at the rear of this set were repainted black; the TUAAM box on the starboard front wing was wired in & the top half of its' aerial mount was repainted a darker black & satin varnished as it is a type of Bakelite material.
However, I should point out clearly here that the Clansman 353 set would have stood on a mount where it is situated behind the commander, near to the fuel filler cap. I didn't know this during the build stage & stuck it down very well to the top of the fuel tank. This was later pointed out to me so I did try to remove the radio set to add this mount but would have probably smashed the model to pieces if I had succeeded in doing so. Oh well, maybe next time, Dan!
I would very much like to thank Dan Daddow, Royal Signals Regt. (Retd) for all his wonderful help & patience in explaining the details & intricacies I needed to know to achieve a near accurate rendition of the Clansman 353 & Clansman 351 & all ancillary equipment. Cheers mate!

Note here I added a puddle of 'water' in the floor well where the GPMG stanchion is situated using Future Clear.


So that's that step done.
Now on to the figures...where I'm having a torrid time trying to paint the British DPM pattern!
UGH!!!!
Dannyd

Joined: March 27, 2007
KitMaker: 803 posts
Armorama: 793 posts

Posted: Sunday, April 06, 2014 - 09:33 PM UTC
That's looking great joe, nice work bud
Keef1648

Joined: January 23, 2008
KitMaker: 1,240 posts
Armorama: 1,192 posts

Posted: Sunday, April 06, 2014 - 11:23 PM UTC
Wonderful and inspiring work Joe.
Now you know me, I always have a comment.
The 353 radio set is in a precarious and possibly dangerous position/location and we can only hope the item is switched off when refueling as it is very close to the filler cap and thus spillage and fumes. Hence, the use of a radio tray to lift it up, insulation and ani vibration mounts, plus secure it.
And note the location of the BCF fire Ext for obvious reasns!

An excellent build so far.
Keith.
Now you know me, I always have a comment.
The 353 radio set is in a precarious and possibly dangerous position/location and we can only hope the item is switched off when refueling as it is very close to the filler cap and thus spillage and fumes. Hence, the use of a radio tray to lift it up, insulation and ani vibration mounts, plus secure it.
And note the location of the BCF fire Ext for obvious reasns!

An excellent build so far.
Keith.

joegrafton

Joined: October 04, 2009
KitMaker: 1,209 posts
Armorama: 1,143 posts

Posted: Thursday, April 10, 2014 - 09:16 PM UTC
Right, let's move on to onboard figures...
The figures I will be using are one & the same figure for both front seating positions.
However, one is from 'The Imperial Gallery' which I guess is now OOP & the other is from 'Wee Friends'.
They are both 1/35th resin figures of what appears to be a British Paratrooper dressed in kit that was prevalent in the 1980's.
Here is a picture...
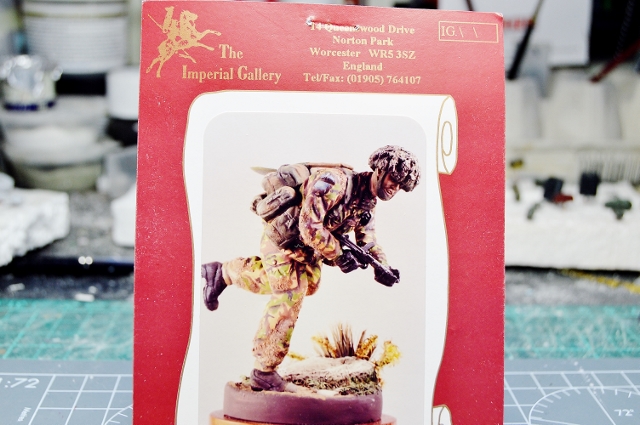
The above picture shows 'The Imperial Gallery' effort. As you can see he is in an action pose toting a sterling SMG.
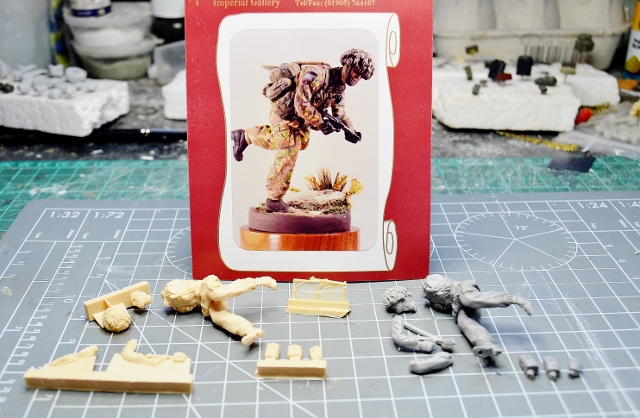
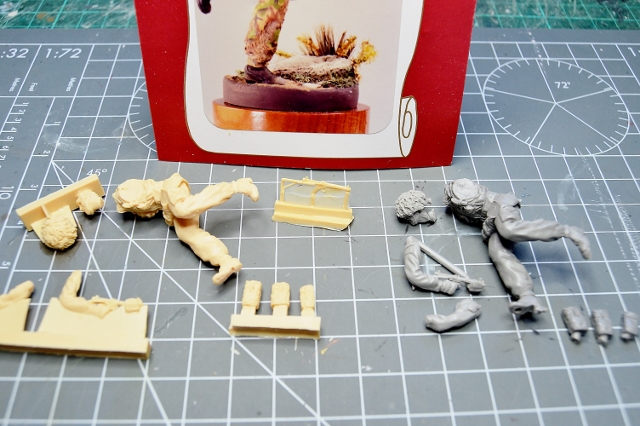
The two photos above shows us basically a breakdown of what you get with each figure. The cream coloured figure on the left is the one from 'The Imperial Gallery' & the grey figure is from 'Wee Friends'.
All we really need is the base figure, arms & hands from each set but he will clearly not fit in the vehicle in the pose that he is in so the first thing we need to do is take the main body & cut it in half thus...
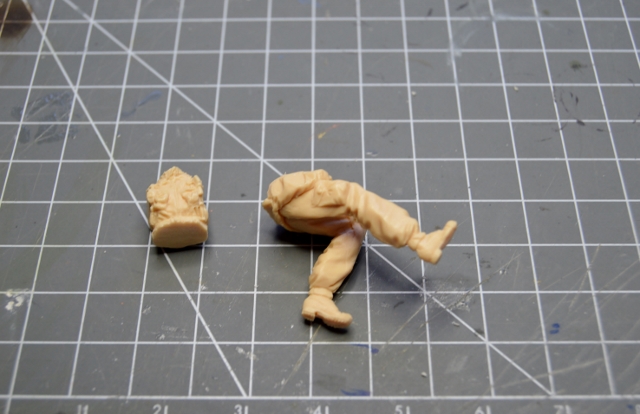
I usually cut just below the belt line.
Again, as you can see from the following photograph we are still having problems getting him to fit...
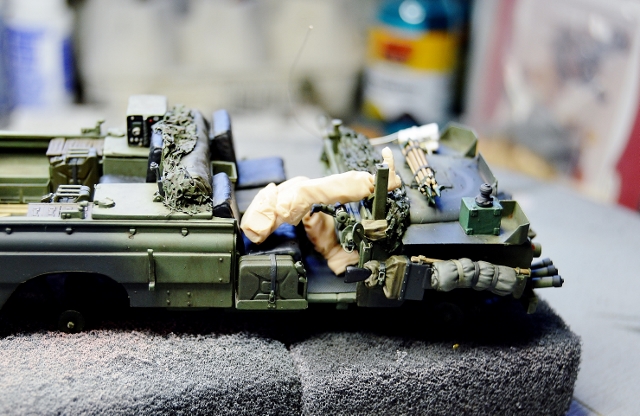
...so more work has to be done.
So, I cut both legs just below the knee so I am left with his thighs, bum & waist. I use my Dremel multitool to grind off a lot of resin on the underside of his legs.
I prefer to grind away at the figure as opposed to the seats as I find it easier this way.
Also, I need to grind off much of the area where his back is touching the seat upright. This is so he appears to be sitting in the seat as opposed to on it.
Next we take each bottom half of the legs & using a piece of copper wire we can attach each bottom half to their respective top half using CA glue.
However, you need to just attach it at the wire so as to allow free movement of the bottom half so as to get the right fit when placing him in the seat.
So, once you are happy with the position of the legs, glue them securely & then fill the gaps. I use Aves Apoxie Sculpt 2 part modelling compound as my filler of choice.
Allow this to dry for 24 hours, then go back & build up the legs with your Aves putty (or whatever you use) where you have ground off a lot of the resin on the underside, keeping it wet with just plain tap water.
Press the figure down into the seat to achieve a correct sit.
Remove the figure & again allow to dry for 24 hours.
Once dry, build up the thigh pockets & the legs will look like they should do.
Here are some photos of the lower half of the body sitting correctly in the drivers seat...
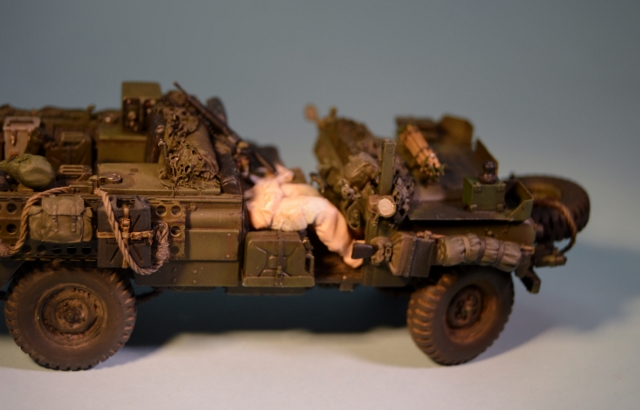
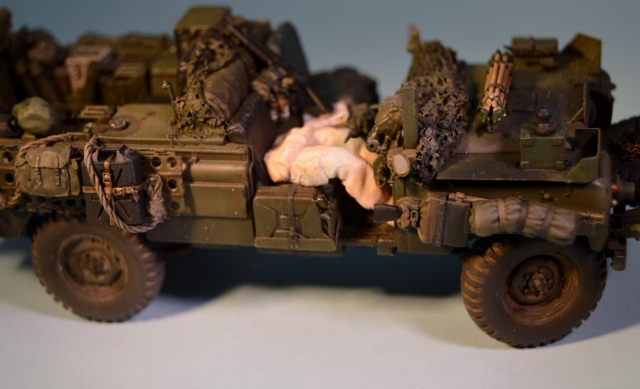
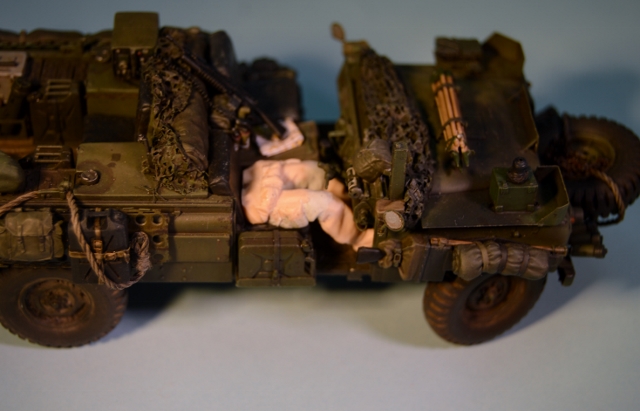
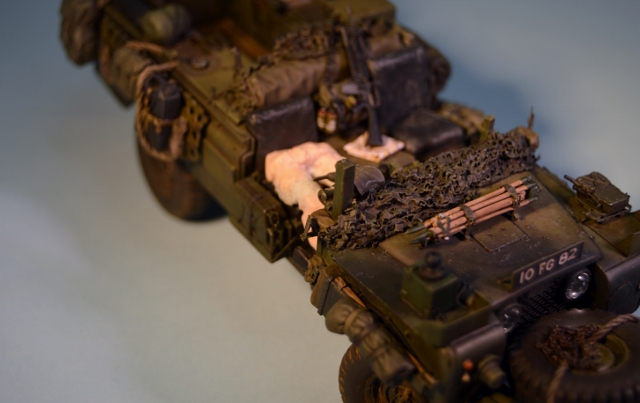
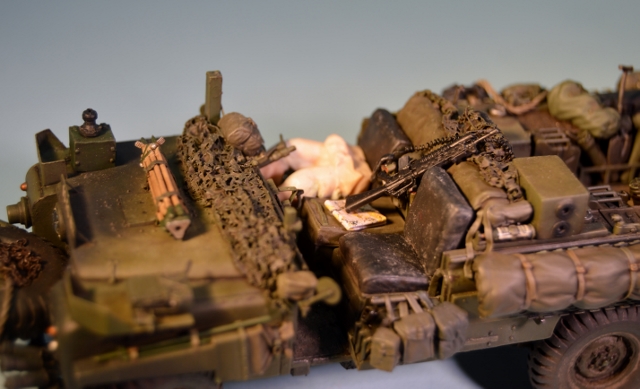
Next, work on the torso.
The figures I will be using are one & the same figure for both front seating positions.
However, one is from 'The Imperial Gallery' which I guess is now OOP & the other is from 'Wee Friends'.
They are both 1/35th resin figures of what appears to be a British Paratrooper dressed in kit that was prevalent in the 1980's.
Here is a picture...

The above picture shows 'The Imperial Gallery' effort. As you can see he is in an action pose toting a sterling SMG.


The two photos above shows us basically a breakdown of what you get with each figure. The cream coloured figure on the left is the one from 'The Imperial Gallery' & the grey figure is from 'Wee Friends'.
All we really need is the base figure, arms & hands from each set but he will clearly not fit in the vehicle in the pose that he is in so the first thing we need to do is take the main body & cut it in half thus...

I usually cut just below the belt line.
Again, as you can see from the following photograph we are still having problems getting him to fit...

...so more work has to be done.
So, I cut both legs just below the knee so I am left with his thighs, bum & waist. I use my Dremel multitool to grind off a lot of resin on the underside of his legs.
I prefer to grind away at the figure as opposed to the seats as I find it easier this way.
Also, I need to grind off much of the area where his back is touching the seat upright. This is so he appears to be sitting in the seat as opposed to on it.
Next we take each bottom half of the legs & using a piece of copper wire we can attach each bottom half to their respective top half using CA glue.
However, you need to just attach it at the wire so as to allow free movement of the bottom half so as to get the right fit when placing him in the seat.
So, once you are happy with the position of the legs, glue them securely & then fill the gaps. I use Aves Apoxie Sculpt 2 part modelling compound as my filler of choice.
Allow this to dry for 24 hours, then go back & build up the legs with your Aves putty (or whatever you use) where you have ground off a lot of the resin on the underside, keeping it wet with just plain tap water.
Press the figure down into the seat to achieve a correct sit.
Remove the figure & again allow to dry for 24 hours.
Once dry, build up the thigh pockets & the legs will look like they should do.
Here are some photos of the lower half of the body sitting correctly in the drivers seat...


Next, work on the torso.
joegrafton

Joined: October 04, 2009
KitMaker: 1,209 posts
Armorama: 1,143 posts

Posted: Sunday, April 12, 2015 - 03:49 PM UTC
Hello again!
I would firstly like to apologise for the delay in getting this model finished. It's been over a year since my last post on this subject & it would be a travesty not to see this one through to the end so I have been plugging away at it for a while, here & there, in the hope that this will eventually see the light of day.
So, the following pictures show the work I have done on the torso:
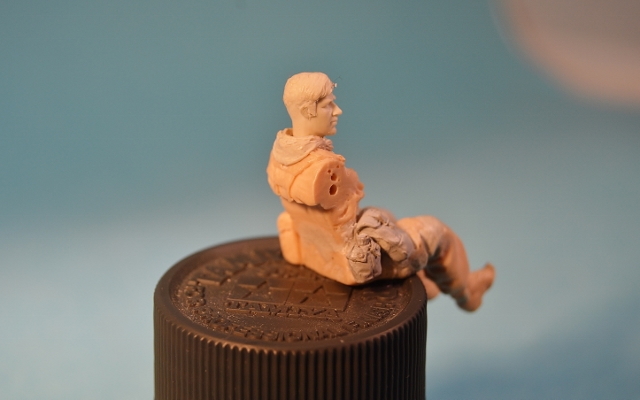
Using a piece of 1mm brass wire I attached the torso to the legs with some CA glue & filled any gaps with Aves putty. This was allowed to set for 24hrs.
After this I cut away much of the figures' back with a rotary tool, as you can see readily in the photo above. This is the vital step in the figure conversion process because in the real world the guy would have soft clothes on & would be sitting in a (relatively) soft seat, yet we are working with hard resin figures & seats so you need to chop a lot of the figure away to give the illusion that the figure is sitting in the seat as opposed to on it. Don't be afraid to remove a lot of resin material & test fit regularly until you are happy with the results.
There were a few details that I decided to remove from the original moulded torso including the collar & scrim scarf, epaulettes (as he would be wearing an SAS smock which had a rank slide at the chest & no epaulettes),moulded smoke grenade & the shovel attachment strap on the '58 pattern webbing yoke which was a common practice among SAS personnel, apparently.
I gave the figure some belt kit using a Bravo 6 water bottle from the Australian SAS range & some '58 pattern ammo pouches.
I began building up the hood for the SAS smock at this point using Aves putty.
The head is from the Hornet range, being with WWII haircuts but I added some funky '70's sideburns & filled in the side parting again using Aves putty.
Holes were drilled to take the arms.
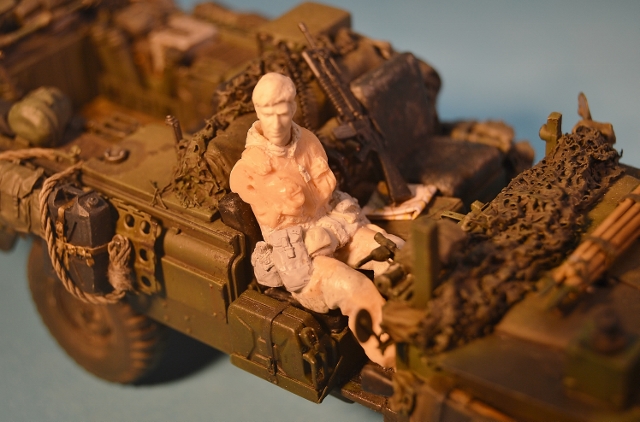
In the photo above you can see the side parting of the hair filled in & re-shaped a bit, the rank slide on the chest & the hem of the smock rebuilt & pockets added using Aves putty.
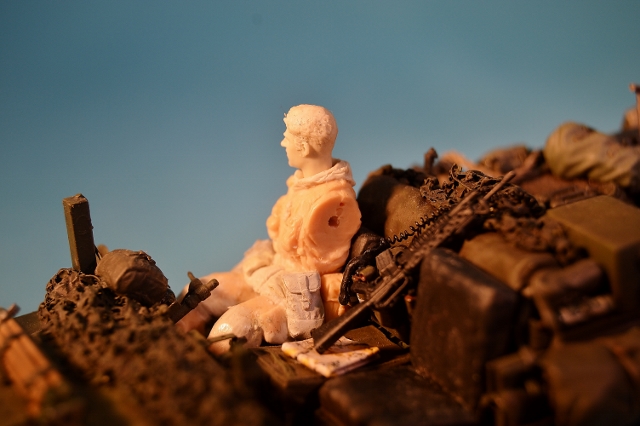
The image above shows the other side of the figure. When adding the belt kit the same method applies here as it was with his back. The canvas webbing & clothing 'gives' in real life so removing resin with the a rotary tool was done to give the kit a more realistic 'sit'.
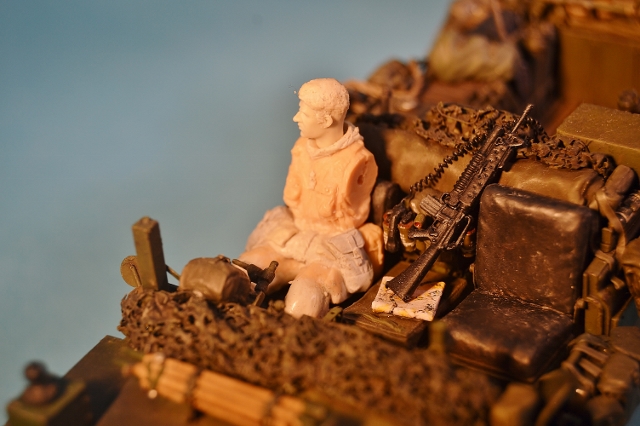
Notice how he is sitting 'in' the seat. However, more work needs to be done to get it looking right...
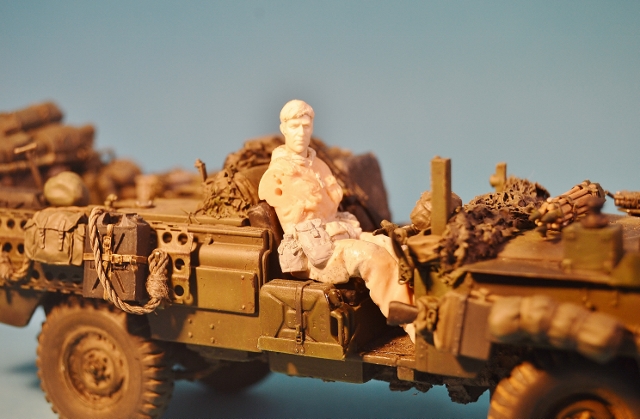
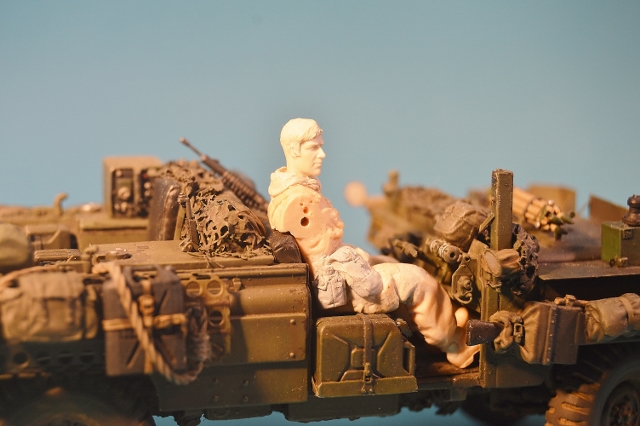
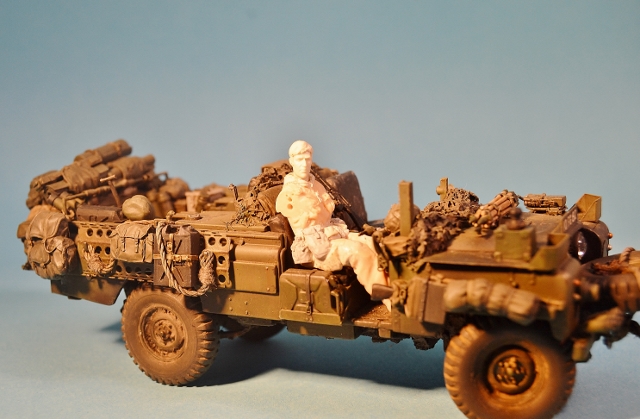
Above shows a good photograph of just how much was removed from his back to get a good 'sit'.
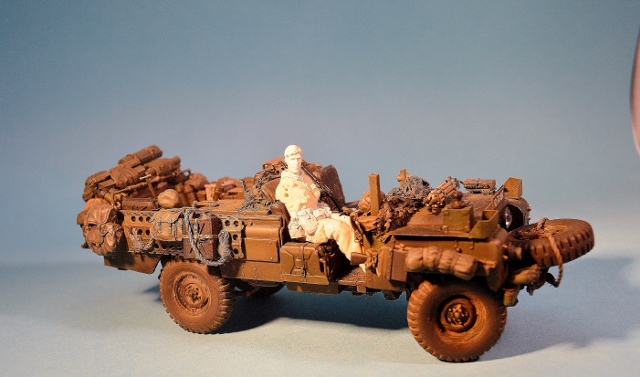
More soon...
I would firstly like to apologise for the delay in getting this model finished. It's been over a year since my last post on this subject & it would be a travesty not to see this one through to the end so I have been plugging away at it for a while, here & there, in the hope that this will eventually see the light of day.
So, the following pictures show the work I have done on the torso:

Using a piece of 1mm brass wire I attached the torso to the legs with some CA glue & filled any gaps with Aves putty. This was allowed to set for 24hrs.
After this I cut away much of the figures' back with a rotary tool, as you can see readily in the photo above. This is the vital step in the figure conversion process because in the real world the guy would have soft clothes on & would be sitting in a (relatively) soft seat, yet we are working with hard resin figures & seats so you need to chop a lot of the figure away to give the illusion that the figure is sitting in the seat as opposed to on it. Don't be afraid to remove a lot of resin material & test fit regularly until you are happy with the results.
There were a few details that I decided to remove from the original moulded torso including the collar & scrim scarf, epaulettes (as he would be wearing an SAS smock which had a rank slide at the chest & no epaulettes),moulded smoke grenade & the shovel attachment strap on the '58 pattern webbing yoke which was a common practice among SAS personnel, apparently.
I gave the figure some belt kit using a Bravo 6 water bottle from the Australian SAS range & some '58 pattern ammo pouches.
I began building up the hood for the SAS smock at this point using Aves putty.
The head is from the Hornet range, being with WWII haircuts but I added some funky '70's sideburns & filled in the side parting again using Aves putty.
Holes were drilled to take the arms.

In the photo above you can see the side parting of the hair filled in & re-shaped a bit, the rank slide on the chest & the hem of the smock rebuilt & pockets added using Aves putty.

The image above shows the other side of the figure. When adding the belt kit the same method applies here as it was with his back. The canvas webbing & clothing 'gives' in real life so removing resin with the a rotary tool was done to give the kit a more realistic 'sit'.


Notice how he is sitting 'in' the seat. However, more work needs to be done to get it looking right...


Above shows a good photograph of just how much was removed from his back to get a good 'sit'.

More soon...
Keef1648

Joined: January 23, 2008
KitMaker: 1,240 posts
Armorama: 1,192 posts

Posted: Sunday, April 12, 2015 - 04:46 PM UTC
Great to see this update mate, I was wondering where and when we would get to see you here again.
Keep up this excellent work.
Keith.
Keep up this excellent work.
Keith.

Dannyd

Joined: March 27, 2007
KitMaker: 803 posts
Armorama: 793 posts

Posted: Sunday, April 12, 2015 - 04:55 PM UTC
Hi Joe ,
Good to see you back on this again fella , been missing the updates to be honest .
Great work on the figure mate , looking forward to seeing him in paint.
Kind Regards
Dan
Good to see you back on this again fella , been missing the updates to be honest .
Great work on the figure mate , looking forward to seeing him in paint.
Kind Regards
Dan
 |


