


Hosted by Richard S.
What If 4: Machines of the Mind

gcdavidson

Joined: August 05, 2003
KitMaker: 1,698 posts
Armorama: 1,563 posts
Posted: Thursday, July 17, 2014 - 04:29 AM UTC
Cheers Alex. A few more details added to the turret last night:

Trisaw

Joined: December 24, 2002
KitMaker: 4,105 posts
Armorama: 2,492 posts
Posted: Thursday, July 17, 2014 - 05:27 AM UTC
Wow, that looks great, Graeme! It's neat how everything came together.

corsair924
Joined: August 11, 2008
KitMaker: 403 posts
Armorama: 322 posts
Posted: Thursday, July 17, 2014 - 05:35 AM UTC

dweeb203

Joined: May 06, 2014
KitMaker: 59 posts
Armorama: 58 posts
Posted: Thursday, July 17, 2014 - 05:14 PM UTC
Quoted Text
Cheers Alex. A few more details added to the turret last night:
That's amazing graeme! I love to see that someone has a same idea with me (altough mine was for anti-tank gatling cannon, and not for this campaign).i also loved the way you make the turret! By the way the gatling is scratchbuilt? And what did you used for the hull?
dweeb203
Joined: May 06, 2014
KitMaker: 59 posts
Armorama: 58 posts
Posted: Thursday, July 17, 2014 - 09:39 PM UTC
Some updates, after 3 hours of hard work, the result of the first time turret scratch build and turret mod was a bit disappointing for me, at least the interior won't be visible when it's done


dweeb203
Joined: May 06, 2014
KitMaker: 59 posts
Armorama: 58 posts
Posted: Friday, July 18, 2014 - 06:27 PM UTC
Another update. Fixed yesterday's error and added more detail, but it's still very very rough , will clean it up with putty later

And got another idea for the hull, without wall. the driver's seat is scratch built

combined (driver from another kit)

i'm a noob, Still nothing compared to your skills,
And got another idea for the hull, without wall. the driver's seat is scratch built
combined (driver from another kit)
i'm a noob, Still nothing compared to your skills,

Nito74

Joined: March 04, 2008
KitMaker: 5,386 posts
Armorama: 4,727 posts
Posted: Sunday, July 20, 2014 - 05:12 AM UTC
Update :


Still working on the lower hull.
It will be a Leo II Hull with a T-55 Turret.
Still not sure about the Camo, Urban style Black,Blue & Grey or Brown, Sand & Khaki.
Still working on the lower hull.
It will be a Leo II Hull with a T-55 Turret.
Still not sure about the Camo, Urban style Black,Blue & Grey or Brown, Sand & Khaki.
gcdavidson
Joined: August 05, 2003
KitMaker: 1,698 posts
Armorama: 1,563 posts
Posted: Sunday, July 20, 2014 - 06:57 AM UTC
Tamiya Primer applied with a rattle can:

Nito74
Joined: March 04, 2008
KitMaker: 5,386 posts
Armorama: 4,727 posts
Posted: Tuesday, July 22, 2014 - 08:18 AM UTC
Graeme, great weapon, Primed Firepower !
Here's my update,
Working on the Hull


Dryfit

With equipment & PE engine grill

Turret Mockup

Colours for camo

Here's my update,
Working on the Hull
Dryfit
With equipment & PE engine grill
Turret Mockup
Colours for camo
dweeb203
Joined: May 06, 2014
KitMaker: 59 posts
Armorama: 58 posts
Posted: Tuesday, July 22, 2014 - 06:02 PM UTC
I'm in doubt right now, should i use the cannon or use a gatling instead? I got a gatling gun from the master grade Unicorn Gundam Full Armor, and it fits pretty well on the mantlet (?) waithout any big issue
Here's how it looks (dry fit)

and revised the gun breech too, because the previous one is just too messy (will add chain of ammo if it will be gatling)

Here's how it looks (dry fit)
and revised the gun breech too, because the previous one is just too messy (will add chain of ammo if it will be gatling)
Nito74
Joined: March 04, 2008
KitMaker: 5,386 posts
Armorama: 4,727 posts
Posted: Wednesday, July 23, 2014 - 05:39 AM UTC
Today's update,
Working on the turret


Mock up w/ Hull

I changed the T-55 main gun with a JSU-122 gun.

Working on the turret
Mock up w/ Hull
I changed the T-55 main gun with a JSU-122 gun.

Bluestab
Joined: December 03, 2009
KitMaker: 2,160 posts
Armorama: 1,906 posts
Posted: Wednesday, July 23, 2014 - 07:31 AM UTC
Fernando, Now I see what you're going for. I think you'll be okay on the interior.
John, That looks pretty cool. I think the 122 really sets off the look right. It's a lot of work but slat or some other add-on armor on the turret would really make this thing sing....especially with the armor on the hull.
Backstory....
The Yumi was a line of Japanese tank destroyers designed around light tanks and the German supplied 5cm pak. By 1943, the 5cm gun was showing its age against the tanks coming out of the Soviet factories. The Japanese could still use these antitank guns against the American Shermans and Stuarts.
Germany sent the Japanese a shipment of weapons and weapons plans. It was hoped that if the Japanese could add pressure to the Allies in the Pacific it would help the Germans in Europe.
The Japanese copied the German 5cm gun and mounted it on to a variety of light tanks. Construction was simple and straightforward.
This example was built using one of the Chinese purchased Vickers tanks captured by the Japanese. The fighting compartment was enclosed and extended back over the side intake ducts. The rear add-on was used for ammunition stowage.
The Yumi V had a crew of three; commander, driver, and gunner. The gunner was tasked with loading his own weapon. Due to the driver's position, the gun was modified to be sighted, loaded, and fired from the opposite side.
Most Yumi tank destroyers saw service at Okinawa, China, and the defense of the Japanese Home Islands. Performance was mixed and often limited to the mechanical reliability of their host vehicles. The Japanese crews favored the 5cm gun.
Assembly done and ready for paint. I would add at the last minute a pistol port above the driver's hatch for the commander. I had planned on adding a MG mount from an early Panzer 3 but never found the mount in the spares. The port cover is a scrap of styrene.


Painted. Went tan, dark green, and then red-brown. I sort of used Tamiya's Type 97 (ch-na) as a guide...I'd borrow the crew and leftover decals as well.

Speaking of crew...

Crew and decals. Tracks were terrible, perhaps the worse ones I've every dealt with without tossing. Decals are taken from the Tamiya kit.


Some outdoors shots....in the bush...knocking over trees, and in ambush mode.


And with that I'm done. This is probably the last one I'm doing for this What-If Campaign. My favorite is the Assault Stuart. I've still got ideas so those will probably come out in the next What If campaign.
John, That looks pretty cool. I think the 122 really sets off the look right. It's a lot of work but slat or some other add-on armor on the turret would really make this thing sing....especially with the armor on the hull.
Backstory....
The Yumi was a line of Japanese tank destroyers designed around light tanks and the German supplied 5cm pak. By 1943, the 5cm gun was showing its age against the tanks coming out of the Soviet factories. The Japanese could still use these antitank guns against the American Shermans and Stuarts.
Germany sent the Japanese a shipment of weapons and weapons plans. It was hoped that if the Japanese could add pressure to the Allies in the Pacific it would help the Germans in Europe.
The Japanese copied the German 5cm gun and mounted it on to a variety of light tanks. Construction was simple and straightforward.
This example was built using one of the Chinese purchased Vickers tanks captured by the Japanese. The fighting compartment was enclosed and extended back over the side intake ducts. The rear add-on was used for ammunition stowage.
The Yumi V had a crew of three; commander, driver, and gunner. The gunner was tasked with loading his own weapon. Due to the driver's position, the gun was modified to be sighted, loaded, and fired from the opposite side.
Most Yumi tank destroyers saw service at Okinawa, China, and the defense of the Japanese Home Islands. Performance was mixed and often limited to the mechanical reliability of their host vehicles. The Japanese crews favored the 5cm gun.
Assembly done and ready for paint. I would add at the last minute a pistol port above the driver's hatch for the commander. I had planned on adding a MG mount from an early Panzer 3 but never found the mount in the spares. The port cover is a scrap of styrene.
Painted. Went tan, dark green, and then red-brown. I sort of used Tamiya's Type 97 (ch-na) as a guide...I'd borrow the crew and leftover decals as well.
Speaking of crew...
Crew and decals. Tracks were terrible, perhaps the worse ones I've every dealt with without tossing. Decals are taken from the Tamiya kit.
Some outdoors shots....in the bush...knocking over trees, and in ambush mode.
And with that I'm done. This is probably the last one I'm doing for this What-If Campaign. My favorite is the Assault Stuart. I've still got ideas so those will probably come out in the next What If campaign.
Nito74
Joined: March 04, 2008
KitMaker: 5,386 posts
Armorama: 4,727 posts
Posted: Thursday, July 24, 2014 - 06:19 AM UTC
Thanks Alex !!
I still don't know if I'll add some slat add-on armor.
I worked on the hatches.

There's a clear part I'll need to paint with clear blue or clear red first.
I'm considering giving a coat of Mr.Surfacer to replicate the rough texture of the turret too.
Stay tuned for more !!
The wheels will be next on the bench
I still don't know if I'll add some slat add-on armor.
I worked on the hatches.
There's a clear part I'll need to paint with clear blue or clear red first.
I'm considering giving a coat of Mr.Surfacer to replicate the rough texture of the turret too.
Stay tuned for more !!
The wheels will be next on the bench
Scipio2010

#401
Joined: December 08, 2013
KitMaker: 323 posts
Armorama: 221 posts
Posted: Saturday, July 26, 2014 - 03:37 PM UTC
Finally got around to painting the JagdSturm Tiger

Nito74
Joined: March 04, 2008
KitMaker: 5,386 posts
Armorama: 4,727 posts
Posted: Monday, July 28, 2014 - 04:02 AM UTC
Working on the wheels

Nito74
Joined: March 04, 2008
KitMaker: 5,386 posts
Armorama: 4,727 posts
Posted: Wednesday, July 30, 2014 - 01:04 PM UTC
Update:


Tracks and painting of the resto of the hull will be next.
Finished the hatch too

Tracks and painting of the resto of the hull will be next.
Finished the hatch too
Nito74
Joined: March 04, 2008
KitMaker: 5,386 posts
Armorama: 4,727 posts
Posted: Saturday, August 02, 2014 - 06:57 AM UTC
Dry fit w/preshade

with turret,

Hull almost ready for the camo...

with turret,
Hull almost ready for the camo...
Nito74
Joined: March 04, 2008
KitMaker: 5,386 posts
Armorama: 4,727 posts
Posted: Sunday, August 03, 2014 - 06:09 AM UTC
Ok, today's work so far:
- Basic coat NATO Brown is done.
- Started the Camo colours
Since this is a WhatIf Campaign, and half my build is a Leopard (Panthera pardus)..

Here's the camo:
Turret


Hull

Dry Fit Turret + Hull

- Basic coat NATO Brown is done.
- Started the Camo colours
Since this is a WhatIf Campaign, and half my build is a Leopard (Panthera pardus)..
Here's the camo:
Turret
Hull
Dry Fit Turret + Hull
Trisaw
Joined: December 24, 2002
KitMaker: 4,105 posts
Armorama: 2,492 posts
Posted: Monday, August 04, 2014 - 06:56 AM UTC
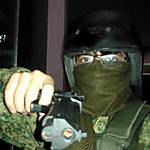
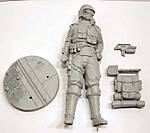
I'm in. I'm going to enter Grey Matter Figures' 120mm "Never Say Die" futuristic commander soldier.
Nito74
Joined: March 04, 2008
KitMaker: 5,386 posts
Armorama: 4,727 posts
Posted: Thursday, August 07, 2014 - 06:59 AM UTC
Lots of work on this one, last few days work :


I painted the tools, tail lights, MG ammo boxes and finished the camo too. I add 2 more colours.
Vallejo Pale Sand and Life Colour RAL 7027


Next step:
Filters & Washes, some dirt and the Turret Machine Gun.
I painted the tools, tail lights, MG ammo boxes and finished the camo too. I add 2 more colours.
Vallejo Pale Sand and Life Colour RAL 7027
Next step:
Filters & Washes, some dirt and the Turret Machine Gun.
Nito74
Joined: March 04, 2008
KitMaker: 5,386 posts
Armorama: 4,727 posts
Posted: Saturday, August 09, 2014 - 07:20 AM UTC
Final Wash & filter


Pigments & dirt will be next, the turret MG and some jerrycans and small arms maybe.
Pigments & dirt will be next, the turret MG and some jerrycans and small arms maybe.
Bluestab
Joined: December 03, 2009
KitMaker: 2,160 posts
Armorama: 1,906 posts
Posted: Saturday, August 09, 2014 - 04:25 PM UTC
John,
That's pretty bizarre looking, but in a good way. What was the inspiration?
That's pretty bizarre looking, but in a good way. What was the inspiration?

WARDUKWNZ

Joined: June 01, 2011
KitMaker: 1,716 posts
Armorama: 1,638 posts

Posted: Saturday, August 09, 2014 - 05:23 PM UTC
Question ,,, is this ok to join as tis partly started but still a long way from being finished .

Cheers
Phill

Cheers
Phill

Nito74
Joined: March 04, 2008
KitMaker: 5,386 posts
Armorama: 4,727 posts
Posted: Sunday, August 10, 2014 - 01:43 AM UTC
@Phill
The Campaign leader, Paul Roberts stated in the rules
"You can not port over a previously built model and simply repaint it, there must be either significant work performed on the model or a significant diorama built around the model as part of the campaign."
I don't see any problem with your build for not joining in.
@Alex
Since it was a T-55 turret with a JSU-122 gun and a Leopard chassis, I have to admit I was not sure about painting scheme or decals to be honest.
I was thinking of small spots covering large areas, then I came across several leopard photos, the big cat not the tank, and it got me thinking... mmmmhhh why not ?
I used a base of NATO brown and used several desert / sand tones for the spots.
Thanks for watching !
Bluestab
Joined: December 03, 2009
KitMaker: 2,160 posts
Armorama: 1,906 posts
Posted: Sunday, August 10, 2014 - 04:06 AM UTC
John, the big cat spots tie-in didn't even cross my mind.
Phill, glad to see you back building. Is that a shark head?
Phill, glad to see you back building. Is that a shark head?
 |

WEB HOSTING BY


Copyright ©2021 Armorama and Kitmaker Network, a subsidiary of Silver Star Enterprises
All Rights Reserved. Please read our Conditions of Use and Privacy Policy.
All Rights Reserved. Please read our Conditions of Use and Privacy Policy.