Hosted by Darren Baker
M1025 Humvee - OIF
turkeyshot

Joined: February 06, 2012
KitMaker: 138 posts
Armorama: 133 posts

Posted: Monday, February 10, 2014 - 12:46 AM UTC
Those figures look great so far Marko. Excellent work on the camo.
gigi63

Joined: February 09, 2014
KitMaker: 241 posts
Armorama: 241 posts

Posted: Monday, February 10, 2014 - 07:46 AM UTC
Until now, you've done a great job congratulations.
Cheers Luigi
http://acciaioverdemodellingblog.blogspot.it/
Cheers Luigi
http://acciaioverdemodellingblog.blogspot.it/
hliu24

Joined: November 19, 2010
KitMaker: 798 posts
Armorama: 797 posts

Posted: Monday, February 10, 2014 - 12:54 PM UTC
Great Work! love the all the cables around the radio and details......how did you paint the US Flag on the figure?
Thanks
Jay
Thanks
Jay
Maki


Joined: February 13, 2002
KitMaker: 5,579 posts
Armorama: 2,988 posts

Posted: Monday, February 10, 2014 - 08:37 PM UTC
Thanks guys. The flags are Echelon decals.
Mario
Mario
Korean123

Joined: September 15, 2013
KitMaker: 15 posts
Armorama: 15 posts

Posted: Thursday, February 13, 2014 - 07:52 PM UTC
Quoted Text
Could you tell us which color you used for these camo of the clothes? Just a quick pic of the figures... still headless, but hopefully not for long. Nemrod figures are not bad, they fit Tamiya seats well, but I had to do some trimming to be able to close the Humvee doors properly. Perhaps because I added some details to the door interior.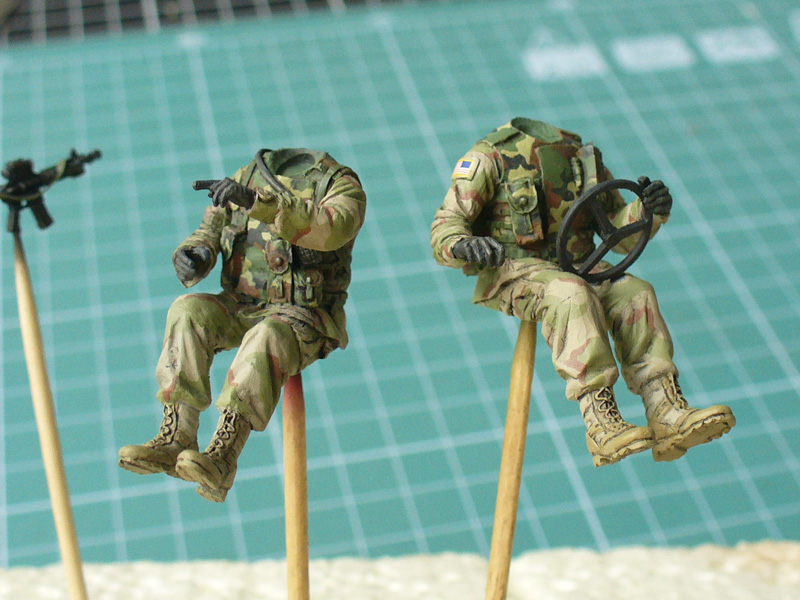
M

Maki


Joined: February 13, 2002
KitMaker: 5,579 posts
Armorama: 2,988 posts

Posted: Thursday, February 13, 2014 - 09:00 PM UTC
I'm using Humbrol enamels, and the mixes are usually done on the palette without any particular mixing ratios.
Anyway, the woodland colors are:
117 + 80 (green)
160 + 121 (brown)
117 + 121 (ochre)
117 + 33 (black).
3-color DBU colors are:
121 + 84 (sand)
121 + 117 (greenish tone)
160 + 121 (brown).
Hope it helps,
Mario
Anyway, the woodland colors are:
117 + 80 (green)
160 + 121 (brown)
117 + 121 (ochre)
117 + 33 (black).
3-color DBU colors are:
121 + 84 (sand)
121 + 117 (greenish tone)
160 + 121 (brown).
Hope it helps,
Mario
35th-scale

Joined: November 21, 2007
KitMaker: 3,212 posts
Armorama: 2,807 posts

Posted: Friday, February 14, 2014 - 01:26 AM UTC
Looks great so far! Figures really are excellent

galactica

Joined: April 11, 2008
KitMaker: 146 posts
Armorama: 126 posts

Posted: Monday, February 17, 2014 - 08:29 AM UTC
Outstanding job Mario !
I'm glad for my very little contribution.
I'm glad for my very little contribution.
Maki


Joined: February 13, 2002
KitMaker: 5,579 posts
Armorama: 2,988 posts

Posted: Friday, February 21, 2014 - 04:05 AM UTC
The figures are almost finished. I still have to add a radio antenna to the driver figure and also a map in the codriwer's hand, but that's about it.
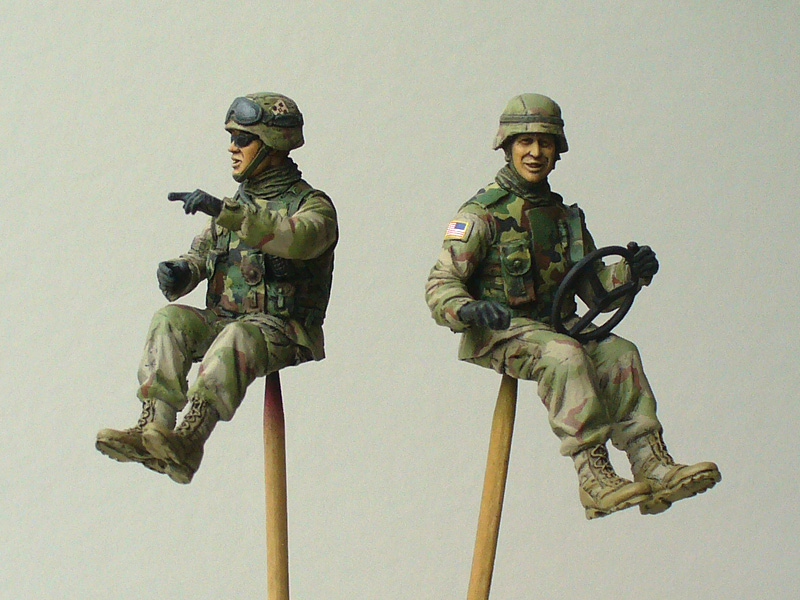
Some more gear after fixing the figures to their seats and I'll be able to close the Humvee.
Mario

Some more gear after fixing the figures to their seats and I'll be able to close the Humvee.
Mario
Posted: Friday, February 21, 2014 - 04:15 AM UTC
Wow! Great work on the figures!
gigi63

Joined: February 09, 2014
KitMaker: 241 posts
Armorama: 241 posts

Posted: Friday, February 21, 2014 - 07:43 AM UTC
Excellent work Mario.The one with glasses is really nice.
Compliments.
Ciao Luigi
Compliments.
Ciao Luigi
Maki


Joined: February 13, 2002
KitMaker: 5,579 posts
Armorama: 2,988 posts

Posted: Friday, February 21, 2014 - 09:07 AM UTC
Thanks guys! I'm not really satisfied with the paintjob on the figures, but since they are my first 1/35 scale figures in a long time, I think they were a good practice.
Mario
Mario
Hisham

Joined: July 23, 2004
KitMaker: 6,856 posts
Armorama: 6,363 posts

Posted: Friday, February 21, 2014 - 09:55 AM UTC
Come on!! The faces came out great.. the paint is clean and smooth.. and just enough highlights to bring out the facial features.. too bad they won't be seen very clearly inside the vehicle 
Hisham

Hisham
Nito74

Joined: March 04, 2008
KitMaker: 5,386 posts
Armorama: 4,727 posts

Posted: Friday, February 21, 2014 - 10:33 AM UTC
Quoted Text
Wow! Great work on the figures!
I agree with Brent..
Maki


Joined: February 13, 2002
KitMaker: 5,579 posts
Armorama: 2,988 posts

Posted: Sunday, February 23, 2014 - 12:57 AM UTC
Thanks for the positive comments guys!
The figures are installed to their seats and the interior is finished. Now I will fix the roof and the doors hoping some of the work on the interior would still be visible...
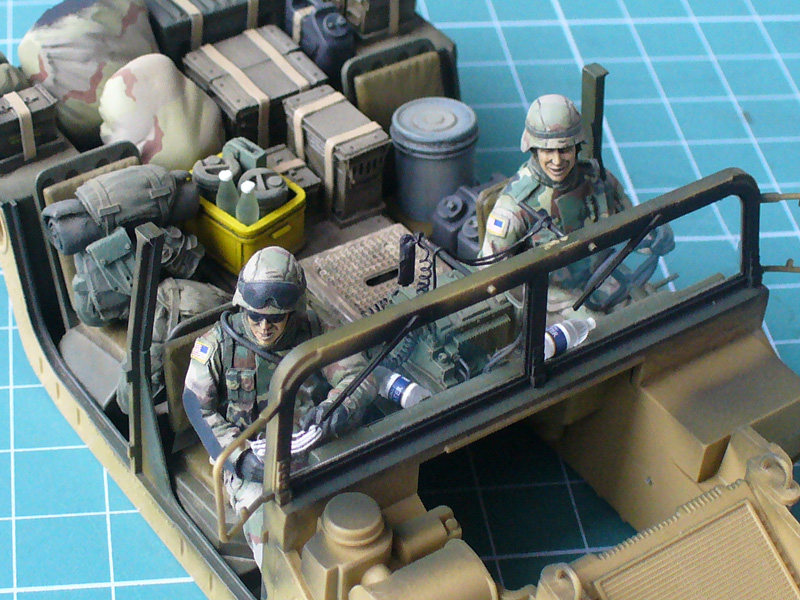
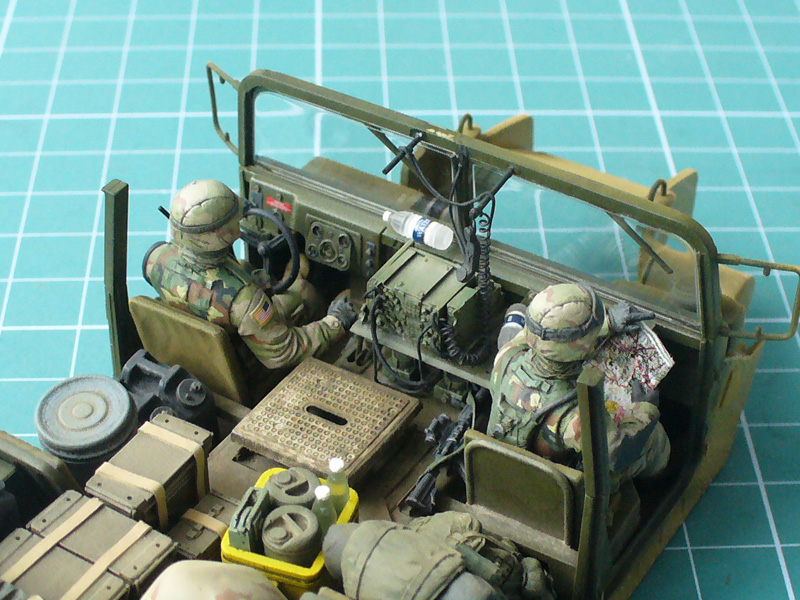
More pics are here: link
Mario
The figures are installed to their seats and the interior is finished. Now I will fix the roof and the doors hoping some of the work on the interior would still be visible...


More pics are here: link
Mario
Maki


Joined: February 13, 2002
KitMaker: 5,579 posts
Armorama: 2,988 posts

Posted: Saturday, March 15, 2014 - 02:10 AM UTC
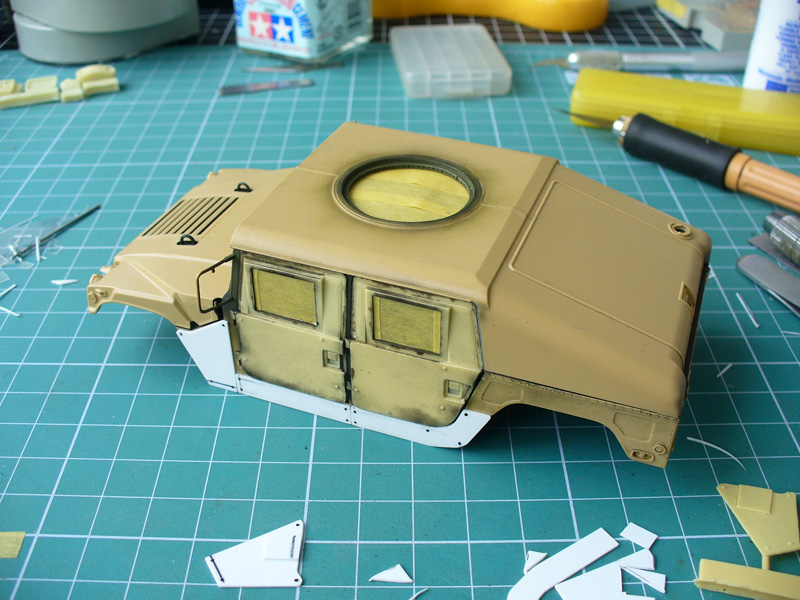
Here's some progress. I didn't like Blast add-on armor and decided to build my own from scratch... I still need to add some rivets to the armor.
Mario

Mario
gigi63

Joined: February 09, 2014
KitMaker: 241 posts
Armorama: 241 posts

Posted: Saturday, March 15, 2014 - 02:41 AM UTC
Hi Mario i look a good progress.I will follow the next steps.
Ciao Luigi
http://acciaioverdemodellingblog.blogspot.it/
Ciao Luigi
http://acciaioverdemodellingblog.blogspot.it/
Maki


Joined: February 13, 2002
KitMaker: 5,579 posts
Armorama: 2,988 posts

Posted: Friday, April 25, 2014 - 03:10 AM UTC
Here's some progress... black undercoat:
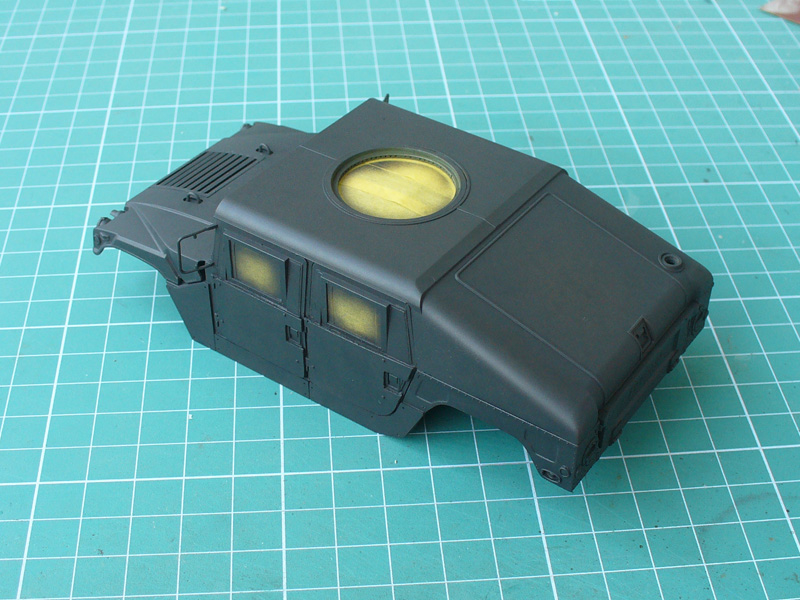
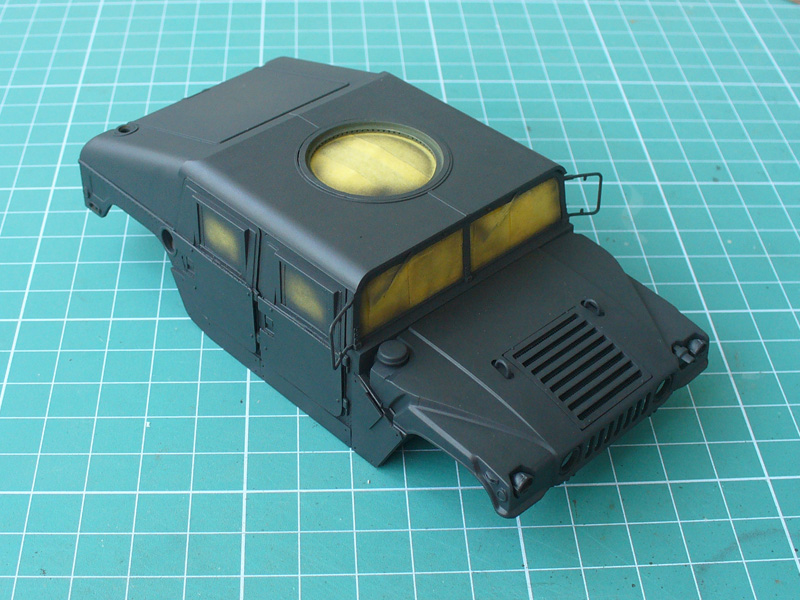
and then camo painting using J's work masks:
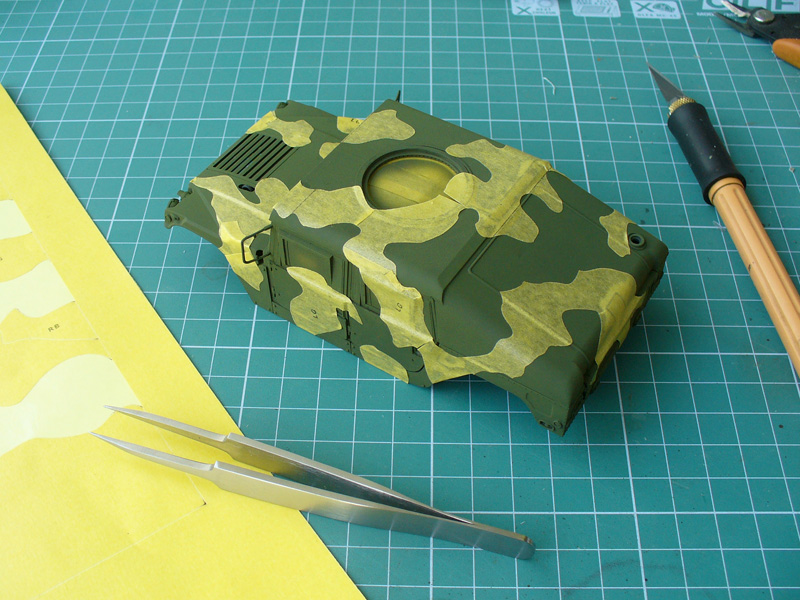
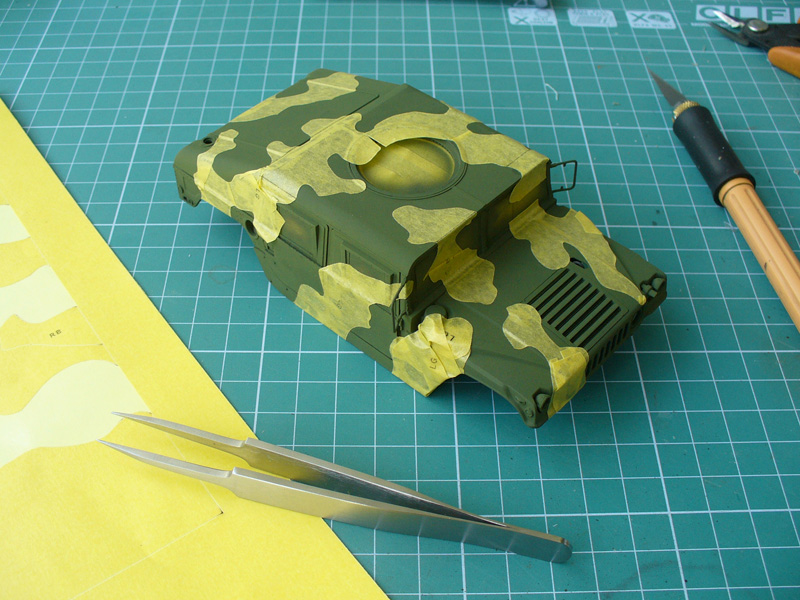
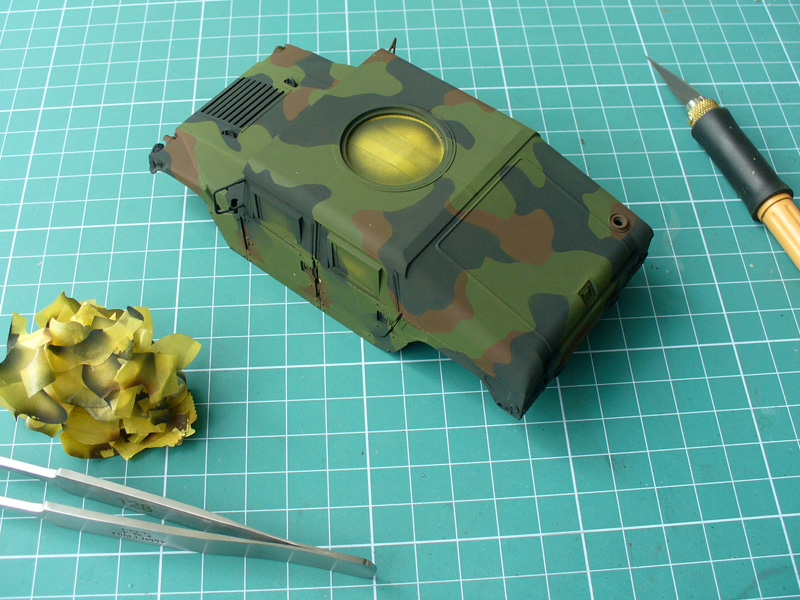
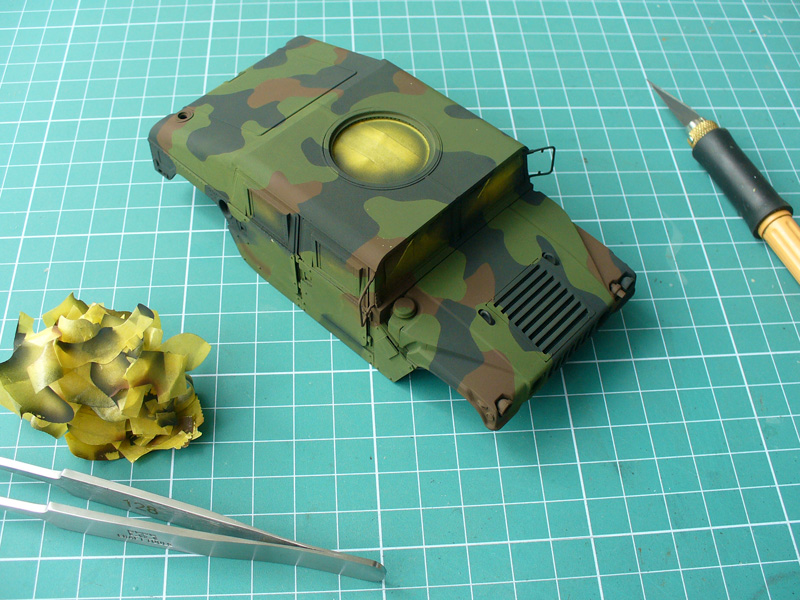
add-on armor was painted sand:
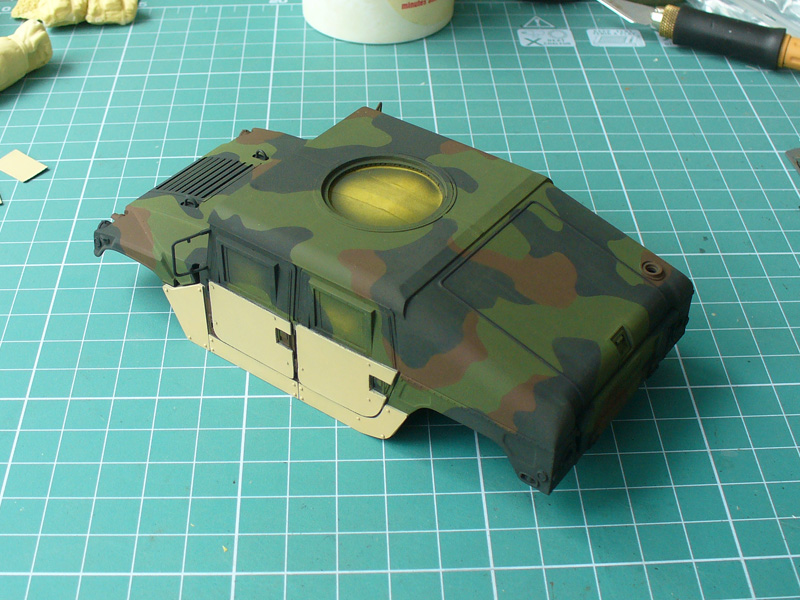
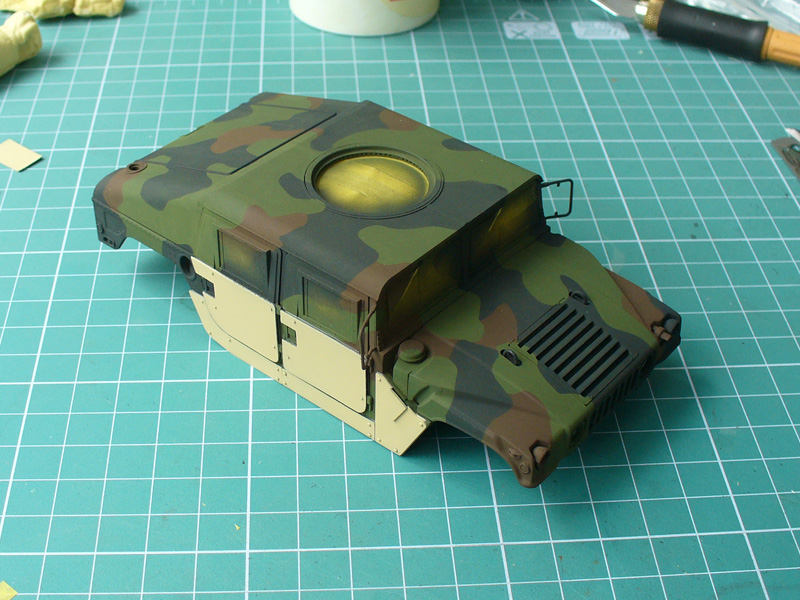
I'll try to subdue the colors a bit with a filter or something, but the camo is pretty much finished. Now the stowage, weapons ring, etc...
Mario


and then camo painting using J's work masks:


add-on armor was painted sand:


I'll try to subdue the colors a bit with a filter or something, but the camo is pretty much finished. Now the stowage, weapons ring, etc...
Mario
SiStorey

Joined: March 14, 2014
KitMaker: 242 posts
Armorama: 161 posts

Posted: Friday, April 25, 2014 - 03:26 AM UTC
Stunning detail mate, good model indeed!! will it be going onto a little dio base will it??
Nice one


Si
Nice one


Si
Graywolf


Joined: December 01, 2001
KitMaker: 6,405 posts
Armorama: 1,850 posts

Posted: Friday, April 25, 2014 - 03:56 AM UTC
Great progress Brother.J's work masks look useful. 

trahe

Joined: April 03, 2006
KitMaker: 1,158 posts
Armorama: 950 posts

Posted: Friday, April 25, 2014 - 04:18 AM UTC
Looking really good there! Great job on all aspects of this build!
SHarjacek

Joined: January 29, 2011
KitMaker: 977 posts
Armorama: 553 posts

Posted: Friday, April 25, 2014 - 06:33 AM UTC
Great paint job Mario, how did you like J's works masks, I heard the one they produce for tanks aren't the best.
Kind regards, Sven.
Kind regards, Sven.

Maki


Joined: February 13, 2002
KitMaker: 5,579 posts
Armorama: 2,988 posts

Posted: Friday, April 25, 2014 - 07:18 AM UTC
Thanks guys, it's still a long road ahead... and yes, I'm planning a small vignette for it.
As for the masks, I have heard all the stories on J's work but decided to give them a go anyway. The masks proved to be a big help although some parts are too big and not accurately shaped so I had to do quite a lot of extra work...
Mario
As for the masks, I have heard all the stories on J's work but decided to give them a go anyway. The masks proved to be a big help although some parts are too big and not accurately shaped so I had to do quite a lot of extra work...
Mario
youngtiger1

Joined: May 14, 2008
KitMaker: 534 posts
Armorama: 344 posts

Posted: Friday, April 25, 2014 - 03:42 PM UTC
Coming along very nice. I like how your crew looks. I wish I could paint figure as good...perhaps, in future that will change. Also, I will sure to check out J's work mask and other stuff because I'm not familiar with this outfit. Keep up the good work 
Mike

Mike
Maki


Joined: February 13, 2002
KitMaker: 5,579 posts
Armorama: 2,988 posts

Posted: Saturday, May 03, 2014 - 09:39 PM UTC
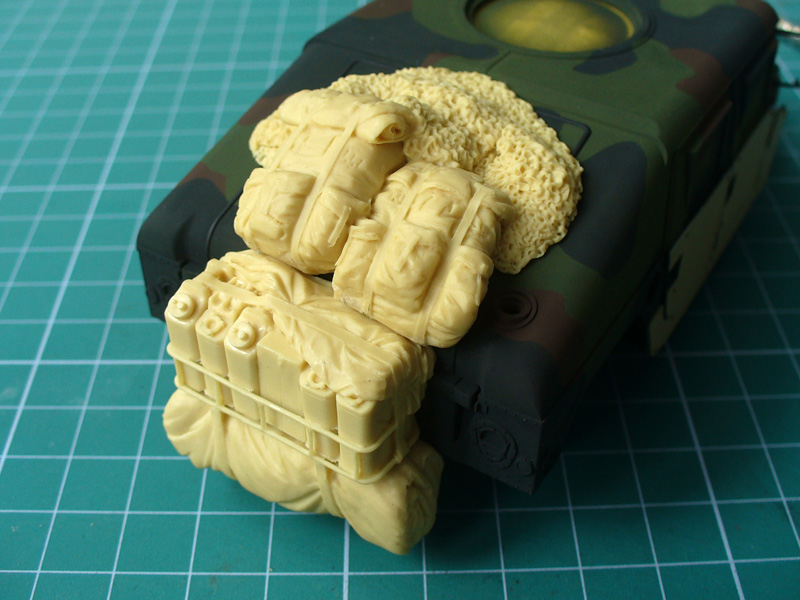
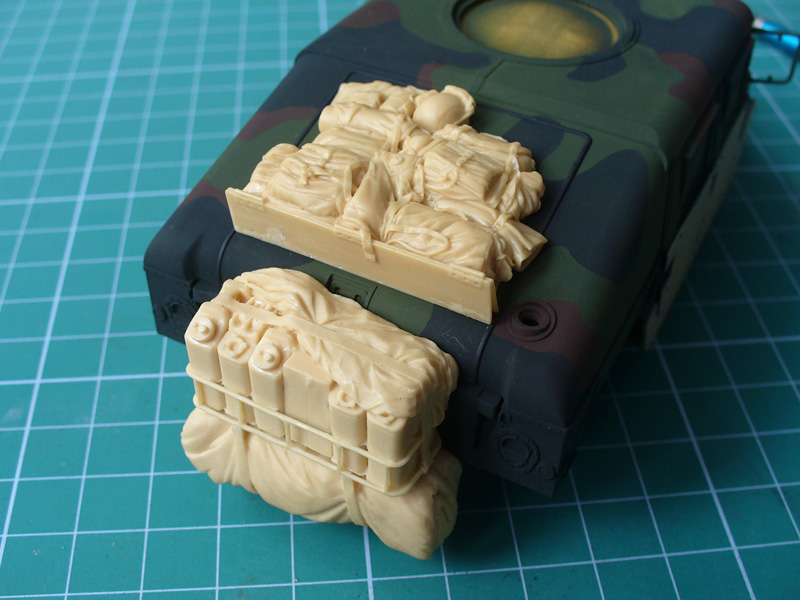
The suspension is finished and installed. The tires will be added after all the painting and weathering is done... I do have one question. I'm adding the stowage and don't know what to use for the best effect. The rear shelf with jerry cans is definitely on, but what to add on the rear hatch? Here are the options:
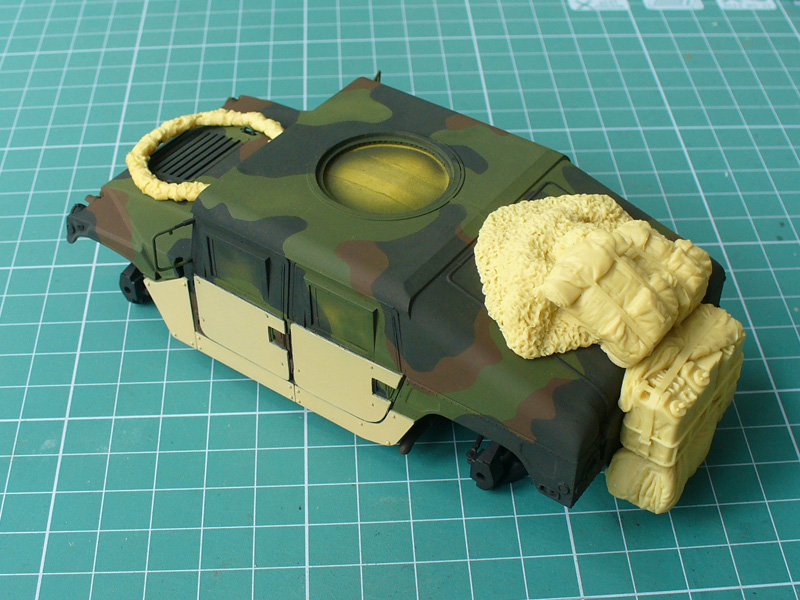
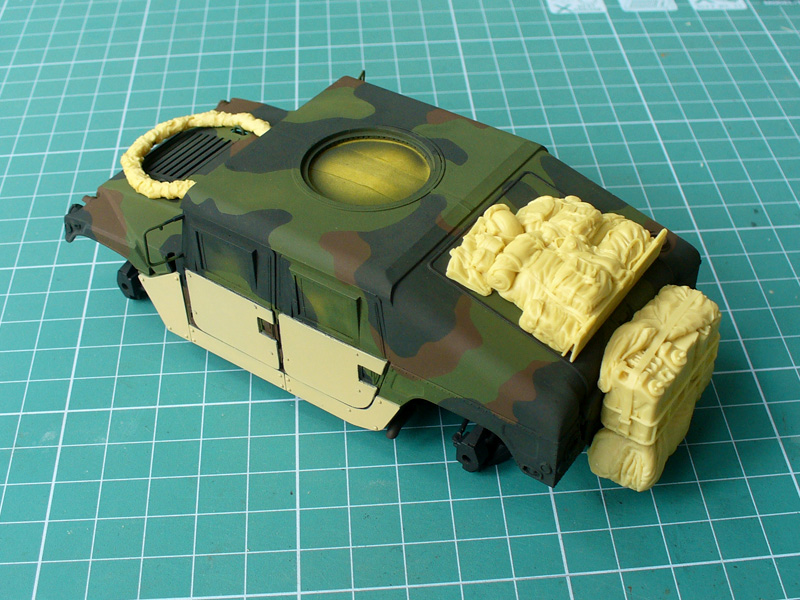
The first is a camo net with two large backpacks, and the second one is a hatch shelf with some crew gear. I'm inclined to go with the first option, although I have not seen many Humvees with camo net... There is also a third option, but I would prefer to put the spare tire to the front brushguard.
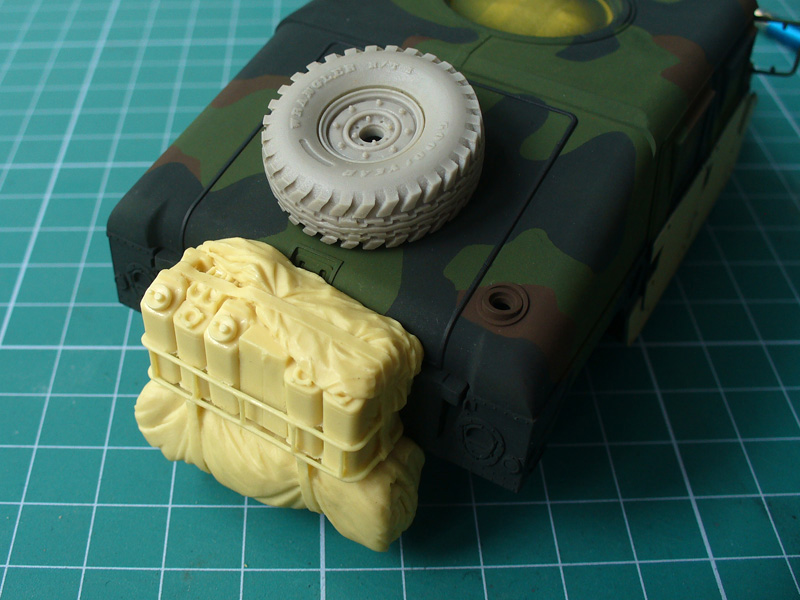
Mario


The first is a camo net with two large backpacks, and the second one is a hatch shelf with some crew gear. I'm inclined to go with the first option, although I have not seen many Humvees with camo net... There is also a third option, but I would prefer to put the spare tire to the front brushguard.


Mario
 |


