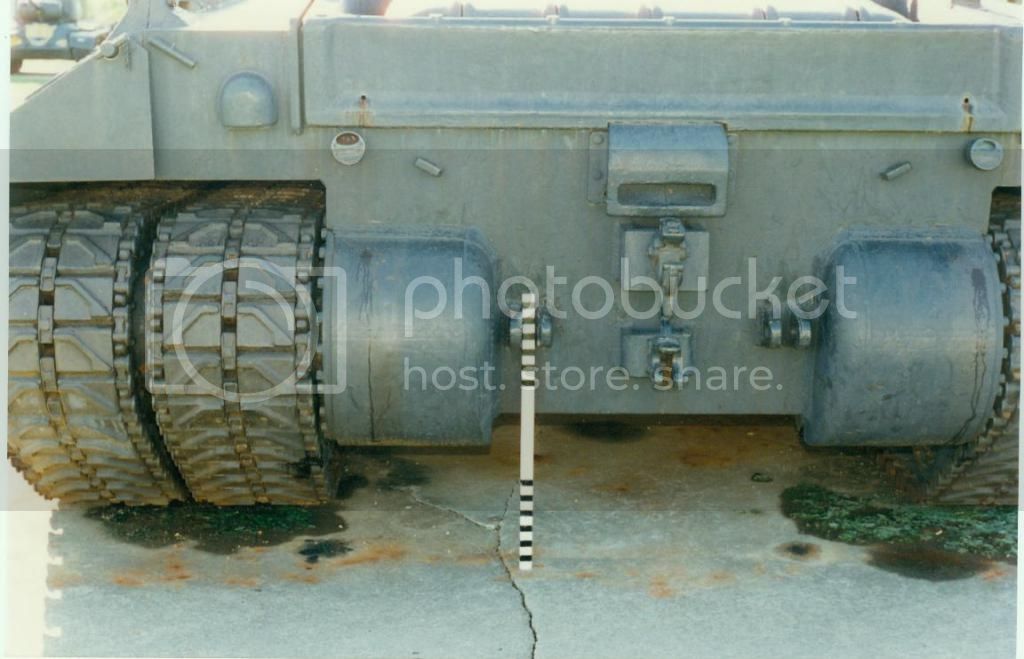
T28 Super heavy tank (Dragon)
Moscow, Russia
Joined: January 24, 2012
KitMaker: 177 posts
Armorama: 177 posts
Posted: Sunday, July 13, 2014 - 11:55 PM UTC
Napier, New Zealand
Joined: August 01, 2005
KitMaker: 1,049 posts
Armorama: 841 posts
Posted: Monday, July 14, 2014 - 12:39 AM UTC
Impressive work so far Dmitry - looking fwd to seeing you tame this beast!
cheers
Brent
Available for commissions,visit my Flickr Albums and modelling/painting blog to discuss .......
http://houseofqueeg.wordpress.com/
https://www.flickr.com/photos/134514258@N04/albums
New Jersey, United States
Joined: March 15, 2002
KitMaker: 1,745 posts
Armorama: 1,483 posts
Posted: Monday, July 14, 2014 - 02:10 AM UTC
Looking good so far...any ideas how your going to tackle the width issues on the kit?
Moscow, Russia
Joined: January 24, 2012
KitMaker: 177 posts
Armorama: 177 posts
Posted: Monday, July 14, 2014 - 06:05 AM UTC
California, United States
Joined: August 10, 2012
KitMaker: 1,510 posts
Armorama: 1,443 posts
Posted: Monday, July 14, 2014 - 07:36 AM UTC
Looks good so far. Keep at it.
What cheek! Let them have it!
Kansas, United States
Joined: December 25, 2012
KitMaker: 441 posts
Armorama: 441 posts
Posted: Monday, July 14, 2014 - 07:38 AM UTC
I remember seeing one of these on display when I was a kid and visited Ft Knox back in early 80's.
I wonder if you compared a couple of surviving examples if you'd find slight variations in the shape anyways as this would have been a huge casting.
I'm just wondering - anyone have comparison pics between actual surviving vehicles to see how much variability there was between vehicles?
I can believe talking scarecrows and wizards in great emerald cities, but I refuse to believe there is no paperwork involved when your house lands on a witch.
Virginia, United States
Joined: June 24, 2005
KitMaker: 364 posts
Armorama: 355 posts
Posted: Monday, July 14, 2014 - 08:06 AM UTC
> "Then I passed to the case, but comparison with photos brought me into despondency. Front part is wrong:"
I am impressed with what you're doing. I've got this kit (and the detail set by ET), and am just going to build it out of the box. I am enjoying seeing the work that you are doing to improve it. Good luck, and please keep posting.
Dave
"We've been looking for the enemy for some time now.
We've finally found him. We're surrounded.
That simplifies our problem of getting to these people and killing them." - Chesty Puller, at Chosin
Texas, United States
Joined: August 22, 2013
KitMaker: 675 posts
Armorama: 667 posts
Posted: Monday, July 14, 2014 - 08:41 AM UTC
WOW !
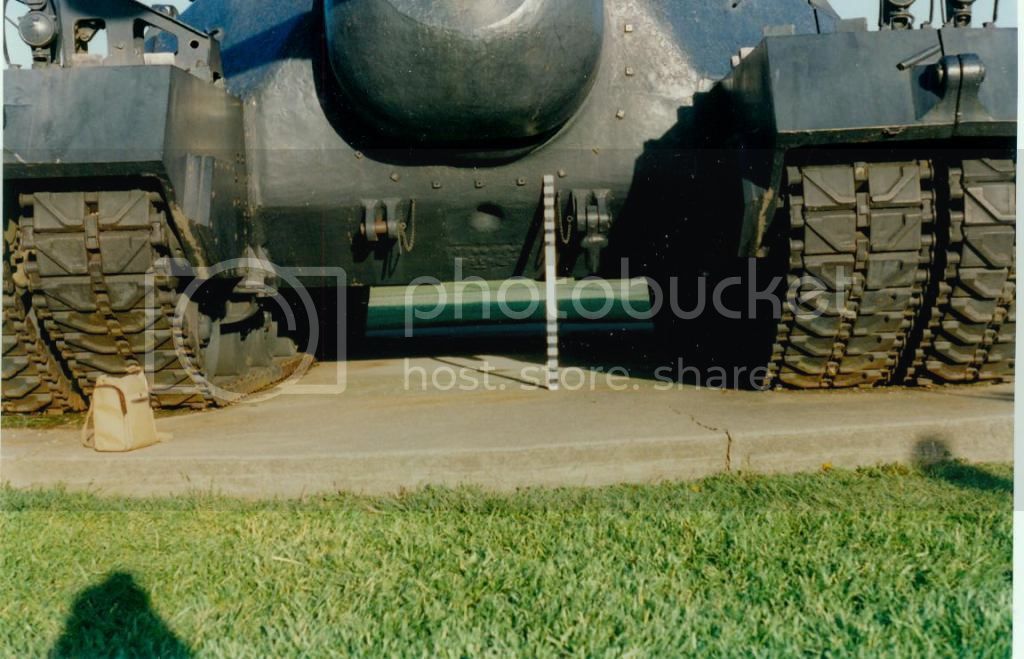
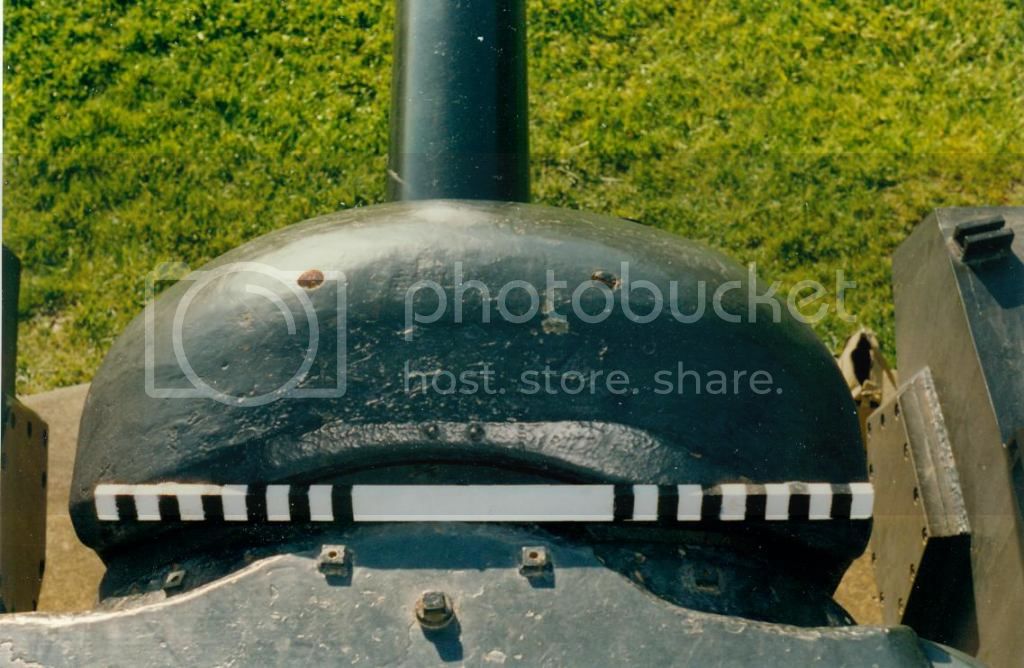
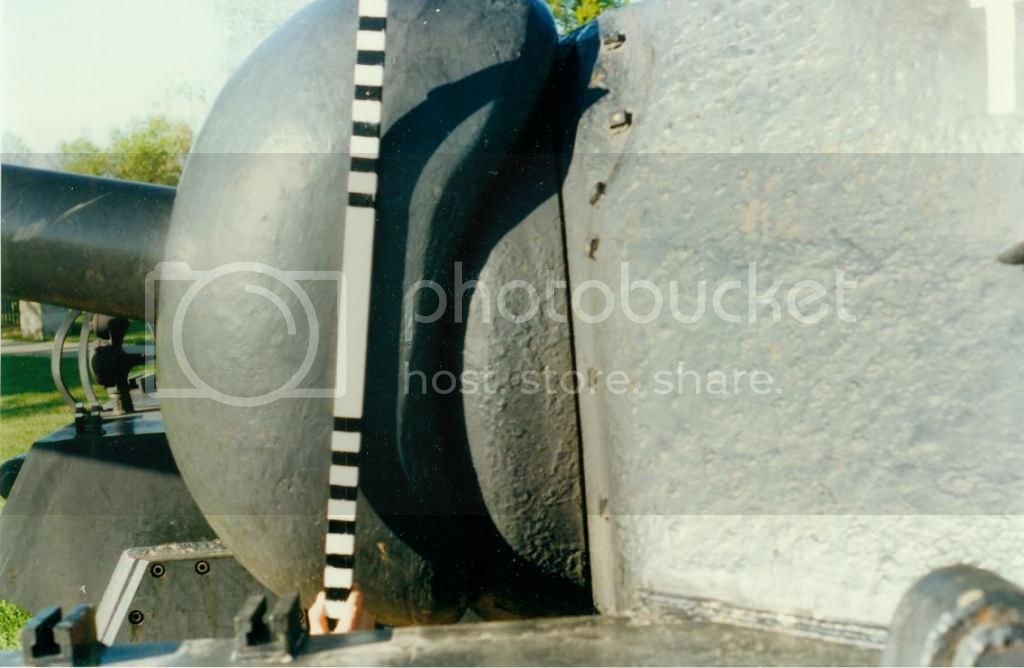
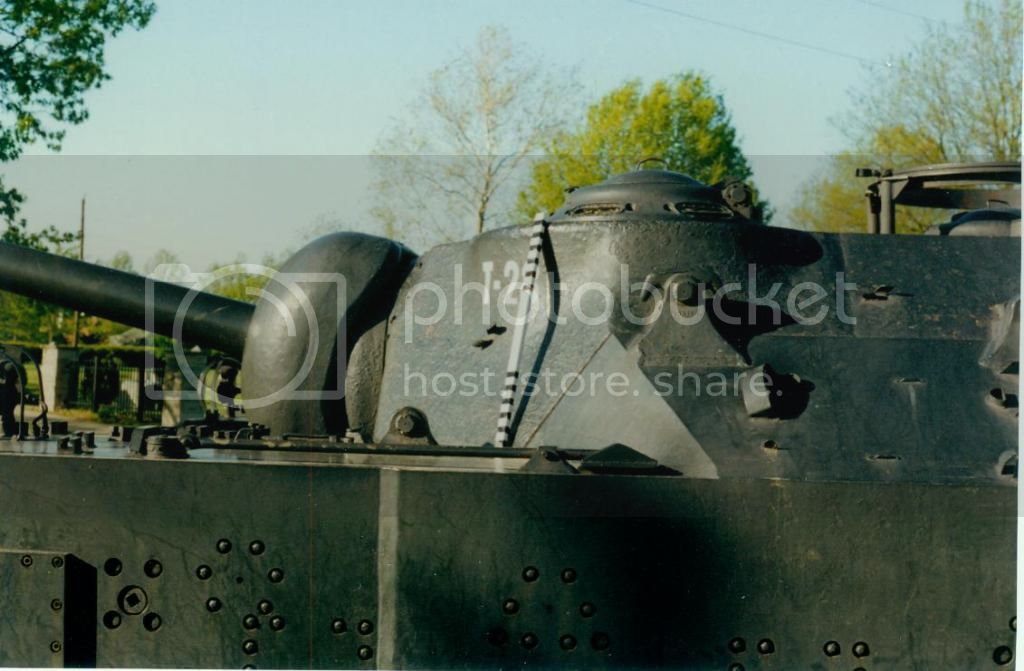
Most impressive -- but what do you use as a standard ?
Where are the #'s you use as a certainty to correct the kit's deficiency ?
Moscow, Russia
Joined: January 24, 2012
KitMaker: 177 posts
Armorama: 177 posts
Posted: Monday, July 14, 2014 - 06:44 PM UTC
Quoted Text
I'm just wondering - anyone have comparison pics between actual surviving vehicles to see how much variability there was between vehicles?
Their two only made. One burned down, the second in the museum.
The only difference which I saw is an existence of antenna inputs.
Moscow, Russia
Joined: January 24, 2012
KitMaker: 177 posts
Armorama: 177 posts
Posted: Monday, July 14, 2014 - 06:46 PM UTC
Quoted Text
I am impressed with what you're doing. I've got this kit (and the detail set by ET), and am just going to build it out of the box. I am enjoying seeing the work that you are doing to improve it. Good luck, and please keep posting.
Dave
Thanks, Dave, I'll keep posting. I promise

Moscow, Russia
Joined: January 24, 2012
KitMaker: 177 posts
Armorama: 177 posts
Posted: Monday, July 14, 2014 - 06:50 PM UTC
Quoted Text
WOW !
Most impressive -- but what do you use as a standard ?
Where are the #'s you use as a certainty to correct the kit's deficiency ?
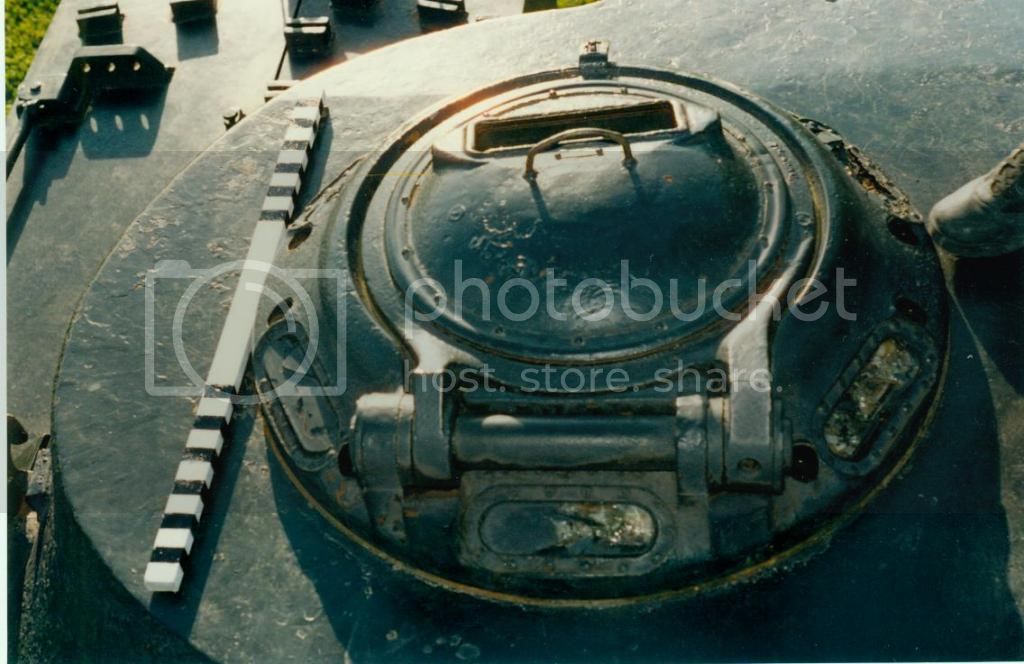
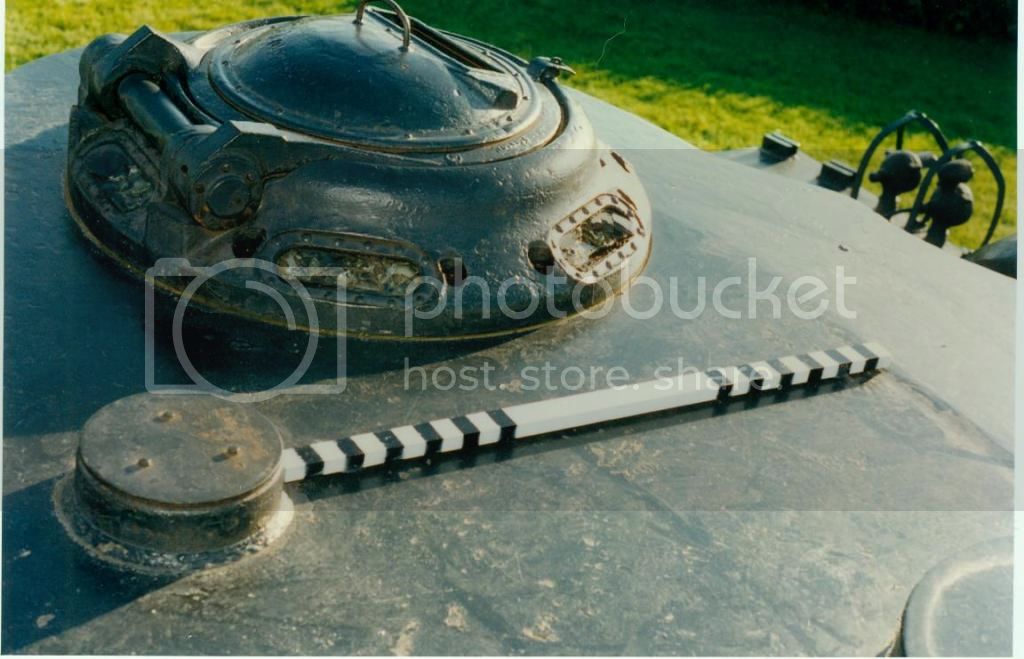
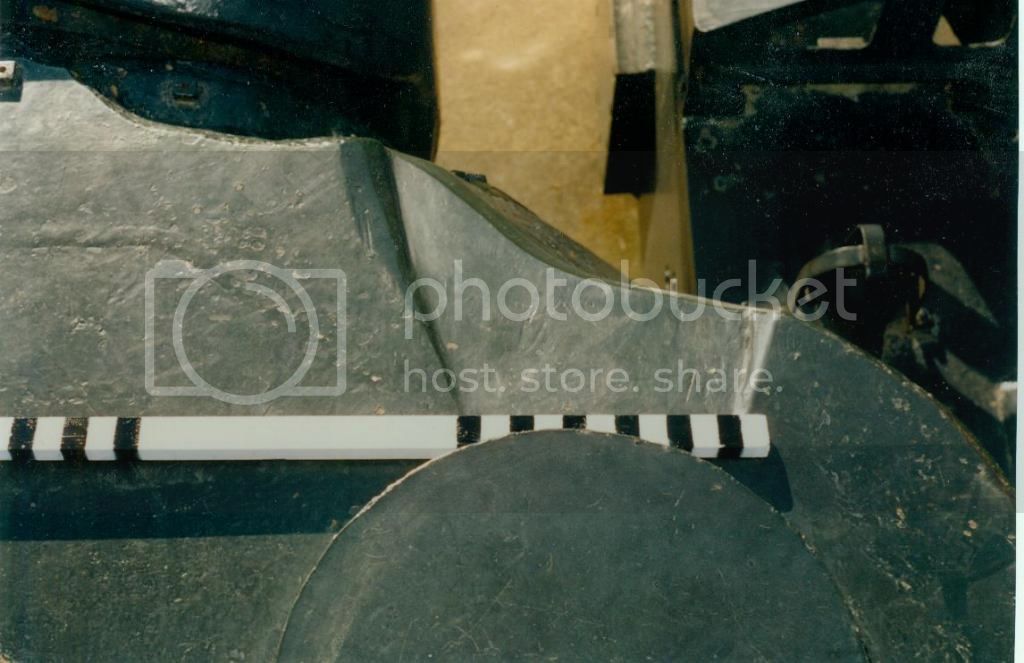
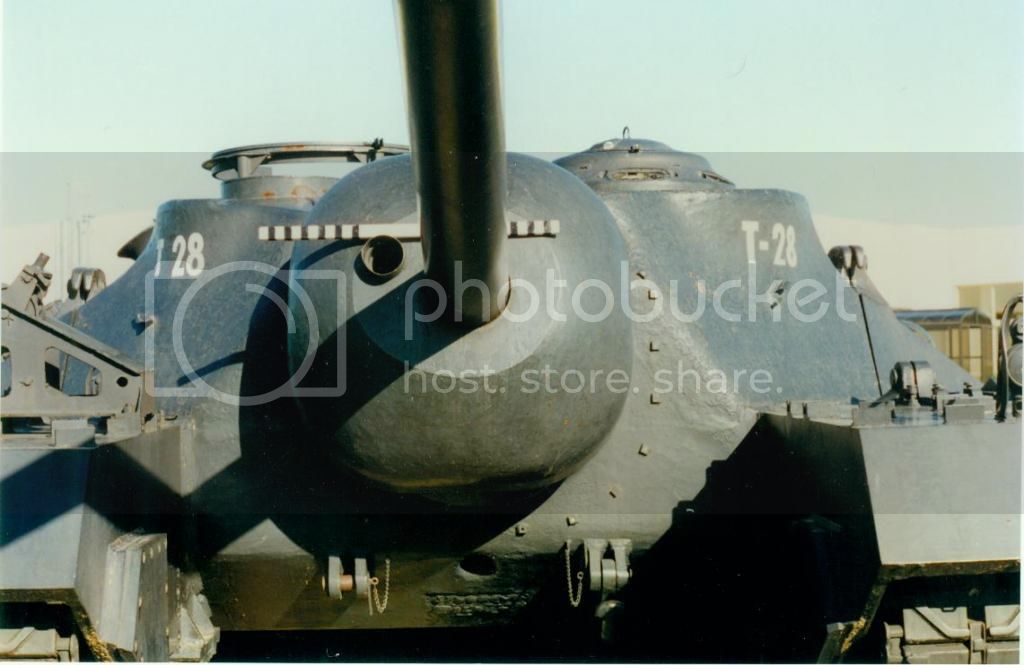
I use walkaround from Patton museum and archives foto. I do only looking at a photo.
Moscow, Russia
Joined: January 24, 2012
KitMaker: 177 posts
Armorama: 177 posts
Posted: Wednesday, July 16, 2014 - 02:39 AM UTC
Virginia, United States
Joined: June 24, 2005
KitMaker: 364 posts
Armorama: 355 posts
Posted: Wednesday, July 16, 2014 - 05:29 AM UTC
Very exciting to watch this come together! Thank you for continuing to update us on your work.
Dave
"We've been looking for the enemy for some time now.
We've finally found him. We're surrounded.
That simplifies our problem of getting to these people and killing them." - Chesty Puller, at Chosin
Moscow, Russia
Joined: January 24, 2012
KitMaker: 177 posts
Armorama: 177 posts
Posted: Thursday, July 17, 2014 - 07:26 AM UTC
Minnesota, United States
Joined: April 11, 2014
KitMaker: 96 posts
Armorama: 94 posts
Posted: Monday, July 21, 2014 - 01:05 PM UTC
great progress, I'm tempted to give my T-28 a interior, but i haven't done much about the flawed parts of the kit, I just need to find more reference material for the interior.
Moscow, Russia
Joined: January 24, 2012
KitMaker: 177 posts
Armorama: 177 posts
Posted: Thursday, August 14, 2014 - 06:54 AM UTC
Texas, United States
Joined: March 11, 2007
KitMaker: 977 posts
Armorama: 976 posts
Posted: Thursday, August 14, 2014 - 07:17 AM UTC
Really nice work on the textures and weld.
Gregovich "I paint all my Models in 4BO Green" Beckman
Holder of the Knight's Cross, Hero of the Soviet Union, Dragon Slayer and Slinger of Massive BS.
New Mexico, United States
Joined: August 01, 2005
KitMaker: 8 posts
Armorama: 7 posts
Posted: Thursday, August 14, 2014 - 03:42 PM UTC
Moscow, Russia
Joined: January 24, 2012
KitMaker: 177 posts
Armorama: 177 posts
Posted: Thursday, August 14, 2014 - 08:01 PM UTC
Ed, thank you very much. This is good fotos for detail.
Moscow, Russia
Joined: January 24, 2012
KitMaker: 177 posts
Armorama: 177 posts
Posted: Sunday, August 24, 2014 - 04:10 AM UTC
New Jersey, United States
Joined: July 25, 2006
KitMaker: 1,139 posts
Armorama: 946 posts
Posted: Tuesday, August 26, 2014 - 12:09 PM UTC
I'm watching your build hoping to save some pointers for when I tackle the beast.
Tom
"ALLONS" 11TH ACR BLACKHORSE
"Death Before Dismount"
19K40/ Dino Rider 19F10
Indiana, United States
Joined: June 10, 2005
KitMaker: 6,188 posts
Armorama: 5,960 posts
Posted: Tuesday, August 26, 2014 - 10:39 PM UTC
I am interested and on-board!

Jeff
Virginia, United States
Joined: June 24, 2005
KitMaker: 364 posts
Armorama: 355 posts
Posted: Tuesday, August 26, 2014 - 11:03 PM UTC
Impressive work, Dmitry. May I ask what putty you are using for the weld seems?
Dave
"We've been looking for the enemy for some time now.
We've finally found him. We're surrounded.
That simplifies our problem of getting to these people and killing them." - Chesty Puller, at Chosin
Moscow, Russia
Joined: January 24, 2012
KitMaker: 177 posts
Armorama: 177 posts
Posted: Sunday, August 31, 2014 - 07:10 AM UTC
Moscow, Russia
Joined: January 24, 2012
KitMaker: 177 posts
Armorama: 177 posts
Posted: Wednesday, September 03, 2014 - 06:37 AM UTC


