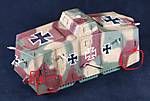
Great looking model. Love what you did with the decals.
I wish I could purchase this kit in the UK but Meng seem to be hard to get hold of
Hosted by Darren Baker
Meng A7V (Krupp)

SDavies

Joined: January 09, 2010
KitMaker: 979 posts
Armorama: 959 posts

Posted: Thursday, March 05, 2015 - 06:45 PM UTC
gastec

Joined: February 03, 2014
KitMaker: 1,042 posts
Armorama: 871 posts

Posted: Friday, March 06, 2015 - 06:20 AM UTC
Thanks Steven.
Noticed in my last post I uploaded the same photo twice

I've also been asked how it compares in size to another tank so here it is next to a Tiran 4...

Gary
Noticed in my last post I uploaded the same photo twice


I've also been asked how it compares in size to another tank so here it is next to a Tiran 4...

Gary
gastec

Joined: February 03, 2014
KitMaker: 1,042 posts
Armorama: 871 posts

Posted: Saturday, March 07, 2015 - 04:05 AM UTC
Pin wash. Liberal application using home-made wash with oils and white spirit. Allowed to dry before tidying up with a large brush moistened in spirit...


Another coat of clear next in preparation for oil dot application.
Gary


Another coat of clear next in preparation for oil dot application.
Gary
gastec

Joined: February 03, 2014
KitMaker: 1,042 posts
Armorama: 871 posts

Posted: Saturday, March 07, 2015 - 11:04 AM UTC
My favourite part of the weathering process...

Gary

Gary
gastec

Joined: February 03, 2014
KitMaker: 1,042 posts
Armorama: 871 posts

Posted: Sunday, March 08, 2015 - 12:07 AM UTC
Set aside now to dry....


Gary
Posted: Sunday, March 08, 2015 - 02:35 AM UTC
Hi Gary,
Interesting looking kit, good solid build, nice work so far.
Al

Interesting looking kit, good solid build, nice work so far.
Al


iowabrit

Joined: November 06, 2007
KitMaker: 585 posts
Armorama: 557 posts

Posted: Sunday, March 08, 2015 - 04:20 AM UTC
I've been trying to figure out what those 'Y'shaped pieces are near the four corners. At first I wondered if they were to hold the door open but they are even on the ends where there are no doors. Anyone have any theories? Great build Gary, I was also really wondering how the decals would work on those top grates but you seem to have found the solution. Good job !!!

ubisuck

Joined: December 20, 2012
KitMaker: 461 posts
Armorama: 255 posts

Posted: Sunday, March 08, 2015 - 07:57 AM UTC
Quoted Text
I've been trying to figure out what those 'Y'shaped pieces are near the four corners. At first I wondered if they were to hold the door open but they are even on the ends where there are no doors. Anyone have any theories? Great build Gary, I was also really wondering how the decals would work on those top grates but you seem to have found the solution. Good job !!!
There's my theory


Could they be there to hold those panels?
Marc/ubi
andyelbac

Joined: January 16, 2008
KitMaker: 65 posts
Armorama: 57 posts

Posted: Monday, March 09, 2015 - 12:09 AM UTC
I've just got mine from the Postie and looking at the instructions the Y shaped items in the corners are shields for the towing hooks.
Great build log as well!
Great build log as well!
iowabrit

Joined: November 06, 2007
KitMaker: 585 posts
Armorama: 557 posts

Posted: Monday, March 09, 2015 - 01:18 AM UTC
Quoted Text
I've just got mine from the Postie and looking at the instructions the Y shaped items in the corners are shields for the towing hooks.
Great build log as well!
Nope, not those, the ones Im talking about are some kind of inverted Y shaped strap at each end of the side armor.
iowabrit

Joined: November 06, 2007
KitMaker: 585 posts
Armorama: 557 posts

Posted: Monday, March 09, 2015 - 01:21 AM UTC
Quoted Text
Quoted TextI've been trying to figure out what those 'Y'shaped pieces are near the four corners. At first I wondered if they were to hold the door open but they are even on the ends where there are no doors. Anyone have any theories? Great build Gary, I was also really wondering how the decals would work on those top grates but you seem to have found the solution. Good job !!!
There's my theory
could be I guess
Could they be there to hold those panels?
Marc/ubi

pespada

Joined: June 13, 2014
KitMaker: 65 posts
Armorama: 60 posts

Posted: Monday, March 09, 2015 - 01:44 AM UTC
Some kind of grab handles? Or tiedown cleats?
andyelbac

Joined: January 16, 2008
KitMaker: 65 posts
Armorama: 57 posts

Posted: Monday, March 09, 2015 - 02:12 AM UTC
Maybe they were used to secure the lower hinged panels when lifted up for maintenance?
DaGreatQueeg

Joined: August 01, 2005
KitMaker: 1,049 posts
Armorama: 841 posts

Posted: Monday, March 09, 2015 - 02:58 AM UTC
gastec

Joined: February 03, 2014
KitMaker: 1,042 posts
Armorama: 871 posts

Posted: Tuesday, March 10, 2015 - 08:21 AM UTC
Sounds very plausible Marc.
A figure would help with a sense of scale Brent. Any suggestions (preferably resin)?
Meanwhile, after some 'chipping' with a sponge and a small brush using AK Chipping Color AK711, I then applied some AK 'Rainmarks'. A further light misting with a filter toned things down and helped blend things in together...


Gary
A figure would help with a sense of scale Brent. Any suggestions (preferably resin)?
Meanwhile, after some 'chipping' with a sponge and a small brush using AK Chipping Color AK711, I then applied some AK 'Rainmarks'. A further light misting with a filter toned things down and helped blend things in together...


Gary

Frenchy

Joined: December 02, 2002
KitMaker: 12,719 posts
Armorama: 12,507 posts

Posted: Tuesday, March 10, 2015 - 04:23 PM UTC
Quoted Text
A figure would help with a sense of scale Brent. Any suggestions (preferably resin)?
What about this pair from Mantis Miniatures (both figures are available separately) :
Set #35074 :

H.P.
gastec

Joined: February 03, 2014
KitMaker: 1,042 posts
Armorama: 871 posts

Posted: Tuesday, March 10, 2015 - 10:07 PM UTC
Thanks H.P. 
Gary

Gary
harto

Joined: August 31, 2005
KitMaker: 3 posts
Armorama: 2 posts

Posted: Saturday, July 04, 2015 - 08:56 AM UTC
I'd assumed they were sort of stirrups which attached to the bottom of the doorframe to assist in boarding (look at the height of the doors from the ground otherwise). The only problem is that the placement for the front door, (nearest the main gun) seems to preclude anyone being able to reach it when the door is open.
Posted: Thursday, July 09, 2015 - 03:29 AM UTC
I have been following this post for a while and what a wonderful job. I was wondering if you had finished the A7V, by this I mean adding it to a diorama base, adding mud and scratches ect and added the figures to the diorama? Just checking in on your progress on this model and if you have any new pictures to post.
gastec

Joined: February 03, 2014
KitMaker: 1,042 posts
Armorama: 871 posts

Posted: Thursday, July 09, 2015 - 05:33 AM UTC
Hi Brenton
No more progress I'm afraid. We're moving into a brand new house in a couple of months so busy preparting for that and as a result, I've lost my paiting area to storage for now so will have to wait until we move and I get a seperate workshop built.
At least I can still build at the moment so not all doowm and gloom
Gary
No more progress I'm afraid. We're moving into a brand new house in a couple of months so busy preparting for that and as a result, I've lost my paiting area to storage for now so will have to wait until we move and I get a seperate workshop built.
At least I can still build at the moment so not all doowm and gloom

Gary
pzandt

Joined: January 02, 2013
KitMaker: 68 posts
Armorama: 57 posts
Posted: Thursday, July 16, 2015 - 08:33 AM UTC
Great build. I look forward to seeing the final product.
acebatau

Joined: February 10, 2008
KitMaker: 730 posts
Armorama: 616 posts

Posted: Friday, July 17, 2015 - 05:53 PM UTC
Nice build
Smokeyr67

Joined: November 01, 2006
KitMaker: 145 posts
Armorama: 137 posts

Posted: Tuesday, October 27, 2015 - 02:51 AM UTC
Quoted Text
And not to forget Wagen 506 "Mephisto" with the Bocklafette gunmount.
BTW Does any of Australian friends live in or near Queenland and can take pics of Wagen 506?
.
Mephisto's been moved south from Brisbane to the AWM in Canberra, so maybe one of the ACT based modellers could help you out?
gastec

Joined: February 03, 2014
KitMaker: 1,042 posts
Armorama: 871 posts

Posted: Thursday, May 18, 2017 - 02:35 PM UTC
Well it's been a while. The kit kinda got hidden away in a box for the move and didn't see the light of day until earlier this week. I decided this was one shelf queen I needed to finalise as the Mk.IV and FT17 needed a companion in the display cabinet.
Unfortunately, I had a slight mishap when a tube I secured to the underside to allow me to hold onto during painting snapped, and she fell straight onto a hard floor with disasterous consequences. I set it aside for a day before deciding to repair the damage (incluidng scartchbilding an MG shield) before getting her over the finish line this evening.
In the end, pretty much OOTB except for some turned brass MG barrels and lead wire for the cooling jacket hoses. Hope you like it...


Full set of pics can be found here - http://plasticarmour.com/a7v.html
Gary
Unfortunately, I had a slight mishap when a tube I secured to the underside to allow me to hold onto during painting snapped, and she fell straight onto a hard floor with disasterous consequences. I set it aside for a day before deciding to repair the damage (incluidng scartchbilding an MG shield) before getting her over the finish line this evening.
In the end, pretty much OOTB except for some turned brass MG barrels and lead wire for the cooling jacket hoses. Hope you like it...


Full set of pics can be found here - http://plasticarmour.com/a7v.html
Gary

strongarden

Joined: May 14, 2012
KitMaker: 730 posts
Armorama: 624 posts

Posted: Saturday, May 20, 2017 - 10:57 AM UTC
Great job Gary! Just went back thru to catch up with the overall progress, thanks for gettin' 'er done! 
Dave

Dave

 |


