_GOTOBOTTOM
Armor/AFV: Early Armor
WWI and other early tanks and armored cars.
Hosted by Darren Baker
Meng A7V (Krupp)
gastec
Visit this Community
Auckland, New Zealand
Joined: February 03, 2014
KitMaker: 1,042 posts
Armorama: 871 posts
Posted: Friday, February 27, 2015 - 03:18 AM UTC


Couldn't resist starting this one

Construction begins with the road wheels - 30 all up...


Sprue attachment points are a bit bigger than I would have liked but careful cutting should negate and issues.

Each wheel has two parts which easily glue together. They'll need to be left to allow the cement to fully cure before putting them on the axles if you want them to rotate...


Think I'll stop using my modelling bench cutting surface as the background as it doesn't make for great images

Gary
Wolfhead
Visit this Community
Minnesota, United States
Joined: August 16, 2005
KitMaker: 53 posts
Armorama: 52 posts
Posted: Friday, February 27, 2015 - 03:20 AM UTC
Will be following this with interest.
gastec
Visit this Community
Auckland, New Zealand
Joined: February 03, 2014
KitMaker: 1,042 posts
Armorama: 871 posts
Posted: Friday, February 27, 2015 - 03:43 AM UTC
Welcome along Soren

Idler and drive wheels....


Disappointing that there are so many prominent seams to have to deal with

Gary
Tojo72
Visit this Community
North Carolina, United States
Joined: June 06, 2006
KitMaker: 4,691 posts
Armorama: 3,509 posts
Posted: Friday, February 27, 2015 - 04:04 AM UTC
Nice,will be following along.
gastec
Visit this Community
Auckland, New Zealand
Joined: February 03, 2014
KitMaker: 1,042 posts
Armorama: 871 posts
Posted: Friday, February 27, 2015 - 04:31 AM UTC
Hi Anthony

The wheels are 'trapped' between the two side plates and are then attached to the main suspension carrier....


1 of the 3 required units completed....


Gary
panamadan
Visit this Community
Minnesota, United States
Joined: July 20, 2004
KitMaker: 1,513 posts
Armorama: 1,449 posts
Posted: Friday, February 27, 2015 - 04:38 AM UTC
Lots of little wheels!
Dan
dylans
Visit this Community
British Columbia, Canada
Joined: March 05, 2009
KitMaker: 394 posts
Armorama: 380 posts
Posted: Friday, February 27, 2015 - 05:18 AM UTC
love it. I will be following along.
iowabrit
Visit this Community
Iowa, United States
Joined: November 06, 2007
KitMaker: 585 posts
Armorama: 557 posts
Posted: Friday, February 27, 2015 - 05:27 AM UTC
I got mine in the mail today, looks really nice, but I need to finish the three other kits I have started before I dive into this one.
gastec
Visit this Community
Auckland, New Zealand
Joined: February 03, 2014
KitMaker: 1,042 posts
Armorama: 871 posts
Posted: Friday, February 27, 2015 - 05:33 AM UTC
Unfortunately, my willpower isn't as strong as yours Steve

All 3 now complete....


Gary
gastec
Visit this Community
Auckland, New Zealand
Joined: February 03, 2014
KitMaker: 1,042 posts
Armorama: 871 posts
Posted: Friday, February 27, 2015 - 05:49 AM UTC
Onto the floorpan next and the final drive unit....


Vinyl collars for the drive sprockets.

Next up, the floor side plates....


Gary
gastec
Visit this Community
Auckland, New Zealand
Joined: February 03, 2014
KitMaker: 1,042 posts
Armorama: 871 posts
Posted: Friday, February 27, 2015 - 08:19 AM UTC
With the floorpan sides on, the return roller support brackets are next up....


Fit between the halves isn't great but won't be seen on completed model

One side's worth of return rollers....


All in place....


Main suspension units fixed in place...


Tracks are up next....

Gary
gastec
Visit this Community
Auckland, New Zealand
Joined: February 03, 2014
KitMaker: 1,042 posts
Armorama: 871 posts
Posted: Friday, February 27, 2015 - 02:32 PM UTC
Tracks. Nowhere near as good as the Tamiya offerings, but do the job nonetheless. 2 parts per link and 48 links per side. Clean up of each link is a paint but they go together fine...


... and wrap around the wheels as they should....


Other=s ide tomorrow.

Gary
HermannB
Visit this Community
Bayern, Germany
Joined: October 14, 2008
KitMaker: 4,099 posts
Armorama: 4,067 posts
Posted: Friday, February 27, 2015 - 02:44 PM UTC
Could the track tension be varied by the seperate idlers?
gastec
Visit this Community
Auckland, New Zealand
Joined: February 03, 2014
KitMaker: 1,042 posts
Armorama: 871 posts
Posted: Friday, February 27, 2015 - 02:56 PM UTC
Hi Hans-Hermann

The kit idler is not adjustable, but you could easily make it so with some minor work.

Gary
gastec
Visit this Community
Auckland, New Zealand
Joined: February 03, 2014
KitMaker: 1,042 posts
Armorama: 871 posts
Posted: Saturday, February 28, 2015 - 04:04 AM UTC
Second set of tracks now and the cabin floor sections are next....


2 HUGE radiators each end of the engine compartment...


Forgot to take some WIP shots, but driver's section is nicely detailed and looks the part. The two leather chairs wouldn't look out of place in a CEOs office


Now, I'm afraid to say, it's not all been plain sailing

The soft plastic makes cleaning up of seams etc a real chore - and there are lots of them. Even minor flash in places. The biggest headache though was the radiator/driver's section assemblies due to poor fitment. I'm going to have this vehicle buttoned up so am not too fussed this time round about everything looking perfect, but I needed to do a fair bit of modifying to get things to fit.
The two locating blocks on the hull floor for the radiators stop the bottom of the rad sitting flush with the floor. I ended up removing these blocks completely. I also found that the driver's section floor sits slightly too low. So, if I do another build I would cut off the two centre support sections which are moulded as one piece on the lower sides (Parts B1 & B18) and assemble the upper section as one before attaching it to the floor.
I also had to make some slight adjustments to the bottom corners of parts A10 and A9 to ensure they fitted between the floor plates. Basically, the message here is dry fit all the way before committing to cement.

While I'm enjoying the build and it is making into a nice kit, things like this are a real let down and surely not something you should expect from a modern day designed kit?

Gary
Tojo72
Visit this Community
North Carolina, United States
Joined: June 06, 2006
KitMaker: 4,691 posts
Armorama: 3,509 posts
Posted: Saturday, February 28, 2015 - 05:59 AM UTC
thanks for all the tips,keep em coming as I now have one on order.
warhog
Visit this Community
North Carolina, United States
Joined: November 26, 2003
KitMaker: 568 posts
Armorama: 398 posts
Posted: Saturday, February 28, 2015 - 07:35 AM UTC
Got this kit on the bench. Looking forward to your build and starting mine.
gastec
Visit this Community
Auckland, New Zealand
Joined: February 03, 2014
KitMaker: 1,042 posts
Armorama: 871 posts
Posted: Saturday, February 28, 2015 - 09:34 AM UTC
5.7-cm Maxim-Nordenfelt gun. Soft detail and fit is poor in places but makes into a nice little cannon overall....


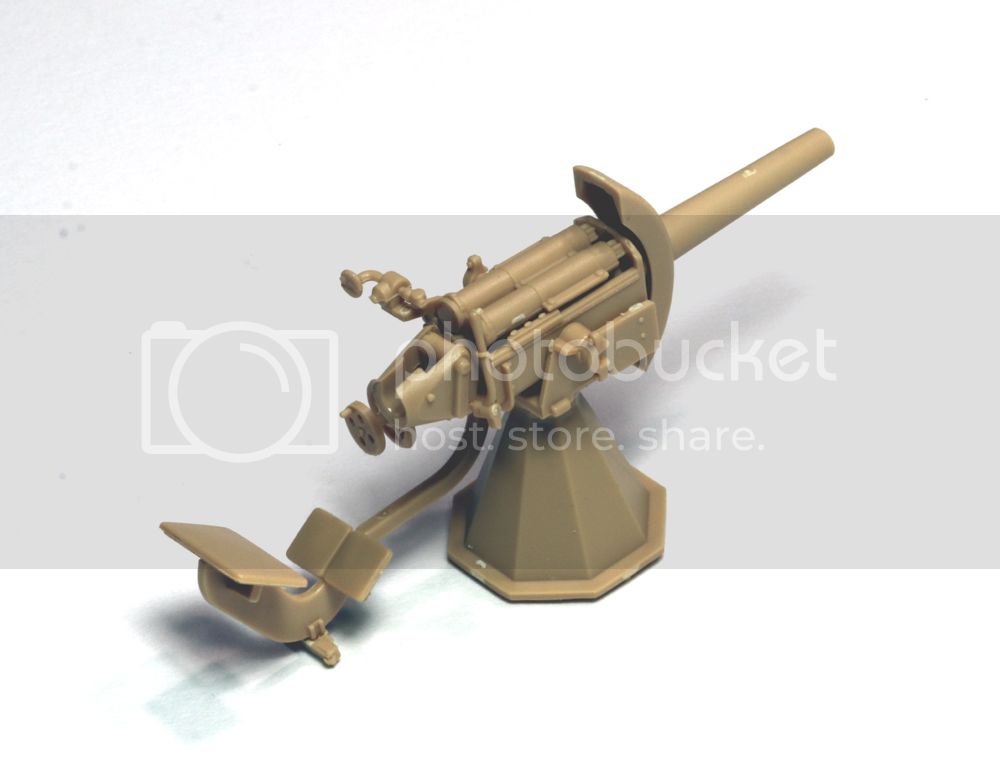
With its shield and ammo box in place....


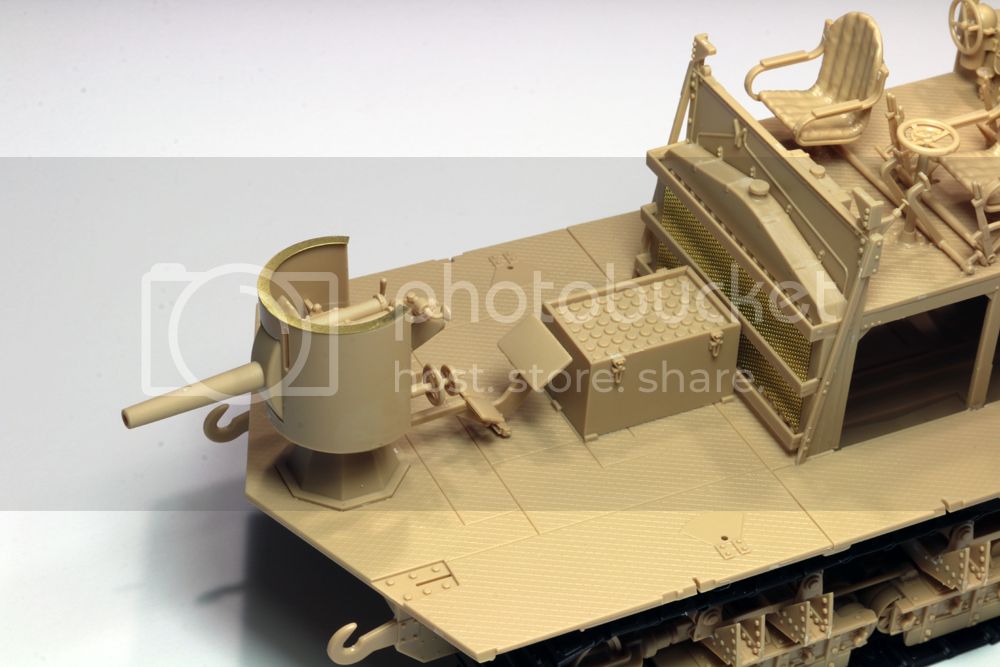
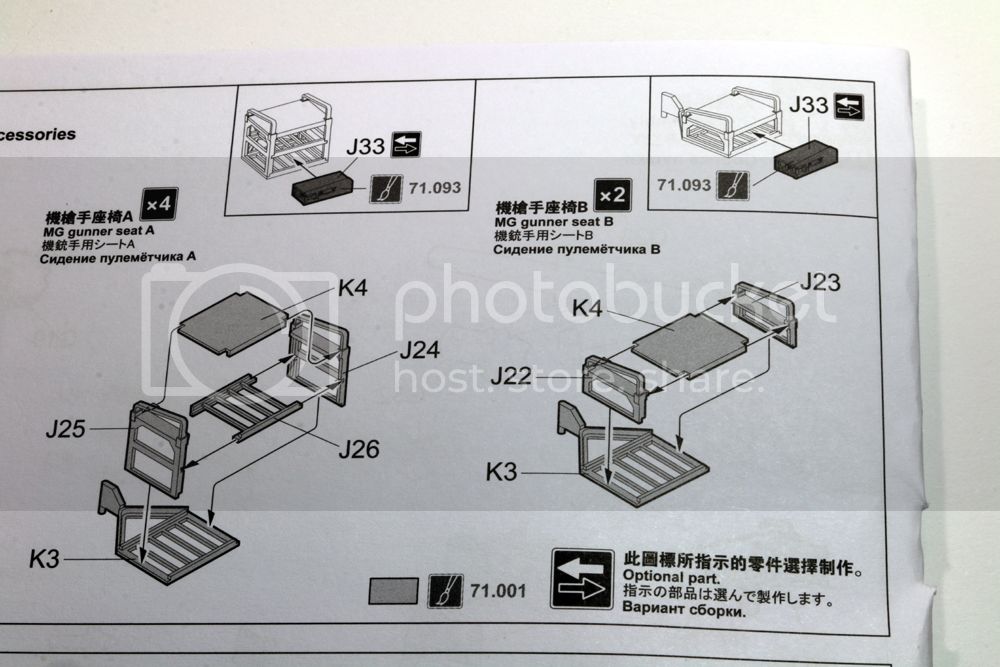
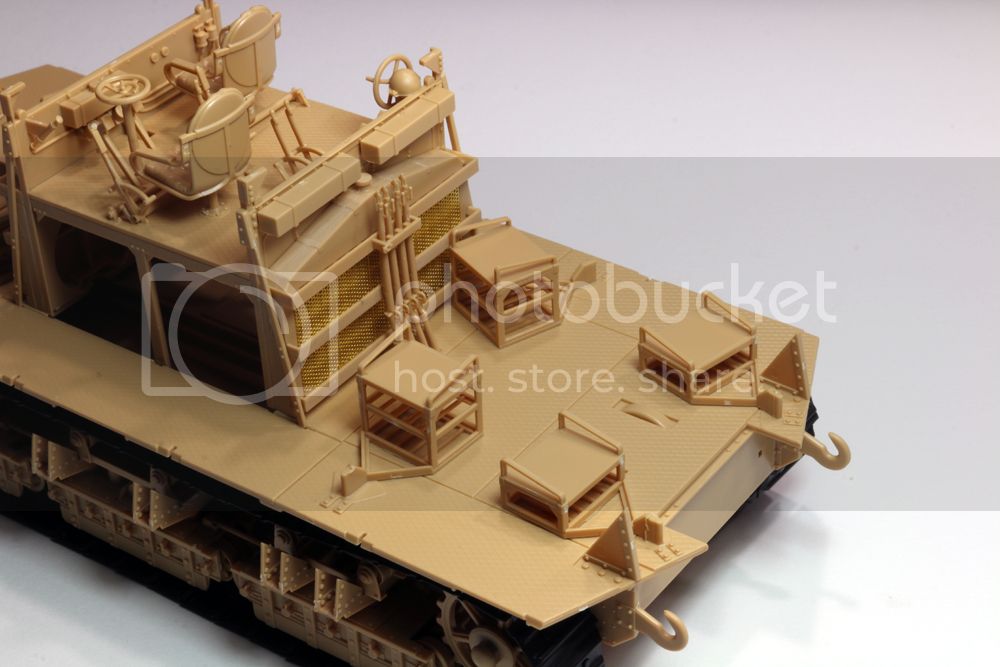
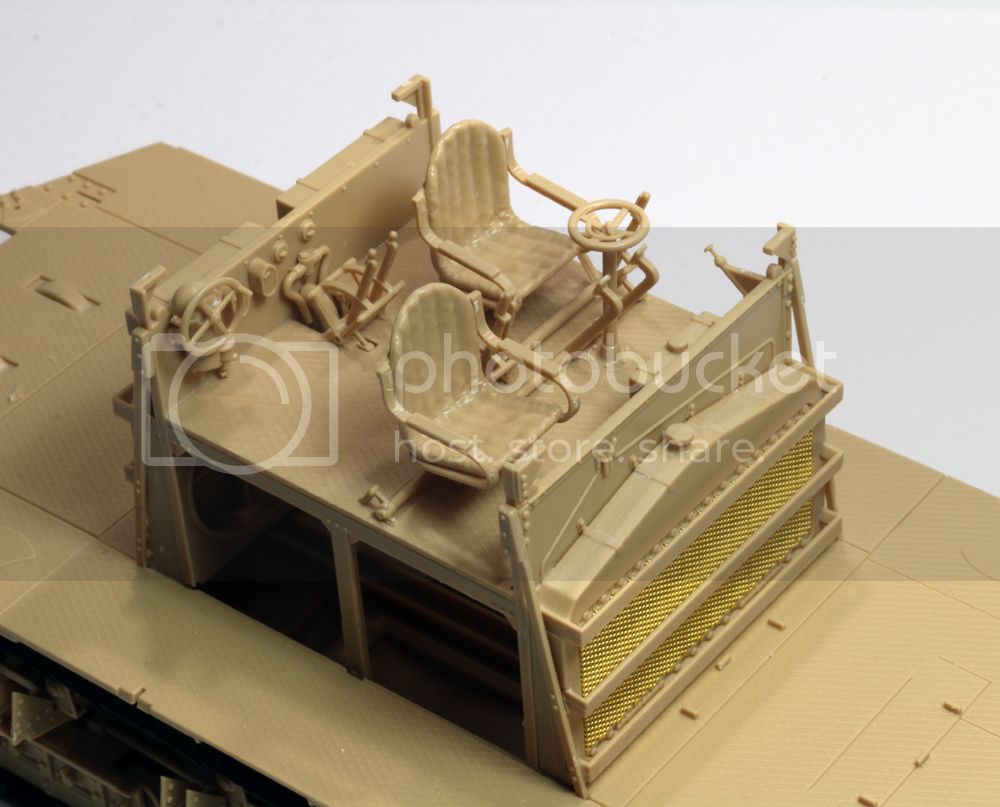
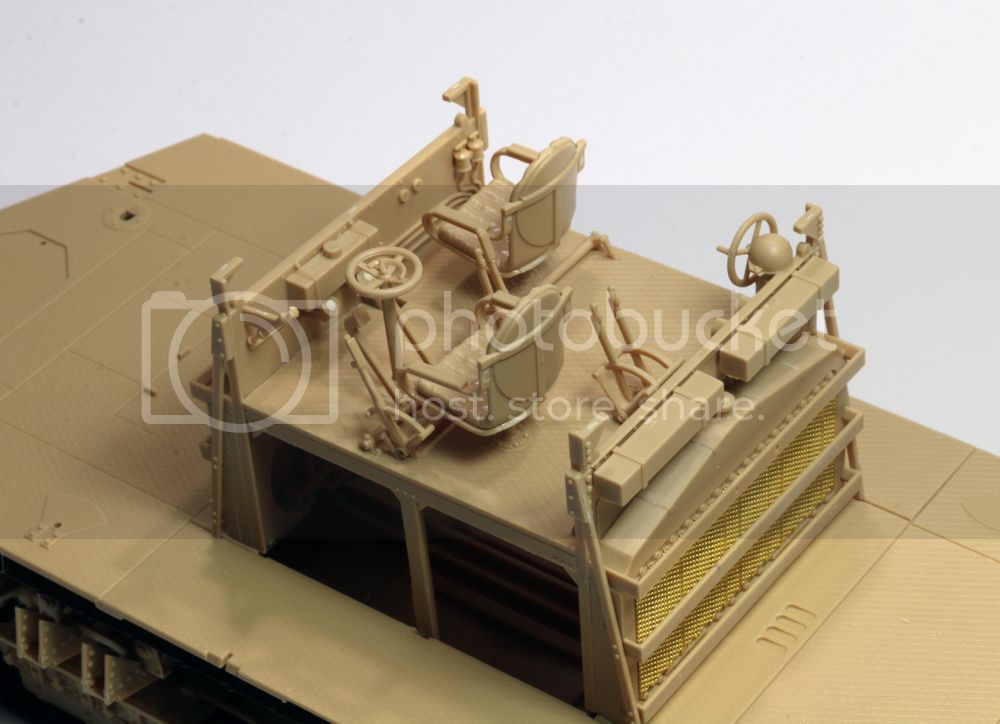
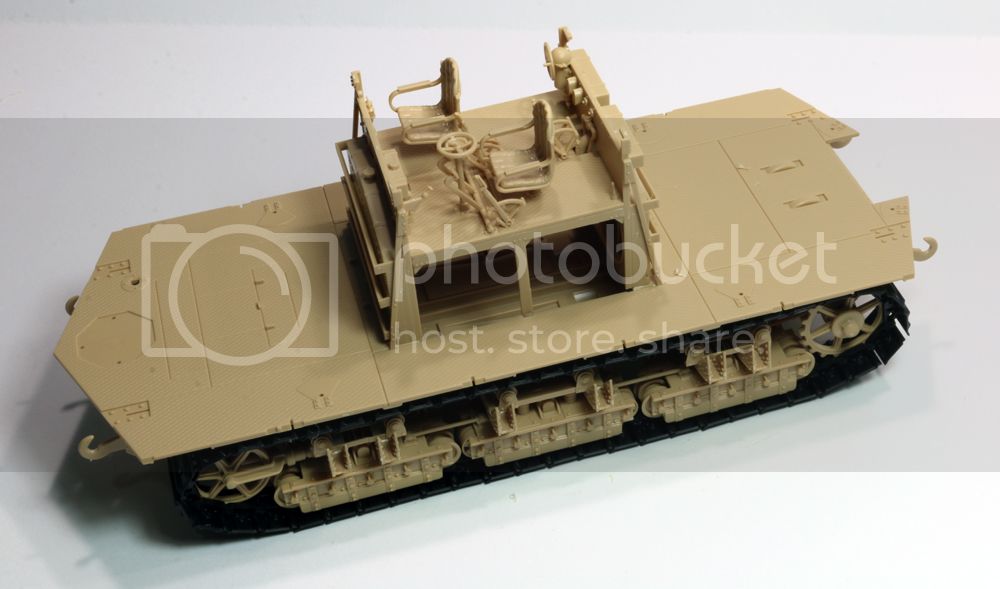
MG operators get their own little seats with ammo box storage racks....


Rear section has a rack for 4 Mauser Gewehr 98 infantry rifles. You also get a extras with bayonets fitted, 8 hand grenades and a pair of MP18 SMGs with ammo drums. Nice touch.


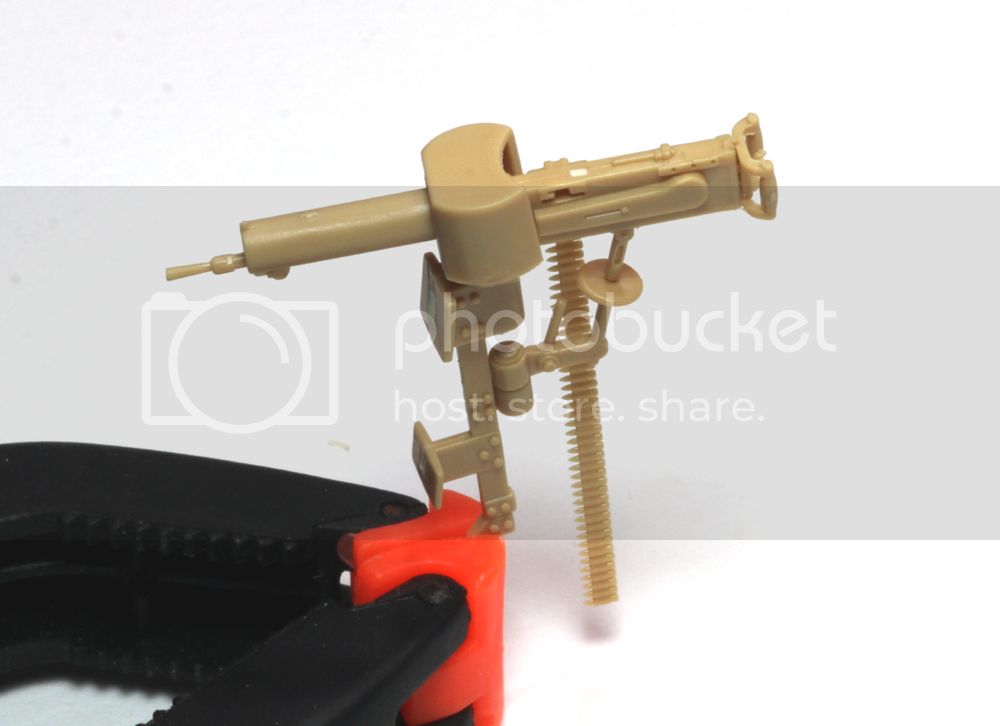
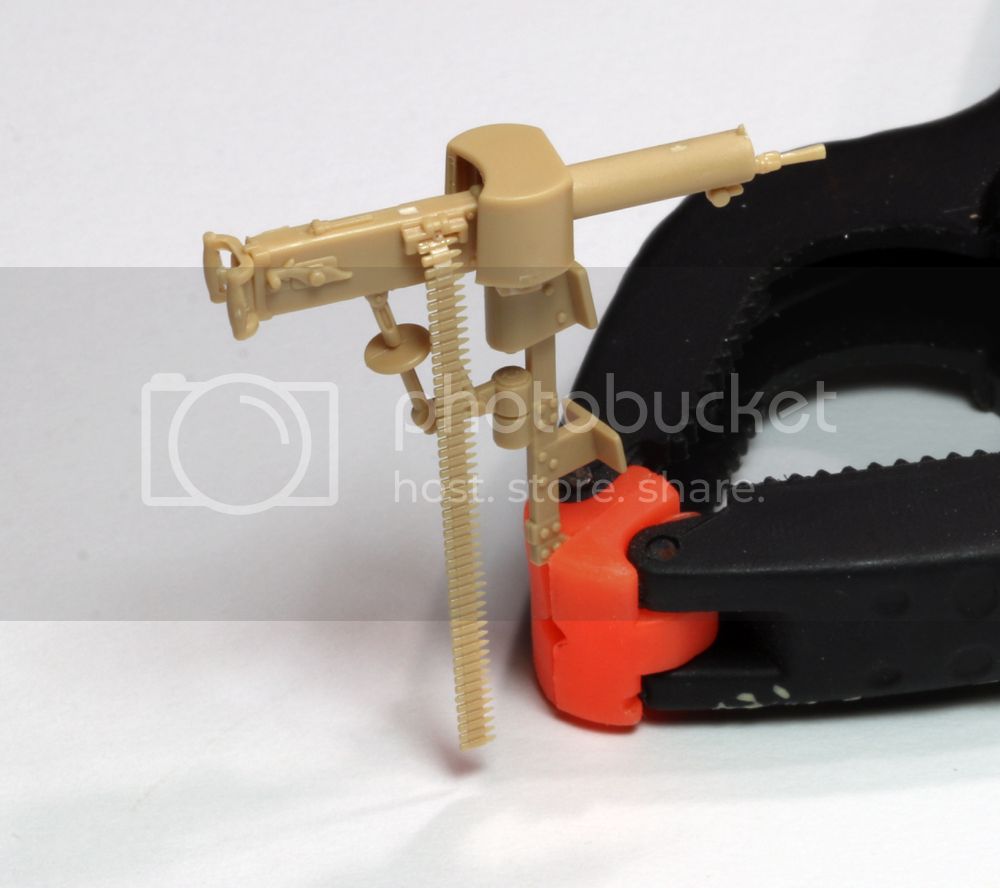
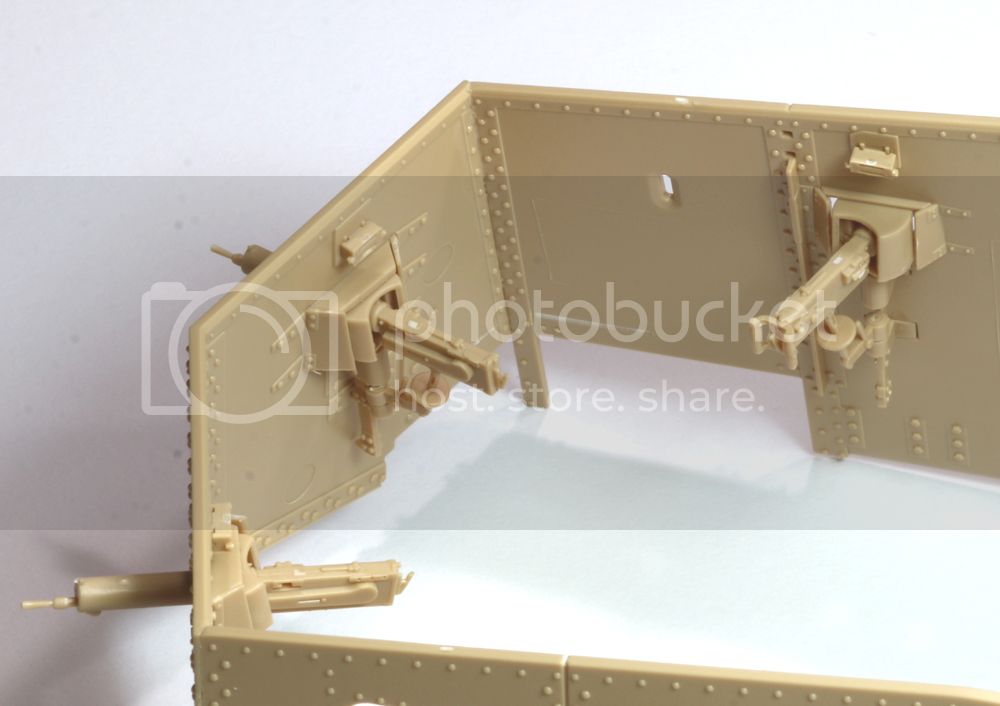
6 rather nice Maschinengewehr 08 7.9mm MGs provided. Disappointing that you have to drill out your own muzzles though. Ammo belts need to be bent to shape which will need care to prevent snapping them....


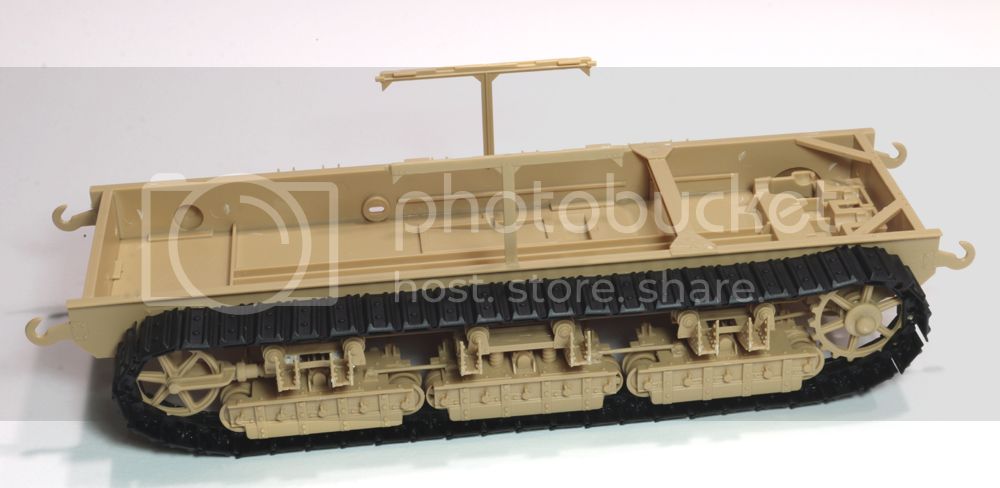
Previous experience over the years has taught me to not always follow the instructions and I'll be deviating from them here.

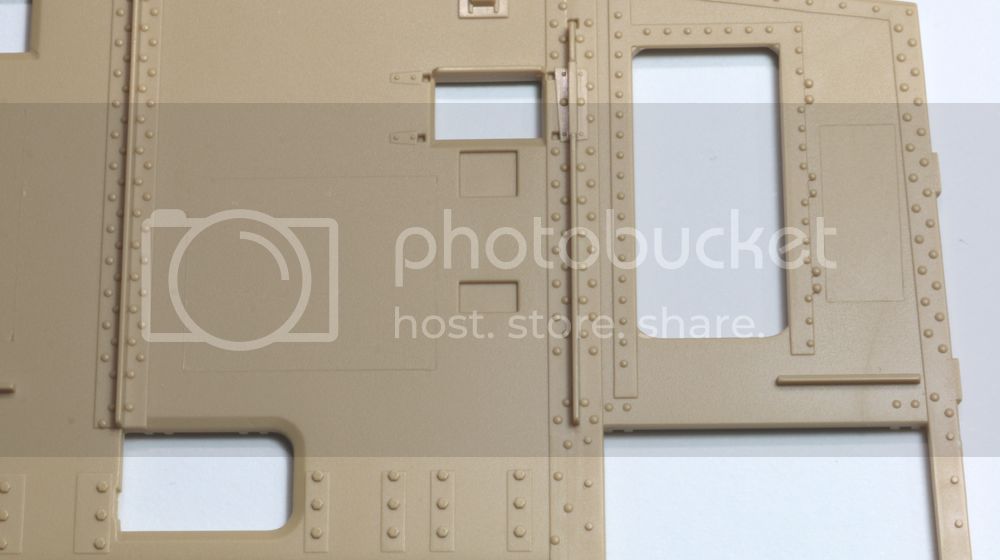
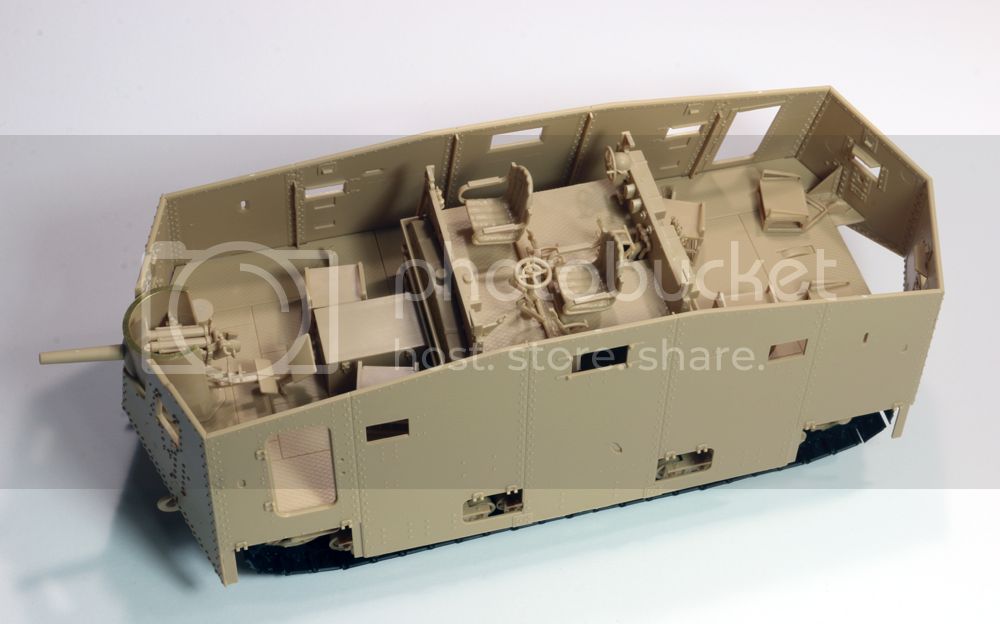
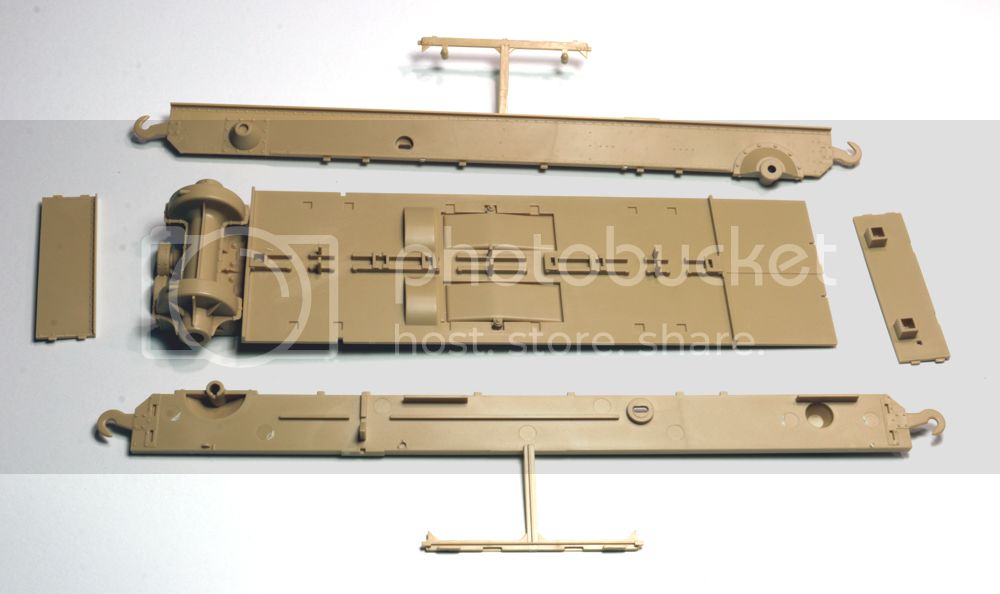
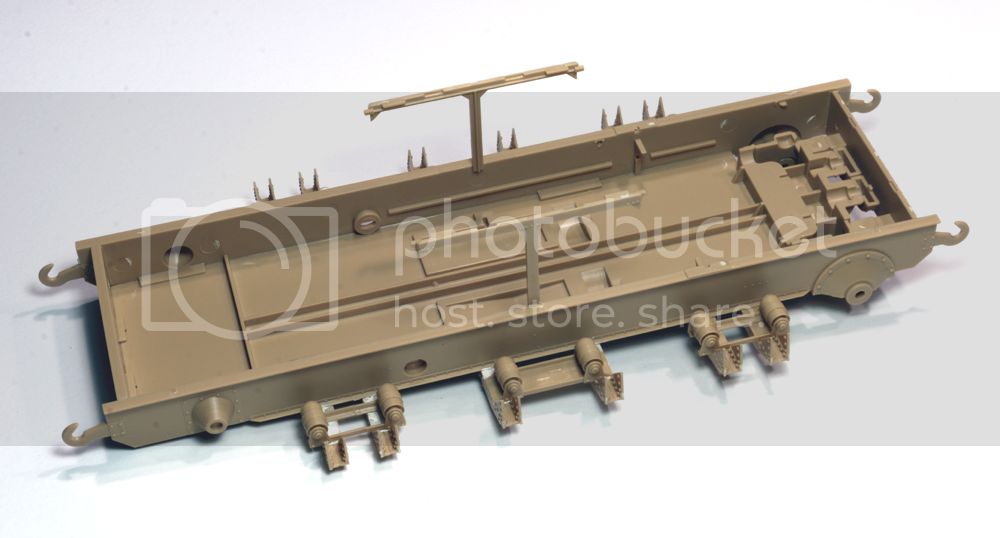
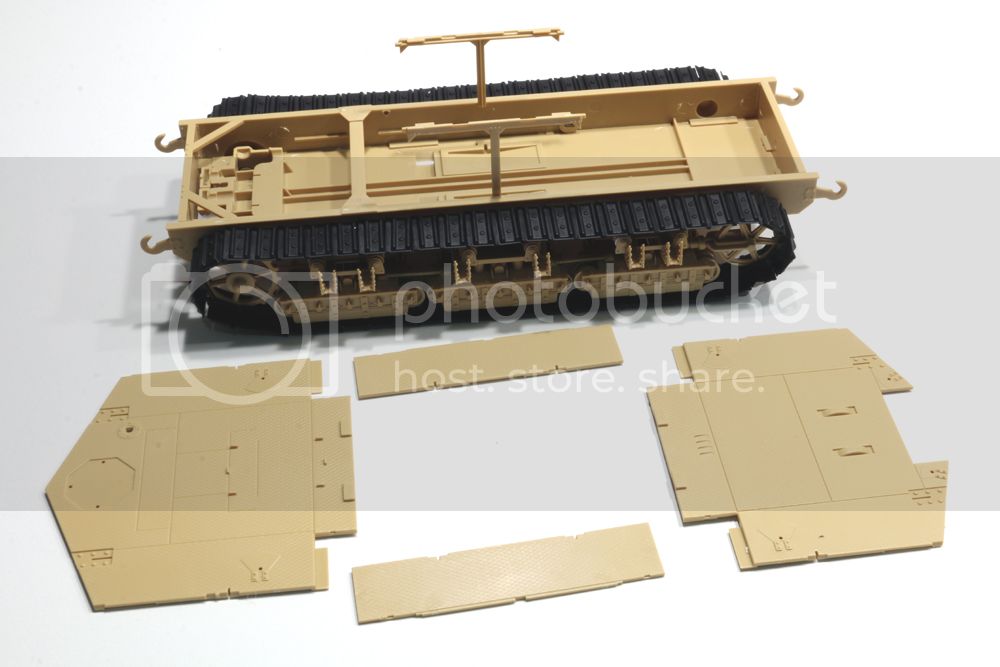
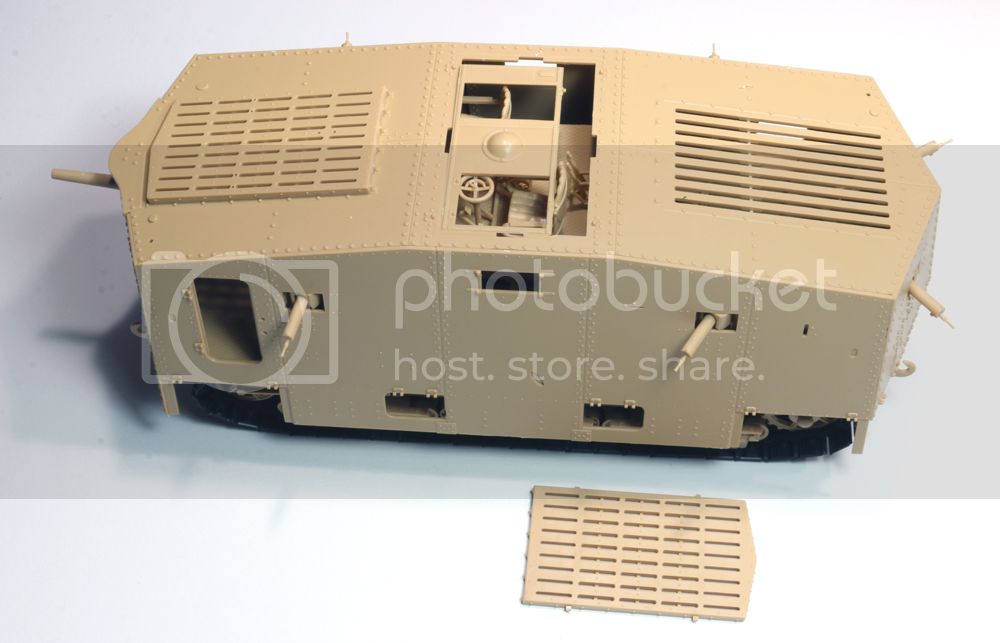
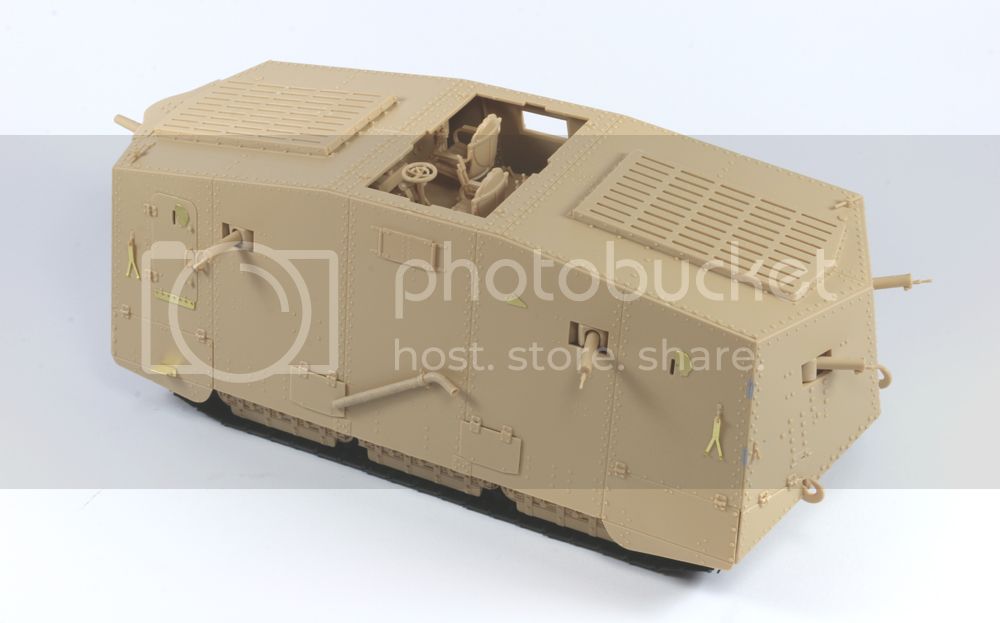
The 4 side panels....


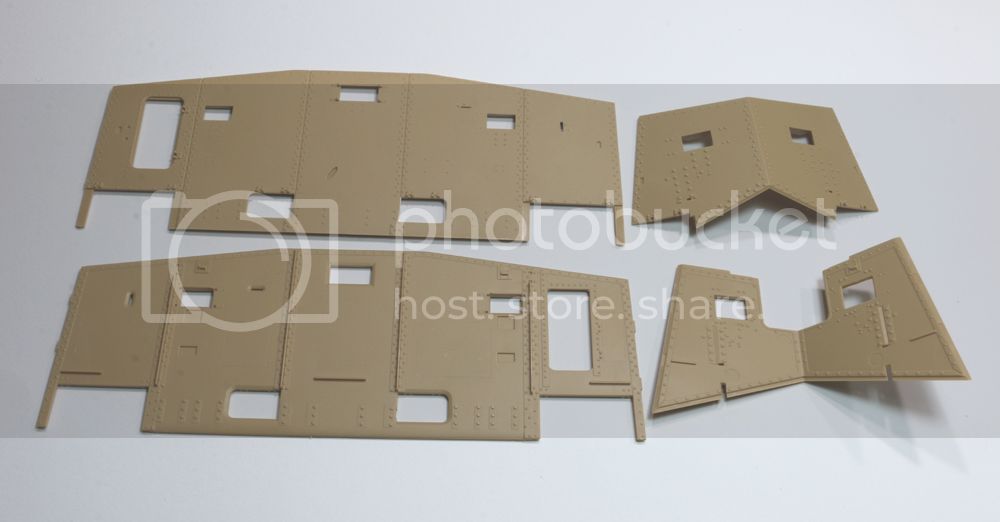
Not an issue for me on this build, but there are some pin marks and other raised lines on the inside which will need to be dealt with....


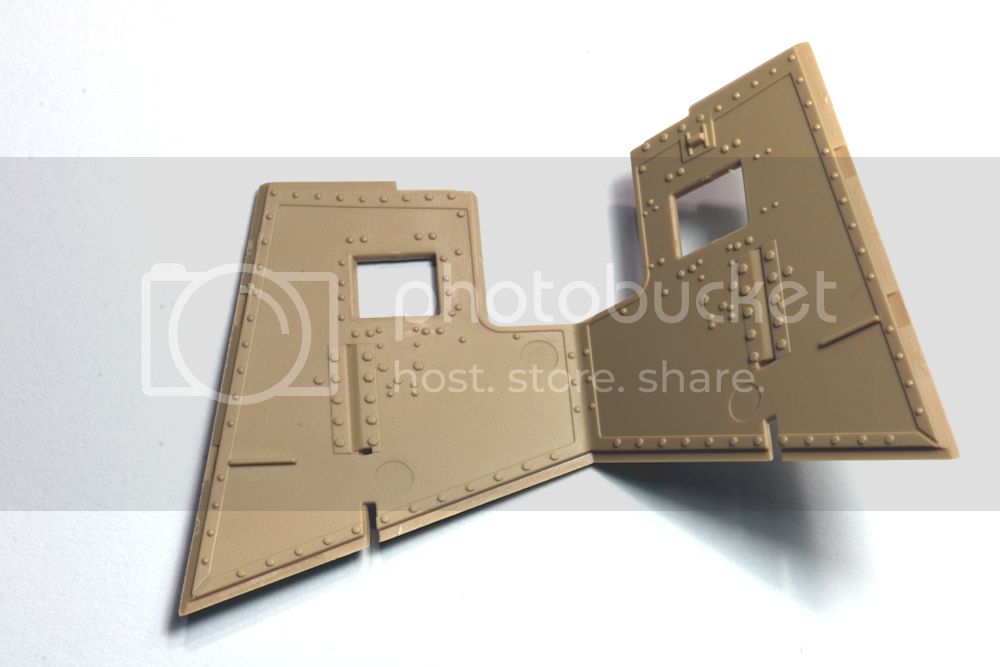
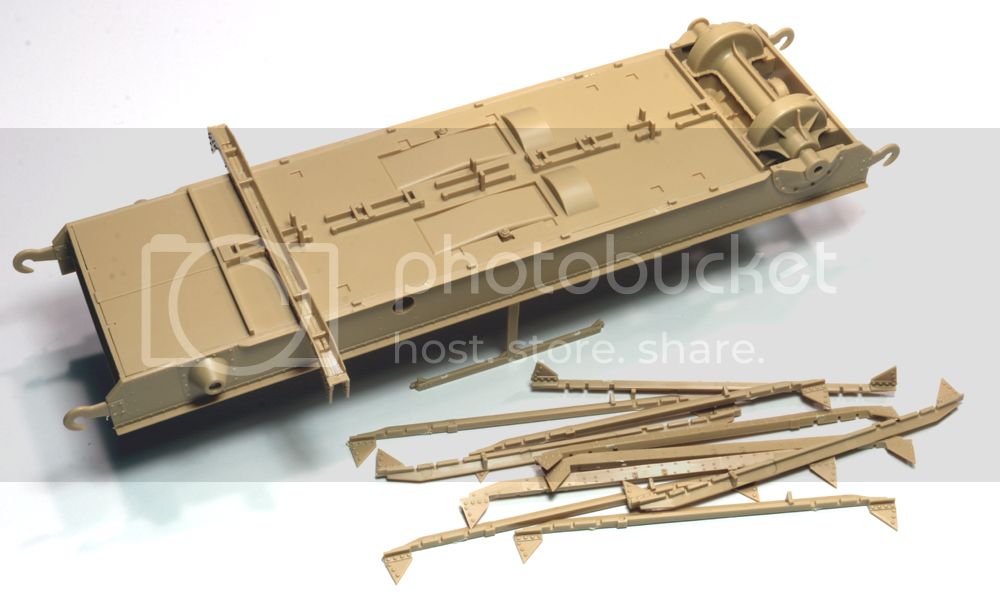
I've sometimes found that attaching large panels like this directly to the hull floor doesn't always guaranteed proper alignment of the corners so I've glued all 4 panels together separately from the chassis...


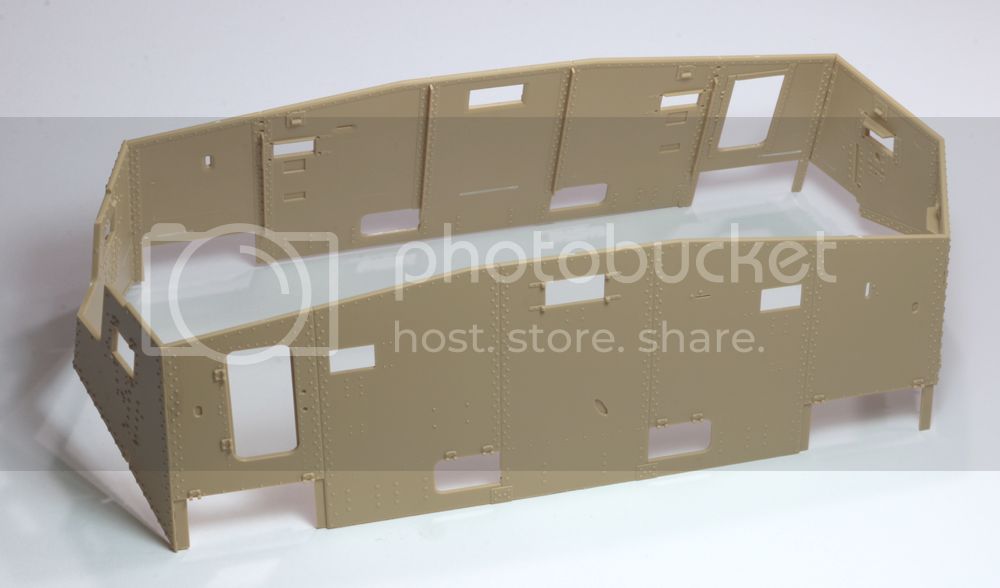
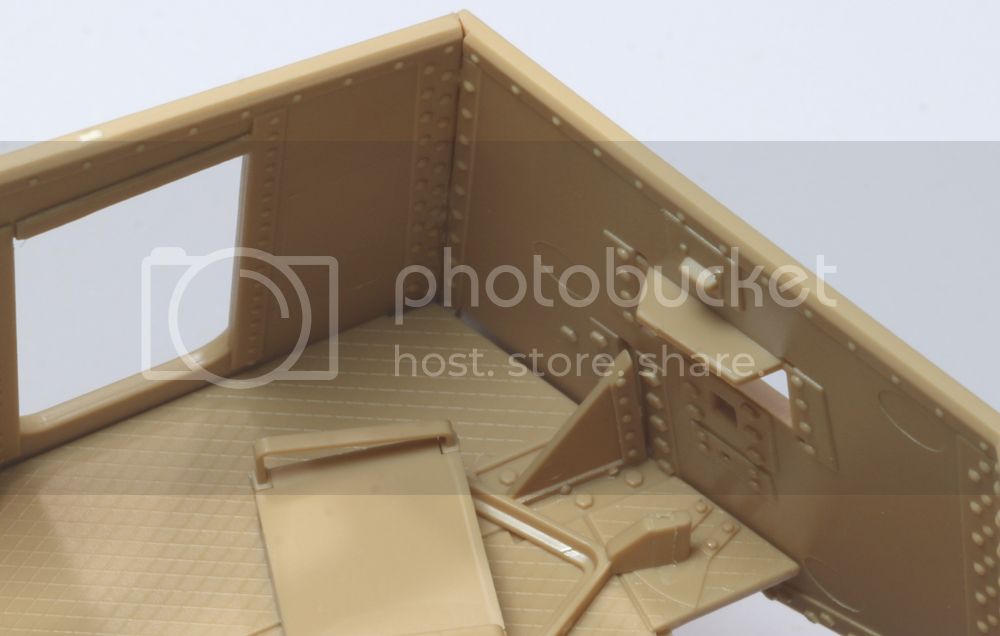
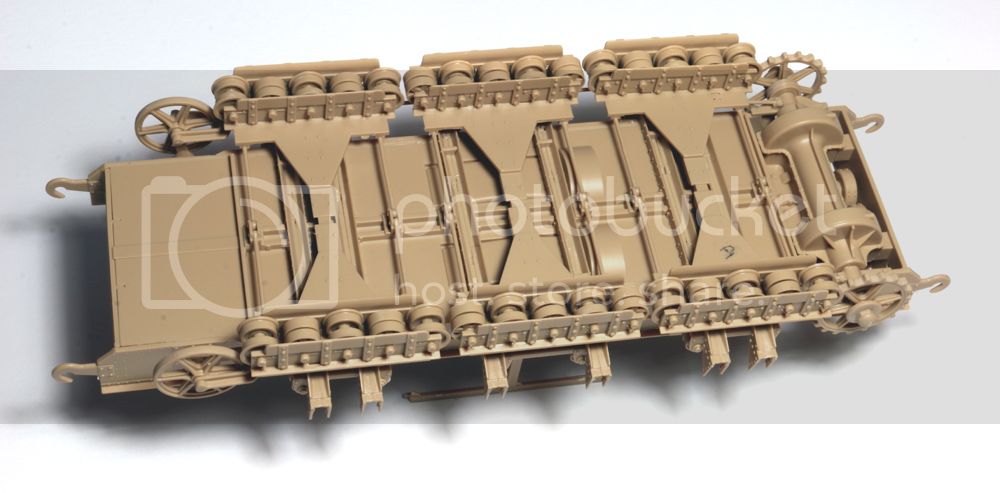
A few of the cut outs in the floor plates (G34, G35, G36 & G37) need to be opened up slightly otherwise the internal vertical ribs won't fit properly. There are some slight gaps at each end. I would strongly recommend fitting the triangular gussets (J16) after the upper hull is in place ..


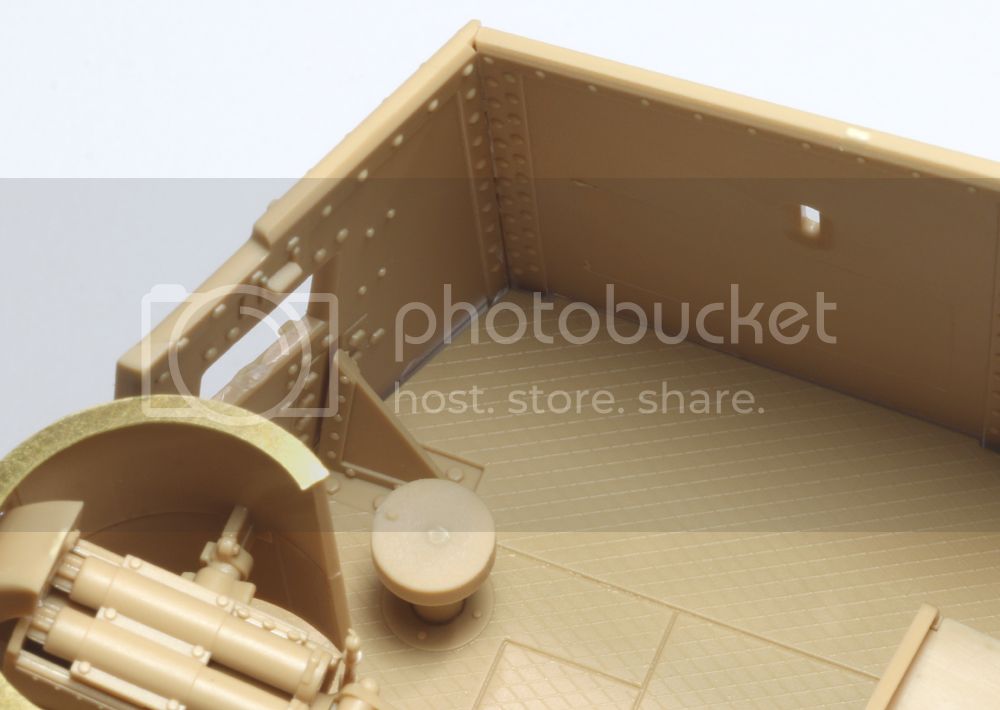
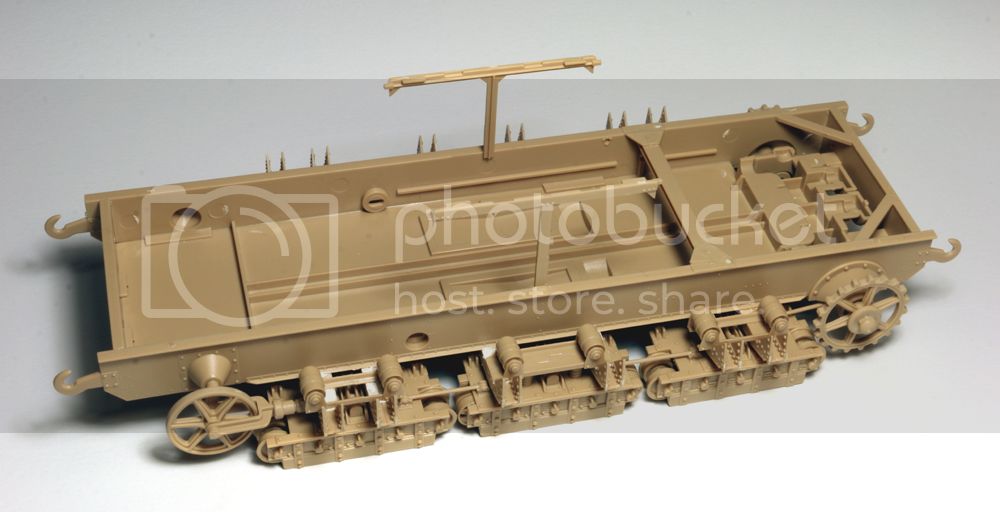
... so I feel vindicated in my process. If following this method, then remember to remove the raised locating strips at the base of the side panels.

Overall, fit from the outside is fine though each corner will need a little tidy up once the cement has fully cured. And beginning to look like a real behemoth now....


Gary
gastec
Visit this Community
Auckland, New Zealand
Joined: February 03, 2014
KitMaker: 1,042 posts
Armorama: 871 posts
Posted: Saturday, February 28, 2015 - 10:13 PM UTC
MGs are fitted in place without any hassle along with separate shields on either side of the main casing...


Roof goes on next and fitment is pretty good overall. You also get separate intake vent covers - these need careful clean up around the edges to remove a seam line so as not to damage the rivet detail....


Wouldn't have been much fun at the best of times being inside one of these but given that the vents on the top are open, imagine it raining or shrapnel from airbursts

Gary
AFVFan
Visit this Community
North Carolina, United States
Joined: May 17, 2012
KitMaker: 1,980 posts
Armorama: 1,571 posts
Posted: Sunday, March 01, 2015 - 04:48 AM UTC
Don't know which would be worse, be one of the guys getting rained on at either end, or getting slow roasted over the engine in the center.
gastec
Visit this Community
Auckland, New Zealand
Joined: February 03, 2014
KitMaker: 1,042 posts
Armorama: 871 posts
Posted: Sunday, March 01, 2015 - 10:29 AM UTC
Bob - they could at least take a shower if they got too hot

Further updates inc doors, visors, exhaust etc....


Hands up those who knew Krupp did a cabriolet version

Gary
Removed by original poster on 03/02/15 - 06:58:14 (GMT).
HermannB
Visit this Community
Bayern, Germany
Joined: October 14, 2008
KitMaker: 4,099 posts
Armorama: 4,067 posts
Posted: Sunday, March 01, 2015 - 12:00 PM UTC
You can plate over the gun opening and install two more MG08. This will give you Wagen 501 "Gretchen", the only female A7V.
So anyone does AM MG08?
https://www.youtube.com/watch?v=mO3ibZbMkdM
knewton
Visit this Community
New Zealand
Joined: June 19, 2013
KitMaker: 1,217 posts
Armorama: 1,092 posts
Posted: Sunday, March 01, 2015 - 12:32 PM UTC
looks great; but your updates and progress are steadily dissolving my resolve to not buy any more kits until I finish a shelf queen. Or two.

I expect to give in any day now.

Kylie
mag135
Visit this Community
Madrid, Spain / España
Joined: July 08, 2006
KitMaker: 146 posts
Armorama: 128 posts
Posted: Sunday, March 01, 2015 - 12:48 PM UTC

Quoted Text

Bob - they could at least take a shower if they got too hot

Further updates inc doors, visors, exhaust etc....


Hands up those who knew Krupp did a cabriolet version

Gary


turret panels could be folded down
 _GOTOTOP