Scotland, United Kingdom
Joined: October 04, 2010
KitMaker: 275 posts
Armorama: 260 posts
Posted: Wednesday, June 10, 2015 - 06:00 AM UTC

" BORDER="0">
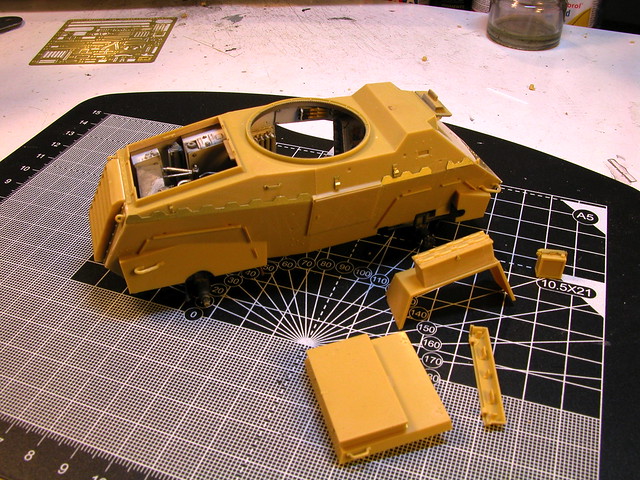
I have been away for a while with some real life things to deal with, but am now back in the wonderful world of plastic armour with this little Swiss watch of a kit. It is beautifully detailed and complex model that needs some care to assemble. With a full interior and engine/transmission I am thinking of a small vignette with a couple of figures to show it all off, still early days though. Hope the image displays as the Flickr hosting site has changed since the last time I did this.
Georgia, United States
Joined: May 09, 2014
KitMaker: 273 posts
Armorama: 270 posts
Posted: Wednesday, June 10, 2015 - 08:19 AM UTC
Looks like an exciting build, can't wait to see how it develops!
Scotland, United Kingdom
Joined: October 04, 2010
KitMaker: 275 posts
Armorama: 260 posts
Posted: Wednesday, June 24, 2015 - 03:04 AM UTC
Removed by original poster on 05/13/19 - 23:40:47 (GMT).
Alabama, United States
Joined: September 22, 2008
KitMaker: 476 posts
Armorama: 447 posts
Posted: Wednesday, June 24, 2015 - 04:23 AM UTC
I shelved this kit at almost the point you are now in order to work on less intense builds without interiors. Still waffling on when to pick it up again. Maybe this will be the push I need.
Uusimaa, Finland
Joined: October 22, 2012
KitMaker: 1,194 posts
Armorama: 1,077 posts
Posted: Wednesday, June 24, 2015 - 05:52 AM UTC
I've got one in the stash waiting to get insaned. Fortunately I love doing insane things. Will have to keep an eye on this, good job so far.
Kimmo
There is a time to laugh and a time not to laugh, and this is not one of them.
Ontario, Canada
Joined: November 03, 2012
KitMaker: 2,275 posts
Armorama: 2,233 posts
Posted: Wednesday, June 24, 2015 - 06:02 AM UTC
ColinEdm
 Associate Editor
Alberta, Canada
Joined: October 15, 2013
KitMaker: 1,355 posts
Armorama: 1,229 posts
Posted: Tuesday, June 30, 2015 - 07:37 PM UTC
The voices are back.....excellent....
Scotland, United Kingdom
Joined: October 04, 2010
KitMaker: 275 posts
Armorama: 260 posts
Posted: Thursday, July 09, 2015 - 08:17 PM UTC
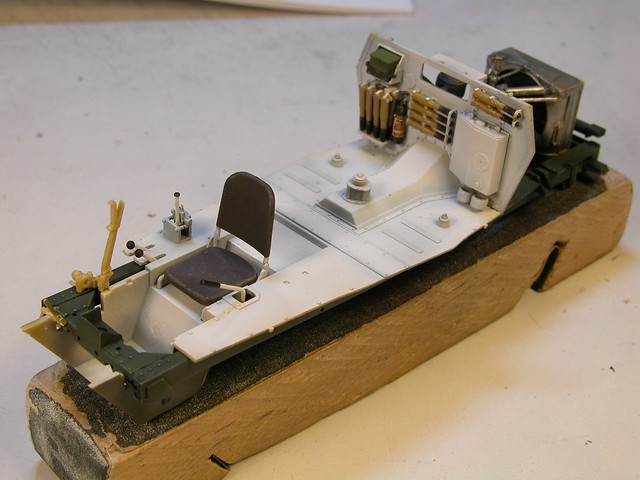
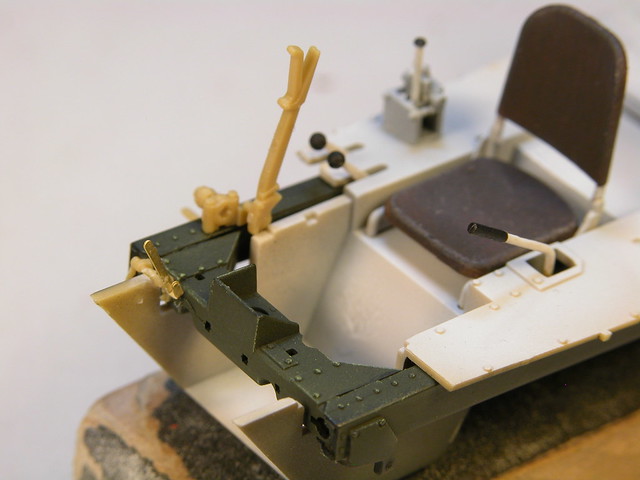
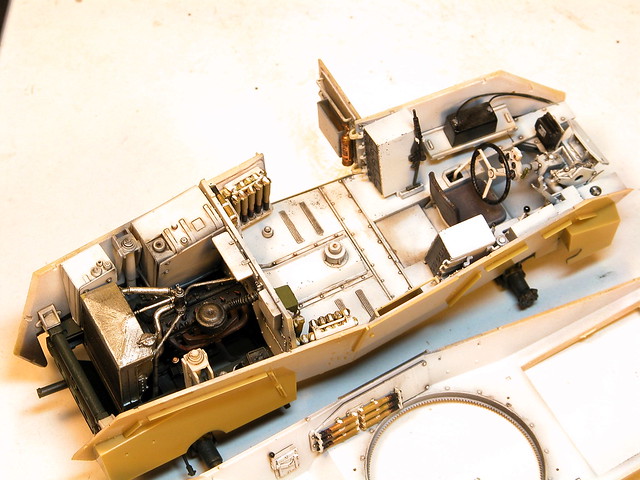
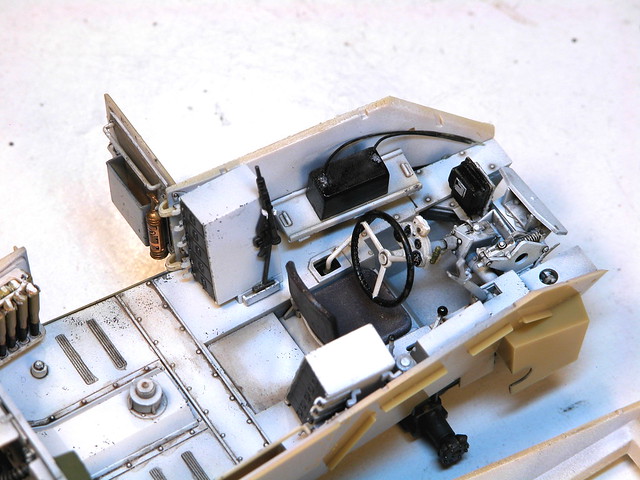
Here are some new pics to show some progress.
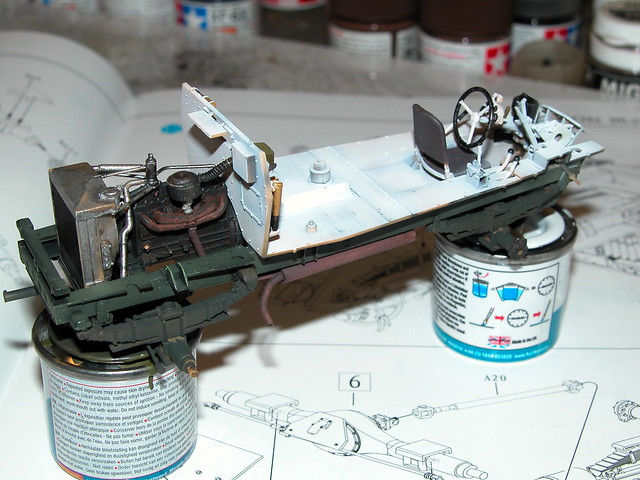
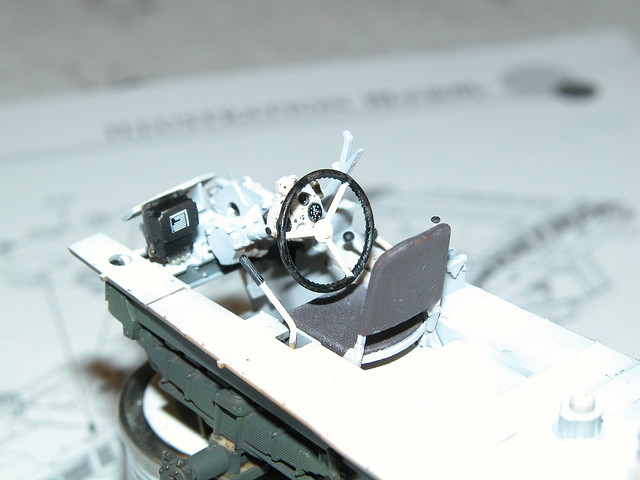
Yes this is intense, thanks for all your intrest. Although fiddly in the extreme it is going together well and the fit of parts is very good. The painting is not complete yet, with really just the basic colours and a little black pre shade done, still pin washes and scuffing up to do. For anyone who has this kit and still to start it my only advice would be take great care that when building up the chassis to get the parts in the right position, follow the diagrams arrows right to their point and try to keep everything square. Time will tell whether I have managed this properly. The next stages are the assembly of the hull side walls with relevant fittings and look to be a little easier!
Removed by original poster on 05/13/19 - 23:41:07 (GMT).
Scotland, United Kingdom
Joined: October 04, 2010
KitMaker: 275 posts
Armorama: 260 posts
Posted: Sunday, August 02, 2015 - 12:42 AM UTC

#026
Pennsylvania, United States
Joined: June 08, 2002
KitMaker: 1,744 posts
Armorama: 1,359 posts
Posted: Sunday, August 02, 2015 - 02:01 AM UTC
They're coming to take me away, HA HA...Those nice young men in their funny white coats...they're coming to take me away HA HA!!! I've had that feeling before...where you'd rather take a real torch (flashlight to all of us Yanks...but torch sounds sooooo much cooler) to the workbench than a battery powered one!
Jeff

Bodeen
What a long strange trip it's been!
Uusimaa, Finland
Joined: October 22, 2012
KitMaker: 1,194 posts
Armorama: 1,077 posts
Posted: Sunday, August 02, 2015 - 03:23 AM UTC
Coming along nicely.
Kimmo
There is a time to laugh and a time not to laugh, and this is not one of them.
Scotland, United Kingdom
Joined: October 04, 2010
KitMaker: 275 posts
Armorama: 260 posts
Posted: Thursday, August 20, 2015 - 03:54 AM UTC
Wojewodztwo Slaskie, Poland
Joined: October 21, 2003
KitMaker: 529 posts
Armorama: 500 posts
Posted: Thursday, August 20, 2015 - 05:59 AM UTC
Hi Paul,
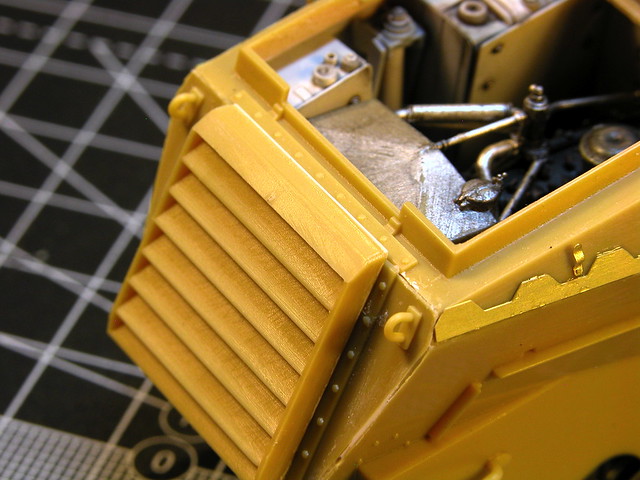
Wow, nice interior weathering, looks great so far.I like poster inside, it's great idea.

Scotland, United Kingdom
Joined: October 04, 2010
KitMaker: 275 posts
Armorama: 260 posts
Posted: Thursday, September 17, 2015 - 04:23 AM UTC
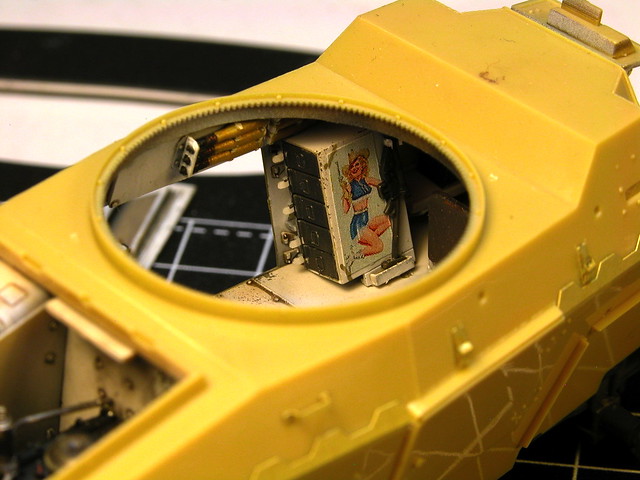
Thanks for your interest. My brother who knows about these things doesn't beleive "pin ups" would be allowed and would not pass an inspection by Rupert! I like to think maybe it would.
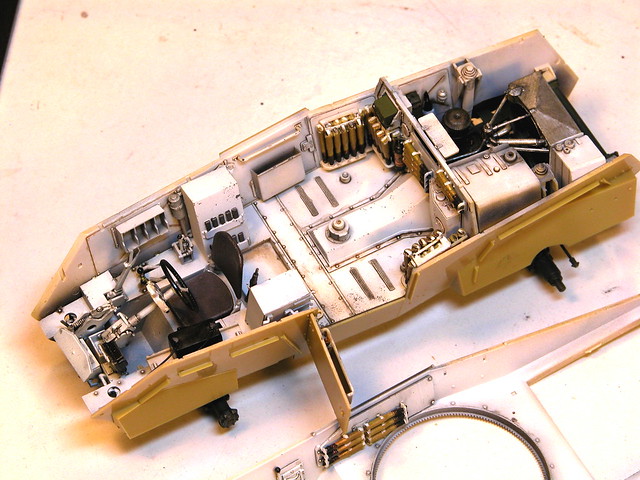
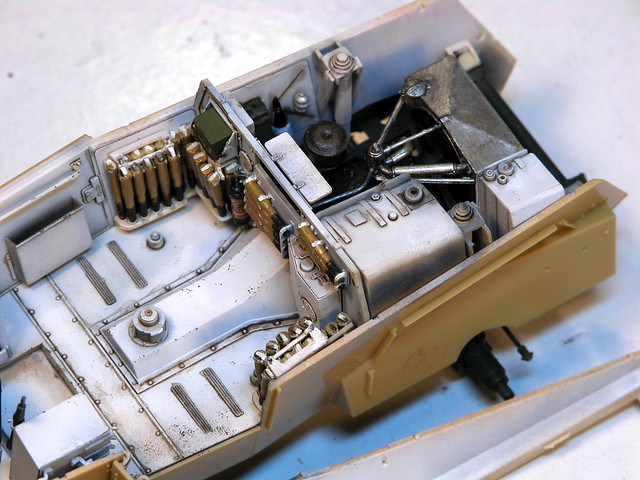
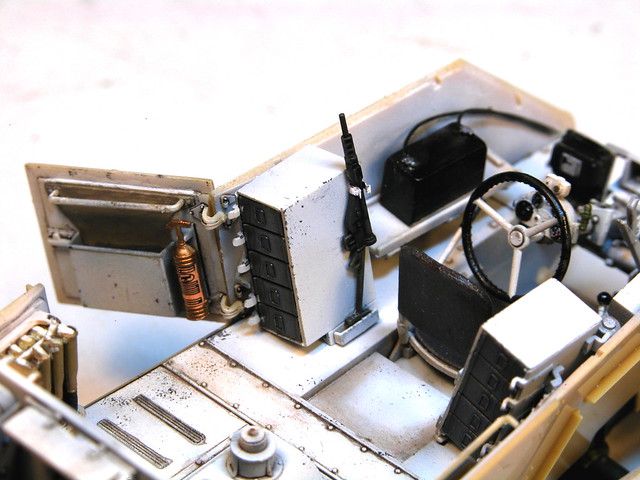
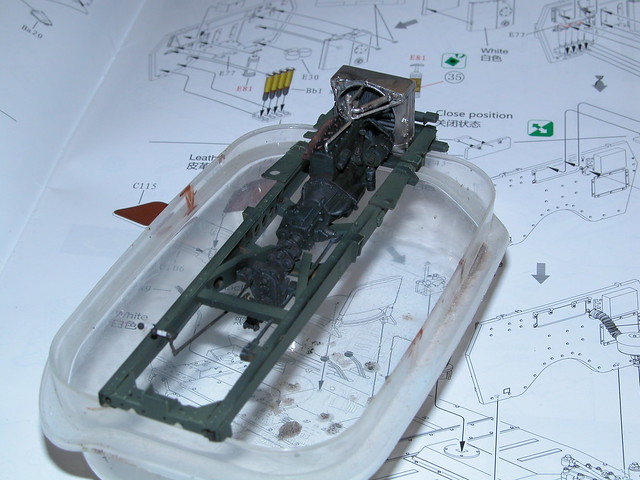
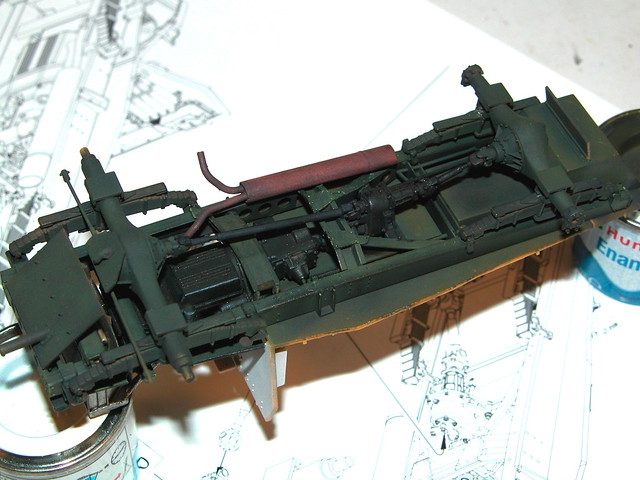
Anyway here are a couple of pics of the very modest progress to date;

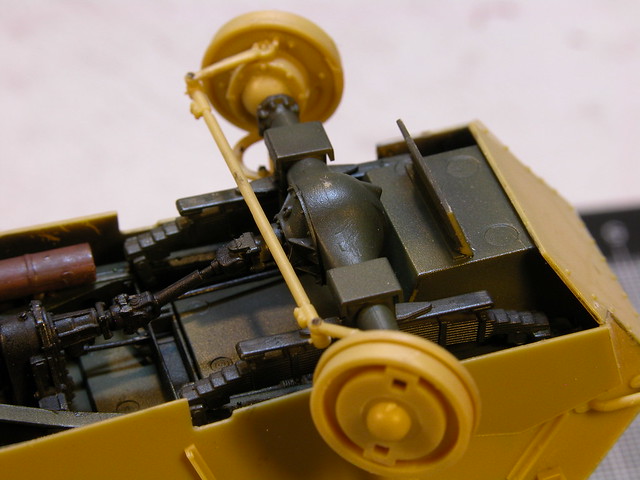
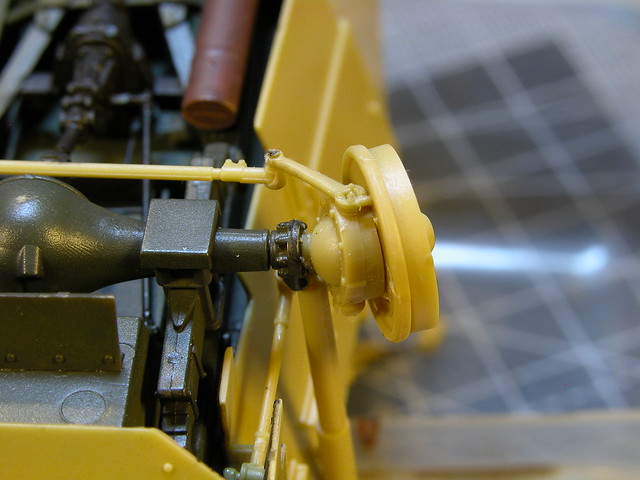
As can been seen the pile of bits and sub assemblys grows.
I am now doing the turret, the breech for this is quite a delicate thing made up from many tiny peices and proved not to be a very good fit through the inner mantlet and needed a little sanding and jiggling about which was a bit tricky once fully glued together, my advice would be to just cement the two basic halfs together and then check the fit of both the inner mantlet and also the main gun barrel which didn't fit very well either leaving a rather ugly join to the breech this will be hidden between the inner and outer mantlets.
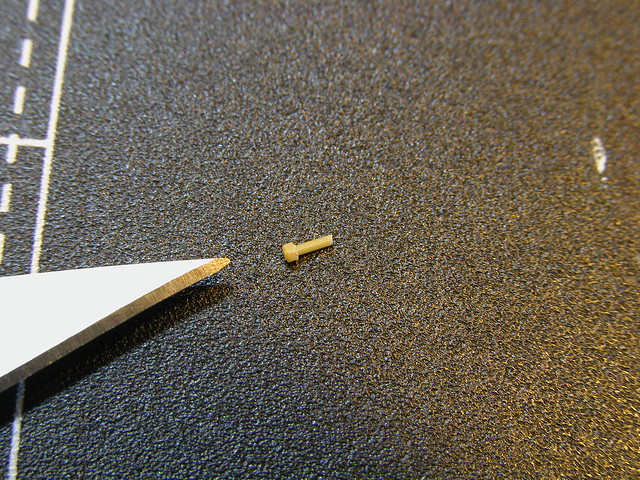
I did manage to get the steering swivel hubs to work though ! Using the old heated blade trick to flatten down the ends of the pins to keep the linkages free to operate. So it'll be great fun steering it around the floor going broom broom.
England - East Anglia, United Kingdom
Joined: August 12, 2005
KitMaker: 14,499 posts
Armorama: 11,675 posts
Posted: Friday, September 18, 2015 - 11:05 AM UTC
Hi Paul,
Just came across this one, excellent work so far.
Al

'Action this Day'
Winston Spencer Churchill
Overijssel, Netherlands
Joined: July 01, 2010
KitMaker: 1,322 posts
Armorama: 1,239 posts
Posted: Friday, September 18, 2015 - 12:58 PM UTC
Quote
So it will be great steering over the floor, going broom, broom
Unquote
Hmmm....
Remembering me (with a painful smile) a day years ago when I found my 6 year old son and his friends doing just that with some models.
As you may understand they had a lot of fun, my wife tried to explain that I always could build a new one and I experienced the loss of many hours fiddeling around with tiny parts to come to, in my eyes, very good results......
ColinEdm
Associate Editor Alberta, Canada
Joined: October 15, 2013
KitMaker: 1,355 posts
Armorama: 1,229 posts
Posted: Sunday, September 20, 2015 - 12:58 AM UTC
Great progress! Love the pinup idea.
The voices are back.....excellent....
Netherlands
Joined: May 20, 2015
KitMaker: 335 posts
Armorama: 266 posts
Posted: Monday, October 05, 2015 - 05:34 PM UTC
If you think you're having a headache filling gaps with styrene strips can you imagine how mine must be from reworking the entire engine bay of a 1/35 M4A3 Sherman with Verlinden parts that are so inaccurate it's not even funny? Have a look in my topic if you want to see pictures of what I am talking about.
Love the effort you are putting into your build, lots of superb detailing

Scotland, United Kingdom
Joined: October 04, 2010
KitMaker: 275 posts
Armorama: 260 posts
Posted: Thursday, October 08, 2015 - 04:13 AM UTC
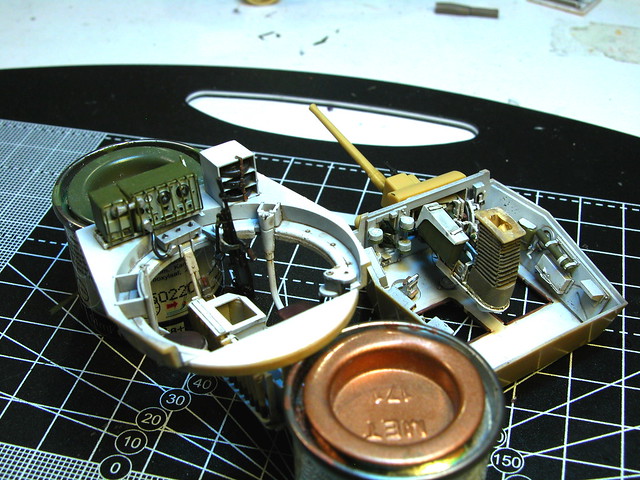
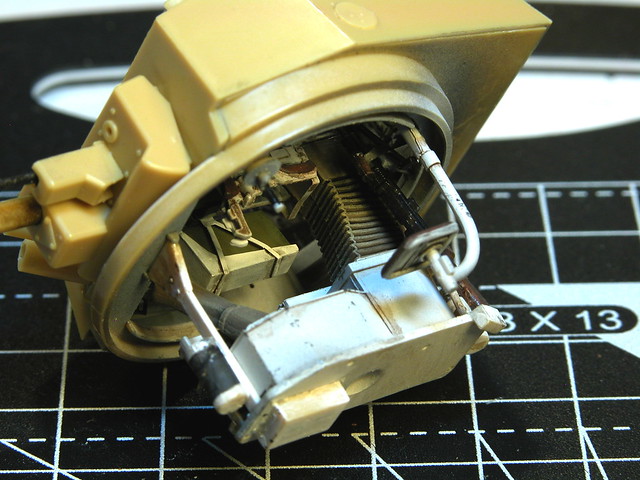
Thanks for your encouragement men. Here are another couple of pics. Did I say this was a fiddly wee kit, well it got even trickier;
 DSCN7027
 by
tankglasgow, on Flickr
 DSCN7025
 by
tankglasgow, on Flickr
Getting the main gun and the coaxial with the MG belt feeding over the top of the main breech all to line up nicely into the two mantlets and then to make sure the two cartridge case shutes line up with the bin on floor was awkward. I have had to use a bit of licence with the painting of the turret internals as there isn't much contemparory refrence material out there apart from the restored one called "Vandal" which I think was used as refrence for the design of the kit. Not a lot of this detail will be seen when it's done but for me that's not really too important, I suppose it's really the challenge of getting it all to fit in. It did make me think about the driver of one of these things, he has no access hatch of his own and once he has crawled in the side doorway along the floor over the folded down backrest of his own seat and finally at the controls he has virtually no way out once the turret is facing forward. It must have been truly terrifying under fire.
Scotland, United Kingdom
Joined: October 04, 2010
KitMaker: 275 posts
Armorama: 260 posts
Posted: Saturday, November 14, 2015 - 04:37 AM UTC
Nearly done with it, still a little more weathering, touch up, some crew clutter etc. Will post better pics when finished. Still thinking of a small vignette parked up in french/belgian barn/shed, to be continued.....
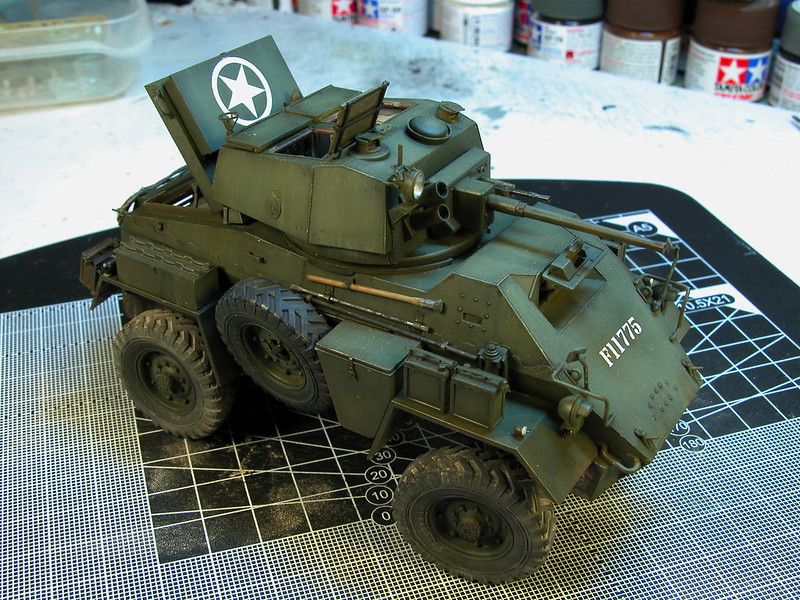 DSCN7053
 by
tankglasgow, on Flickr
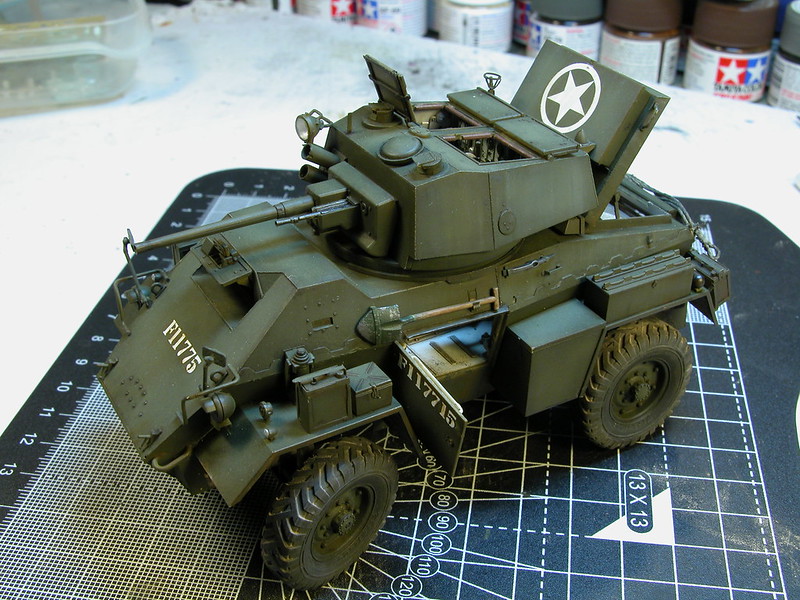 DSCN7051
 by
tankglasgow, on Flickr
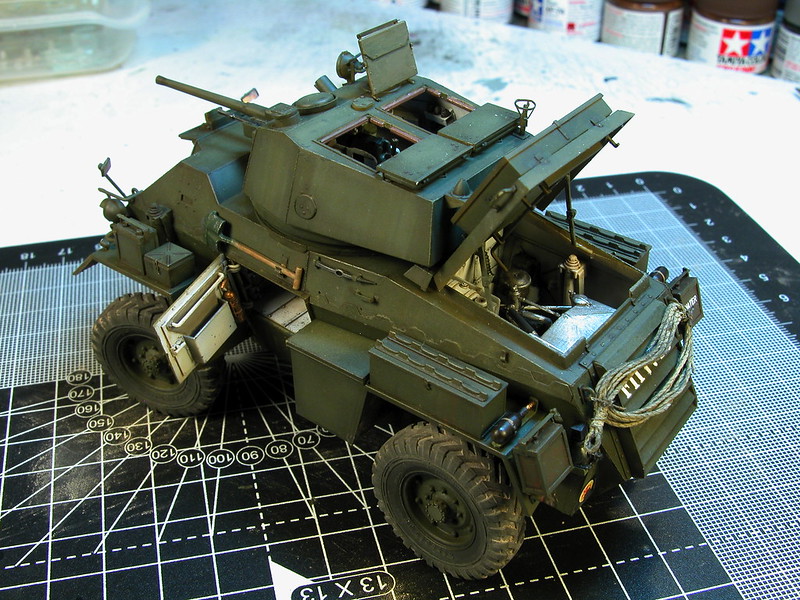 DSCN7055
 by
tankglasgow, on Flickr
 DSCN7054
 by
tankglasgow, on Flickr
Anybody spot the howler of a mistake?
Iowa, United States
Joined: November 06, 2007
KitMaker: 585 posts
Armorama: 557 posts
Posted: Saturday, November 14, 2015 - 05:17 AM UTC
Well, I'm guessing which ever crew member painted that F number, his commander is not going to be pleased.

Apart from that, a very good build.great paintwork and weathering. I have the version of this kit with the additional clear parts but I can't imagine using them, luckily you get the plain plastic parts as well.
My short term memory is getting really bad....and so is my short term memory.
Arizona, United States
Joined: October 20, 2015
KitMaker: 304 posts
Armorama: 293 posts
Posted: Saturday, November 14, 2015 - 04:11 PM UTC
Excellent detail and the paint job is 1st rate.
North Carolina, United States
Joined: March 27, 2005
KitMaker: 56 posts
Armorama: 49 posts
Posted: Thursday, November 19, 2015 - 02:27 AM UTC
Awesome work, what did you use for the SCC15?