

Hi all, I thought I would share what has been my first kit (attempt) since I was about 17.. I am now alas 35!!
A lot has changed, and there are some big firsts for me on this build.... first "upgrades" first photoetch and first airbrushing.
I started this a little while ago, but am re-starting again after a bit of a break... I am here for your advice as there are some things I am not sure about. Mostly painting and weathering! My biggest concern is im going to turn all my work to date to garbage when I start with the painting!
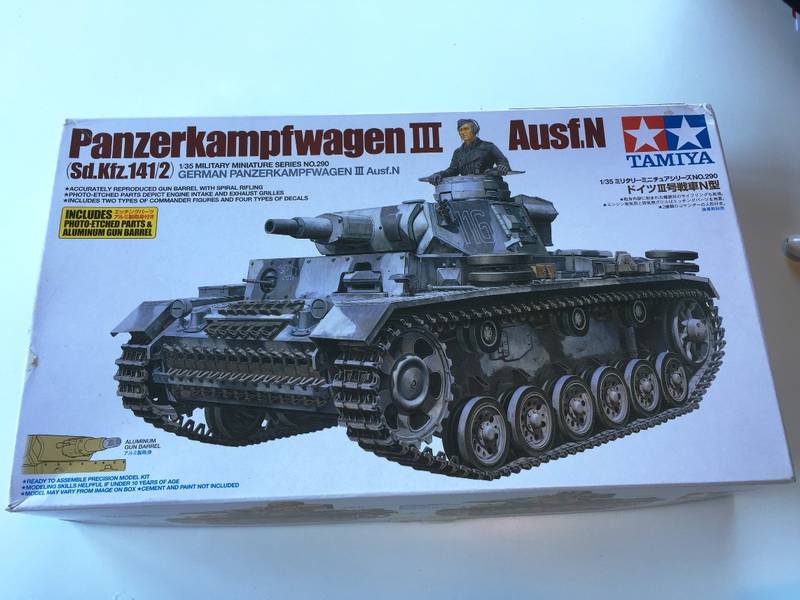
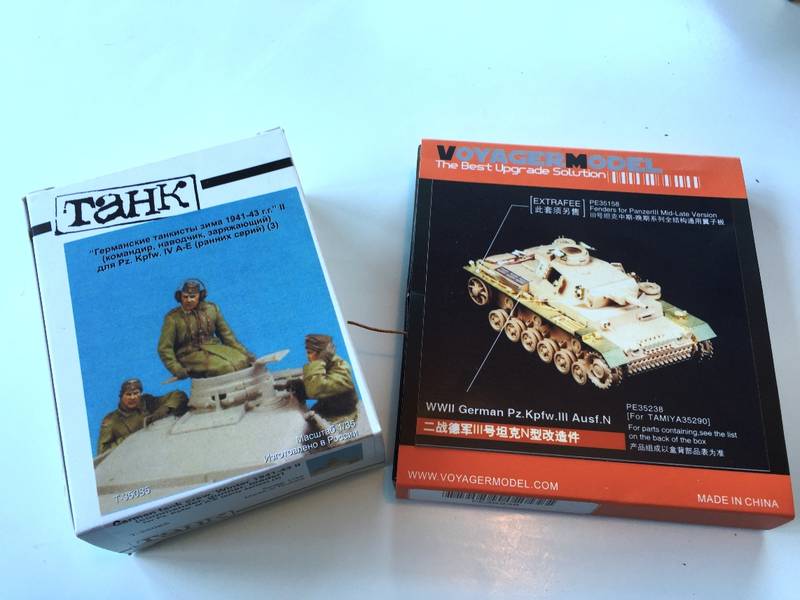
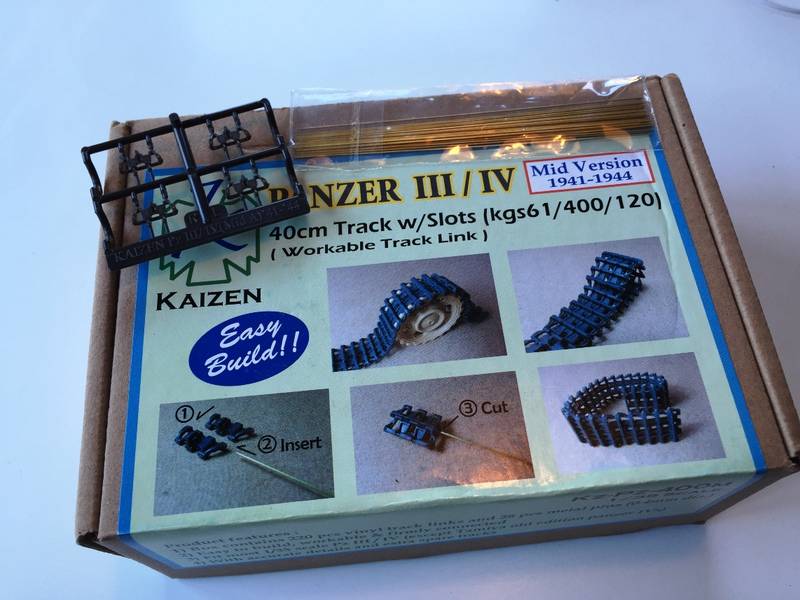
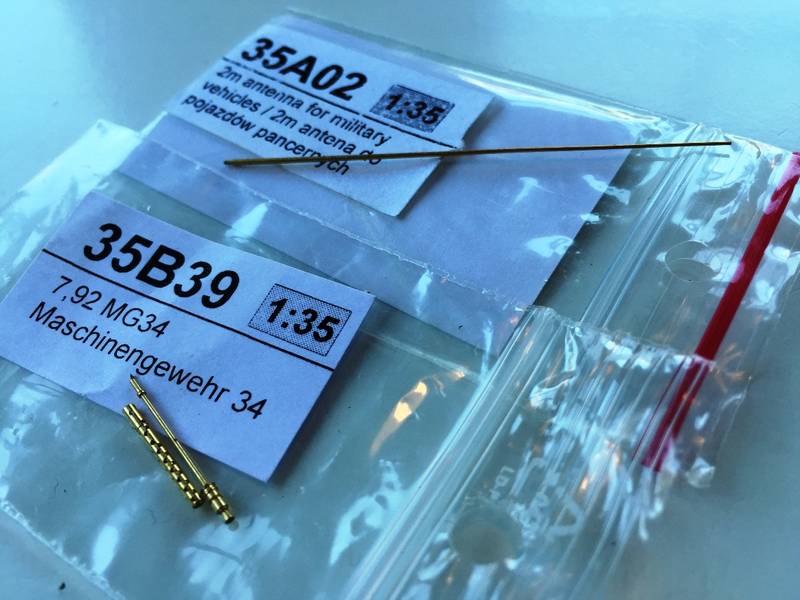
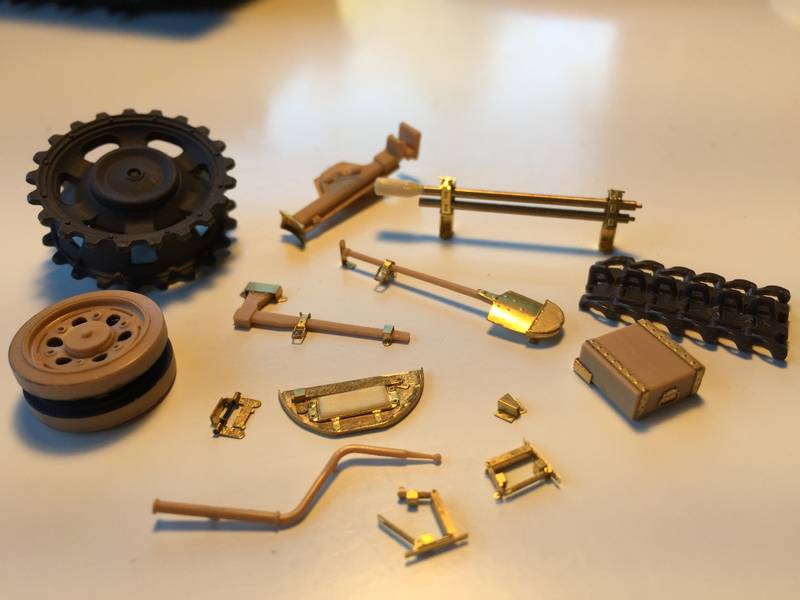
Anyhow basically I have the Tamiya Panzer III Ausf.N kit number 35290.... and wow how things have changed since I last modelled, the kit is a stunner. I also have splashed out on the Voyager PE kit 35238, which also has a bit of resin. The TaNK crew set T-35085, Kaizen individual tracks, and a few other smaller upgrades (including another Voyager photetech skirts kit which I just robbed the front armor for around the drivers hatch from).
please feel free to comment but go easy! When I started I wasn't worried about historical accuracy, but now I think I should be.
I am planning on possibly Dragons Tiger kit 6600 (initial) as a follow up to match this bad boy.
A few photos of the goods will follow shortly.....
Hosted by Darren Baker
Panzer III Ausf.N, fisrt kit in 18 years!

barleeni

Joined: June 12, 2015
KitMaker: 43 posts
Armorama: 43 posts
Posted: Friday, June 12, 2015 - 07:01 AM UTC
Removed by original poster on 06/13/15 - 02:34:29 (GMT).
barleeni
Joined: June 12, 2015
KitMaker: 43 posts
Armorama: 43 posts
Posted: Friday, June 12, 2015 - 07:30 AM UTC
This is what I have started with..... (sorry about the lighting, it is the middle of winter in my dark little house)
barleeni
Joined: June 12, 2015
KitMaker: 43 posts
Armorama: 43 posts
Posted: Friday, June 12, 2015 - 07:47 AM UTC
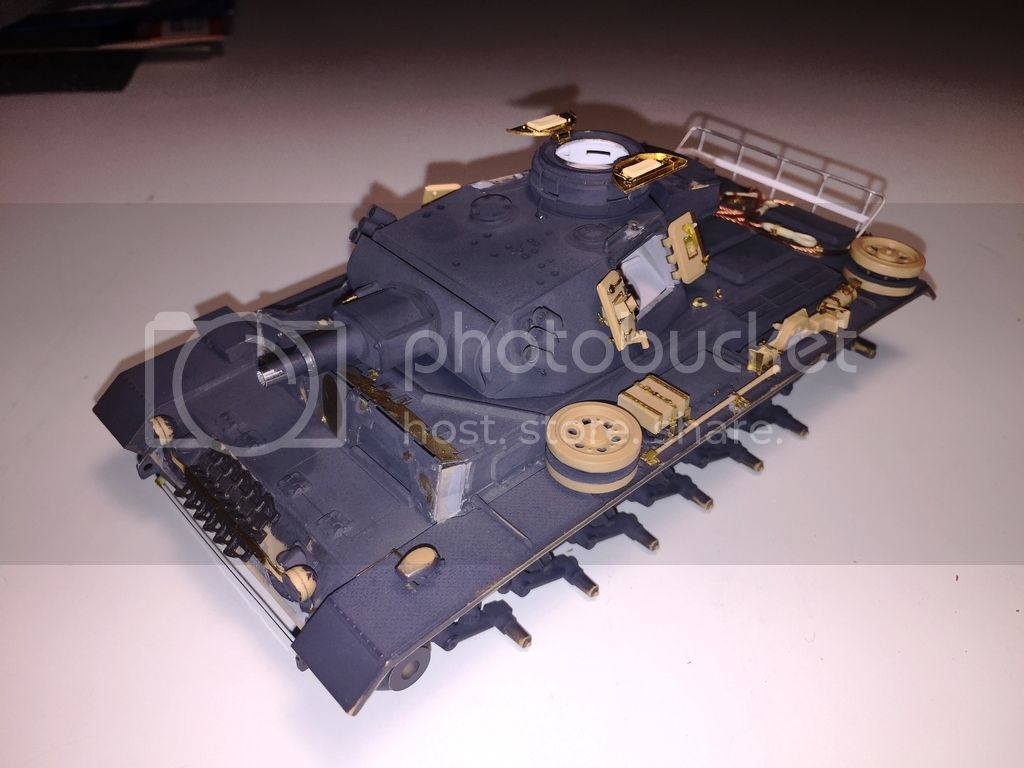
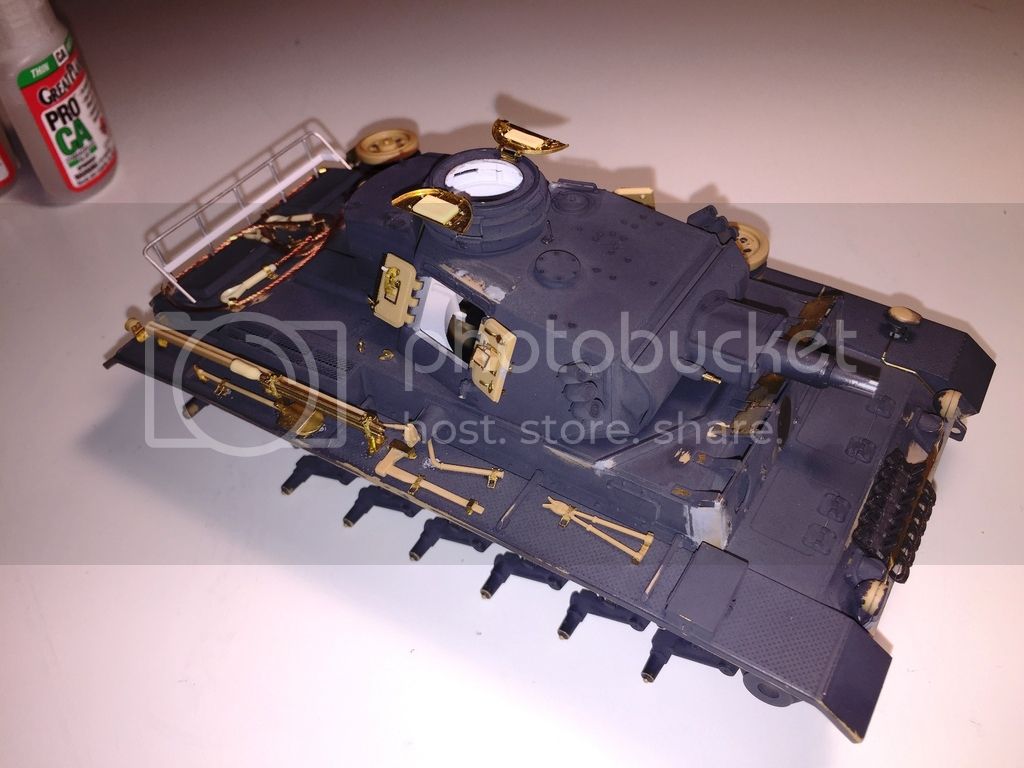
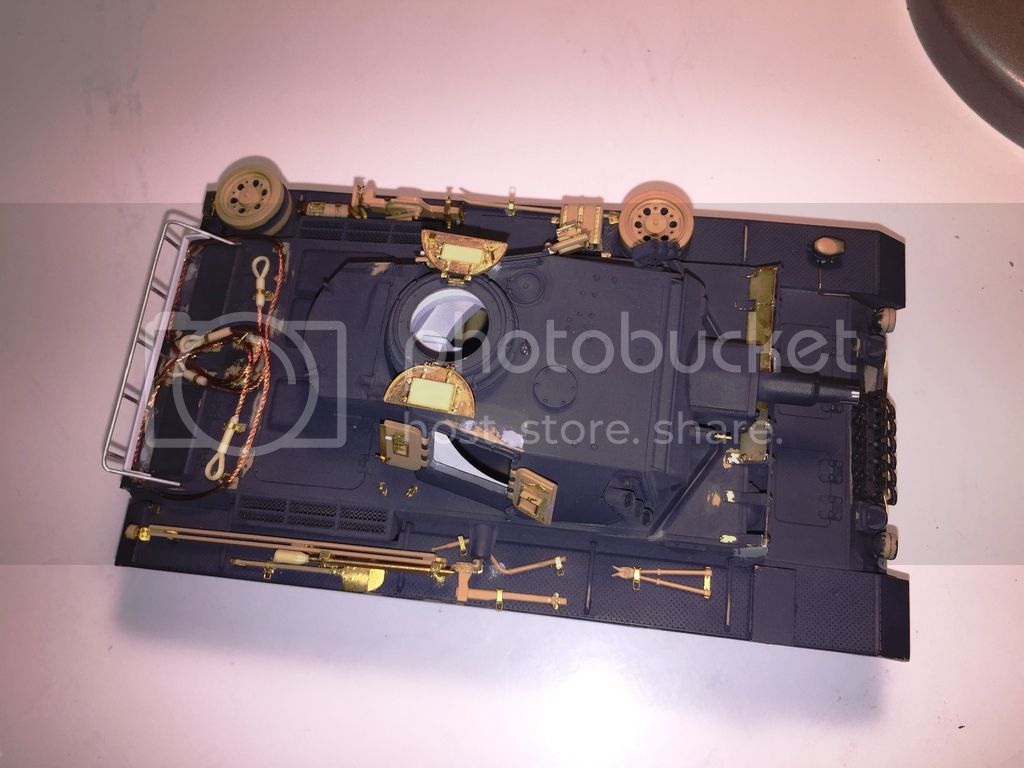
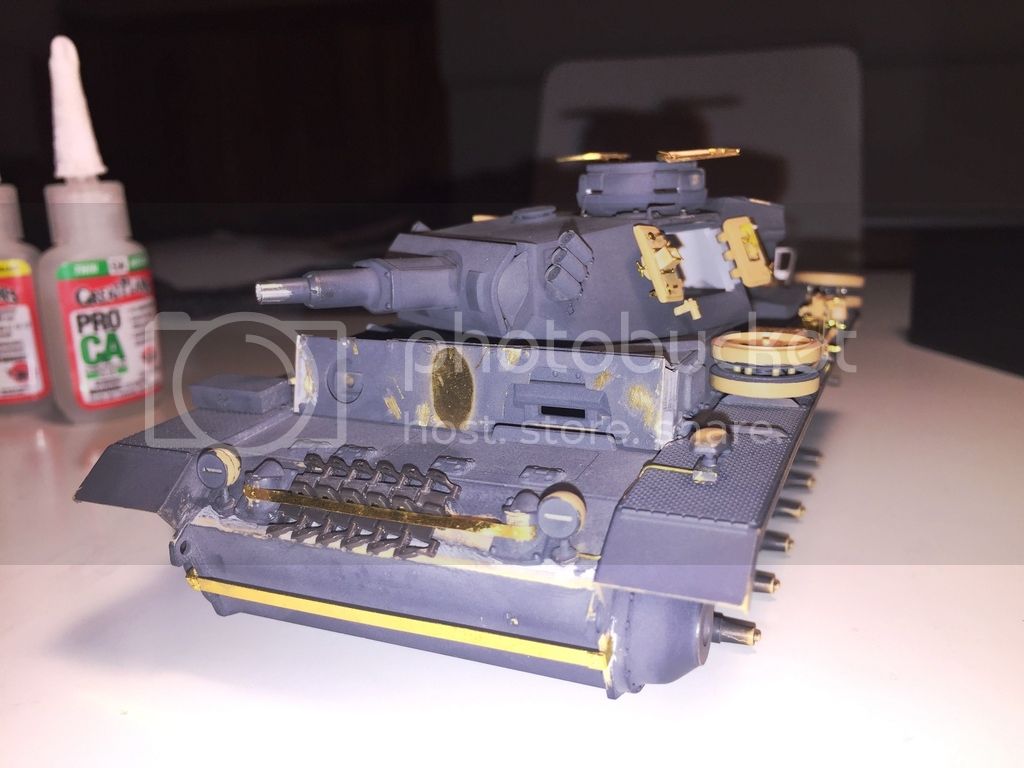
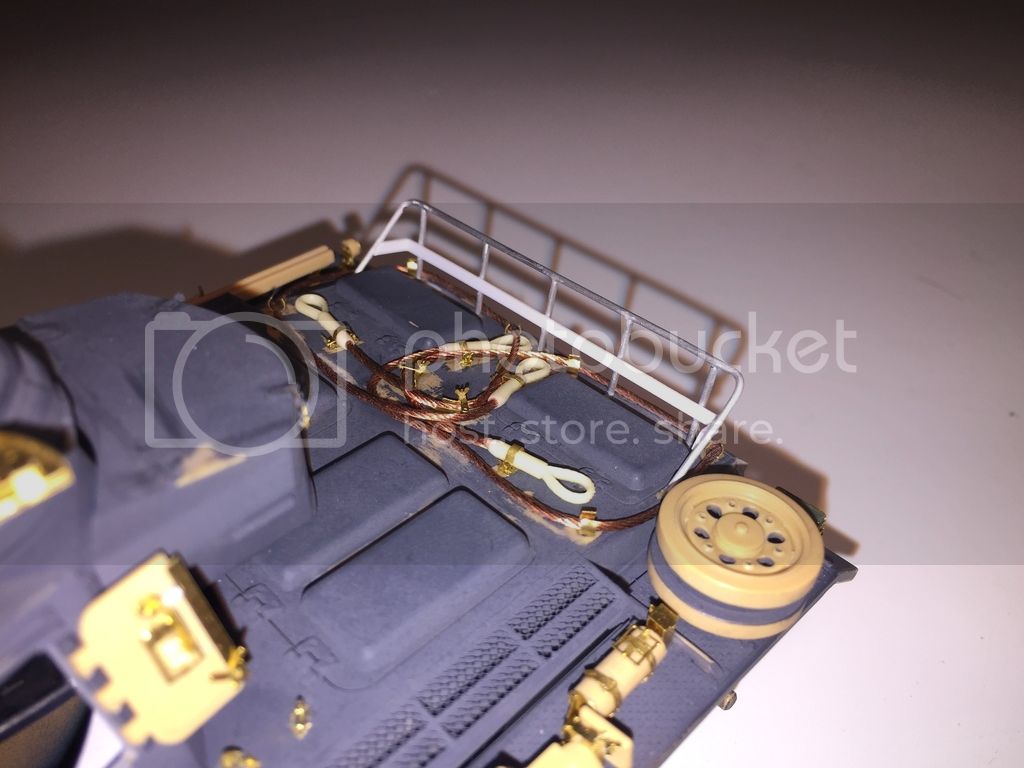
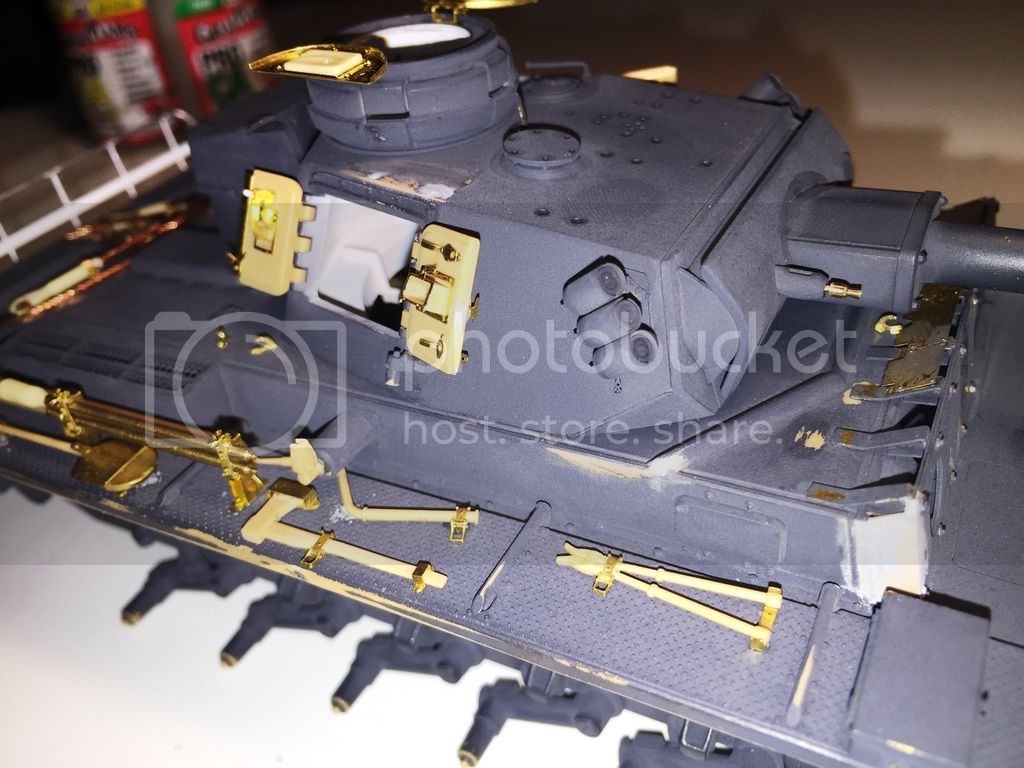
So, as mentioned I have actually made a start and made some good progress. Some photos below of what the current article looks like.
I have made a few mistakes along the way, the first being the grey paint applied. I was initially thinking I would paint the model in full, and then add the tools and other bits and pieces. But I have now decided (I think) that I will fully finish the model, and then paint.
One of the reasons among others is that superglue doesn't stick to paint as I have found (well it does, but sometimes a part would break off after I added it taking a layer of paint with it! as the paint hasn't bonded well with the plastic!!)
Quick question please......... is there a one-stop primer that suits both plastic / resin and photetched parts?
Pics so far:

Cantstopbuyingkits

Joined: January 28, 2015
KitMaker: 2,099 posts
Armorama: 1,920 posts
Posted: Friday, June 12, 2015 - 07:52 AM UTC
Quoted Text
One of the reasons among others is that superglue doesn't stick to paint as I have found (well it does, but sometimes a part would break off after I added it taking a layer of paint with it! as the paint hasn't bonded well with the plastic!!)
Usually the paint on areas of the model you want to apply glue to can be easily re emoted with a light sanding or scraping.
AFVFan

Joined: May 17, 2012
KitMaker: 1,980 posts
Armorama: 1,571 posts
Posted: Friday, June 12, 2015 - 08:09 AM UTC
Just about any kind of primer will work on all three types of material.
Looks like you've done a pretty nice job so far, especially considering you're just getting back in the hobby.
Looks like you've done a pretty nice job so far, especially considering you're just getting back in the hobby.
barleeni
Joined: June 12, 2015
KitMaker: 43 posts
Armorama: 43 posts
Posted: Saturday, June 13, 2015 - 10:15 AM UTC
Hi all, I am planning on painting and marking this model up as tank 116, of the 502 group. This panzer would have fought alongside the very first tiger tanks (one of these tigers is going to be my next project).
I will (god willing) try the hairbrush technique to simulate the winter whitewash on the tank.
Bearing this in mind, does anyone know if the Tamiya kit has any inaccuracies in it in regards to panzer 116? I think the track retaining member on the upper front of the hull is a little incorrect on Tamiya's part, but it has been rectified in the Voyager upgrade kit.
I think I should scratchbuild a fuel can rack on the back, as I have seen one photo of panzer 116 which shows that. I have only ever since 1 photo of panzer 116? (having been destroyed with a corpse hanging from the turret poor sod) does anyone know of any others?
Thanks in advance to anyone who can offer any tips!
p.s. I did a few hours yesterday, not much progress as I was doing some tools, and crikey those tool clasps in photoetch from 4 pieces each are extremely time consuming!

GeraldOwens
Joined: March 30, 2006
KitMaker: 3,736 posts
Armorama: 3,697 posts
Posted: Saturday, June 13, 2015 - 10:35 AM UTC
Quoted Text
Hi all, I am planning on painting and marking this model up as tank 116, of the 502 group. This panzer would have fought alongside the very first tiger tanks (one of these tigers is going to be my next project).
I will (god willing) try the hairbrush technique to simulate the winter whitewash on the tank.
Bearing this in mind, does anyone know if the Tamiya kit has any inaccuracies in it in regards to panzer 116? I think the track retaining member on the upper front of the hull is a little incorrect on Tamiya's part, but it has been rectified in the Voyager upgrade kit.
I think I should scratchbuild a fuel can rack on the back, as I have seen one photo of panzer 116 which shows that. I have only ever since 1 photo of panzer 116? (having been destroyed with a corpse hanging from the turret poor sod) does anyone know of any others?
Thanks in advance to anyone who can offer any tips!
p.s. I did a few hours yesterday, not much progress as I was doing some tools, and crikey those tool clasps in photoetch from 4 pieces each are extremely time consuming!
As I recall, Tamiya still doesn't include the six little tubular struts that link the inner and outer wheels together (the six smaller holes in the face of the wheels are where the tubing was welded). On some tanks, the tubing was open at the ends, while on others, the tubes were closed up with weld bead (I've seen both in preserved vehicles). These struts are hard to see on the running gear, and could be skipped, but they are very apparent on the spare wheels, so be sure to add them there.
barleeni
Joined: June 12, 2015
KitMaker: 43 posts
Armorama: 43 posts
Posted: Saturday, June 13, 2015 - 12:25 PM UTC
Hi Gerald, thanks for that tip. I think I know what you mean, I guess the plan would be to drill out the existing little holes in those wheels from both sides and insert a small length of brass tube? with the tube sitting proud a little bit from the rim face?
Thanks! Ill see if I can give it a go if I can track down some tube of the right size.
Thanks! Ill see if I can give it a go if I can track down some tube of the right size.
GeraldOwens
Joined: March 30, 2006
KitMaker: 3,736 posts
Armorama: 3,697 posts
Posted: Monday, June 15, 2015 - 09:11 AM UTC
Quoted Text
Hi Gerald, thanks for that tip. I think I know what you mean, I guess the plan would be to drill out the existing little holes in those wheels from both sides and insert a small length of brass tube? with the tube sitting proud a little bit from the rim face?
Thanks! Ill see if I can give it a go if I can track down some tube of the right size.
That's a lot of work. I'd just drill the rear wheel and insert a length of styrene rod from behind, and not mess up the nice surface detail of the outer wheel. If you want a hollow opening rather than the closed up type, just drill the center out a little with a pin vise.
barleeni
Joined: June 12, 2015
KitMaker: 43 posts
Armorama: 43 posts
Posted: Sunday, June 21, 2015 - 08:04 AM UTC
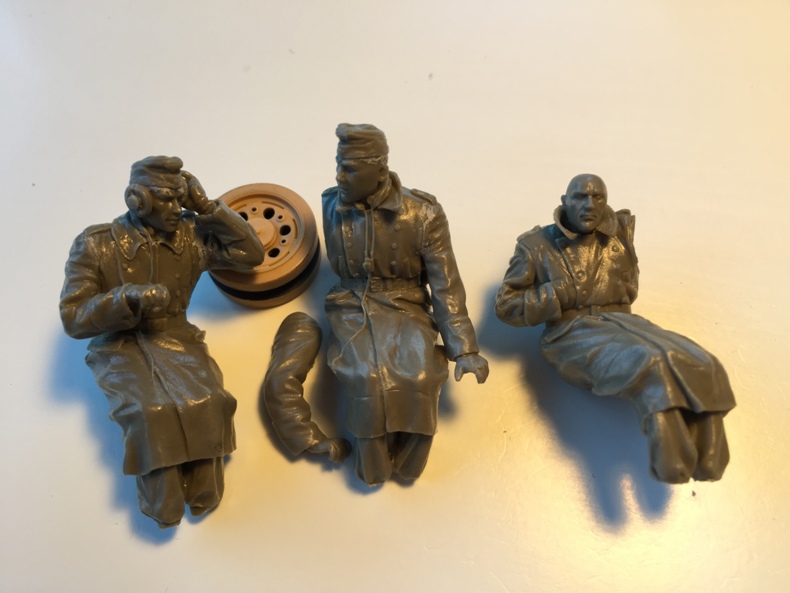
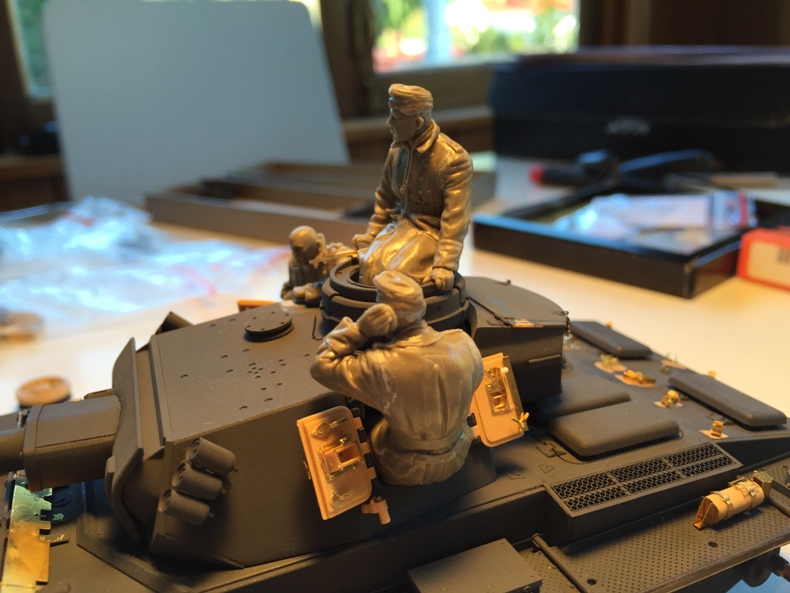
I have done some work on the figures, they are top quality and go together with minimal fuss, just a wee bit of putty here and there, they are all bald so I sculpted a bit of hair onto 2 of the figures. The third figure who is currently bald will have a helmet added after painting.
They are however proving a bit fiddly to fit to the tank. I have had to remove or trim the grab handles on the top of the turret but I'm still having issues with baldies arm position. The commander is a real struggle to fit in amongst the hatch (he should have one arm resting on the edge of the hatch, not somewhere in the middle as currently shown - his right arm is just blu-tacked in place at the moment). Plenty of dry-fitting to come I think!
The TaNK figures come with no instructions etc. etc. so I have no idea what colors to be painting these guys? Any tips................ this is going to Panzer 116, in winter whitewash.
David Bryden is the Tiger Guru.......... who is the Panzer III guru?

Any tips / comments / errors appreciated!
They are however proving a bit fiddly to fit to the tank. I have had to remove or trim the grab handles on the top of the turret but I'm still having issues with baldies arm position. The commander is a real struggle to fit in amongst the hatch (he should have one arm resting on the edge of the hatch, not somewhere in the middle as currently shown - his right arm is just blu-tacked in place at the moment). Plenty of dry-fitting to come I think!
The TaNK figures come with no instructions etc. etc. so I have no idea what colors to be painting these guys? Any tips................ this is going to Panzer 116, in winter whitewash.
David Bryden is the Tiger Guru.......... who is the Panzer III guru?
Any tips / comments / errors appreciated!
barleeni
Joined: June 12, 2015
KitMaker: 43 posts
Armorama: 43 posts
Posted: Sunday, June 21, 2015 - 08:15 AM UTC
Quoted Text
Quoted TextHi Gerald, thanks for that tip. I think I know what you mean, I guess the plan would be to drill out the existing little holes in those wheels from both sides and insert a small length of brass tube? with the tube sitting proud a little bit from the rim face?
Thanks! Ill see if I can give it a go if I can track down some tube of the right size.
That's a lot of work. I'd just drill the rear wheel and insert a length of styrene rod from behind, and not mess up the nice surface detail of the outer wheel. If you want a hollow opening rather than the closed up type, just drill the center out a little with a pin vise.
Thanks Gerald, and done! I'll post a photo of the result soon. I did a bit of a search, and did manage to find 1 cutaway photo showing exactly what you describe. The Tamiya kit reflects the hollow tie rather than solid as you suggest some variants may have been.

PanzerGeek

Joined: February 10, 2008
KitMaker: 221 posts
Armorama: 217 posts

Posted: Monday, June 22, 2015 - 06:54 PM UTC
Looking very good so far David. I have the same kit with the PE set from Voyager. Im doing mine in the desert scheme of Abteilung 501 in Tunisia. Keep up the good work! 

Hohenstaufen

Joined: December 13, 2004
KitMaker: 2,192 posts
Armorama: 1,615 posts

Posted: Tuesday, June 23, 2015 - 09:55 PM UTC
Quoted Text
The TaNK figures come with no instructions etc. etc. so I have no idea what colors to be painting these guys? Any tips................ this is going to Panzer 116, in winter whitewash.
David, tank crew where issued with the same standard greatcoat as any other branch of the Heer, so these guys would be wearing a standard field grey greatcoat, with or without the bottle green collar, your choice. Underneath they are wearing their Black Panzer clothing. Waffenfarbe in a soutache on the caps, and as piping on shoulder straps of greatcoat is rose pink.
barleeni
Joined: June 12, 2015
KitMaker: 43 posts
Armorama: 43 posts
Posted: Thursday, June 25, 2015 - 11:30 AM UTC
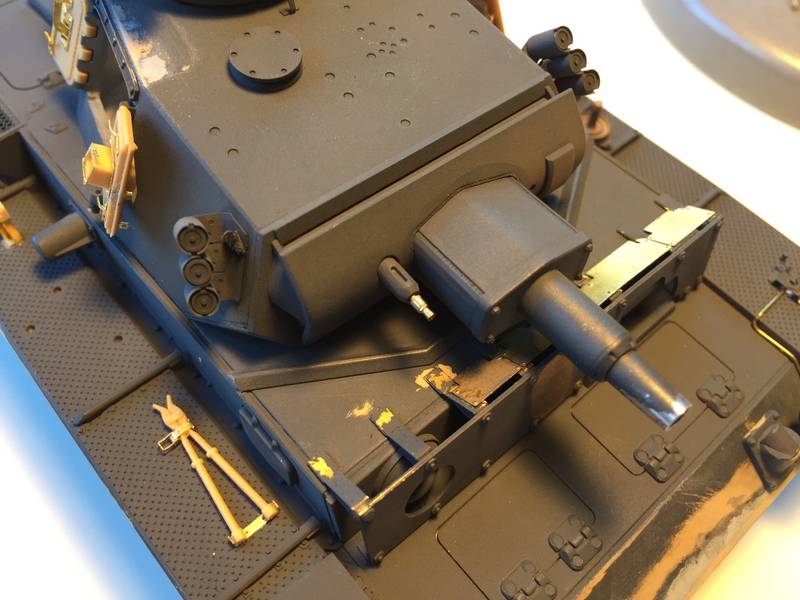
Hi all, progress is going well, I hope to have the hull finished in the next few days, then it will be onto priming it properly. I am about to order Vallejo Grey Primer, and Vallejo Airbrush Thinner to do the priming - hopefully it works well! I also will order at the some time some Vallejo rust pigments, and I am thinking of ordering Vallejo chipping medium as an alternate to the hairbrush technique. Has anyone tried the Vallejo chipping medium? any good?
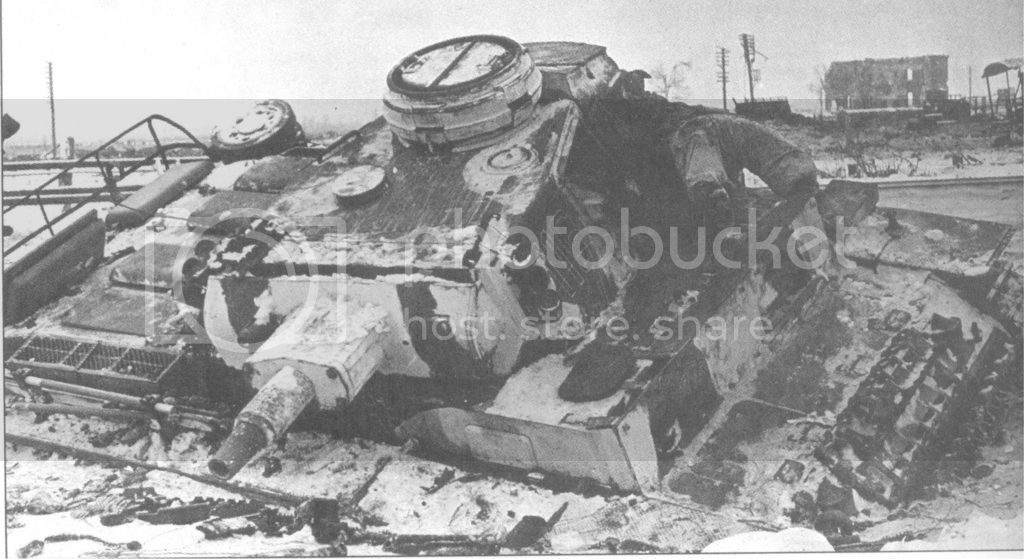
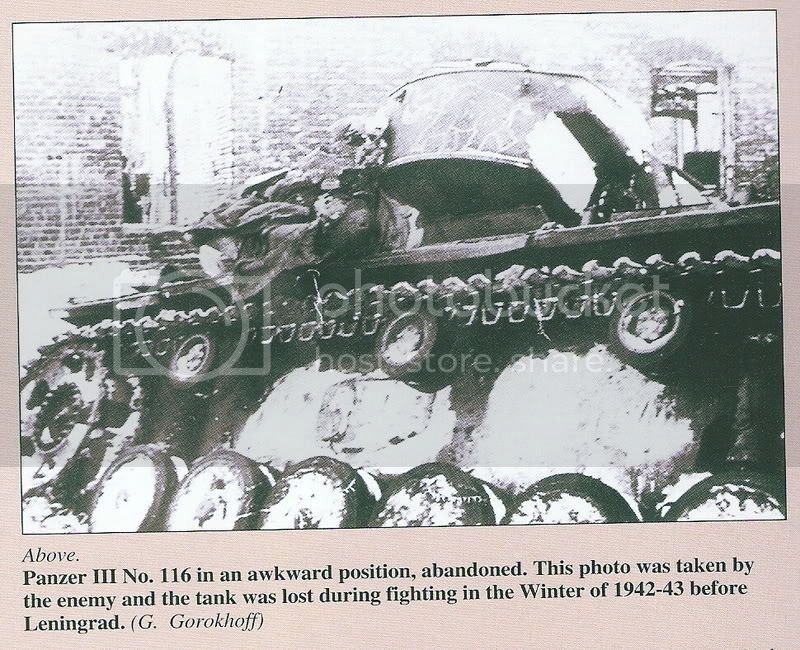
Anyhow, I am putting the final touches on the hull and have been studying these two photos of tank 116 below.
A couple of things have come to my attention:
1) The toolbox at the front on the fender is shown on the left fender in the photos, behind what is left of the Notek light... but Tamiya and Voyager instructions show it on the right fender, which is where I have put it! I guess I should swap it??? or is it easily relocatable in the field? would it have moved around?
2) The rack at the rear.. it looks like it is made from tubular or round bar not flatbar? I will recreate it from... perhaps 0.75mm brass? which would scale to about 25mm round / 1inch material? looks about right to me.
3) I cant really tell, but it looks like there is no deflector in front of the turret? or is it just my eyes (I have added the deflector to my model, should I remove it?)
If anyone has any other material / photos of this particular tank and could share, that would be brilliant!!!


barleeni
Joined: June 12, 2015
KitMaker: 43 posts
Armorama: 43 posts
Posted: Thursday, June 25, 2015 - 11:42 AM UTC
Quoted Text
Looking very good so far David. I have the same kit with the PE set from Voyager. Im doing mine in the desert scheme of Abteilung 501 in Tunisia. Keep up the good work!
Steve, the Tamiya kit is a work of art, and so is the voyager kit! The voyager kit has been a lot of work, but im very impressed. It is very comprehensive, the only things I have done so far outside of the voyager upgrades is to cut off the ends of the exhausts, and replace with brass tube to give a better scale wall thickness of the pipe. I also put some brass wire in for the notek light, and I also got some brass MG barrels.
I do now wonder though if I should have got the Voyager photoetch fenders kit? have you seen it or thought about also getting that?

justsendit
Joined: February 24, 2014
KitMaker: 3,033 posts
Armorama: 2,492 posts
Posted: Thursday, June 25, 2015 - 11:56 AM UTC
Quoted Text
... I am thinking of ordering Vallejo chipping medium as an alternate to the hairbrush technique. Has anyone tried the Vallejo chipping medium? any good?
Hi David,
Ive used it with hit-or-miss results, it does seem to be a little thick ... and I have yet to try hairspray. Im no pro but the general consensus recommends experimenting on a practice piece of Styrene before getting too carried away. You'll find, there are many discussions in the forums on this topic.
Great work so far!
mike
barleeni
Joined: June 12, 2015
KitMaker: 43 posts
Armorama: 43 posts
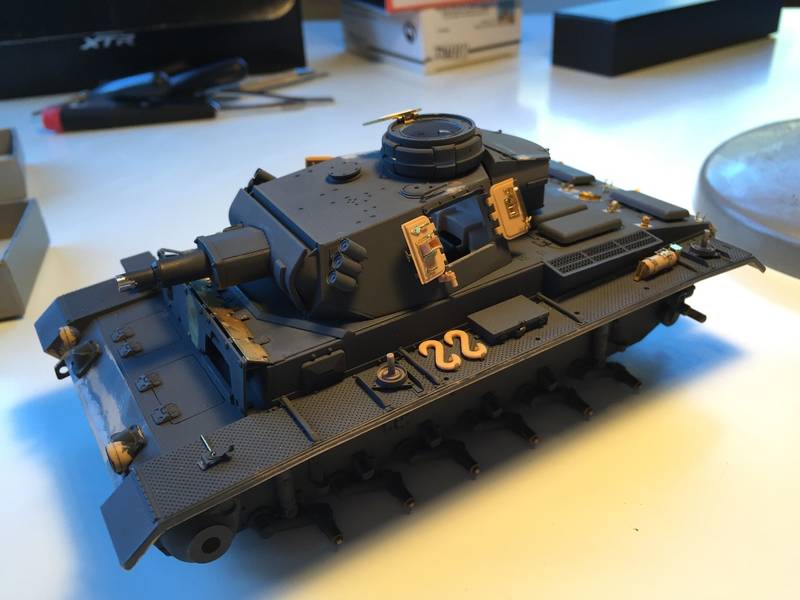
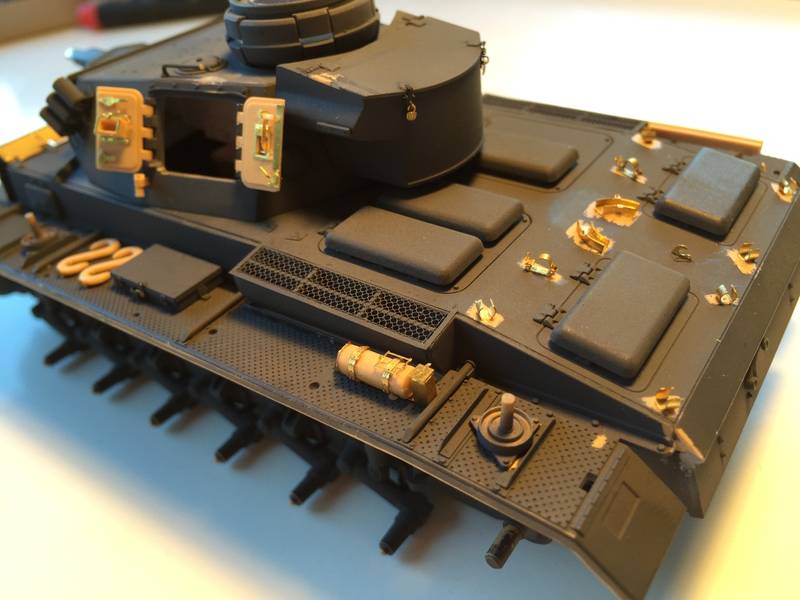
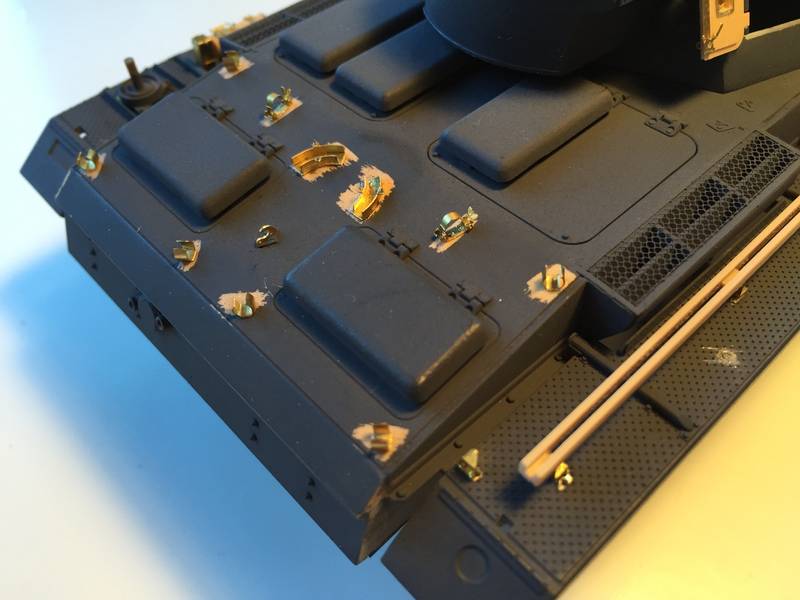
Posted: Saturday, June 27, 2015 - 02:27 PM UTC
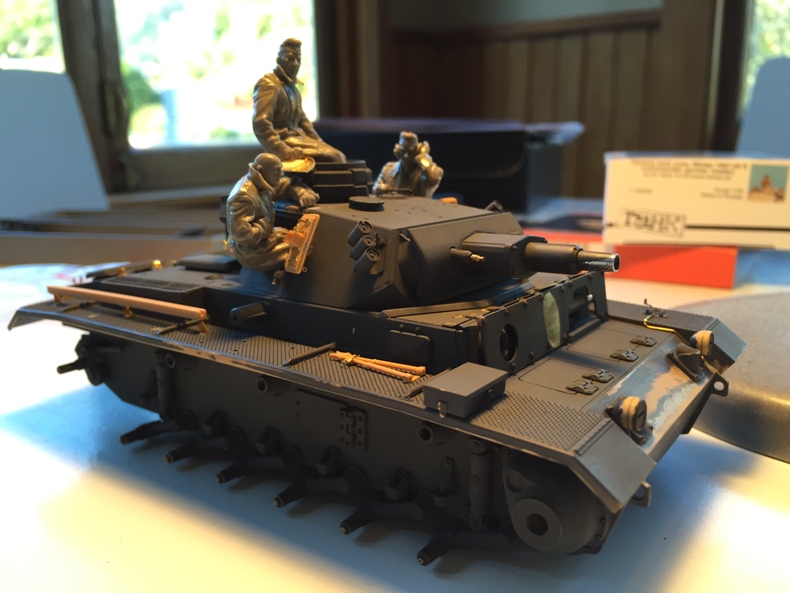
I think im finished with the build of the tank itself. I still have figures to work on though.
I have scratchbuilt the rack at the rear shown in the reference photo, I think it worked out pretty well. At the time I thought using styrene strip for the intermediate member would be ok, but it doesn't look quite right. It will be partially hidden in the end so im not too worried. My local hobby shop had no brass, so I ended up making the rack out of 0.8m aluminium which worked out quite well as it was a bit more flexible and easy to manipulate.
I decided against removing and repositioning the small box on the front of the right fender, as I think removing it would have munted the finish on the mudgaurd beyond repair.
I also added the tubular ties to the spare wheels as recommended by Gerald.
Criticism and comments welcome! if there is anything obviously wrong or that could use improving please let me know!
Next stage will be to finalise the fit of the figures (I think I have to break the commanders arm at his elbow, and rework it to get it fit properly, not looking forward to that!)
Then I think I will give it a good soaking to remove all my dirty greasy fingerpints and then on with the primer.
Photos here (sorry about the lighting!!)


JPTRR

#051

Joined: December 21, 2002
KitMaker: 7,772 posts
Armorama: 2,447 posts
Posted: Saturday, June 27, 2015 - 06:25 PM UTC
Hi David,
Welcome back to modeling! Looks like you've kept up with the hobby.
OK, seriously, are you saying you have not built a model in 18 years? Because your this model looks great, like an old pro is assembling it! Really nice work.
Anyone notice that the tank in the mud, on the back of the turret tool box is painted a rhino or elephant?

Removed by original poster on 05/13/19 - 23:37:03 (GMT).
 |

WEB HOSTING BY


Copyright ©2021 Armorama and Kitmaker Network, a subsidiary of Silver Star Enterprises
All Rights Reserved. Please read our Conditions of Use and Privacy Policy.
All Rights Reserved. Please read our Conditions of Use and Privacy Policy.