Next project: Dragon's jagdpanther
South Australia, Australia
Joined: July 09, 2014
KitMaker: 327 posts
Armorama: 283 posts
Posted: Tuesday, October 27, 2015 - 01:06 PM UTC
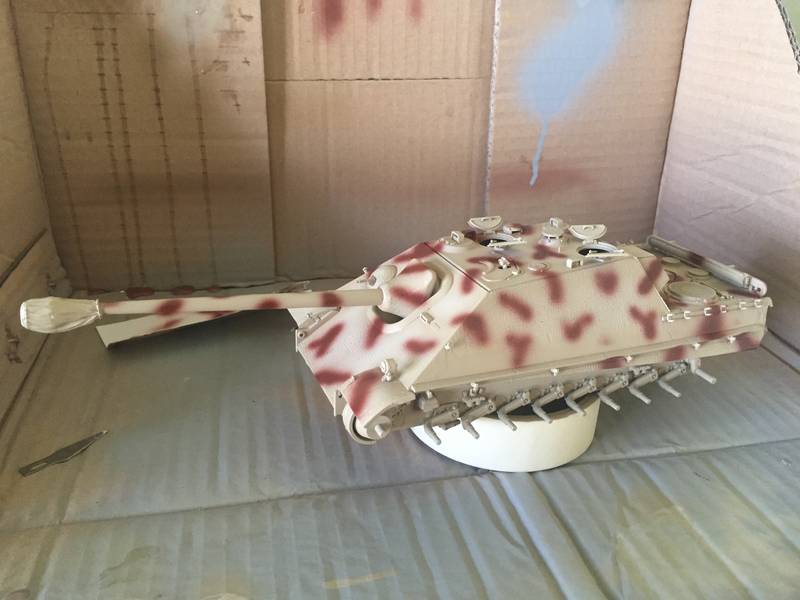
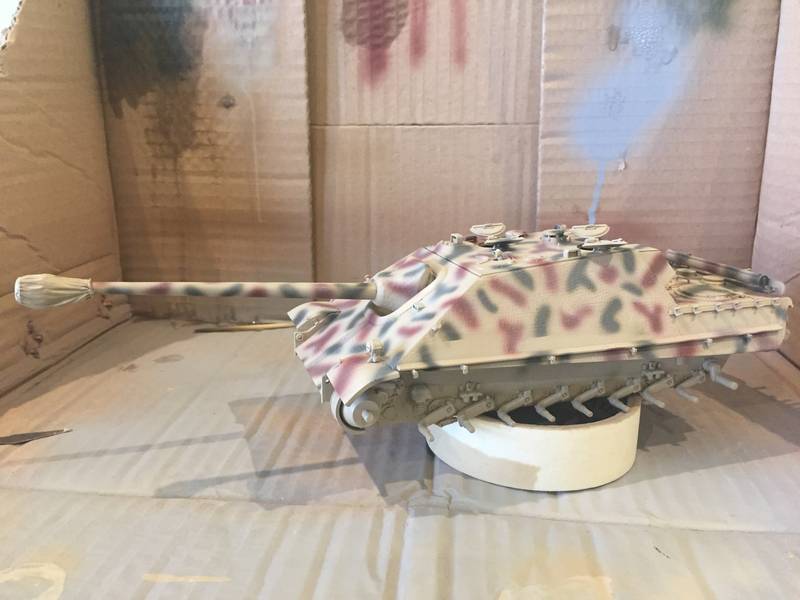
Well here is the camo, I first painted the brown camo, then I done the green. Can't say I enjoyed painting it as I found it hard with to make the shapes of the camo pattern look "natural". Feedback really appreciated
Cheers
Arizona, United States
Joined: October 20, 2015
KitMaker: 304 posts
Armorama: 293 posts
Posted: Tuesday, October 27, 2015 - 04:24 PM UTC
Nik, To a untrained eye the camo looks ok. I am sure some people with more knowledge will be able to help more.
The build is looking nice.
Robert
Oklahoma, United States
Joined: September 30, 2015
KitMaker: 2,493 posts
Armorama: 2,344 posts
Posted: Tuesday, October 27, 2015 - 06:24 PM UTC
I think it looks killer! Great job, keep us updated.
"Only the dead have seen the end of war." - Plato
South Australia, Australia
Joined: July 09, 2014
KitMaker: 327 posts
Armorama: 283 posts
Posted: Wednesday, October 28, 2015 - 01:10 AM UTC
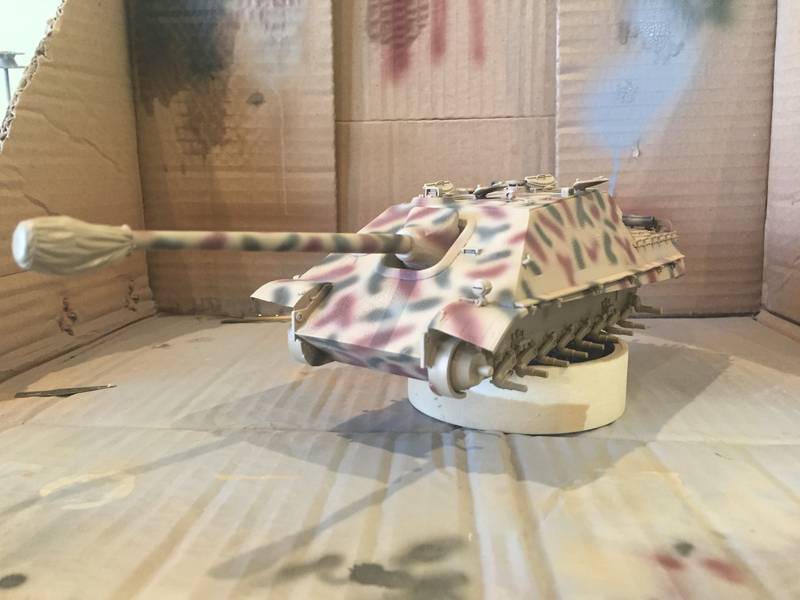
A front view.
Oklahoma, United States
Joined: September 30, 2015
KitMaker: 2,493 posts
Armorama: 2,344 posts
Posted: Wednesday, October 28, 2015 - 01:22 AM UTC
"Only the dead have seen the end of war." - Plato
Queensland, Australia
Joined: October 02, 2008
KitMaker: 658 posts
Armorama: 629 posts
Posted: Wednesday, October 28, 2015 - 04:08 AM UTC
Quoted Text
Ersatz is the German for imitation.
I was close!
South Australia, Australia
Joined: July 09, 2014
KitMaker: 327 posts
Armorama: 283 posts
Posted: Monday, November 02, 2015 - 11:56 AM UTC
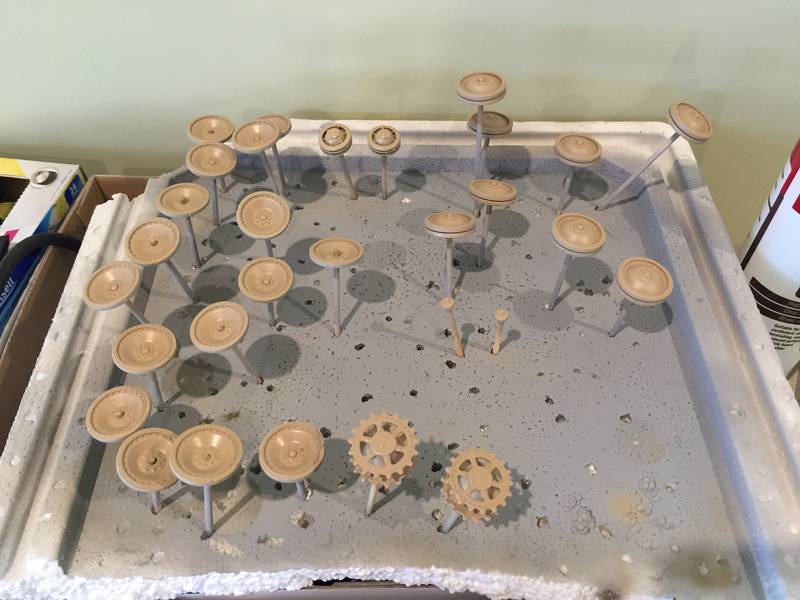
After cleaning up the road wheels and adding minor wear and tear where the ersatz is I primed them with Tamiya surface primer. I have just sprayed them with Mr Hobby h79 (sandy yellow).
I have also primed and sprayed the dragon DS tracks Tamiya burnt iron. Due to my trip to Hawaii in a fortnight I couldn't splash out and get aftermarket metal tracks, but maybe after Hawaii I will.
South Australia, Australia
Joined: July 09, 2014
KitMaker: 327 posts
Armorama: 283 posts
Posted: Sunday, November 08, 2015 - 07:06 AM UTC
Finally, I have all the road wheels on minus the 2 small ones up near the drive sprockets. I wish I bought the quickwheel paint mask for the wheels. I did not enjoy hand painting them at all!!
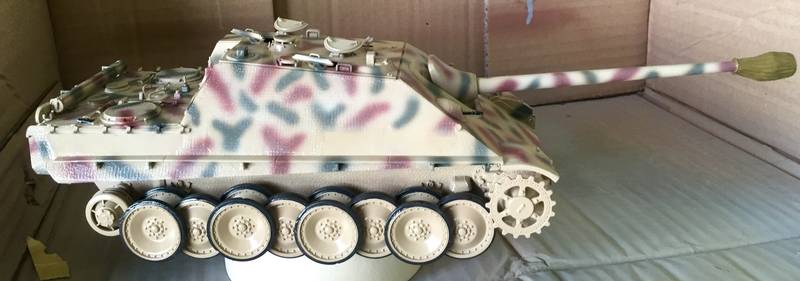
Next I will continue the detail painting, such as tools and the muzzle bag. I have given the whole model a clear coat, but once detail painting is complete it will receive another
Oklahoma, United States
Joined: September 30, 2015
KitMaker: 2,493 posts
Armorama: 2,344 posts
Posted: Sunday, November 08, 2015 - 07:17 AM UTC
Great job! Now I want to build one! Lol
"Only the dead have seen the end of war." - Plato
South Australia, Australia
Joined: July 09, 2014
KitMaker: 327 posts
Armorama: 283 posts
Posted: Sunday, November 08, 2015 - 10:34 AM UTC
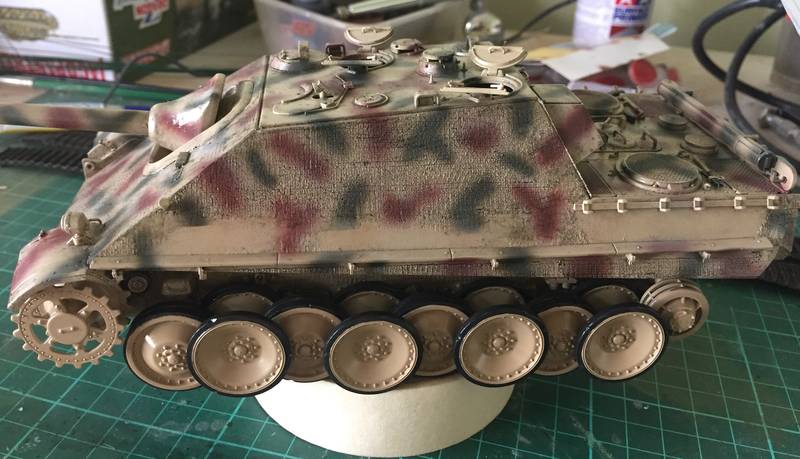
With thanks to a 36C day no detail painting was achieved. Paint dried way to quickly, so I added a wash over the zimmerit to accentuate the texture. This also blends the camouflage so it doesn't look as fresh.
South Australia, Australia
Joined: July 09, 2014
KitMaker: 327 posts
Armorama: 283 posts
Posted: Monday, November 09, 2015 - 02:35 PM UTC
Realising that the kit doesn't come with a range of numbers for many options and variations of tanks I have just ordered some Peddinghaus decals. Wish I ordered these a while ago, as no the project may be held up. Still a bit to do including finishing the detail painting but otherwise I play the waiting game

South Australia, Australia
Joined: July 09, 2014
KitMaker: 327 posts
Armorama: 283 posts
Posted: Sunday, November 15, 2015 - 10:12 AM UTC
Half way through detail painting and I have come to the fire extinguisher. I've read a few posts regarding colours of extinguishers on other vehicles. My question is seeing how 3./654 modified their vehicles from standard configuration of the tool location etc, what colour would the fire extinguisher have been?! Tia

#424
Queensland, Australia
Joined: April 23, 2015
KitMaker: 4,648 posts
Armorama: 2,248 posts
Posted: Sunday, November 15, 2015 - 10:56 AM UTC
"Artillery adds dignity, to what would otherwise be an ugly brawl."
Frederick The Great
South Australia, Australia
Joined: July 09, 2014
KitMaker: 327 posts
Armorama: 283 posts
Posted: Sunday, November 15, 2015 - 11:03 AM UTC
Cheers Gary

thanks for the feedback, it's greatly appreciated. Unfortunately i will have to postpone any further progress for a few weeks from mid week for my venture to Hawaii.
South Australia, Australia
Joined: July 09, 2014
KitMaker: 327 posts
Armorama: 283 posts
Posted: Thursday, December 31, 2015 - 02:47 PM UTC
Been a while since bit of an update. I was waiting for some decals to arrive and they arrived yesterday. I jumped straight back to the table and put them on straight away.
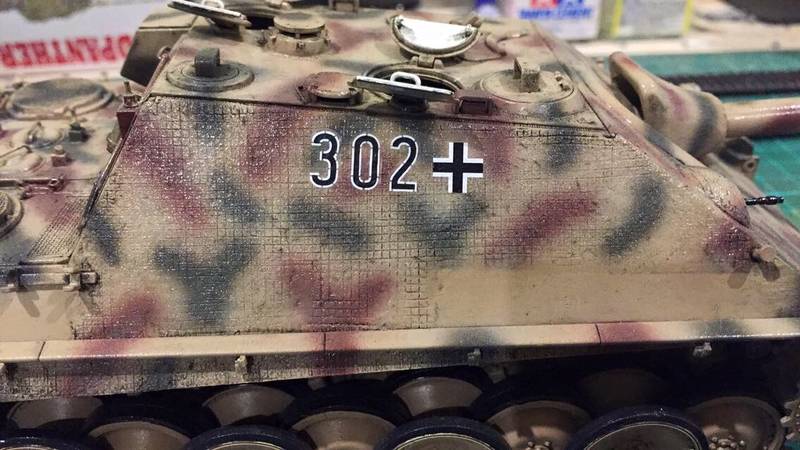
How does this look?! I'm quite happy with the results and to get this project back underway. HAPPY NEW YEAR EVERYONE AND HAPPY MODELLING IN 2016!!

#424
Queensland, Australia
Joined: April 23, 2015
KitMaker: 4,648 posts
Armorama: 2,248 posts
Posted: Thursday, December 31, 2015 - 03:47 PM UTC
I still think it looks great. More pics would be better. Did you say you were doing a dio for this?
"Artillery adds dignity, to what would otherwise be an ugly brawl."
Frederick The Great
South Australia, Australia
Joined: July 09, 2014
KitMaker: 327 posts
Armorama: 283 posts
Posted: Sunday, January 03, 2016 - 05:35 PM UTC
Quoted Text
I still think it looks great. More pics would be better. Did you say you were doing a dio for this?
Hi Gary, the decals are the only update so far. I have just added a flat coat to seal them. On the weekend I will finish the detail painting and I will start the weathering.
Yes the plan is for a dio for this.....eventually. I have two figures for the crew hatches to be made up and painted.
I'm just glad this project is back underway.
South Australia, Australia
Joined: July 09, 2014
KitMaker: 327 posts
Armorama: 283 posts
Posted: Friday, January 15, 2016 - 08:38 AM UTC
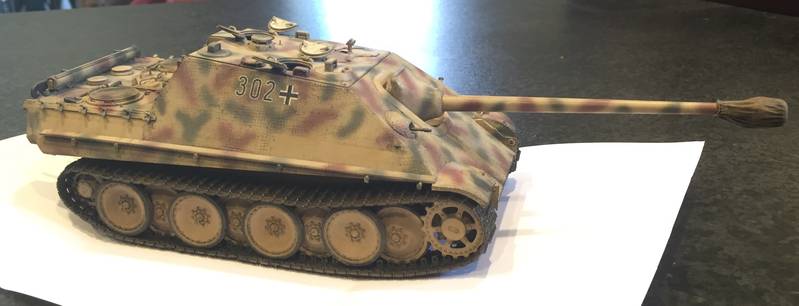
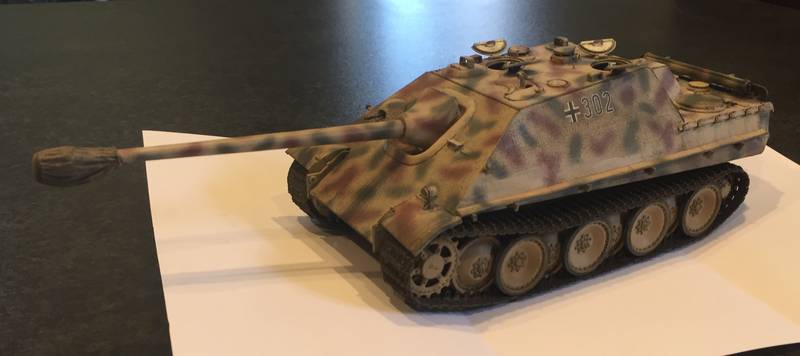
99% complete. Just a few final touches to go including adding the spare track links and the branches to the hull
Oklahoma, United States
Joined: September 30, 2015
KitMaker: 2,493 posts
Armorama: 2,344 posts
Posted: Friday, January 15, 2016 - 08:46 AM UTC
"Only the dead have seen the end of war." - Plato
Pennsylvania, United States
Joined: April 09, 2015
KitMaker: 1,063 posts
Armorama: 1,000 posts
Posted: Friday, January 15, 2016 - 08:48 AM UTC
Shaping up very nicely. Good looking zim. Looks a bit dark for my taste but it could just be the lighting.
"No plan survives contact with the enemy." Helmuth von Moltke the Elder
South Australia, Australia
Joined: July 09, 2014
KitMaker: 327 posts
Armorama: 283 posts
Posted: Friday, January 15, 2016 - 09:48 AM UTC
Quoted Text
Shaping up very nicely. Good looking zim. Looks a bit dark for my taste but it could just be the lighting.
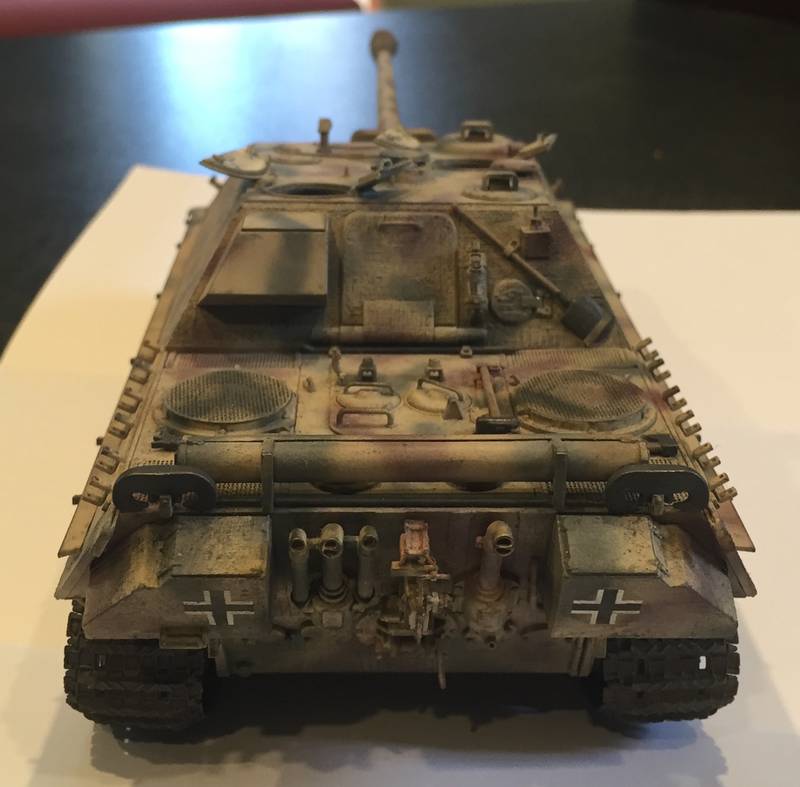
Yeah it is poor lighting. It is actually very subtle. I only use my iPhone camera and the ceiling lights for photos. Once it's 100% complete I will try to get some better photos
South Australia, Australia
Joined: July 09, 2014
KitMaker: 327 posts
Armorama: 283 posts
Posted: Friday, January 15, 2016 - 09:50 AM UTC
One more

#424
Queensland, Australia
Joined: April 23, 2015
KitMaker: 4,648 posts
Armorama: 2,248 posts
Posted: Friday, January 15, 2016 - 10:08 AM UTC
Looks great, Nick. I do most of my 'completed' photos atop my barbi.
Cheers,
Gary
"Artillery adds dignity, to what would otherwise be an ugly brawl."
Frederick The Great
South Australia, Australia
Joined: July 09, 2014
KitMaker: 327 posts
Armorama: 283 posts
Posted: Saturday, January 16, 2016 - 10:33 AM UTC
Quoted Text
Looks great, Nick. I do most of my 'completed' photos atop my barbi.
Cheers,
Gary
Hopefully not while you are cooking dinner at the same time lol
South Australia, Australia
Joined: July 09, 2014
KitMaker: 327 posts
Armorama: 283 posts
Posted: Tuesday, October 10, 2017 - 07:33 AM UTC
Well 18 months after my last post in here i have finally finished the 2 figures for the jagdpanther. I still need to add some foliage as per the original pic.


Thoughts and feedback most welcome


 thanks for the feedback, it's greatly appreciated. Unfortunately i will have to postpone any further progress for a few weeks from mid week for my venture to Hawaii.


