England - South East, United Kingdom
Joined: March 05, 2016
KitMaker: 34 posts
Armorama: 28 posts
Posted: Monday, April 04, 2016 - 10:06 PM UTC
Signing up with one of these

Should be nice & quick and will make me learn winter camo and some snow.
New York, United States
Joined: June 19, 2015
KitMaker: 74 posts
Armorama: 70 posts
Posted: Wednesday, April 06, 2016 - 01:53 AM UTC
Rhode Island, United States
Joined: December 08, 2002
KitMaker: 833 posts
Armorama: 601 posts
Posted: Wednesday, April 06, 2016 - 08:20 AM UTC
Took care of the lower hull and wheels tonight. All primed and ready for paint. So far so good.

----Nothing is "idiot proof" because they will always build a better idiot.------
----Never try to teach a pig to whistle. It wastes your time and it annoys the pig.----

#460
California, United States
Joined: September 16, 2014
KitMaker: 1,156 posts
Armorama: 1,024 posts
Posted: Thursday, April 07, 2016 - 02:58 AM UTC
What great builds here! I hesitate to join in with my more modest effort but will just the same. I have a Tamiya Churchill that I have wanted to build for some years. I had in mind building a Korean War version and had seen some pictures of them there. I found some AM decals for a Korean tank and a few weeks ago started in
Before I got too far along I noticed in the research material that the Crocodile models used in Korea as gun tanks can't be built with this Tamiya kit. OK, this one will be a WW2 model and a Crocodile kit was swapped with a pal.
The next blunder I made was to mistake Tamiya "British Green" for the Tamiya "Dark Green" needed for this tank. I had not intended to build a 1960s F1 racing tank but that is what it looked like!
It has now been repainted and it waiting for gloss & decals.
Here are some pics of the racing Churchill:
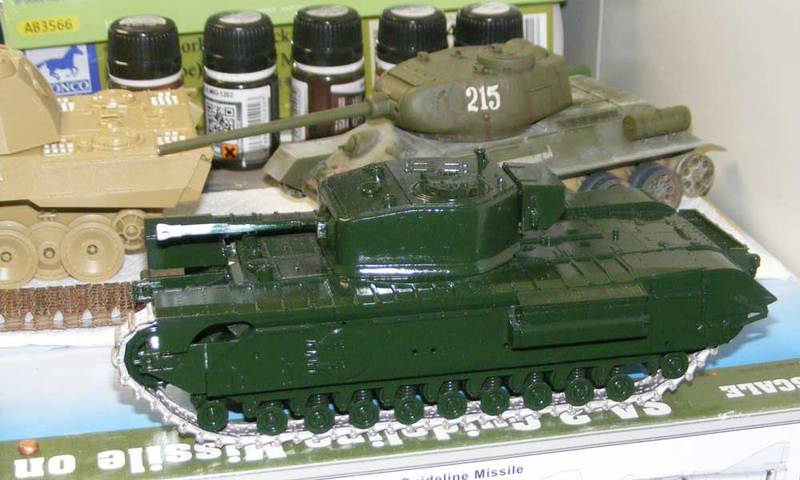
I have to admit that I was tempted to paint a yellow racing stripe and to paint the wheels yellow . . .
Vintage Paul
I'd happily live in the past but for air conditioning, the internet, mobile phones, modern medicine & dentistry and, and, and . . .
Namabiiru
 Associate Editor
#399
Rhode Island, United States
Joined: March 05, 2014
KitMaker: 2,888 posts
Armorama: 1,920 posts
Posted: Thursday, April 07, 2016 - 06:33 PM UTC
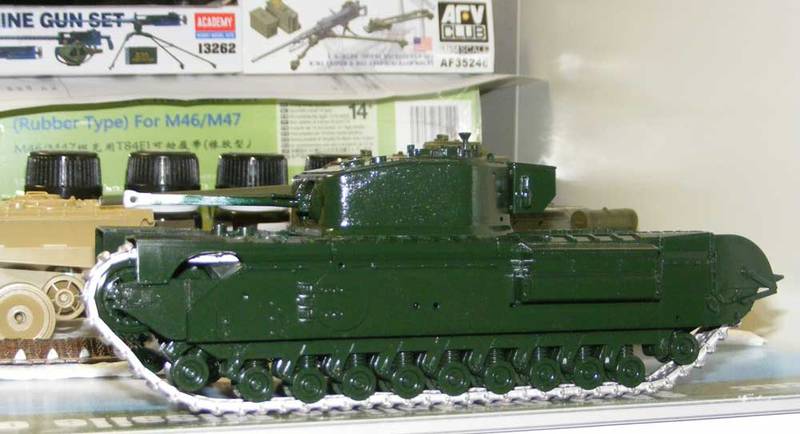
The paint job alone has got to add another 2-3kph to the max speed....


#460
California, United States
Joined: September 16, 2014
KitMaker: 1,156 posts
Armorama: 1,024 posts
Posted: Friday, April 08, 2016 - 03:16 AM UTC
Quoted Text
The paint job alone has got to add another 2-3kph to the max speed....
This is especially funny as the Churchill would have been in the running for the slowest tank of WW2. One of the books mentioned the early versions managed 18 mph and the later versions with added armor only got up to 13 mph.
Vintage Paul
I'd happily live in the past but for air conditioning, the internet, mobile phones, modern medicine & dentistry and, and, and . . .
Spain / España
Joined: November 18, 2004
KitMaker: 456 posts
Armorama: 333 posts
Posted: Saturday, April 09, 2016 - 12:17 AM UTC
Hi guys,
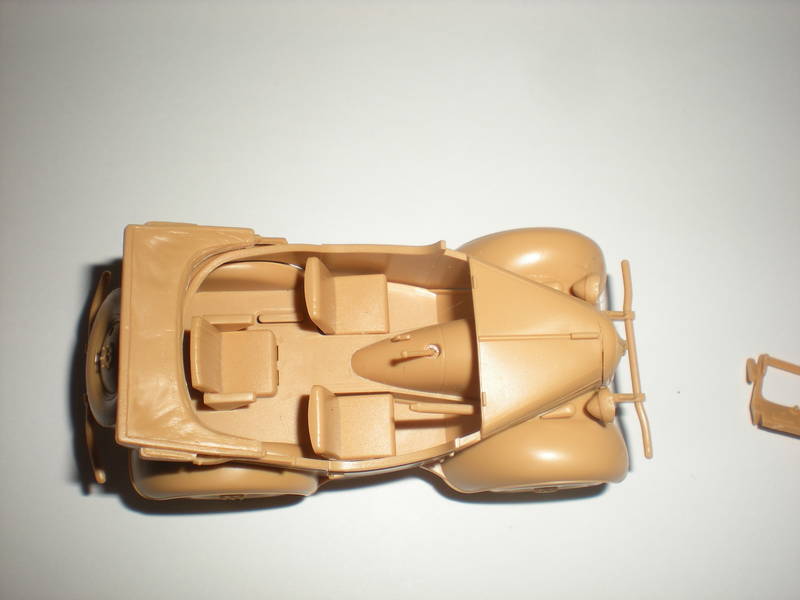
My entrance for the campaign will be a Sd.Kfz.222.
As you can see I keep several kits in one box and in order to do so I keep most of the pieces cut from the sprue but without any clean up done.

Since they ask for the original box I looked for the original box which right now I use to keep my oil paints.

Best regards,
Angel
#123
New Mexico, United States
Joined: November 17, 2008
KitMaker: 1,202 posts
Armorama: 635 posts
Posted: Saturday, April 09, 2016 - 05:28 AM UTC
Howdy Y'all

I'm just about done with the construction phase. I dry fitted the parts and I'm worried there's going to be a nasty gap or two trying to attach the body to the chassis. Everything is looking very simplified so I hope it comes out looking decent.
Take care,
Don "Lakota"
Working on Campaigns:
1/72 Hasegawa Ki-84 Frank
1/144 Dragon Armor
Rhode Island, United States
Joined: December 08, 2002
KitMaker: 833 posts
Armorama: 601 posts
Posted: Saturday, April 09, 2016 - 09:05 AM UTC
Some sub assemblies, machine gun, main gun holder and smoke screen units.

Main gun and commanders cupola.

----Nothing is "idiot proof" because they will always build a better idiot.------
----Never try to teach a pig to whistle. It wastes your time and it annoys the pig.----
#011
Jerusalem, Israel
Joined: February 06, 2009
KitMaker: 1,507 posts
Armorama: 1,304 posts
Posted: Saturday, April 09, 2016 - 07:44 PM UTC
Good, I've been searching for an excuse to get their Matilda kit (again) to replace the one I have (which is now broken

)
George: "If we do happen to step on a mine, Sir, what do we do ?"
Blackadder: "Normal procedure, Lieutenant, is to jump 200 feet in the air and scatter oneself over a wide area."
United States
Joined: August 28, 2015
KitMaker: 319 posts
Armorama: 308 posts
Posted: Monday, April 11, 2016 - 05:10 AM UTC
#123
New Mexico, United States
Joined: November 17, 2008
KitMaker: 1,202 posts
Armorama: 635 posts
Posted: Monday, April 11, 2016 - 05:34 AM UTC
Howdy Brian
You've got a nice build going on so far. Is the photo-etch included in the kit? The extra stowage looks great. Do have anything to put between the rear tarp and the rear hull to hide the gap? If not, don't worry; everything is looking good.
Take care,
Don "Lakota"
Working on Campaigns:
1/72 Hasegawa Ki-84 Frank
1/144 Dragon Armor
United States
Joined: August 28, 2015
KitMaker: 319 posts
Armorama: 308 posts
Posted: Monday, April 11, 2016 - 05:50 AM UTC
Hi Lakots!
Concerning the gap, I believe there is a space present between the hull and folding stowage bin on the real M-51. I will check references, if not I have a bunch of resin stowage to spread around the deck. In the photos of M-51s during the 6 Days War they are COVERED in stowage/cargo so I will probably add a bunch more stuff. The photo etch is an add on from Legend Productions and honestly I really don't know if it was worth it. I'm glad I got it to improve my skills but between work, the remodel, two young kids, and the wife... it was just frustrating! I think it will be worth it in the end though. I feel 80%+ of the photo etch parts are replacing plastic kit parts that look just fine. Thanks for commenting! Hope your build is going well. Really looking forward to watching everyone's build progress. There are some really nice builds going on!
Rhode Island, United States
Joined: December 08, 2002
KitMaker: 833 posts
Armorama: 601 posts
Posted: Monday, April 11, 2016 - 07:05 AM UTC
Hull put together and turret done as well.

----Nothing is "idiot proof" because they will always build a better idiot.------
----Never try to teach a pig to whistle. It wastes your time and it annoys the pig.----
Rhode Island, United States
Joined: December 08, 2002
KitMaker: 833 posts
Armorama: 601 posts
Posted: Thursday, April 14, 2016 - 07:33 AM UTC
Main paint is on now for the detail work.

----Nothing is "idiot proof" because they will always build a better idiot.------
----Never try to teach a pig to whistle. It wastes your time and it annoys the pig.----
New York, United States
Joined: June 19, 2015
KitMaker: 74 posts
Armorama: 70 posts
Posted: Monday, April 18, 2016 - 08:54 PM UTC
Rhode Island, United States
Joined: December 08, 2002
KitMaker: 833 posts
Armorama: 601 posts
Posted: Saturday, April 23, 2016 - 01:07 AM UTC
----Nothing is "idiot proof" because they will always build a better idiot.------
----Never try to teach a pig to whistle. It wastes your time and it annoys the pig.----
#123
New Mexico, United States
Joined: November 17, 2008
KitMaker: 1,202 posts
Armorama: 635 posts
Posted: Saturday, April 23, 2016 - 02:04 AM UTC
Brian,
I feel your pain. I'm a kitchen table builder myself due to the kids and wife. I'm trying to sell a lot of my models to downsize and to tell the truth, the out of box builds using the latest Tamiya kits are just fine for me.
Keep on building.
Don "Lakota"
Working on Campaigns:
1/72 Hasegawa Ki-84 Frank
1/144 Dragon Armor
New York, United States
Joined: June 19, 2015
KitMaker: 74 posts
Armorama: 70 posts
Posted: Sunday, April 24, 2016 - 07:12 PM UTC
Monte,
i am really digging the camo colors. Looks sharp.
I love waiting for parts

United States
Joined: August 28, 2015
KitMaker: 319 posts
Armorama: 308 posts
Posted: Sunday, April 24, 2016 - 07:38 PM UTC
Monte, That JDF tank is looking great. I can't wait to see it after you finish your washes and dry brushing. What tracks did you order? You did a great job applying the cammo pattern. My next tank is an AMX 30B2 for the Fighting Frogs campaign and it will be my first AFV with a cammo pattern, all the others have been green! Hope I can get my pattern to look that good.
I will have an update soon on my M51. I managed to find a little time for modelling over the last couple days.

Rhode Island, United States
Joined: December 08, 2002
KitMaker: 833 posts
Armorama: 601 posts
Posted: Sunday, April 24, 2016 - 09:10 PM UTC
Quoted Text
What tracks did you order?
Thanks Stephen
Bryan, I ordered a set of Model Kasten tracks for it. They're the only game in town if you want after market tracks. And even they were a pain in the butt to find. I was going to keep the whole tank OOB, sort of for an old nostalgic feeling, but the tracks are just horrible so also went on and used actual wire for the tow cable. Other than that the rest of the kit is stock.
----Nothing is "idiot proof" because they will always build a better idiot.------
----Never try to teach a pig to whistle. It wastes your time and it annoys the pig.----
United States
Joined: August 28, 2015
KitMaker: 319 posts
Armorama: 308 posts
Posted: Monday, April 25, 2016 - 01:13 AM UTC
I see a lot of "actual wire" sets available online for specific models but then I was at Home Depot the other day and noticed picture hanging wire looked a lot like small scale cable. Is this what people are using in place of the kit "string" or kit specific sets which seem expensive for what they are? Or is there another economical product that resembles real cable that people are using, maybe a braided lead wire?
I am waiting on some tracks for my Panzer III L. from MasterClub right now. Any experience with this manufacturer? Read some good reviews.
Tank looks great!
Bryan
Rhode Island, United States
Joined: December 08, 2002
KitMaker: 833 posts
Armorama: 601 posts
Posted: Monday, April 25, 2016 - 01:40 AM UTC
Quoted Text
I see a lot of "actual wire" sets available online for specific models but then I was at Home Depot the other day and noticed picture hanging wire looked a lot like small scale cable. Is this what people are using in place of the kit "string" or kit specific sets which seem expensive for what they are? Or is there another economical product that resembles real cable that people are using, maybe a braided lead wire?
I am waiting on some tracks for my Panzer III L. from MasterClub right now. Any experience with this manufacturer? Read some good reviews.
Tank looks great!
Bryan
You got it Bryan. Picture hanging wire, guitar strings (metal of course)or in lots of cases I use wire from old electronics that are being thrown out. I just save a bunch of different gauge wire and just strip the coating off as I need it. And since most of that is already braided you can break that down to make earphone and mic cables for figures and use others to wire radios.
----Nothing is "idiot proof" because they will always build a better idiot.------
----Never try to teach a pig to whistle. It wastes your time and it annoys the pig.----
New York, United States
Joined: June 19, 2015
KitMaker: 74 posts
Armorama: 70 posts
Posted: Wednesday, April 27, 2016 - 10:06 PM UTC
Rhode Island, United States
Joined: December 08, 2002
KitMaker: 833 posts
Armorama: 601 posts
Posted: Thursday, April 28, 2016 - 02:14 AM UTC
Well done Stephen. I love the tank crew sitting around the tank BS'ing. Who's figures are they?
----Nothing is "idiot proof" because they will always build a better idiot.------
----Never try to teach a pig to whistle. It wastes your time and it annoys the pig.----


