

Nice progress, Brent. Looks to be another awesome build by you.
Ernest, superb finish on the wing surfaces. How do you do this? It looks fantastic.
Campaigns
Where Armorama group builds can be discussed, organized, and updates posted.
Where Armorama group builds can be discussed, organized, and updates posted.
Hosted by Darren Baker, Richard S.
Tamiya Campaign
SGTJKJ

#041

Joined: July 20, 2006
KitMaker: 10,069 posts
Armorama: 4,677 posts

Posted: Friday, February 26, 2016 - 11:27 PM UTC


Thirian24

Joined: September 30, 2015
KitMaker: 2,493 posts
Armorama: 2,344 posts
Posted: Saturday, February 27, 2016 - 01:09 AM UTC
That is absolutely beautiful Ernest. Wow.

andromeda673
Joined: July 30, 2013
KitMaker: 584 posts
Armorama: 525 posts
Posted: Saturday, February 27, 2016 - 03:55 AM UTC
that zero is stunning!!!!!! Good job mate!

greif8

Joined: January 17, 2006
KitMaker: 673 posts
Armorama: 116 posts

Posted: Saturday, February 27, 2016 - 02:24 PM UTC
Thank you to everyone for the very kind words.
Brent your Super Pershing is looking very good indeed. I don't know if all Tamiya's 1/32 aircraft have thick decals. The A6M2b Zero was their second new mold 1/32 aircraft. following the A6M5 that came out in 2000, adding new parts only, so it is the same mold. I am guessing the decals date from about 10 years ago, when the A6M2b kit was released. I have Tamiya's newest 1/32 plane, the F4U-1A Corsair in my stash, when I build it we'll see how the decals do. I can tell if I have the struggles I had with the kit decals on this build, I will trash the kit set and buy AM decals.
Jesper - following is the technique I use to airbrush an aircraft that has a single color. After priming, I pre-shade the panel/rivet lines a color that I think will harmonize well with the base color; in this case I used Tamiya's NATO Black. I don't try to be really precise while airbrushing the pre-shading, and in fact, add random areas with the color. This will than fool the eye into thinking the base color has more depth when it is finished. I than spray 4-5 very light coats of the base color, applied at a shallow angle so as not to fill in the panel/rivet lines. I "eyeball" the progress and stop at 4 or 5 coats when I am satisfied.
Of course this takes a while to do, I painted the base coat on this model over three separate airbrushing sessions, but I think this gives the modeler the most control over the amount of paint laid down. The paint itself is thinned a little more than normal, which is about 50/50 for me, being thinned at 60% thinner to 40% paint. This is to keep the coat light enough that I can spray it wet on the surface but not over cover the underlying paints completely. I have found that this keeps the coats smooth.
I then do some very subtle post shading to either bring out detail I covered through airbrushing, or to add a bit more depth where necessary.
The fading is done with a finishing product sold by True Earth; it is essentially and acrylic glaze and ready to airbrush right out of the bottle. I setup my airbrush, for this job I use my H&S Infinity, just as I do for spraying Luftwaffe camo scheme. That is, 5-10 psi and the trigger travel set to minimum. I than spray very, very lightly into the center of panels or other area until I have lightened that area to what I feel is right. I spray the effect unevenly to simulate fading due to the sun. This also takes quite a bit of time, and not a little practice, to get right - less is more in this case. When finished you have the effect you see in the photos, which admittedly is not for everyone's taste.
greif8
Joined: January 17, 2006
KitMaker: 673 posts
Armorama: 116 posts
Posted: Saturday, February 27, 2016 - 02:35 PM UTC
Moving right along with the build following are a few shots showing some "chipping" wear. I decided to do so this time with a silver pen and pencil rather than using the hairbrush technique. The silver pen simulates chipping down to the bare metal and the pencil does a good job replicating either scuffing or light chipping.
I also weathered the underside of the model, again using a couple of finishing products from True Earth to replicate the streaking that occurred due to operating in the salty air of the Pacific. I still have to add various exhaust and other stains.
Overall view after first pass of streaking.

Close up of port wing, streaking complete.

Cockpit sill chipping and scuffing.

Chipping along wingtip fold area.


DaGreatQueeg

Joined: August 01, 2005
KitMaker: 1,049 posts
Armorama: 841 posts

Posted: Saturday, February 27, 2016 - 03:26 PM UTC
Quoted Text
Brent your Super Pershing is looking very good indeed. I don't know if all Tamiya's 1/32 aircraft have thick decals. The A6M2b Zero was their second new mold 1/32 aircraft. following the A6M5 that came out in 2000, adding new parts only, so it is the same mold. I am guessing the decals date from about 10 years ago, when the A6M2b kit was released. I have Tamiya's newest 1/32 plane, the F4U-1A Corsair in my stash, when I build it we'll see how the decals do. I can tell if I have the struggles I had with the kit decals on this build, I will trash the kit set and buy AM decals.
Thanks for the reply matey. I've been eyeing up the recent big scale aircraft releases and as I don't really have an aircraft bits/decal collection I'd be largely relying on the kit decals ....
And I'm really enjoying watching your build take shape !
cheers
Brent

Lakota

#123
Joined: November 17, 2008
KitMaker: 1,202 posts
Armorama: 635 posts
Posted: Sunday, February 28, 2016 - 05:25 AM UTC
Howdy Y'all 
I made a little progress on my model. A very relaxing kit to build so far.
Take care,
Don "Lakota"
I made a little progress on my model. A very relaxing kit to build so far.
Take care,
Don "Lakota"

ColinEdm


Joined: October 15, 2013
KitMaker: 1,355 posts
Armorama: 1,229 posts
Posted: Sunday, February 28, 2016 - 07:27 AM UTC
That Zero is stunning Ernest, absolutely beautiful.

Cantstopbuyingkits

Joined: January 28, 2015
KitMaker: 2,099 posts
Armorama: 1,920 posts
Posted: Sunday, February 28, 2016 - 10:26 AM UTC
Ernest, that's a true beautiful. I don't build aircraft but I want the kit now.
greif8
Joined: January 17, 2006
KitMaker: 673 posts
Armorama: 116 posts
Posted: Sunday, February 28, 2016 - 12:14 PM UTC
Nice progress Don. That looks like a nice relaxing build in progress.
Colin and Tim, thank you for the kind words. The build has turned out pretty well, with the only downer being the kit decals which were very, very thick - pretty common for Tamiya aircraft kits - and the only weakness on the one. Next time I will go with an AM decal set.
Colin and Tim, thank you for the kind words. The build has turned out pretty well, with the only downer being the kit decals which were very, very thick - pretty common for Tamiya aircraft kits - and the only weakness on the one. Next time I will go with an AM decal set.

Magpie

Joined: July 10, 2011
KitMaker: 653 posts
Armorama: 273 posts

Posted: Sunday, February 28, 2016 - 12:33 PM UTC
Making progress, build is done and a coat of primer
minas-ithil
#110
Joined: September 20, 2005
KitMaker: 248 posts
Armorama: 224 posts

Posted: Sunday, February 28, 2016 - 06:25 PM UTC
To One and All,
First, a couple of shout-outs,
Ernest - the Zero is really awesome, I like the subtle streaks on the wings - something that is often overdone.
Scott - Nice progress on the Stug III - I really like those Tamiya 1/48's!
Brent - nice work on the bunch of Pershings.
Dustin - Really good Tiger - this campaign is turning into a Tamiya 1/48 fest!
Now for some progress on the MkIV. Actually it is almost ready for painting. During the week, completed the sponsons;
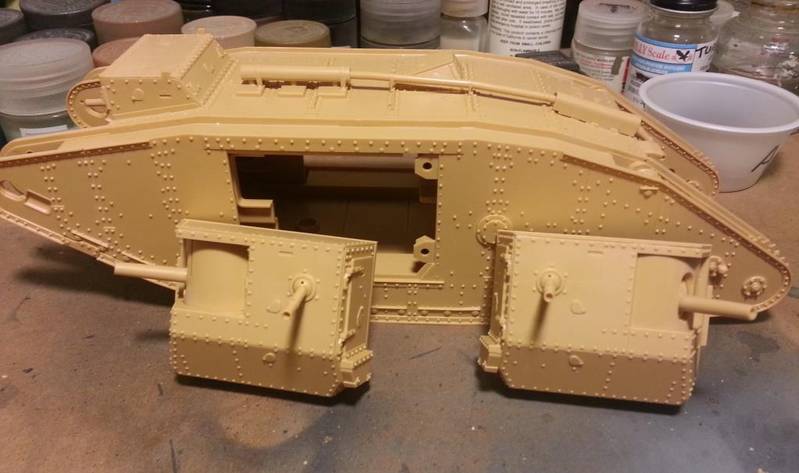
Cleaned up the countless track links - approx. 185, since you get a few spares - in case the carpet monster is a bit peckish...
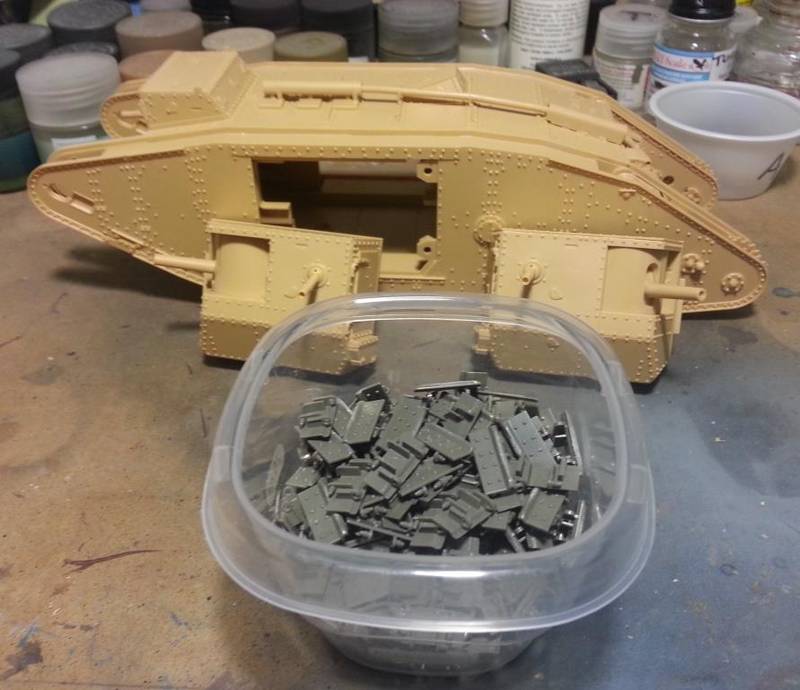
Then build them, well just snap them into place, into short lengths. They said 87 per side, I found that I needed on extra link each side.
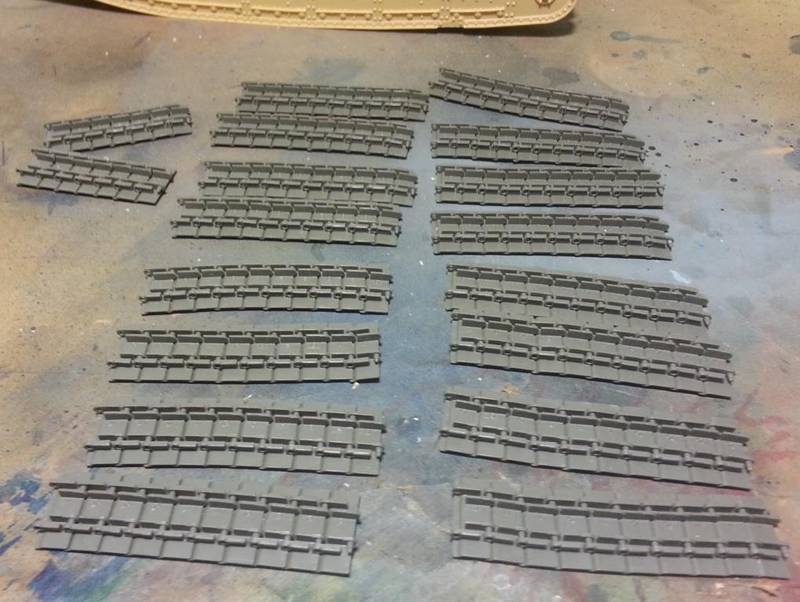
I them assembled the sections into the full length and painted them.
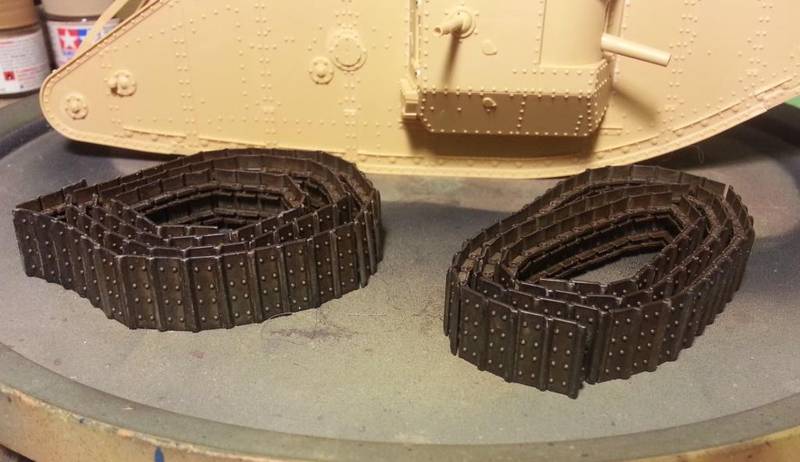
While the tracks were drying, I attached the sponsons, the unditching rails and few extra bits. The tank is now completed, except for a couple of parts to go on after painting.
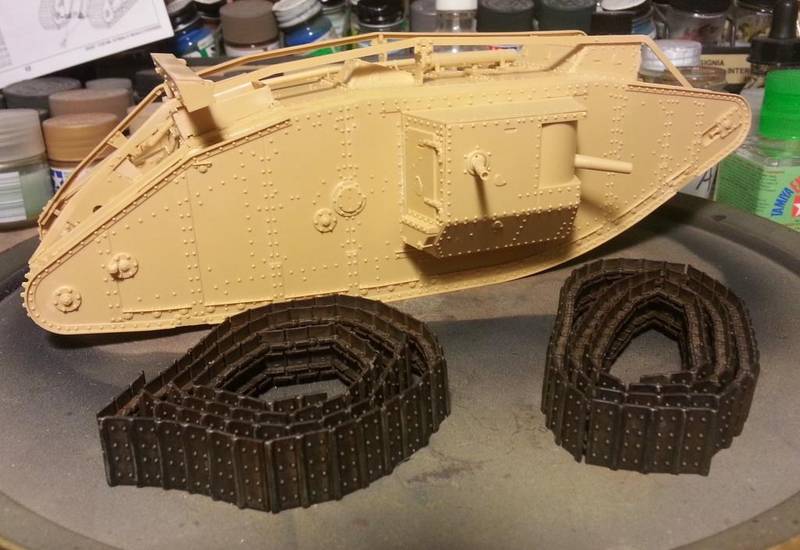
Hopefully some time this week to hit the painting phase, my favorite part of a build - making the piece come to life! (or at least that is the intent)
Comments always welcome.
Thanks,
Stephen
First, a couple of shout-outs,
Ernest - the Zero is really awesome, I like the subtle streaks on the wings - something that is often overdone.
Scott - Nice progress on the Stug III - I really like those Tamiya 1/48's!
Brent - nice work on the bunch of Pershings.
Dustin - Really good Tiger - this campaign is turning into a Tamiya 1/48 fest!
Now for some progress on the MkIV. Actually it is almost ready for painting. During the week, completed the sponsons;
Cleaned up the countless track links - approx. 185, since you get a few spares - in case the carpet monster is a bit peckish...
Then build them, well just snap them into place, into short lengths. They said 87 per side, I found that I needed on extra link each side.
I them assembled the sections into the full length and painted them.
While the tracks were drying, I attached the sponsons, the unditching rails and few extra bits. The tank is now completed, except for a couple of parts to go on after painting.
Hopefully some time this week to hit the painting phase, my favorite part of a build - making the piece come to life! (or at least that is the intent)
Comments always welcome.
Thanks,
Stephen

Namabiiru
#399
Joined: March 05, 2014
KitMaker: 2,888 posts
Armorama: 1,920 posts

Posted: Monday, February 29, 2016 - 04:21 AM UTC
Stephen,
Good looking build. How did you paint the tracks? They really do look like old steel. Very impressive.
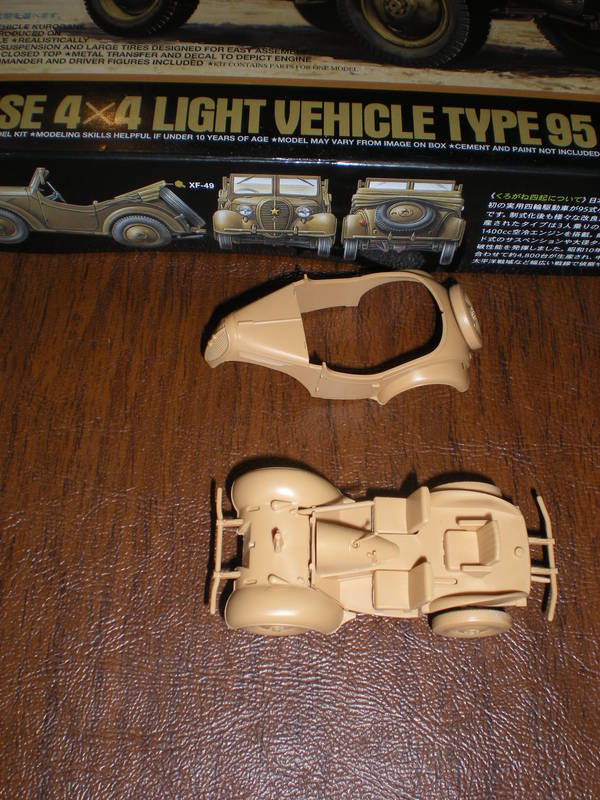
Got my Tilly II all ready for the pain barn.
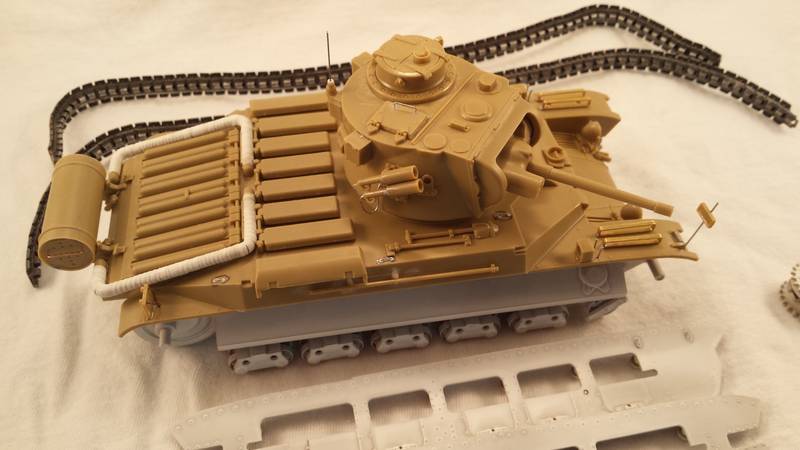
The molded-in detail on the exhaust was horrible so I shaved it off and re-wrapped the pipes to simulate the asbestos insulation.

Good looking build. How did you paint the tracks? They really do look like old steel. Very impressive.
Got my Tilly II all ready for the pain barn.
The molded-in detail on the exhaust was horrible so I shaved it off and re-wrapped the pipes to simulate the asbestos insulation.
greif8
Joined: January 17, 2006
KitMaker: 673 posts
Armorama: 116 posts
Posted: Monday, February 29, 2016 - 12:22 PM UTC
Scott, nice progress on the Stug!
Stephen, great work thus far. The tracks look especially well done!
Mark, sweet little scratch building for the exhausts. general assembly looks very good.
Ernest
Stephen, great work thus far. The tracks look especially well done!
Mark, sweet little scratch building for the exhausts. general assembly looks very good.
Ernest
minas-ithil
#110
Joined: September 20, 2005
KitMaker: 248 posts
Armorama: 224 posts
Posted: Monday, February 29, 2016 - 06:33 PM UTC
Marc and Ernest,
The tracks were a piece of cake to assemble, just click in one pin and then the other, very nicely done. Once assembled I painted them with a black wash from a batch I made a while ago. I used a brush, so that I could get into the nooks and crannies. Once that was dried, I again brushed on the AK Track wash, a real nice shade of dirty, rusty tint. The two of them really worked well, to my surprise. They really look like old, used steel. This will provide a real nice base for some metallic highlights on the ribs, from ground contact and then dirt/mud gunk when the entire beast gets weathered. Thanks for the comments.
Stephen

pablo_g

Joined: October 21, 2003
KitMaker: 529 posts
Armorama: 500 posts

Posted: Monday, February 29, 2016 - 08:37 PM UTC
Hello guys,
your build progress look very nice. When I finish couple of models I join to you.
your build progress look very nice. When I finish couple of models I join to you.

giubro

Joined: November 10, 2011
KitMaker: 9 posts
Armorama: 8 posts
Posted: Monday, February 29, 2016 - 09:08 PM UTC
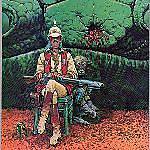
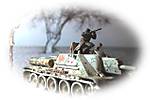
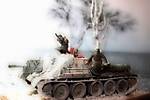
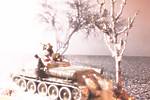
I have completed these days , work on SU 122 ... here are the final photos ...
greif8
Joined: January 17, 2006
KitMaker: 673 posts
Armorama: 116 posts
Posted: Wednesday, March 02, 2016 - 06:09 PM UTC
Nice work Giuseppe. I like the very original photo technique as well!
Ernest
Ernest
Chaman911
Joined: August 28, 2015
KitMaker: 319 posts
Armorama: 308 posts
Posted: Wednesday, March 02, 2016 - 08:05 PM UTC
Hello everyone! I know it is a little late but I wanted to get in on the group build. I am days away from finishing my Tasca Firefly and have a Tamiya M51 Supersherman I was planning to do next. I got the kit for Christmas from my wife (yeah, she is a keeper) and picked up the Legends detail PE set and resin stowage set as well as pair of Tasca M2 machine guns. I also bought a book specifically on the M51 during the Six Days War for reference. I plan to build a tank from the 14th Armor Brigade in June 1967.
This is my first ever group build and only my fourth model kit since I was a teenager so I am hoping to learn from you more experienced modelers as I watch your work progress. Hopefully I can get this thing done on time and earn my first campaign ribbon in addition to some new friends in the community.
Happy modeling,
Bryan
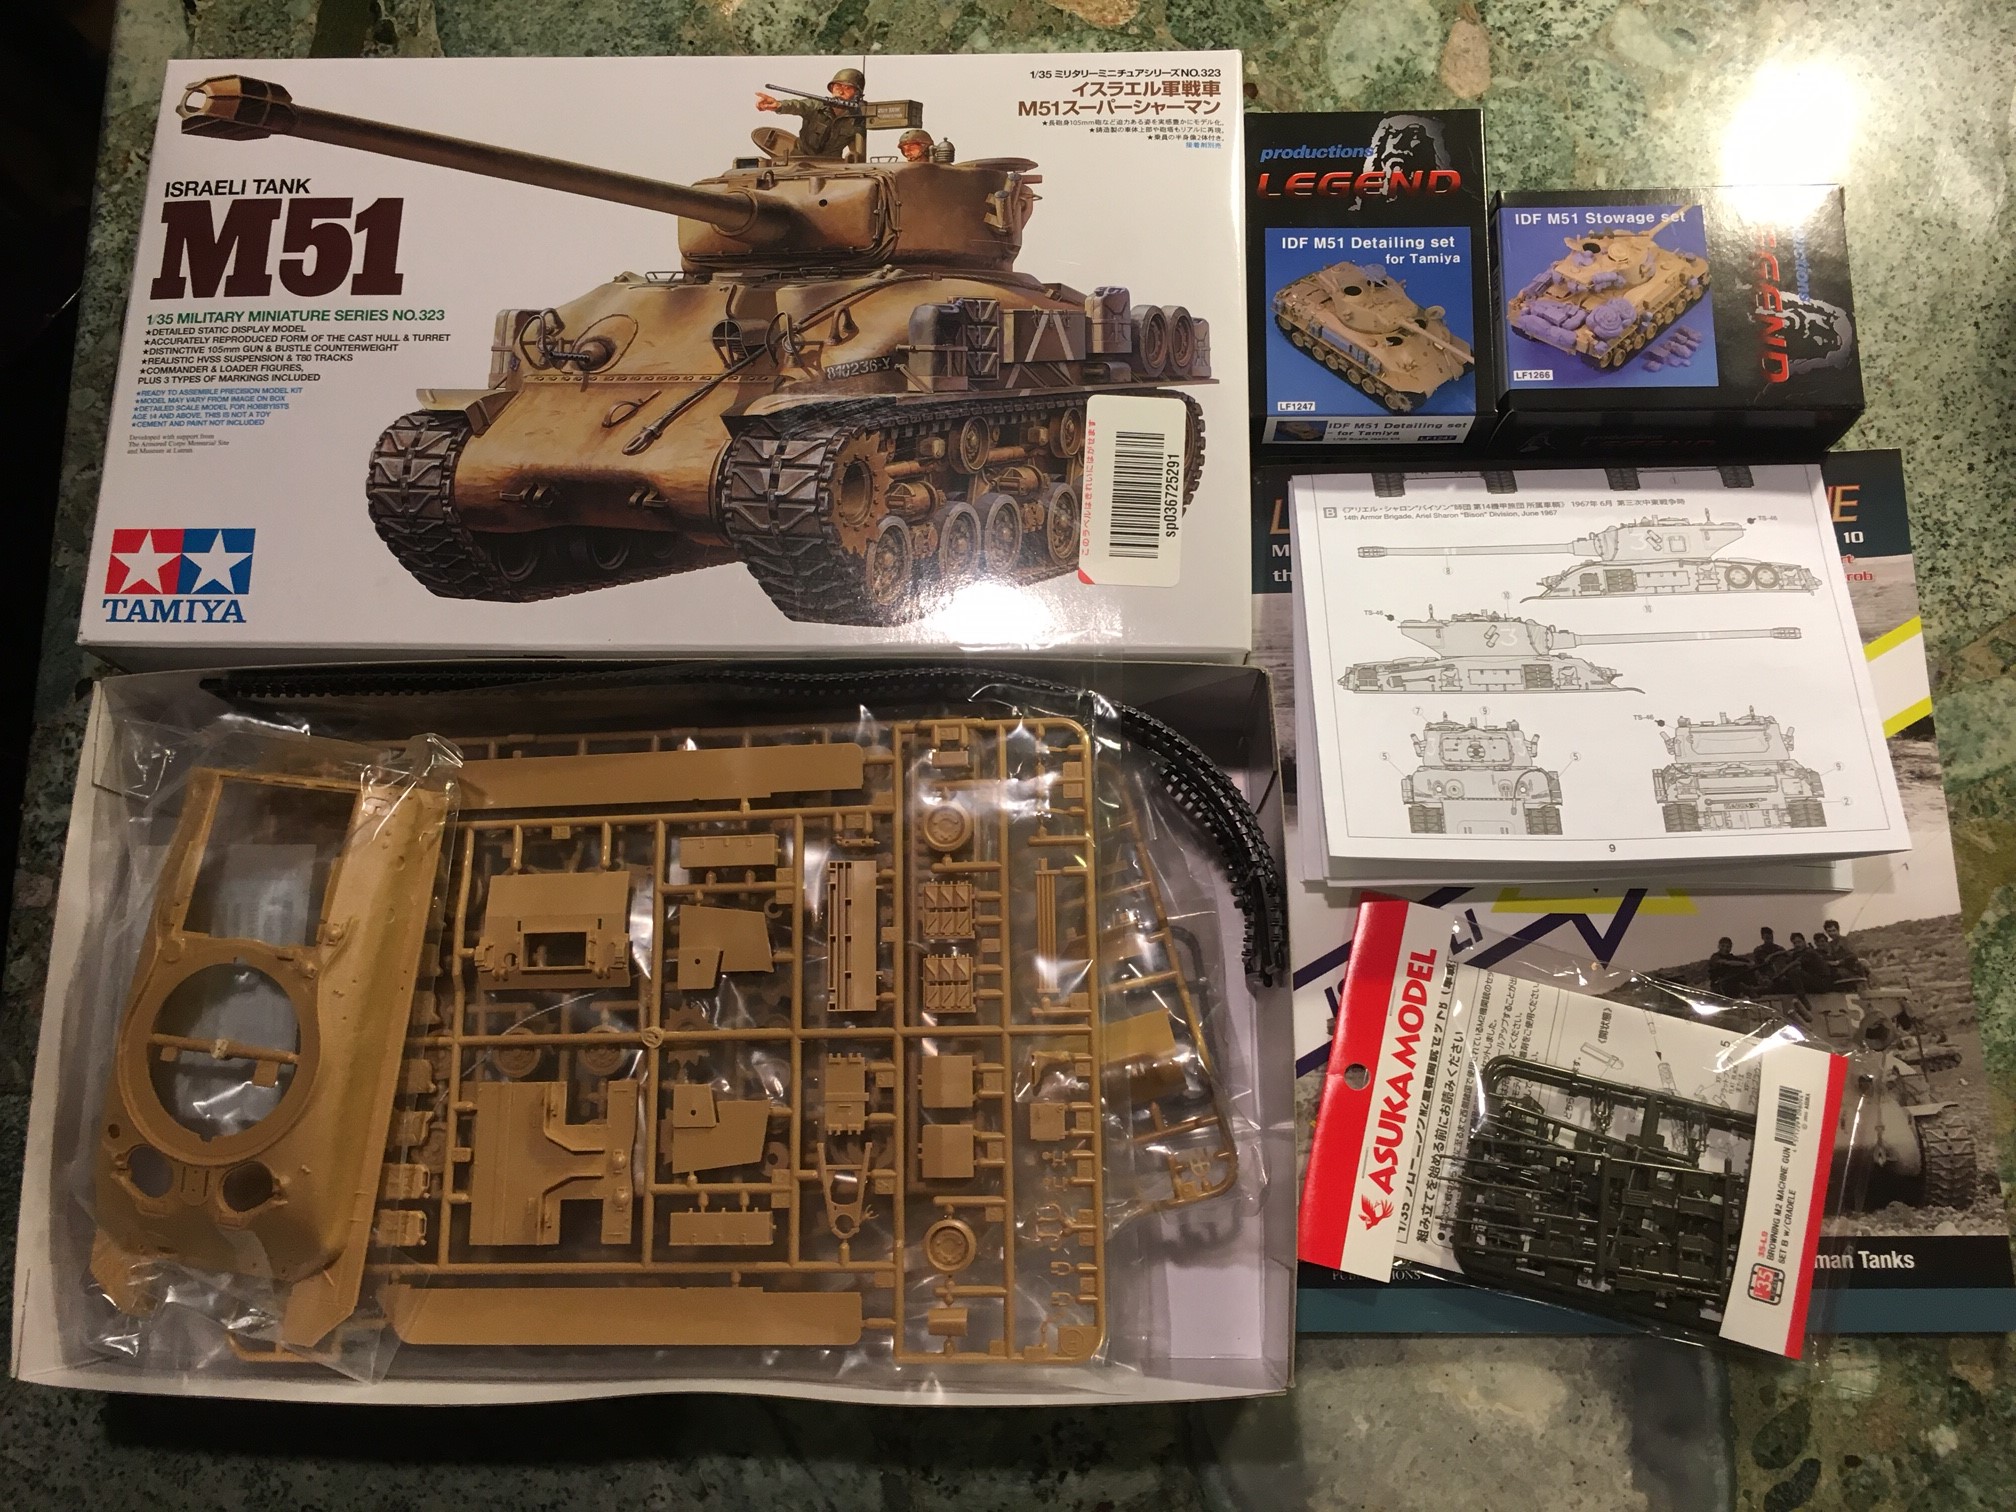
Starting pic.
This is my first ever group build and only my fourth model kit since I was a teenager so I am hoping to learn from you more experienced modelers as I watch your work progress. Hopefully I can get this thing done on time and earn my first campaign ribbon in addition to some new friends in the community.
Happy modeling,
Bryan
Starting pic.
greif8
Joined: January 17, 2006
KitMaker: 673 posts
Armorama: 116 posts
Posted: Wednesday, March 02, 2016 - 09:50 PM UTC
Welcome aboard Bryan!
Ernest
Ernest
Thirian24
Joined: September 30, 2015
KitMaker: 2,493 posts
Armorama: 2,344 posts
Posted: Thursday, March 03, 2016 - 06:41 AM UTC
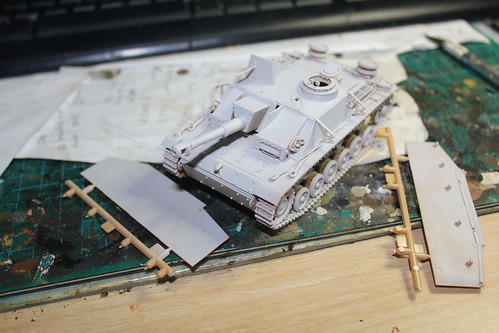
Ready for paint.
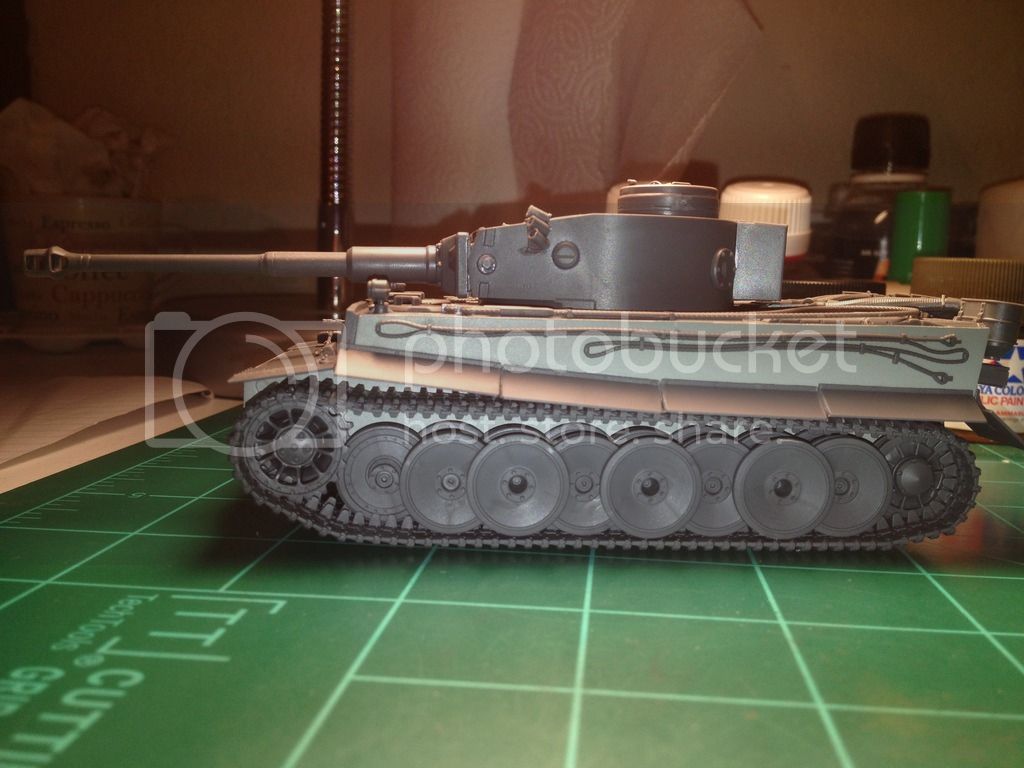
Everybody has very nice progress. Great job all.

Everybody has very nice progress. Great job all.
Thirian24
Joined: September 30, 2015
KitMaker: 2,493 posts
Armorama: 2,344 posts
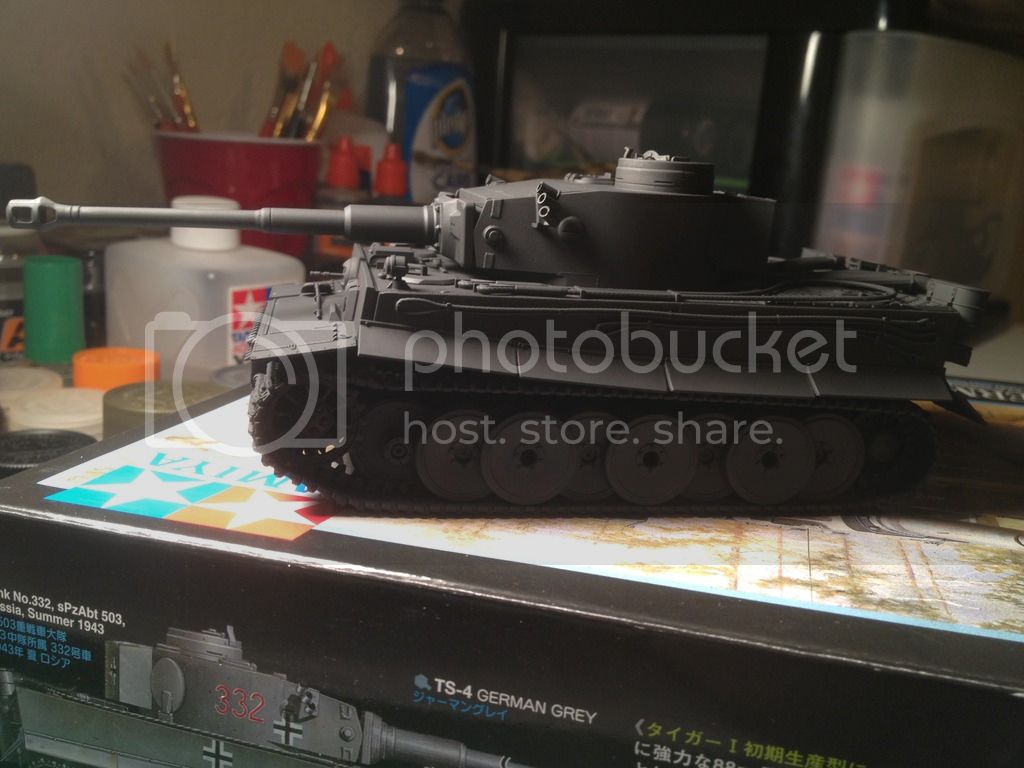
Posted: Thursday, March 03, 2016 - 09:03 AM UTC
AK black on.

DaGreatQueeg
Joined: August 01, 2005
KitMaker: 1,049 posts
Armorama: 841 posts
Posted: Friday, March 04, 2016 - 04:51 PM UTC
Looking good Dustin!
And the S'Pershing is progressing. Base shading and blending back complete, camo next ....
cheers
Brent


And the S'Pershing is progressing. Base shading and blending back complete, camo next ....
cheers
Brent


Magpie
Joined: July 10, 2011
KitMaker: 653 posts
Armorama: 273 posts
Posted: Friday, March 04, 2016 - 06:10 PM UTC
Managed to get some airbrush time in today.
Main cam and some details done
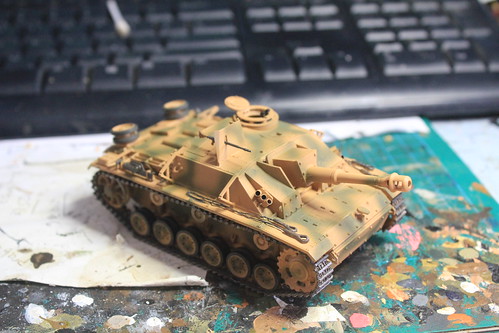
Main cam and some details done
Thirian24
Joined: September 30, 2015
KitMaker: 2,493 posts
Armorama: 2,344 posts
Posted: Friday, March 04, 2016 - 06:14 PM UTC
Those look very nice Brent and Scott.
 |

WEB HOSTING BY


Copyright ©2021 Armorama and Kitmaker Network, a subsidiary of Silver Star Enterprises
All Rights Reserved. Please read our Conditions of Use and Privacy Policy.
All Rights Reserved. Please read our Conditions of Use and Privacy Policy.