Quoted Text
Thanks for the Blog on this kit

You're welcome....thanks for following along!

Greg, the answer is yes!

Well that was not so bad! I managed to get this one assembled! I would say that the fit was pretty decent for about 90% of the kit. Only areas I found I needed to add a little more pressure to get the joints to close were the two 45 degree corners to the rear of the casemate and along the top edge where the side aprons meet the top of the tractor. Nothing bad at all, just a little hold while the glue set.


There are a few spots one might consider adding some extra details to. First being the hydraulic cylinder for the blade. This is a movable part to allow the builder to position the blade up or down. The attachment point at the piston and blade could use an attachment pin...basically a sliver of .5mm to 1mm rod would do the trick. Also, the cylinder itself. This is just a tube and it is mostly hidden behind the brass shield; however, the forward hydraulic line with a hose running back behind the shield would be seen. A small nipple made from styrene rod and a hose from stretched sprue or wire would add the detail quite nicely.

Takom did a nice job in not molding the lift handles to the engine deck separately. This adds some definition as they can be placed in any position. If interested, something around a .2 or .3mm nut could be put on either side of each mounting point to add some color. Also, the small tie-down handles are molded into the surface. These are similar to ones seen on many tanks from WWII German Armor to present day MBT's. They could be improved by sanding off the molded version and replicate new ones from a piece of thinly stranded copper wire or even from one of the many photo etch sets on the market today.


There is nothing in the way of gear supplied with the kit. The only peripheral items other than a shovel and pick axe are the two jerry cans and the one fire extinguisher. The kit does supply a ear door for the dozer, I was thinking of leaving this part off. I noticed from many reference pictures the door is removed.

The hatch to this M9 is designed to work so the builder could have it open or closed...which adds to the confusion of why a hole into the driver's compartment was not provided. In the picture, you can see I used the cupola and a fine tip Sharpie to draw the circle to cut an opening. With the hatch open, you may want to add the inner latches.

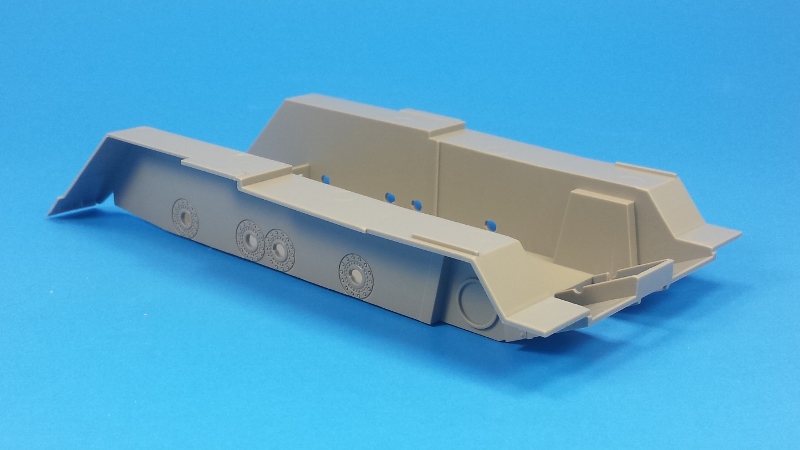
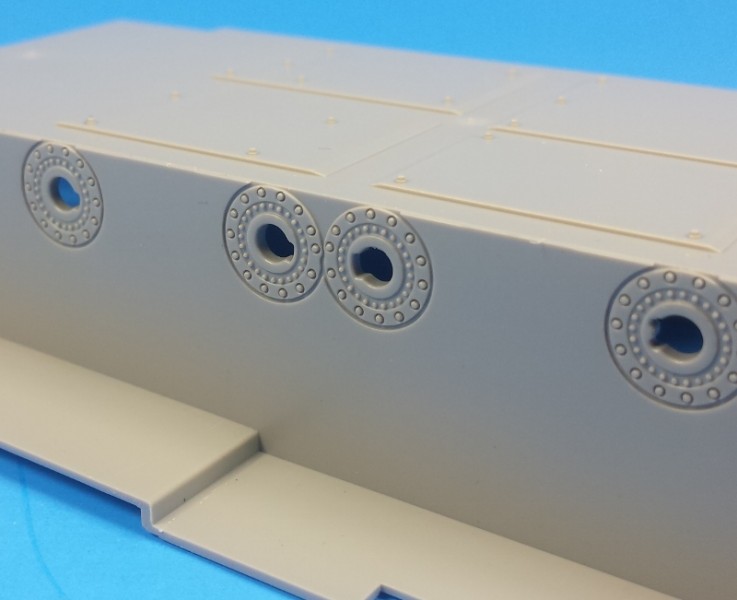
As suspected in my review of the kit, there are four ejector pin marks located on the top of the side fenders in the Ejector Box.

The blade is full movable once the kit is completed...if so desired.

There are two hitch pins provided to lock the blade in the push configuration...

The bottom of the blade can swing up into a hooked position. The two hooks can be made to move if you wanted, simply by making a small pin from brass rod or wire and drill accordingly. The original part actually has two holes...one for the hinge point and one for the locking point.

The entire blade assembly, with or without the bottom in the up position, can be lifted to expose the inner box.

Finally, the tracks. The tracks have some nice detailing to them. While these are movable and snap together similar to other movable trancks on the market today, I will suggest that anyone building this kit almost treat these like the Magic Tracks from DML. The small pin is only plastic and the nature of the beast is soft and these plastic pins will wear down or snap off in the installation. Make the tracks, add some thin adhesive to the joints, like with the Magic Tracks, allow to dry for a bit and then position around the wheels and sprockets and allow them to dry. The track pads are not installed yet as they are rubber on the real dozer and will be painted separately.

Next stop would be the priming booth! This probably won't happen until the weekend...but will happen soon!
Thanks for stopping in!!