_GOTOBOTTOM
Constructive Feedback
For in-progress or completed build photos. Give and get contructive feedback!
M60A3 TTS (Revell 1/35)
dexter059
Visit this Community
Region de Valparaiso, Chile
Joined: July 28, 2005
KitMaker: 1,569 posts
Armorama: 1,385 posts
Posted: Friday, October 28, 2016 - 09:58 PM UTC
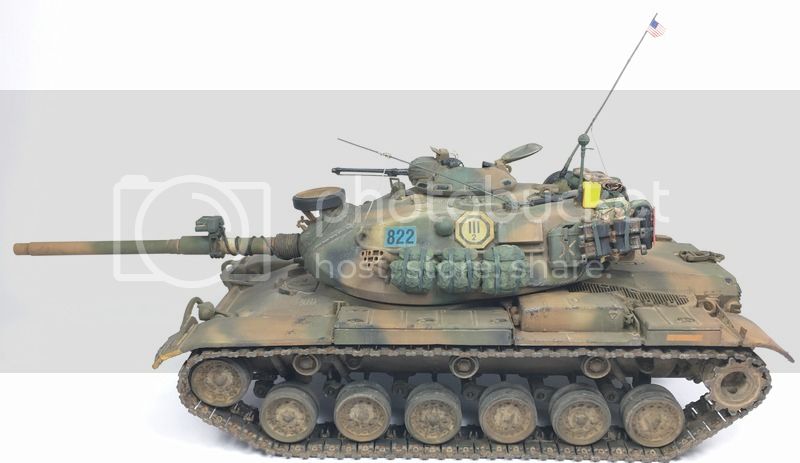
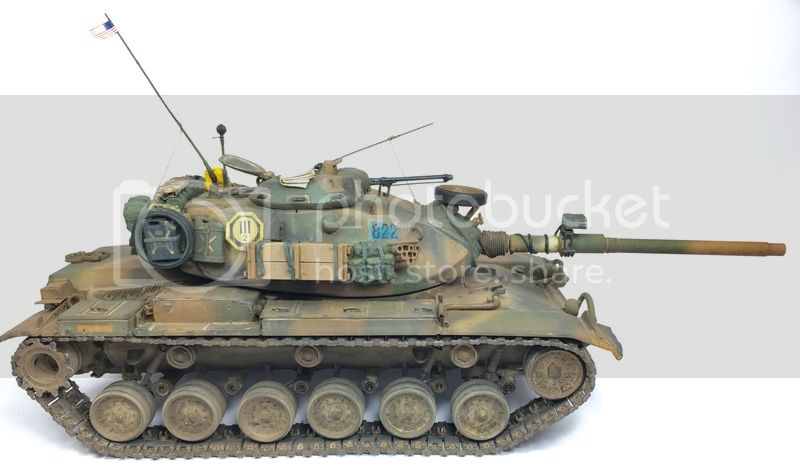
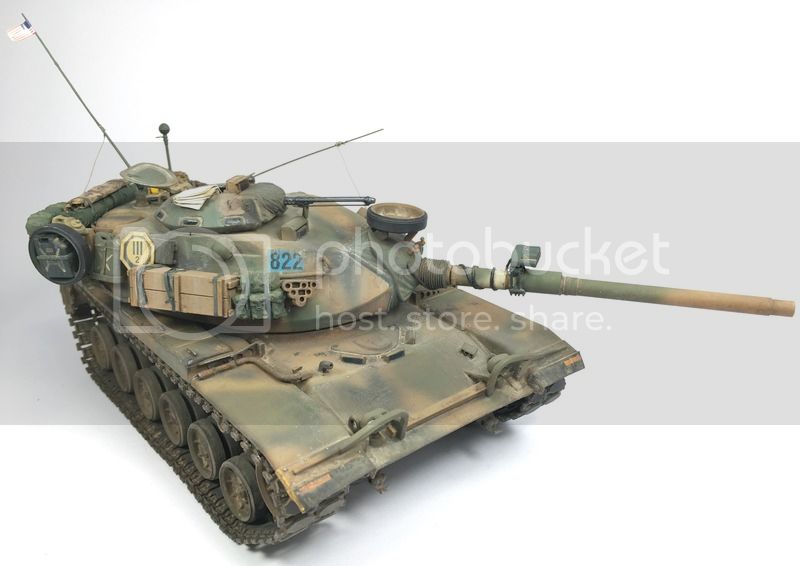
Hi folks, here's another recently finished build, work on it ended a few days ago.

Kit is from Revell's rebox of Esci M60A3TTS, released in early 2000's, was sitting on my stash and the release of the new kit from AFV Club gave some motivation to start it. I'm also working on some figures and base to make a vignette inspired on Reforger exercices of late 80's.

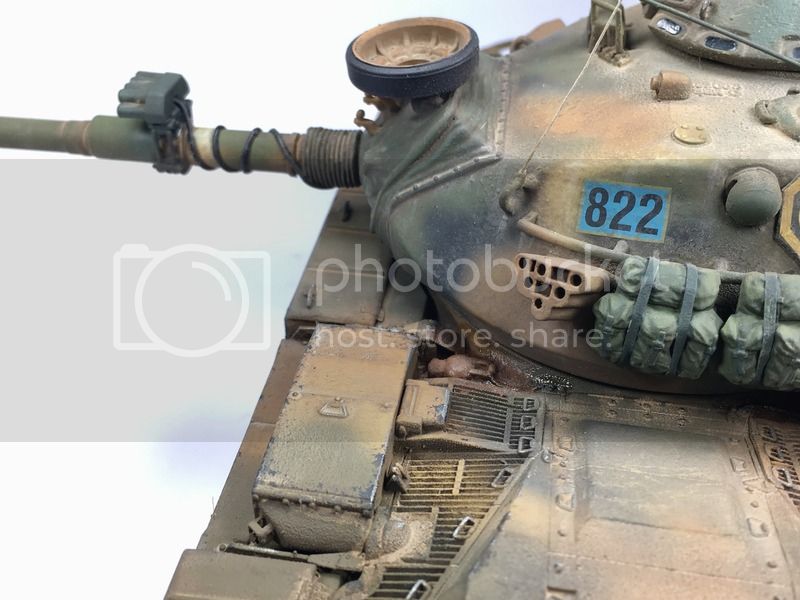
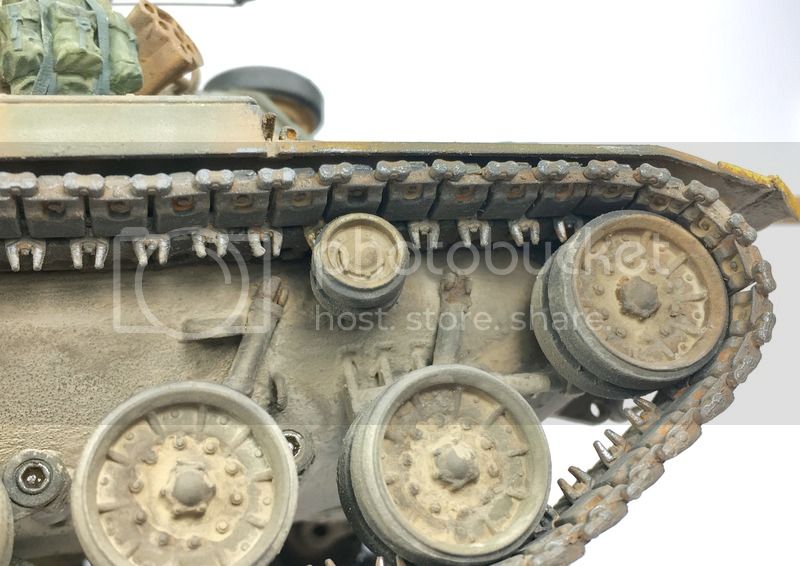
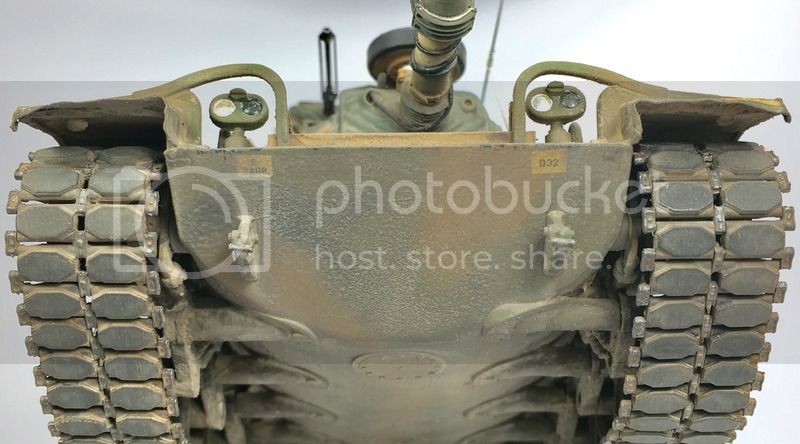
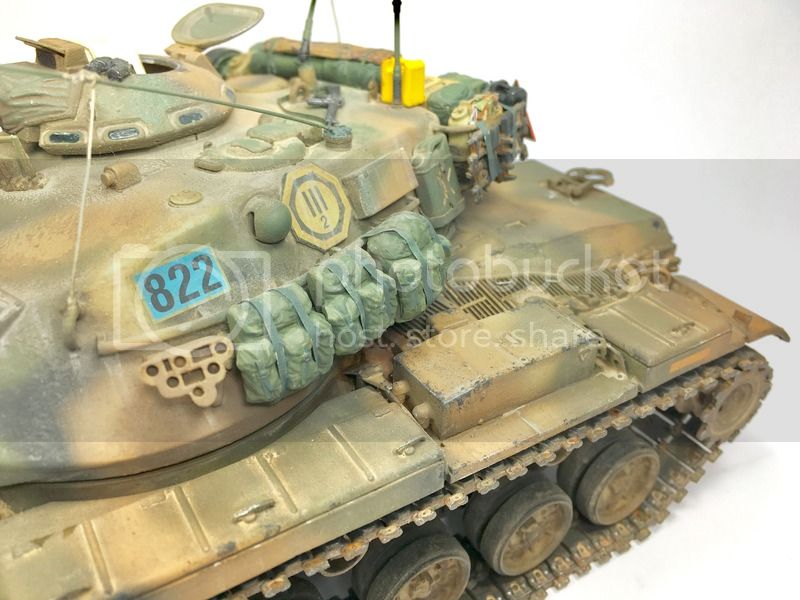
The basic kit was improved with Def Models metal barrel and wind sensor, Orange Hobby antenna, Tamiya Hoffmann device, Eduard photoetched and Bronco tracks, plus some scratch. Stowage from Meng, Tamiya and Legend. Painted with K4, Model Air and Tamiya acrylics, weathering with oils and AK interactive enamel products (washes, filters, pigments, dirt deposits).

Hope you like it and comments welcome


[img width=653 height=600]http://i10.photobucket.com/albums/a143/dexter059/M60A3%20TTS%20US%20ARMY/4ABA3AD0-2558-4EC6-8D4C-A2615DFFEEF2.jpg[/img]

[img width=646 height=600]http://i10.photobucket.com/albums/a143/dexter059/M60A3%20TTS%20US%20ARMY/7D55979E-8349-42F6-8D8A-DDAF553F503B.jpg[/img]


[img width=761 height=600]http://i10.photobucket.com/albums/a143/dexter059/M60A3%20TTS%20US%20ARMY/6265D644-0631-4903-89F1-AE4F89BBEB95.jpg[/img]

[img width=760 height=600]http://i10.photobucket.com/albums/a143/dexter059/M60A3%20TTS%20US%20ARMY/E4E6D878-B931-4BBE-88E0-2FAC3FBB3DEF.jpg[/img]

[img width=736 height=600]http://i10.photobucket.com/albums/a143/dexter059/M60A3%20TTS%20US%20ARMY/81452C07-B9A0-4675-B9AE-7BFD7FE0DB9A.jpg[/img]


[img width=774 height=600]http://i10.photobucket.com/albums/a143/dexter059/M60A3%20TTS%20US%20ARMY/96A28A33-E6B4-400D-9783-D0F94B3AADB7.jpg[/img]




[img width=729 height=600]http://i10.photobucket.com/albums/a143/dexter059/M60A3%20TTS%20US%20ARMY/704D9A54-97B5-46D6-8971-56F8B1076FEB.jpg[/img]

[img width=543 height=600]http://i10.photobucket.com/albums/a143/dexter059/M60A3%20TTS%20US%20ARMY/51EA756C-3A4A-47AA-B70A-51A1F0263690.jpg[/img]
[img width=732 height=600]http://i10.photobucket.com/albums/a143/dexter059/M60A3%20TTS%20US%20ARMY/EC28FC40-3673-42C4-A3AC-4AECE8E2FF2B.jpg[/img]


[img width=717 height=600]http://i10.photobucket.com/albums/a143/dexter059/M60A3%20TTS%20US%20ARMY/D4431DC6-BC87-4FD1-A9B2-5665E2DEF890.jpg[/img]





Cheers


210cav
Visit this Community
Virginia, United States
Joined: February 05, 2002
KitMaker: 6,149 posts
Armorama: 4,573 posts
Posted: Friday, October 28, 2016 - 10:16 PM UTC
Klaus-- great job on a fine tank! You did her proud.
Well done
DJ
dexter059
Visit this Community
Region de Valparaiso, Chile
Joined: July 28, 2005
KitMaker: 1,569 posts
Armorama: 1,385 posts
Posted: Saturday, October 29, 2016 - 12:13 AM UTC
Thanks DJ
HeavyArty
Visit this Community
Florida, United States
Joined: May 16, 2002
KitMaker: 17,694 posts
Armorama: 13,742 posts
Posted: Saturday, October 29, 2016 - 12:28 AM UTC
Very nice. Great job on weathering and stowage.
dexter059
Visit this Community
Region de Valparaiso, Chile
Joined: July 28, 2005
KitMaker: 1,569 posts
Armorama: 1,385 posts
Posted: Saturday, October 29, 2016 - 12:42 AM UTC
Thanks Gino
historianmodeler
Visit this Community
United States
Joined: October 27, 2013
KitMaker: 62 posts
Armorama: 62 posts
Posted: Saturday, October 29, 2016 - 02:15 AM UTC
Great work. Question though, how'd did you do the MERDC camo, is it a mix of airbrushing and hand brushing?
dexter059
Visit this Community
Region de Valparaiso, Chile
Joined: July 28, 2005
KitMaker: 1,569 posts
Armorama: 1,385 posts
Posted: Saturday, October 29, 2016 - 02:24 AM UTC
Thanks Kody!

MERDC camo was painted freehand with an 0,3 mm airbrush, quite a challenge by the way, I followed a template I found online.

Forgot to mention, I tried to add the mud holes on sprokets, I used a motor toool but ended up too round (sigh...) also changed the kit 0,50 cal MG using one from Academy and adding the side bars for the blank firing adaptor.

Cheers
flugwuzzi
Visit this Community
Lower Austria, Austria
Joined: November 02, 2007
KitMaker: 633 posts
Armorama: 599 posts
Posted: Saturday, October 29, 2016 - 03:06 AM UTC
Phantastic work Klaus. Great painting and weathering effect and the level of detail you put into your build is just stunning.
Great images as well.

Thanks for sharing.
Cheers
Walter
dexter059
Visit this Community
Region de Valparaiso, Chile
Joined: July 28, 2005
KitMaker: 1,569 posts
Armorama: 1,385 posts
Posted: Saturday, October 29, 2016 - 04:41 AM UTC

Quoted Text

Phantastic work Klaus. Great painting and weathering effect and the level of detail you put into your build is just stunning.
Great images as well.

Thanks for sharing.
Cheers
Walter


Thanks for your comments Werner

Cheers!
Bravo1102
Visit this Community
New Jersey, United States
Joined: December 08, 2003
KitMaker: 2,864 posts
Armorama: 2,497 posts
Posted: Saturday, October 29, 2016 - 05:35 AM UTC
Very nice. You have a good eye for details and weathering.

The stuff you missed is the kind of stuff that unless you were there you wouldn't pick up on. Highly intuitive stuff very difficult to get from pictures.

An example, one wouldn't use straps to attach a track link to the bustle rack. Track weighs far too much for that. Trust me, I once tried just to see if it could be done. You bolt the center guides to the rungs of the rack so it hangs there. How do you think track pads are attached to the rear of the bustle rack? The bolts are passed through the net.

The hose of the bilge pump next to the driver's hatch pinches shut when not pumping. Once you know that you can see it in pictures, but if you didn't you might never notice. And that's not to say noone ever didn't put an open nozzle on the end, because you could and there are some I knew who would have been tempted to do so. Attach a hose and pump the water completely clear of the tank rather then splashed down the glacis plate.

Fantastic work though. You really captured the look of the old beast.
dexter059
Visit this Community
Region de Valparaiso, Chile
Joined: July 28, 2005
KitMaker: 1,569 posts
Armorama: 1,385 posts
Posted: Saturday, October 29, 2016 - 07:12 AM UTC
Thanks for your comments and insights Stephen, I'll take them in consideration for my next M60 (new A3 from AFV Club, I alredy have it!!)

Cheers
historianmodeler
Visit this Community
United States
Joined: October 27, 2013
KitMaker: 62 posts
Armorama: 62 posts
Posted: Saturday, October 29, 2016 - 07:40 AM UTC

Quoted Text

Thanks Kody!

MERDC camo was painted freehand with an 0,3 mm airbrush, quite a challenge by the way, I followed a template I found online.

Forgot to mention, I tried to add the mud holes on sprokets, I used a motor toool but ended up too round (sigh...) also changed the kit 0,50 cal MG using one from Academy and adding the side bars for the blank firing adaptor.

Cheers


PAINTED FREE HAND!!!!!!!!!!!!!!!!

I swear it looks airbrushed, how much thinning did you need to do on the paint?
dexter059
Visit this Community
Region de Valparaiso, Chile
Joined: July 28, 2005
KitMaker: 1,569 posts
Armorama: 1,385 posts
Posted: Saturday, October 29, 2016 - 07:53 AM UTC

Quoted Text


PAINTED FREE HAND!!!!!!!!!!!!!!!!

I swear it looks airbrushed, how much thinning did you need to do on the paint?


Hi Kody,

What I mean is that I airbrushed all 4 MERDC colours, but no masking, just old MK1 eyeball following the template I found.

Cheers
Thirian24
Visit this Community
Oklahoma, United States
Joined: September 30, 2015
KitMaker: 2,493 posts
Armorama: 2,344 posts
Posted: Saturday, October 29, 2016 - 05:44 PM UTC
Wow. Very nice!
dexter059
Visit this Community
Region de Valparaiso, Chile
Joined: July 28, 2005
KitMaker: 1,569 posts
Armorama: 1,385 posts
Posted: Saturday, October 29, 2016 - 08:47 PM UTC
Thanks Dustin

Cheers
BruceJ8365
Visit this Community
Kansas, United States
Joined: December 25, 2012
KitMaker: 441 posts
Armorama: 441 posts
Posted: Friday, November 18, 2016 - 09:12 AM UTC
Very awesome. My fav tanks and I love the winter verdant scheme.

One easy fix you might consider:

The control cable for the gun fire simulator goes through the coax machine gun port. That the one on the loaders side. You've got it going through the gunners sight.
 _GOTOTOP