Hi guys,
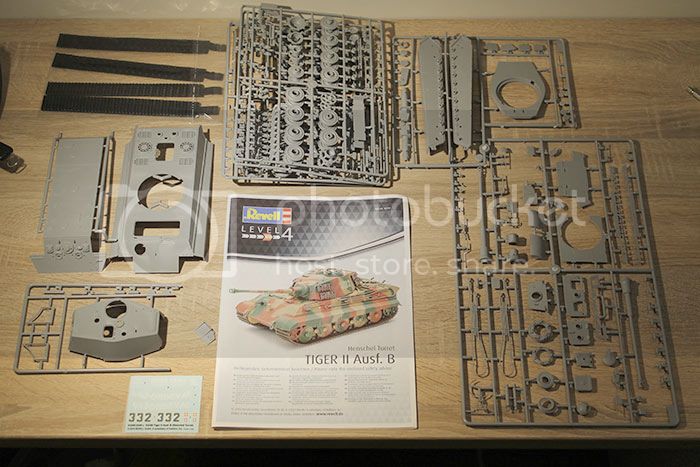
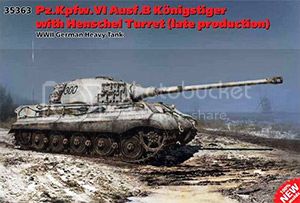
For my second project I chose this 'Tiger II ausf.B' from Revell (N°03249).
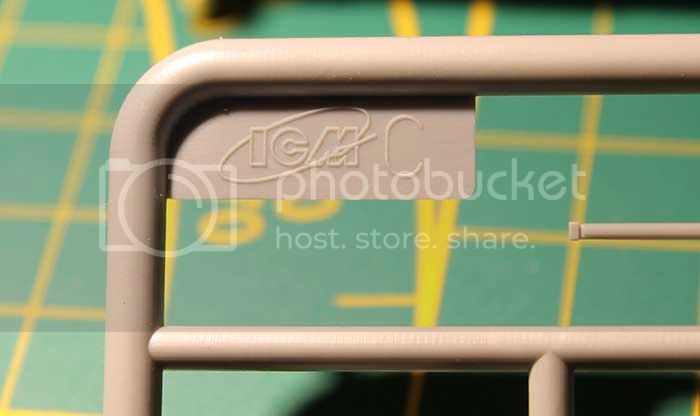
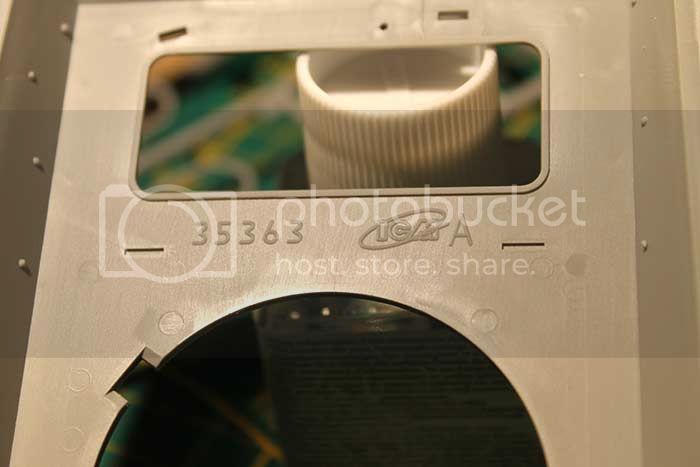
Although the box is from Revell, the molds are from ICM (N°35363)
First look at the parts, looks like a good starter kit (level 4).
I want to use this Kingtiger to try out some painting techniques like a 3 tone german camouflage, maybe some snow, mud and rust...
The plan is a small battle of the bulge diorama, but I don't yet have something specific in mind, I might use some ww2 pic's as a starting point.
I personally don't like the look of the decal numbers (blue/yellow), maybe I'll try to paint them myself...
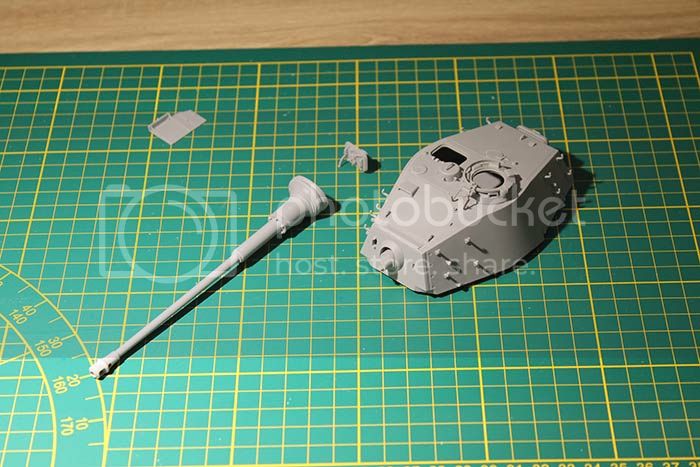
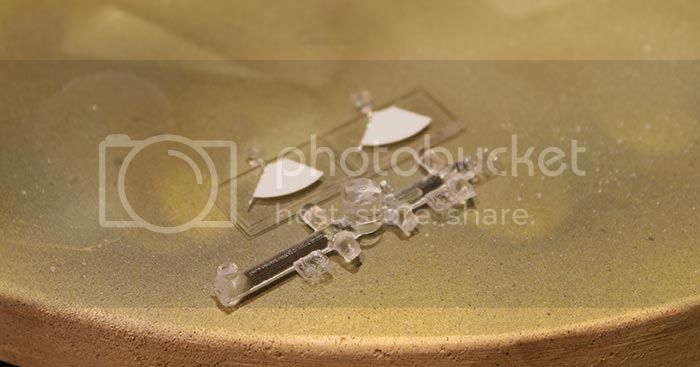
This evening I started working on the turret, the pieces fit nice together.
That's all for now
Kind regards
Steven
Hosted by Darren Baker
Tiger II ausf.B - (Revell ~ ICM) 1/35
Steven000
Antwerpen, Belgium
Joined: August 07, 2016
KitMaker: 191 posts
Armorama: 120 posts
Joined: August 07, 2016
KitMaker: 191 posts
Armorama: 120 posts
Posted: Monday, January 30, 2017 - 05:23 AM UTC
iakarch
Louisiana, United States
Joined: May 19, 2007
KitMaker: 459 posts
Armorama: 421 posts
Joined: May 19, 2007
KitMaker: 459 posts
Armorama: 421 posts
Posted: Monday, January 30, 2017 - 05:48 AM UTC
Steve,
Look forward to your build, first time I have seen the Revell Tiger II.
TankManNick
California, United States
Joined: February 01, 2010
KitMaker: 551 posts
Armorama: 543 posts
Joined: February 01, 2010
KitMaker: 551 posts
Armorama: 543 posts
Posted: Monday, January 30, 2017 - 06:08 AM UTC
First time I've seen a build start with the turret!
With all the KT's out right now this will make an interesting comparison.
Steven000
Antwerpen, Belgium
Joined: August 07, 2016
KitMaker: 191 posts
Armorama: 120 posts
Joined: August 07, 2016
KitMaker: 191 posts
Armorama: 120 posts
Posted: Tuesday, January 31, 2017 - 05:00 AM UTC
Hi guys,
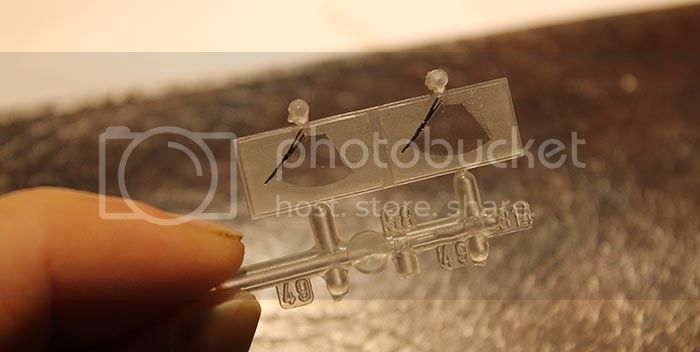
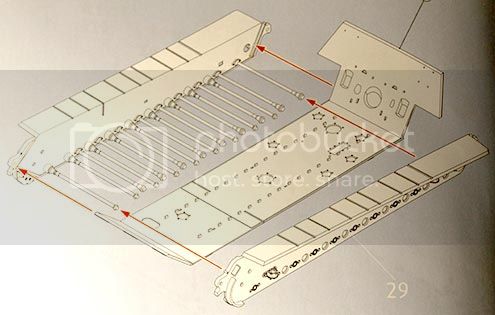
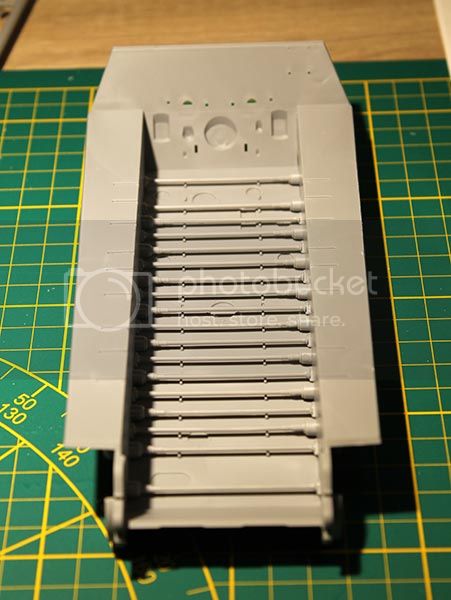
I Forgot to post these detail pics of the plastic, showing the ICM origin.
Inside the hull the ICM kit N° is visible.
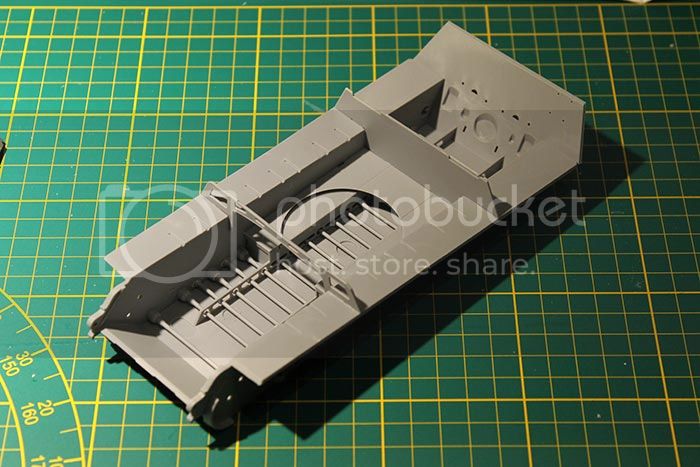
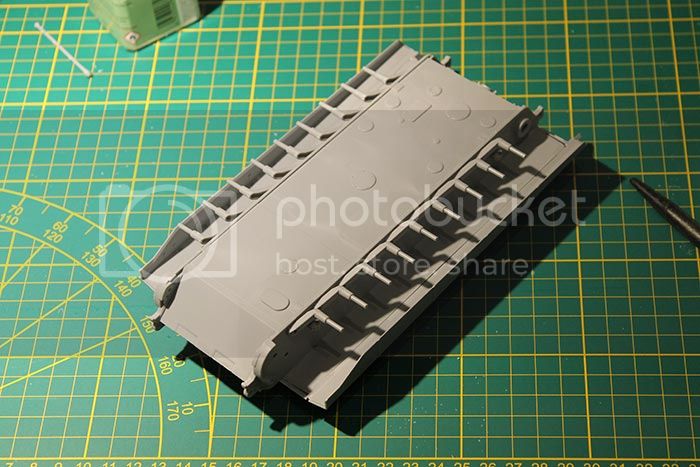
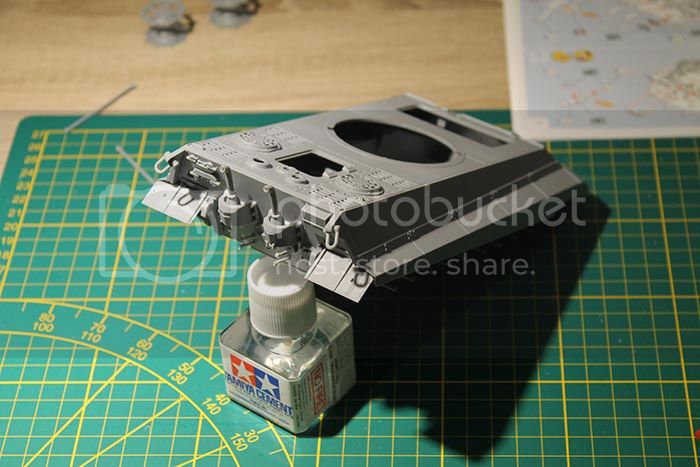
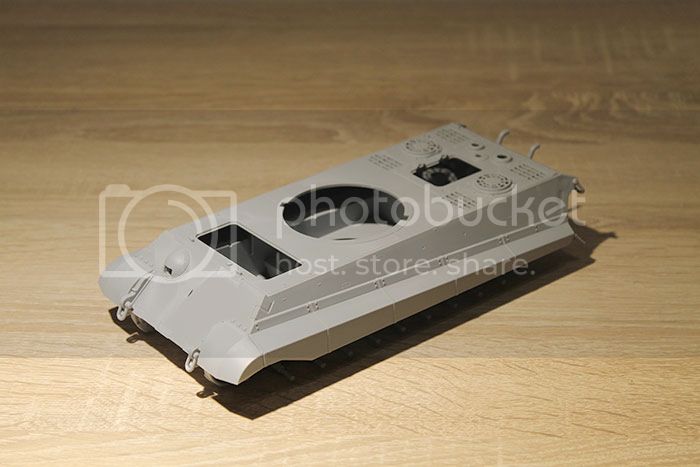
I had some time to start working on the hull this evening, not much to look at for the moment, but got some progress
Bit tricky to get the shafts in place while gluing the sides
but got the shafts in place
When the top of the hull is mounted the hull becomes a very solid piece.
Kind regards
Steven
Steven000
Antwerpen, Belgium
Joined: August 07, 2016
KitMaker: 191 posts
Armorama: 120 posts
Joined: August 07, 2016
KitMaker: 191 posts
Armorama: 120 posts
Posted: Monday, February 06, 2017 - 06:27 AM UTC
Hi guys,
I have a small update on the King Tiger,
First I made a simple tool to airbrush the wheels, as they tend to fly all over the place when applying air-pressure.
Just some 18mm MDF scrap, drilled with my largest 'hole saw'. Then drilled some smaller holes for toothpicks...
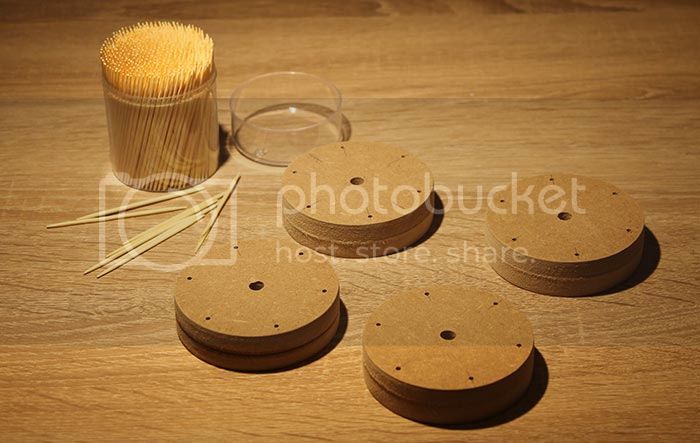
Then glued the toothpicks in the holes...
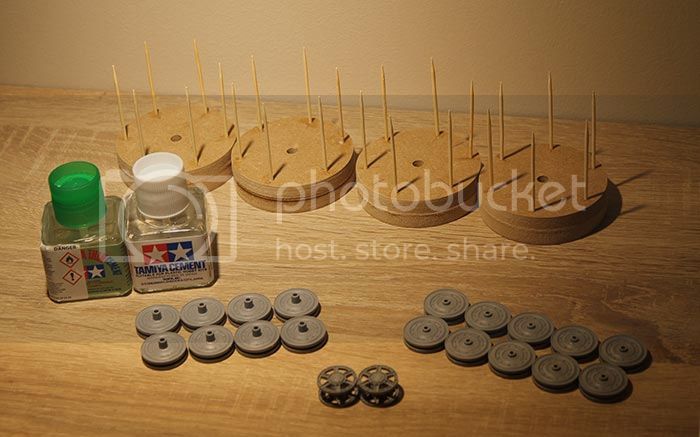
And attached the wheels with a small dot of hot-glue on the backside.
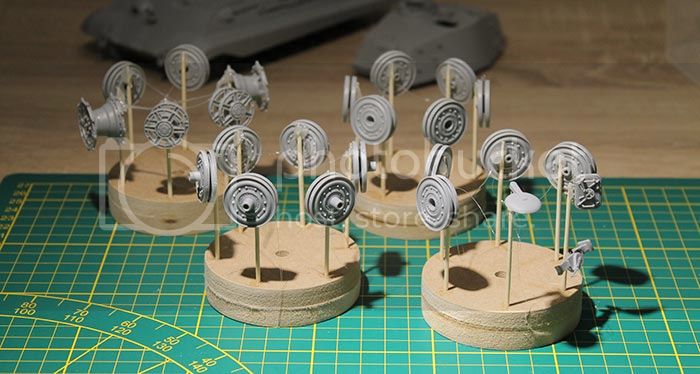
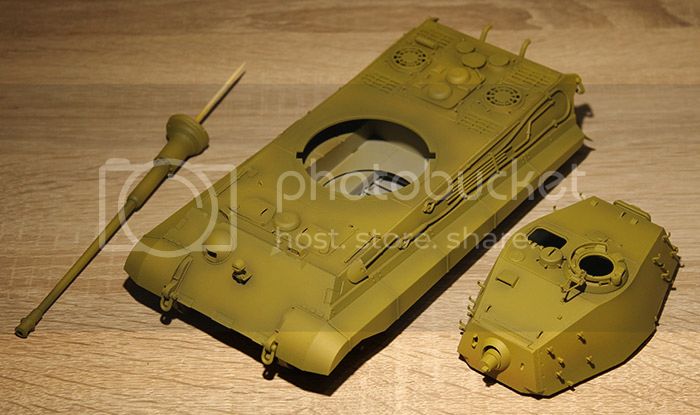
I first airbrushed the model with 'Dark Yellow' surface primer (Vallejo)
After the first coat I darkend the 'Dark-yellow-mix' and sprayed some preshading.
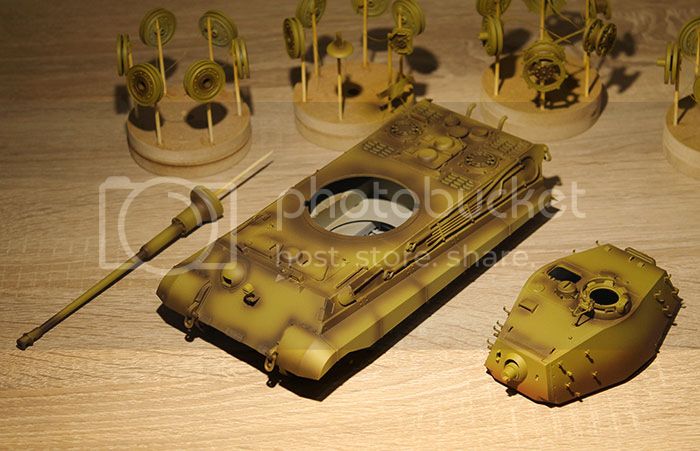
Then re-covered the model again with a thin coat of 'Dark Yellow' to tone down the preshading...
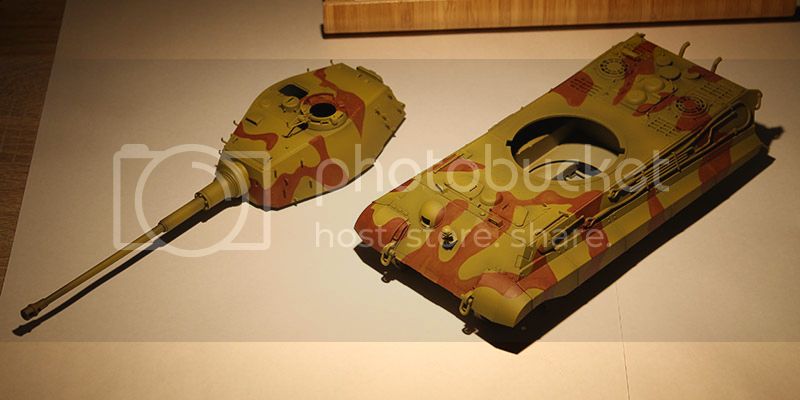
I planned to airbrush the 3-tone camouflage pattern, but after reading some articles the Kingtiger-Pattern for the Ardennes was painted in the factory by brush. So I decided to paint the camouflage by hand.
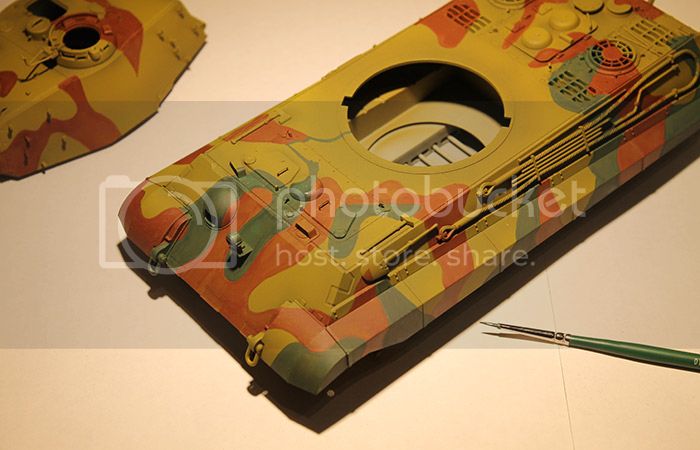
I underestimated this and it kept me busy for a few hours... I read in a book that the paint should be thinned to avoid brush strokes, so I had to apply 2 coats for each color...
Here I'm painting the 'Red Brown' (Vallejo)
And the 'Green', for some reason I bought 'German Extra Dark Green' (Vallejo Panzer.series) a while ago, so it turned out quite dark after the 2nd layer...
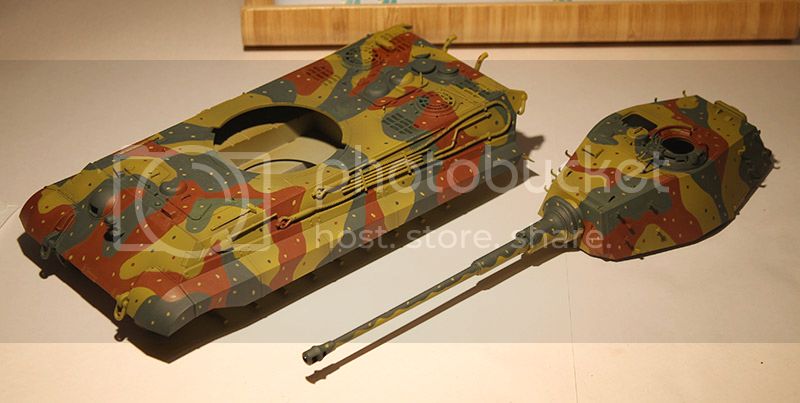
After the pattern was done I applied the speckles/stips...
At this stage I took a step back to look a the model and got dissapointed about the colors; it feels a bit toys like and the colors don't seem to match very well I think.
I hope to get this solved in the weathering stages...
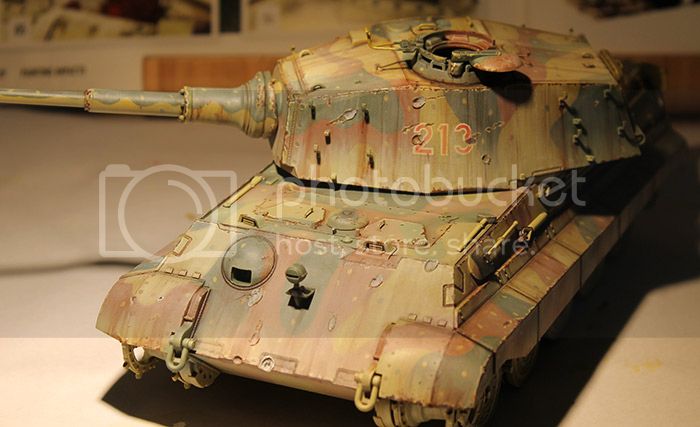
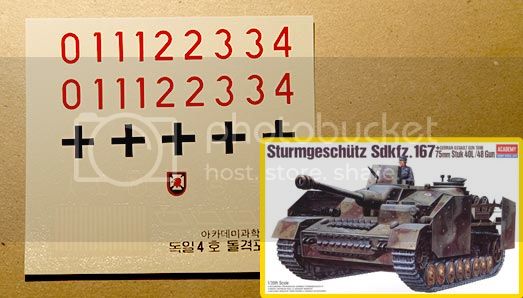
The decals that come with the kit are blue/yellow for Tiger II N°332. I personally don't like these colors, so I borrowed some numbers from an other kit; 'Sturmgeschütz SdKfz 167 (Academy)'
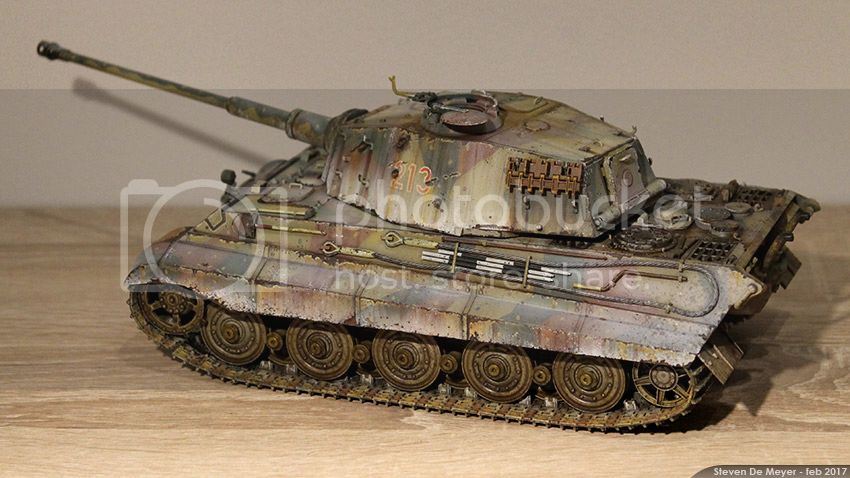
I went for Tiger N°213, this Tiger reached 'La Gleise' and was abandoned by Panzergruppe Peiper. (battle of the Bulge)
It is not yet my intention to create an exact replica of this specific Tiger, this project is mainly intended to experiment some painting techniques...
The decals are on
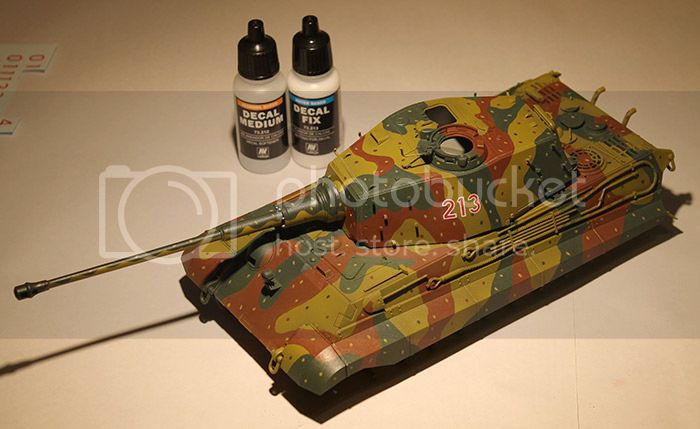
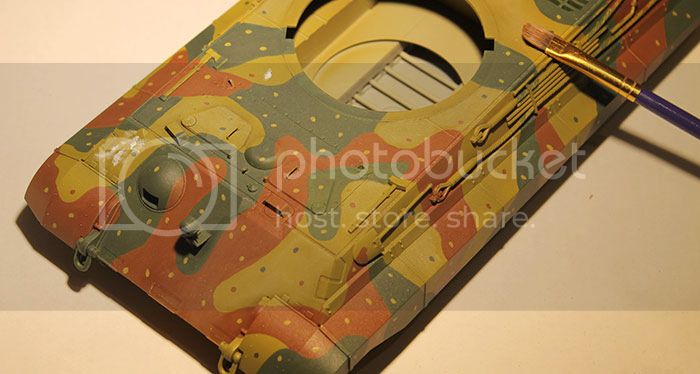
I bought some new oil paint to try out weathering with oils...
Didn't feel very comfortable, but I do like the extra time you get with these oils (I'm a dead-slow painter)
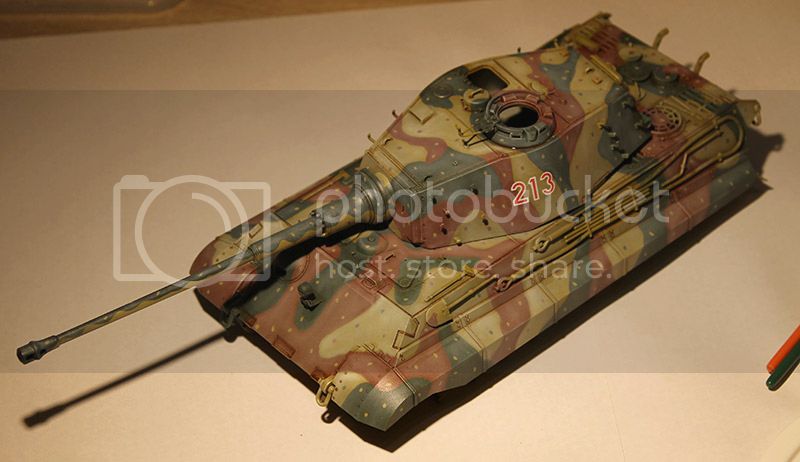
This is what I got at the moment, not sure if I like it, hope to improve it in a next stage...
I also did a first pin-wash with 'dark umber' and terpentine. (drying now)
Thanks for reading - crits and comments welcome
Kind regards
Steven
Armorsmith
Pennsylvania, United States
Joined: April 09, 2015
KitMaker: 1,063 posts
Armorama: 1,000 posts
Joined: April 09, 2015
KitMaker: 1,063 posts
Armorama: 1,000 posts
Posted: Monday, February 06, 2017 - 08:29 AM UTC
Looking good. I like the cammo pattern. Very nice work thus far and looking forward to more.
Tankerman
California, United States
Joined: June 14, 2006
KitMaker: 54 posts
Armorama: 54 posts
Joined: June 14, 2006
KitMaker: 54 posts
Armorama: 54 posts
Posted: Monday, February 06, 2017 - 08:57 AM UTC
Looks like the weathering brought the camo colors closer to reality. Good looking model thanks to your work.
Posted: Monday, February 06, 2017 - 09:41 AM UTC
Looks great Steve - I like how the hand brushed camo came out. Was it free hand or masked? Tat
Steven000
Antwerpen, Belgium
Joined: August 07, 2016
KitMaker: 191 posts
Armorama: 120 posts
Joined: August 07, 2016
KitMaker: 191 posts
Armorama: 120 posts
Posted: Saturday, February 18, 2017 - 01:37 AM UTC
Quoted Text
Looks great Steve - I like how the hand brushed camo came out. Was it free hand or masked? Tat
Thanks, I didn't use a mask, it was painted with a small brush, first I did the outline, then filled the area. I thinned the paint to avoid brush-strokes and had to apply 2 layers.
----
After my 'diy armor piercing shell'-adventure I finally made some time to work further on the Tiger...
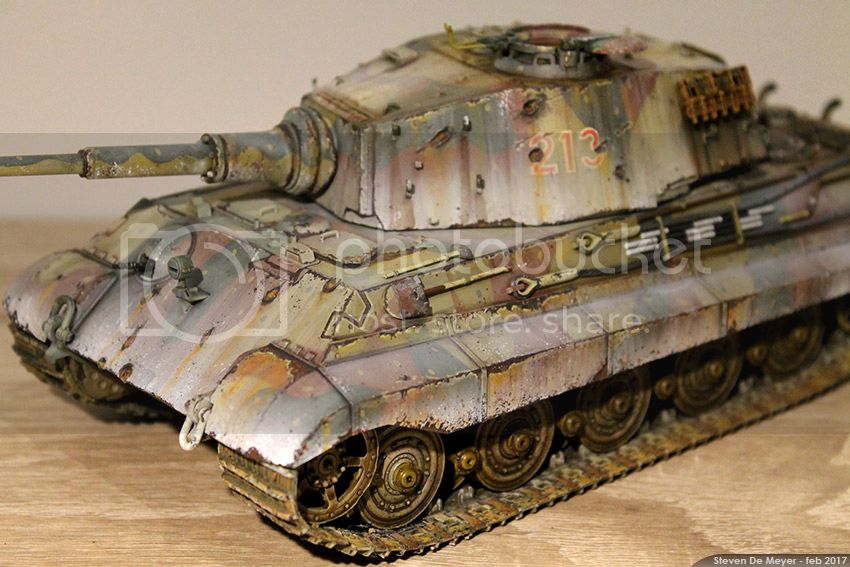
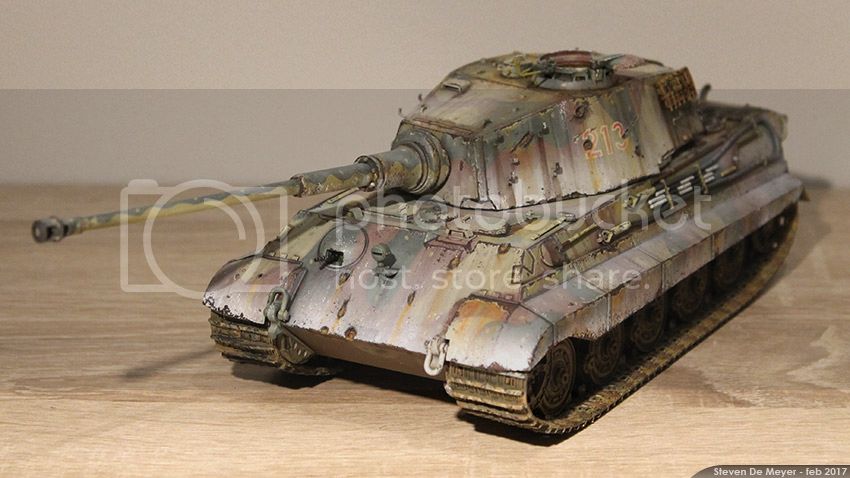
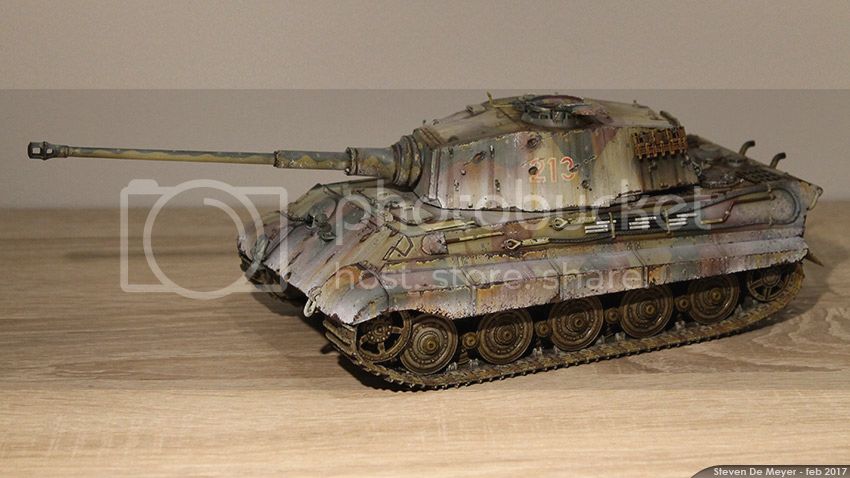
I got a bit carried away while trying out some weathering techniques, so the thing looks like it had a pretty rough day I guess , I could use some critics on this for next projects. I need to learn to apply things a more subtle I think, I find that pretty difficult.
Making impacts
This is what I got at the moment
Thanks for reading & kind regards
STeven
Hard_Target
Virginia, United States
Joined: January 30, 2017
KitMaker: 20 posts
Armorama: 17 posts
Joined: January 30, 2017
KitMaker: 20 posts
Armorama: 17 posts
Posted: Saturday, February 18, 2017 - 03:40 AM UTC
I think it looks really good. How did you achieve the chipped paint and streaking affects?
Steven000
Antwerpen, Belgium
Joined: August 07, 2016
KitMaker: 191 posts
Armorama: 120 posts
Joined: August 07, 2016
KitMaker: 191 posts
Armorama: 120 posts
Posted: Saturday, February 18, 2017 - 11:04 AM UTC
Hi Timothy,
I use (Vallejo) acrylics, the chipping was done with a fine brush and a mix of brown/black, I tried to achieve some depth by adding a fine highlighting line on the underside of the chipped spot, to simulate the base color showing up.
The streaking was done with very thinned paint, like a filter, then painting a stroke top to bottom. This can be blended with some water if you are fast.
Thanks & kind regards
Steven
ahandykindaguy
Alberta, Canada
Joined: August 20, 2008
KitMaker: 1,295 posts
Armorama: 1,191 posts
Joined: August 20, 2008
KitMaker: 1,295 posts
Armorama: 1,191 posts
Posted: Sunday, February 19, 2017 - 12:48 AM UTC
A very nice representation of weathering and camouflage... I like it's overall look, it may be overdone, but I'm not going to say that. I like your outcome, it looks like it's been through the grinder and made it out ok...
Thanks for sharing Steven.
Armorsmith
Pennsylvania, United States
Joined: April 09, 2015
KitMaker: 1,063 posts
Armorama: 1,000 posts
Joined: April 09, 2015
KitMaker: 1,063 posts
Armorama: 1,000 posts
Posted: Sunday, February 19, 2017 - 02:13 AM UTC
A bit overdone for my taste but the over all look and the effects are outstanding.
Steven000
Antwerpen, Belgium
Joined: August 07, 2016
KitMaker: 191 posts
Armorama: 120 posts
Joined: August 07, 2016
KitMaker: 191 posts
Armorama: 120 posts
Posted: Monday, February 20, 2017 - 04:18 AM UTC
I too find it overdone, maybe I can hide some of it with a bit of snow, but haven't done any snow yet so I'm not sure if that would be a good idea...
I'm still gonna make a small dio with the tank, for me that's the best practice, going through all stages and trying to get some experience.
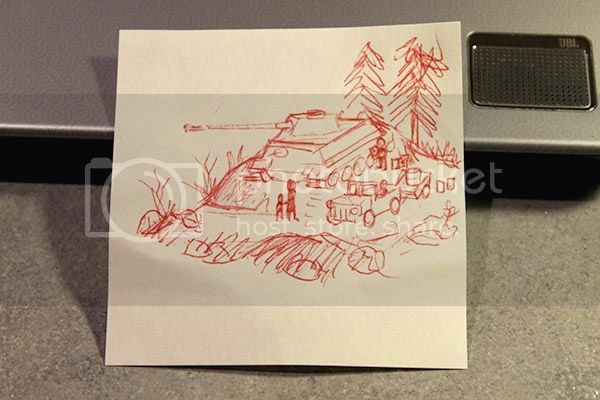
I thought about it and here is what I'm gonna try to tell with the little dio;
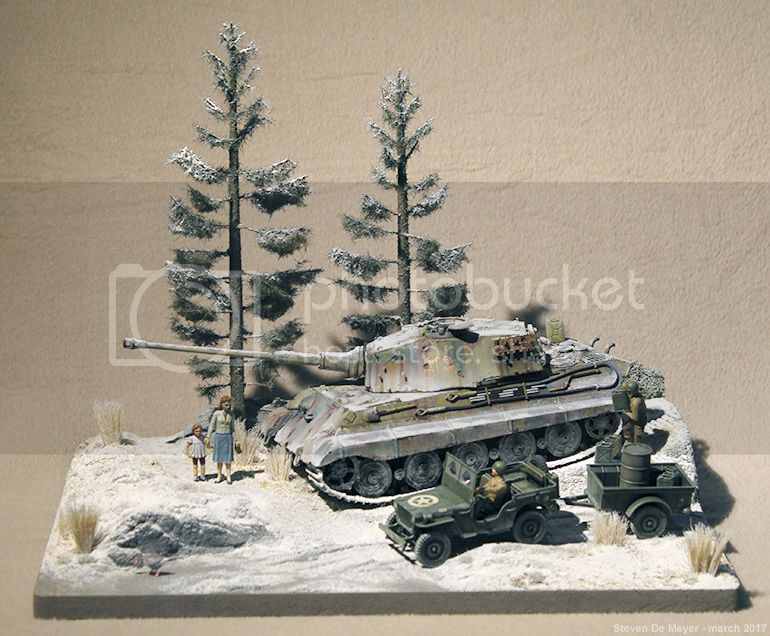
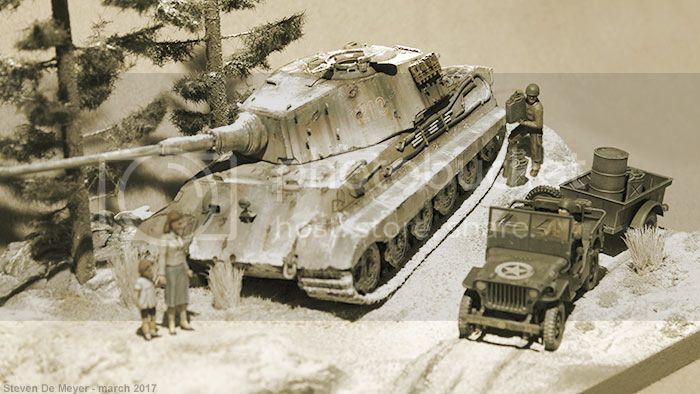
This is a very fast/rough sketch, the Tiger has reached 'La Gleize' in the Ardennes, it tried to make a stand, but the engine failed due to the severe lack of fuel. The crew also ran out of ammunition and went on the run...
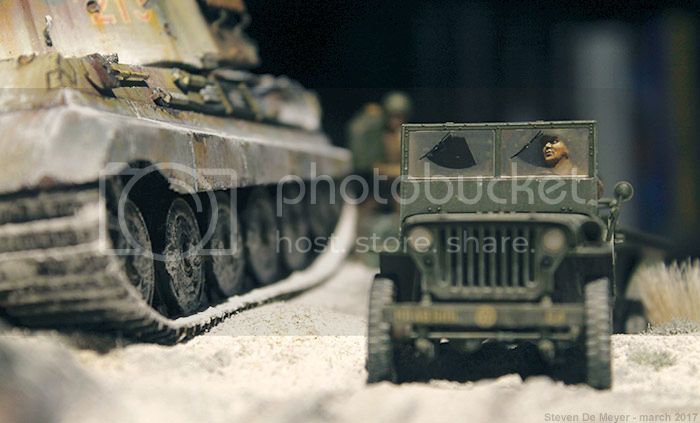
The Allies captured the Tiger and are bringing a small amount of fuel with there Willy jeep, attempting to drive the thing down the muddy road, were it can be towed by a heavy recovery truck and shipped to the States for testing purposes.
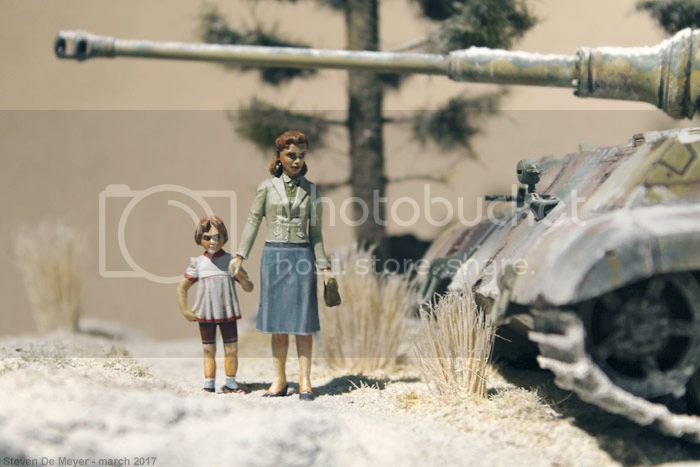
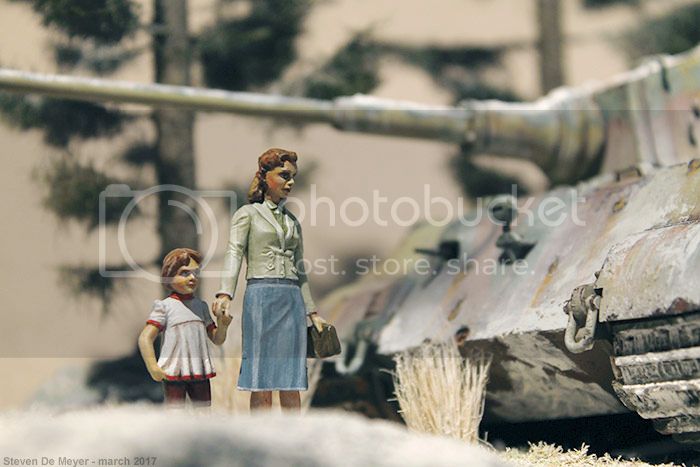
As the fighting seems over some local civilians are comming out of there shelters meeting the Americans...
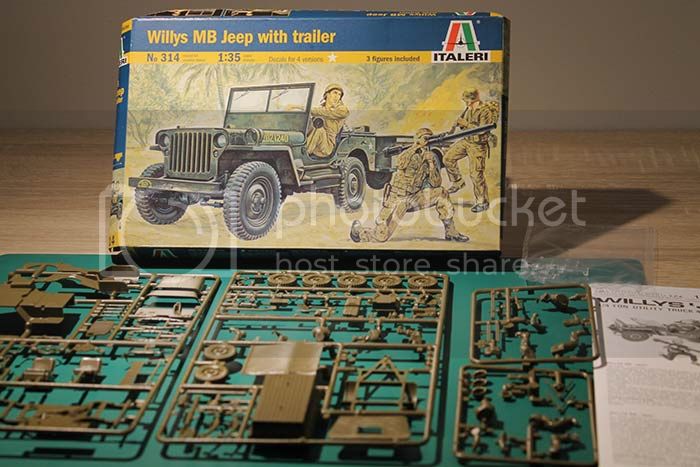
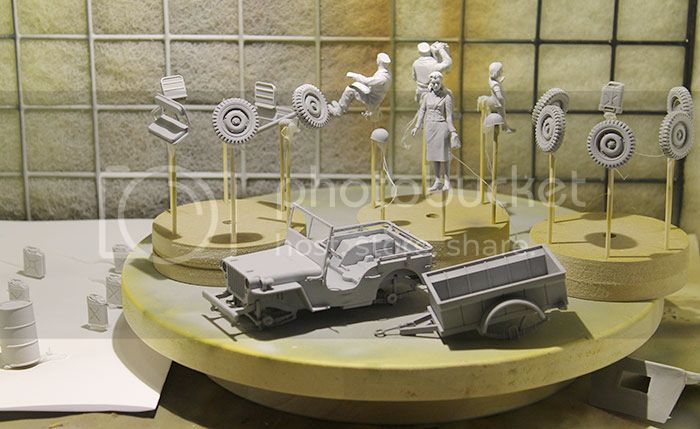
I started building the Willy jeep, it's a rather old Italeri kit with 3 figures and trailer.
Although the kit is still nice, there is a lot of cleaning up to do (flash)...
Ready for primer...
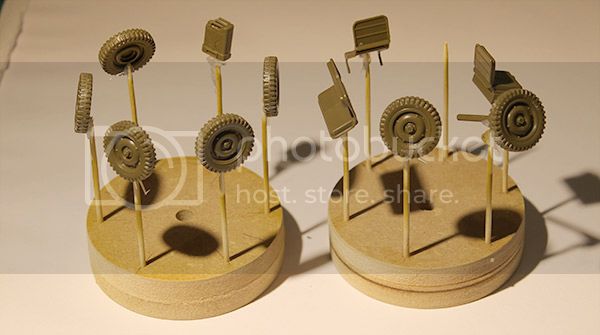
Here I glued the wheels on my spraying-tool with a dot of hot glue...
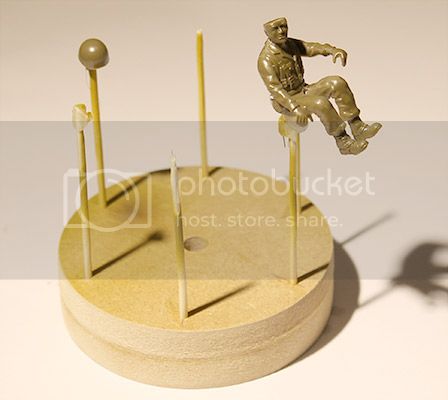
The driver...
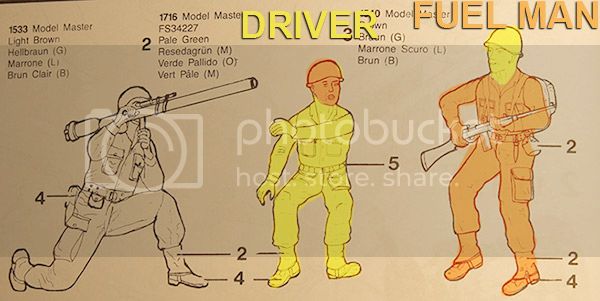
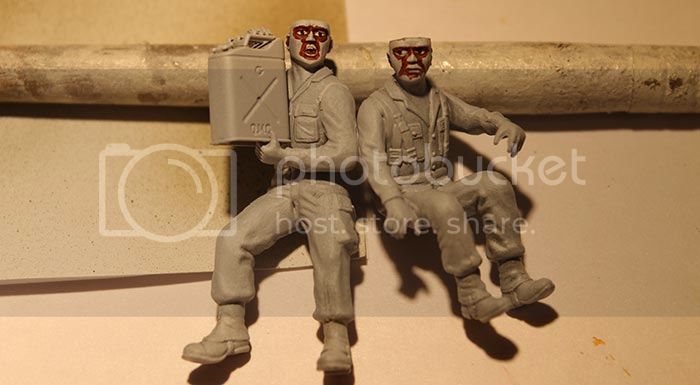
I won't use the bazooka-man, but I did adjust the 3rd guy;
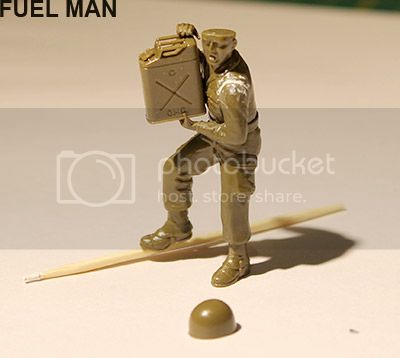
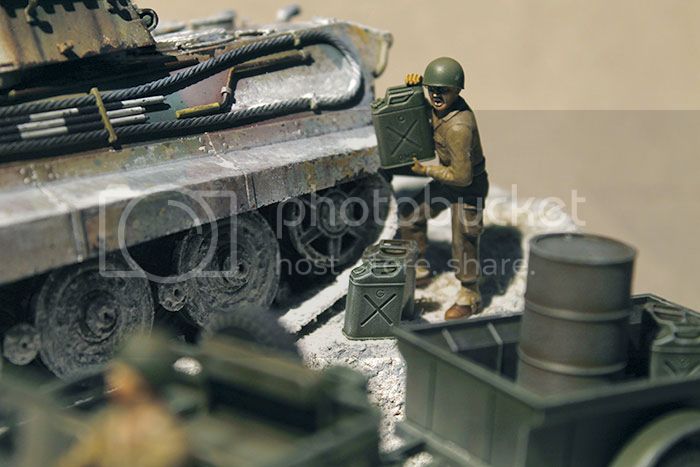
he will be carrying a jerrycan to get it on the back of the Tiger...
Here he is ready to paint...
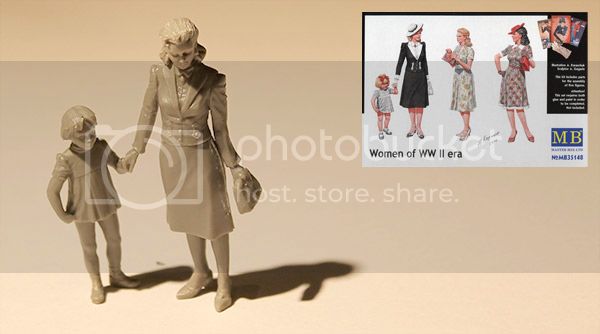
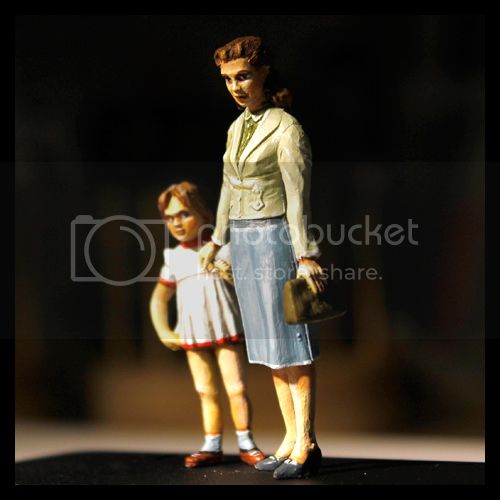
I also made these 2 civilians, making contact with the driver (master box kit)
So that's all for now, gonna try to primer them tomorrow...
Thanks for reading & kind regards
Steven
Steven000
Antwerpen, Belgium
Joined: August 07, 2016
KitMaker: 191 posts
Armorama: 120 posts
Joined: August 07, 2016
KitMaker: 191 posts
Armorama: 120 posts
Posted: Tuesday, February 21, 2017 - 02:07 AM UTC
Hi guys,
Another small update, did some more paining today.
First job was a thin coat of primer (Vallejo surf.primer grey)
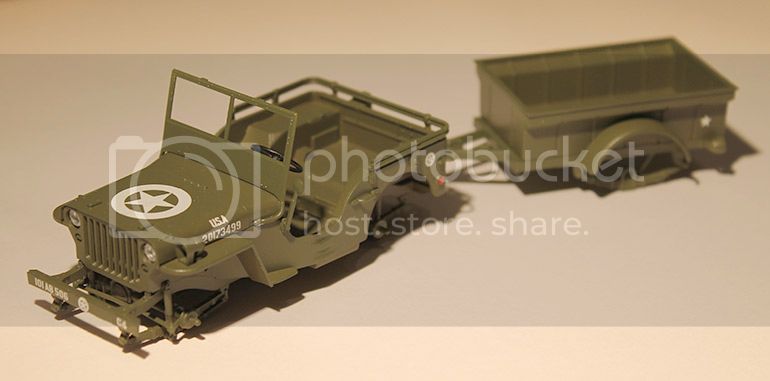
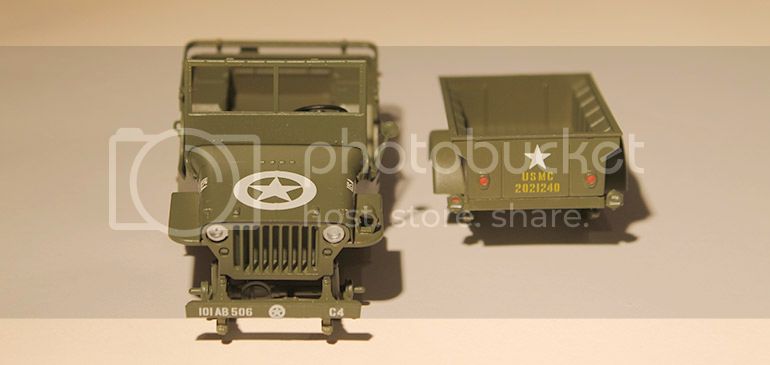
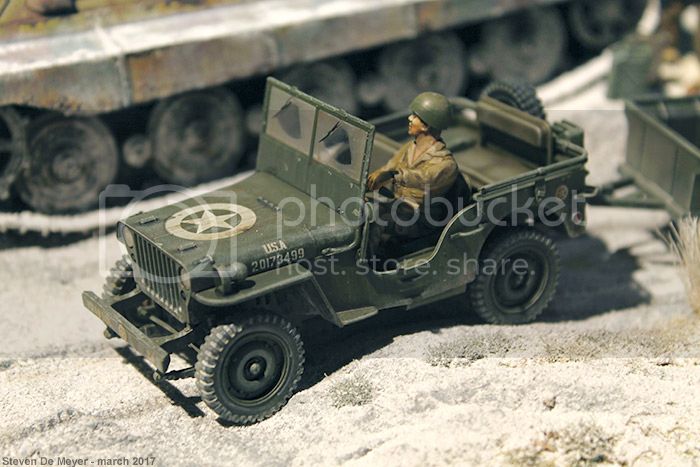
Then I airbrushed US green on the Willy jeep and trailer.
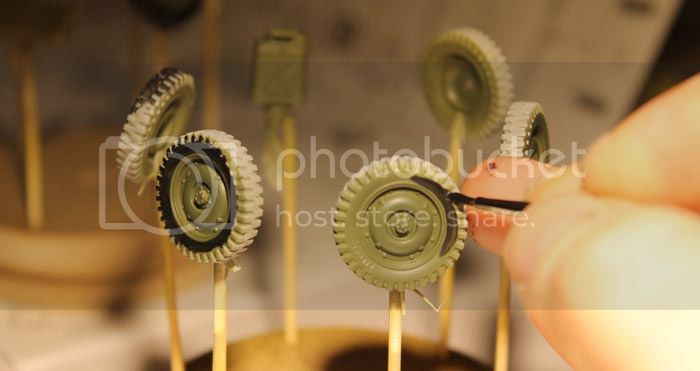
Here the wheels were airbrushed (green) and I'm painting the tire with a brush.
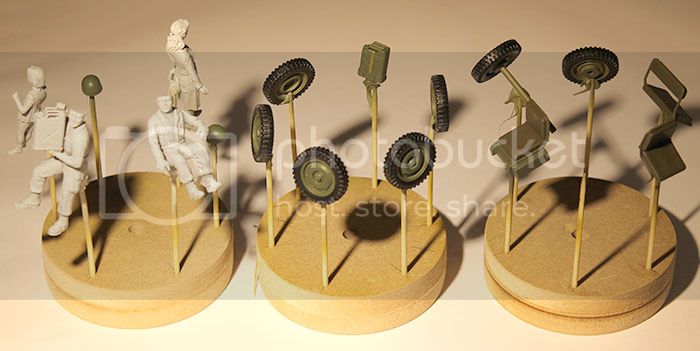
I keep the parts as long as possible on their toothpick So I don't lose any parts and they are easier to handle...
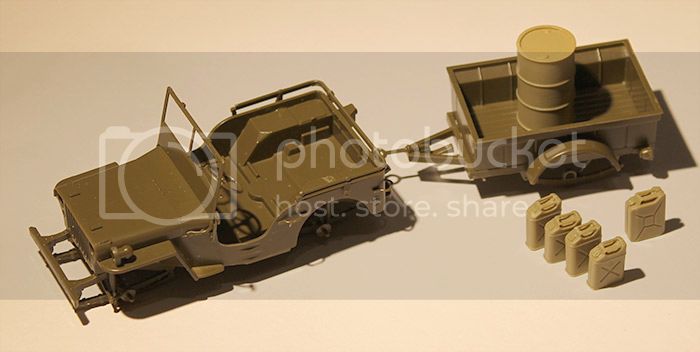
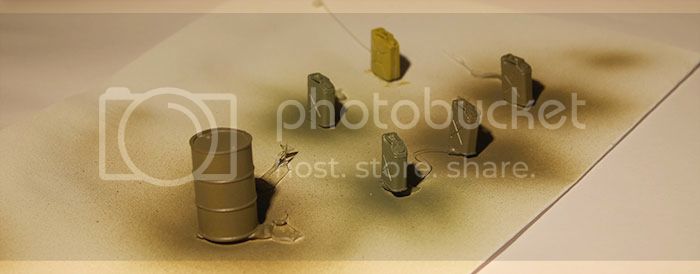
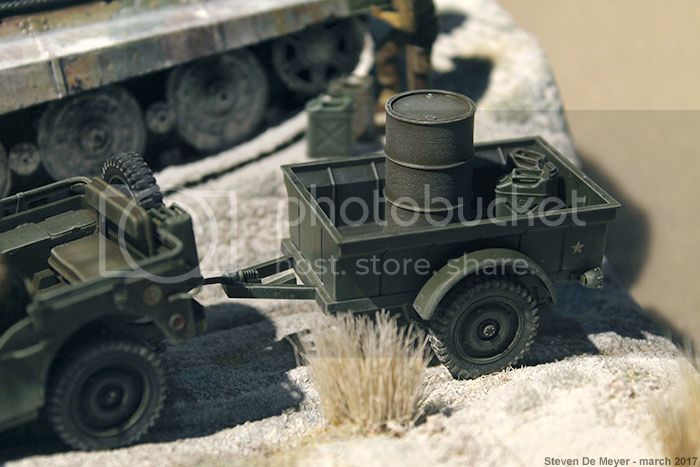
Some fuel for the Tiger... (Us dark green and Olive drab, one german can in dark yellow)
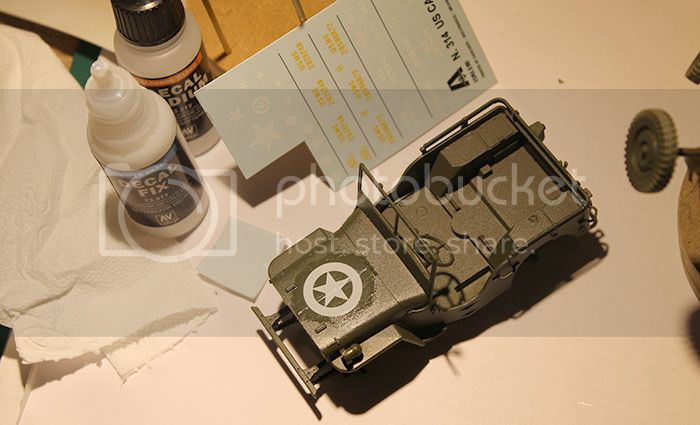
Then it was time for decals.
I personally don't like this kind of job (applying decals), I find it stressful because I haven't done it many times.
Started with a thin layer of gloss varnish, then applied 'Decal medium' (vallejo) ... quick! get that decal on! The medium is evaporating very fast and I'm still trying to 'catch' the decal with my tweezers...
After that I apply 'Decal fix' (Vallejo) which as to set for a few hours.
(you can find the process here; Vallejo 'Applying decals')
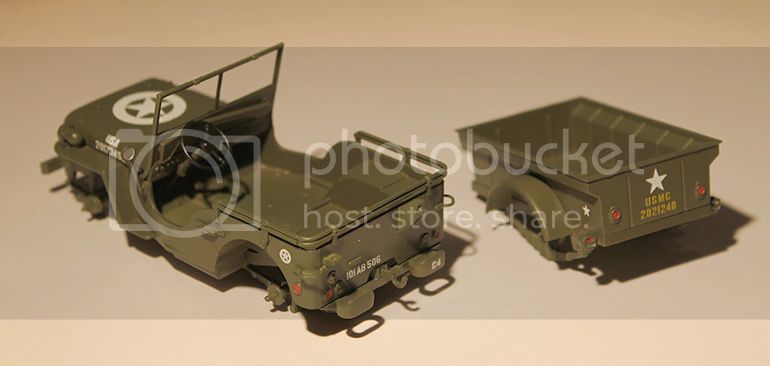
Here the base colors and decals are done.
(The clear parts for the headlights are not yet mounted)
So, that's all for now...
Next is a bit of weathering and painting figures
Kind regards
Steven
Steven000
Antwerpen, Belgium
Joined: August 07, 2016
KitMaker: 191 posts
Armorama: 120 posts
Joined: August 07, 2016
KitMaker: 191 posts
Armorama: 120 posts
Posted: Tuesday, February 21, 2017 - 07:37 AM UTC
Hello everyone,
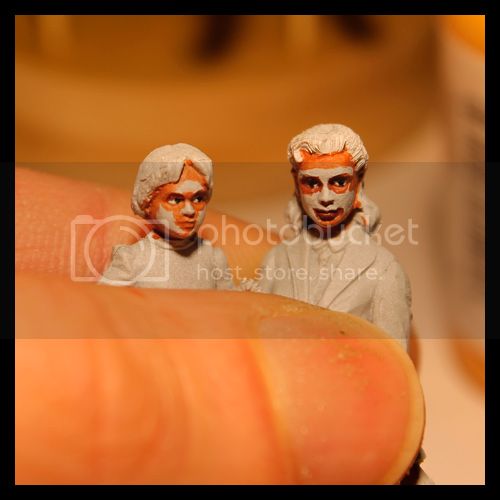
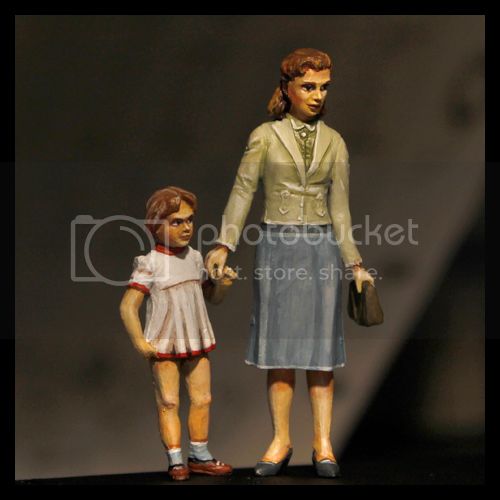
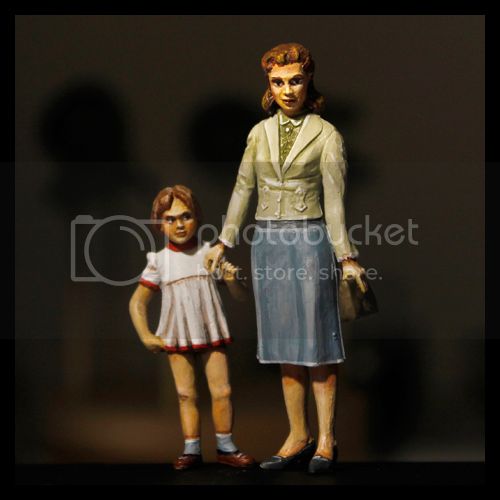
I couldn't sleep so I worked a few more hours on the first two figures. I've put all my effort into these figs and reached my limits I think, at the moment I'm happy with the result but I will have to wait for a fresh view to look at them in the morning.
I started with the eyes (white, black). I have only one bottle of skin-color (Vallejo Dark flesh) but I mix it with some white, black and dark red to make the variations.
Here is what I have at the moment
Maybe I'll make their clothes a bit more dirty in the end, as they lived in a shelter for a while, I don't know yet...
I'm off to bed!
Kind regards
Steven
brekinapez
Georgia, United States
Joined: July 26, 2013
KitMaker: 2,272 posts
Armorama: 1,860 posts
Joined: July 26, 2013
KitMaker: 2,272 posts
Armorama: 1,860 posts
Posted: Tuesday, February 21, 2017 - 08:02 AM UTC
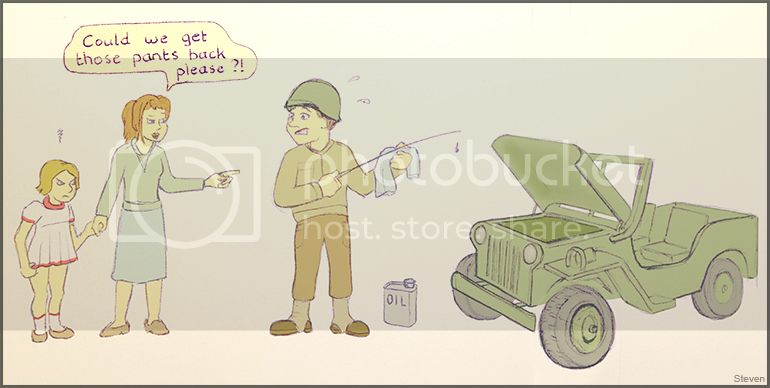
That kid needs some pants.
guni-kid
Nordrhein-Westfalen, Germany
Joined: July 21, 2007
KitMaker: 521 posts
Armorama: 514 posts
Joined: July 21, 2007
KitMaker: 521 posts
Armorama: 514 posts
Posted: Tuesday, February 21, 2017 - 02:38 PM UTC
Quoted Text
Yeah, that's right, now that you say it That kid needs some pants.
Otherwise: Nice work! Thanks for sharing and I can only say: stay with it, you're doing a very fine Job and are off to a great start into your modelling career!
iguanac
Belgrade, Serbia & Montenegro
Joined: September 06, 2007
KitMaker: 145 posts
Armorama: 131 posts
Joined: September 06, 2007
KitMaker: 145 posts
Armorama: 131 posts
Posted: Tuesday, February 21, 2017 - 04:44 PM UTC
Watch out - the trailer is registered to US Marines ' none available in same theater with King Tiger
Steven000
Antwerpen, Belgium
Joined: August 07, 2016
KitMaker: 191 posts
Armorama: 120 posts
Joined: August 07, 2016
KitMaker: 191 posts
Armorama: 120 posts
Posted: Tuesday, February 21, 2017 - 05:27 PM UTC
Quoted Text
That kid needs some pants.
First thing that crossed my mind...
I'll see what I can do about the pants
Quoted Text
Thanks for sharing and I can only say: stay with it
Thanks Marian, I'll do my best, hope to finish it before I lose interest
Quoted Text
Watch out - the trailer is registered to US Marines ' none available in same theater with King Tiger
Thanks for the info Marko,
Do you mean the registration marks on the backside, or was this type of trailer not used at all in the Bulge?
Kind regards
Steven
iguanac
Belgrade, Serbia & Montenegro
Joined: September 06, 2007
KitMaker: 145 posts
Armorama: 131 posts
Joined: September 06, 2007
KitMaker: 145 posts
Armorama: 131 posts
Posted: Tuesday, February 21, 2017 - 05:31 PM UTC
Steven, it was registration number in yellow USMC (US Marine COrps). I remember that kit offered USMC version as well as regular army and airborne troops.I believe you could easily cover it with paint. Otherwise great job and scenery
Steven000
Antwerpen, Belgium
Joined: August 07, 2016
KitMaker: 191 posts
Armorama: 120 posts
Joined: August 07, 2016
KitMaker: 191 posts
Armorama: 120 posts
Posted: Wednesday, March 01, 2017 - 04:17 AM UTC
Quoted Text
Steven, it was registration number in yellow USMC (US Marine COrps). I remember that kit offered USMC version as well as regular army and airborne troops.I believe you could easily cover it with paint.
Thanks Marco, I used the decal instructions for the 101st airborne for the jeep, but there was only one decal-drawing for the trailer, so that's how I got it wrong . I mixed the green paint in the airbrush cup, so bit difficult to fix but I think I'm just going to cover it up with some dirt in the end. Will pay a bit more attention next time
------
I have a small update on the jeep and crew;
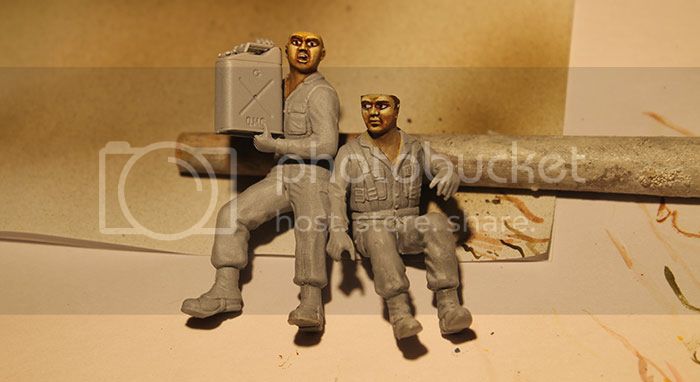
Painting the American figures faces, started with the dark shade (I just learned from Doug that it might be better to paint the hole face dark and then add the highlights)
Here the faces are done
Masking the windscreen wipers with some tape (Willy jeep)
Then I airbrushed it with a thinned mix
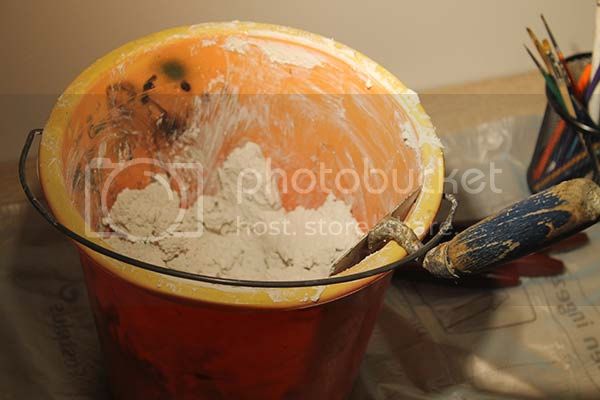
a bucket with some wall-gipsum for the little dio
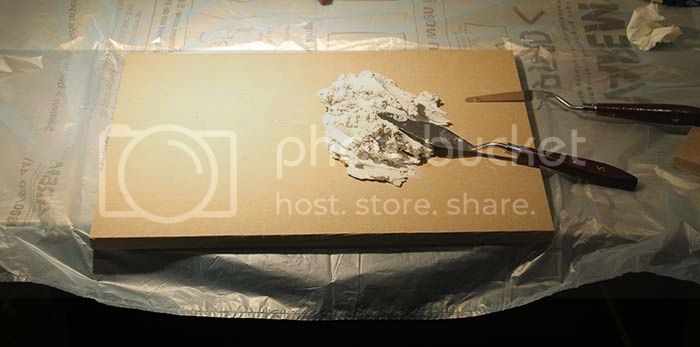
I'm using a 360x255mm (14.1x10") piece of MDF, so it fits inside my bookcase...
Here I started sculpting.
The jeep is almost finished, the seats and driver are installed.
I did my best to do the weathering a bit more subtle then with the Tiger but I find it very difficult.
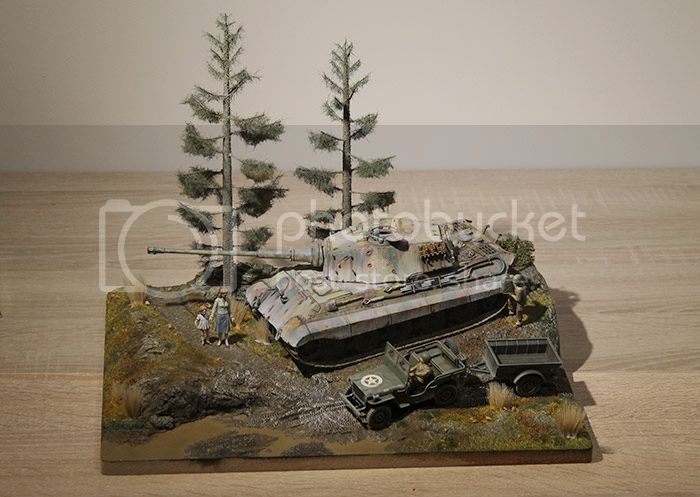
Here is an overview of the dio, it's drying now.
Not sure how it will turn out with paint. I think it needs at least one tree in the back, but I haven't yet started building one... (and still have to give her pants )
Thanks for reading & kind regards
Steven
Steven000
Antwerpen, Belgium
Joined: August 07, 2016
KitMaker: 191 posts
Armorama: 120 posts
Joined: August 07, 2016
KitMaker: 191 posts
Armorama: 120 posts
Posted: Saturday, March 04, 2017 - 04:35 AM UTC
Hi guys,
I worked some more on the dio today,
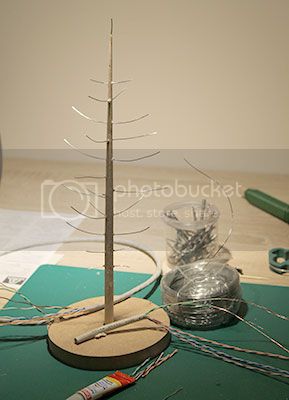
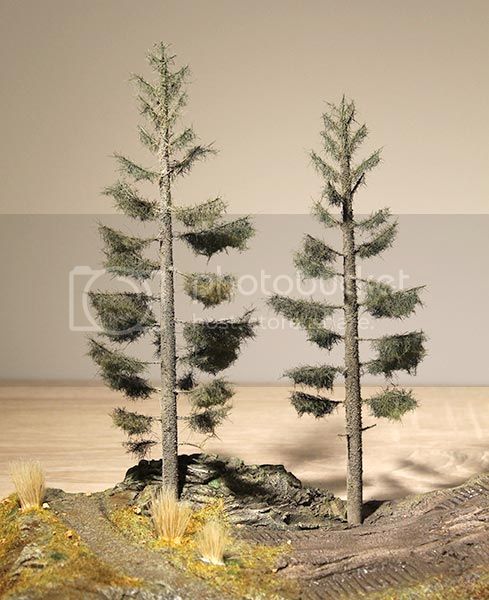
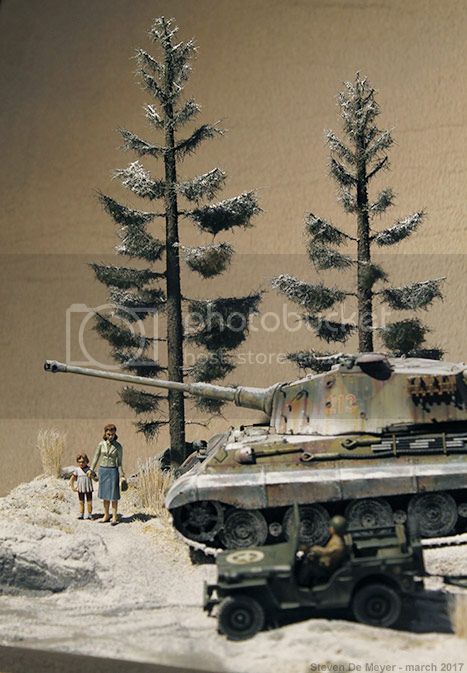
I decided to create two pine trees in the background, for this I used an 8mm wooden stick. I tapered it roughly with a knife, then smoothed it out with sandpaper.
Then I drilled holes in the trunk and glued iron-wire branches. In the top I used thinner (copper) wire from a piece of LAN cable...
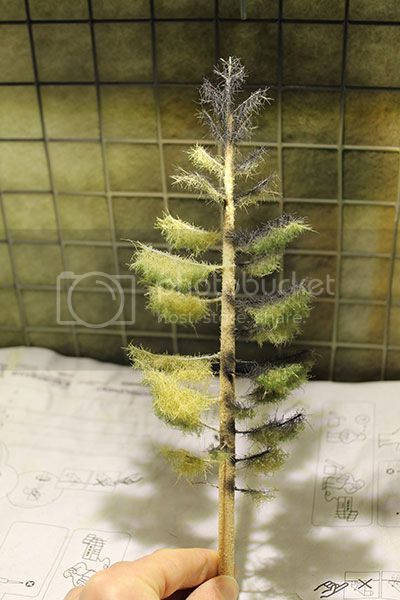
Then I glued fibers to the branches, and later started airbrushing the tree.
This is how they look at the moment, I'm planning to add a small amount of snow on the branches tomorrow.
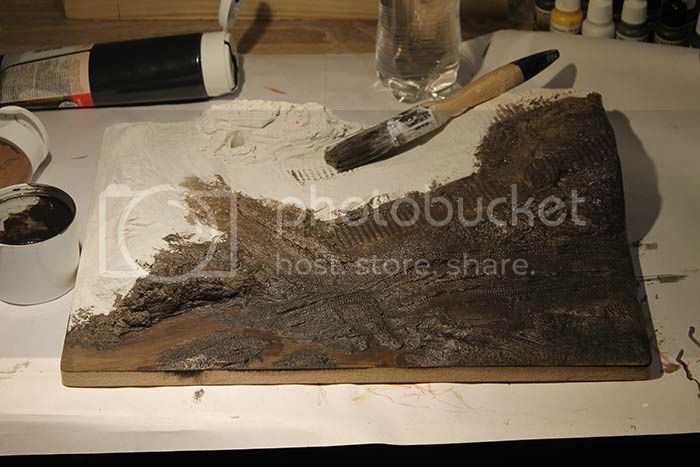
Here I'm painting a brown/black basecoat on the gipsum. This is done with large cheap acrylic tubes.
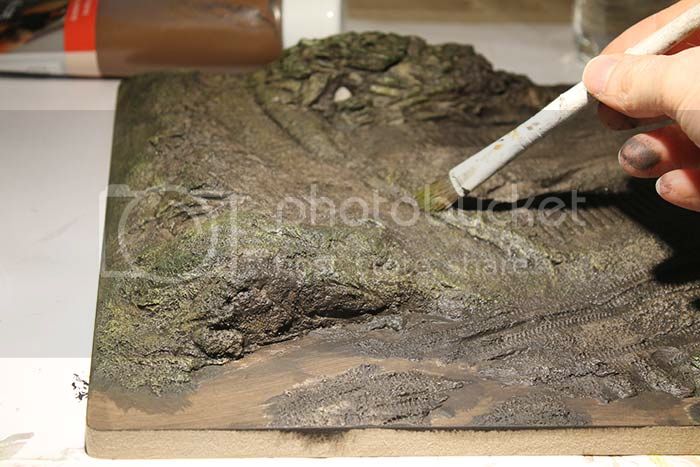
I mixed some green colors for some sort of moss effect.
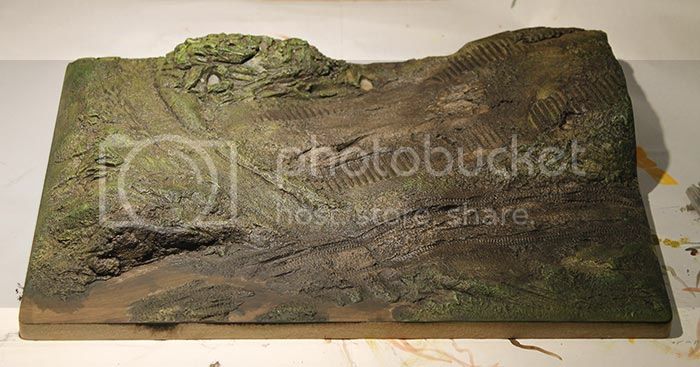
This is what I have at the moment, I added some small green 'stuff' here and there, and sprayed it with thinned wood glue. Tomorrow it should be dry and then I'm gonna try to add a white filter over all of the dio, to blend things together and get a colder look. Maybe make the puddle a bit frosted etc...
Thanks for reading and kind regards
Steven
Steven000
Antwerpen, Belgium
Joined: August 07, 2016
KitMaker: 191 posts
Armorama: 120 posts
Joined: August 07, 2016
KitMaker: 191 posts
Armorama: 120 posts
Posted: Sunday, March 05, 2017 - 02:54 AM UTC
Hi guys,
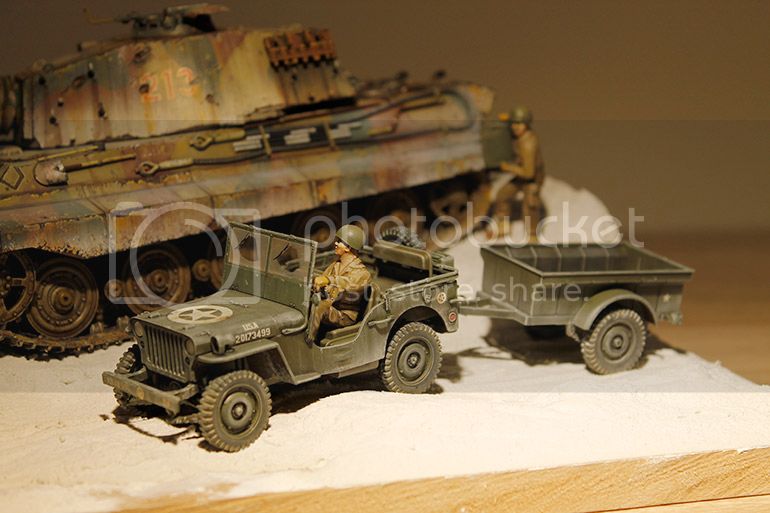
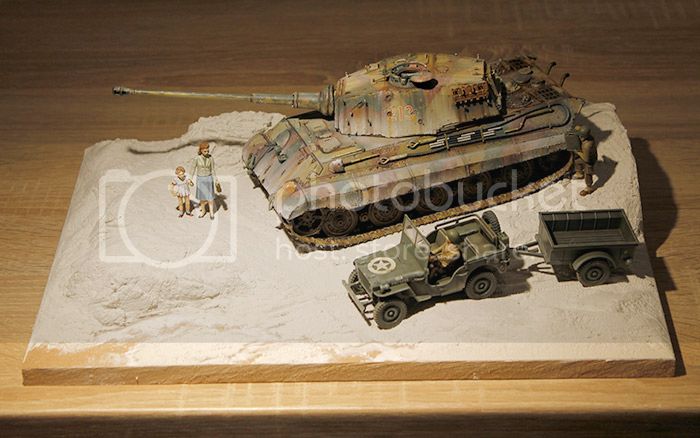
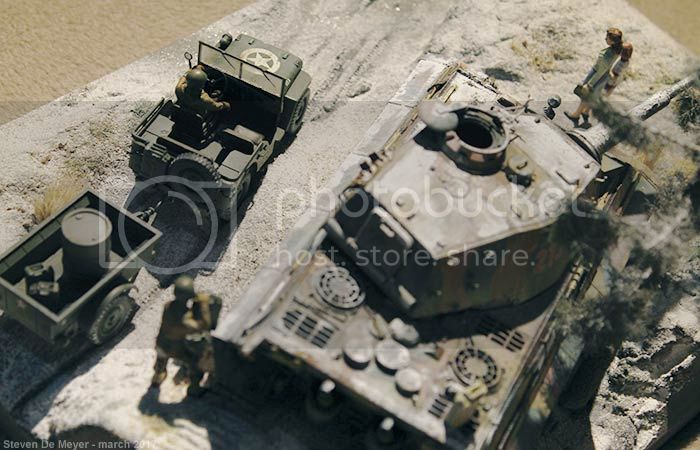
Today I added snow, for this I used basic (wall) gipsum powder which I applied in a few layers with a fine sift. Spray adhesive was sprayed over each layer to fixate it. Once you start adding snow there is no way back...
This is what I have now, still getting used to the snowy look...
All the vehicles are glued with wood glue, the figures and cans with super glue...
"Hey! This fuel ain't gonna unload itself! Get your a*s over here!"
As the fight seems to be over, some local civilians are coming out of their shelter...
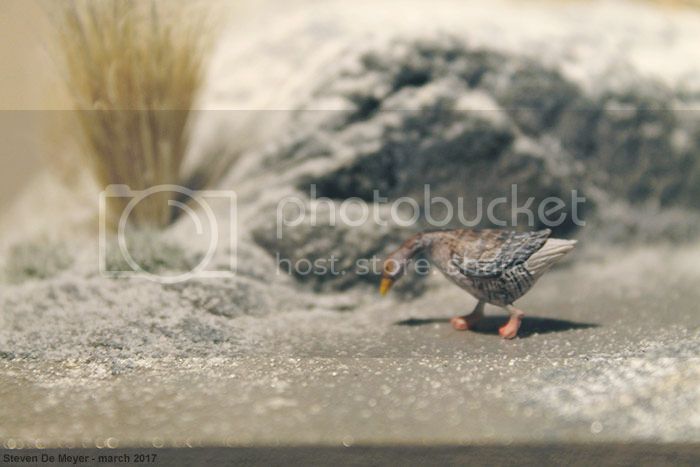
I added a duck (Tamiya 'Livestock N° 35128'),
Also tried to make this part look a bit frozen (bit of gipsum powder and gloss varnish)
So that's it, thanks for reading!
Kind regards
Steven
ltb073
New York, United States
Joined: March 08, 2010
KitMaker: 3,662 posts
Armorama: 3,078 posts
Joined: March 08, 2010
KitMaker: 3,662 posts
Armorama: 3,078 posts
Posted: Saturday, March 25, 2017 - 06:28 AM UTC
Great looking diorama thanks for the step by step process that you used