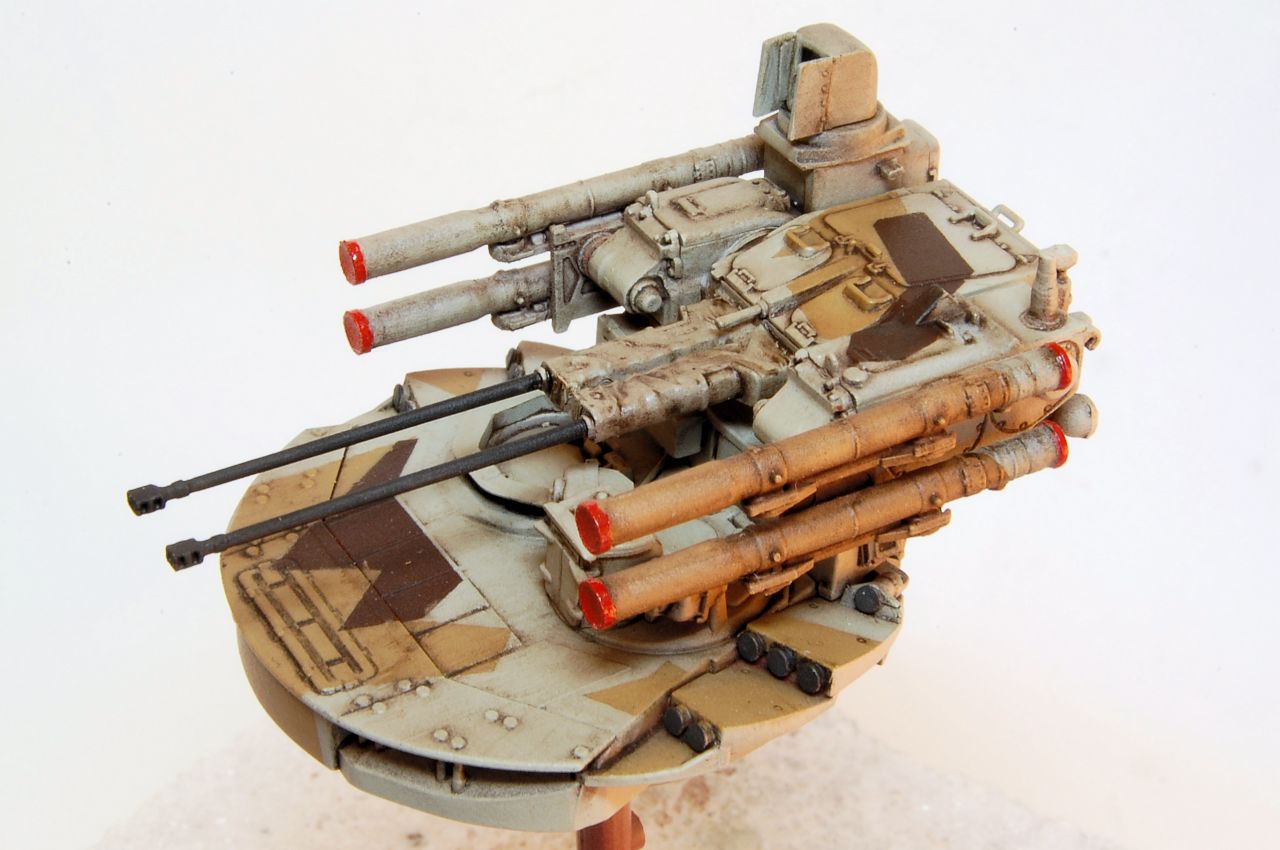
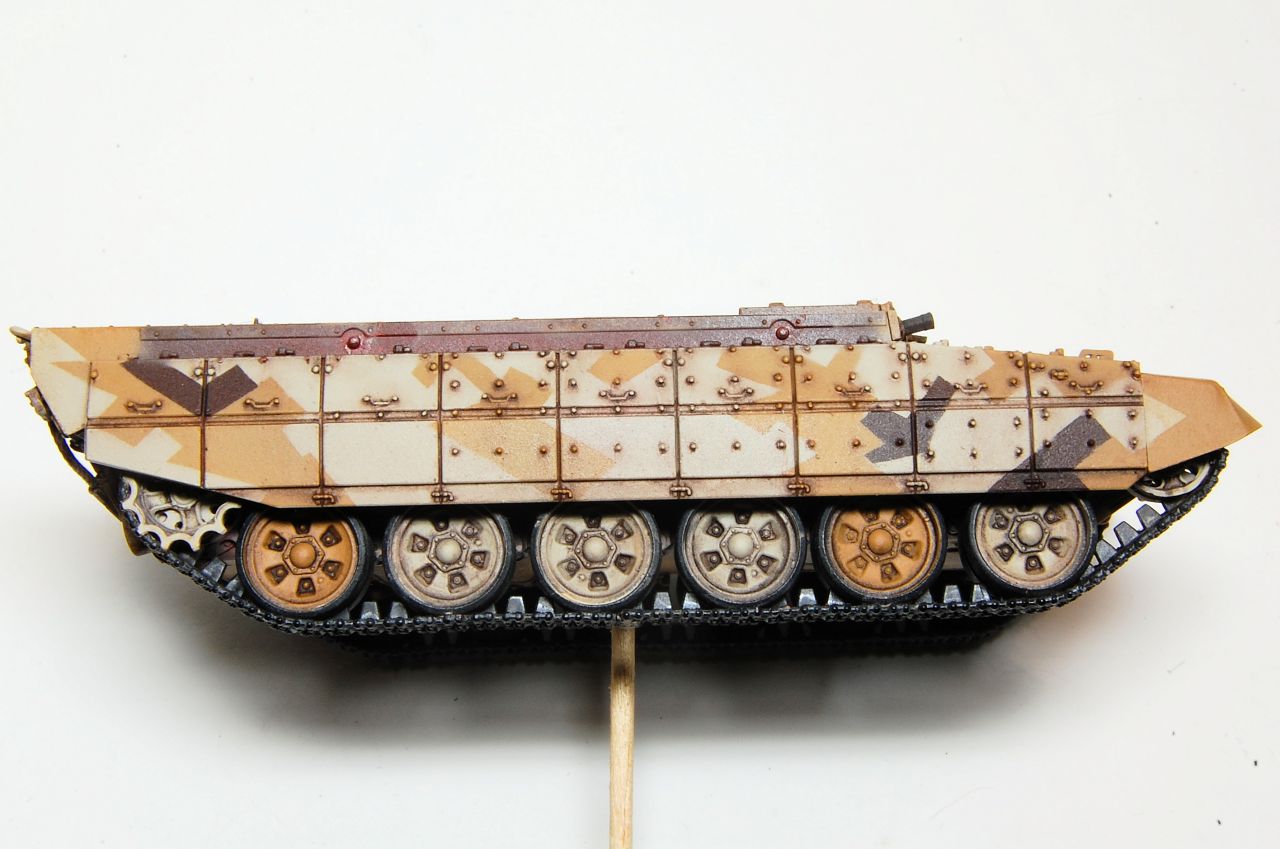
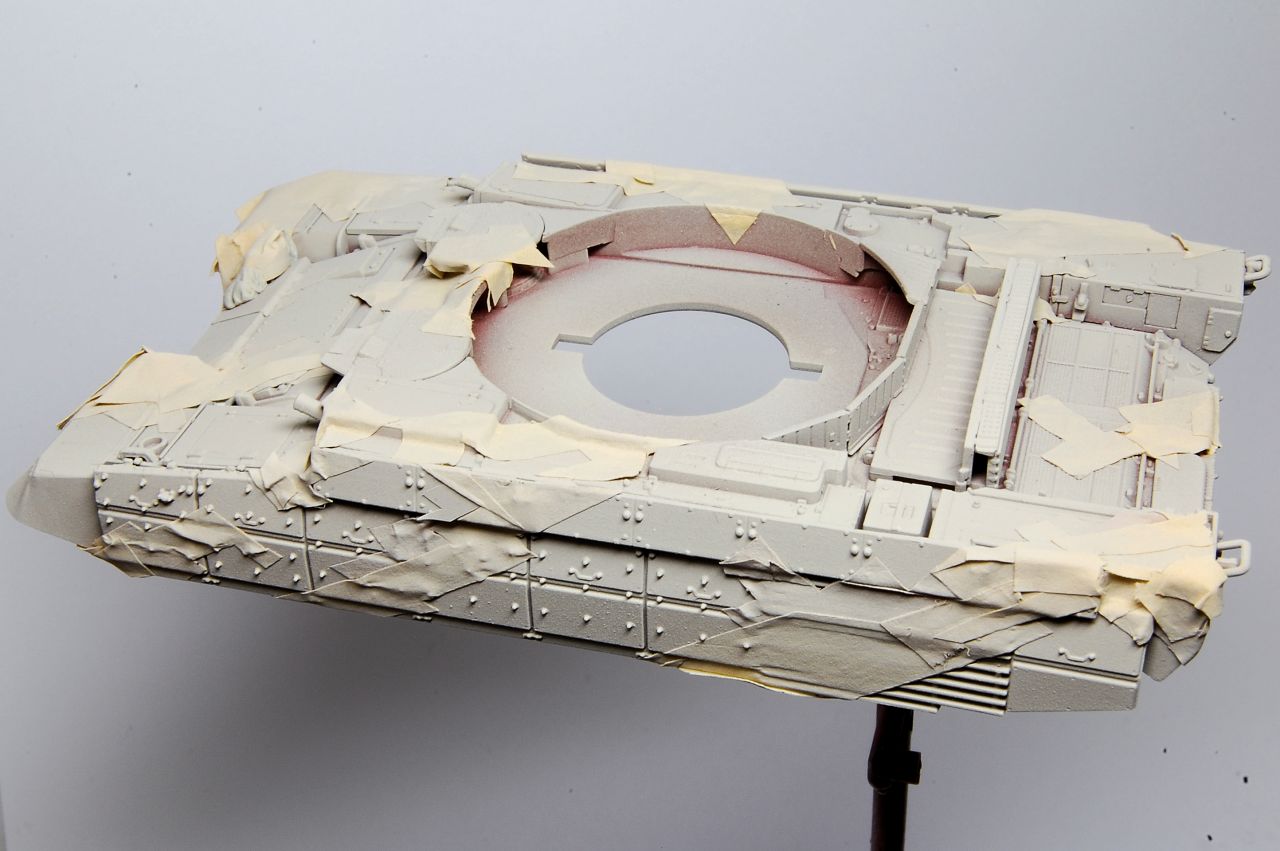
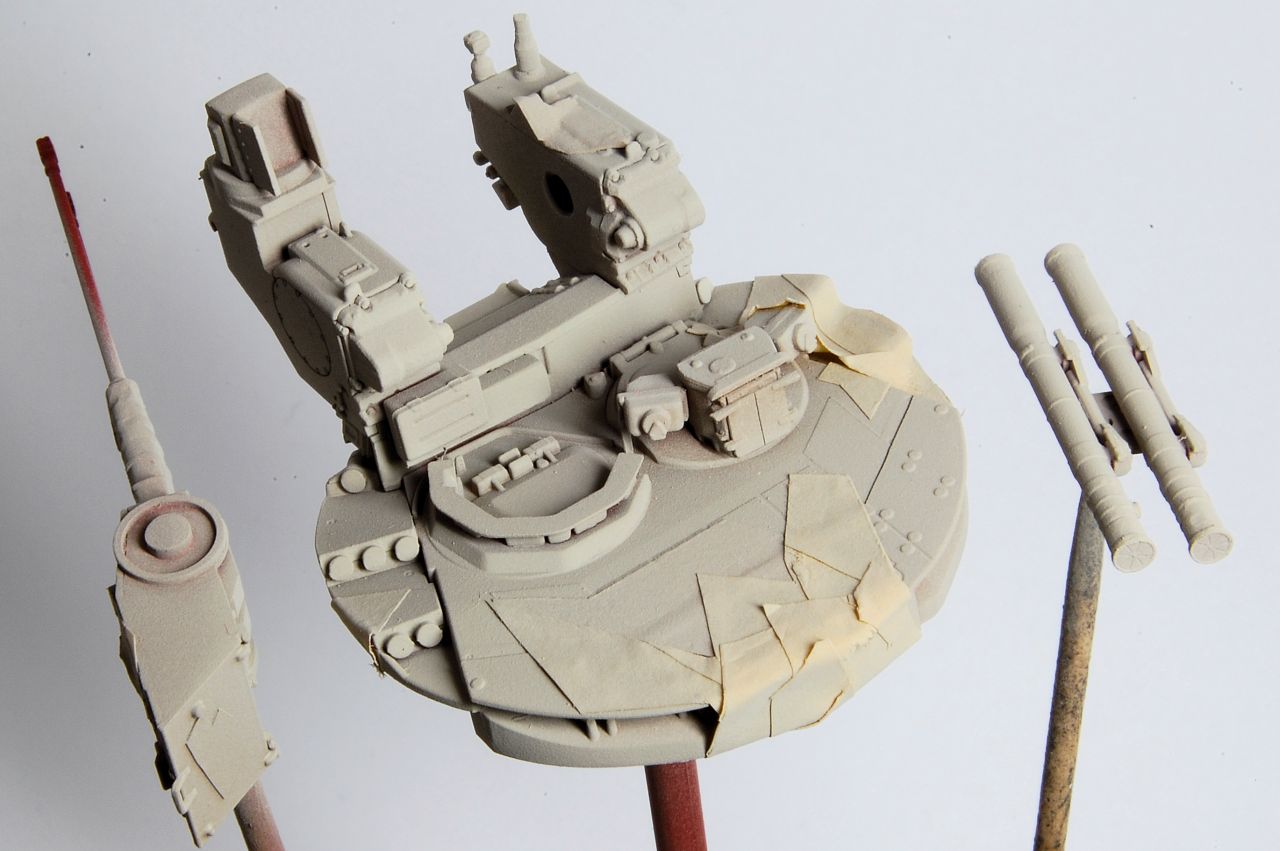
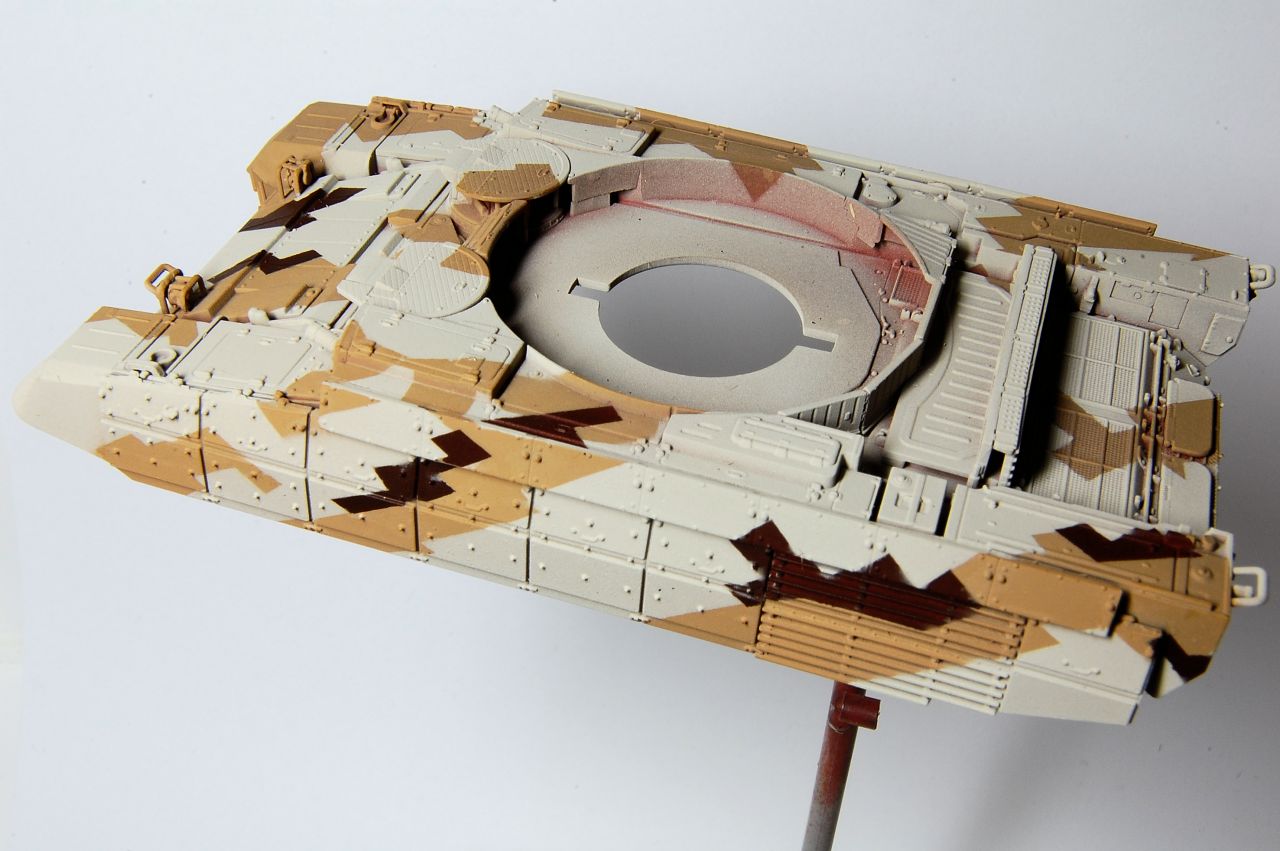
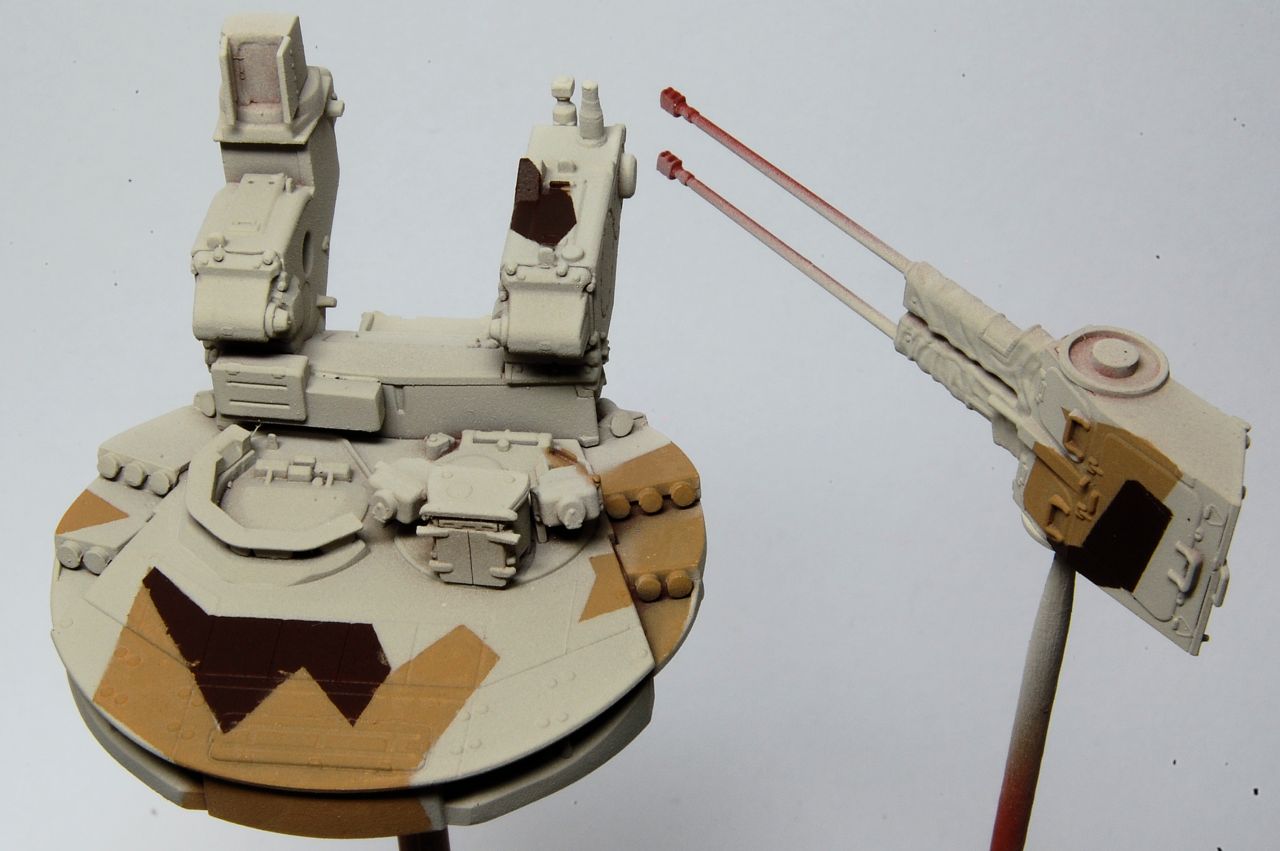
Main colour added on top of second layer of masking - lots more layers in some places...
All masking removed... looks a little "raw" and some retouching is needed where masking didn't quite join up, or paint crept under the edges, mainly around rivets I think. Not too bad though, it gives something to work with as a base coat. Lower hull is lagging one paint step behind. Deck Tan on reflection is definitely too grey, but I hope it is pale enough that I can give it a filter / glaze with something to warm it up a bit and move it towards something more sandy.
Hosted by Darren Baker
Zvezda's Tiny Terminator Build
firstcircle
England - South East, United Kingdom
Joined: November 19, 2008
KitMaker: 2,249 posts
Armorama: 2,007 posts
Joined: November 19, 2008
KitMaker: 2,249 posts
Armorama: 2,007 posts
Posted: Friday, July 28, 2017 - 08:45 PM UTC
tread_geek
Ontario, Canada
Joined: March 23, 2008
KitMaker: 2,847 posts
Armorama: 2,667 posts
Joined: March 23, 2008
KitMaker: 2,847 posts
Armorama: 2,667 posts
Posted: Friday, July 28, 2017 - 11:45 PM UTC
Matthew,
Fascinating developments and progress on this rather complex endeavour. I am somewhat puzzled by your images and commentary about colour issues in particular where you refer to the Tamiya "Deck Tan" and how it looks kind of "greyish". Am I kind of colour blind, are their issues with digital cameras or monitors? Looking at the colour I use which is marked as "Wooden Deck Tan" XF-78, mine appears to have a somewhat more yellowish tint to it. Example: The boxes are XF-78
Opel Load 3:4-2 by Jan Etal, on Flickr
This got me curious if we were talking about the same colour. It turns out we were NOT. Your "Deck Tan" is XF-55 and indeed more greyish. Thank heavens we were talking about the proverbial " apples and oranges" and I wasn't about to lose my mind.
Cheers,
Jan
firstcircle
England - South East, United Kingdom
Joined: November 19, 2008
KitMaker: 2,249 posts
Armorama: 2,007 posts
Joined: November 19, 2008
KitMaker: 2,249 posts
Armorama: 2,007 posts
Posted: Saturday, July 29, 2017 - 02:08 AM UTC
Jan, indeed, I think the colour you show in your photo is what I should be using, and mine is XF-55. The lid and the paint in the bottle don't really look grey, but once applied next to the other colours it does. As I said, I hope, as the other colours are basically brown variations, I should be able to lay some translucent coat over the top of the whole thing to bring it to a more browny sandy appearance. I think at this scale, the contrast between the colours needs to be toned down in any case.
tread_geek
Ontario, Canada
Joined: March 23, 2008
KitMaker: 2,847 posts
Armorama: 2,667 posts
Joined: March 23, 2008
KitMaker: 2,847 posts
Armorama: 2,667 posts
Posted: Tuesday, December 26, 2017 - 03:08 AM UTC
Well, it has taken a while but finally this has made an appearance. BMPT by Jan Etal, on Flickr
I had ordered this twice with the first time being when this thread appeared. Each time the place I ordered from failed to deliver. In desperation I sent off a letter to the chubby fellow in the red suit with white trim and it arrived Christmas Eve.
Matthew, I shall be following your build and instructions in this thread with due diligence to be sure that all 197 parts end up where they should be. To all reading this thread, best wishes for whatever season is appropriate to you.
Cheers,
A Happy Jan
Akatsiya60
United Kingdom
Joined: March 28, 2014
KitMaker: 12 posts
Armorama: 12 posts
Joined: March 28, 2014
KitMaker: 12 posts
Armorama: 12 posts
Posted: Wednesday, December 27, 2017 - 07:44 PM UTC
One thing you might want to note, is that the Zvezda lower hull, like their T 90 kit is totally wrong, the overall dimension is correct but every other one in between is wrong. Good news, the Revell T 90 lower hull is a perfect replacement that will give you better wheels and dimensions, just the engineering attachment points at the front need some slight modification, but you can easily cut the ones from Zvezda to do this.
firstcircle
England - South East, United Kingdom
Joined: November 19, 2008
KitMaker: 2,249 posts
Armorama: 2,007 posts
Joined: November 19, 2008
KitMaker: 2,249 posts
Armorama: 2,007 posts
Posted: Wednesday, December 27, 2017 - 08:02 PM UTC
Simon, thank you for this; clearly it is far too late for me as mine is well into the painting stage, but your advice may possibly be heeded by Jan. How do you think Zvezda got into doing this? Have they based it on the incorrect variant of the basic T-72 chassis?
Matthew
Matthew
tread_geek
Ontario, Canada
Joined: March 23, 2008
KitMaker: 2,847 posts
Armorama: 2,667 posts
Joined: March 23, 2008
KitMaker: 2,847 posts
Armorama: 2,667 posts
Posted: Thursday, December 28, 2017 - 12:39 AM UTC
Quoted Text
Simon, thank you for this; clearly it is far too late for me as mine is well into the painting stage, but your advice may possibly be heeded by Jan. How do you think Zvezda got into doing this? Have they based it on the incorrect variant of the basic T-72 chassis?
While I am no expert by a long haul and I have yet to open the Terminator's box, I do have a Revell T-90A kit and have mostly assembled the Zvezda T-90. I have put in a bit of work researching these subjects (T-90's, Terminators) and it can indeed get confusing. I believe that there are two T-90 "Russian hulls" plus a T-90 "Export hull" and it appears there are some dimensional differences in certain parts of specific versions. Now add to that there is a Terminator and a Terminator 2. The latter is made from refurbished T-72's and has mostly T-72 running gear and eliminates the two grenade launchers and their operators.
While I haven't studied them "ad-nauseum" my casual visual inspection of the Zvezda and Revell offerings appear to be quite close. I'll take the comments made under advisement but it's still too early in this process to make any plans. Bottom line is that I'm still on a high from finally getting a Terminator kit.
Cheers,
Jan
KruppCake
Ontario, Canada
Joined: July 13, 2015
KitMaker: 401 posts
Armorama: 387 posts
Joined: July 13, 2015
KitMaker: 401 posts
Armorama: 387 posts
Posted: Friday, December 29, 2017 - 08:49 PM UTC
Nice build! I also used masking tape for my splinter camo (1:35).
Akatsiya60
United Kingdom
Joined: March 28, 2014
KitMaker: 12 posts
Armorama: 12 posts
Joined: March 28, 2014
KitMaker: 12 posts
Armorama: 12 posts
Posted: Saturday, December 30, 2017 - 07:04 PM UTC
Quoted Text
Not sure how they managed it, but their 1/72 kit inherited all the problems of their 1/35 kit, i.e that the front lower glacis plate and entrenching tool, and the rear plate are too long, this in turn makes the actual hull floor too short, which in turn messes with the wheel spacing slightly etc. http://i.imgur.com/QdgzUz4.jpgSimon, thank you for this; clearly it is far too late for me as mine is well into the painting stage, but your advice may possibly be heeded by Jan. How do you think Zvezda got into doing this? Have they based it on the incorrect variant of the basic T-72 chassis?
Matthew
This is mine using the Revell hull and wheels with an old set of incorrect OKB T 90 tracks, as I say only modified the engineering points a perfect fit.
firstcircle
England - South East, United Kingdom
Joined: November 19, 2008
KitMaker: 2,249 posts
Armorama: 2,007 posts
Joined: November 19, 2008
KitMaker: 2,249 posts
Armorama: 2,007 posts
Posted: Sunday, December 31, 2017 - 12:59 AM UTC
Hm... The main visual problem I can see in comparison with the real thing is that the kit idler appears to be further away from the first Road wheel than it should be. The spacing of the other wheels in relation to each other looks more or less OK. I hope you don't mind me saying so, but what you've done doesn't seem to have really fixed the problem, the second wheel now seems too close to the third, too far from the first.
Akatsiya60
United Kingdom
Joined: March 28, 2014
KitMaker: 12 posts
Armorama: 12 posts
Joined: March 28, 2014
KitMaker: 12 posts
Armorama: 12 posts
Posted: Sunday, December 31, 2017 - 07:49 PM UTC
Quoted Text
Hm... The main visual problem I can see in comparison with the real thing is that the kit idler appears to be further away from the first Road wheel than it should be. The spacing of the other wheels in relation to each other looks more or less OK. I hope you don't mind me saying so, but what you've done doesn't seem to have really fixed the problem, the second wheel now seems too close to the third, too far from the first.
No you are right and I have never noticed it before, just looked at the model ( as I know the Revell kit is correct to any drawings I have) the problem is not in the wheel spacing but the fact that the wheel has come loose! Who knew?, thanks for pointing it out, I never look that close once done, that and it's facing the other way in the cabinet!☺️
firstcircle
England - South East, United Kingdom
Joined: November 19, 2008
KitMaker: 2,249 posts
Armorama: 2,007 posts
Joined: November 19, 2008
KitMaker: 2,249 posts
Armorama: 2,007 posts
Posted: Sunday, March 22, 2020 - 05:49 AM UTC
Short break of two and half years, and time to finish this off. Such a long pause created some problems. There was a little damage to some of the paintwork, and though I had noted that that I used Deck Tan and Desert Yellow, I don't know what the brown was.
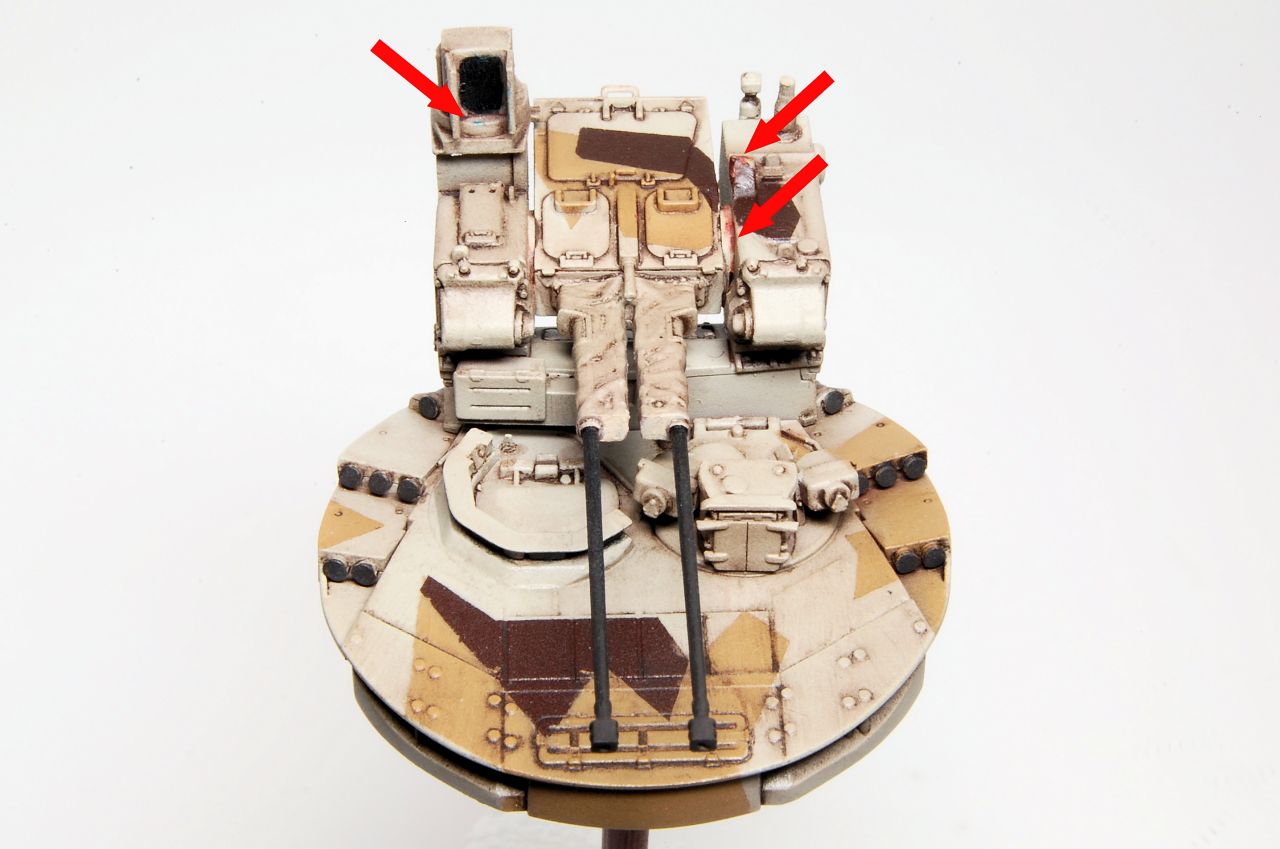
One of the brackets on the rear bar armour had also snapped off and disappeared, so a new one was made from card and rod:
I also noticed that the launcher on the right hand side should have a bit of Deck Tan:
That was masked and added, and the turret damage was touched up, and then the launchers were attached:
The lower side armour was added. This went on quite easily, I just drilled out the holes a little to make sure it went all the way in, and made sure the cement made good contact:
The tow rope was also attached, again, fitted well, just a question of removing the paint for the cement:
The bar armour also fitted well, despite my imperfect scratched bracket - the brackets on the rear plate engage with those on the armour between the two pairs of pegs, then it's a question of ensuring it is vertical and sets that way:
So I realise that since the previous post with photos I had done a lot of the pinwashing and filters, and more of that was done. Also here, the upper side armour is now in place. This revealed something that I should have dealt with much earlier, and something for anyone building it to look out for, which is that there are ejector marks on the side that faces in, the tops of which are just visible in some places.
One of the brackets on the rear bar armour had also snapped off and disappeared, so a new one was made from card and rod:
I also noticed that the launcher on the right hand side should have a bit of Deck Tan:
That was masked and added, and the turret damage was touched up, and then the launchers were attached:
The lower side armour was added. This went on quite easily, I just drilled out the holes a little to make sure it went all the way in, and made sure the cement made good contact:
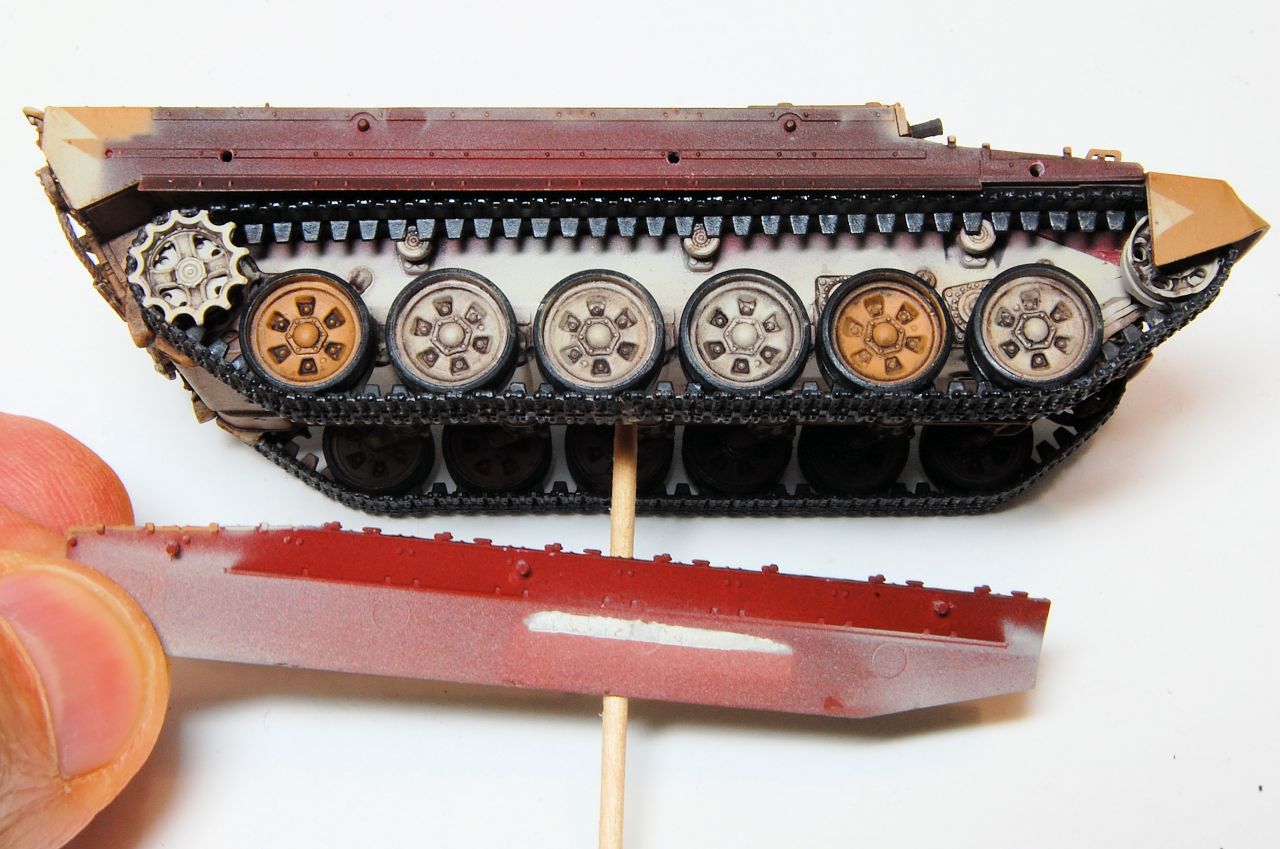
The tow rope was also attached, again, fitted well, just a question of removing the paint for the cement:
The bar armour also fitted well, despite my imperfect scratched bracket - the brackets on the rear plate engage with those on the armour between the two pairs of pegs, then it's a question of ensuring it is vertical and sets that way:
So I realise that since the previous post with photos I had done a lot of the pinwashing and filters, and more of that was done. Also here, the upper side armour is now in place. This revealed something that I should have dealt with much earlier, and something for anyone building it to look out for, which is that there are ejector marks on the side that faces in, the tops of which are just visible in some places.
deerstalker36
Queensland, Australia
Joined: May 16, 2010
KitMaker: 232 posts
Armorama: 218 posts
Joined: May 16, 2010
KitMaker: 232 posts
Armorama: 218 posts
Posted: Sunday, March 22, 2020 - 10:12 PM UTC
lovely rendering of this kit. i should have used your method of masking on my meng one