Crusader to Gazala Campaign
Queensland, Australia
Joined: August 06, 2005
KitMaker: 3,353 posts
Armorama: 3,121 posts
Posted: Wednesday, May 02, 2018 - 02:18 PM UTC
Managed to get some paint down finally. Road wheels, base coat of rubber black and AK RAL 8020. Some touch ups required.
The AK colour is a lot lighter than I would have expected, and presume they expect a wash to be used to darken it....

Then the cab, chassis and armoured rear was done. Primed with Tamiya Grey Primer, pre-shaded with Tamiya Matt Black and Red Brown mix, then base coated with The AK RAL 8020. Then I tried something new - a wash and weathering using Vallejo acrylics. So far just the German Camo Brown was used with water to really change the amount of pigment. It was a risk, but I think it paid off.

Comparison to the Gun which has no wash or weathering yet.

I am very interested to hear your thoughts on this effect.
Cheers
On the Bench:
Dust, styrene scraps, paint splotches and tears.
Queensland, Australia
Joined: August 06, 2005
KitMaker: 3,353 posts
Armorama: 3,121 posts
Posted: Wednesday, May 02, 2018 - 02:27 PM UTC
On the Bench:
Dust, styrene scraps, paint splotches and tears.
Western Australia, Australia
Joined: May 05, 2006
KitMaker: 900 posts
Armorama: 510 posts
Posted: Wednesday, May 02, 2018 - 03:12 PM UTC
That's looking really nice Peter, weathering doesn't seem overdone.
Don't you feel more like you do now than you did when you came in?
United States
Joined: August 28, 2015
KitMaker: 319 posts
Armorama: 308 posts
Posted: Wednesday, May 02, 2018 - 04:13 PM UTC
Alabama, United States
Joined: September 22, 2008
KitMaker: 476 posts
Armorama: 447 posts
Posted: Wednesday, May 02, 2018 - 04:36 PM UTC
I can't wait to see this all put together, though it looks pretty cool in sub-assemblies too.
ColinEdm
 Associate Editor
Alberta, Canada
Joined: October 15, 2013
KitMaker: 1,355 posts
Armorama: 1,229 posts
Posted: Wednesday, May 02, 2018 - 07:35 PM UTC
The voices are back.....excellent....
California, United States
Joined: April 26, 2016
KitMaker: 362 posts
Armorama: 285 posts
Posted: Wednesday, May 02, 2018 - 11:27 PM UTC
"Gonna start blastin"
...Stumpy
Rio Bravo 1959

#424
Queensland, Australia
Joined: April 23, 2015
KitMaker: 4,648 posts
Armorama: 2,248 posts
Posted: Friday, May 04, 2018 - 12:55 PM UTC
Peter,
That weathering and paint modulation look great! Was glad to see them today.
Gaz
"Artillery adds dignity, to what would otherwise be an ugly brawl."
Frederick The Great

#491
Missouri, United States
Joined: April 06, 2016
KitMaker: 602 posts
Armorama: 191 posts
Posted: Sunday, May 06, 2018 - 08:22 AM UTC
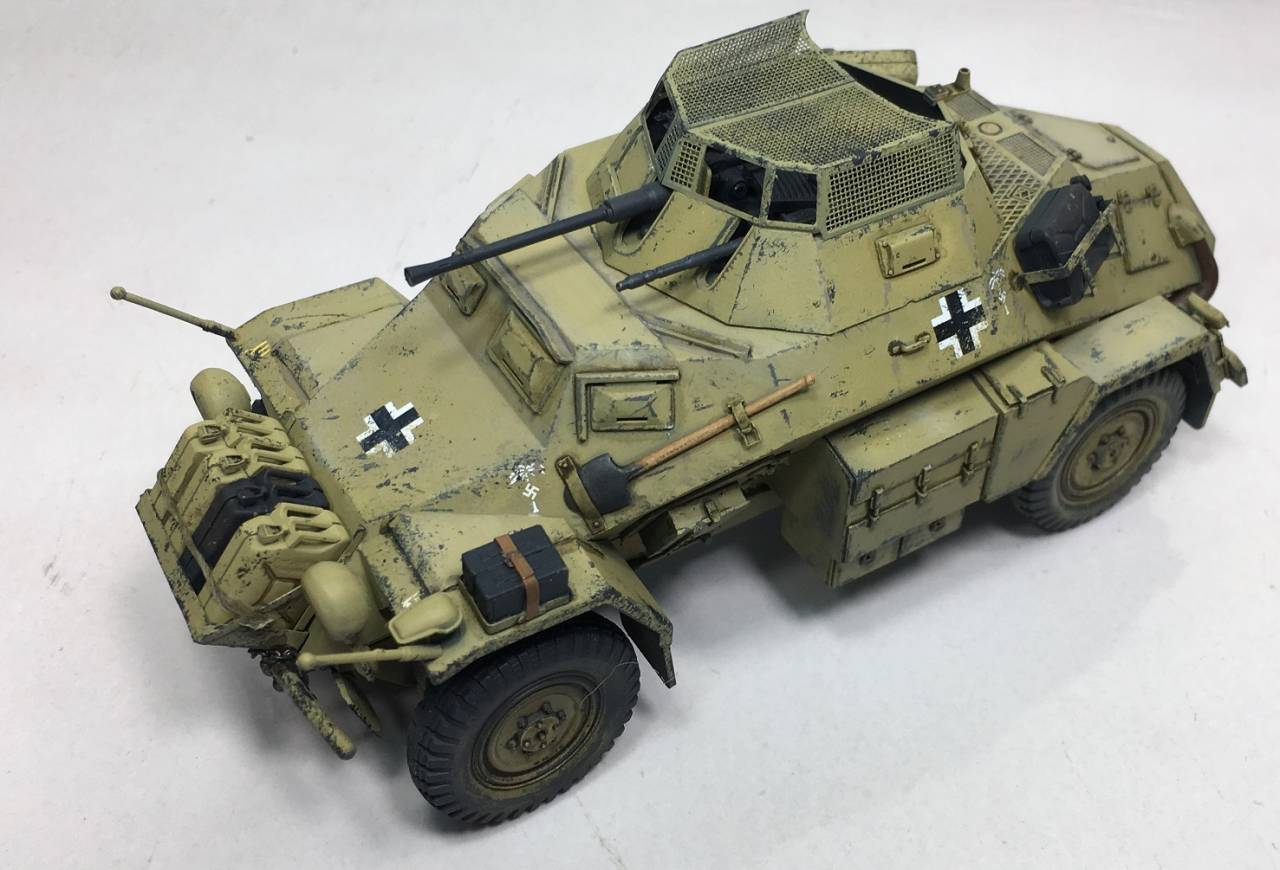
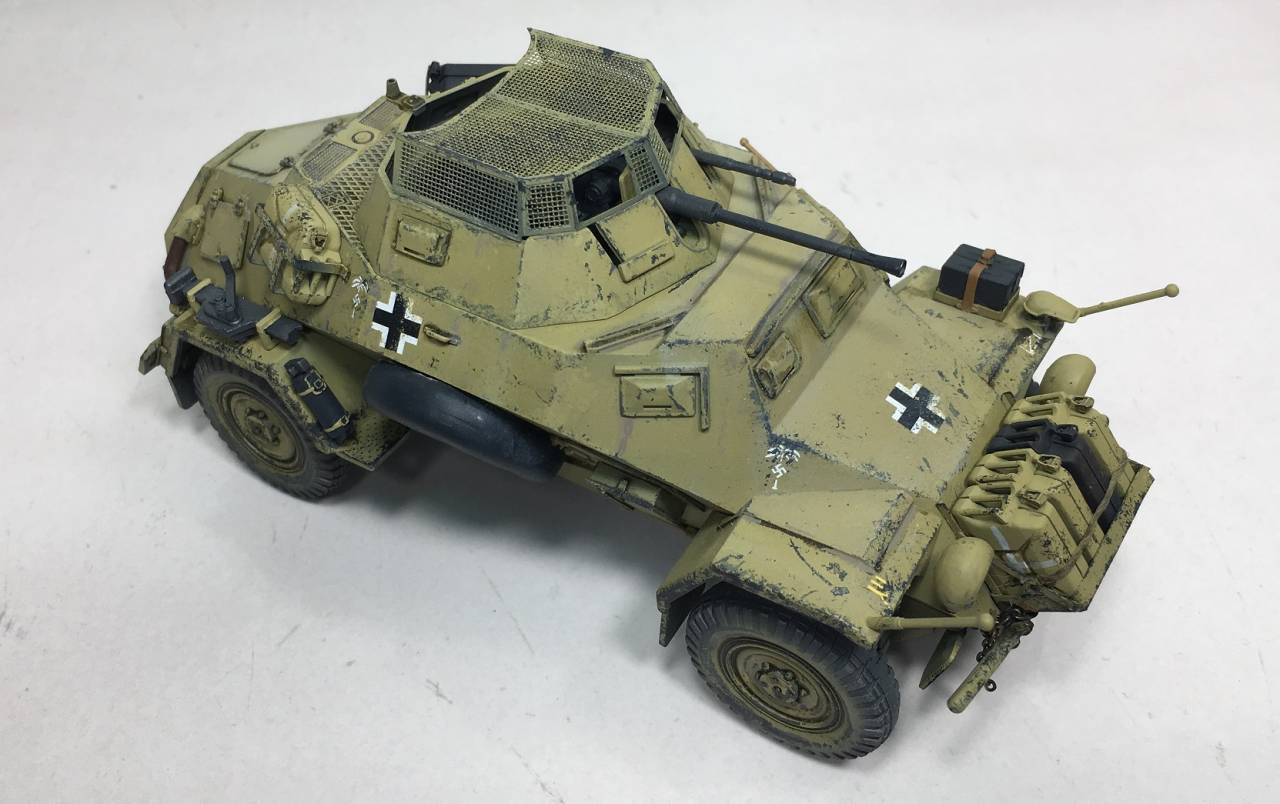
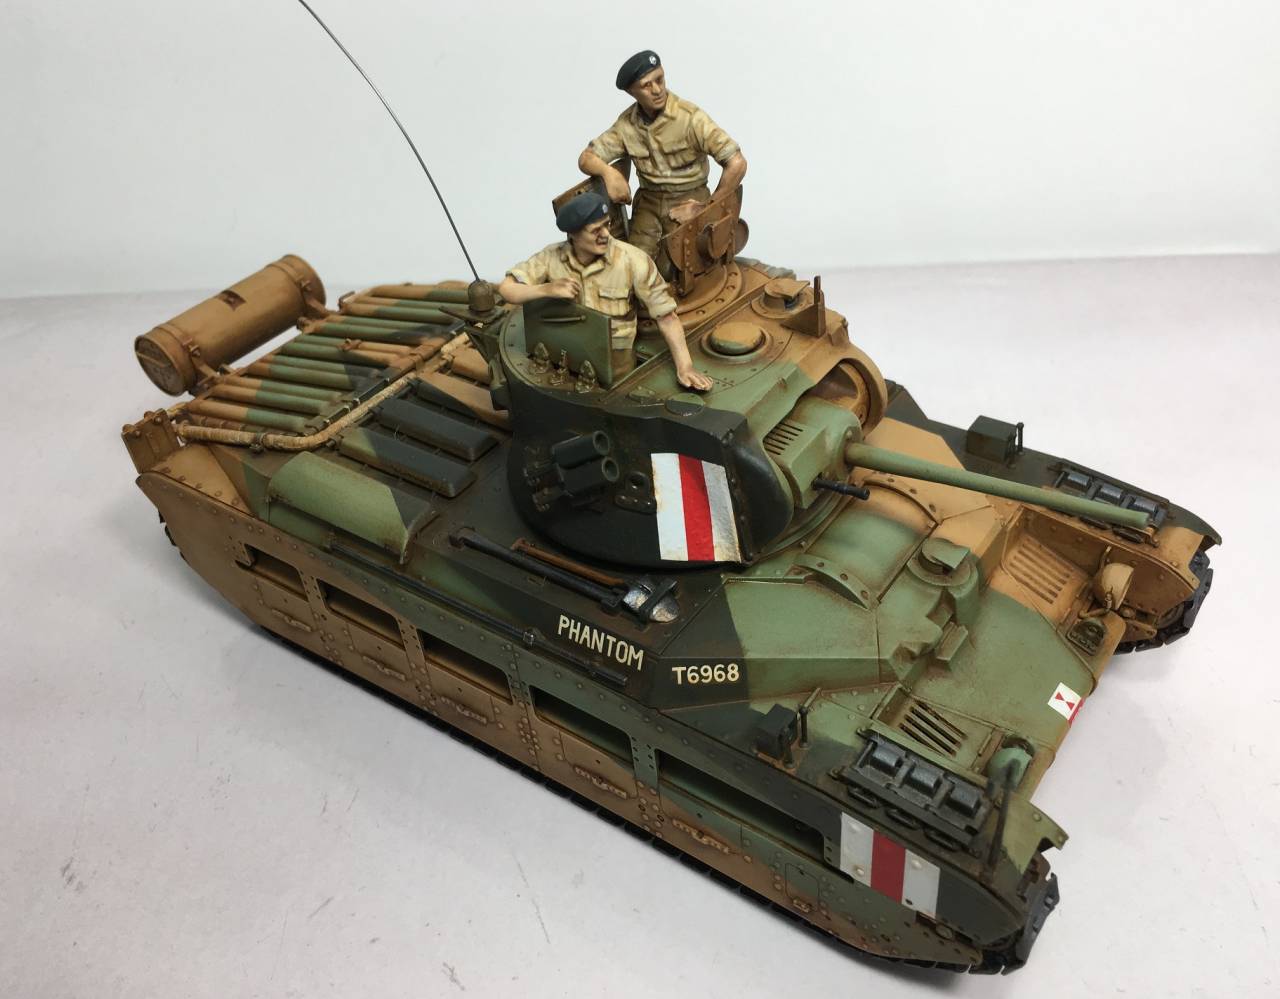
Been a long while since I have updated but at last my 2 entries are completed.
I have to admit I lost steam on this right about when it came time to do the stowage/crew. These are never my favourite things to paint (which is why there are so few crewman on my builds)
I did get my second wind though and spent today finishing them up. The 222 isn't quite what I had envisioned and I am still not 100% happy with it but it will suffice for now. I may go back and do a mini dio at some point.
The Matilda was a delight and came out just right, well apart from the crew who look disfigured but figure painting isn't my strong suit but they look ok from a distance and if you squint

Sd.Kfz 222
Matilda
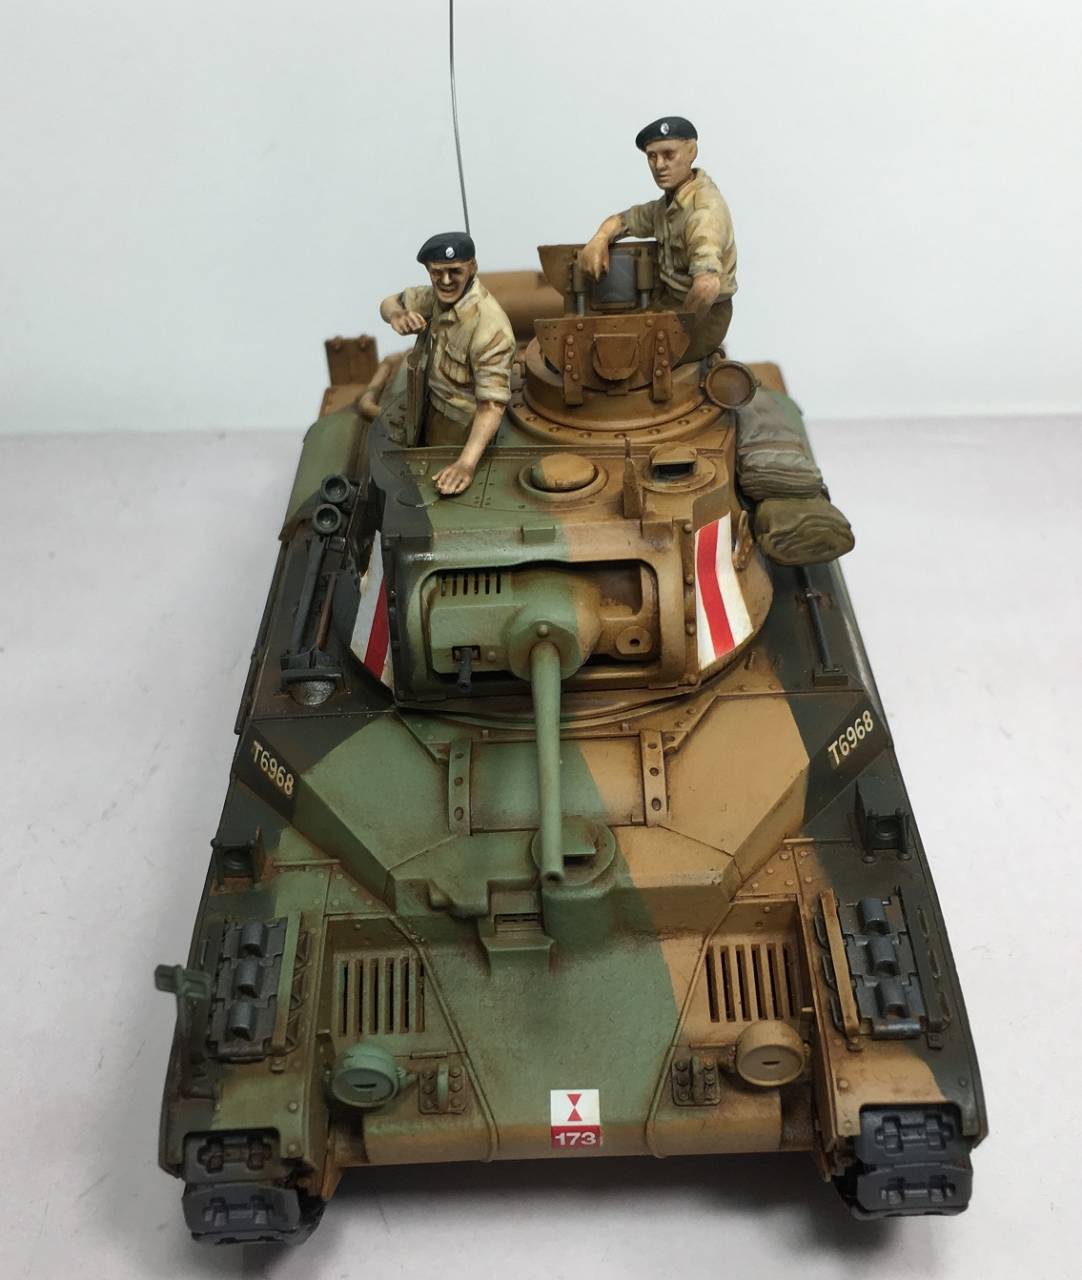
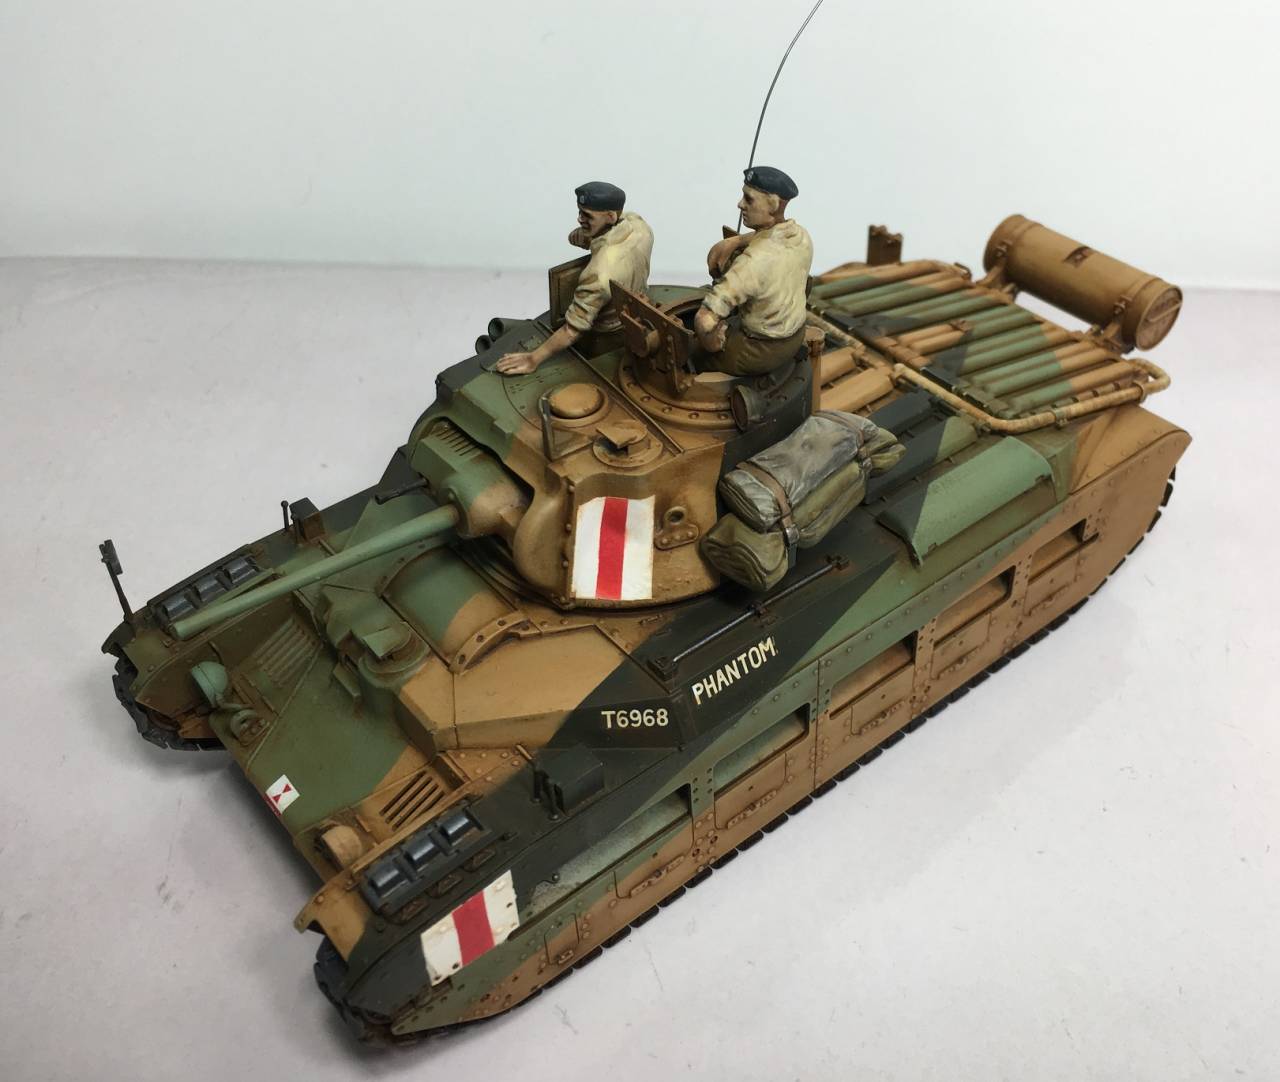
Overall I enjoyed this campaign and the comradery of all the participants. I tried some new things and stretched my comfort zone just a wee bit.
Currently working on: Multiple Campaigns :P

#424
Queensland, Australia
Joined: April 23, 2015
KitMaker: 4,648 posts
Armorama: 2,248 posts
Posted: Sunday, May 06, 2018 - 01:39 PM UTC
Rory,
Congratulations! Two kits is an awesome contribution to the campaign! Thank you very much. I've enjoyed your participation and both builds look great.
I've always had a soft spot in my heart for the 222, so I really love how yours came out.
Gaz
"Artillery adds dignity, to what would otherwise be an ugly brawl."
Frederick The Great
Texas, United States
Joined: June 04, 2017
KitMaker: 503 posts
Armorama: 477 posts
Posted: Wednesday, May 09, 2018 - 09:09 AM UTC
decals soon. That is all, all.


#424
Queensland, Australia
Joined: April 23, 2015
KitMaker: 4,648 posts
Armorama: 2,248 posts
Posted: Wednesday, May 09, 2018 - 11:03 AM UTC
"Artillery adds dignity, to what would otherwise be an ugly brawl."
Frederick The Great
Queensland, Australia
Joined: August 06, 2005
KitMaker: 3,353 posts
Armorama: 3,121 posts
Posted: Wednesday, May 09, 2018 - 03:11 PM UTC
Fantastic work Rory. Love the finishes, especially the Caunter Scheme. Thanks for joining.
Looking good too Kelly.
On the Bench:
Dust, styrene scraps, paint splotches and tears.
United States
Joined: August 28, 2015
KitMaker: 319 posts
Armorama: 308 posts
Posted: Wednesday, May 09, 2018 - 05:24 PM UTC
Rory, great builds. I like how both of them look.
I have finished my build for Big Cats V so now I can focus on completing my Panzer III command tank for this campaign. What colors are you all using for german armor during this timeframe??
California, United States
Joined: April 26, 2016
KitMaker: 362 posts
Armorama: 285 posts
Posted: Wednesday, May 09, 2018 - 09:53 PM UTC
Rory, congrats on crossing the finish line. That is really nice weathering on your 222
"Gonna start blastin"
...Stumpy
Rio Bravo 1959

#491
Missouri, United States
Joined: April 06, 2016
KitMaker: 602 posts
Armorama: 191 posts
Posted: Thursday, May 10, 2018 - 12:27 AM UTC
Thank you all for the kind words. They are much appreciated

I look forward to tracking everyone's progress.
Currently working on: Multiple Campaigns :P
Queensland, Australia
Joined: August 06, 2005
KitMaker: 3,353 posts
Armorama: 3,121 posts
Posted: Thursday, May 10, 2018 - 02:18 AM UTC
Quoted Text
What colors are you all using for german armor during this timeframe??
Hi Bryan
At this time the vehicles were painted in either RAL 8000 or RAL 8020. The first was used from March 1941 and the latter from March 1942. The directive was that 1/3 of each vehicle also be painted RAL 7008 and RAL 7027 respectively. However in practice paint stocks were low and often only the base RAL 8000 or 8020 was used - take the SdKFz 6/3 Diana for example. There were 8 vehicles and only No. 8 was painted with a second camo colour.
It appears that vehicles in RAL 8000 were not often repainted in RAL 8020 for this reason. Often locally obtained stock were used to supplement the issued paints, either mixed in or used on their own.
There are arguments to the exact shades these colours were as the RAL standards changed over time (they were actually introduced during the war so early war is not RAL, but the colours were aligned to a RAL number later - confusing isn't it!)
Not sure of which version you are building, but the Panzer 3 command tank was likely painted Dunkelgrau initially, and over painted later when it was sent to the desert. If it was a later mark, and built in a production run intended to be issued direct to Africa, then it would not have been painted Dunkelgrau.
Don't get hung up too much on colour, as weathering will change it anyway. Just paint it what you feel is the right colour and enjoy yourself.
On the Bench:
Dust, styrene scraps, paint splotches and tears.
Texas, United States
Joined: June 04, 2017
KitMaker: 503 posts
Armorama: 477 posts
Posted: Thursday, May 10, 2018 - 09:04 AM UTC
well, I was going to decal tonight but then realized my German decals were not the correct period. So now I might do the British scheme which I really dont wanna.

Pennsylvania, United States
Joined: April 22, 2012
KitMaker: 344 posts
Armorama: 315 posts
Posted: Friday, May 11, 2018 - 07:14 PM UTC
@Peter - The weathering on the Diana is A+.
@Rory - Great work, I particularly like the caunter camouflage and subtle weathering on the Matilda.
@Kelly - too bad about the decals, keep in mind the markings on a captured vehicle are frequently non-standard.
@Bryan - Looking forward to seeing your command tank come together, your Panther looks sweet! I have some photos of the 'R' tank I could send you, just PM your email address.

Nate
Texas, United States
Joined: June 04, 2017
KitMaker: 503 posts
Armorama: 477 posts
Posted: Saturday, May 12, 2018 - 09:35 AM UTC
I am thinking of modifying them to a more correct look.
Colorado, United States
Joined: February 24, 2014
KitMaker: 3,033 posts
Armorama: 2,492 posts
Posted: Saturday, May 12, 2018 - 11:45 PM UTC
Very nice work going on here, guys. Keep it up!
Cheers!🍺
—mike
Hawaii, United States
Joined: August 27, 2006
KitMaker: 1,646 posts
Armorama: 1,557 posts
Posted: Sunday, May 13, 2018 - 12:02 PM UTC
Peter: The weathering looks spot on.
Rory: The 222 and Matilda both look great. I think you are selling yourself short on the figures. They look good to me.
Kelley: Clean build! I've never been too much into early Allied armor, but this campaign has me rethinking this.
Worked up some of the stowage on the SAS Jeep with some strapping. For the straps I made a sandwich of two layers of Tamiya tape with aluminum foil in between. In the future, I think I will use a more adhesive tape, as I had some de-lamination as I bent it around.


At this point I had only intended to paint the shadow coat under the dashboard so I could put more of it together, but got carried away. Will probably have to do more work for the rest of the assembly, but it was nice to get back on the airbrush. I used Tamiya XF-69 NATO Black, although it looks a little blue in my junk lighting.


Happy Modeling!
Zon
"Certainty of death.
Small chance of sucess.
What are we waiting for?"
-Gimli, Return of the King.
Queensland, Australia
Joined: August 06, 2005
KitMaker: 3,353 posts
Armorama: 3,121 posts
Posted: Sunday, May 13, 2018 - 01:34 PM UTC
Looking good Zon. Interesting idea for the straps, sandwiching foil in them. I might have to steal that idea.
On the Bench:
Dust, styrene scraps, paint splotches and tears.

#424
Queensland, Australia
Joined: April 23, 2015
KitMaker: 4,648 posts
Armorama: 2,248 posts
Posted: Sunday, May 13, 2018 - 02:37 PM UTC
Zon,
Great job on those straps! VEry cool idea!
Gaz
"Artillery adds dignity, to what would otherwise be an ugly brawl."
Frederick The Great
RobinNilsson
 TOS Moderator
Stockholm, Sweden
Joined: November 29, 2006
KitMaker: 6,693 posts
Armorama: 5,562 posts
Posted: Sunday, May 13, 2018 - 03:52 PM UTC
Quoted Text
.....
Worked up some of the stowage on the SAS Jeep with some strapping. For the straps I made a sandwich of two layers of Tamiya tape with aluminum foil in between. In the future, I think I will use a more adhesive tape, as I had some de-lamination as I bent it around....
Happy Modeling!
Zon
I would suggest making a "mold" to shape/build the straps around.
Better adhesive could eliminate the delamination problems but could cause buckling instead. Glue some styrene together to get the approximate width, thickness and corner radius of those jerrycans and build up the straps around this profile.
/ Robin
In memory of Al Superczynski:
"Build what YOU want, the way YOU want to....
and the critics will flame you every time"


