Crusader to Gazala Campaign
Western Australia, Australia
Joined: May 05, 2006
KitMaker: 900 posts
Armorama: 510 posts
Posted: Tuesday, April 03, 2018 - 02:13 PM UTC
Decals are done, fixed the serial by cutting the seven out the second serial and simply applying it over the top of the last five.


Can't say these academy decals are much good. At first application they stuck solid so had to get them dead on as they wouldn't move once applied without first applying quite a bit of water to the model for them to float on.
But once they dried they didn't stick at all. So ended up using microset to try and get the later ones to stick down properly and even that hasn't done a lot of good with quite a bit of curling up at the edges even with microsol and gunze Mark Softer. Will definitely need another gloss coat to seal them in place. Have also added a spare AFV Club white/red/white decal to the front.
Don't you feel more like you do now than you did when you came in?

#453
Texas, United States
Joined: August 28, 2016
KitMaker: 1,925 posts
Armorama: 601 posts
Posted: Tuesday, April 03, 2018 - 05:14 PM UTC
iain,
Your issues with the decals sound just like the issues I just had with putting on Trumpeter decals on my KV-8. The darn things would not slide off the backing.
Mark
Queensland, Australia
Joined: August 06, 2005
KitMaker: 3,353 posts
Armorama: 3,121 posts
Posted: Wednesday, April 04, 2018 - 01:16 AM UTC
Hi Iain
I have never had a set of Academy decals that were really any good. As you say, they do not want to stay put and are overly thick usually. The ones I tried on my Warrior even fell apart once removed from the backing. I usually raid spares or buy aftermarket to replace them now.
In regard to the Microset, that is actually the fluid to use in the place where the decal is to go and it helps you move the decals around a tad. Microsol is the one to make the decals settle down and conform to the shape, and it helps adhesion. Yes the names seem to be opposite, set would tend to suggest it sets the decal down, but it means 'setting the scene' for what is to come...
Bellman is looking a treat though. Really coming to life now.
On the Bench:
Dust, styrene scraps, paint splotches and tears.
Western Australia, Australia
Joined: May 05, 2006
KitMaker: 900 posts
Armorama: 510 posts
Posted: Wednesday, April 04, 2018 - 04:27 AM UTC
Quoted Text
Hi Iain
I have never had a set of Academy decals that were really any good. As you say, they do not want to stay put and are overly thick usually. The ones I tried on my Warrior even fell apart once removed from the backing. I usually raid spares or buy aftermarket to replace them now.
In regard to the Microset, that is actually the fluid to use in the place where the decal is to go and it helps you move the decals around a tad. Microsol is the one to make the decals settle down and conform to the shape, and it helps adhesion. Yes the names seem to be opposite, set would tend to suggest it sets the decal down, but it means 'setting the scene' for what is to come...
Bellman is looking a treat though. Really coming to life now.
Microset is what I laid down under the decals after the first decals looked like being a problem.
Even after the microset/sol treatment and being left overnight, one of the yellow squares just fell off while I was trying to add a sealing clear coat

So now it's stuck on with micro gloss and will get a topcoat once that dries. I ended up going around all the decals with a brush and lifting the edges and getting clear gloss under them to keep them stuck down.
I certainly hope not all academy decals are this bad as I have a few Academy kits that I would prefer not to mess too much with. I already know the M10 Achilles needs new decals because the kit ones are wrong or just plain not included.
Don't you feel more like you do now than you did when you came in?
Queensland, Australia
Joined: August 06, 2005
KitMaker: 3,353 posts
Armorama: 3,121 posts
Posted: Wednesday, April 04, 2018 - 07:42 AM UTC
Quoted Text
I already know the M10 Achilles needs new decals because the kit ones are wrong or just plain not included.
Yes, and they stick like hard work on a bludger too - not at all.
I had problems with them in their :
Achilles
Warrior
M12
Hellcat
Then I learned not to bother with them at all.
On the Bench:
Dust, styrene scraps, paint splotches and tears.

#477
Pest, Hungary
Joined: March 21, 2007
KitMaker: 133 posts
Armorama: 131 posts
Posted: Wednesday, April 04, 2018 - 04:44 PM UTC
Quoted Text
I certainly hope not all academy decals are this bad as I have a few Academy kits that I would prefer not to mess too much with. I already know the M10 Achilles needs new decals because the kit ones are wrong or just plain not included.
Well, it seems that decals are not the strenght of Academy sets. Iain, your Honey looks lovely anyway!
cheers,
Zsolt
On the bench:
- Tristar Panzer IV ausf. B. 1:35 - France 1940 Campaign
- Dragon Panzerjäger I ausf. B 1:35
- Revell Leopard 2A4 1:35
My blog: http://muanyagforgacs.blogspot.com/

#424
Queensland, Australia
Joined: April 23, 2015
KitMaker: 4,648 posts
Armorama: 2,248 posts
Posted: Thursday, April 05, 2018 - 09:19 AM UTC
Iain,
Despite your decal troubles, your Honey looks great! I build an Academy Tiger I a coupla years ago and didn't have any troubles. Must be luck of the draw.
Gaz
"Artillery adds dignity, to what would otherwise be an ugly brawl."
Frederick The Great

#477
Pest, Hungary
Joined: March 21, 2007
KitMaker: 133 posts
Armorama: 131 posts
Posted: Thursday, April 05, 2018 - 01:20 PM UTC
Hello all,
Well, if any of you is interested in building the Dragon Panzerjäger I ausf. B anytime then I warn you, BE PREPARED. You will cut, clean and after you dropped from the tweezer, search tiny parts like these...

and these...

But if you are strong and patient enough, you will build guns like this:


It is quite a nerve-job. But worth it.
cheers,
Zsolt
p.s. the scale is in mm, not inches

On the bench:
- Tristar Panzer IV ausf. B. 1:35 - France 1940 Campaign
- Dragon Panzerjäger I ausf. B 1:35
- Revell Leopard 2A4 1:35
My blog: http://muanyagforgacs.blogspot.com/
Western Australia, Australia
Joined: May 05, 2006
KitMaker: 900 posts
Armorama: 510 posts
Posted: Thursday, April 05, 2018 - 02:18 PM UTC
Nice job Zsolt. Reminds me of the nightmare of fiddly bits that was Broncos 25pdr.
Don't you feel more like you do now than you did when you came in?

#453
Texas, United States
Joined: August 28, 2016
KitMaker: 1,925 posts
Armorama: 601 posts
Posted: Thursday, April 05, 2018 - 04:47 PM UTC
Zsolt,
That is why I wear a home made Jeweler's apron, it catches just about everything I drop so I don't have to search for it. It is the best investment I ever made. I also have tall containers on each end of my work bench so if a part pops off the tweezers it is a good chance that is will bounce off one of the containers and back onto the bench. It may sound like a strange system but it works very well. Before the changes I spent a lot of time looking for parts on the floor.
By the way, nice work on the gun assembly.
Mark

#424
Queensland, Australia
Joined: April 23, 2015
KitMaker: 4,648 posts
Armorama: 2,248 posts
Posted: Friday, April 06, 2018 - 01:04 AM UTC
Zsolt,
You've done very well on the gun assembly. As I get older, I'm considering avoiding Dragon and Bronco despite them having some rare and best offerings out there.
Gaz
"Artillery adds dignity, to what would otherwise be an ugly brawl."
Frederick The Great
Queensland, Australia
Joined: August 06, 2005
KitMaker: 3,353 posts
Armorama: 3,121 posts
Posted: Friday, April 06, 2018 - 01:23 AM UTC
Very nice Zsolt. I have this in the stash, so I am interested to see how it turns out.
My work room has a tiled floor, but the carpet monster's cousin, the tile monster, seems to have taken up residence. I am amazed how bits still disappear.
Gaz, I have one word to say.... "Chicken!!!!" or maybe "Wuss!!!"


. Catch ya in a few hours...
On the Bench:
Dust, styrene scraps, paint splotches and tears.
Uusimaa, Finland
Joined: October 01, 2016
KitMaker: 514 posts
Armorama: 171 posts
Posted: Friday, April 06, 2018 - 10:38 AM UTC

Needs touching up and rudder needs to be red, but otherwise paint work is pretty much done. Hopefully ready in April.

#424
Queensland, Australia
Joined: April 23, 2015
KitMaker: 4,648 posts
Armorama: 2,248 posts
Posted: Friday, April 06, 2018 - 11:12 AM UTC
Yup... I'm a bit chicken. But if I win one in the raffle...
I saw Peter's Diana at our monthly club meeting. Exceptional work on his Diana. It's amazing how big the kit is.
Gaz
"Artillery adds dignity, to what would otherwise be an ugly brawl."
Frederick The Great

#424
Queensland, Australia
Joined: April 23, 2015
KitMaker: 4,648 posts
Armorama: 2,248 posts
Posted: Friday, April 06, 2018 - 11:13 AM UTC
Pasi,
You've come quite a long way, and it's Certainly looking good!
Gaz
"Artillery adds dignity, to what would otherwise be an ugly brawl."
Frederick The Great
Queensland, Australia
Joined: August 06, 2005
KitMaker: 3,353 posts
Armorama: 3,121 posts
Posted: Friday, April 06, 2018 - 11:44 AM UTC
Yes Pasi, the 109 is looking very nice. I see you have weathered the tyres a little too.
Yes, the SdKfz 6/3 was quite large and the big box on the back makes it appear more so. The next step is get some paint on the Diana - hopefully.
On the Bench:
Dust, styrene scraps, paint splotches and tears.
California, United States
Joined: March 03, 2016
KitMaker: 142 posts
Armorama: 137 posts
Posted: Sunday, April 08, 2018 - 07:01 AM UTC
Congrats to all who completed there builds!! Ill be joining the club soon.
The AFVs and the Bird are coming along nicely Gents, keep it up!!
I did have a chance to get some time in a couple of Saturdays back. Not much from last post but its turning out nicely. Did modified the springs for the seat. As you can see in the pics. Probably should've mounted the part to the seat first. Then wrap the wire around the part.


I did modified the saddle bag so i can glue (CA glue) the PE directly to the modified part. It didn't turn out the way i expected. so I decided to keep the saddle bag of but put the PE rack that holds the bags on.


After last night episode of Svengoolie, I put some time in at the bench. Next update, the 750 should be all together and ready for the some primer.
All comments are welcome Gents and happy modeling!!
JohnA

#424
Queensland, Australia
Joined: April 23, 2015
KitMaker: 4,648 posts
Armorama: 2,248 posts
Posted: Sunday, April 08, 2018 - 02:01 PM UTC
JohnA,
The 750 looks great! The PE really makes a difference! Can't believe that map case!
Gaz
"Artillery adds dignity, to what would otherwise be an ugly brawl."
Frederick The Great
Pennsylvania, United States
Joined: April 22, 2012
KitMaker: 344 posts
Armorama: 315 posts
Posted: Monday, April 09, 2018 - 06:51 AM UTC
Iain - nice work on caunter camoflage, I had a hard enough time and my Dorchester is basically a box on wheels.
Zsolt - You were certainly up to the challenge, the little Pak 38(t) looks fantastic.
Pasi - looking forward to your finish, I plan on building a North African 109 in the future.
John - Excellent PE and wire work.
I have attached the undercarriage and hatches. Next step will be a coat of future and decals.

Western Australia, Australia
Joined: March 21, 2016
KitMaker: 247 posts
Armorama: 126 posts
Posted: Monday, April 09, 2018 - 08:53 AM UTC
Hi All
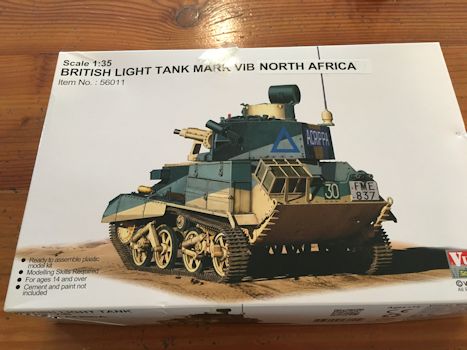
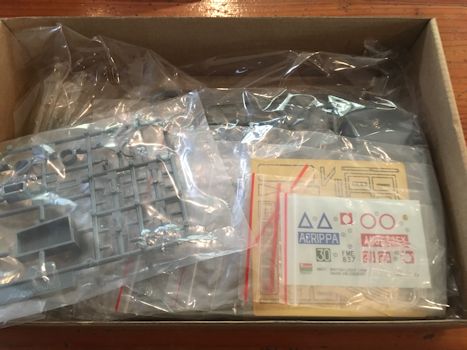
Starting on my Vulcan models Light Tank Mark VIB


#424
Queensland, Australia
Joined: April 23, 2015
KitMaker: 4,648 posts
Armorama: 2,248 posts
Posted: Monday, April 09, 2018 - 01:02 PM UTC
Nathan,
That looks great! So boXXy! I really dig the Caunter scheme.
Gaz
"Artillery adds dignity, to what would otherwise be an ugly brawl."
Frederick The Great

#424
Queensland, Australia
Joined: April 23, 2015
KitMaker: 4,648 posts
Armorama: 2,248 posts
Posted: Monday, April 09, 2018 - 01:03 PM UTC
Linus,
Great to have you with us!
Gaz
"Artillery adds dignity, to what would otherwise be an ugly brawl."
Frederick The Great
Queensland, Australia
Joined: August 06, 2005
KitMaker: 3,353 posts
Armorama: 3,121 posts
Posted: Monday, April 09, 2018 - 01:17 PM UTC
Nathan, 'Monty's Winnebago' is looking fantastic.
Linus welcome aboard. Quick tip - Vulcan tells you to put the tracks on backwards..... which is a bummer, as they are link and length... don't know if they will fit if you turn them around

On the Bench:
Dust, styrene scraps, paint splotches and tears.
Western Australia, Australia
Joined: March 21, 2016
KitMaker: 247 posts
Armorama: 126 posts
Posted: Tuesday, April 10, 2018 - 03:26 AM UTC
Quoted Text
Nathan, 'Monty's Winnebago' is looking fantastic.
Linus welcome aboard. Quick tip - Vulcan tells you to put the tracks on backwards..... which is a bummer, as they are link and length... don't know if they will fit if you turn them around 
Hey Peter thanks for the heads up. I’ll let you know how I get in with it.
Queensland, Australia
Joined: August 06, 2005
KitMaker: 3,353 posts
Armorama: 3,121 posts
Posted: Tuesday, April 10, 2018 - 02:01 PM UTC
Linus you might find this review interesting:
http://www.track-link.com/reviews/3090On the Bench:
Dust, styrene scraps, paint splotches and tears.


