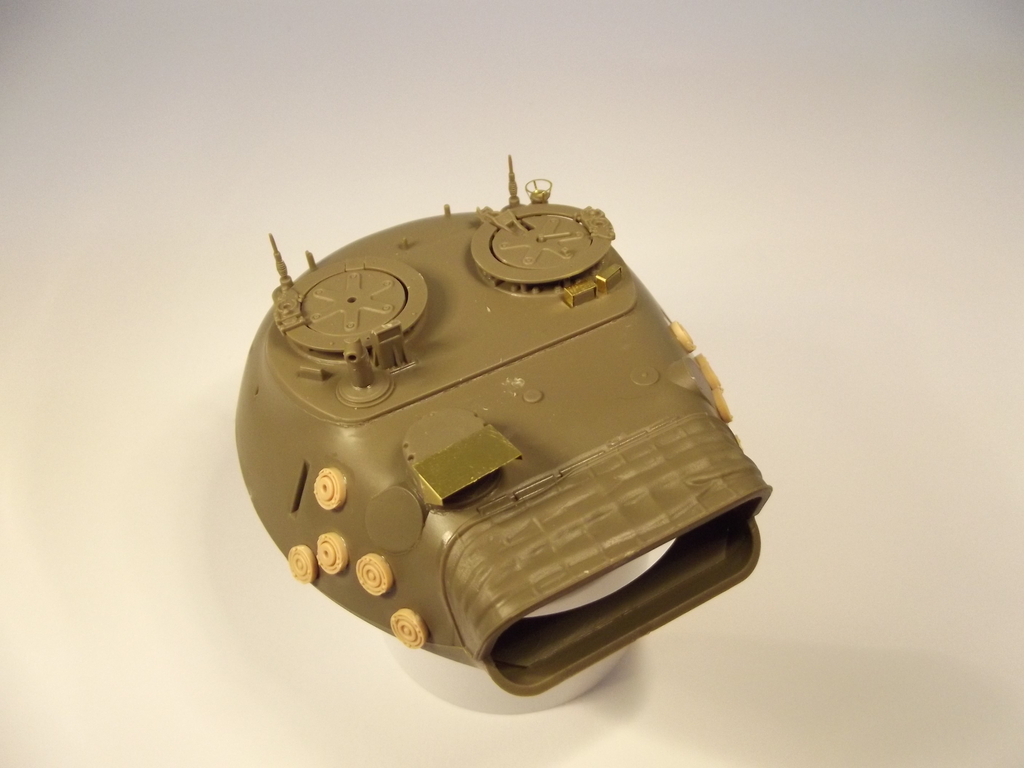
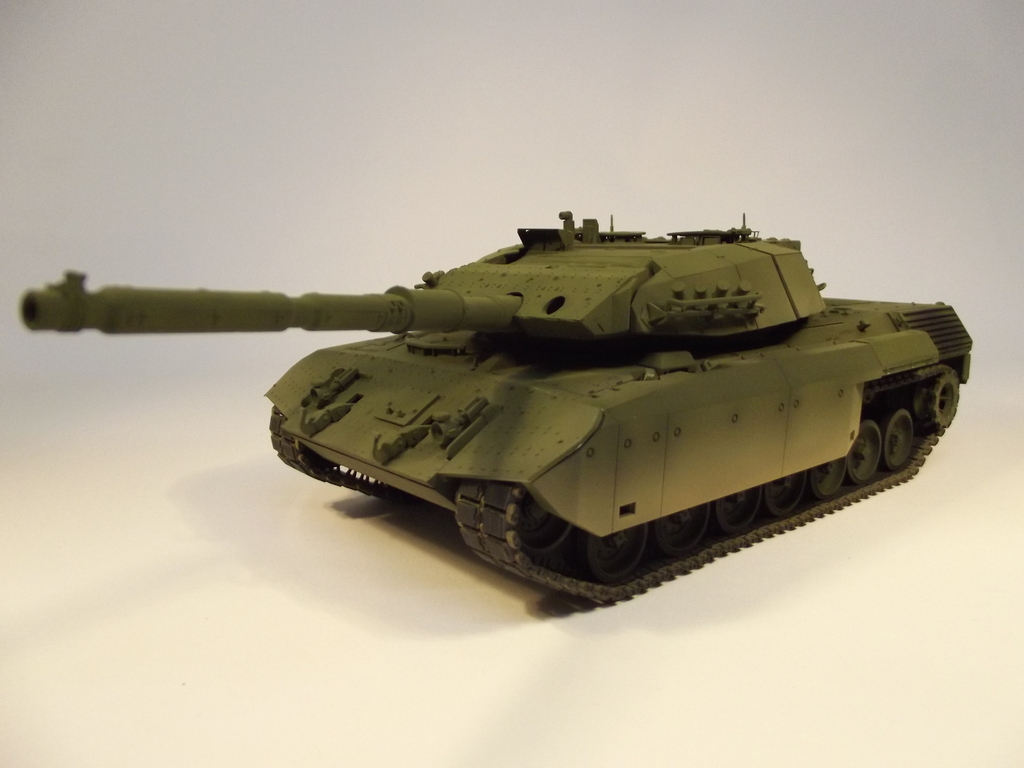
Hi there,fellow plastic addicts
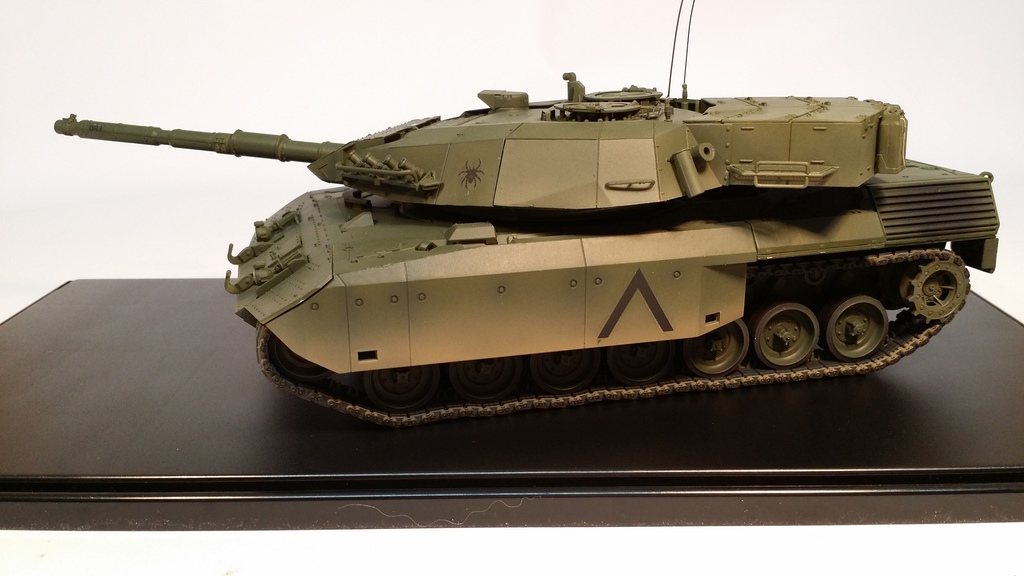
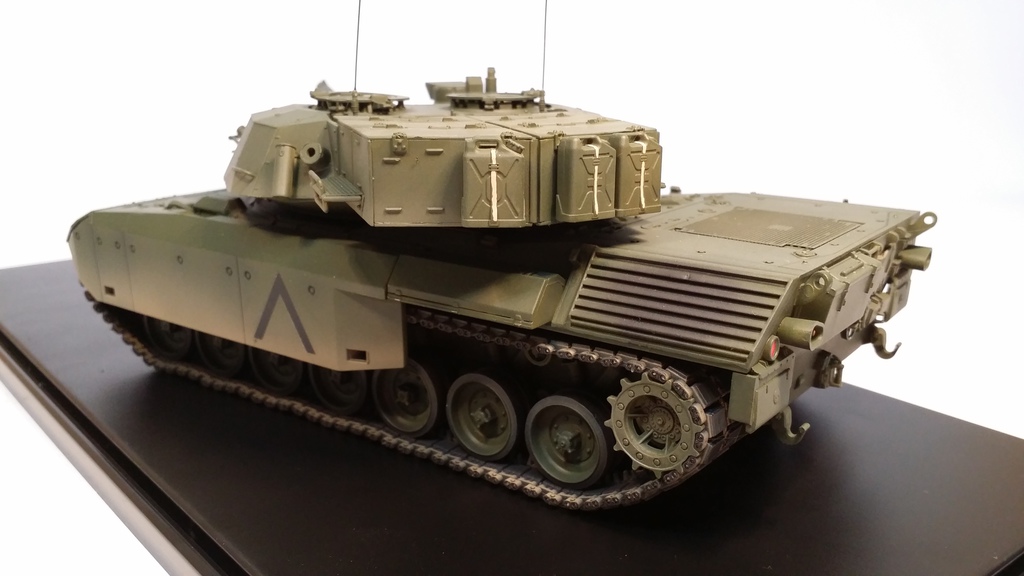
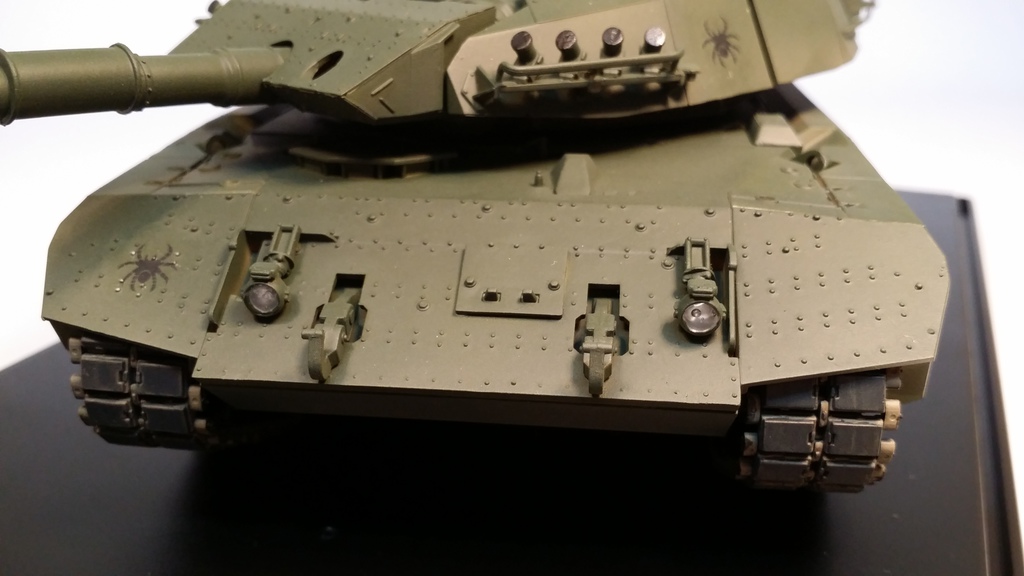
I wanted to show you my latest finished build of Takoms Leopard C2 MEXAS.I think it worked out quite good and i was able to get a bit better at paintwork and weathering (although itīs not heavily weathered,but thatīs not quite realistic for modern tanks i guess...)
I hope the image hotlinking works (luckily i never used PB...)
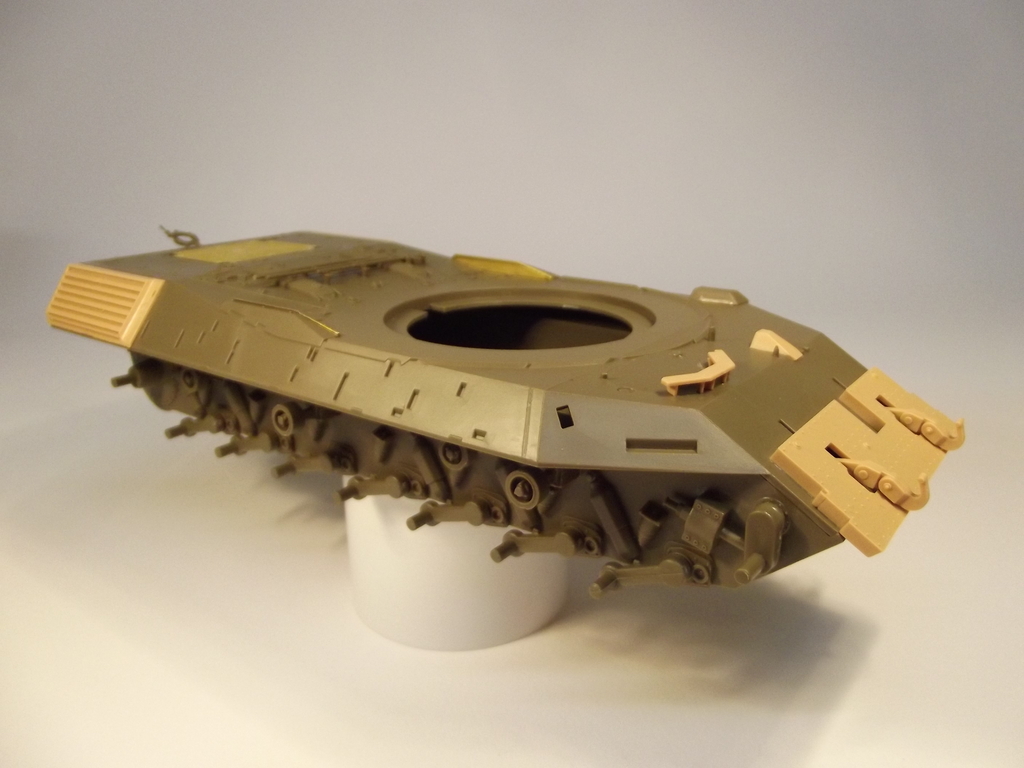
Some build stages:
And the finished Cat (mounted on a Trumpeter Display Case,nothing fancy)
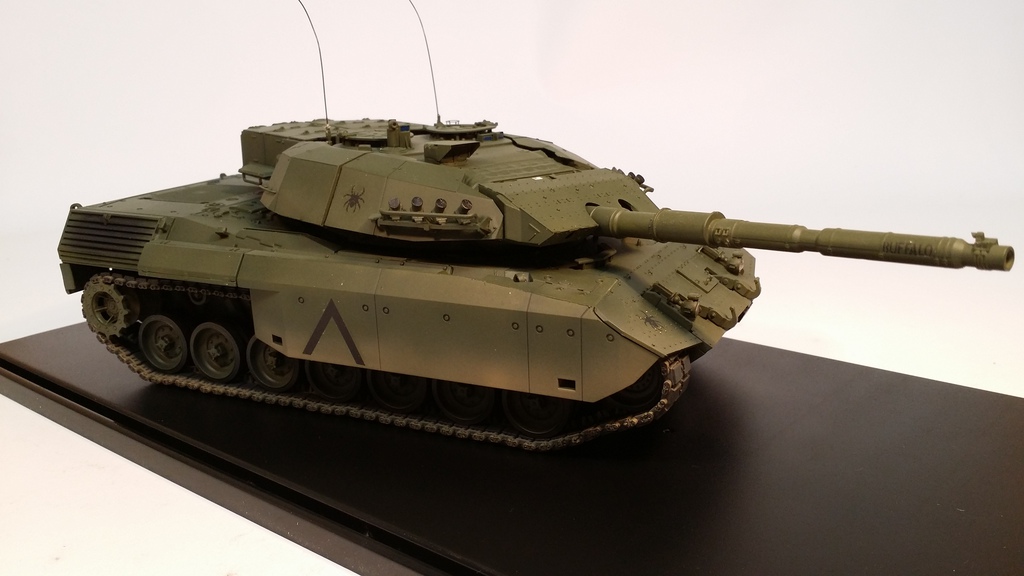
Now,i hope youīll find this build interesting and have a few suggestions on how to improve a little more for the next one.
Constructive Feedback
For in-progress or completed build photos. Give and get contructive feedback!
Hosted by Darren Baker, Dave O'Meara
Takom Leopard C2 MEXAS
Gore_X
Hessen, Germany
Joined: September 15, 2015
KitMaker: 64 posts
Armorama: 62 posts
Joined: September 15, 2015
KitMaker: 64 posts
Armorama: 62 posts
Posted: Tuesday, July 18, 2017 - 01:37 AM UTC
Armorsmith
Pennsylvania, United States
Joined: April 09, 2015
KitMaker: 1,063 posts
Armorama: 1,000 posts
Joined: April 09, 2015
KitMaker: 1,063 posts
Armorama: 1,000 posts
Posted: Tuesday, July 18, 2017 - 02:19 AM UTC
Very nice and clean build. Here are a few things you might want to try on your next build. Apply a wash of a dark brown or black brown color to help accent panel lines and make raised detail stand out a bit more. You may have actually done this but it's difficult for me to see in the pictures. Light dry brushing of the raised detail with a lightened shade of the base color will also help make some to the details stand out. Something else you may want to attempt is some color modulation using some pre and or post shading of the base color to give the overall green color different tonal variations and shades. Nothing wrong with what you have done but just a few suggestions. Having said that, if you are happy with how you do things and are satisfied with the end result then that's all that really matters.
Gore_X
Hessen, Germany
Joined: September 15, 2015
KitMaker: 64 posts
Armorama: 62 posts
Joined: September 15, 2015
KitMaker: 64 posts
Armorama: 62 posts
Posted: Tuesday, July 18, 2017 - 02:54 AM UTC
Thanks for the input.I usually do washes on my models,either plane,tank or softskin.But in this case i kinda missed out on it
Color modulation is another thing...iīm the kind of modeler that is sceptic to the extent that it sometimes is done.I tried it on a smaller level on other models,but then itīs hard to capture on pictures (my photographer skills are not that good).I did a Hobby Boss M-26,where that was done the way i personally like it.
Drybrushing is something i still could do on the model...iīll think about it when my current build is done.
JSSVIII
Massachusetts, United States
Joined: March 28, 2007
KitMaker: 1,169 posts
Armorama: 1,067 posts
Joined: March 28, 2007
KitMaker: 1,169 posts
Armorama: 1,067 posts
Posted: Tuesday, July 18, 2017 - 04:20 AM UTC
Nice Job, how was the kit to build, did you encounter any major problems during the construction process?
Gore_X
Hessen, Germany
Joined: September 15, 2015
KitMaker: 64 posts
Armorama: 62 posts
Joined: September 15, 2015
KitMaker: 64 posts
Armorama: 62 posts
Posted: Tuesday, July 18, 2017 - 09:53 AM UTC
No,no major problems.There were placement issues for the Turret MEXAS mounting brackets (the disc-like ones on the turret flanks) and a faulty,cylindrical part for the hull backplate,which i completely left out (it should be on the right side of the rear hull plate,over the spare track where there is only the lid of it).
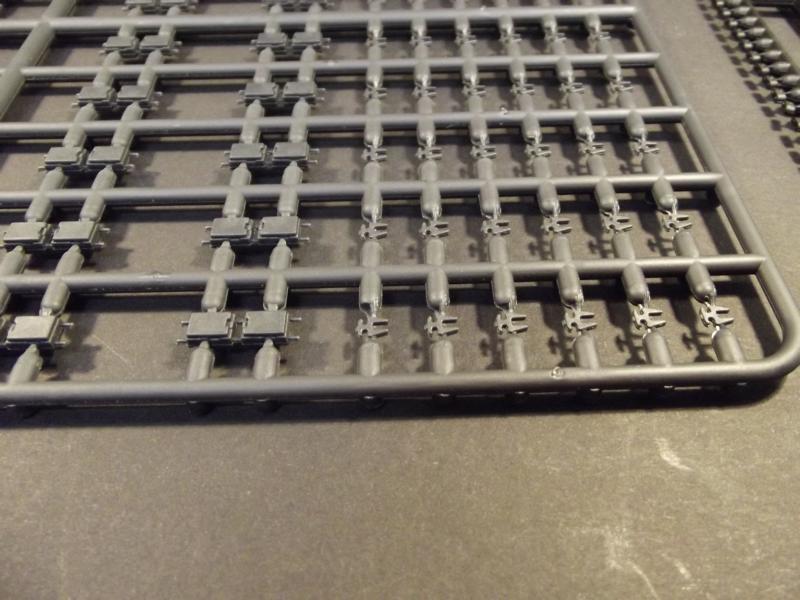
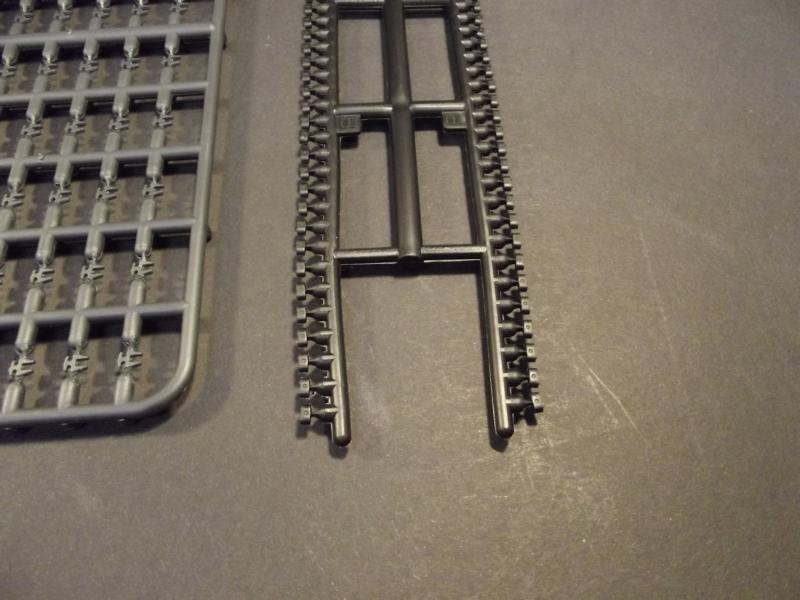
The tracks from Orochi were quite good to build,although the pins are sensitive because theyīre so thin (look here).
The connectors are made of vinyl,so color is a bit tricky here.
All in all my verdict for this kit would be...: very recommendable,but not perfect.
The tracks from Orochi were quite good to build,although the pins are sensitive because theyīre so thin (look here).
The connectors are made of vinyl,so color is a bit tricky here.
All in all my verdict for this kit would be...: very recommendable,but not perfect.
recceboy
Alberta, Canada
Joined: July 20, 2006
KitMaker: 706 posts
Armorama: 665 posts
Joined: July 20, 2006
KitMaker: 706 posts
Armorama: 665 posts
Posted: Sunday, July 23, 2017 - 08:45 AM UTC
Well done on the build with this kit, there are issues with instructions & markings, plus its needs some tweaks to fix the kit issues to bring it to a deployed version.
Our water cans are black plastic, the ones on the back bin.
Well done.
Cheers
Anthony
Author Canadian Leopard Reference Series .
Our water cans are black plastic, the ones on the back bin.
Well done.
Cheers
Anthony
Author Canadian Leopard Reference Series .
Gore_X
Hessen, Germany
Joined: September 15, 2015
KitMaker: 64 posts
Armorama: 62 posts
Joined: September 15, 2015
KitMaker: 64 posts
Armorama: 62 posts
Posted: Sunday, July 23, 2017 - 11:04 AM UTC
Thanks,Anthony.
Takom gave no painting instructions for the cans (or i just didnīt find them...?) and i found no pictures where they were seen,so i just painted them like the hull.
Although i wonder that no one mentioned the missing rear sidepanels of the MEXAS...
Well,i left them out on purpose so a bit of the running gear could be seen.In the front itīs almost completely covered.
Jeff8600
Georgia, United States
Joined: June 19, 2007
KitMaker: 254 posts
Armorama: 76 posts
Joined: June 19, 2007
KitMaker: 254 posts
Armorama: 76 posts
Posted: Tuesday, September 26, 2017 - 08:46 PM UTC
Looks great! one thing that I noticed, for your dusting on the side apply the decal before you "dust" it. the markings should have some of the dust on them as well.
Over all great build!
Spartak
Croatia Hrvatska
Joined: May 26, 2013
KitMaker: 130 posts
Armorama: 108 posts
Joined: May 26, 2013
KitMaker: 130 posts
Armorama: 108 posts
Posted: Tuesday, September 26, 2017 - 11:22 PM UTC
Nice cat.
I suggest that you replace antennas for better look with
http://leopardclub.ca/workshop/LW014B/
I suggest that you replace antennas for better look with
http://leopardclub.ca/workshop/LW014B/
sgtreef
Oklahoma, United States
Joined: March 01, 2002
KitMaker: 6,043 posts
Armorama: 4,347 posts
Joined: March 01, 2002
KitMaker: 6,043 posts
Armorama: 4,347 posts
Posted: Thursday, September 28, 2017 - 03:21 AM UTC
Quoted Text
No,no major problems.There were placement issues for the Turret MEXAS mounting brackets (the disc-like ones on the turret flanks) and a faulty,cylindrical part for the hull backplate,which i completely left out (it should be on the right side of the rear hull plate,over the spare track where there is only the lid of it).
The tracks from Orochi were quite good to build,although the pins are sensitive because theyīre so thin (look here).
The connectors are made of vinyl,so color is a bit tricky here.
All in all my verdict for this kit would be...: very recommendable,but not perfect.
Nice looking build, and the tracks remind me of AFV Clubs, good luck with them.
Almost looks like a Merk, well close anyway.
Wonder why no use of those balls and chains at the rear.
Weathering looks good also, as really no combat to speak of.