Yes Conrad, that is an excellent finish on the T34. The mud looks great.
Mark, the IV is coming along a treat. The screens are really going to be worth the effort you have put into them.
Hosted by Richard S.
The Workhorses Campaign
petbat

Joined: August 06, 2005
KitMaker: 3,353 posts
Armorama: 3,121 posts

Posted: Sunday, April 08, 2018 - 03:10 PM UTC
Posted: Sunday, April 08, 2018 - 04:44 PM UTC
Conrad,
The weathering looks wonderful but you need to do the same to the decals. They really stand out and show no sign of wear as the rest of the vehicle.
Mark
The weathering looks wonderful but you need to do the same to the decals. They really stand out and show no sign of wear as the rest of the vehicle.
Mark
Conrad86

Joined: January 01, 2018
KitMaker: 25 posts
Armorama: 25 posts
Posted: Sunday, April 08, 2018 - 10:46 PM UTC
Thanks for the comments guys, I'm planning to tie the decals in by chipping over them and streaking some grime and rust across them, should work ok.
Posted: Monday, April 09, 2018 - 06:02 AM UTC
Calling this one done. Went with a look of a fairly newish vehicle so its dirtyish but doesn't have chipping etc.
Was pretty happy with this kit overall.
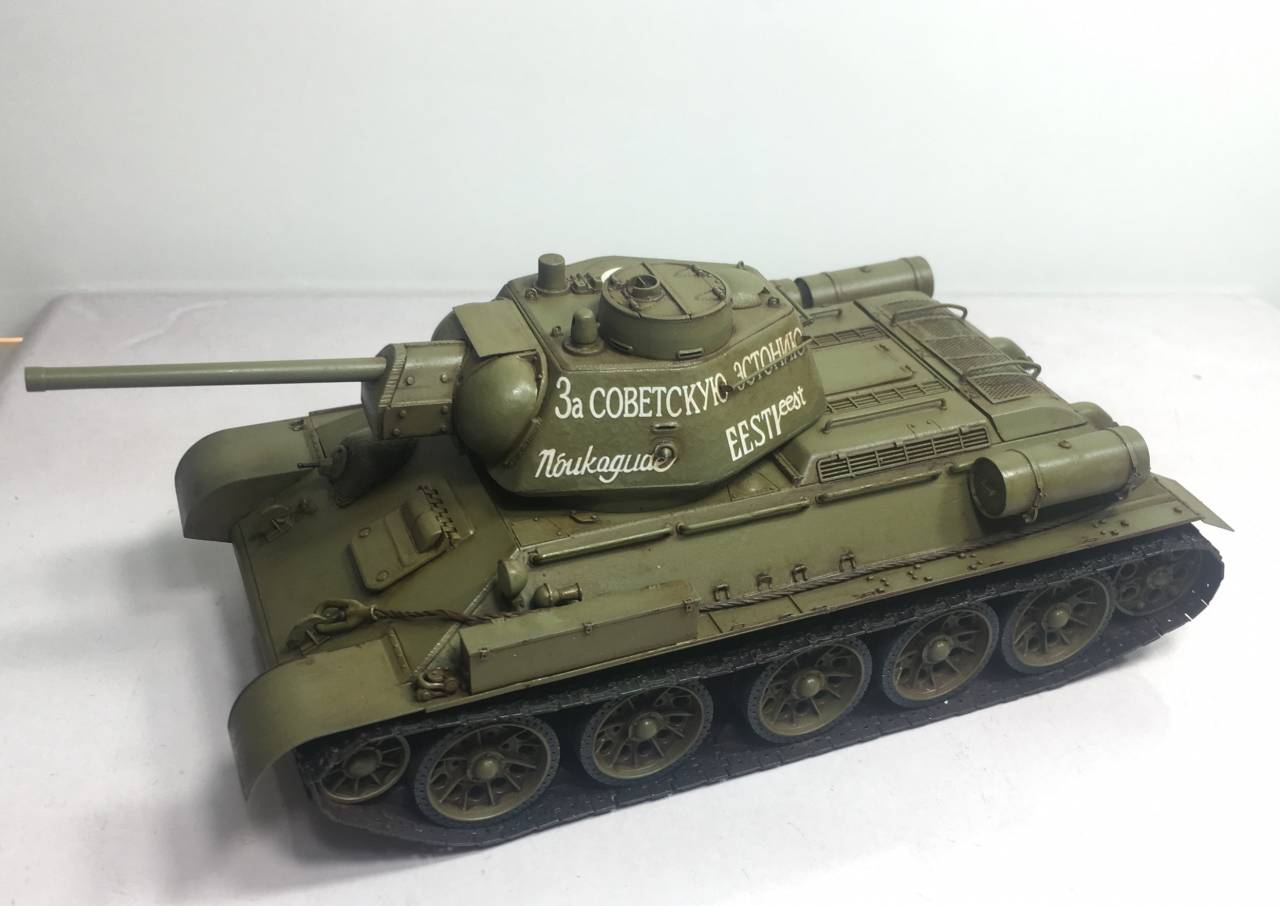
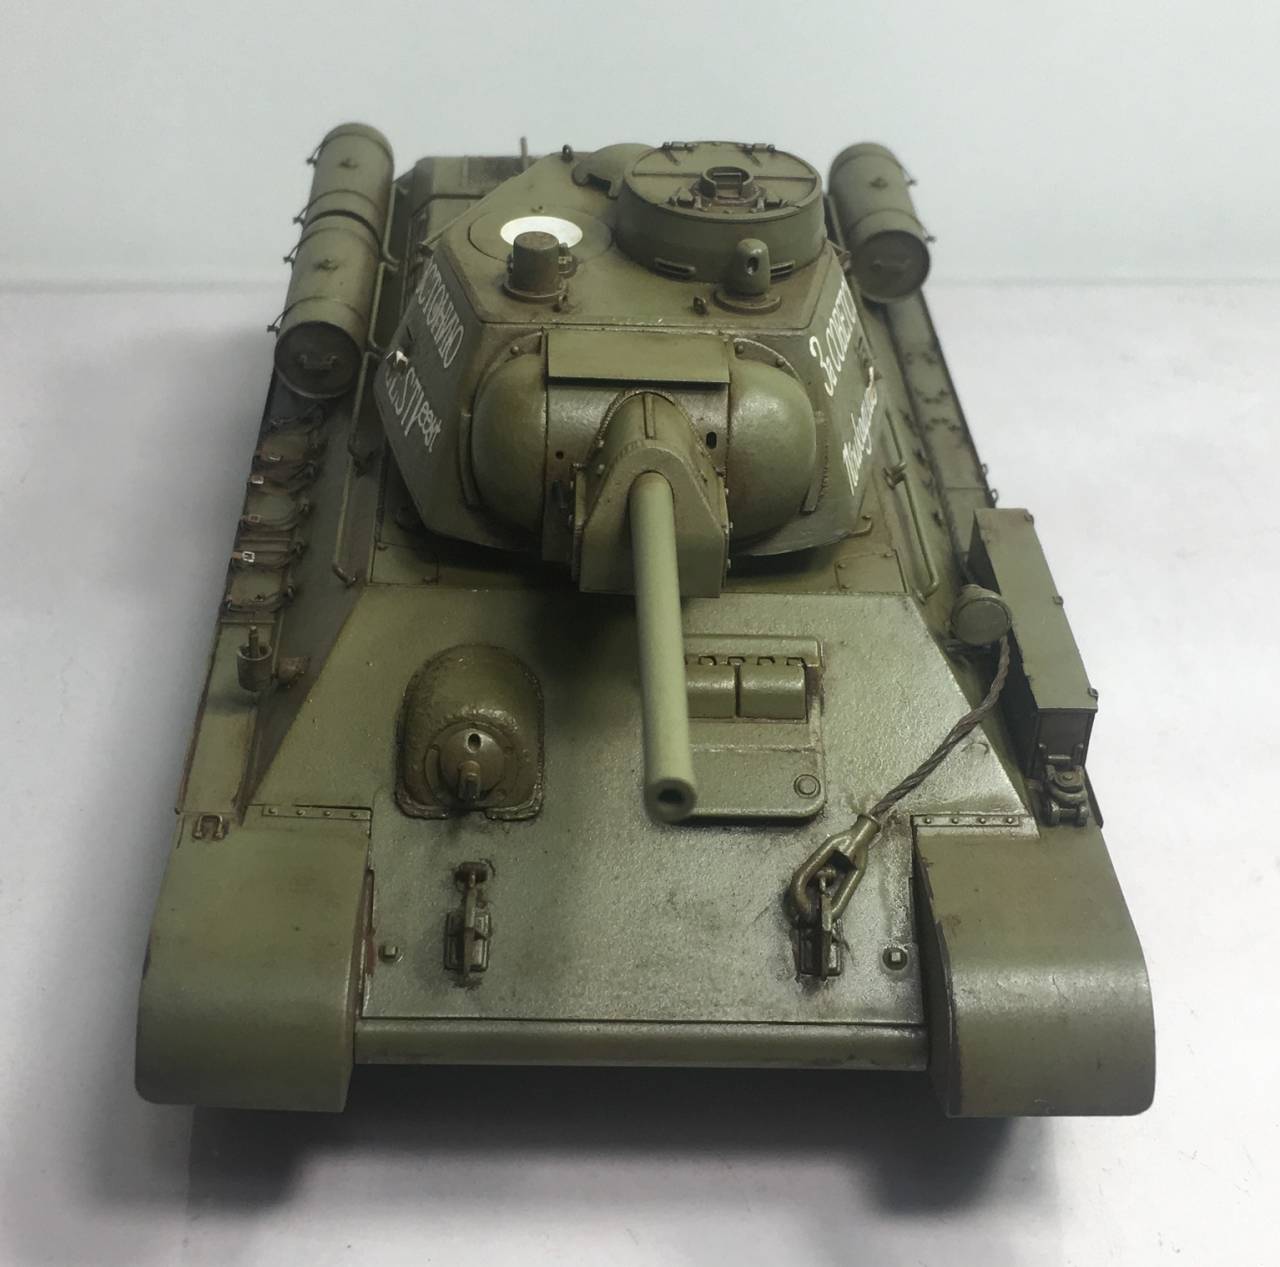
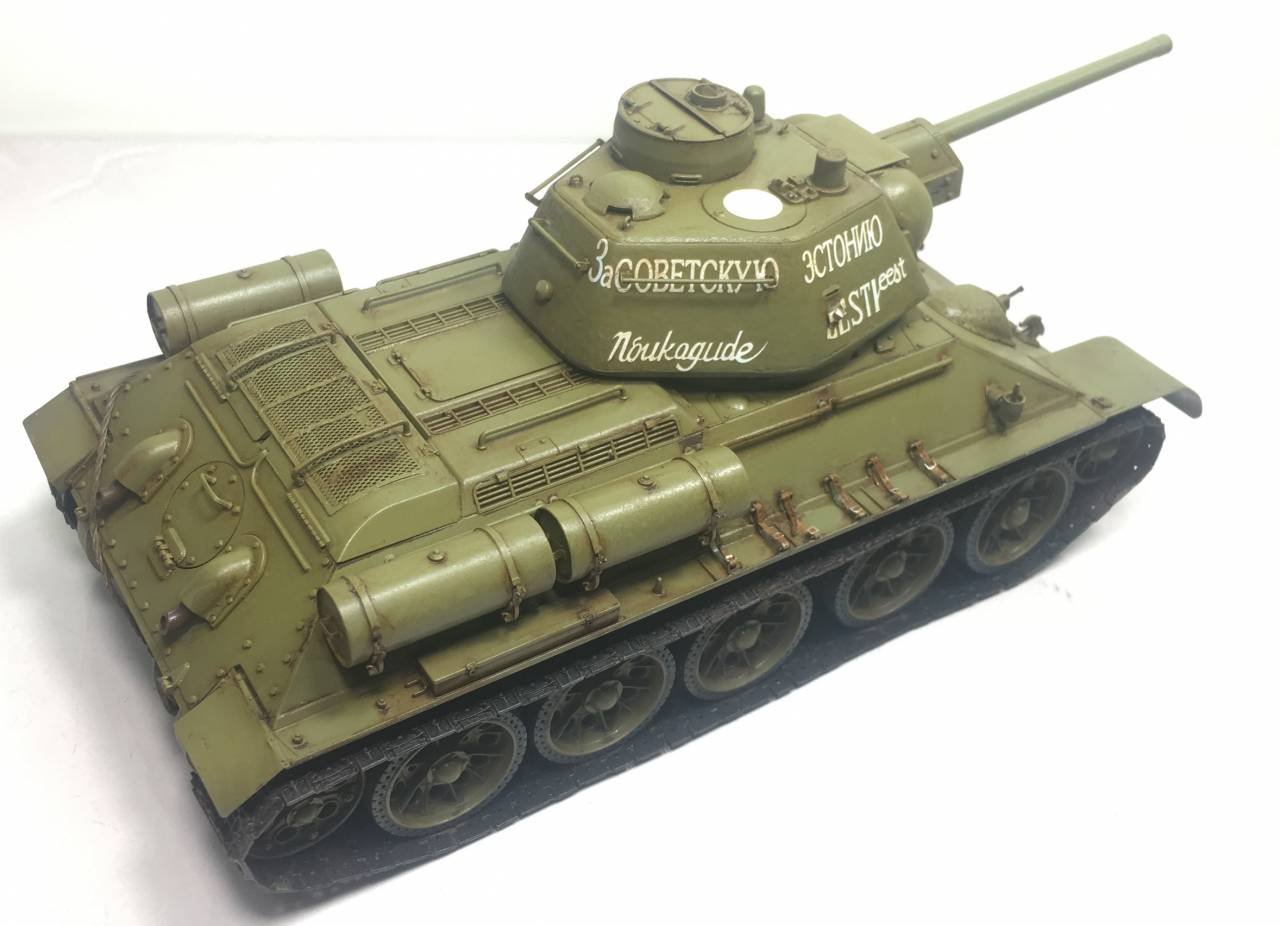
Was pretty happy with this kit overall.


petbat

Joined: August 06, 2005
KitMaker: 3,353 posts
Armorama: 3,121 posts

Posted: Monday, April 09, 2018 - 01:20 PM UTC
Nice one Rory.... not monotone but not hidden under a ton of slop. Looks like it just rolled out of the plant onto the front line, which actually happened in Stalingrad I have been told!
Posted: Monday, April 09, 2018 - 05:55 PM UTC
Quoted Text
Nice one Rory.... not monotone but not hidden under a ton of slop. Looks like it just rolled out of the plant onto the front line, which actually happened in Stalingrad I have been told!
Thank you!
I am trying to tone down my weathering in regards to chipping and wear in general. Looking at photos of the real vehicles in action I seldom see the level of chipping that we see on model kits.
Also I figure a wartime T34 had such a short shelf life it wouldn't have had time to get major wear and tear on it.

k_mero4

Joined: November 26, 2017
KitMaker: 393 posts
Armorama: 369 posts

Posted: Monday, April 09, 2018 - 09:34 PM UTC
Hello, Rory!
Very good work with T-34. I like. There is finesse in the weathering of the model. I sometimes get involved.
Congratulations.
Very good work with T-34. I like. There is finesse in the weathering of the model. I sometimes get involved.
Congratulations.

Posted: Monday, April 09, 2018 - 11:19 PM UTC
Rory,
Very nice finish on the your T-34. I agree with your thoughts on weathering for those tanks. I was just wondering what a T-34 would look like after being put back into service after it was knocked out in battle. I read that many T-34s were repaired 4-5 times and sent back into battle. I was reading were one T-34 was knocked out and repaired 4 times during the battle of Kursk.
Did they look like they came out of the factory or did they just patched the shell hole, repaired the inside and spayed on some paint? They couldn't have time to straighten fenders and such.
Mark
Soojet

Joined: March 22, 2018
KitMaker: 22 posts
Armorama: 20 posts

Posted: Wednesday, April 11, 2018 - 08:26 PM UTC
My Panzer IV Asuf. D is all put together now. This Dragon/Platz kit was super easy to put together, it is more like a Tamiya kit than anything made by Dragon. There will be a very small amount of putty used as well, the fit is superb. I recommend this kit if you want an quick and easy build with some great detail.


Conrad86

Joined: January 01, 2018
KitMaker: 25 posts
Armorama: 25 posts
Posted: Friday, April 13, 2018 - 08:37 PM UTC
Calling this done for the time being, may add the figures later, and will post photos if I do.
The weathering is a bit overcooked I realise, but I wanted to do this one in an almost cartoonish style, it's a lot of fun that way.
Decent model, if I were to build it again I would add PE screens though, otherwise pretty good for only £16 + the Miniart tracks.
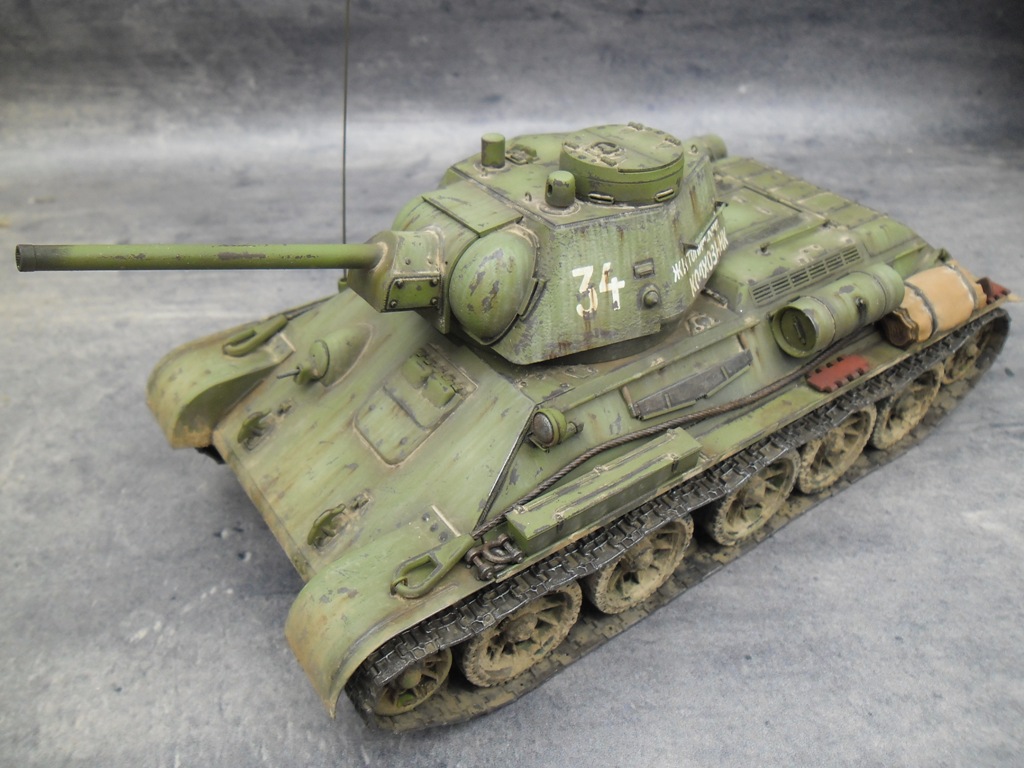
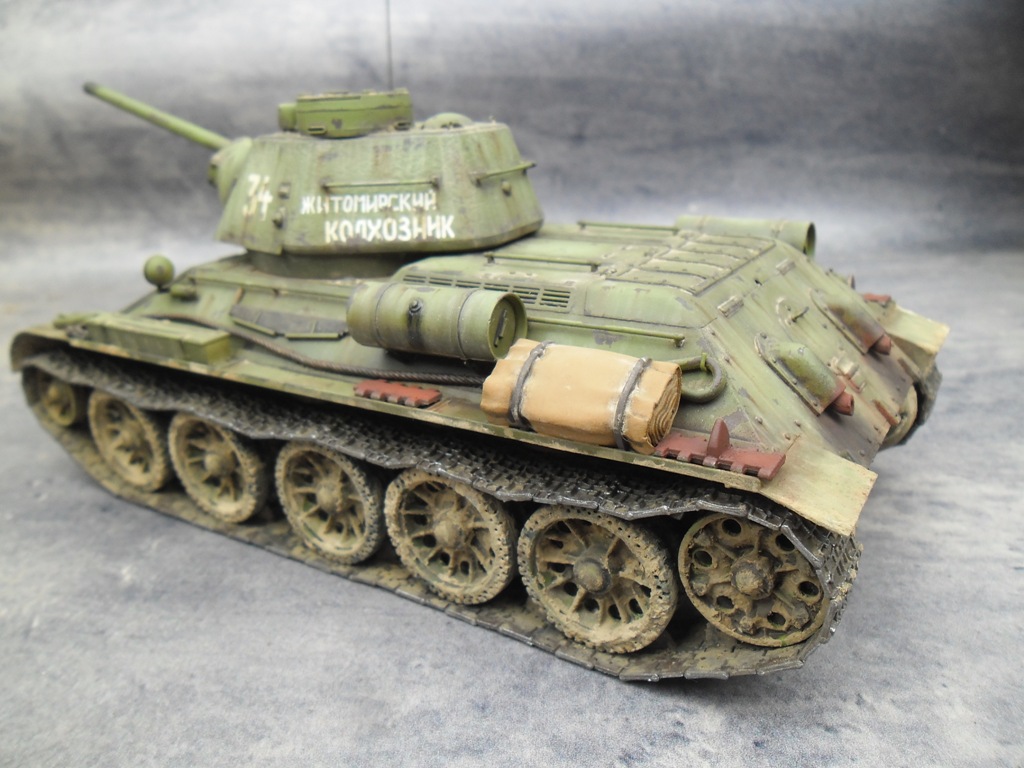
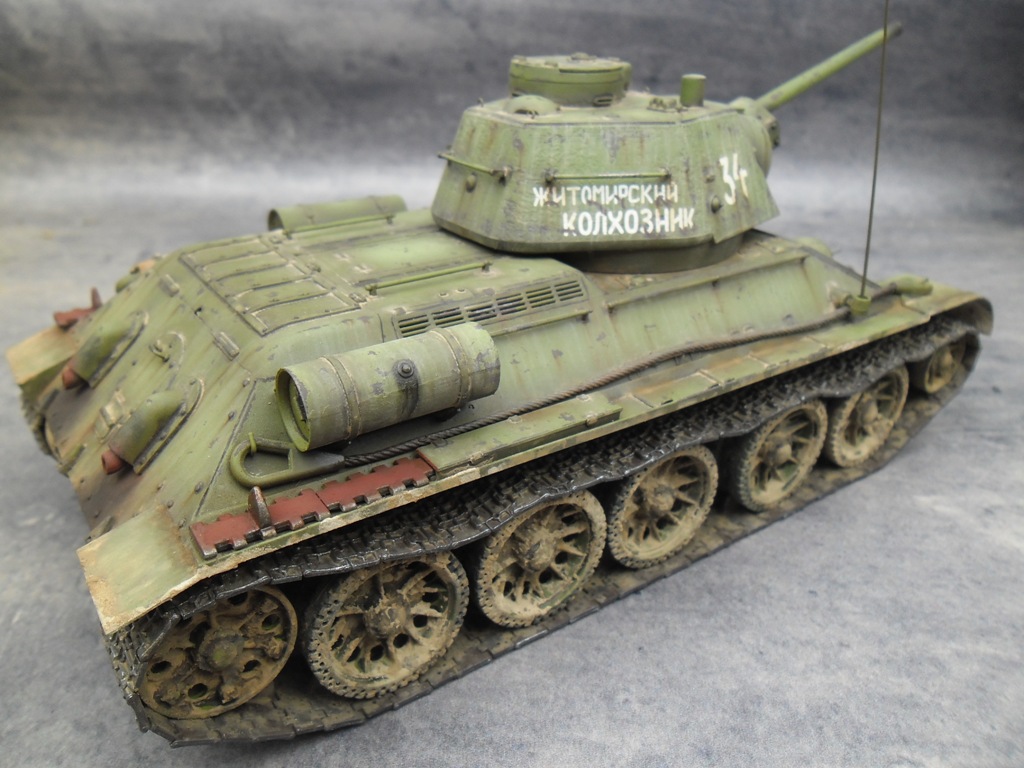
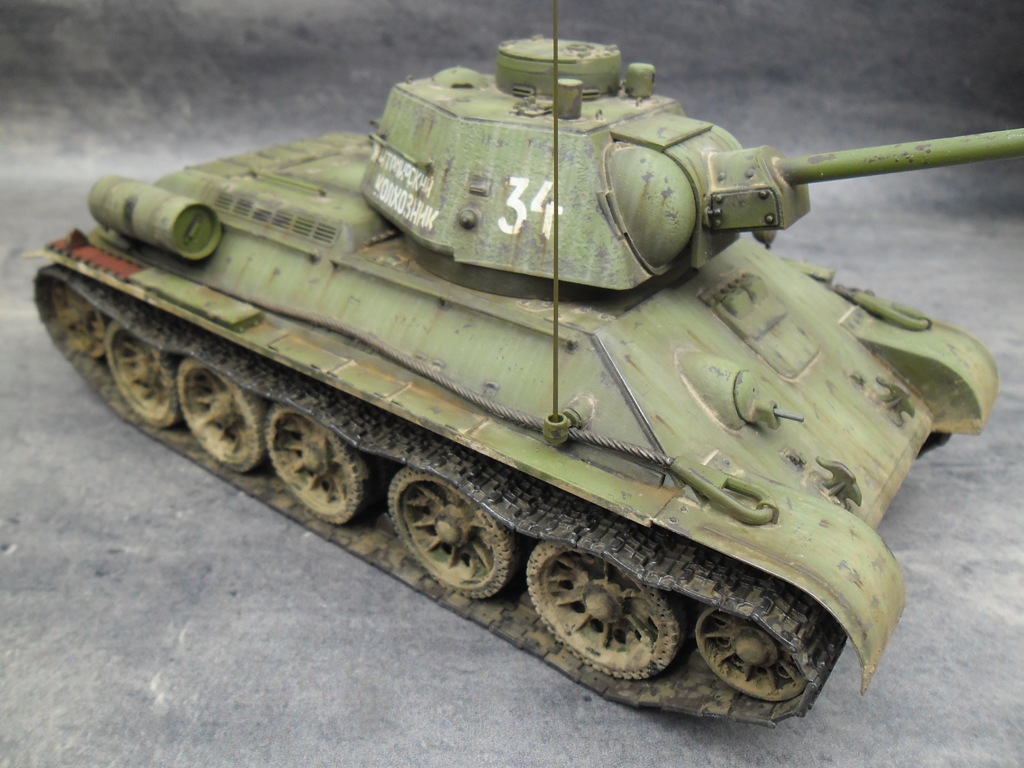
The weathering is a bit overcooked I realise, but I wanted to do this one in an almost cartoonish style, it's a lot of fun that way.
Decent model, if I were to build it again I would add PE screens though, otherwise pretty good for only £16 + the Miniart tracks.
Igorbc

Joined: December 11, 2015
KitMaker: 101 posts
Armorama: 95 posts
Posted: Friday, April 13, 2018 - 09:52 PM UTC
Posted: Saturday, April 14, 2018 - 03:27 AM UTC
Conrad,
Nice finish with your T-34. I wouldn't say the weathering was over done. A lot of those T-34s were repaired many times over and used again. With all of the rain and miles traveled I sure many were in the same condition.
Again nice work and nice looking T-34.
Mark
Nice finish with your T-34. I wouldn't say the weathering was over done. A lot of those T-34s were repaired many times over and used again. With all of the rain and miles traveled I sure many were in the same condition.
Again nice work and nice looking T-34.
Mark
Conrad86

Joined: January 01, 2018
KitMaker: 25 posts
Armorama: 25 posts
Posted: Saturday, April 14, 2018 - 05:13 PM UTC
Thanks Mark, kind words. My t-34 is definitely one that's seen better days!
Chaman911

Joined: August 28, 2015
KitMaker: 319 posts
Armorama: 308 posts
Posted: Sunday, April 15, 2018 - 06:02 AM UTC
I think that T-34 is great. A lot of modeling techniques demonstrated there. Cheers 

Posted: Sunday, April 15, 2018 - 08:24 PM UTC
Conrad, your T34 is a masterpiece. Beautiful work.
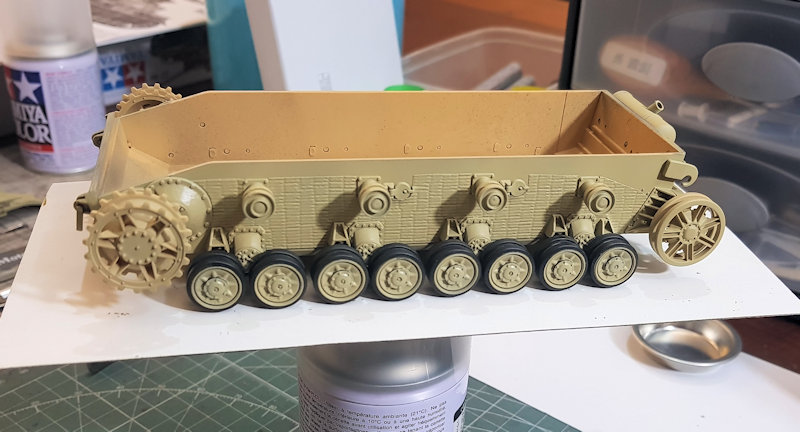
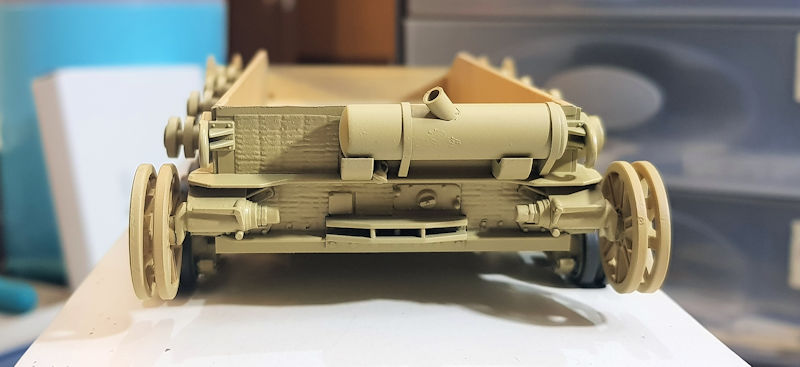
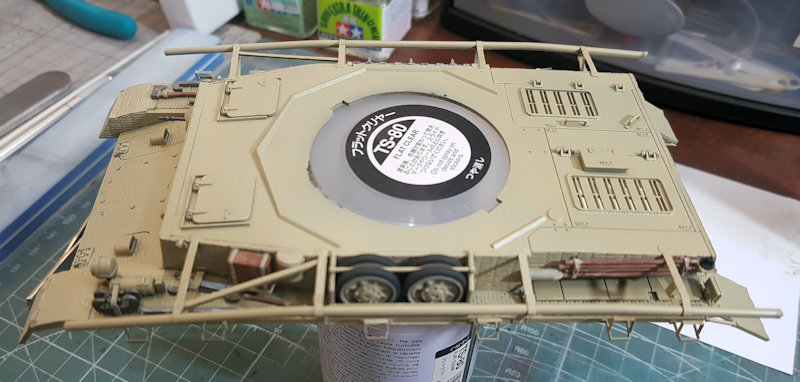
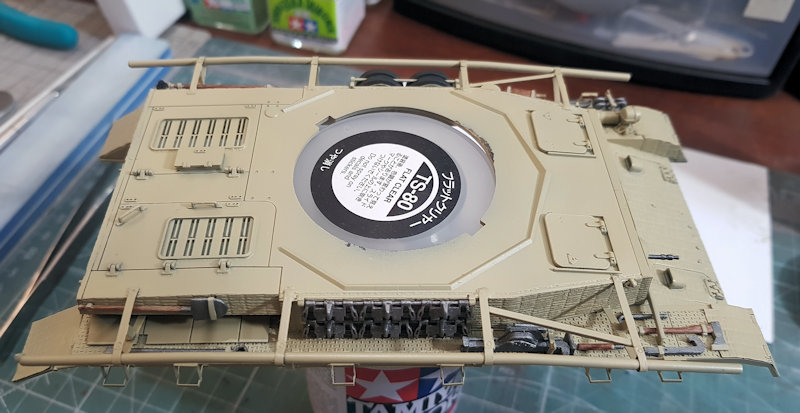
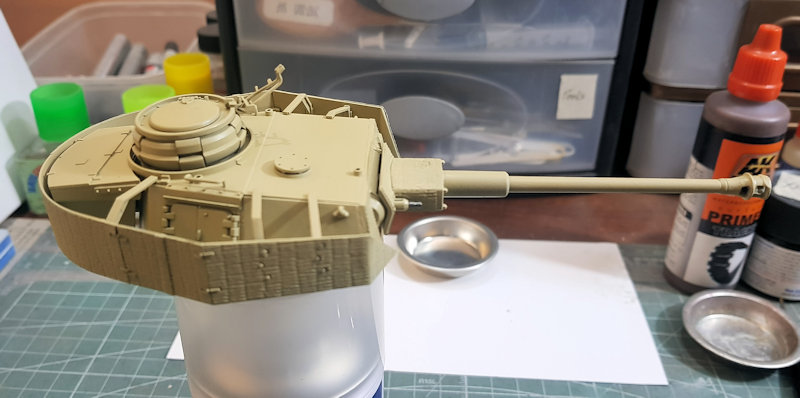
I finally got a little time to continue on my build. All the major sub-assemblies are now complete.
Lower Hull - Drive sprockets are not attached yet. Just dry fitted until I have the tracks completed. Has the wrong exhaust system for a Sep '44 build, but didn't have another option available to me.
Upper Hull - All the tools and equipment is now attached.
Turret
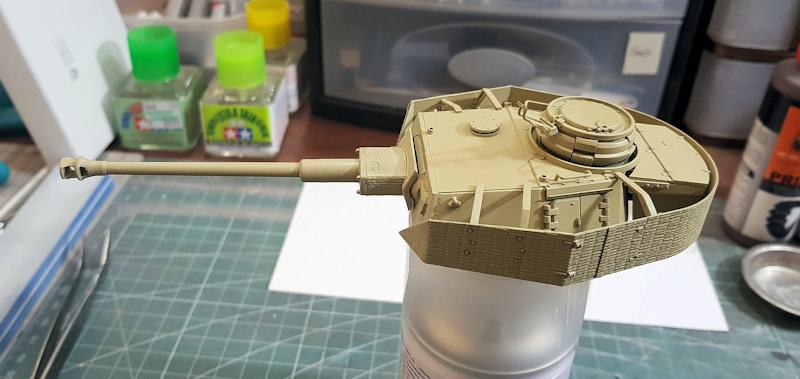
Next task is putting these together. 99 links per side, as on the real tank.
I finally got a little time to continue on my build. All the major sub-assemblies are now complete.
Lower Hull - Drive sprockets are not attached yet. Just dry fitted until I have the tracks completed. Has the wrong exhaust system for a Sep '44 build, but didn't have another option available to me.


Upper Hull - All the tools and equipment is now attached.


Turret


Next task is putting these together. 99 links per side, as on the real tank.


Northern_Lad

Joined: September 17, 2012
KitMaker: 462 posts
Armorama: 417 posts

Posted: Sunday, April 15, 2018 - 11:48 PM UTC
Hello!
I’m joining with the Italeri panzer iv. I’ll do it as the F2 variant. Here is my start up photo and and photos of the AM bits and pieces I’ll use to spruce it up.


So now time to start scraping away the weird extra armour Italeri added to the rear of the turret!
Cheers
Matthew
I’m joining with the Italeri panzer iv. I’ll do it as the F2 variant. Here is my start up photo and and photos of the AM bits and pieces I’ll use to spruce it up.


So now time to start scraping away the weird extra armour Italeri added to the rear of the turret!
Cheers
Matthew
Conrad86

Joined: January 01, 2018
KitMaker: 25 posts
Armorama: 25 posts
Posted: Monday, April 16, 2018 - 08:13 PM UTC
Thanks for the kind comments guys, much appreciated!
Those zimm decals look great painted Mark, not tried them before, been meaning to give them a go.
Those zimm decals look great painted Mark, not tried them before, been meaning to give them a go.
petbat

Joined: August 06, 2005
KitMaker: 3,353 posts
Armorama: 3,121 posts

Posted: Tuesday, April 17, 2018 - 01:04 AM UTC
Great work guys.
Matt the 4 is looking a treat.
Conrad, excellent result on the T34. Love it.
The 2 finished T34's here are what modelling, and joining Group Builds is all about. Have fun, and build and paint the way you want it, not what others believe they should be. Each has a different view, but both are fantastic builds and ones anyone would be proud to have pulled off. Congrats guys.
TFrancoM5A1

Joined: February 06, 2011
KitMaker: 9 posts
Armorama: 8 posts

Posted: Tuesday, April 17, 2018 - 07:16 AM UTC
Excellent looking stuff so far guys. I hope I can live up to them. My first campaign contribution is going to be Tasca/Asuka's Sherman Jumbo done as Cobra King with Archer decals and casting symbols and Modelkasten duckbill tracks (I'm a glutton for punishment).


Going to use Legend's stowage set and Archer's air recognition panels, also.
I apologize in advance for the potato quality photos.


Going to use Legend's stowage set and Archer's air recognition panels, also.
I apologize in advance for the potato quality photos.
MichaelSatin

Joined: January 19, 2008
KitMaker: 3,909 posts
Armorama: 510 posts

Posted: Tuesday, April 17, 2018 - 08:55 AM UTC
Really impressed with the work going on here! Makes me want to actually build something for this campaign myself (instead of just starting it)...
Michael
Michael

Posted: Tuesday, April 17, 2018 - 07:56 PM UTC
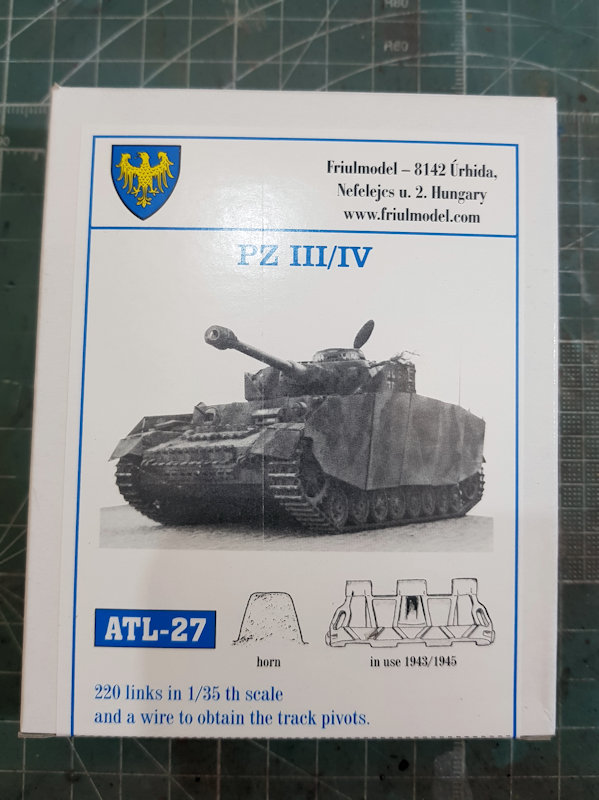
I've assembled the left track. All Panzer IV's, A through J, had 99 links per side. So, I assembled 99 links.
This is the result when test fitting 99 links.
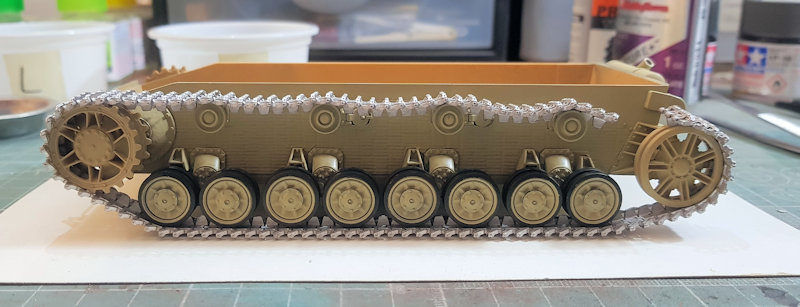
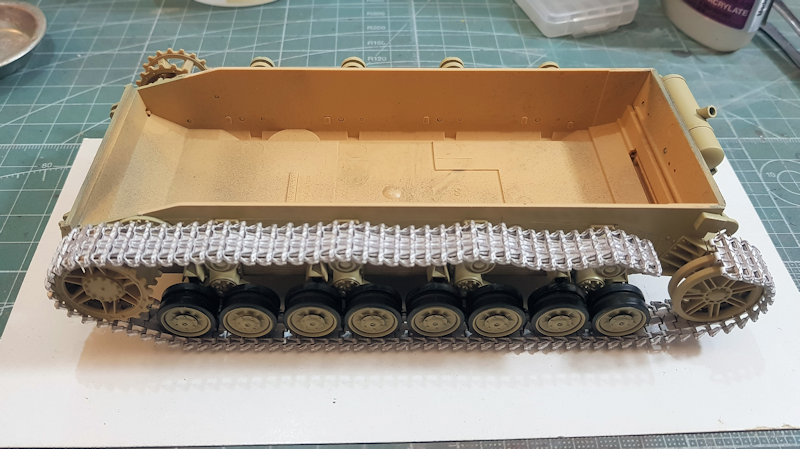
Just a little short I'm guessing that the lower hull dimensions aren't correct. So, I added four additional links, 103 total. This is the result
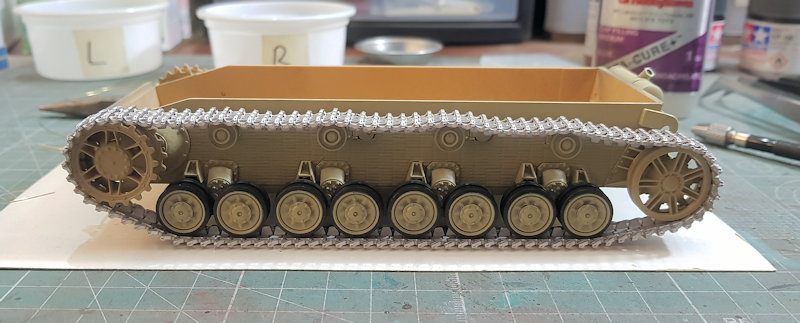
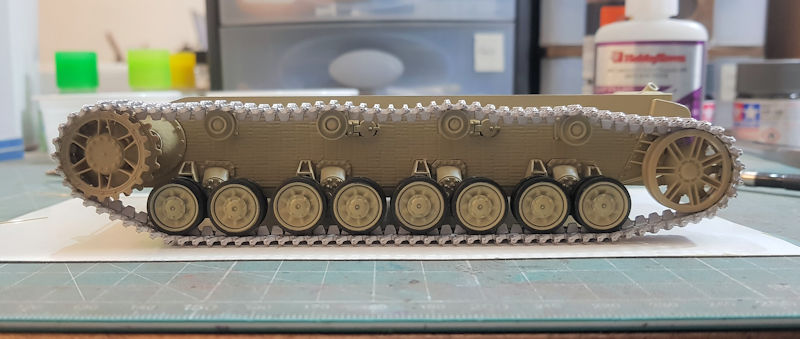
This now looks correct. Just a bit of sag between the return rollers. Next, need to do the right side. Then prime and paint.
This is the result when test fitting 99 links.


Just a little short
 I'm guessing that the lower hull dimensions aren't correct. So, I added four additional links, 103 total. This is the result

This now looks correct. Just a bit of sag between the return rollers. Next, need to do the right side. Then prime and paint.

Northern_Lad

Joined: September 17, 2012
KitMaker: 462 posts
Armorama: 417 posts

Posted: Wednesday, April 18, 2018 - 05:29 PM UTC
Hello,
Progress on the Italeri panzer iv f2… I decided not to scrape away the extra plastic on the rear of the turret, but add miliput to make the armour plate flush.

I swapped the vision ports and turret hatches for spares from a Dragon kit… And the ports on the front of the turret are resin castings based on a Dragon kit part. I had to, as the Italeri kit only comes with one and the f2 had two of them.


I may replace the turret lifting hooks, again, with Dragon spares. Amazing how many extras you get in a Dragon kit....
Cheers
Matthew
Progress on the Italeri panzer iv f2… I decided not to scrape away the extra plastic on the rear of the turret, but add miliput to make the armour plate flush.

I swapped the vision ports and turret hatches for spares from a Dragon kit… And the ports on the front of the turret are resin castings based on a Dragon kit part. I had to, as the Italeri kit only comes with one and the f2 had two of them.


I may replace the turret lifting hooks, again, with Dragon spares. Amazing how many extras you get in a Dragon kit....
Cheers
Matthew
Posted: Monday, April 23, 2018 - 03:58 PM UTC
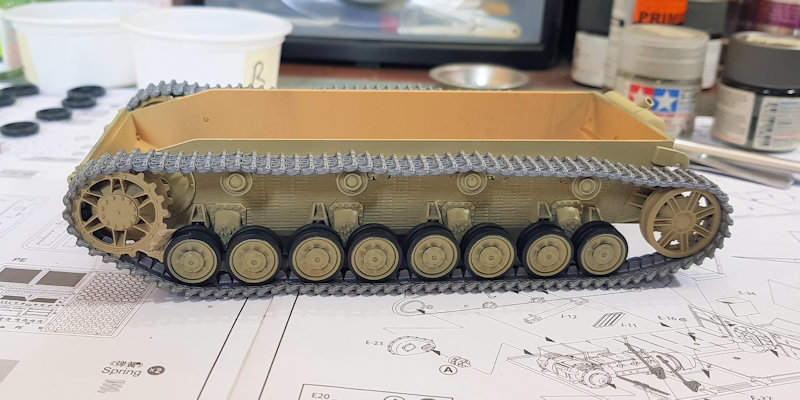
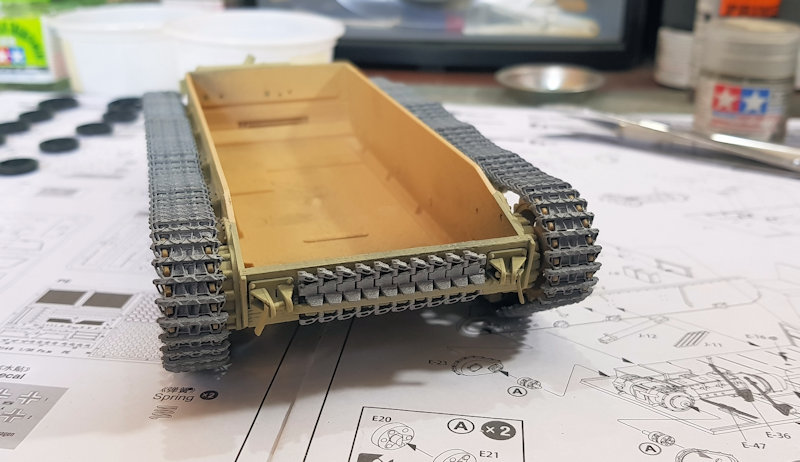
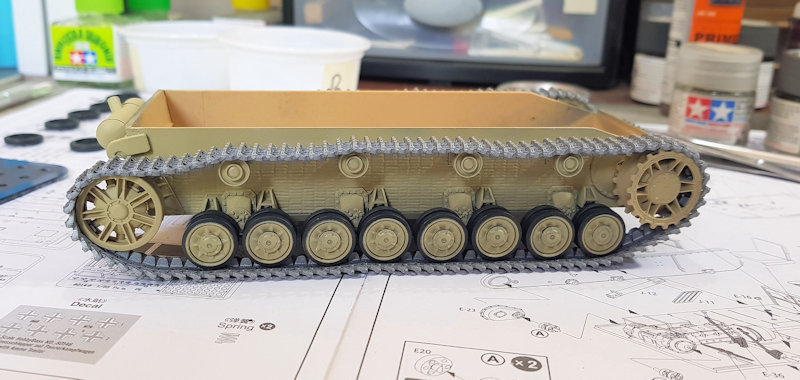
The Friulmodel tracks are primed, painted, and installed.


Posted: Monday, April 23, 2018 - 04:52 PM UTC
Matthew,
Nice updates to the turret. It is amazing how many spares you can get from a Dragon kit.
Mark,
Gotta love the looks of metal tracks. They sure beat the looks of rubber band tracks.
Mark
Nice updates to the turret. It is amazing how many spares you can get from a Dragon kit.
Mark,
Gotta love the looks of metal tracks. They sure beat the looks of rubber band tracks.
Mark
Posted: Monday, April 23, 2018 - 05:43 PM UTC
Mark, Agree completely about the metal tracks
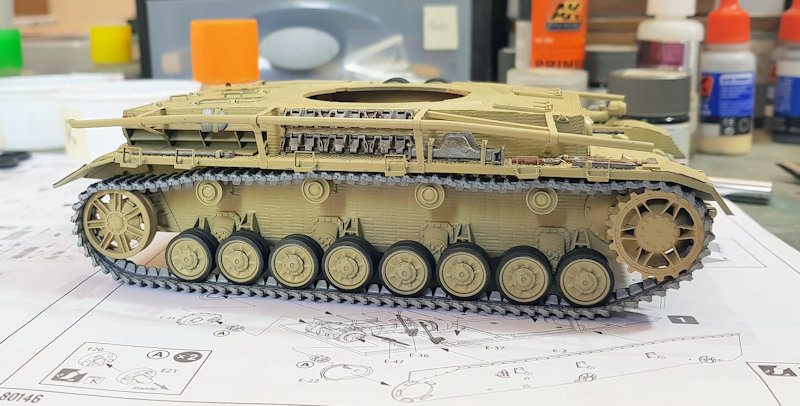
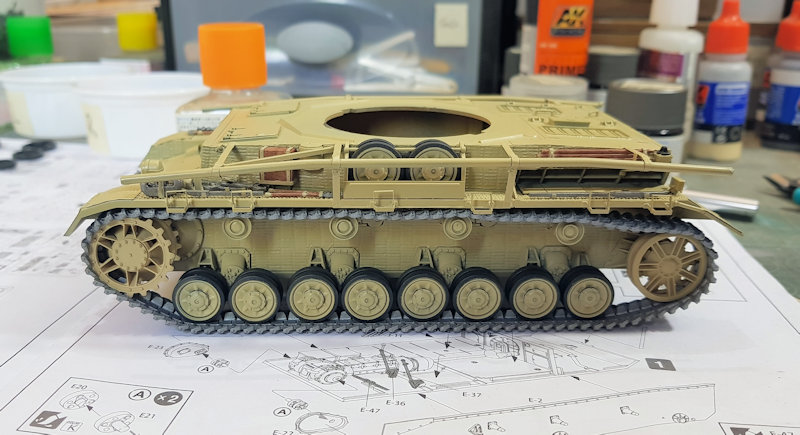
The upper hull is now attached.
With the turret installed
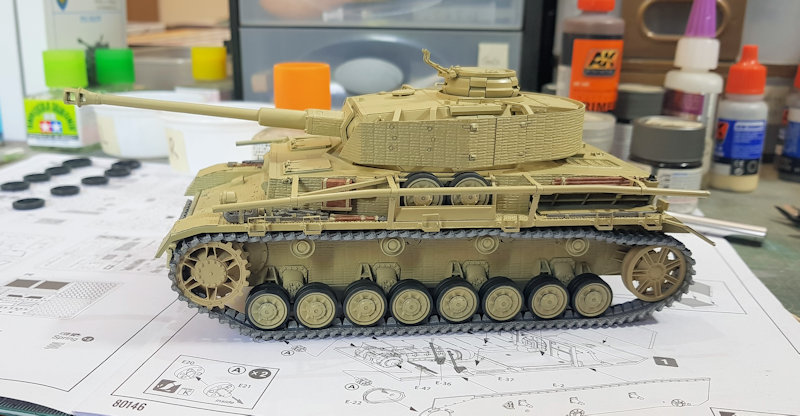
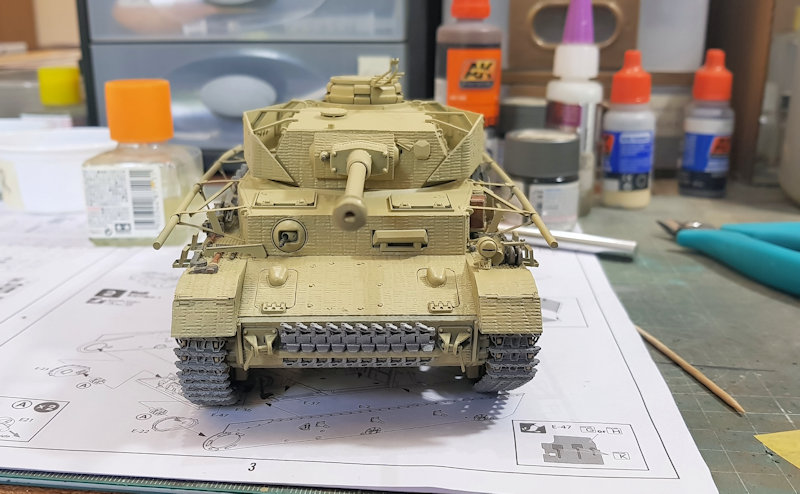
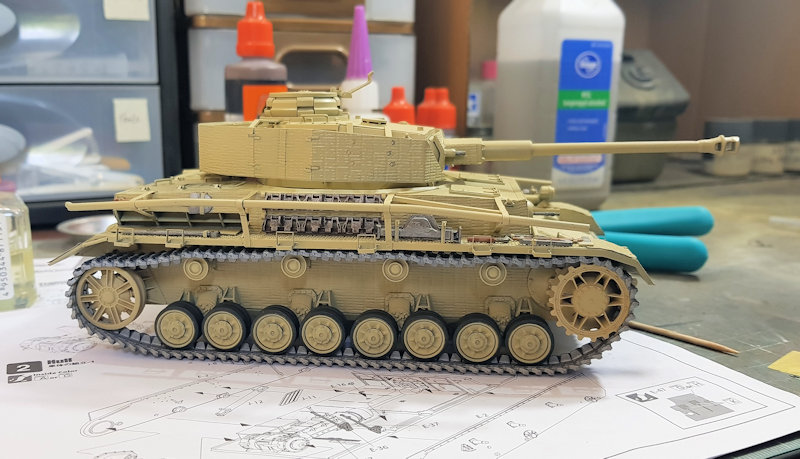
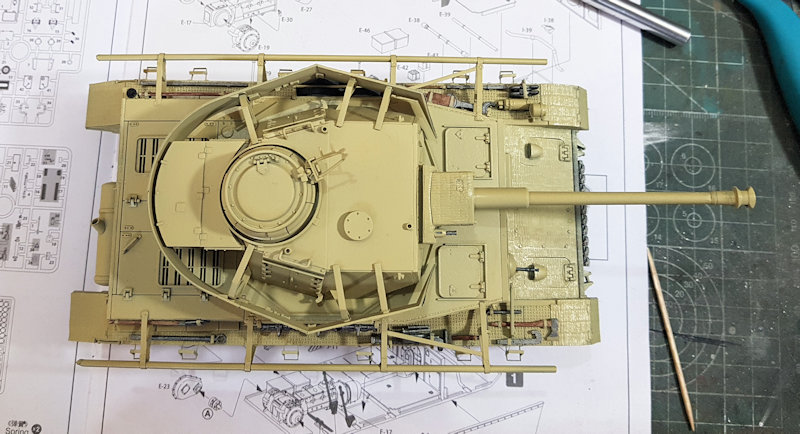
The upper hull is now attached.


With the turret installed


 |


