Distrito Federal, Mexico
Joined: May 31, 2013
KitMaker: 1,457 posts
Armorama: 1,440 posts
Posted: Friday, January 12, 2018 - 11:06 AM UTC
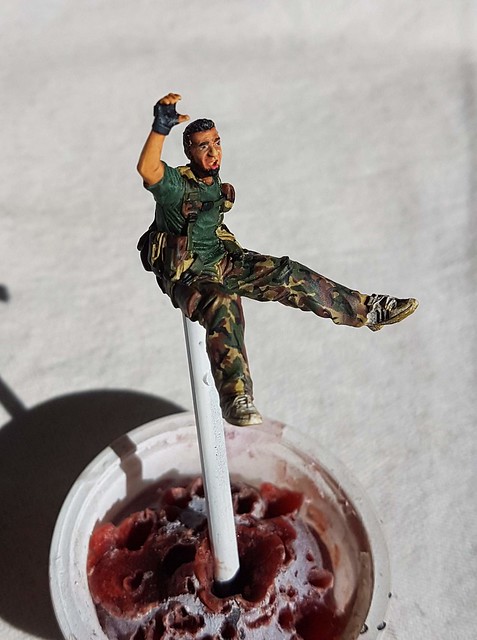
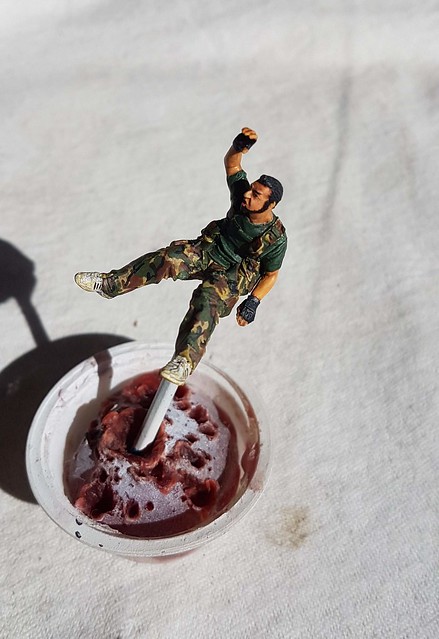
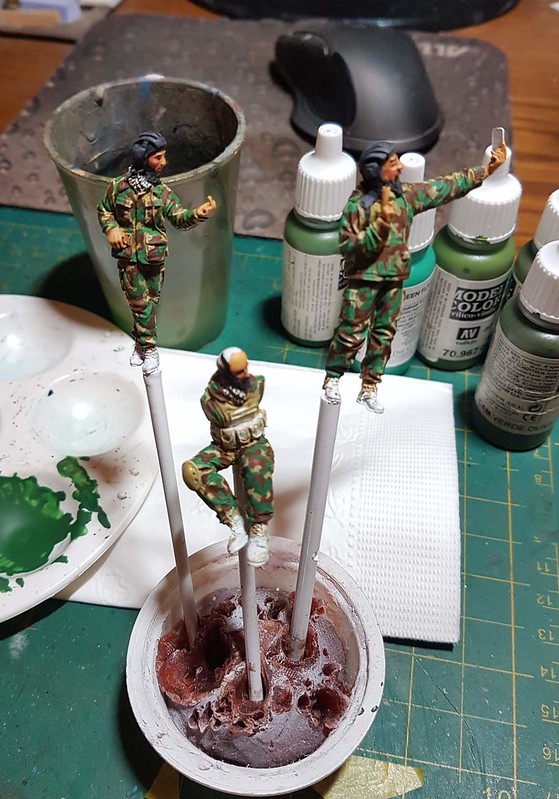
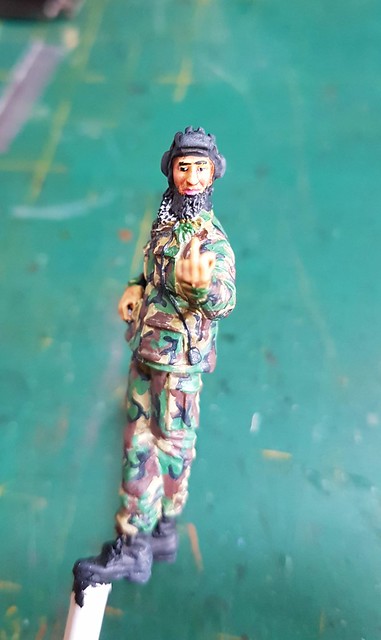
Next we start with the brown. I used Vallejo flat brown. Refer a lot to your picture references for the pattern. Just remember seam lines. The pattern is printed on the cloth and not on the finnished uniform, so make sure your pattern changes as you go over seam lines.
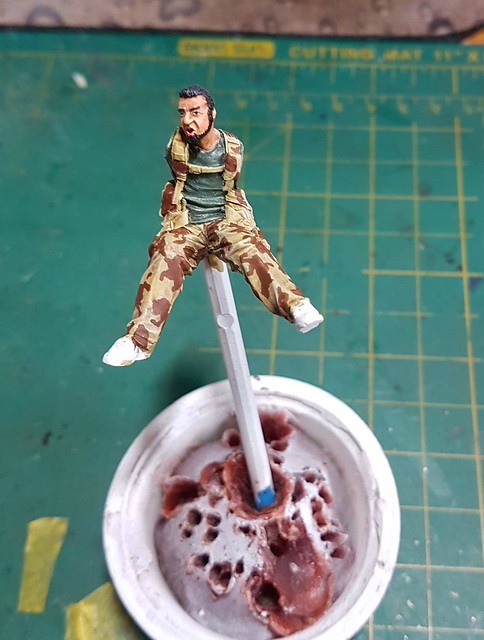
Also be careful when painting small areas like ammo pouches and so on to avoid doing a "miniature version" of the pattern. Again, keep checking your picture references.
Distrito Federal, Mexico
Joined: May 31, 2013
KitMaker: 1,457 posts
Armorama: 1,440 posts
Posted: Friday, January 12, 2018 - 11:17 AM UTC
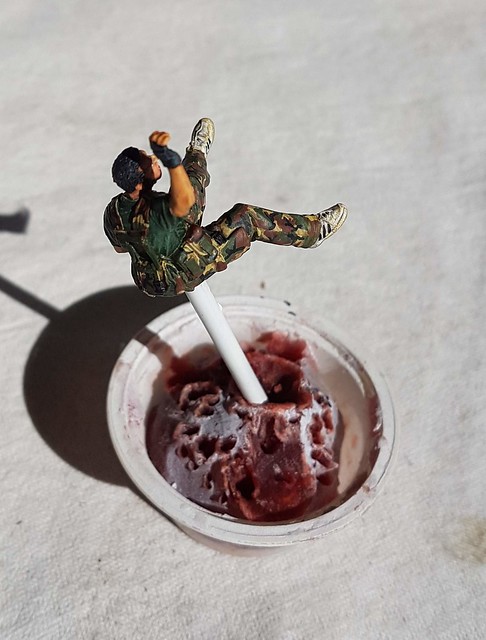
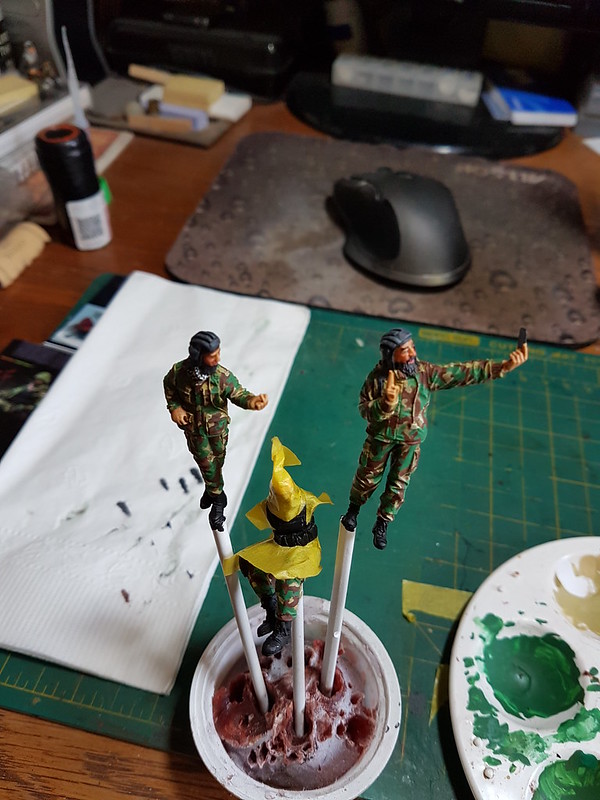
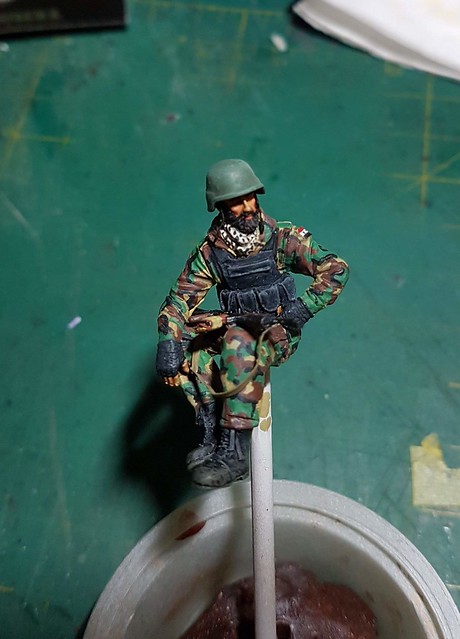
Here I have done the green pattern and I am starting with the black:
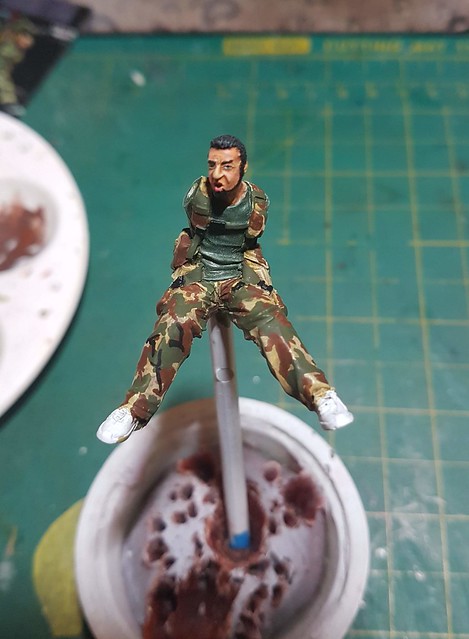
Finnished with the black:
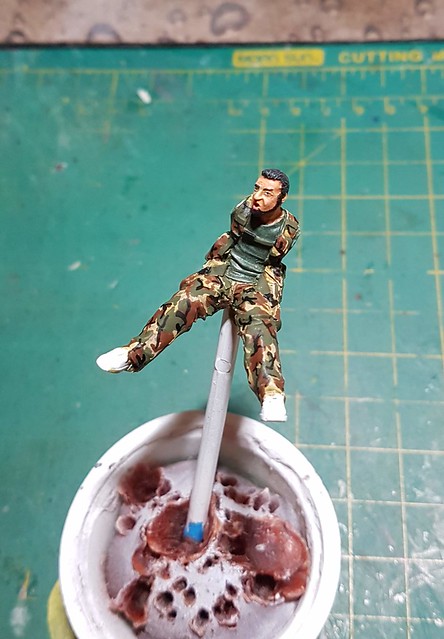
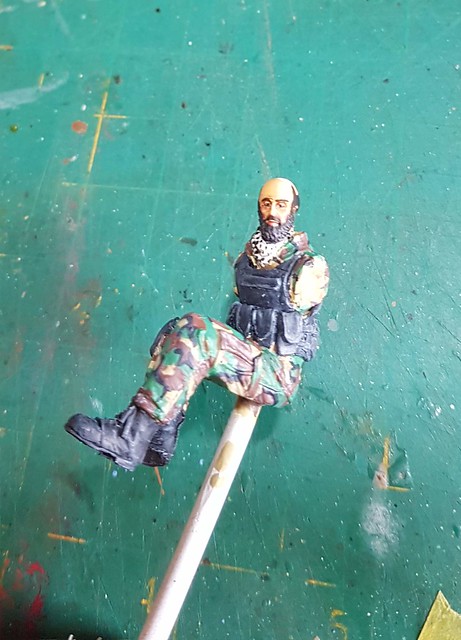
And this is where I am at at the moment. I think next I will give a couple of filters with oils to see if I can get a more "worn look" on the camo.
Distrito Federal, Mexico
Joined: May 31, 2013
KitMaker: 1,457 posts
Armorama: 1,440 posts
Posted: Saturday, January 13, 2018 - 03:58 AM UTC
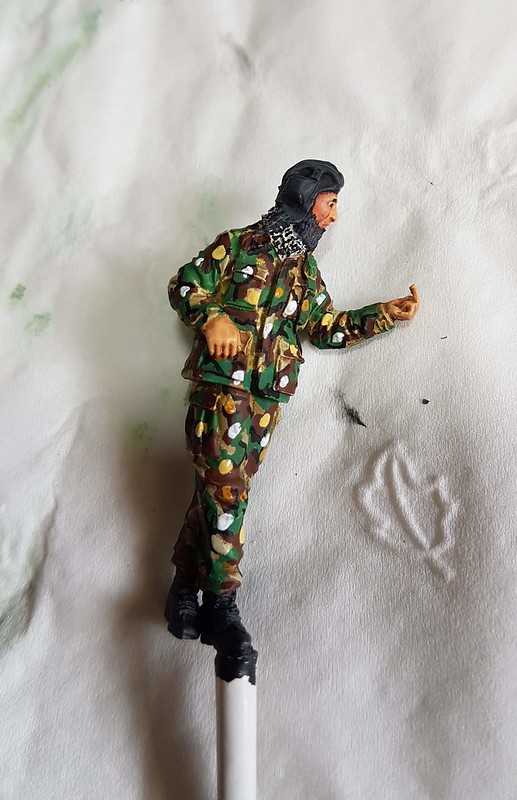
Added some "spots" of oil paint. White, ocher, and yellow, to start the filter:
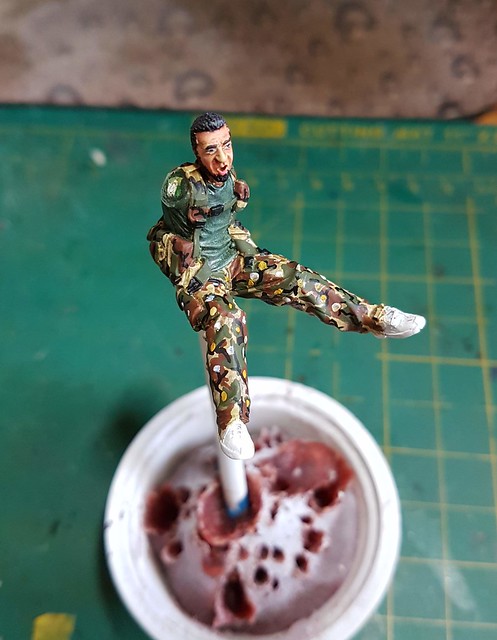
After blending, still wet:
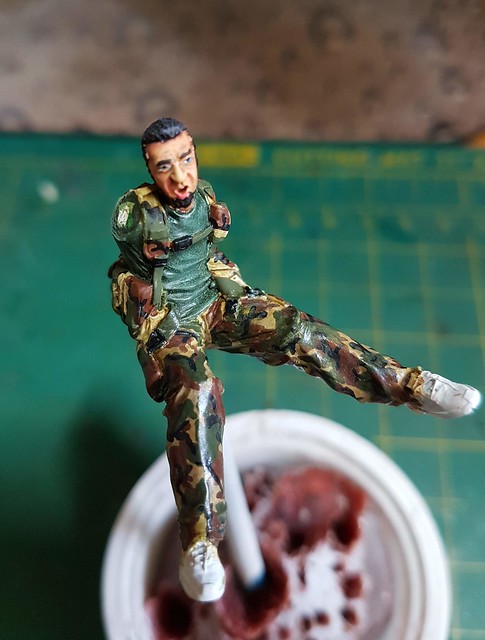
Distrito Federal, Mexico
Joined: May 31, 2013
KitMaker: 1,457 posts
Armorama: 1,440 posts
Posted: Saturday, January 13, 2018 - 07:08 AM UTC
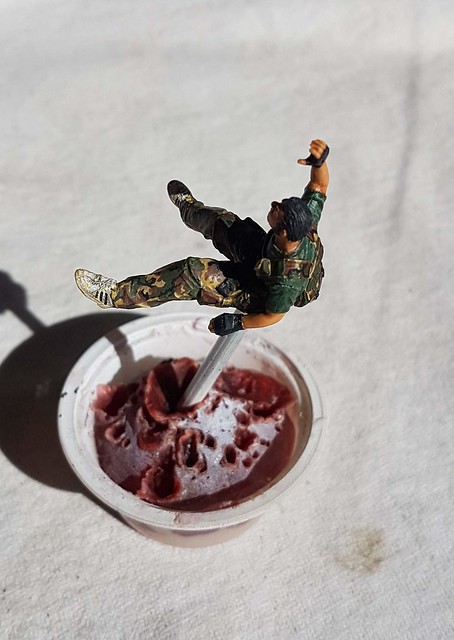
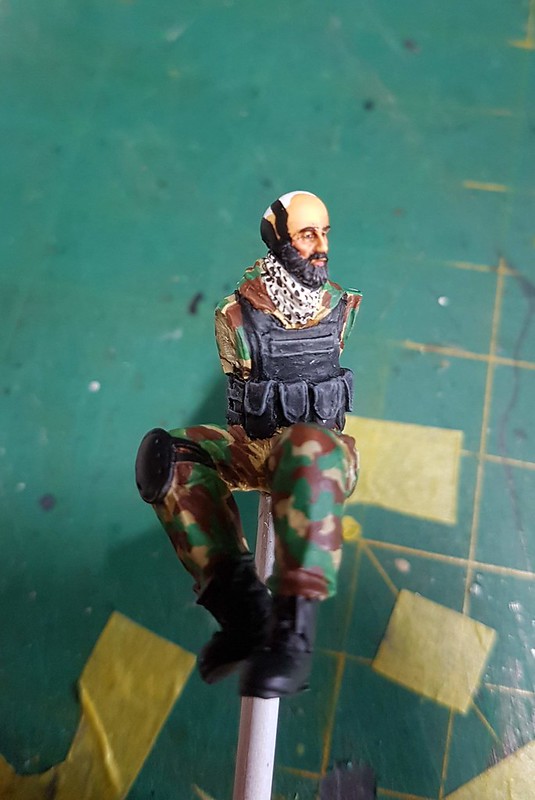
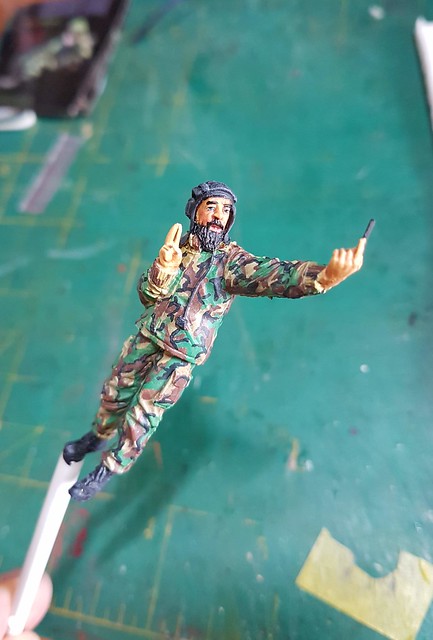
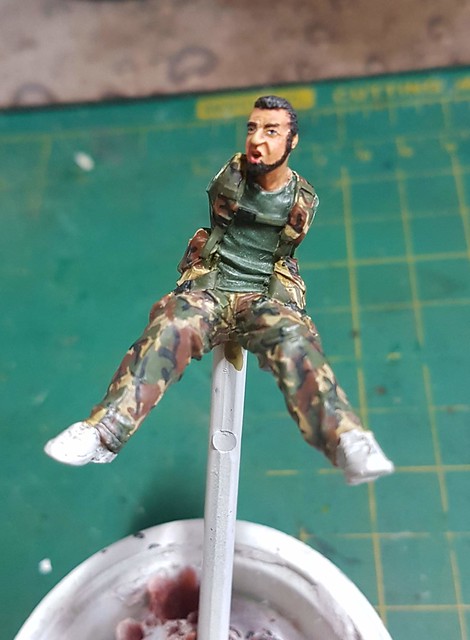
Added a little wash with black oil very thinned.
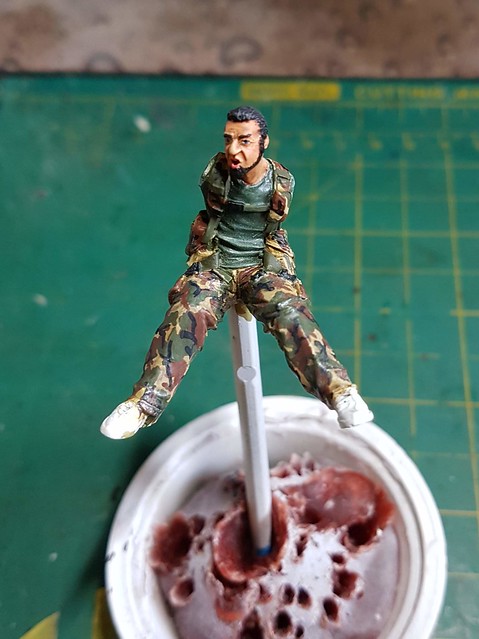
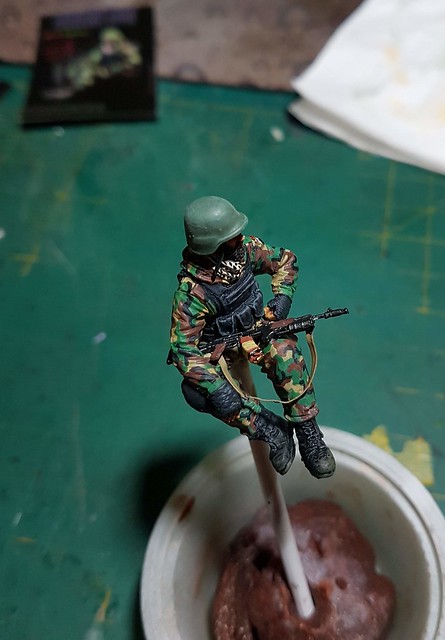
Painted the gloves black then dry brushed them with black and a bit of white:
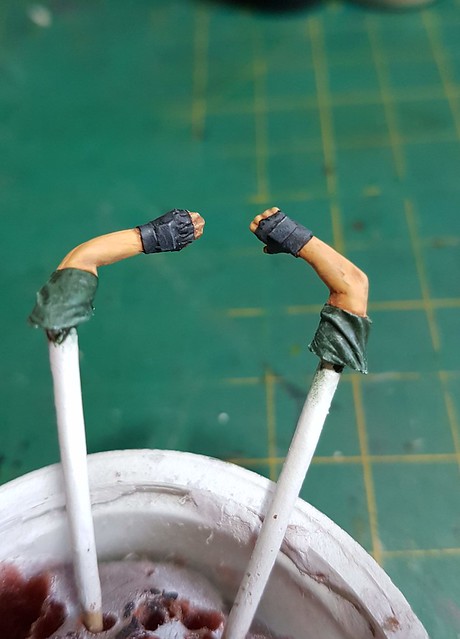
Body almost finnished:
Madrid, Spain / España
Joined: December 19, 2016
KitMaker: 366 posts
Armorama: 300 posts
Posted: Saturday, January 13, 2018 - 10:28 PM UTC
Wow, Marcos. Thank you very much for this tutorial. Now I'm working on a Woodland jacket and I'll use your ideas.
Thanks again for sharing your superb work.
Distrito Federal, Mexico
Joined: May 31, 2013
KitMaker: 1,457 posts
Armorama: 1,440 posts
Posted: Saturday, January 13, 2018 - 10:45 PM UTC
Distrito Federal, Mexico
Joined: May 31, 2013
KitMaker: 1,457 posts
Armorama: 1,440 posts
Posted: Sunday, January 14, 2018 - 05:17 AM UTC
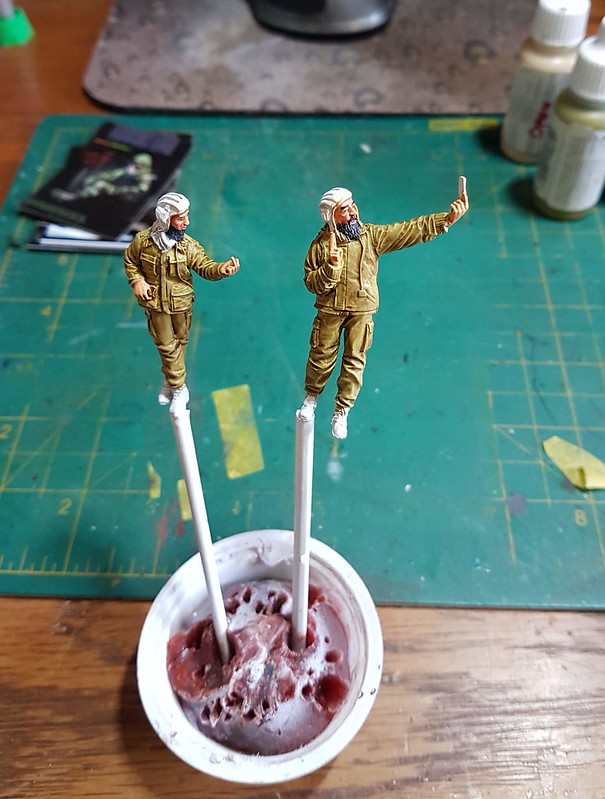
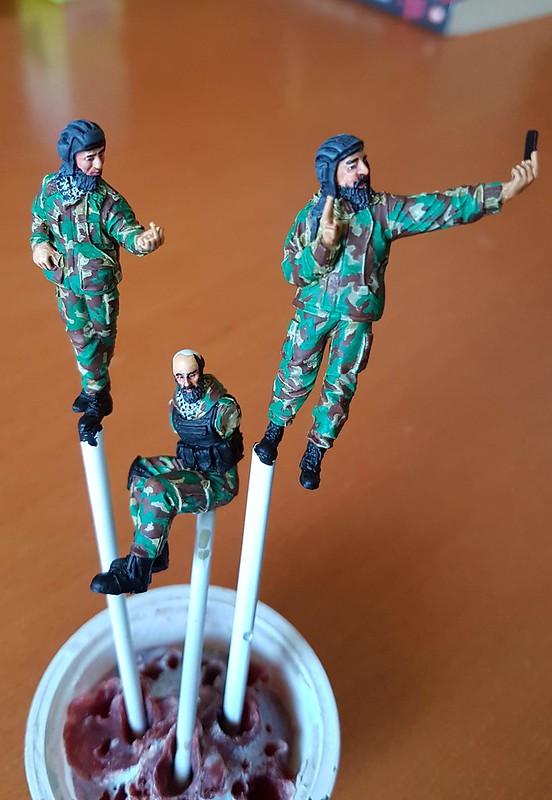
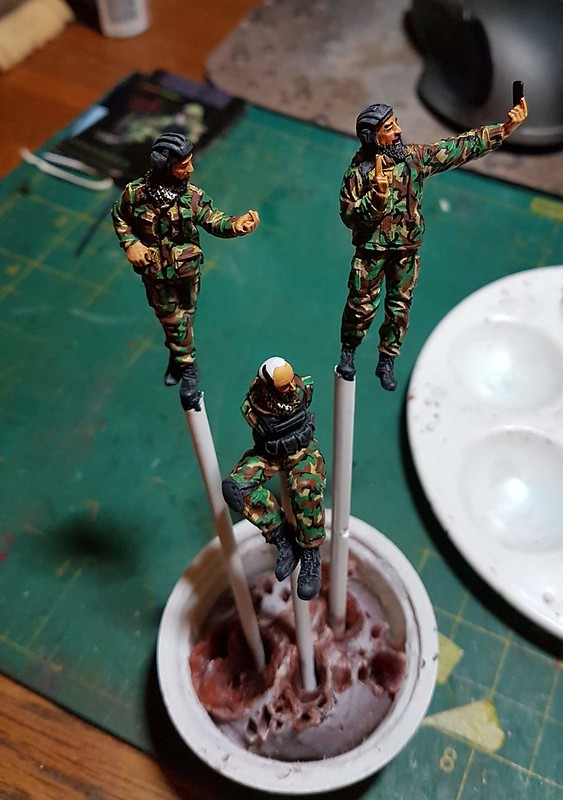
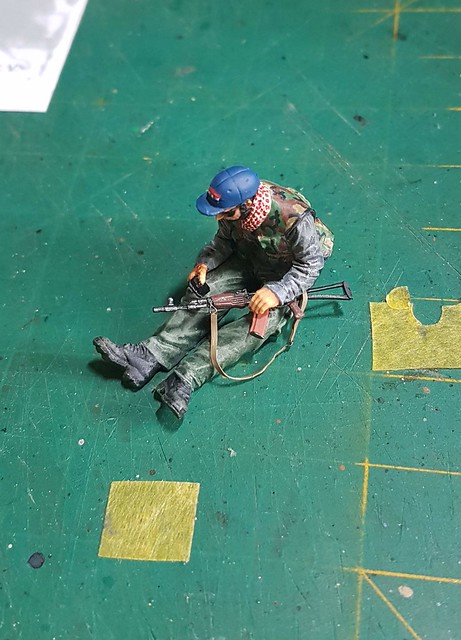
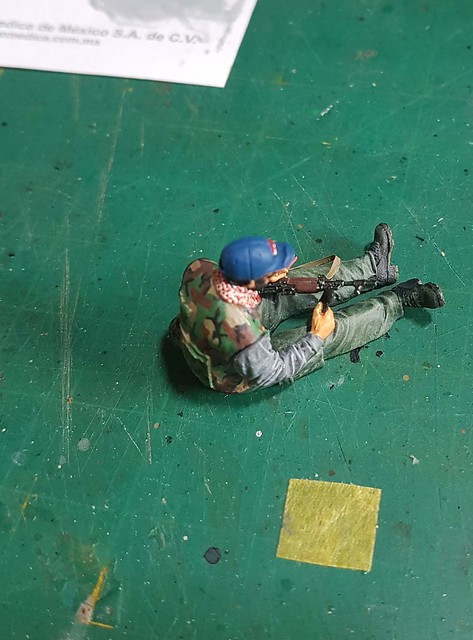
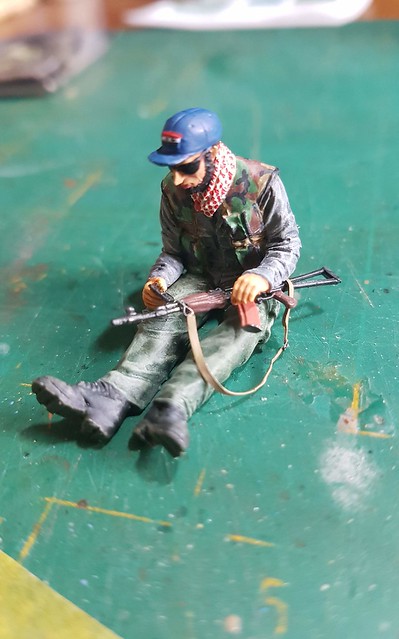
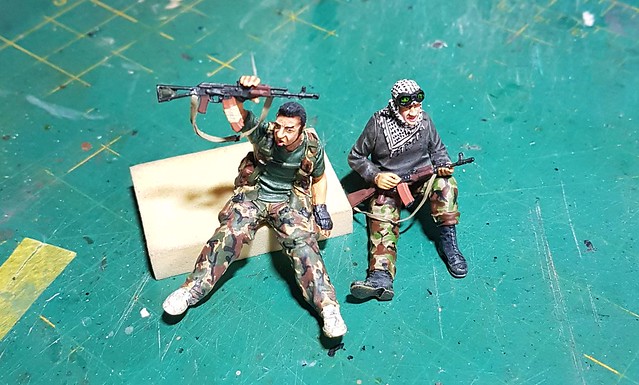
First 2 figures finnished. With my desk lamp they look a bit too shinny, but here is the pic:
Virginia, United States
Joined: April 05, 2006
KitMaker: 159 posts
Armorama: 158 posts
Posted: Wednesday, January 17, 2018 - 07:32 PM UTC
Wow. Great work on the UAZ. That kit had some major issues, IIRC when I built one.
Dalarnas, Sweden
Joined: May 08, 2002
KitMaker: 2,264 posts
Armorama: 1,763 posts
Posted: Wednesday, January 17, 2018 - 08:10 PM UTC
Charles
What we perceive to be may not be what we believe to be.
---------------------------------------------------------------------------
Distrito Federal, Mexico
Joined: May 31, 2013
KitMaker: 1,457 posts
Armorama: 1,440 posts
Posted: Wednesday, January 17, 2018 - 08:58 PM UTC
Thank you Tim and Charles. I will finish all the figures first then deal with tbe BRDM-2. I am still looking for reference pictures on the BRDM.
Distrito Federal, Mexico
Joined: May 31, 2013
KitMaker: 1,457 posts
Armorama: 1,440 posts
Posted: Saturday, February 03, 2018 - 08:13 AM UTC
Distrito Federal, Mexico
Joined: May 31, 2013
KitMaker: 1,457 posts
Armorama: 1,440 posts
Posted: Saturday, February 03, 2018 - 11:45 AM UTC
Distrito Federal, Mexico
Joined: May 31, 2013
KitMaker: 1,457 posts
Armorama: 1,440 posts
Posted: Sunday, February 04, 2018 - 11:13 AM UTC
Madrid, Spain / España
Joined: December 19, 2016
KitMaker: 366 posts
Armorama: 300 posts
Posted: Sunday, February 04, 2018 - 09:58 PM UTC
Love your figures, Marcos!!
Distrito Federal, Mexico
Joined: May 31, 2013
KitMaker: 1,457 posts
Armorama: 1,440 posts
Posted: Sunday, February 04, 2018 - 11:32 PM UTC
Distrito Federal, Mexico
Joined: May 31, 2013
KitMaker: 1,457 posts
Armorama: 1,440 posts
Posted: Thursday, February 08, 2018 - 02:04 AM UTC
Klaus-Adler
 Campaigns Administrator
Scotland, United Kingdom
Joined: June 08, 2015
KitMaker: 1,505 posts
Armorama: 840 posts
Posted: Thursday, February 08, 2018 - 06:32 AM UTC
How did you manage to paint the scarves that are around the necks of some of the soldiers, I would love to know how you did this
Distrito Federal, Mexico
Joined: May 31, 2013
KitMaker: 1,457 posts
Armorama: 1,440 posts
Posted: Thursday, February 08, 2018 - 09:20 AM UTC
Hi David. It is not as complicated as it might seem. First look up a bunch of photo references. Search for "keffiyeh" in google pictures. Use a white base for the "keffiyeh" then playing with the folds on the figure do a pattern of dots (I usually go red or black). Always looking at your references. Avoid randomizing the dots because that will look unrealistic. And basically that is it. Good luck.
Distrito Federal, Mexico
Joined: May 31, 2013
KitMaker: 1,457 posts
Armorama: 1,440 posts
Posted: Tuesday, February 13, 2018 - 10:41 PM UTC
I am working now on the BRDM-2. I don't think I will go heavy on the interior detail because you can barely see the inside. Although I must say the Trumpeter model comes with a very complete interior. And I think I will do some add on armour as you see it ln a lot of Syrian armored vehicles. Just haven't decided what.
New Jersey, United States
Joined: January 05, 2005
KitMaker: 2,185 posts
Armorama: 1,813 posts
Posted: Thursday, February 15, 2018 - 07:01 PM UTC
Nice work Marcos , your figure work is outstanding .
Distrito Federal, Mexico
Joined: May 31, 2013
KitMaker: 1,457 posts
Armorama: 1,440 posts
Posted: Thursday, February 15, 2018 - 09:34 PM UTC
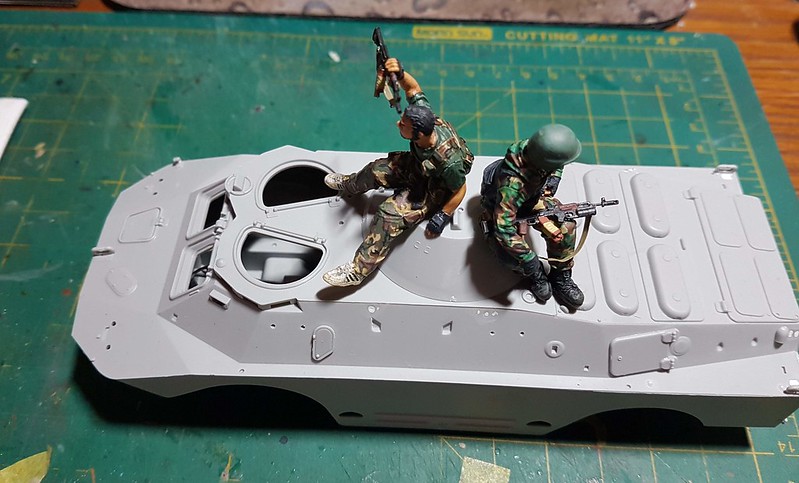
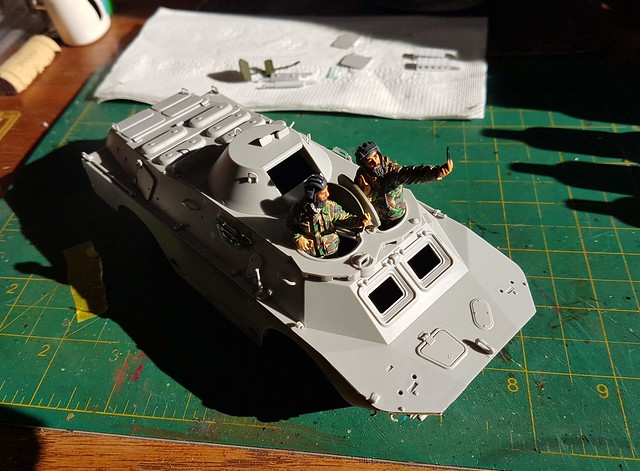
Some advance on the BRDM-2.
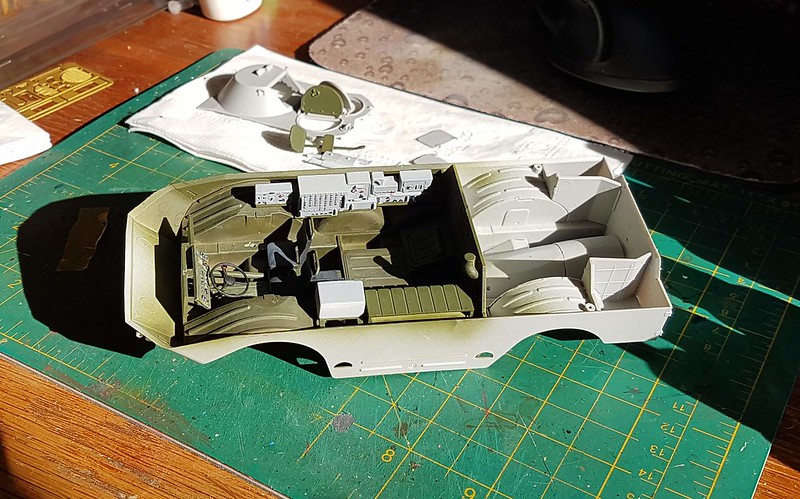
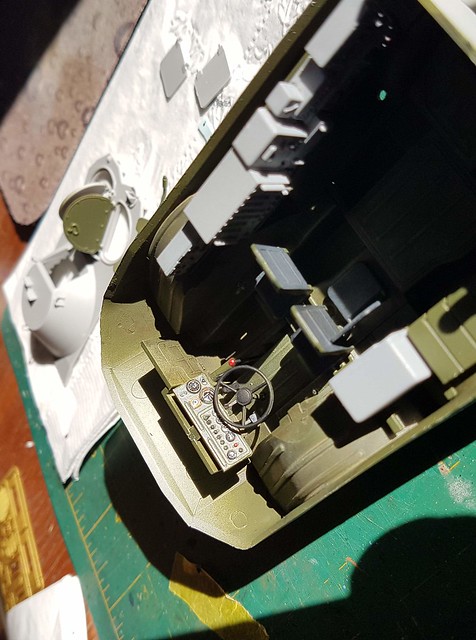
I had to shift the front seats back so that the figures could stand up through the hatches:
France
Joined: February 20, 2012
KitMaker: 1,932 posts
Armorama: 1,907 posts
Posted: Thursday, February 15, 2018 - 09:58 PM UTC
Great work. Figures paint is very nice !
Dalarnas, Sweden
Joined: May 08, 2002
KitMaker: 2,264 posts
Armorama: 1,763 posts
Posted: Wednesday, February 21, 2018 - 07:11 PM UTC
Outstanding work. Those figures and camos are fantastic.
Charles
What we perceive to be may not be what we believe to be.
---------------------------------------------------------------------------
Distrito Federal, Mexico
Joined: May 31, 2013
KitMaker: 1,457 posts
Armorama: 1,440 posts
Posted: Wednesday, February 21, 2018 - 07:57 PM UTC
Thank you Cheyenne, Alex, and Charles.
Distrito Federal, Mexico
Joined: May 31, 2013
KitMaker: 1,457 posts
Armorama: 1,440 posts
Posted: Saturday, February 24, 2018 - 11:23 PM UTC
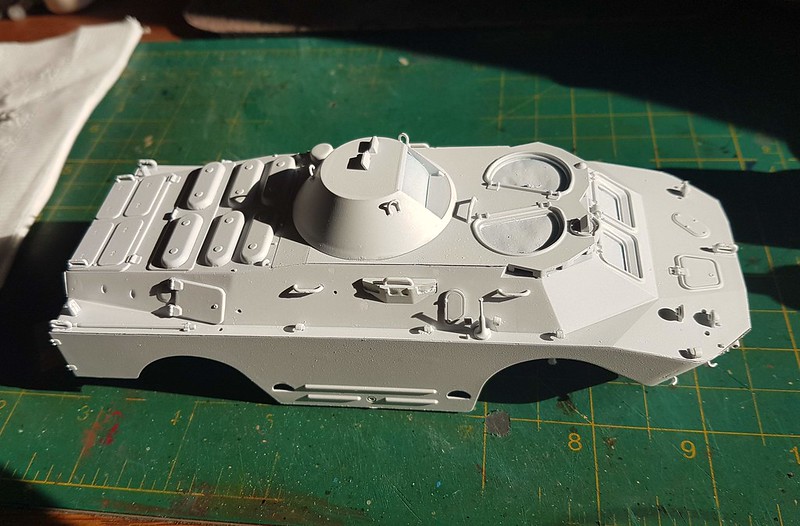
I changed my mind. won´t go with the slat armour on the BRDM. Only references I found was way too complicated to scratch build and I do not whant to end up with a "what if" compromise model.
All primed up:
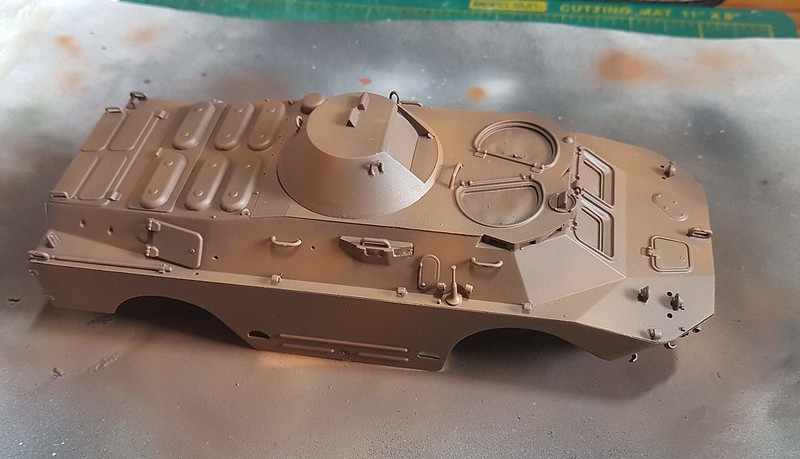
Rust base:
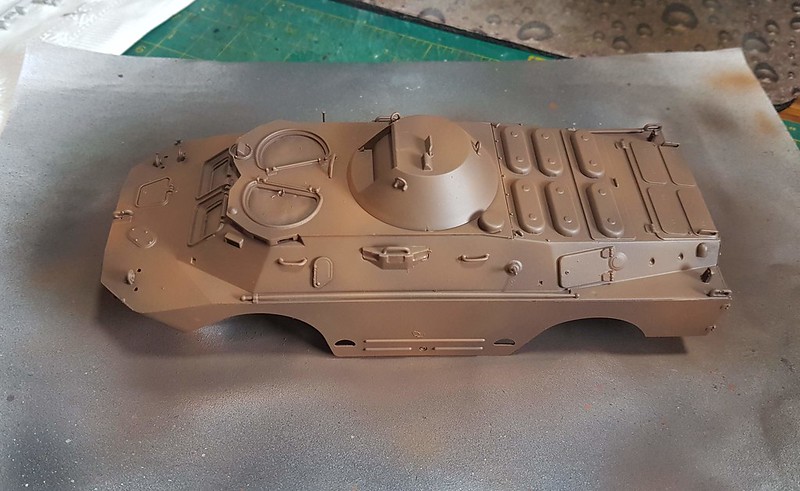
I still have to work a little more on the rust. I will use the hair spray technique.


