
Hosted by Darren Baker
Rye Field Models Cutaway Panther G
ahandykindaguy

Joined: August 20, 2008
KitMaker: 1,295 posts
Armorama: 1,191 posts

Posted: Sunday, March 17, 2019 - 09:31 AM UTC
It looked really good at model club on Tuesday night Colin. I wanted to pick the subassemblies up and get a closer look... but was afraid to. Didn’t want to break anything, it all looked so delicate. Glad you’re posting so we can zoom in on it all!


ColinEdm


Joined: October 15, 2013
KitMaker: 1,355 posts
Armorama: 1,229 posts

Posted: Friday, March 22, 2019 - 09:39 AM UTC
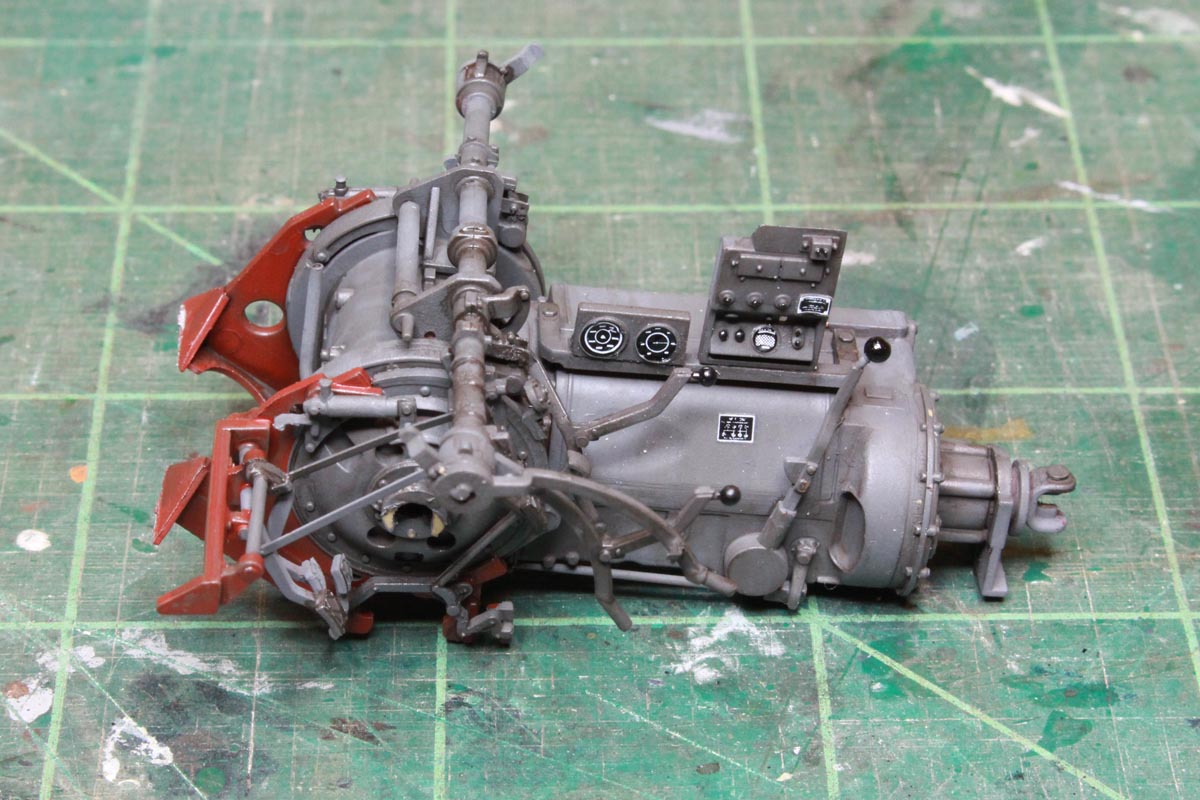
Thanks Dave! Plugging away at the interior, it really requires looking ahead and planning what you are going to do. I also highly recommend multiple test fits as you put together the sub-assemblies, tolerances are very tight so seemingly slight misalignment's have big impacts on how well things go together. I never was able to get the pedal/steering assemblies properly aligned as you can see. Anyways, on to pictures, the transmission assembly painted and decals attached, ready to be installed.
and in the hull:
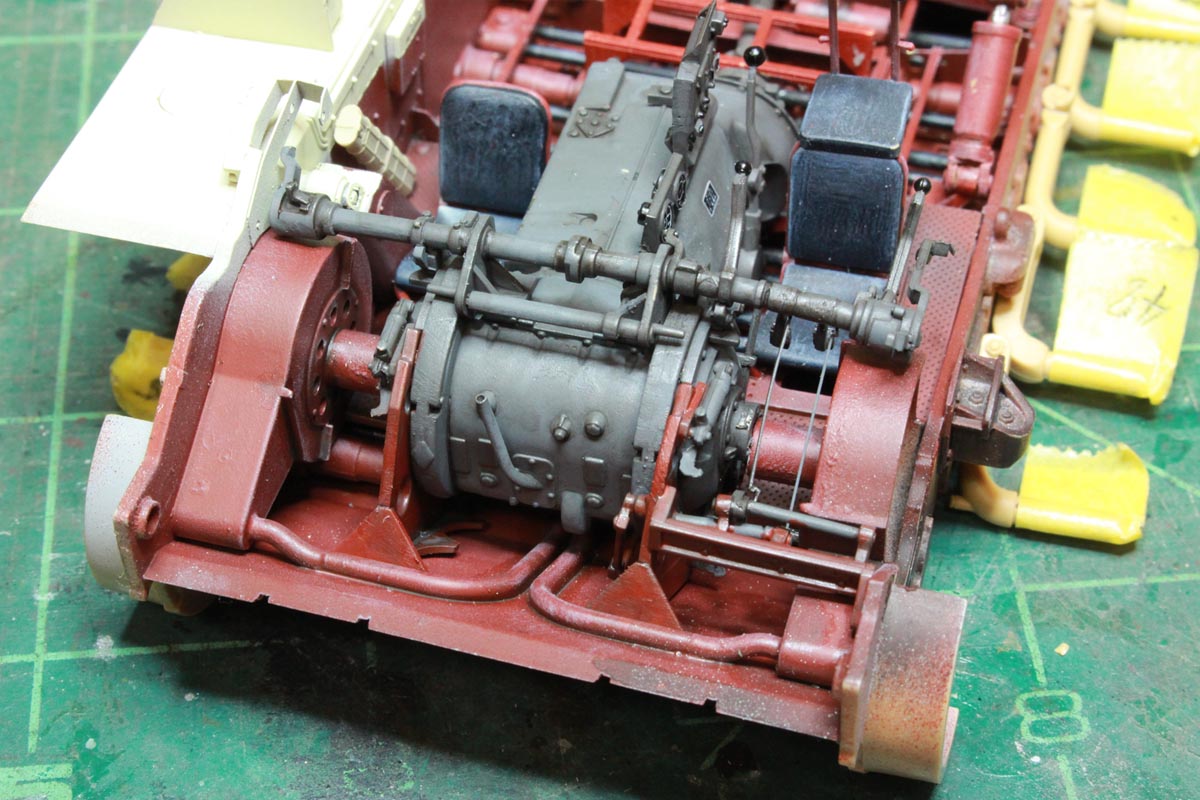
that bend drives me nuts...oh well, learn from me and do it in sections!
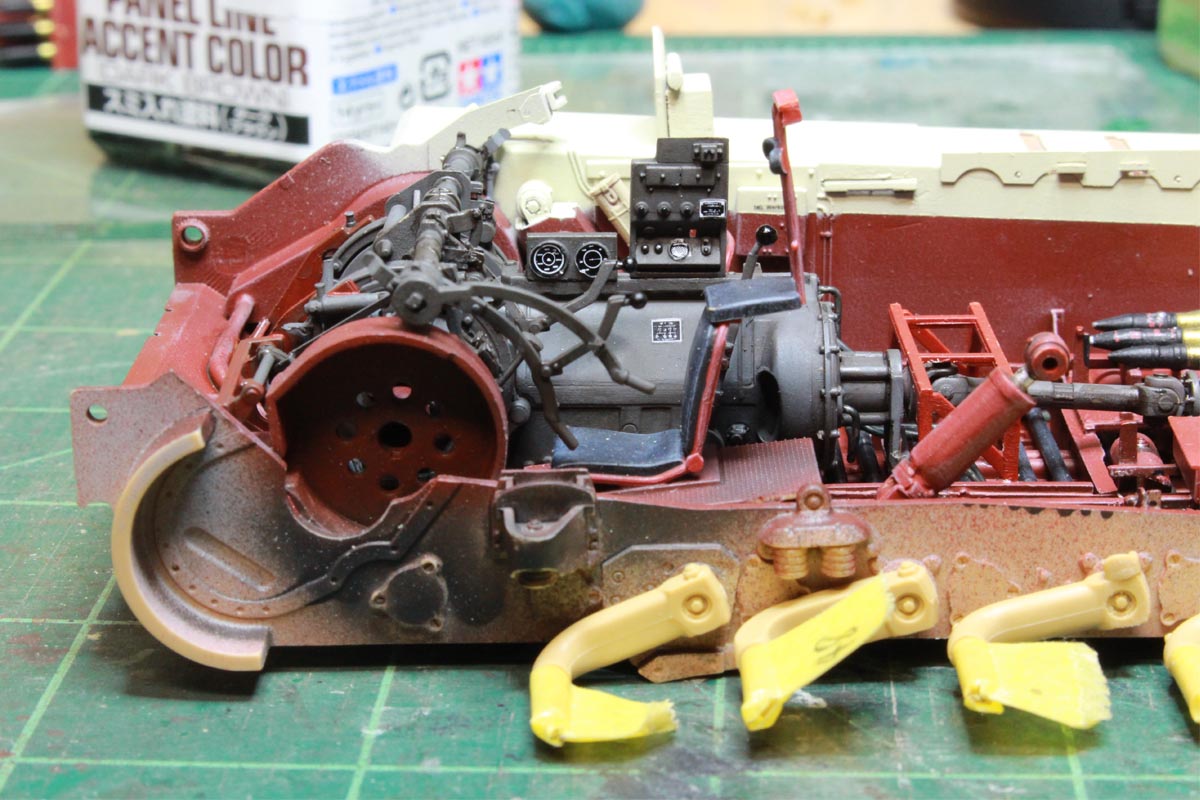
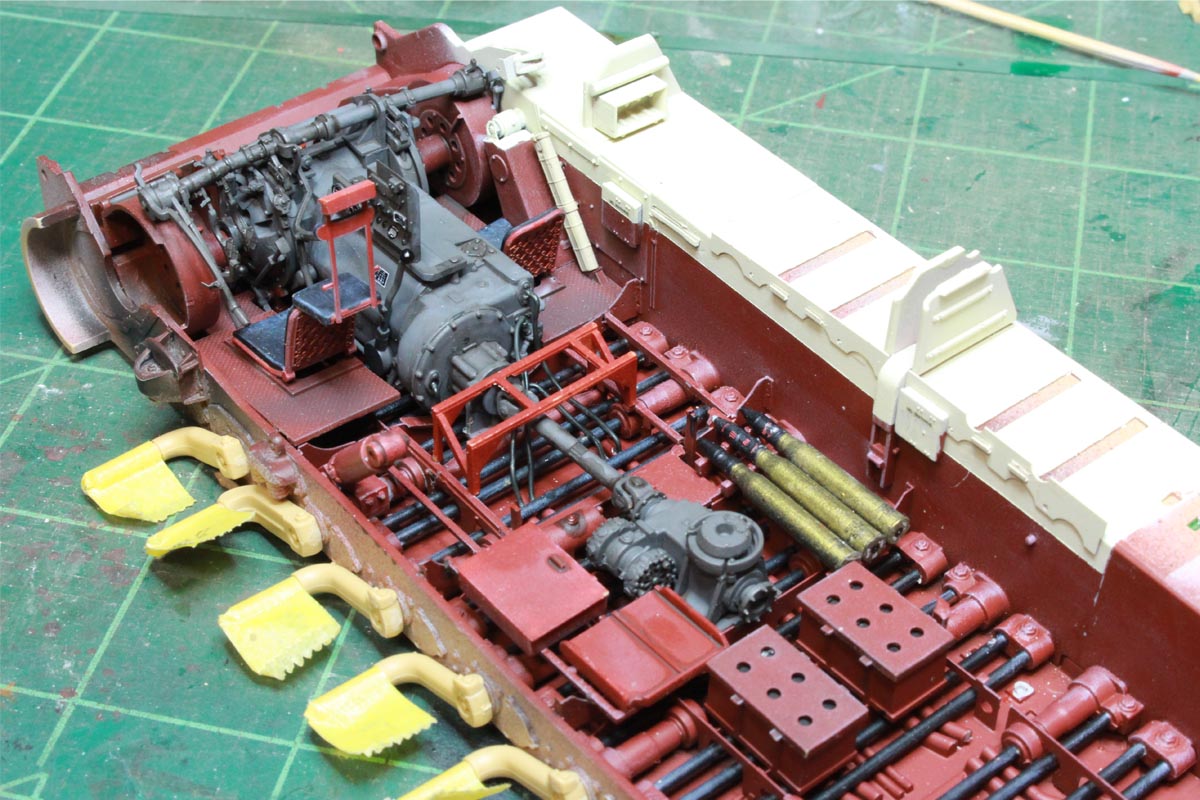
You can see 4 hoses coming off the back of the transmission, leave the driveshaft off and don't install the ammo lockers until you install these or you will have a devil of a time snaking them in!
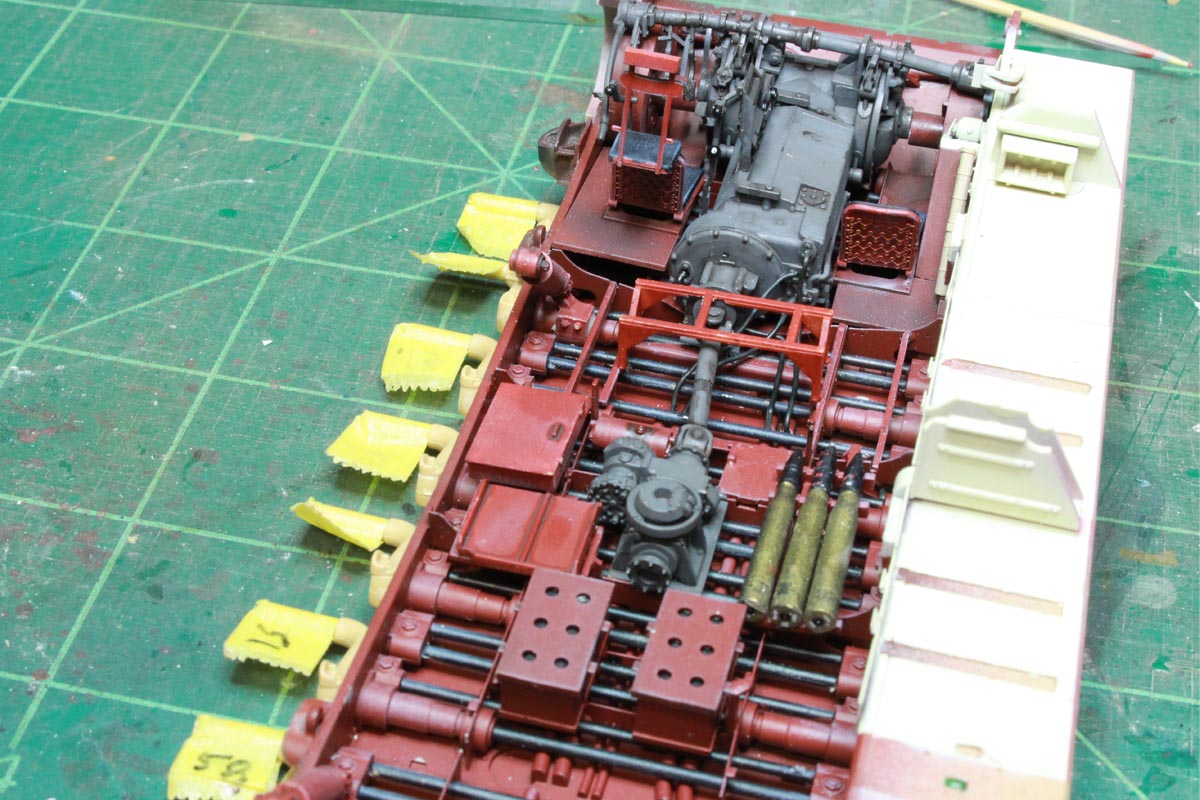

and in the hull:

that bend drives me nuts...oh well, learn from me and do it in sections!


You can see 4 hoses coming off the back of the transmission, leave the driveshaft off and don't install the ammo lockers until you install these or you will have a devil of a time snaking them in!

Dioramartin

Joined: May 04, 2016
KitMaker: 1,476 posts
Armorama: 1,463 posts

Posted: Friday, March 22, 2019 - 10:20 PM UTC
Brilliant work Colin, clear & meticulous & very impressive 


ColinEdm


Joined: October 15, 2013
KitMaker: 1,355 posts
Armorama: 1,229 posts

Posted: Sunday, March 24, 2019 - 03:39 PM UTC
Thanks Tim! Installed the ammo lockers, first aid kit and some flooring.
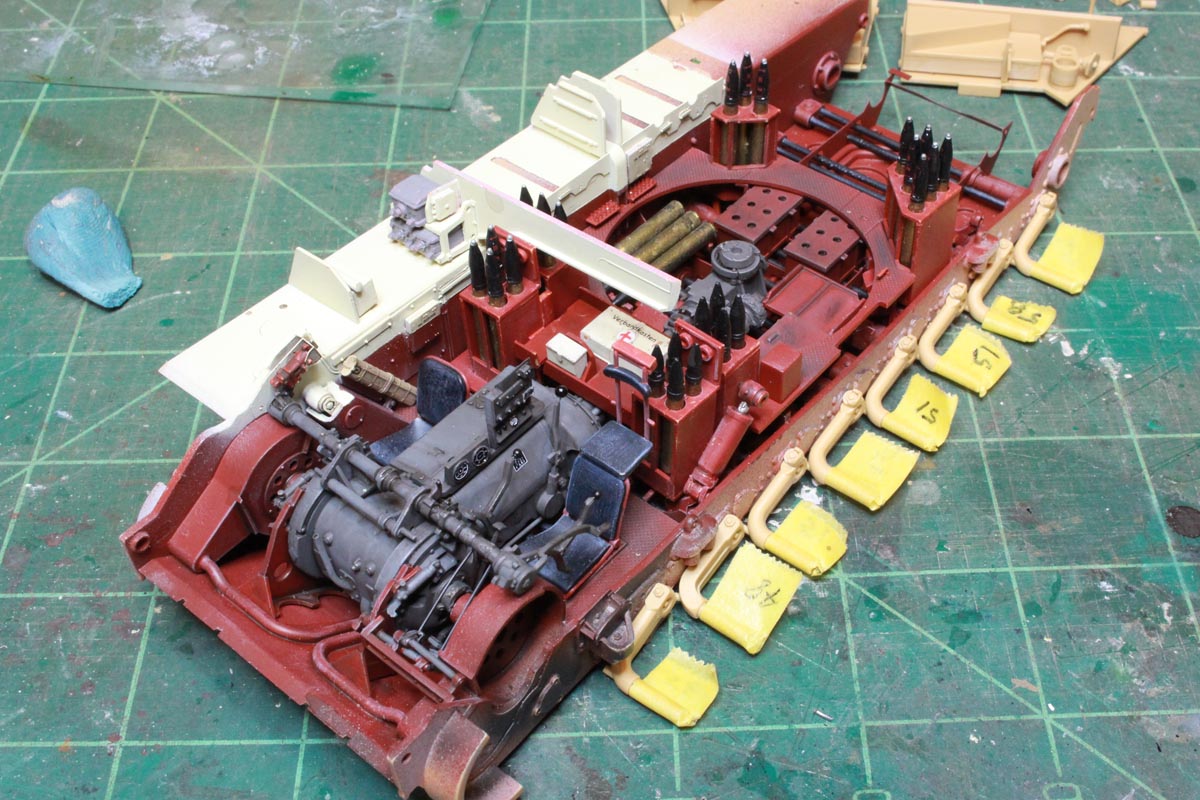
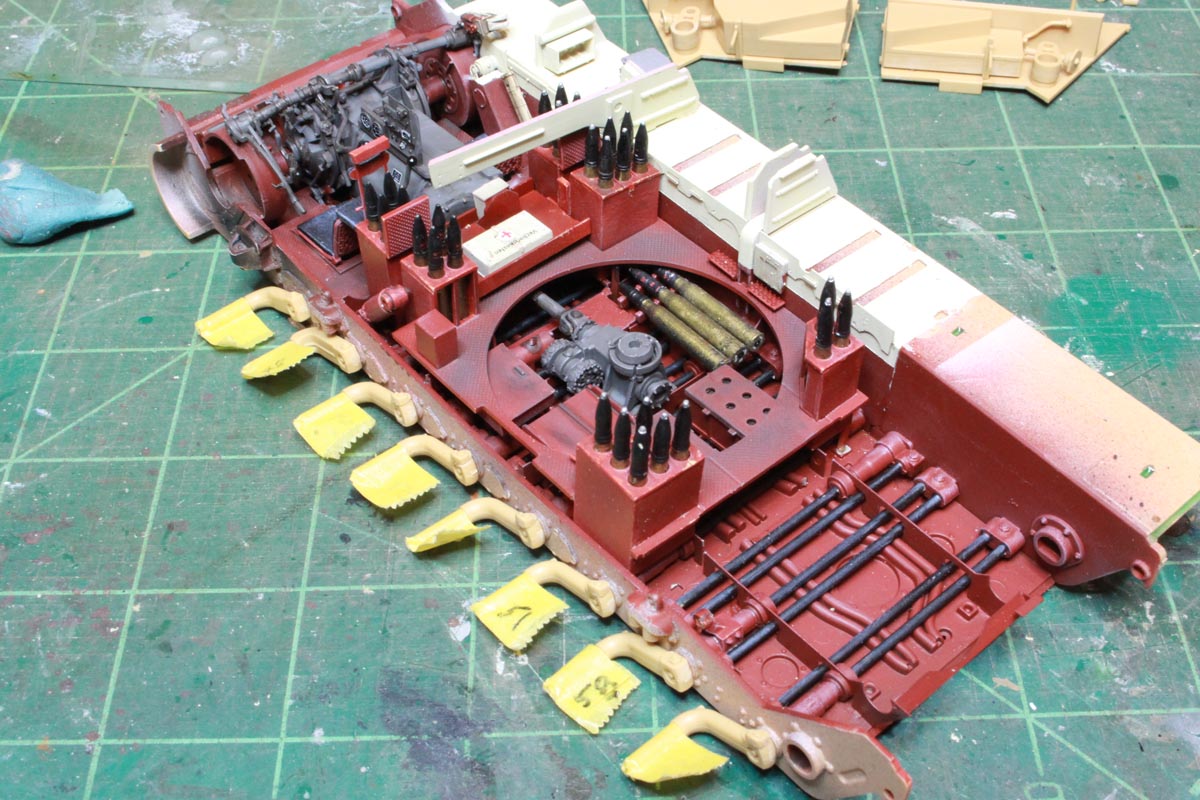
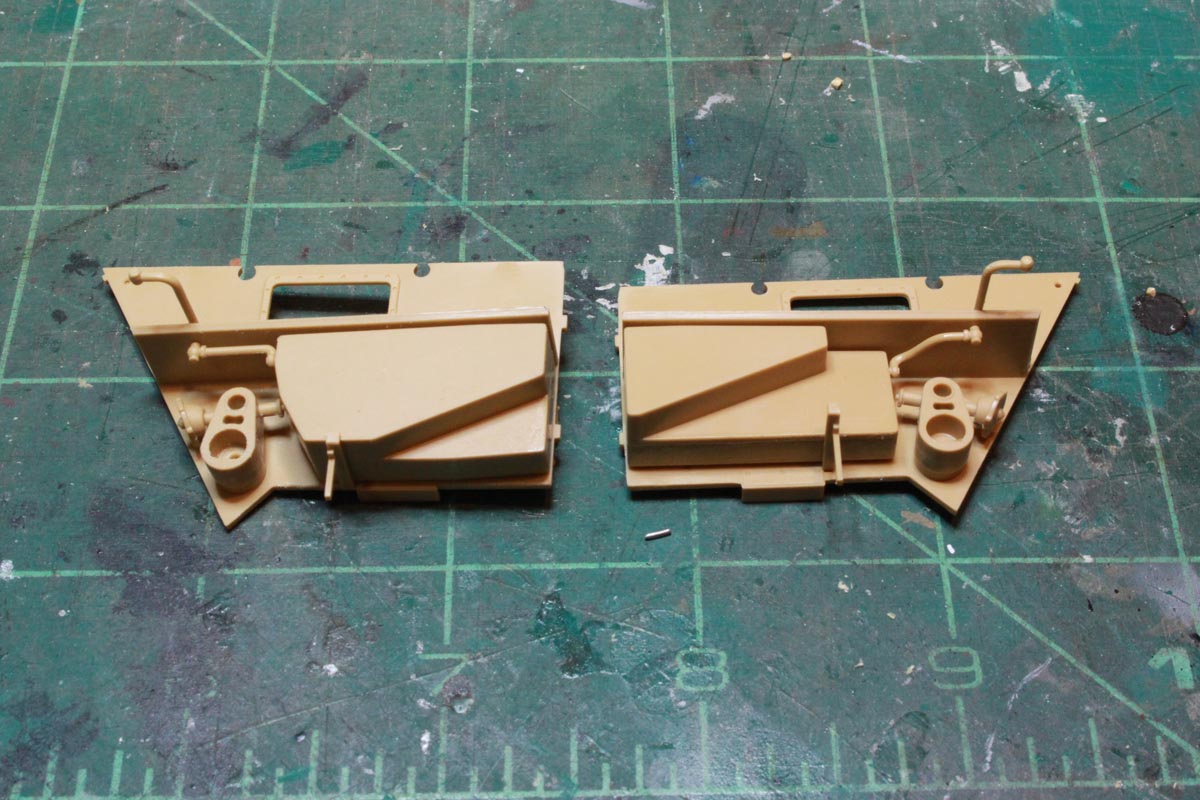
Assembled the firewall and engine compartment bulkheads:
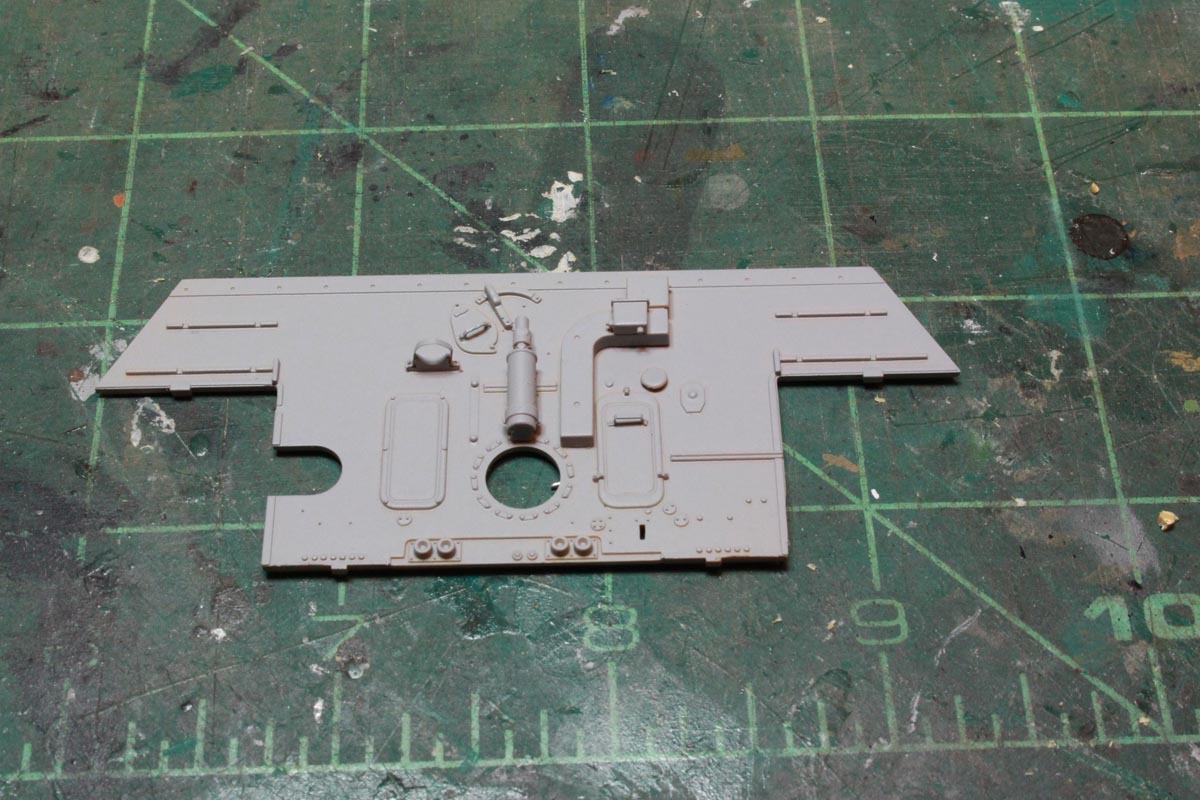
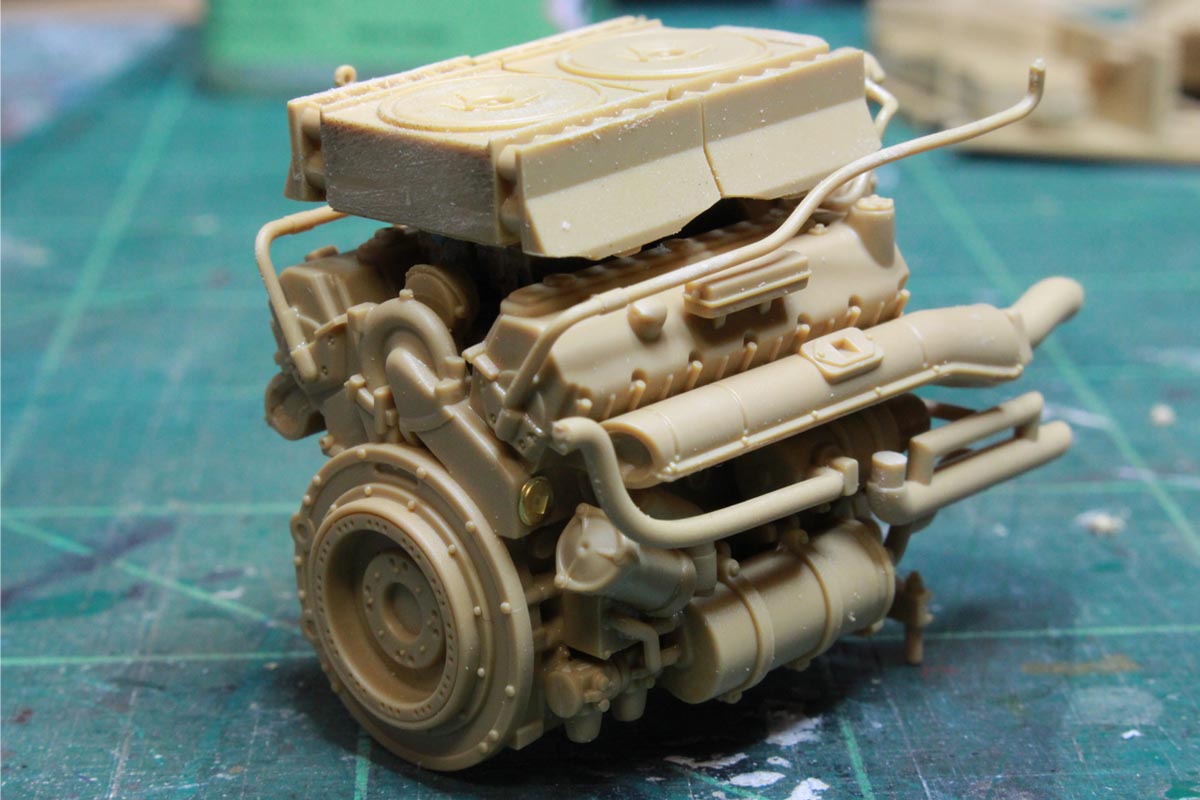
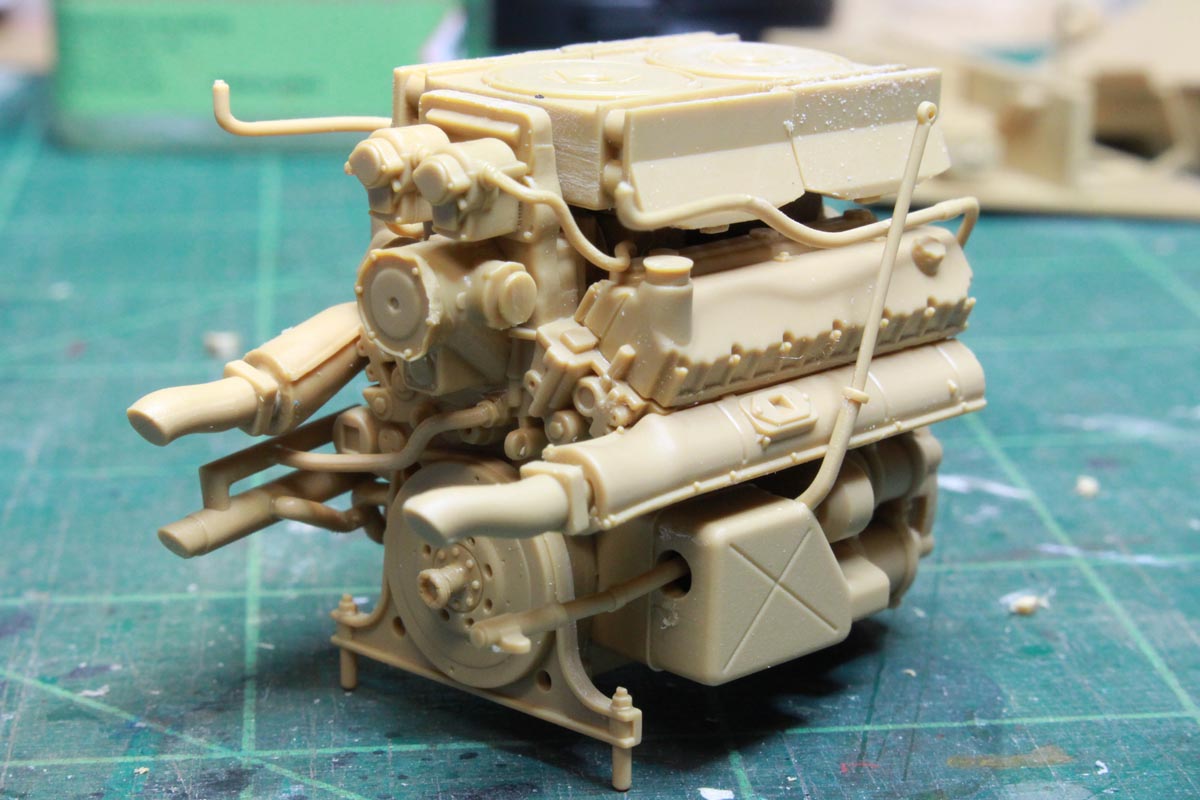
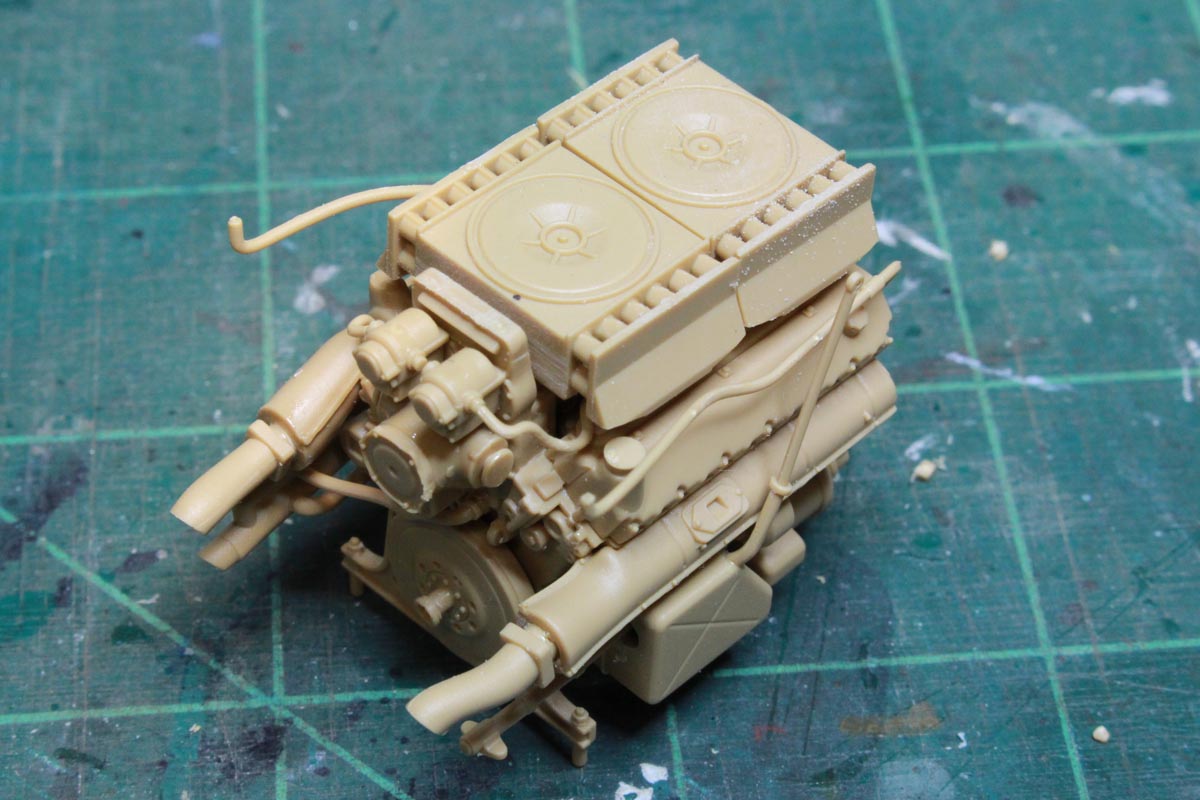
and the gem of an engine:
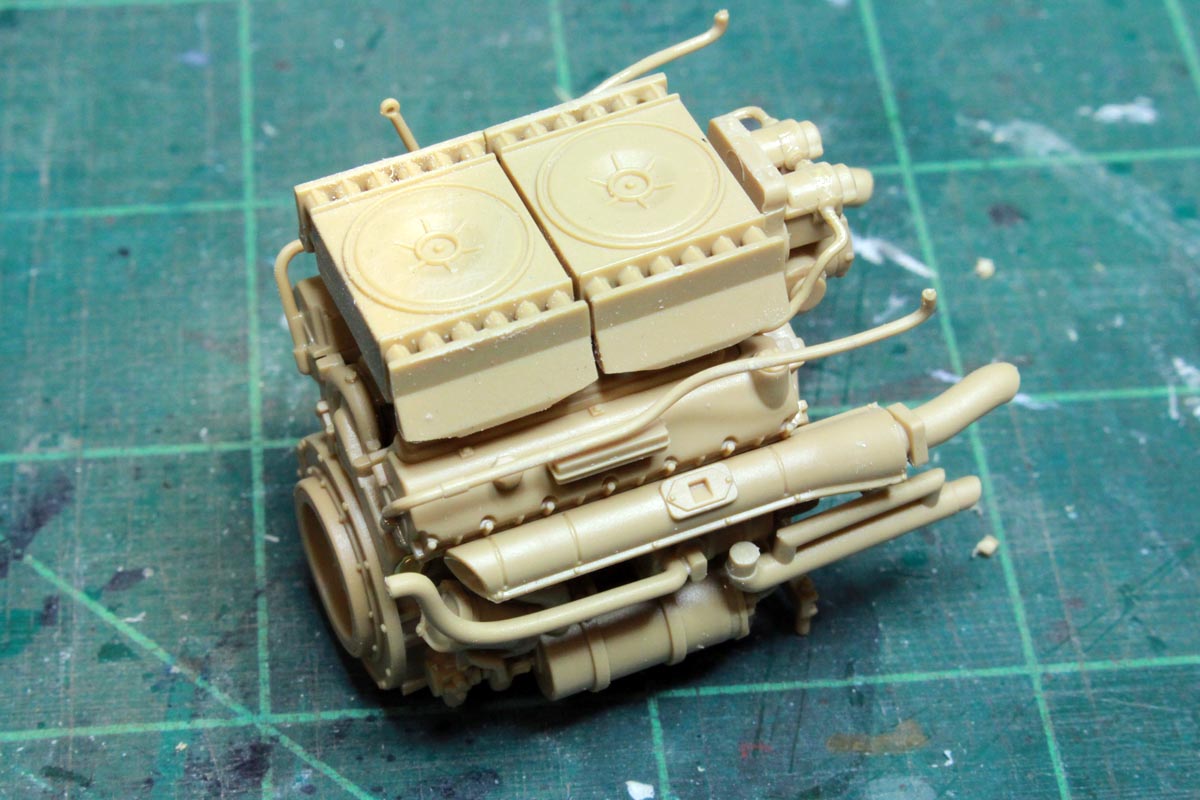
Time for some more painting!


Assembled the firewall and engine compartment bulkheads:


and the gem of an engine:


Time for some more painting!

ColinEdm


Joined: October 15, 2013
KitMaker: 1,355 posts
Armorama: 1,229 posts

Posted: Tuesday, March 26, 2019 - 03:01 PM UTC
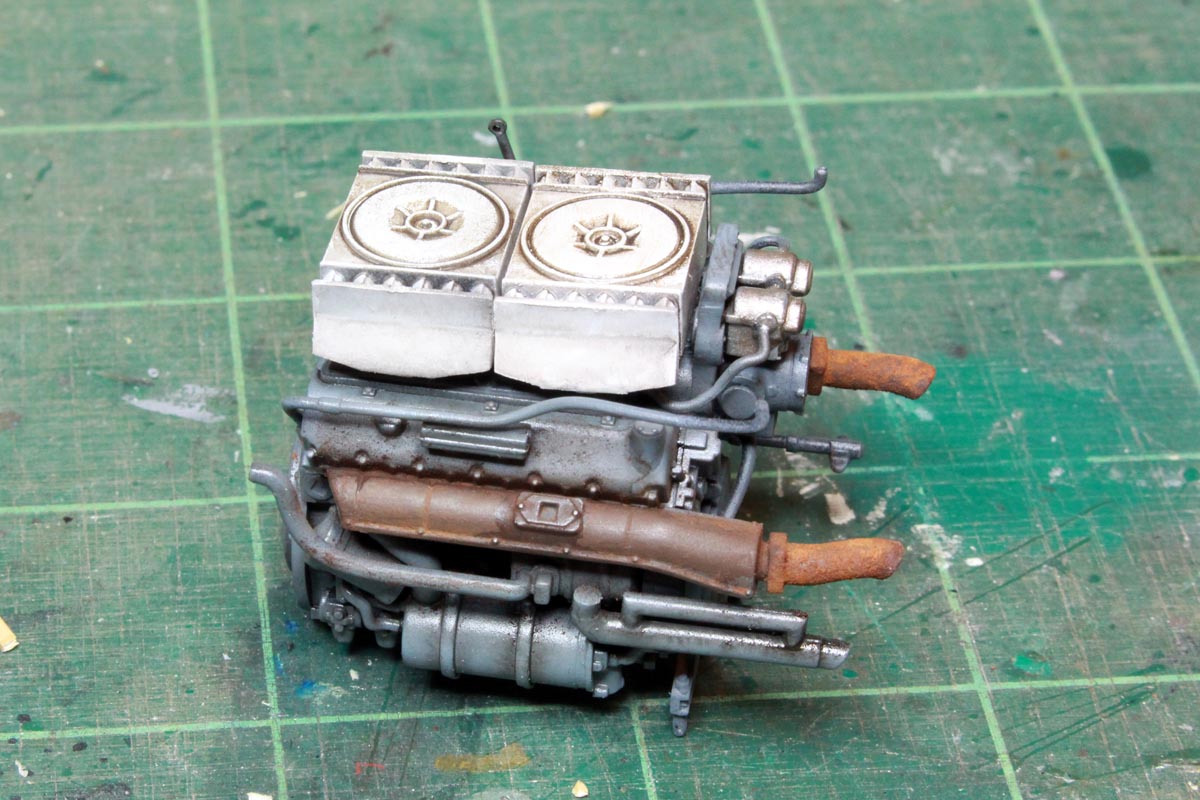
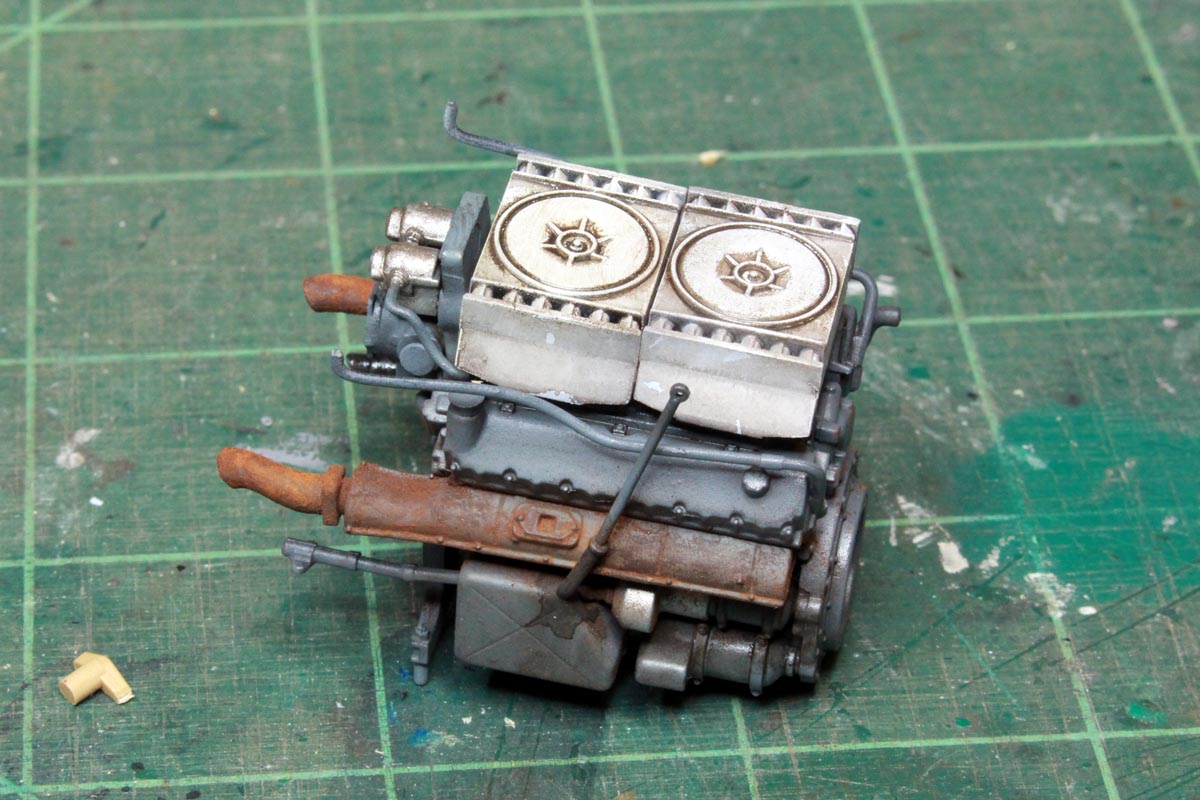
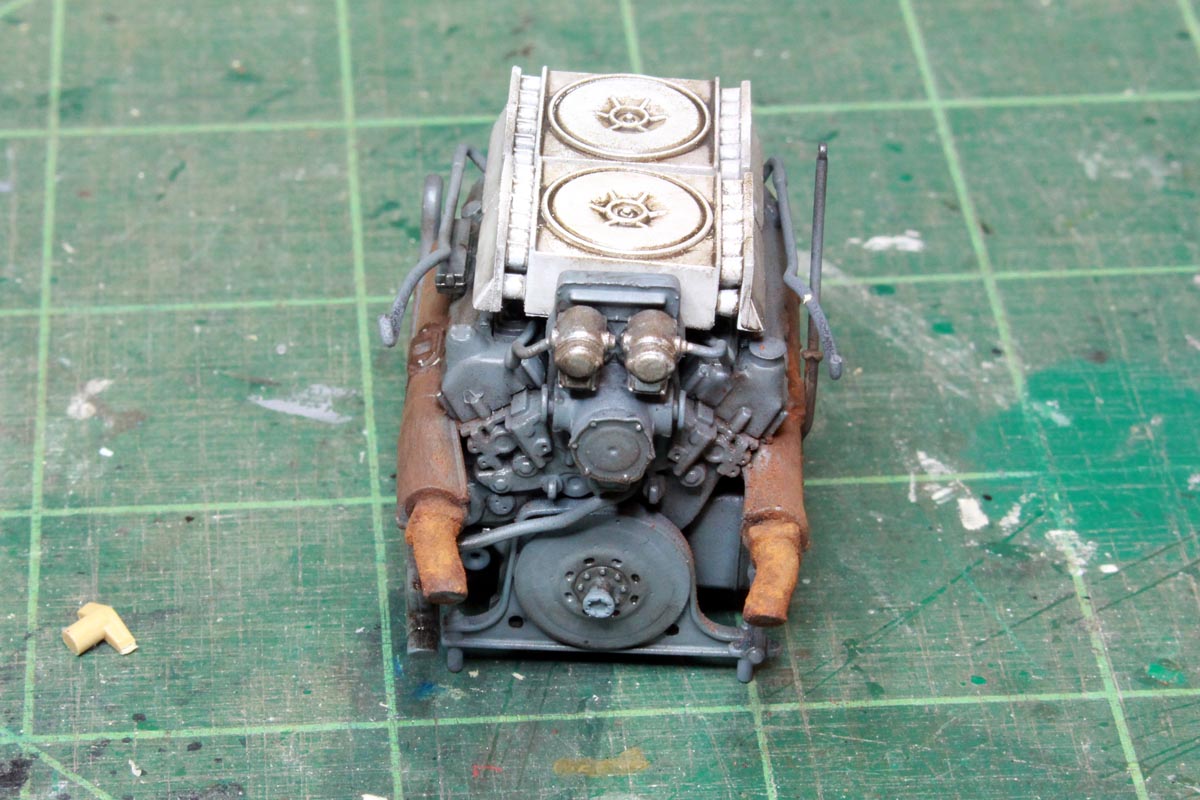
Engine is painted up and ready for install, just working on painting up the interior bulkheads.


funster63

Joined: March 26, 2015
KitMaker: 8 posts
Armorama: 8 posts
Posted: Friday, March 29, 2019 - 09:37 PM UTC
Bloody hell .... whst have i getting myself into.... first model for 30 years and i start with this . The tiny pe is doung my head in lol .... doing a lot of sub assemblies before spraying and painting. Keep up the great work this is helping me alot cheers
Posted: Friday, March 29, 2019 - 11:06 PM UTC
Great work on that engine Colin as regards the paintwork. One question I thought the transmission was supposed to be off white or have you found some data I don't know of?
RickJZ

Joined: March 21, 2008
KitMaker: 35 posts
Armorama: 30 posts

Posted: Saturday, March 30, 2019 - 12:05 PM UTC
Outstanding work! Really enjoy seeing the work you have completed on the interior. Your build is an inspiration to a full interior Panther G (Tamiya) that I will be undertaking in the very near future. All interior components are CMK. The Rye field kit is a tremendous value with all the interior components. Keep up the great job on your build!

ColinEdm


Joined: October 15, 2013
KitMaker: 1,355 posts
Armorama: 1,229 posts

Posted: Saturday, March 30, 2019 - 02:32 PM UTC
Thanks guys! Darren, I have seen and read multiple versions of interior colours. Many colour keys I have seen show the transmission as grey or greenish-grey.
https://www.flickr.com/photos/milspec2009/298092289
https://www.scalenews.de/sd-kfz-171-pzkpfw-v-panther-a-interior-walkaround-292/
https://anicursor.com/pantherVe.html
https://www.1999.co.jp/eng/image/10510333/100/5
Later in the war the lower hull was not painted and just left in primer. Hard to say for sure but I decided to go with the grey.
Posted: Sunday, March 31, 2019 - 08:17 PM UTC
Orders were issued in October 1944 to leave the interior and turret in red oxide primer (RAL8012/3). In February 1945, this was modified to begin painting only the upper turret interior in Elfenbein (RAL1001). All components were to be left in whatever color they were received from the supplier.
B&W period pics would indicate the transmission was a shade of grey or maybe metallic in color.
B&W period pics would indicate the transmission was a shade of grey or maybe metallic in color.

ColinEdm


Joined: October 15, 2013
KitMaker: 1,355 posts
Armorama: 1,229 posts

Posted: Friday, April 05, 2019 - 03:43 PM UTC
More work on the engine compartment where I started to run into some fit issues. First the longitudinal bulkheads were installed, and as can be seen the longitudinal PE braces are a little deformed along the drivers side.
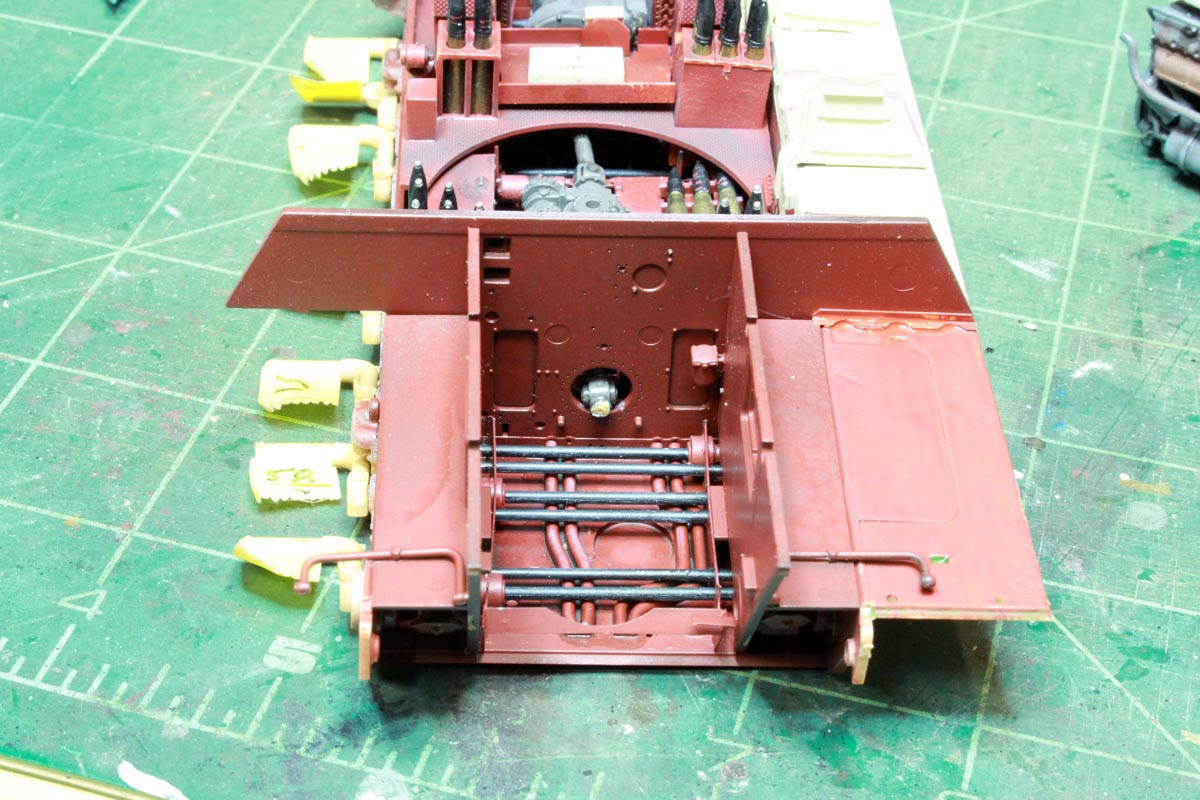
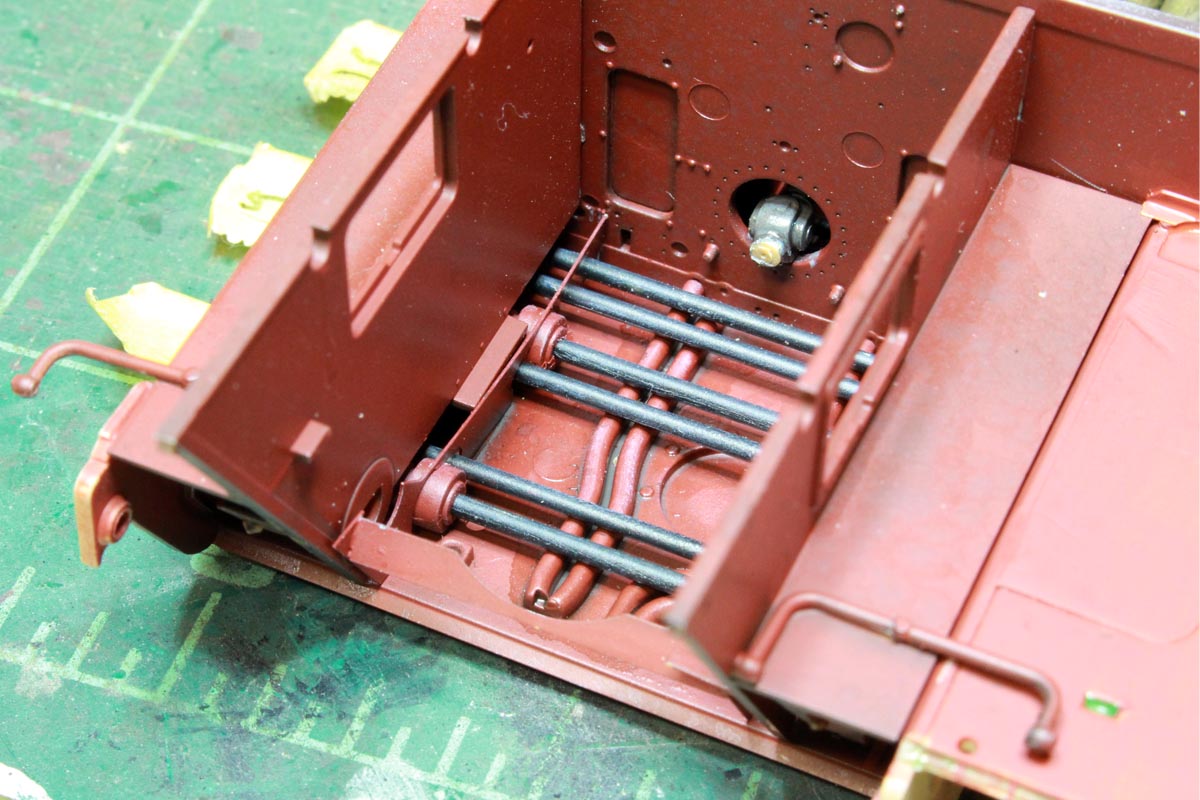
...which is odd as all the other brackets and tabs line up quite nicely, maybe just need to trim the tab on the bulkhead a bit, but you can see the spacing is a bit lopsided. I fit the back plate on to check the fit and the bulkheads line up so it appears the PE sizing is out a bit. Installed the engine and had to trim the driveshaft a bit to make it fit properly.
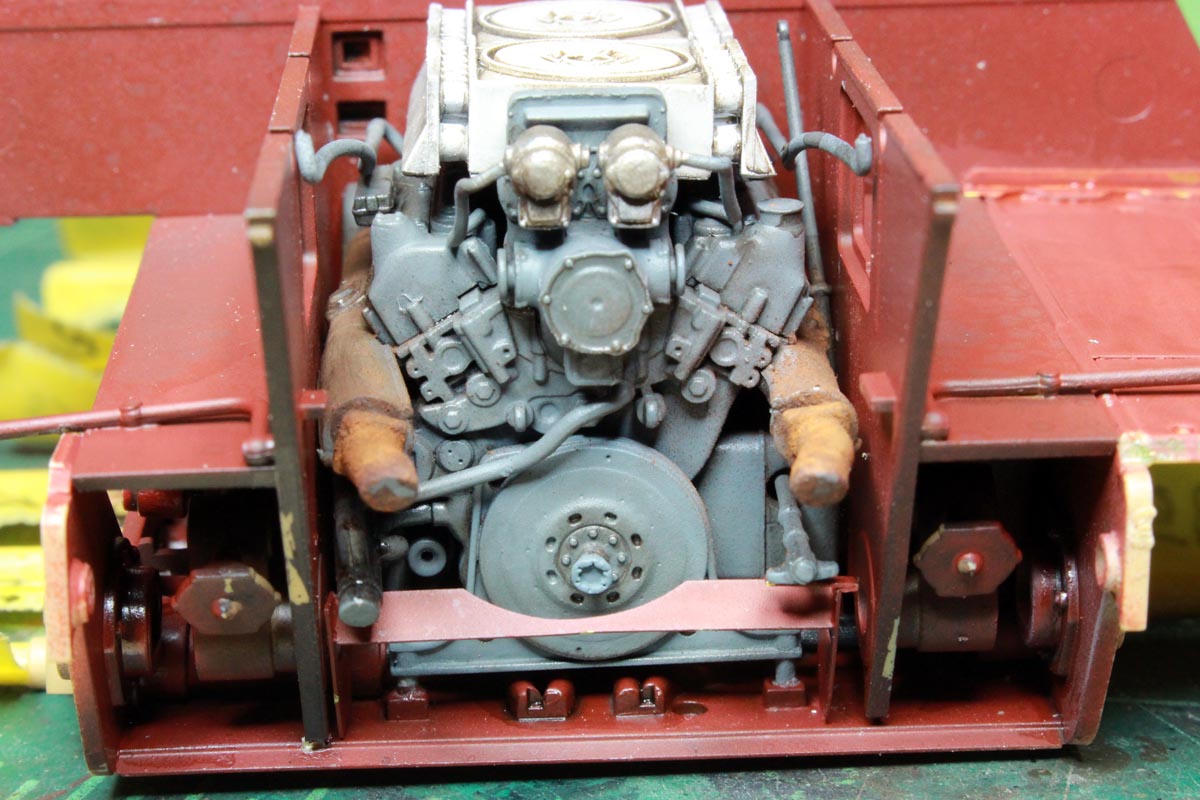
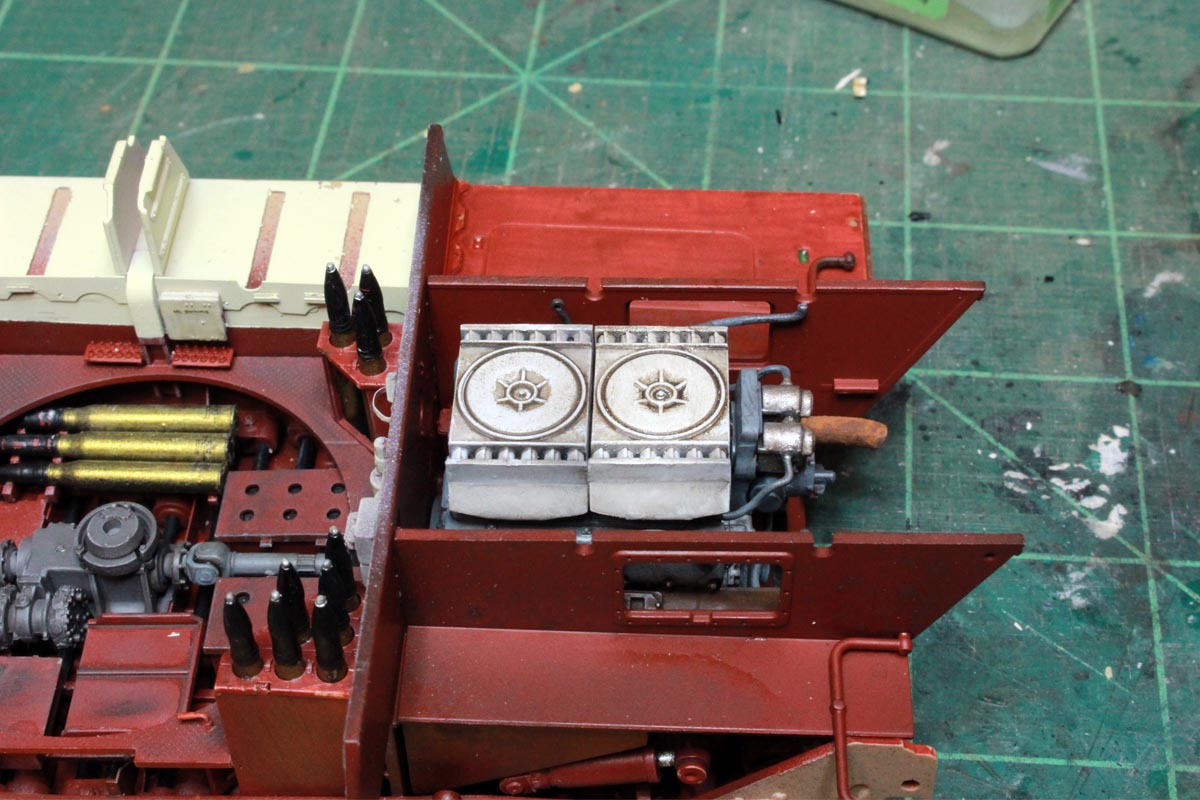
It fits in quite nicely. Radiators, gas tank and oil/coolant tanks assembled and painted :
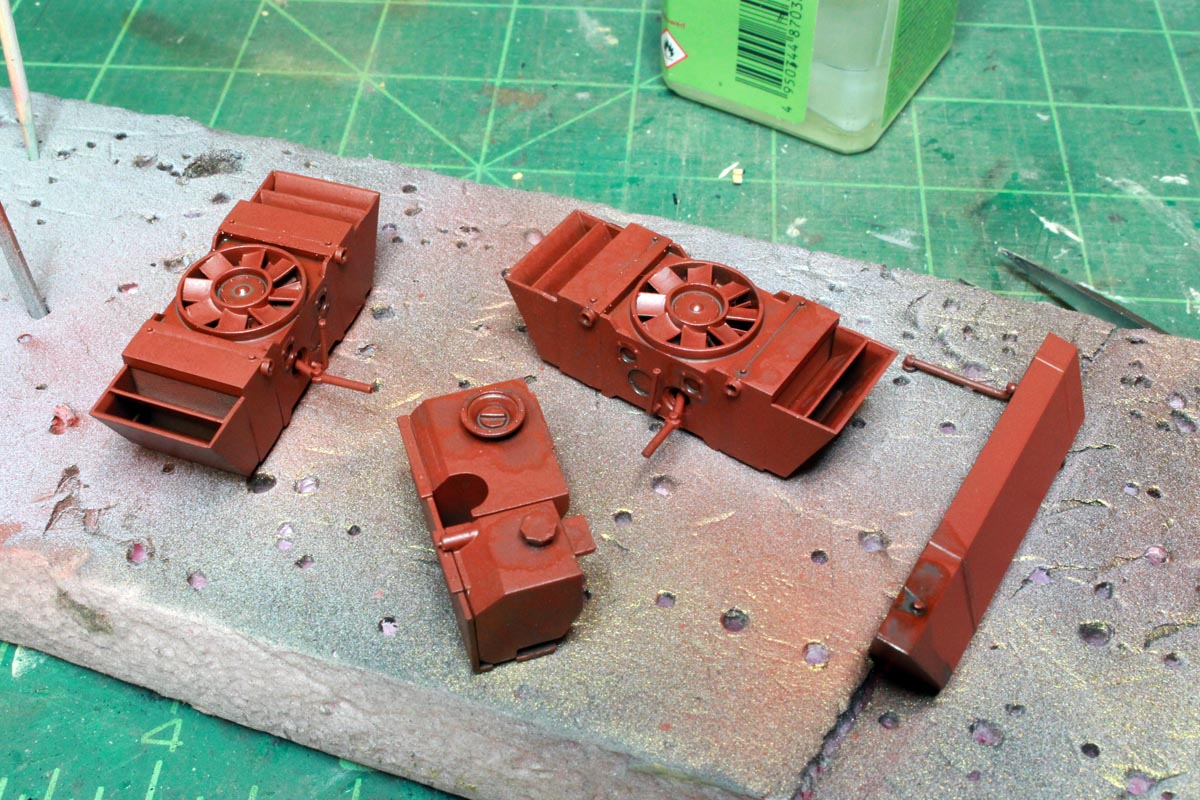


...which is odd as all the other brackets and tabs line up quite nicely, maybe just need to trim the tab on the bulkhead a bit, but you can see the spacing is a bit lopsided. I fit the back plate on to check the fit and the bulkheads line up so it appears the PE sizing is out a bit. Installed the engine and had to trim the driveshaft a bit to make it fit properly.


It fits in quite nicely. Radiators, gas tank and oil/coolant tanks assembled and painted :

Posted: Sunday, April 07, 2019 - 07:39 AM UTC
wow, that's crazy amount of detail! your build is coming along nicely and a great paint job too! keep us updated please 


ColinEdm


Joined: October 15, 2013
KitMaker: 1,355 posts
Armorama: 1,229 posts

Posted: Sunday, May 19, 2019 - 03:12 AM UTC
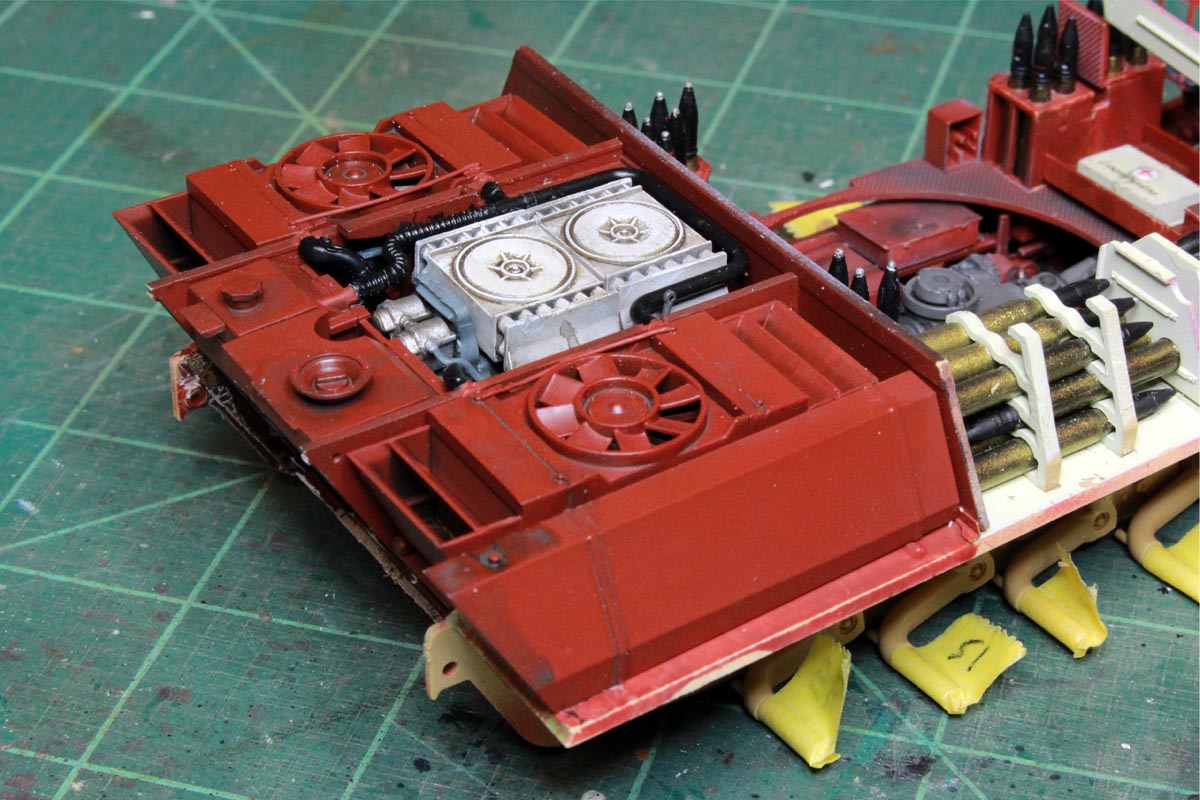
Another long delayed update! Things have progressed significantly. Got the engine, radiators and fuel tank installed. Fits are very tight so try to mask off any connection tabs - I didn't and ran into problems that resulted in some extra fitting adjustments.

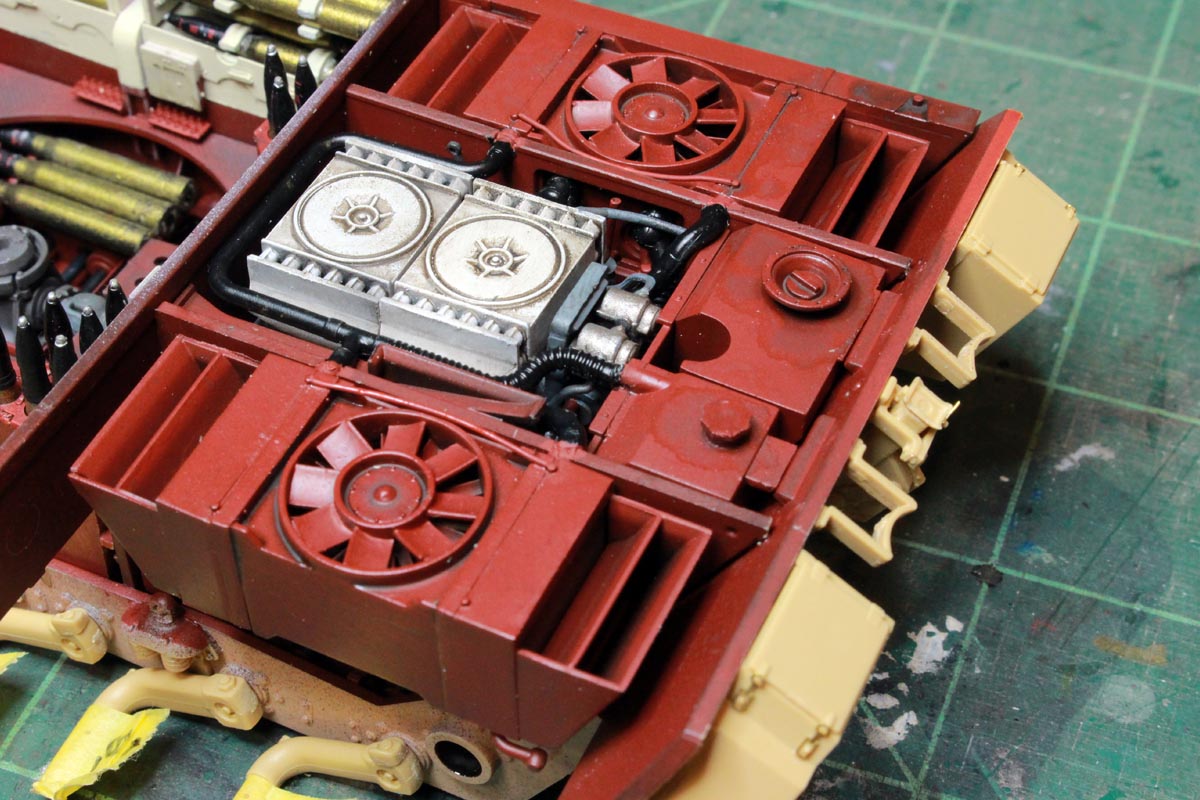
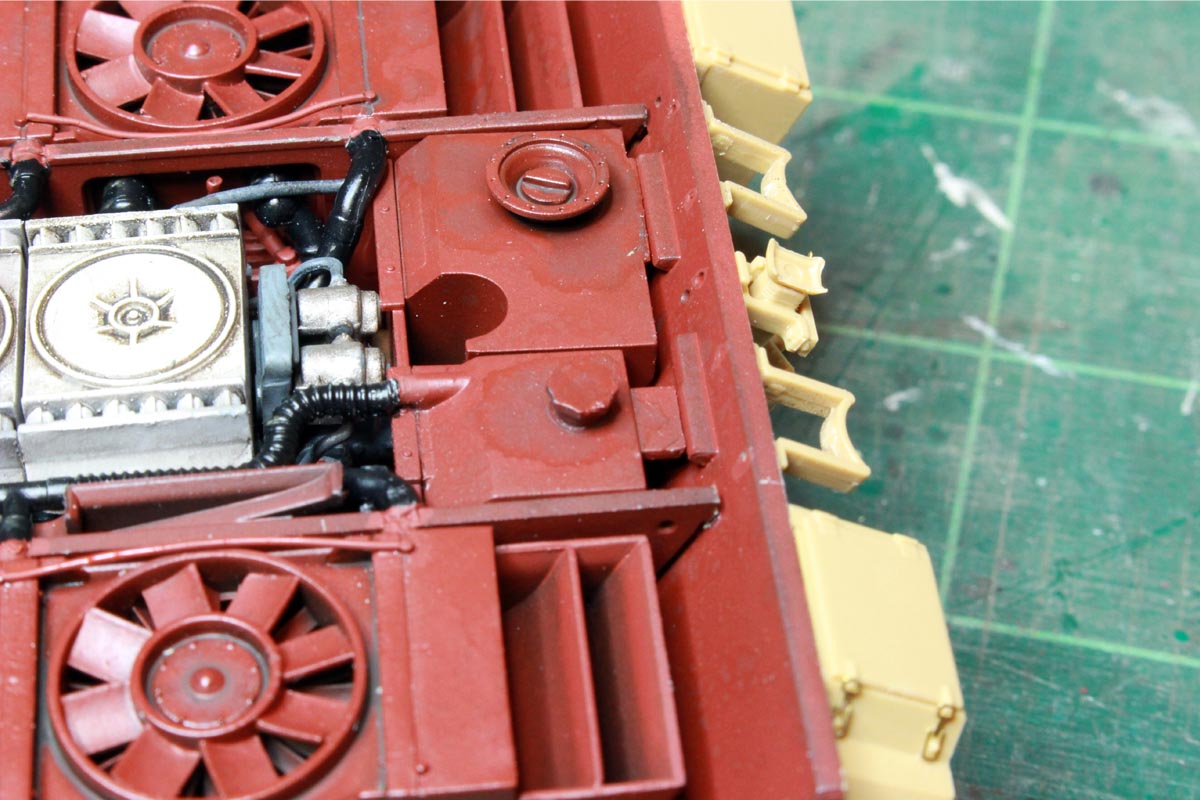
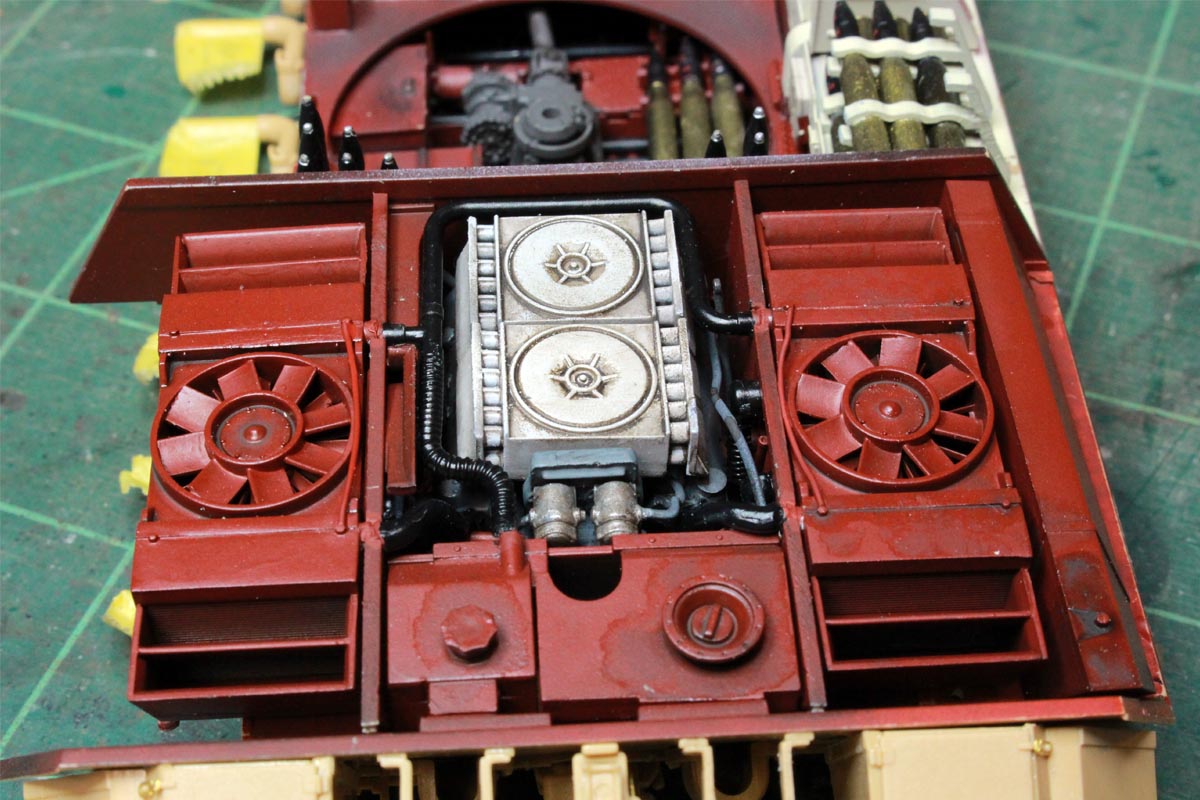
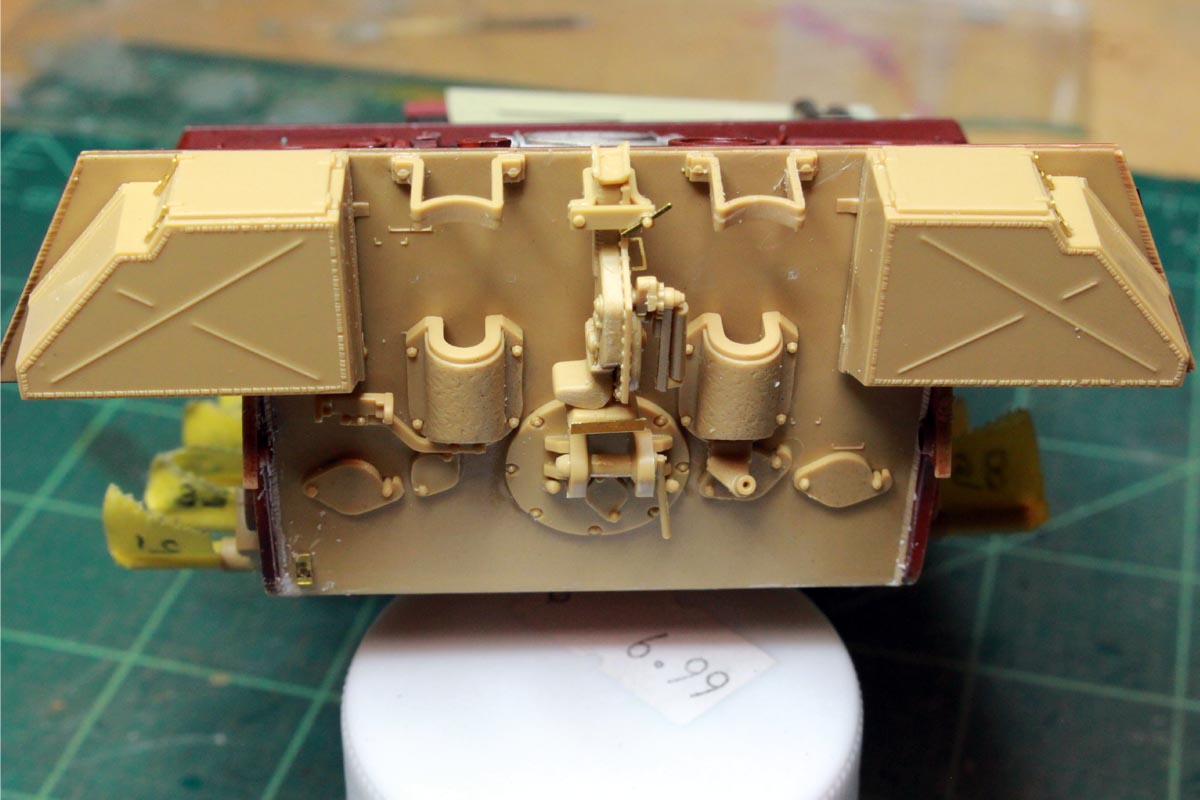
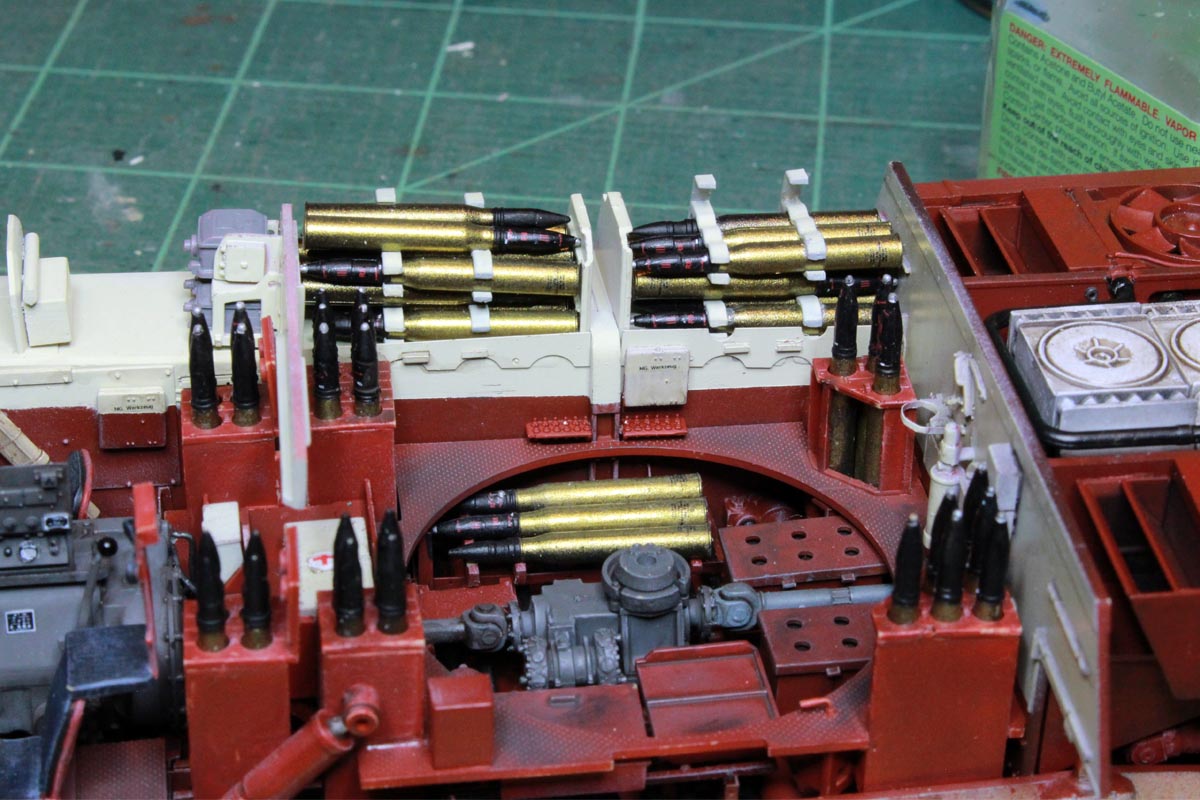
You can see that the rear plate is not aligned properly, I ended up removing it and shaving paint off connector tabs to get a better fit. The sponson ammo storage was added as well.
Put together the final drive assemblies, RFM gives you the gears inside, but it all gets covered up...
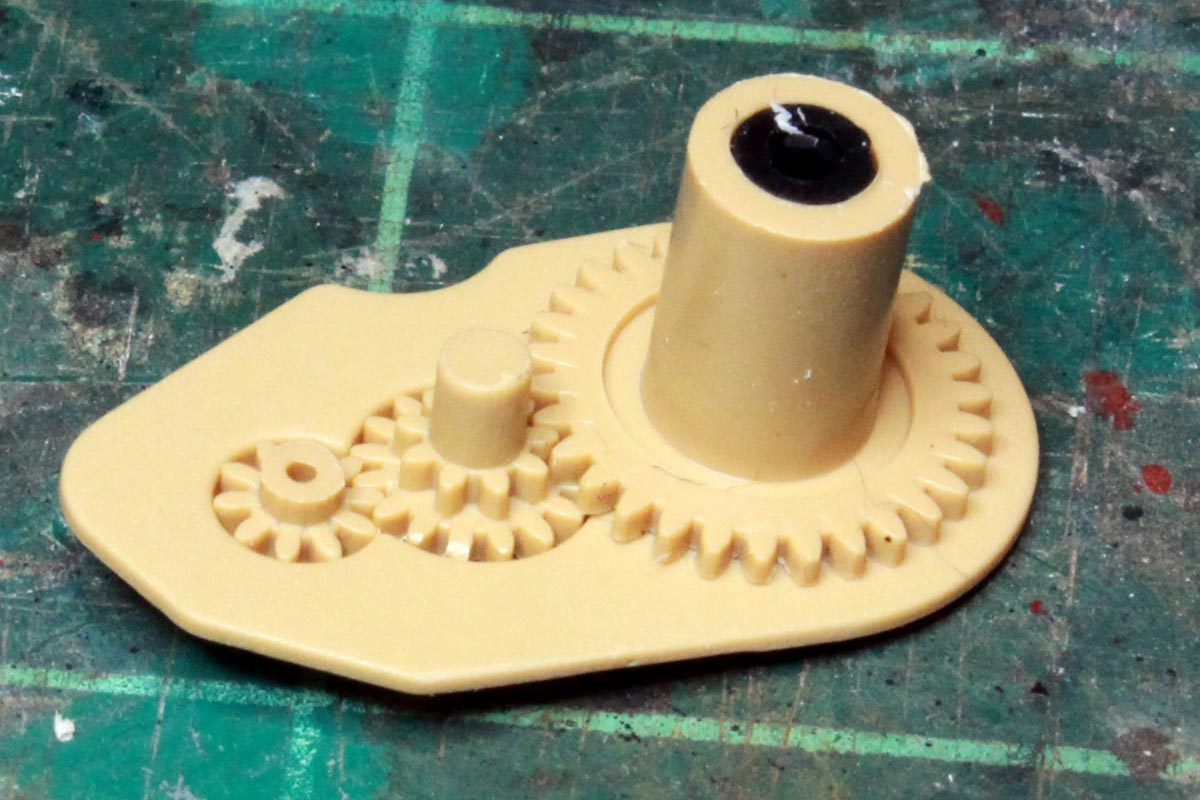
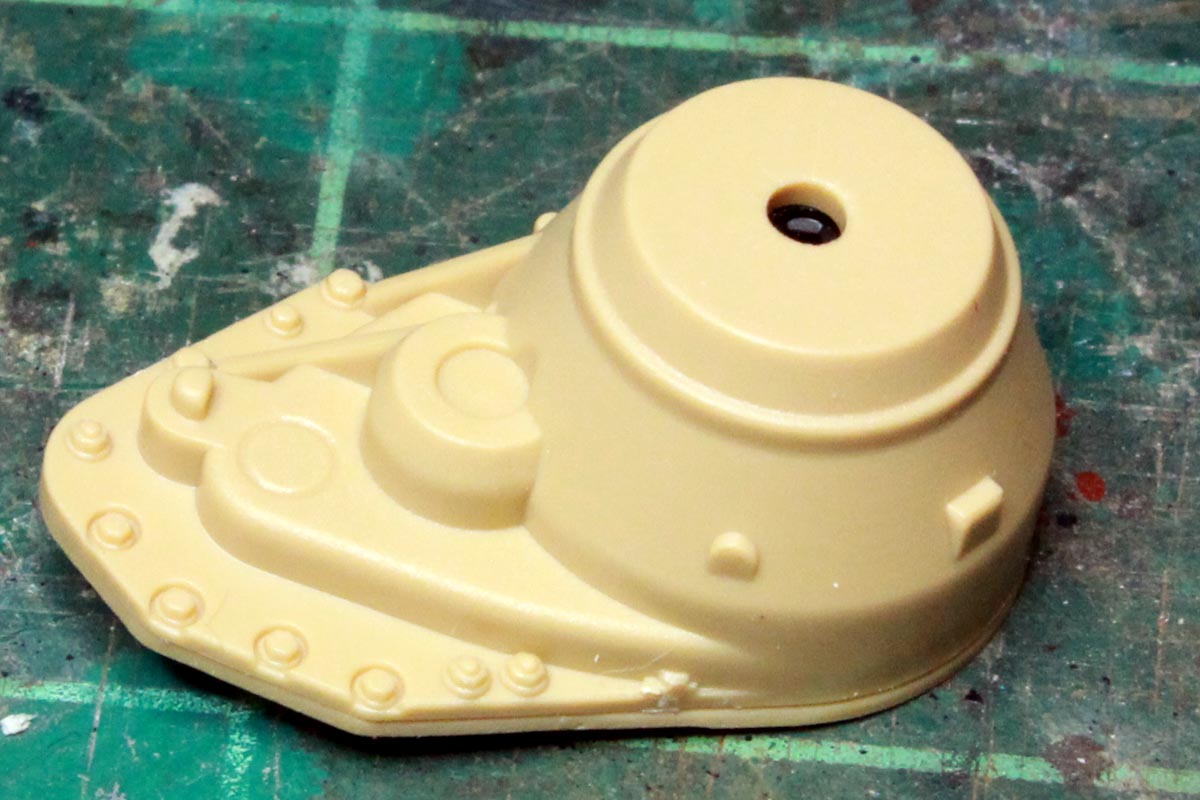
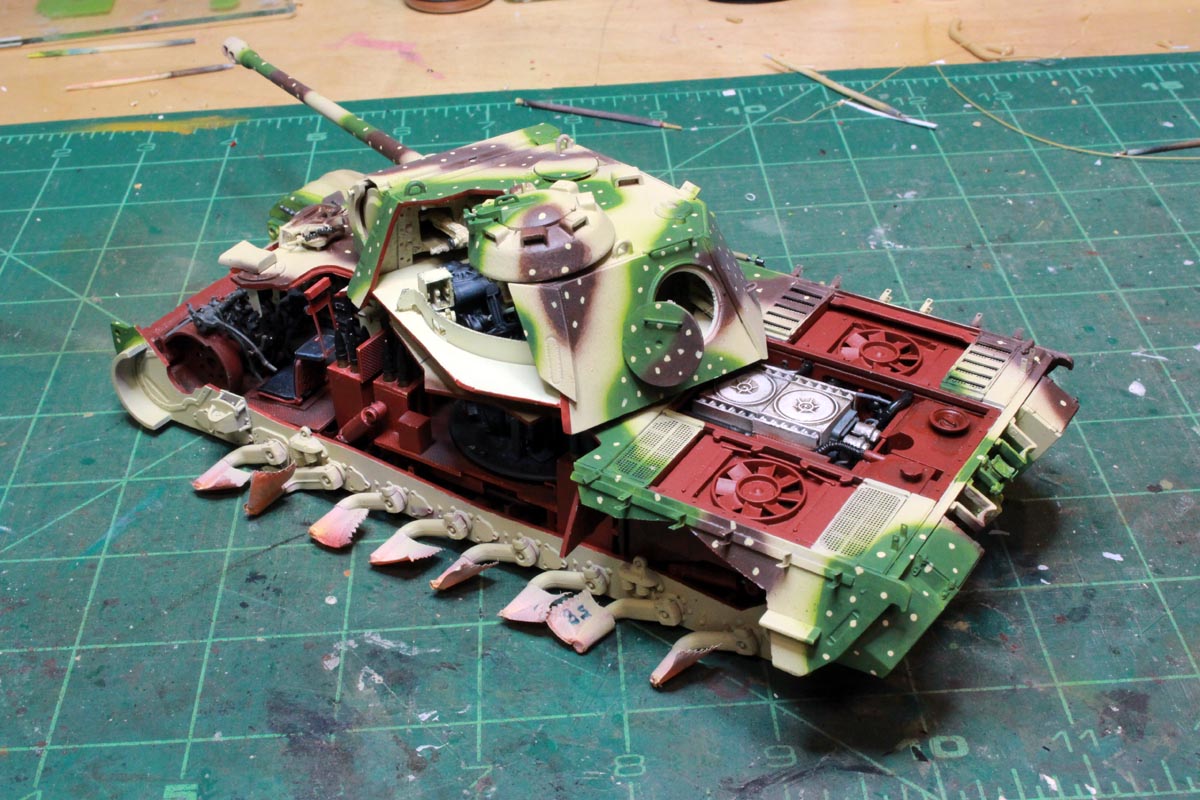
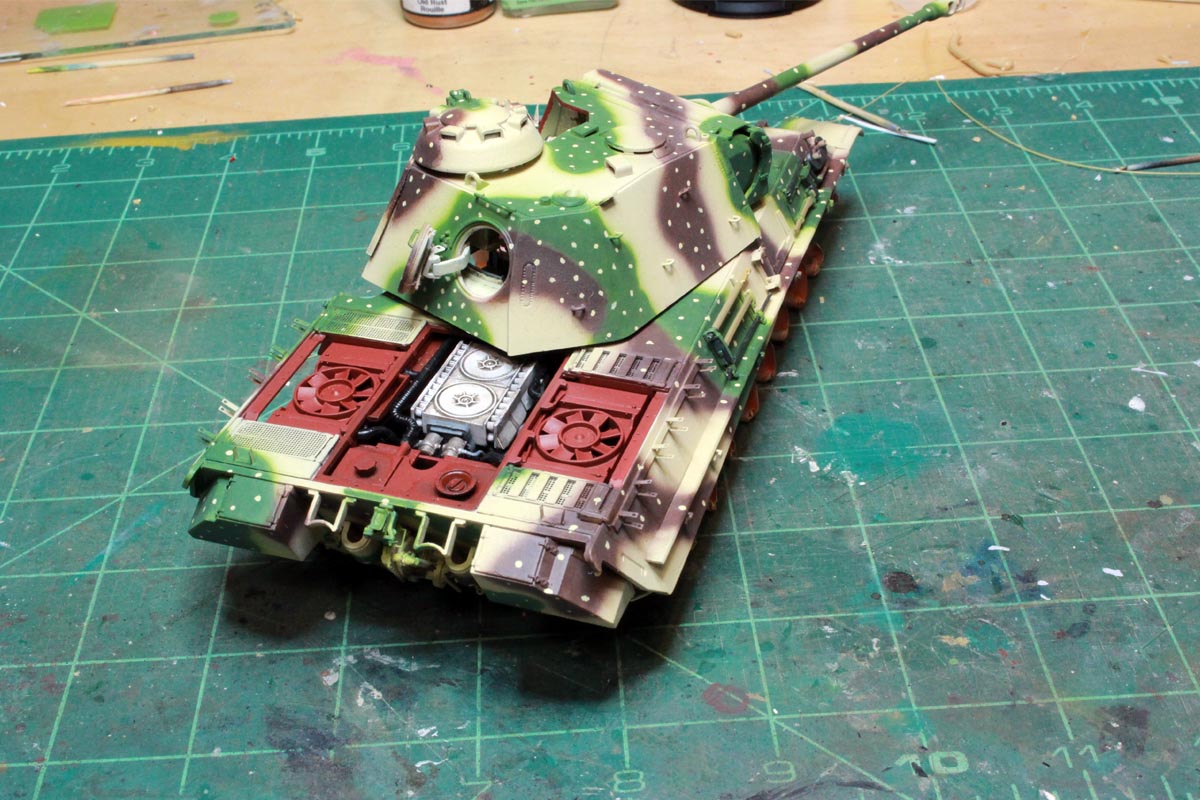
I guess a manintenance diorama showing a disassembled final drive housing could be done. Fitted up the upper hull, a few issues there, again likely due to the tight tolerances and paint interference, but got it together, masked off the interior and painted a 3 tone ambush pattern:
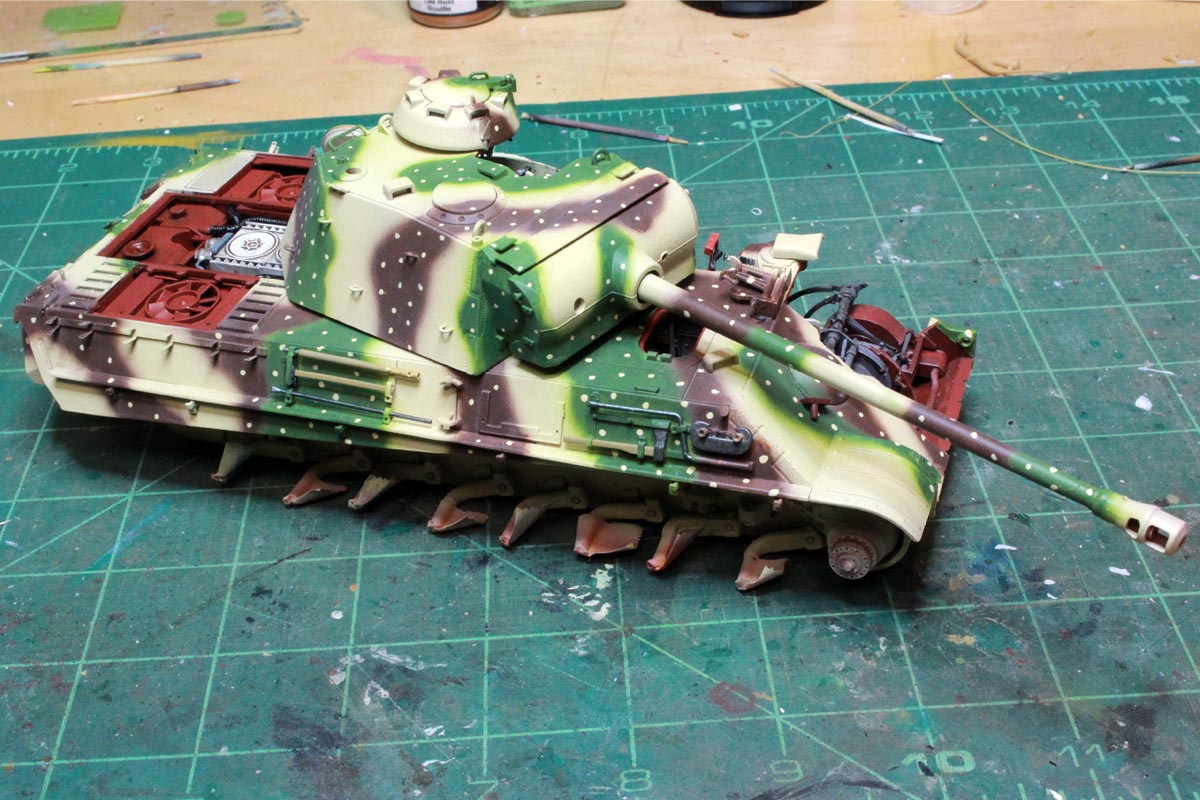
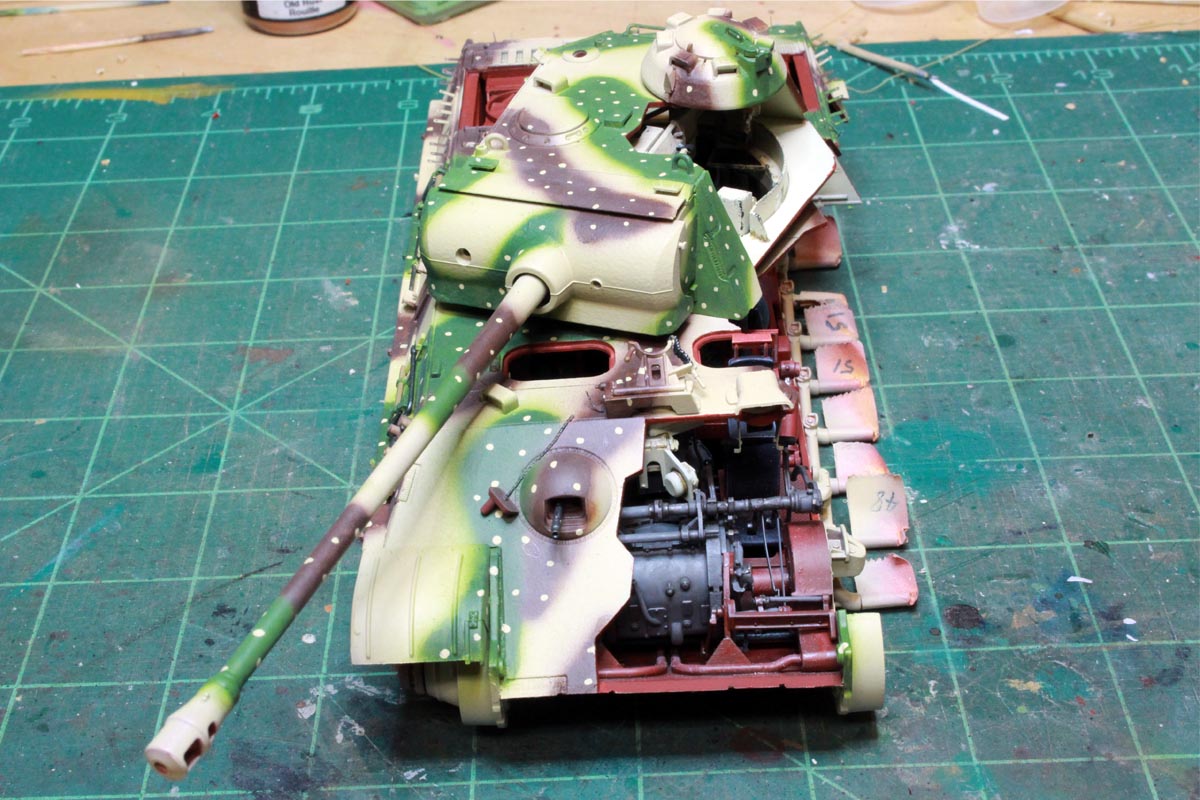
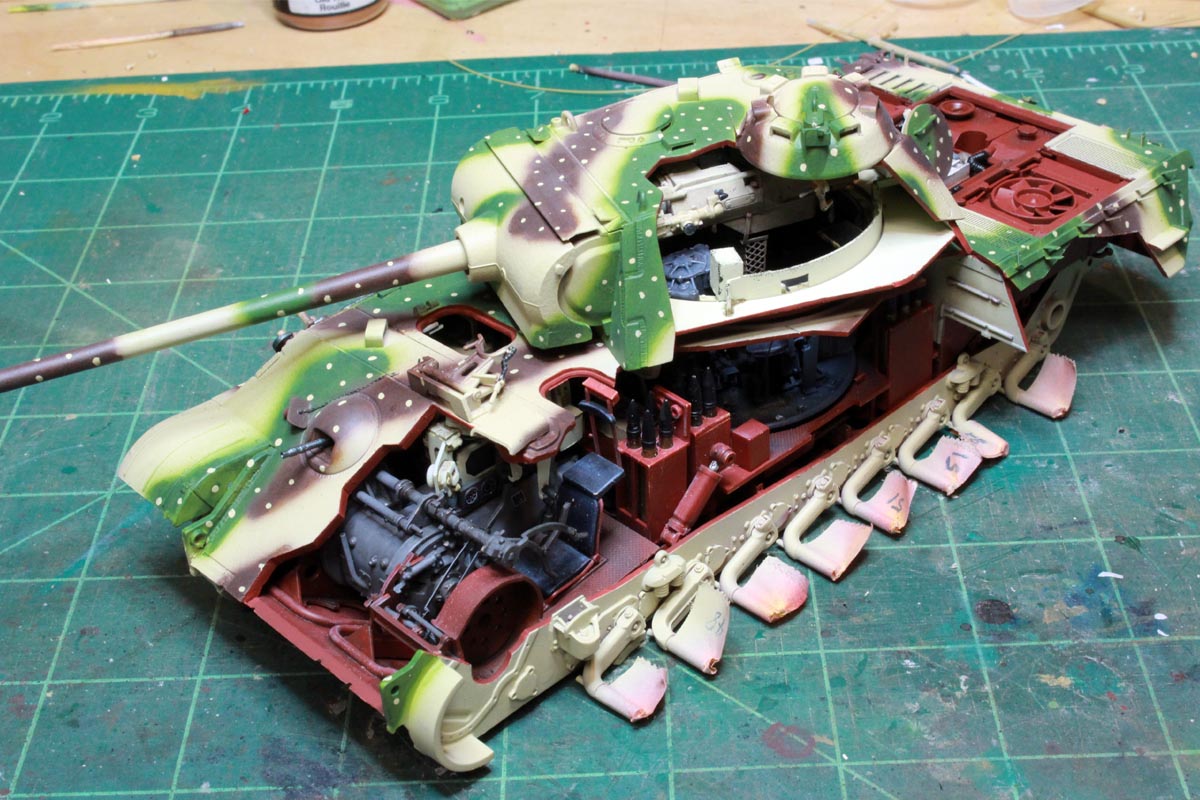
a few more bits to add and some more detail painting then decals and light weathering.


You can see that the rear plate is not aligned properly, I ended up removing it and shaving paint off connector tabs to get a better fit. The sponson ammo storage was added as well.


Put together the final drive assemblies, RFM gives you the gears inside, but it all gets covered up...


I guess a manintenance diorama showing a disassembled final drive housing could be done. Fitted up the upper hull, a few issues there, again likely due to the tight tolerances and paint interference, but got it together, masked off the interior and painted a 3 tone ambush pattern:


a few more bits to add and some more detail painting then decals and light weathering.
Posted: Sunday, May 19, 2019 - 03:45 AM UTC
I am liking this Colin, well done.

ColinEdm


Joined: October 15, 2013
KitMaker: 1,355 posts
Armorama: 1,229 posts

Posted: Friday, July 19, 2019 - 11:50 AM UTC
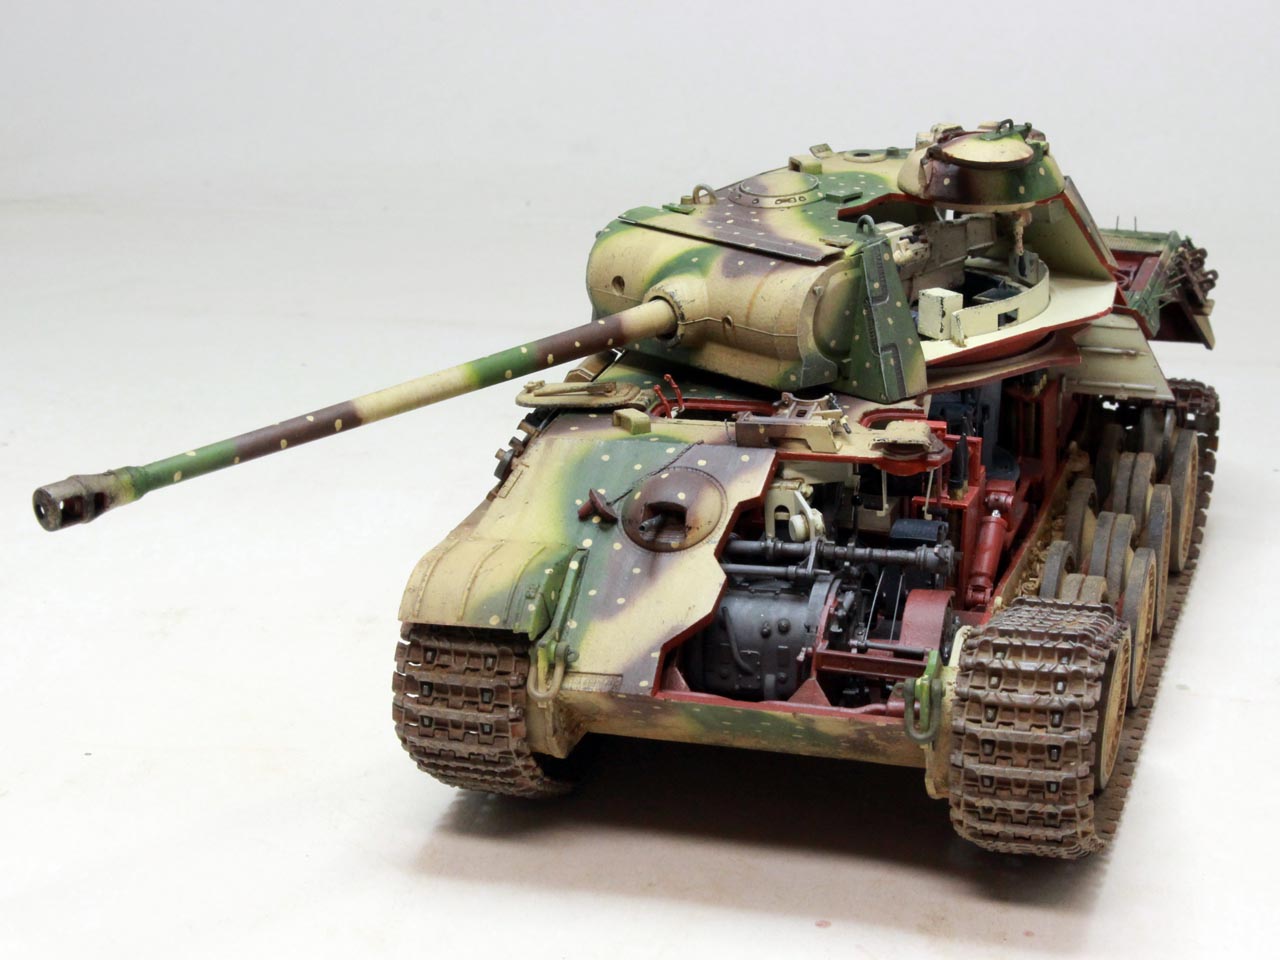
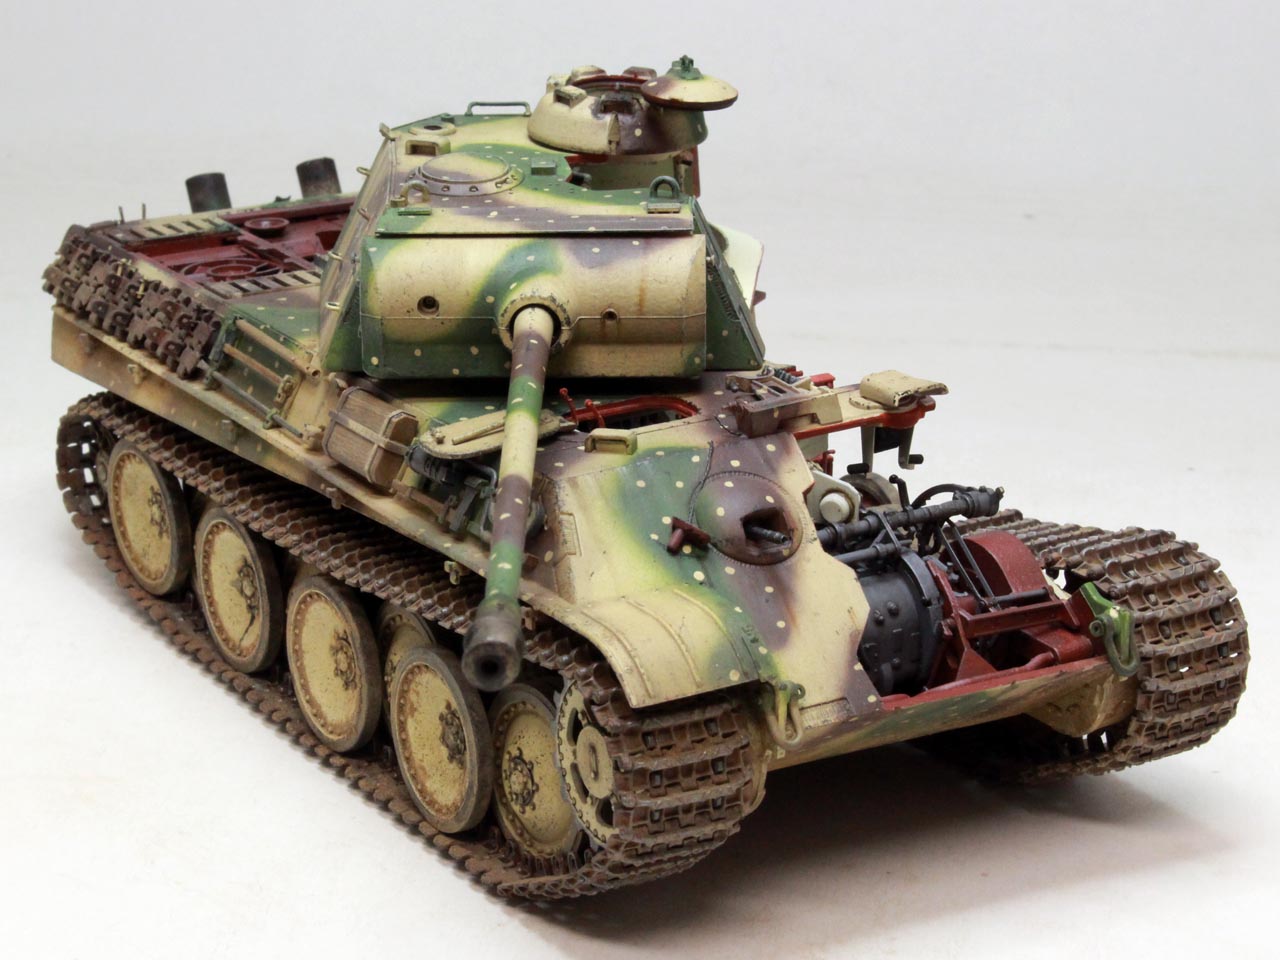
Apologies for the lack of updates, have been having some personal struggles lately but have finally managed to finish this off. The tracks took a long time to put together, each link has two connection points and an ejector pin mark to clean up, but in the end they came together all right. Minor chipping and weathering done, overall not too bad a result, if I had to do it again there are a few things I would have done differently, but overall a very good kit that builds up very nicely.
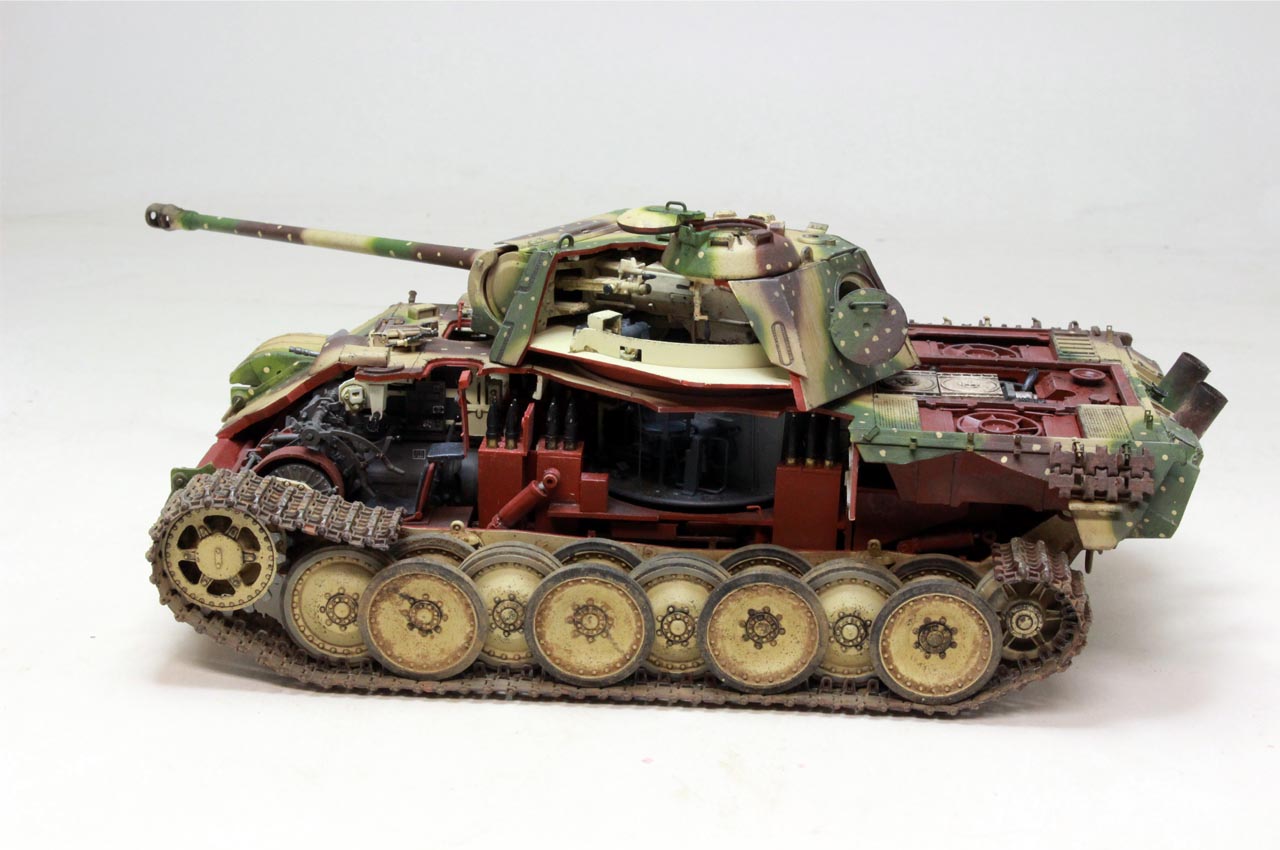
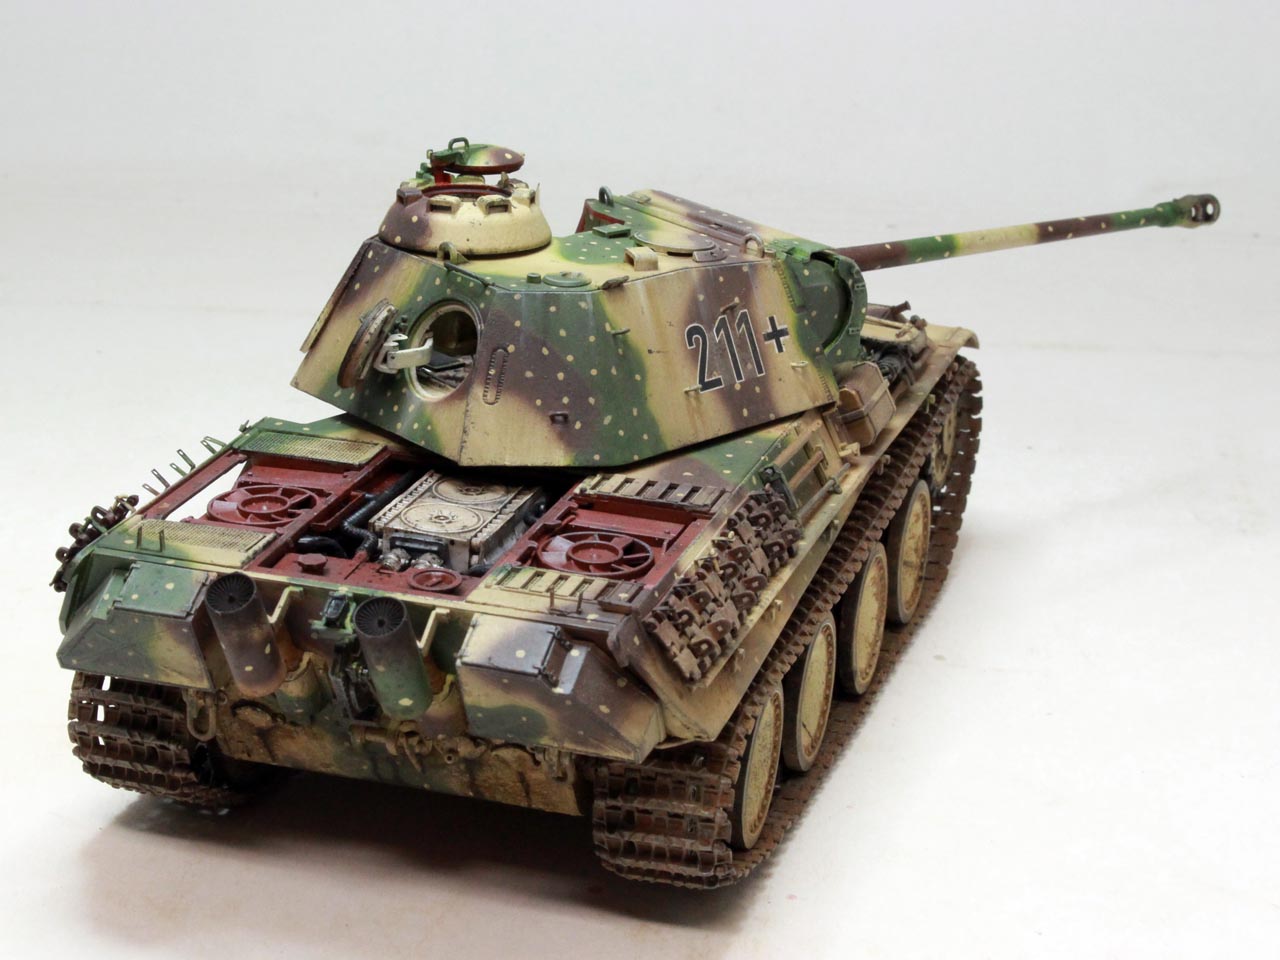
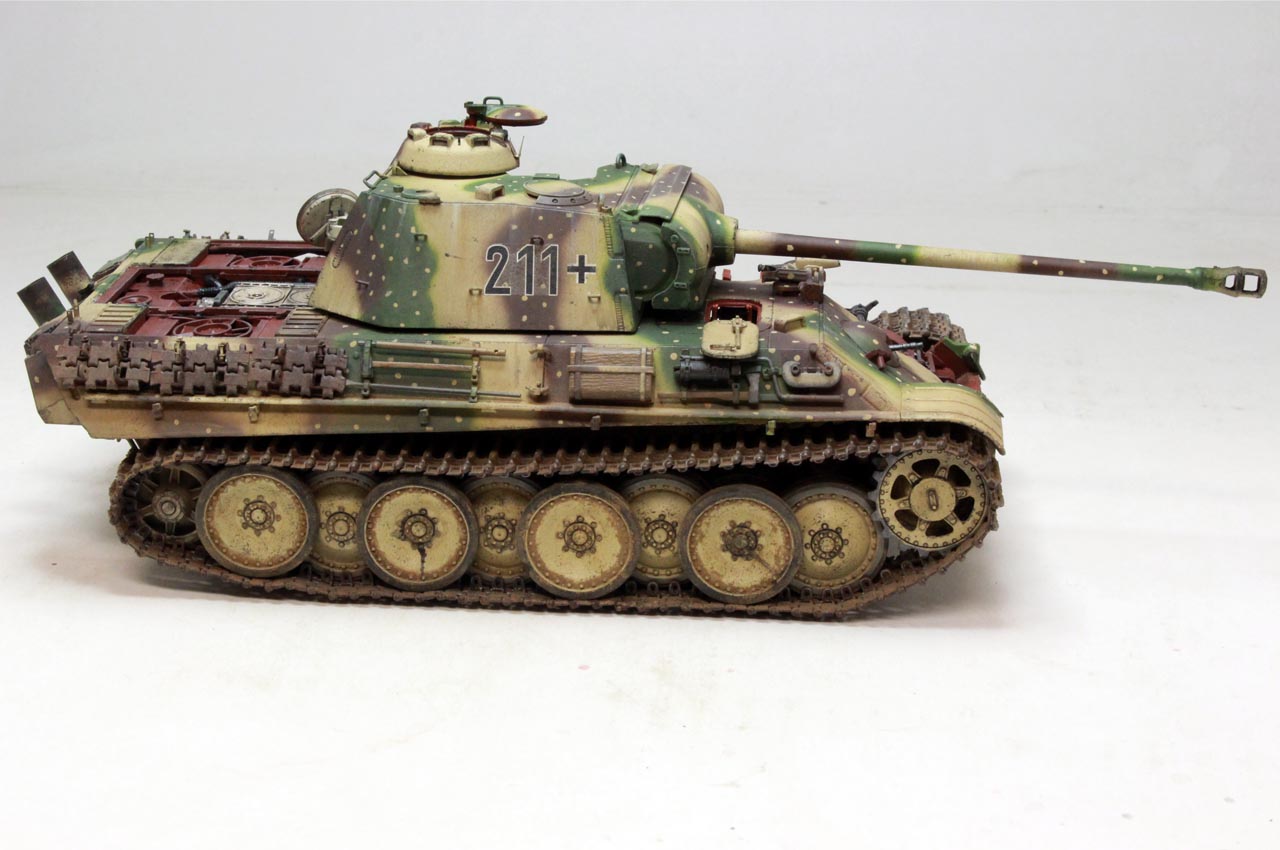
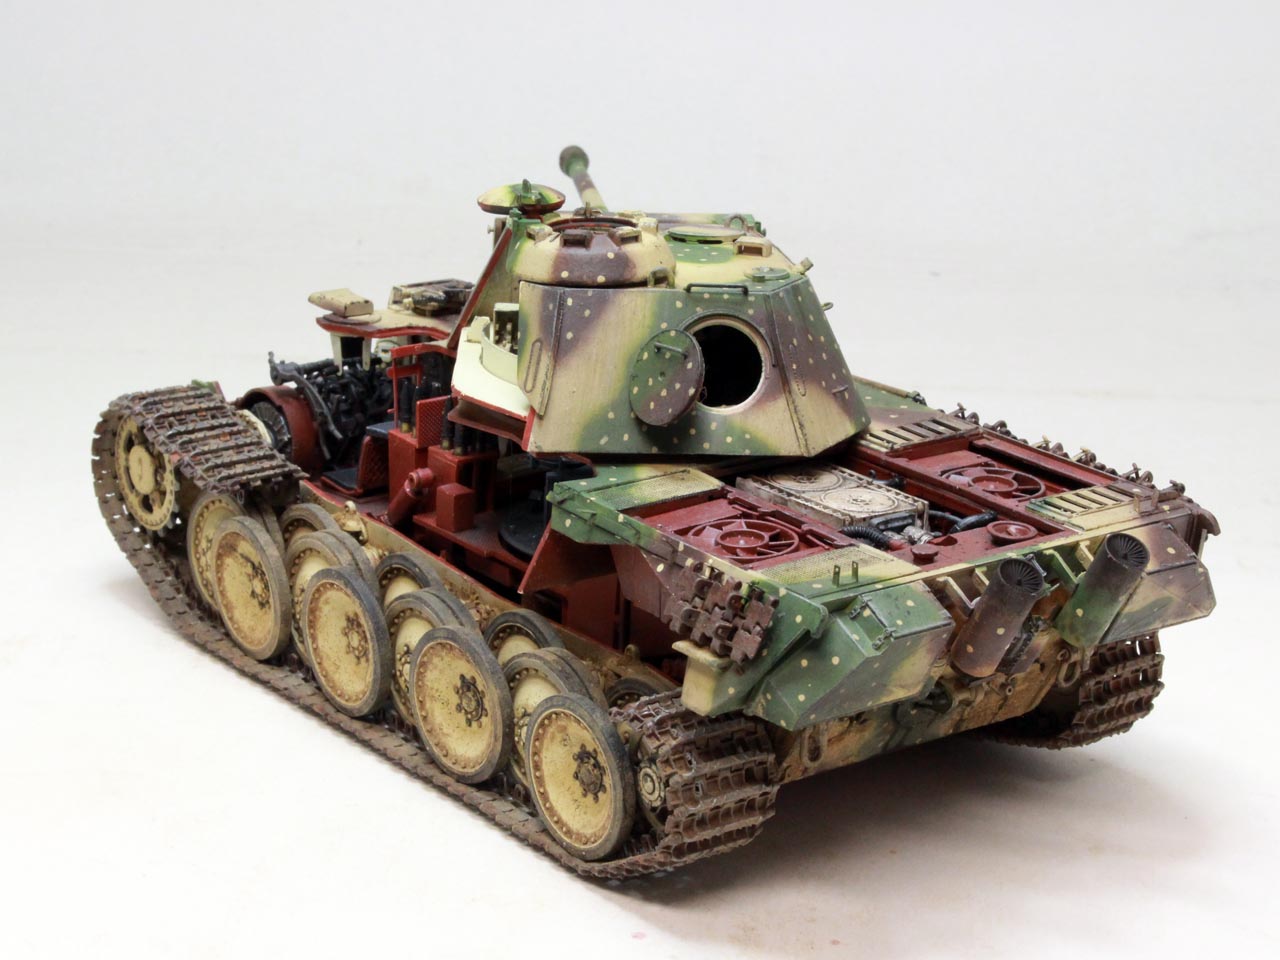
cheers


cheers

Posted: Friday, July 19, 2019 - 03:26 PM UTC
Colin,
Fantastic result. The finished model looks amazing.
Fantastic result. The finished model looks amazing.

ColinEdm


Joined: October 15, 2013
KitMaker: 1,355 posts
Armorama: 1,229 posts

Posted: Friday, July 19, 2019 - 04:18 PM UTC
Thanks Mark! Your Jagdpanther is coming along very nicely too!
Silantra

Joined: March 04, 2004
KitMaker: 2,511 posts
Armorama: 913 posts

Posted: Sunday, July 21, 2019 - 02:23 PM UTC
excellent and congrats to finished this build. Mine is still under the bed...haha
i like the cammo and weathering on this cat
Sil
i like the cammo and weathering on this cat
Sil
 |


