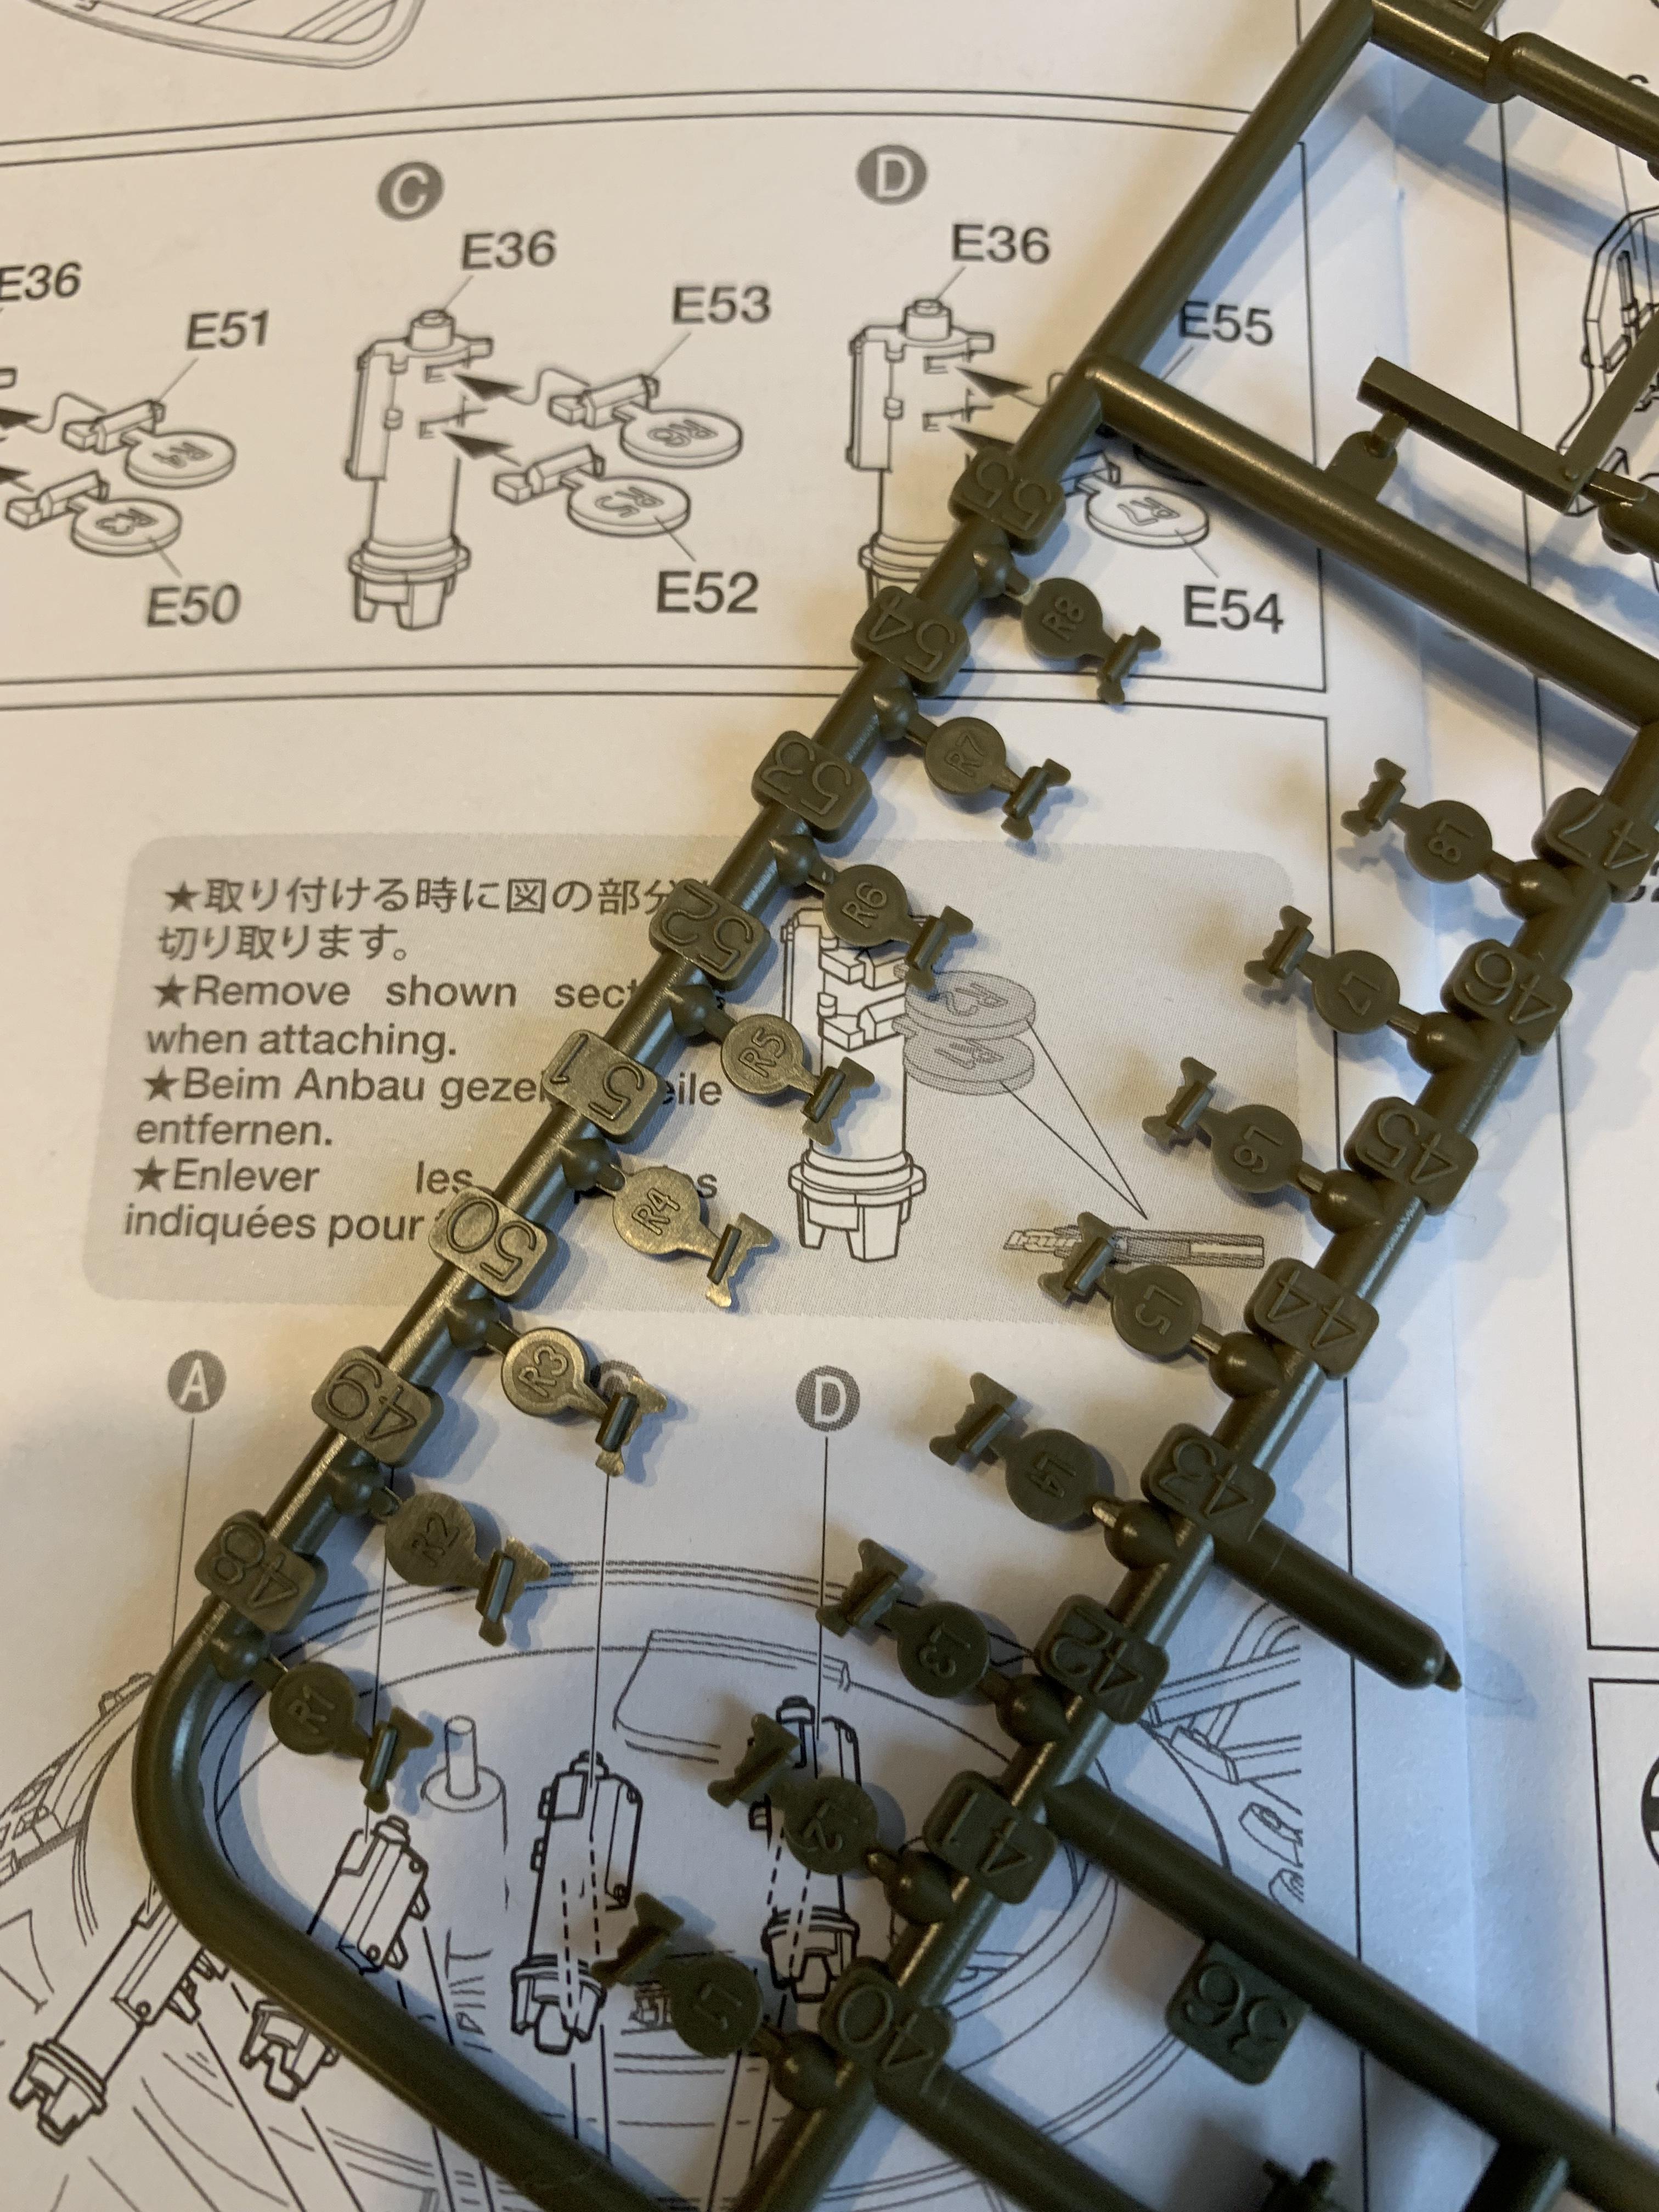
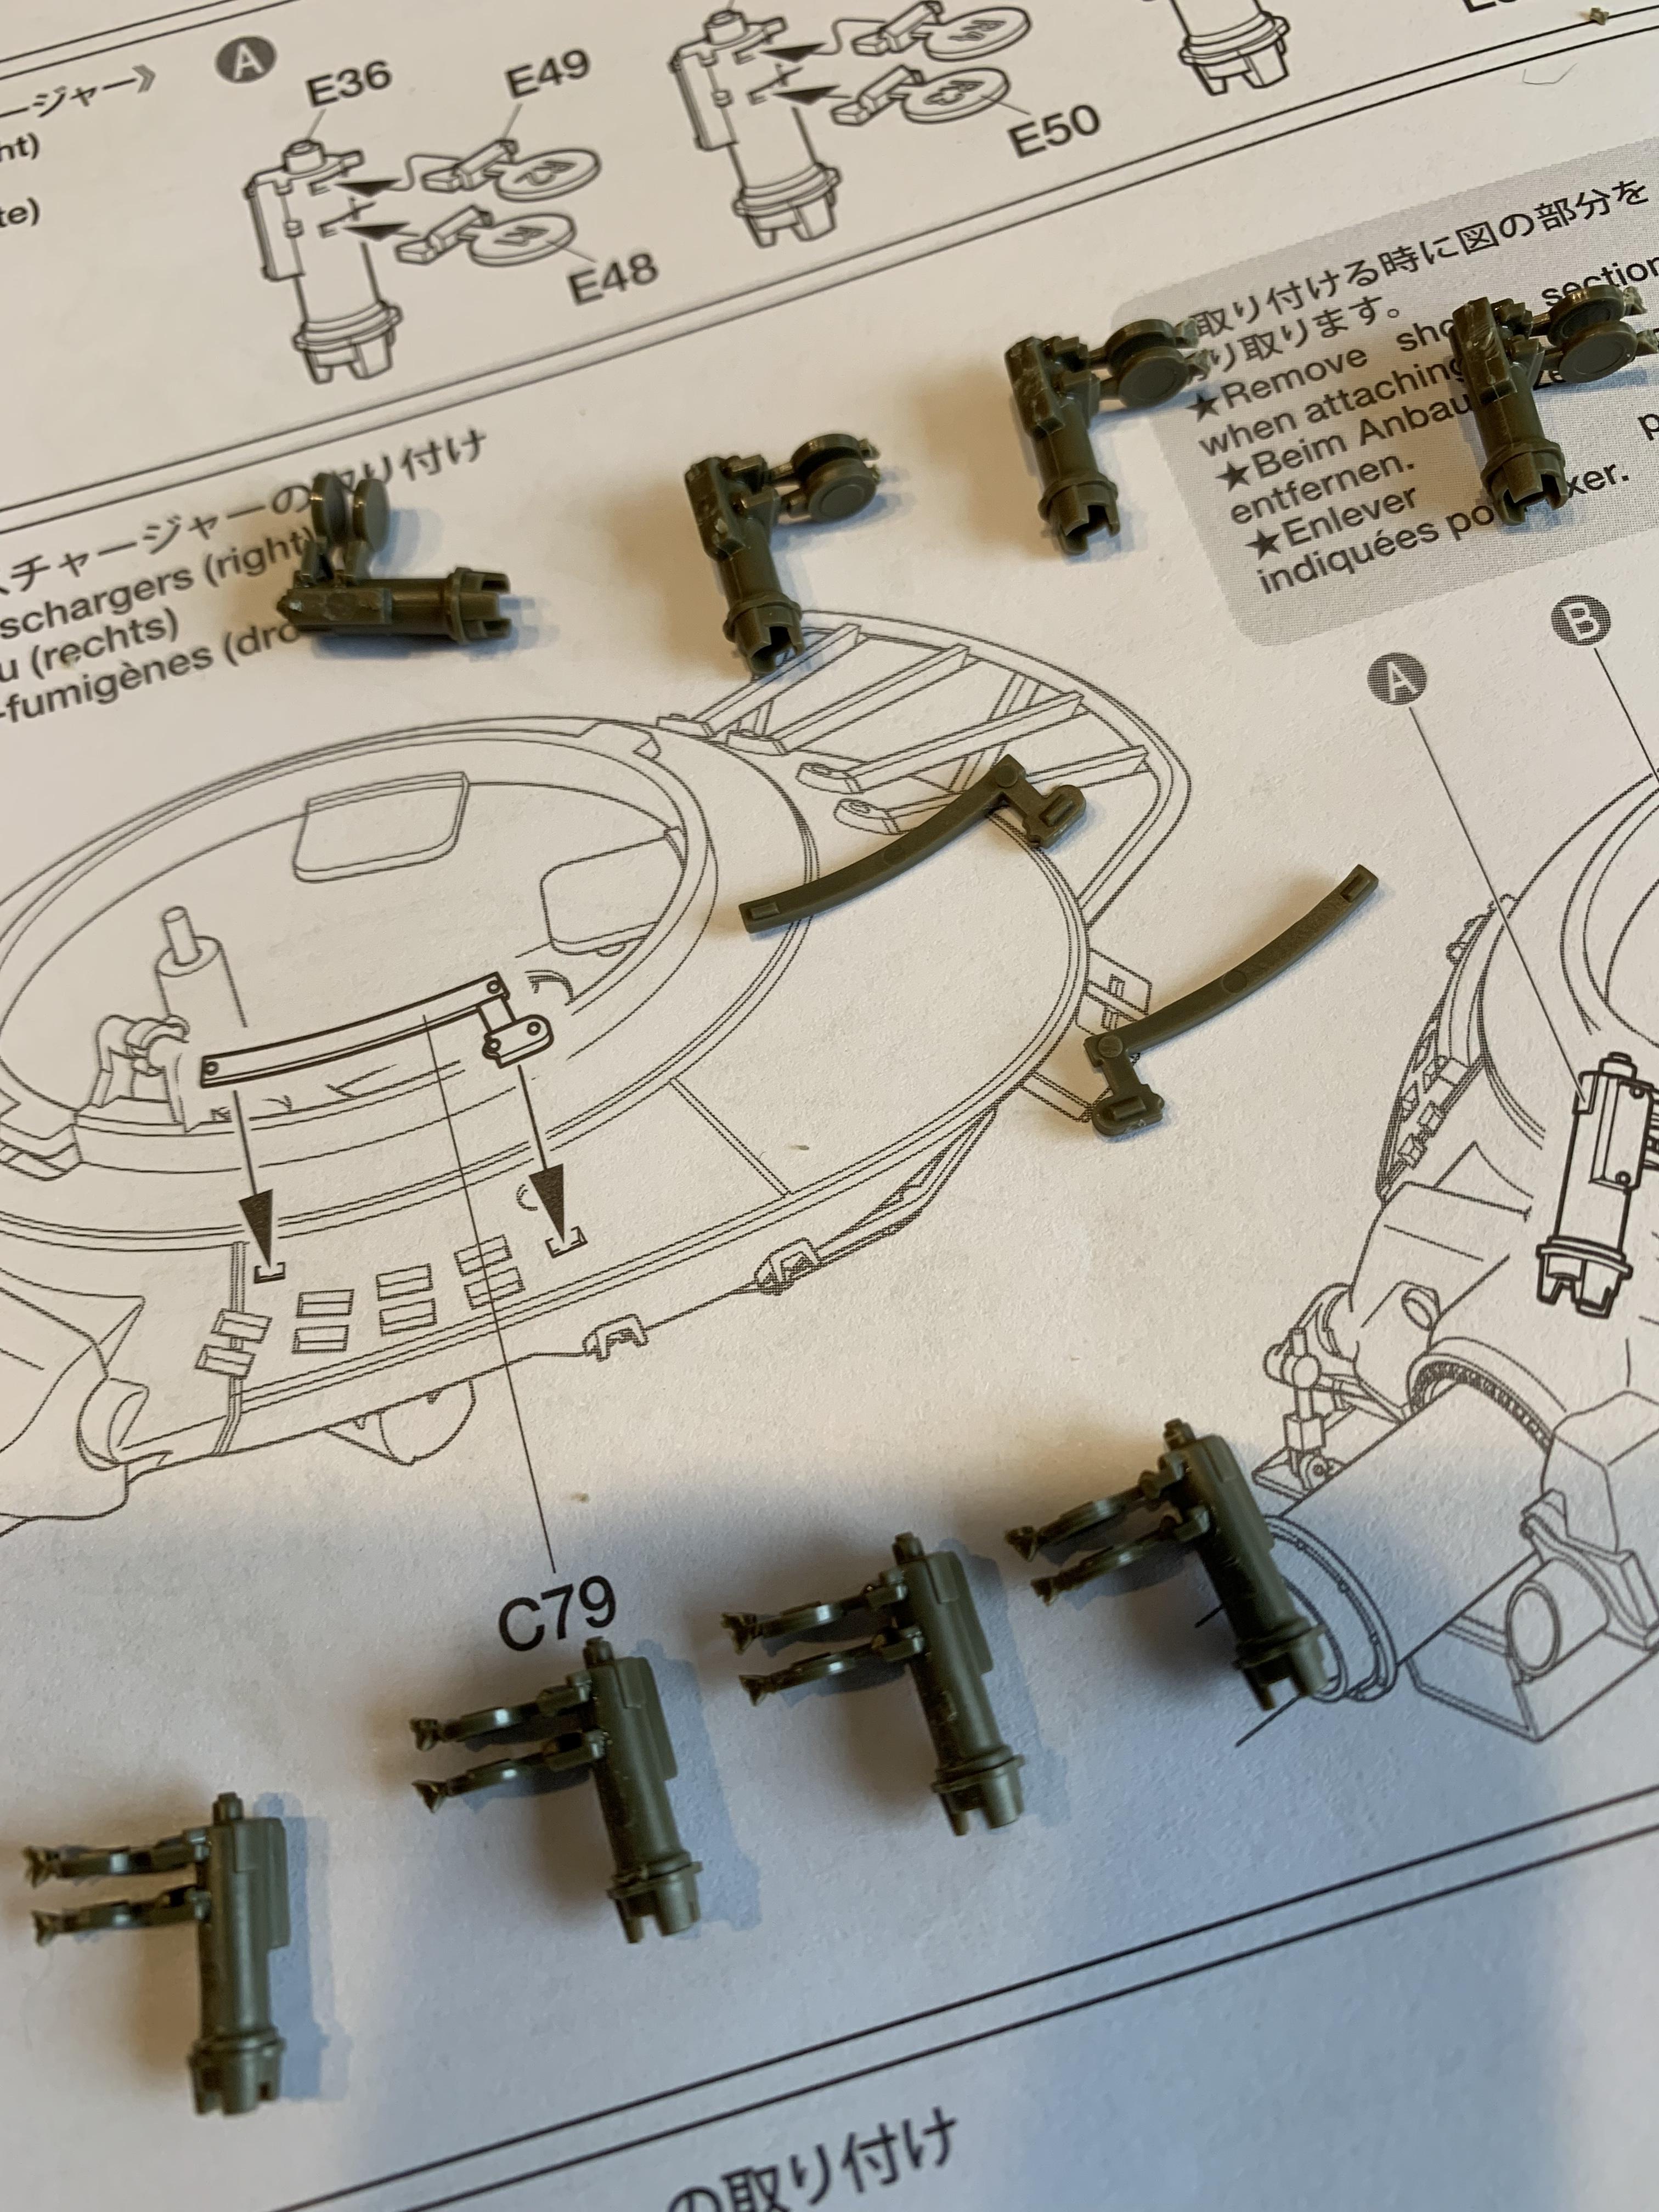
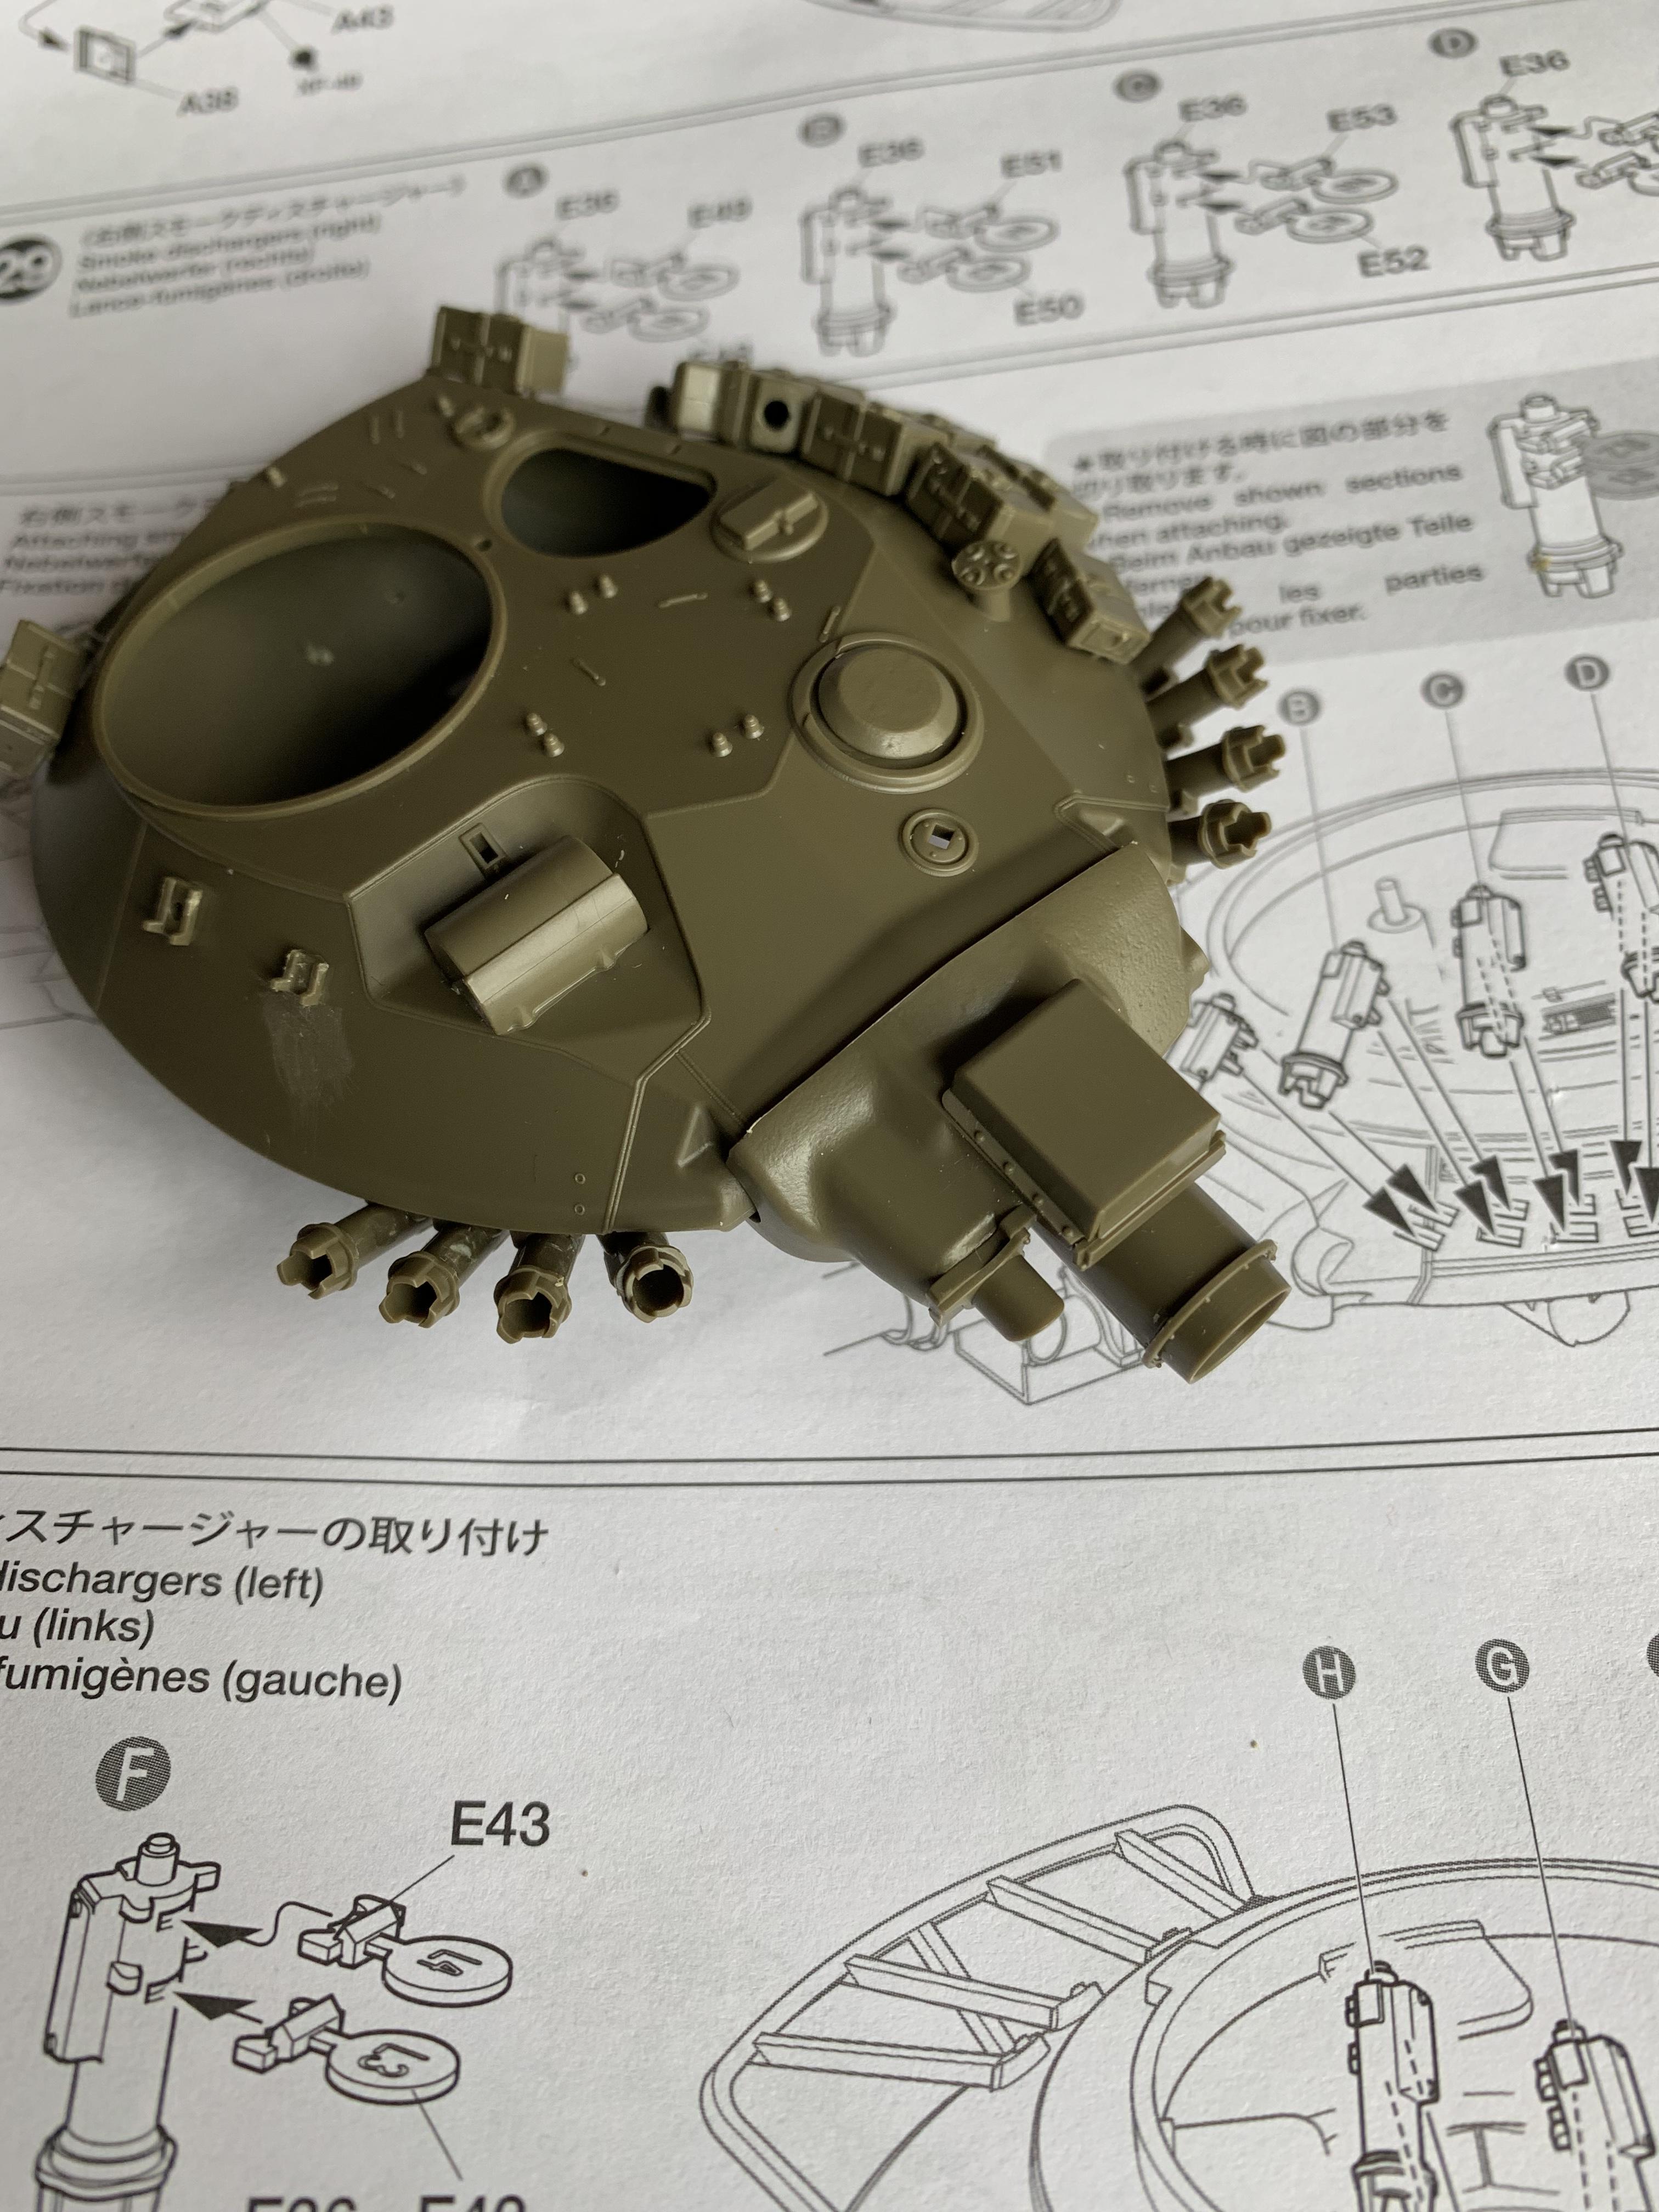
Step 29, 30 and 31
Building and attaching the smoke grenade launchers.
Tamiya gave a lot of thought to this step. With a bunch of tiny and nearly identical mounts for the launcher, Tamiya decided to give you a temporary "handle" to help keep things straight....as in not mixed up AND aligned. Each disc is labeled as well.
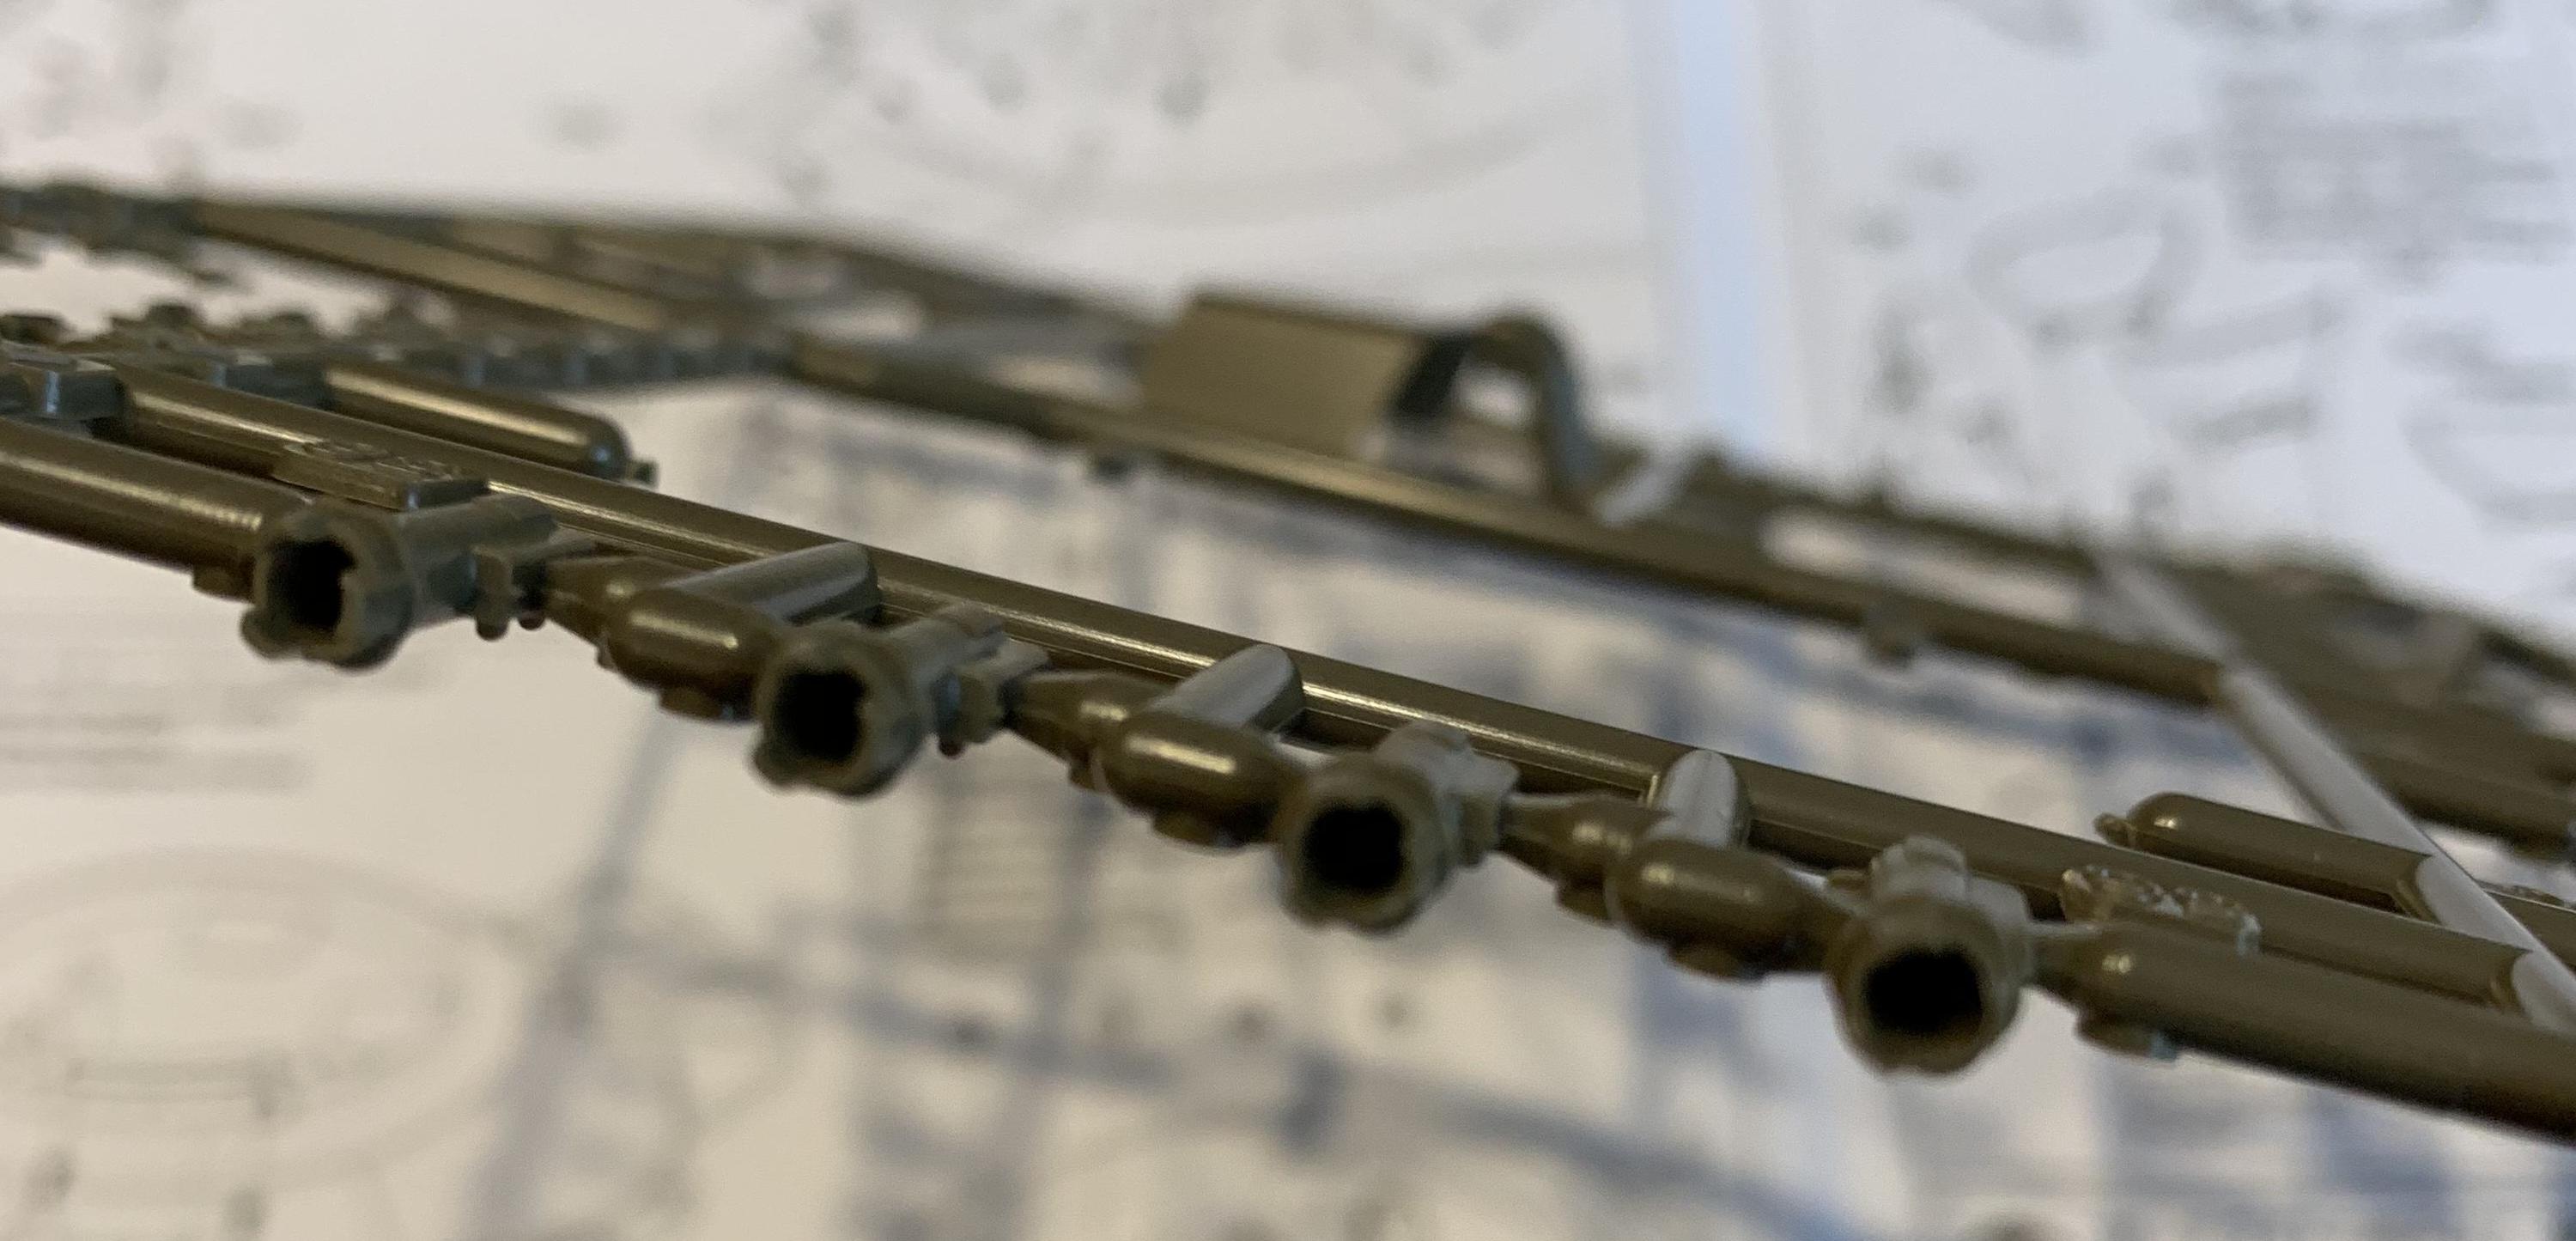
The launchers, four on each side, are slide molded and hollow. No smoke grenades included though.
Everything ready to be installed.
Hosted by Darren Baker
Tamiya Vietnam M551 Sheridan build/review
sherb
New York, United States
Joined: August 25, 2004
KitMaker: 752 posts
Armorama: 378 posts
Joined: August 25, 2004
KitMaker: 752 posts
Armorama: 378 posts
Posted: Saturday, March 02, 2019 - 03:11 AM UTC
sherb
New York, United States
Joined: August 25, 2004
KitMaker: 752 posts
Armorama: 378 posts
Joined: August 25, 2004
KitMaker: 752 posts
Armorama: 378 posts
Posted: Saturday, March 02, 2019 - 03:16 AM UTC
sherb
New York, United States
Joined: August 25, 2004
KitMaker: 752 posts
Armorama: 378 posts
Joined: August 25, 2004
KitMaker: 752 posts
Armorama: 378 posts
Posted: Saturday, March 02, 2019 - 03:24 AM UTC
Step 32
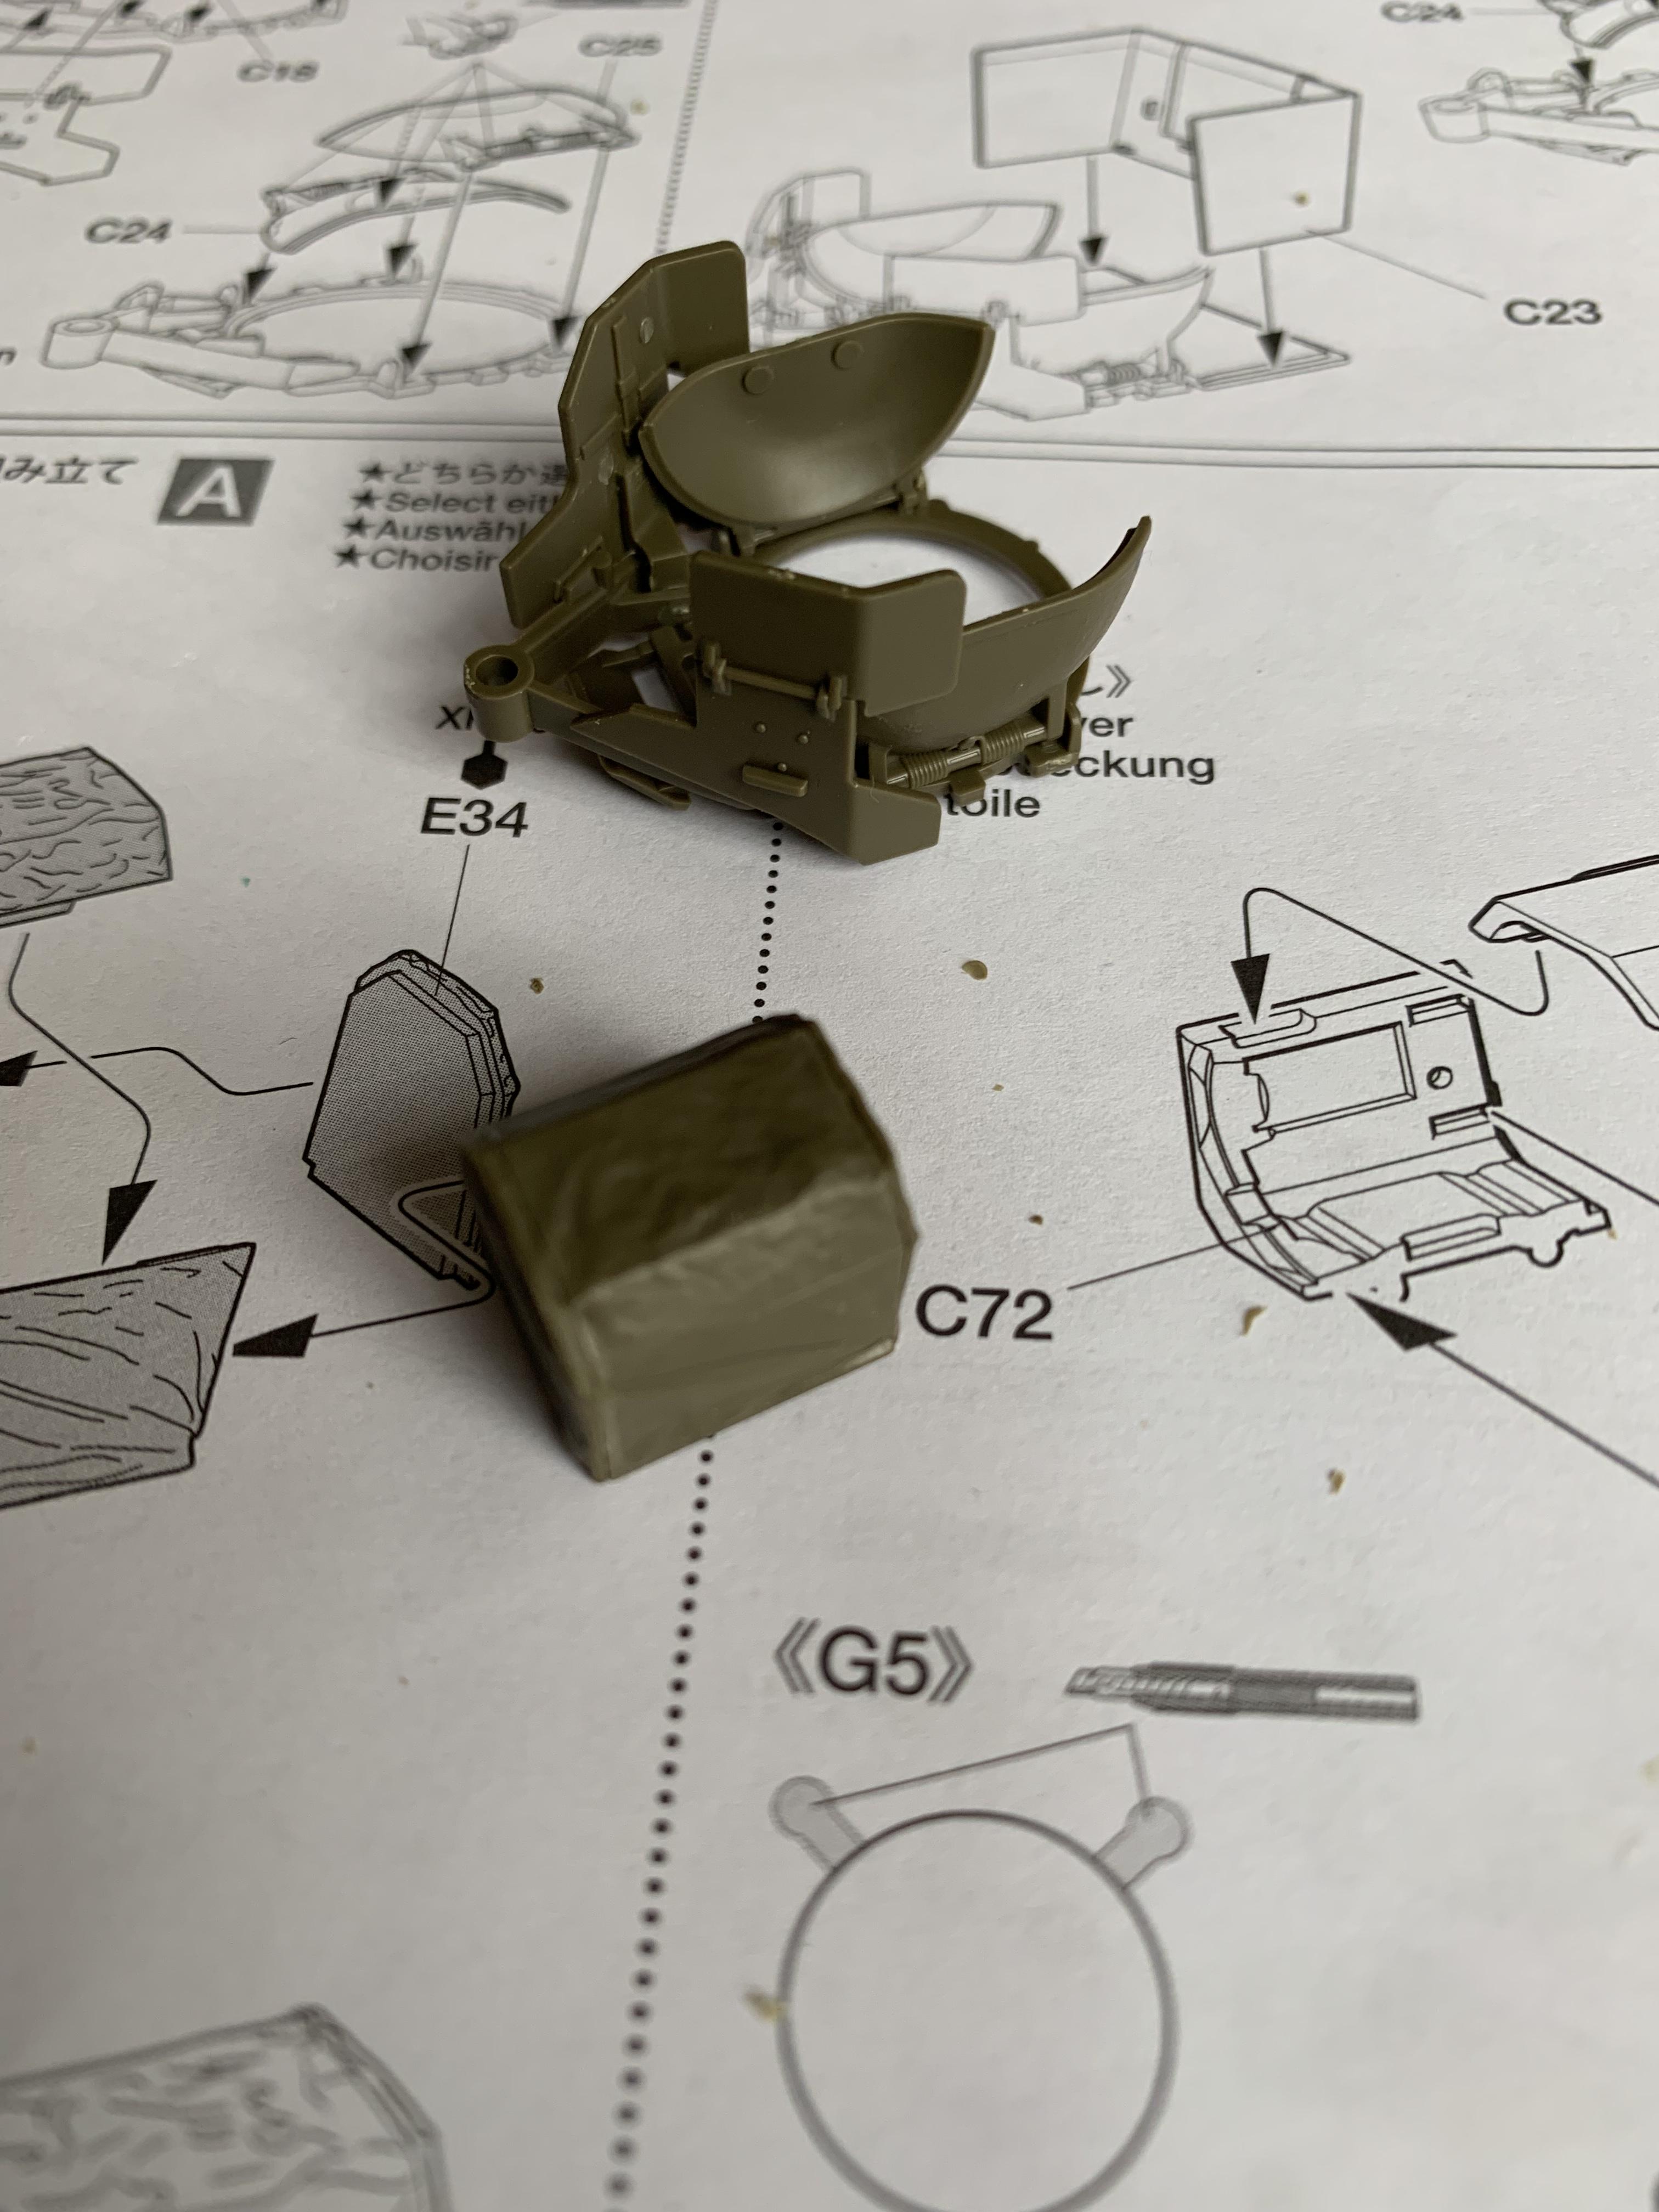
Cupola. Version A on the left is for a 3/4 Cav Sheridan while Version B on the right is for an 11th Cav Sheridan that usually had the distinctive "crows nest" armor. Check your reference though as I have seen 3/4 Cav Sheridan with the crows nest.
The hatch does not move thought there are provisions to have it open or closed (by removing the mounting pins).
Here it is assembled along with the covered searchlight which you build in
Step 33
Step 33 parts
M4A1Sherman
New York, United States
Joined: May 02, 2013
KitMaker: 4,403 posts
Armorama: 4,078 posts
Joined: May 02, 2013
KitMaker: 4,403 posts
Armorama: 4,078 posts
Posted: Saturday, March 02, 2019 - 03:26 AM UTC
Quoted Text
Quoted Text
Hi, Sherb!
I've been following your Build/Review of this new TAMIYA M551 with GREAT INTEREST. I've now decided that I will indeed make at least one of these, possibly two, as part(s) of my collections.
I want to THANK YOU for your very explicit attention to the parts, the instructions, and how this all comes together in the actual assembly of this kit...
GREAT WORK!!!
Hi Dennis,
Thanks for the kind words. It makes me feel it's all worth doing. I'm not the greatest builder but I always enjoy seeing how kits go together so I thought this format would be helpful to others. The majority of the books in my reference library are "in action" style books so unless something really jumps out at me, I won't be commenting on the accuracy of the hull shape or road wheel size etc. etc.
There are some neat building techniques (such as how the driver and his hatch attach as well as how the main gun elevates) so I wanted to highlight that. I wonder if Tamiya will cut me a check for the kits you'll be picking up?
Hello again, Sherb!
First, You're Very Welcome! Second,
I have my doubts that TAMIYA will be cutting you a "commission check" after I buy my M551(s)!!!
Generally, hobby manufacturers, (like any business), are pretty stingy about what they want to lay out in extra expenditures!
Speaking personally, I like the way you are proceeding in your assembly and photography process. What are you using for a camera?
sherb
New York, United States
Joined: August 25, 2004
KitMaker: 752 posts
Armorama: 378 posts
Joined: August 25, 2004
KitMaker: 752 posts
Armorama: 378 posts
Posted: Saturday, March 02, 2019 - 03:41 AM UTC
Quoted Text
Quoted TextQuoted Text
Hi, Sherb!
I've been following your Build/Review of this new TAMIYA M551 with GREAT INTEREST. I've now decided that I will indeed make at least one of these, possibly two, as part(s) of my collections.
I want to THANK YOU for your very explicit attention to the parts, the instructions, and how this all comes together in the actual assembly of this kit...
GREAT WORK!!!
Hi Dennis,
Thanks for the kind words. It makes me feel it's all worth doing. I'm not the greatest builder but I always enjoy seeing how kits go together so I thought this format would be helpful to others. The majority of the books in my reference library are "in action" style books so unless something really jumps out at me, I won't be commenting on the accuracy of the hull shape or road wheel size etc. etc.
There are some neat building techniques (such as how the driver and his hatch attach as well as how the main gun elevates) so I wanted to highlight that. I wonder if Tamiya will cut me a check for the kits you'll be picking up?
Hello again, Sherb!
First, You're Very Welcome! Second,
I have my doubts that TAMIYA will be cutting you a "commission check" after I buy my M551(s)!!!
Generally, hobby manufacturers, (like any business), are pretty stingy about what they want to lay out in extra expenditures!
Speaking personally, I like the way you are proceeding in your assembly and photography process. What are you using for a camera?
You'll see, any day now that commission check is going to show up in my mailbox. Well, a guy can dream, can't he?
I'm just using my iPhone. I know some of the pics aren't all that great but I know my limitations. If I was to pull out my digital camera and set up a formal spot with lighting, none of this would be posted.
This could totally be a weekend kit but with two small kids it has taken me a little over two weeks to get this far. Some nights it literally has been gluing four parts together, taking a pic under the living room lamp and calling it quits.
sherb
New York, United States
Joined: August 25, 2004
KitMaker: 752 posts
Armorama: 378 posts
Joined: August 25, 2004
KitMaker: 752 posts
Armorama: 378 posts
Posted: Saturday, March 02, 2019 - 05:52 AM UTC
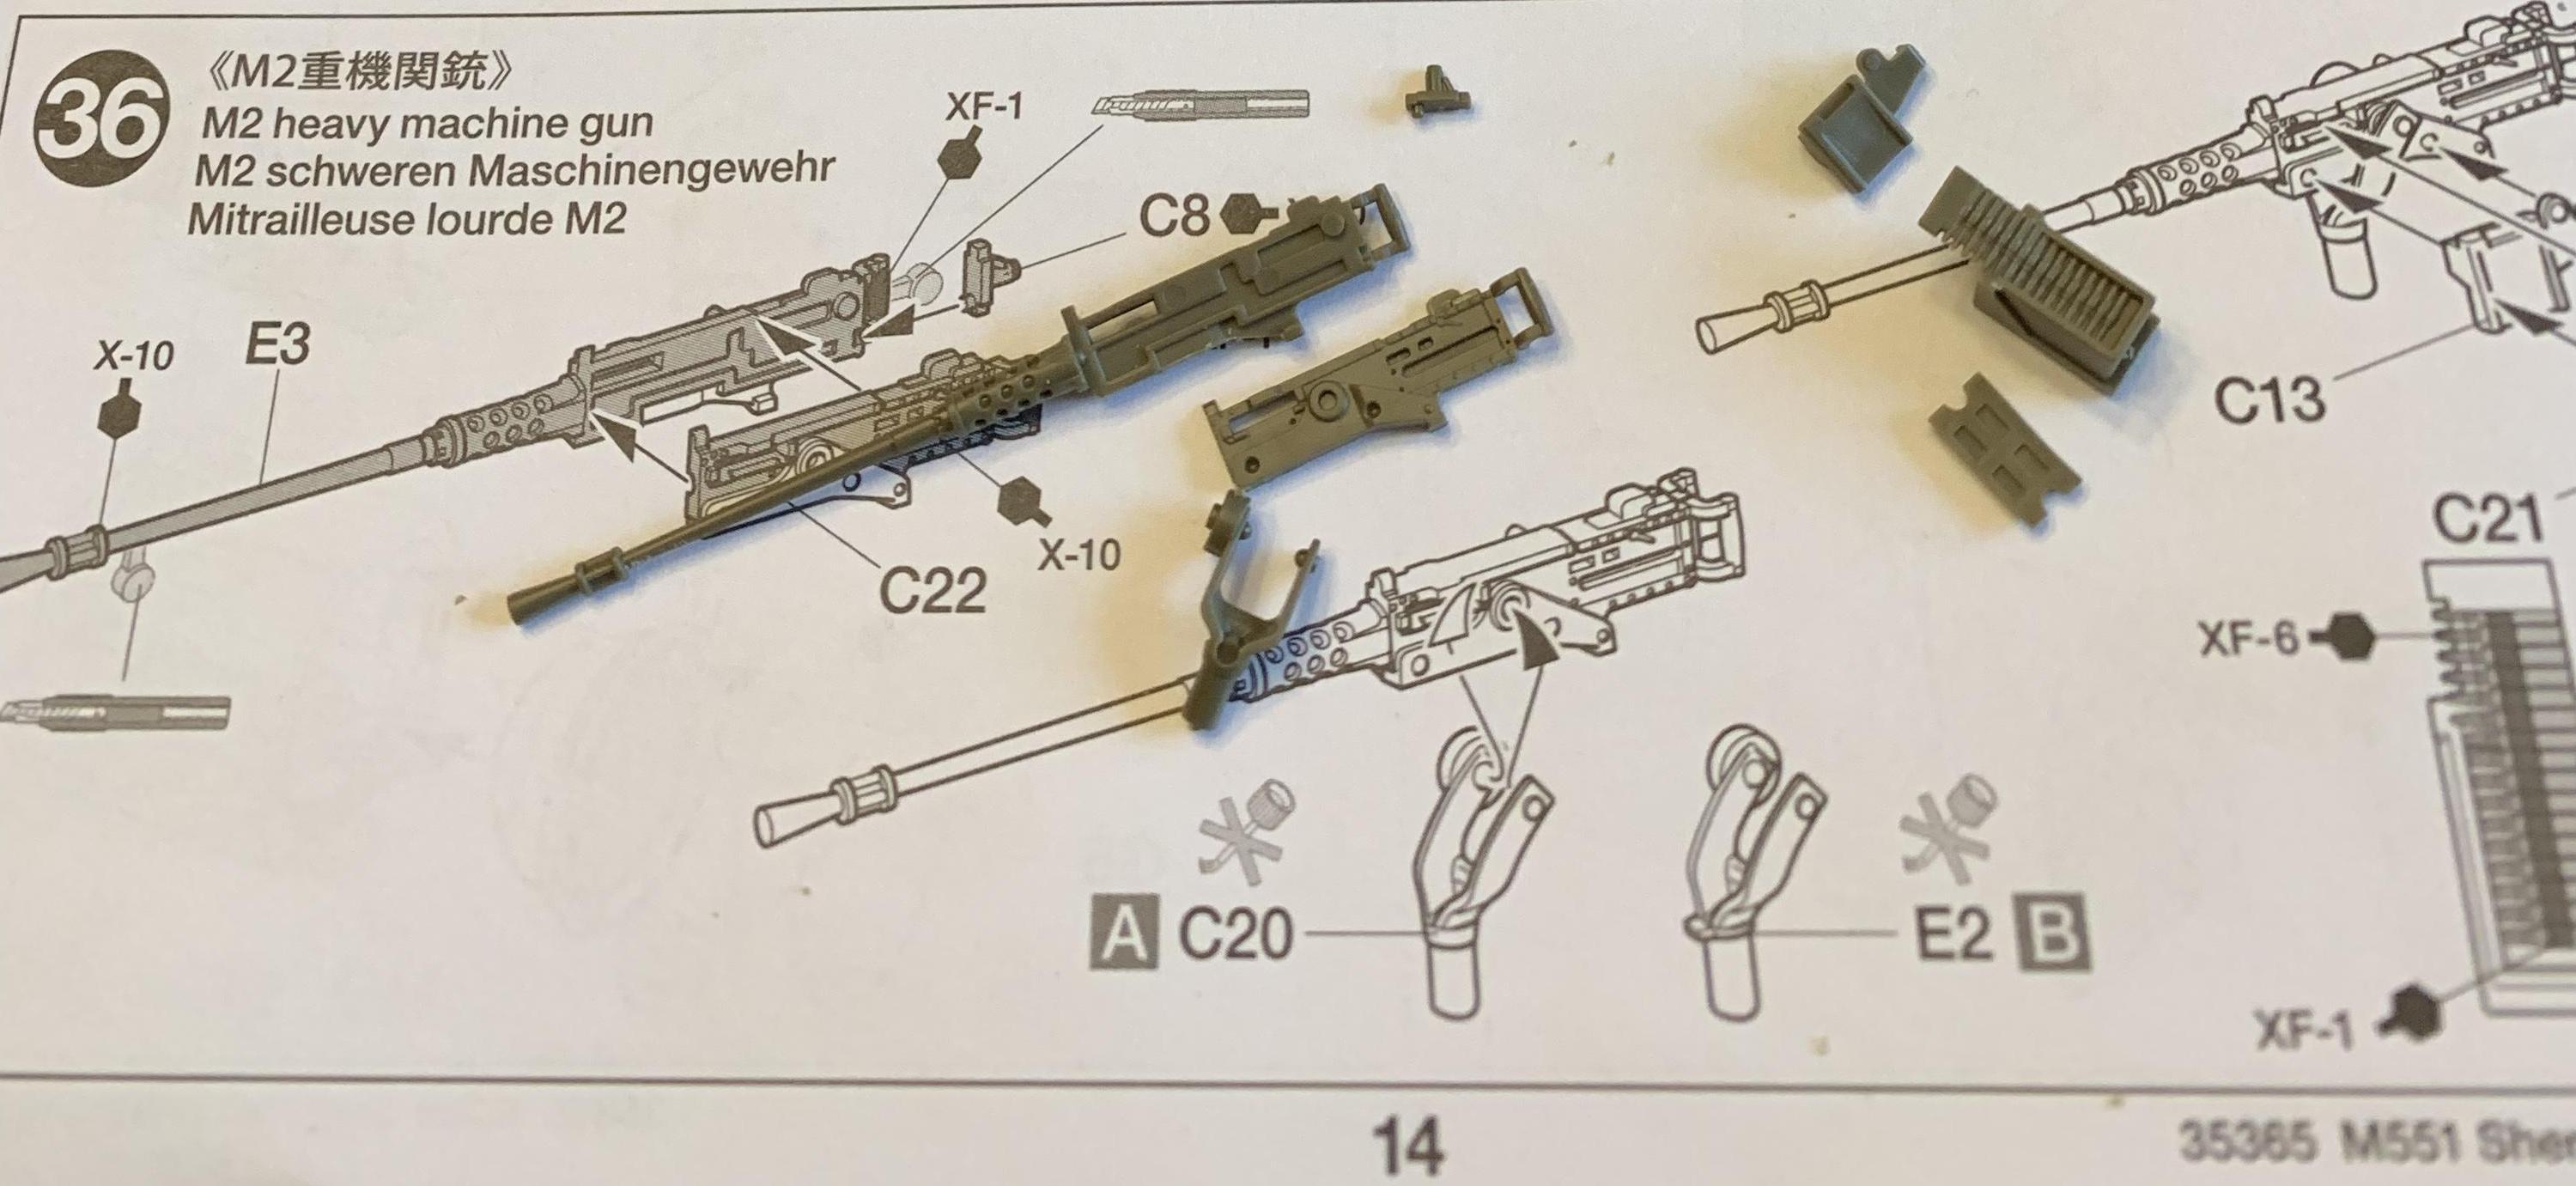
Step 36
The .50 cal. All new tooling. Not that .50 sprue from the late 90s that has been in every WWII kit. Only fault is they didn't use slide molds for the flash hider...two faults, the charging handle doesn't extend out far enough.
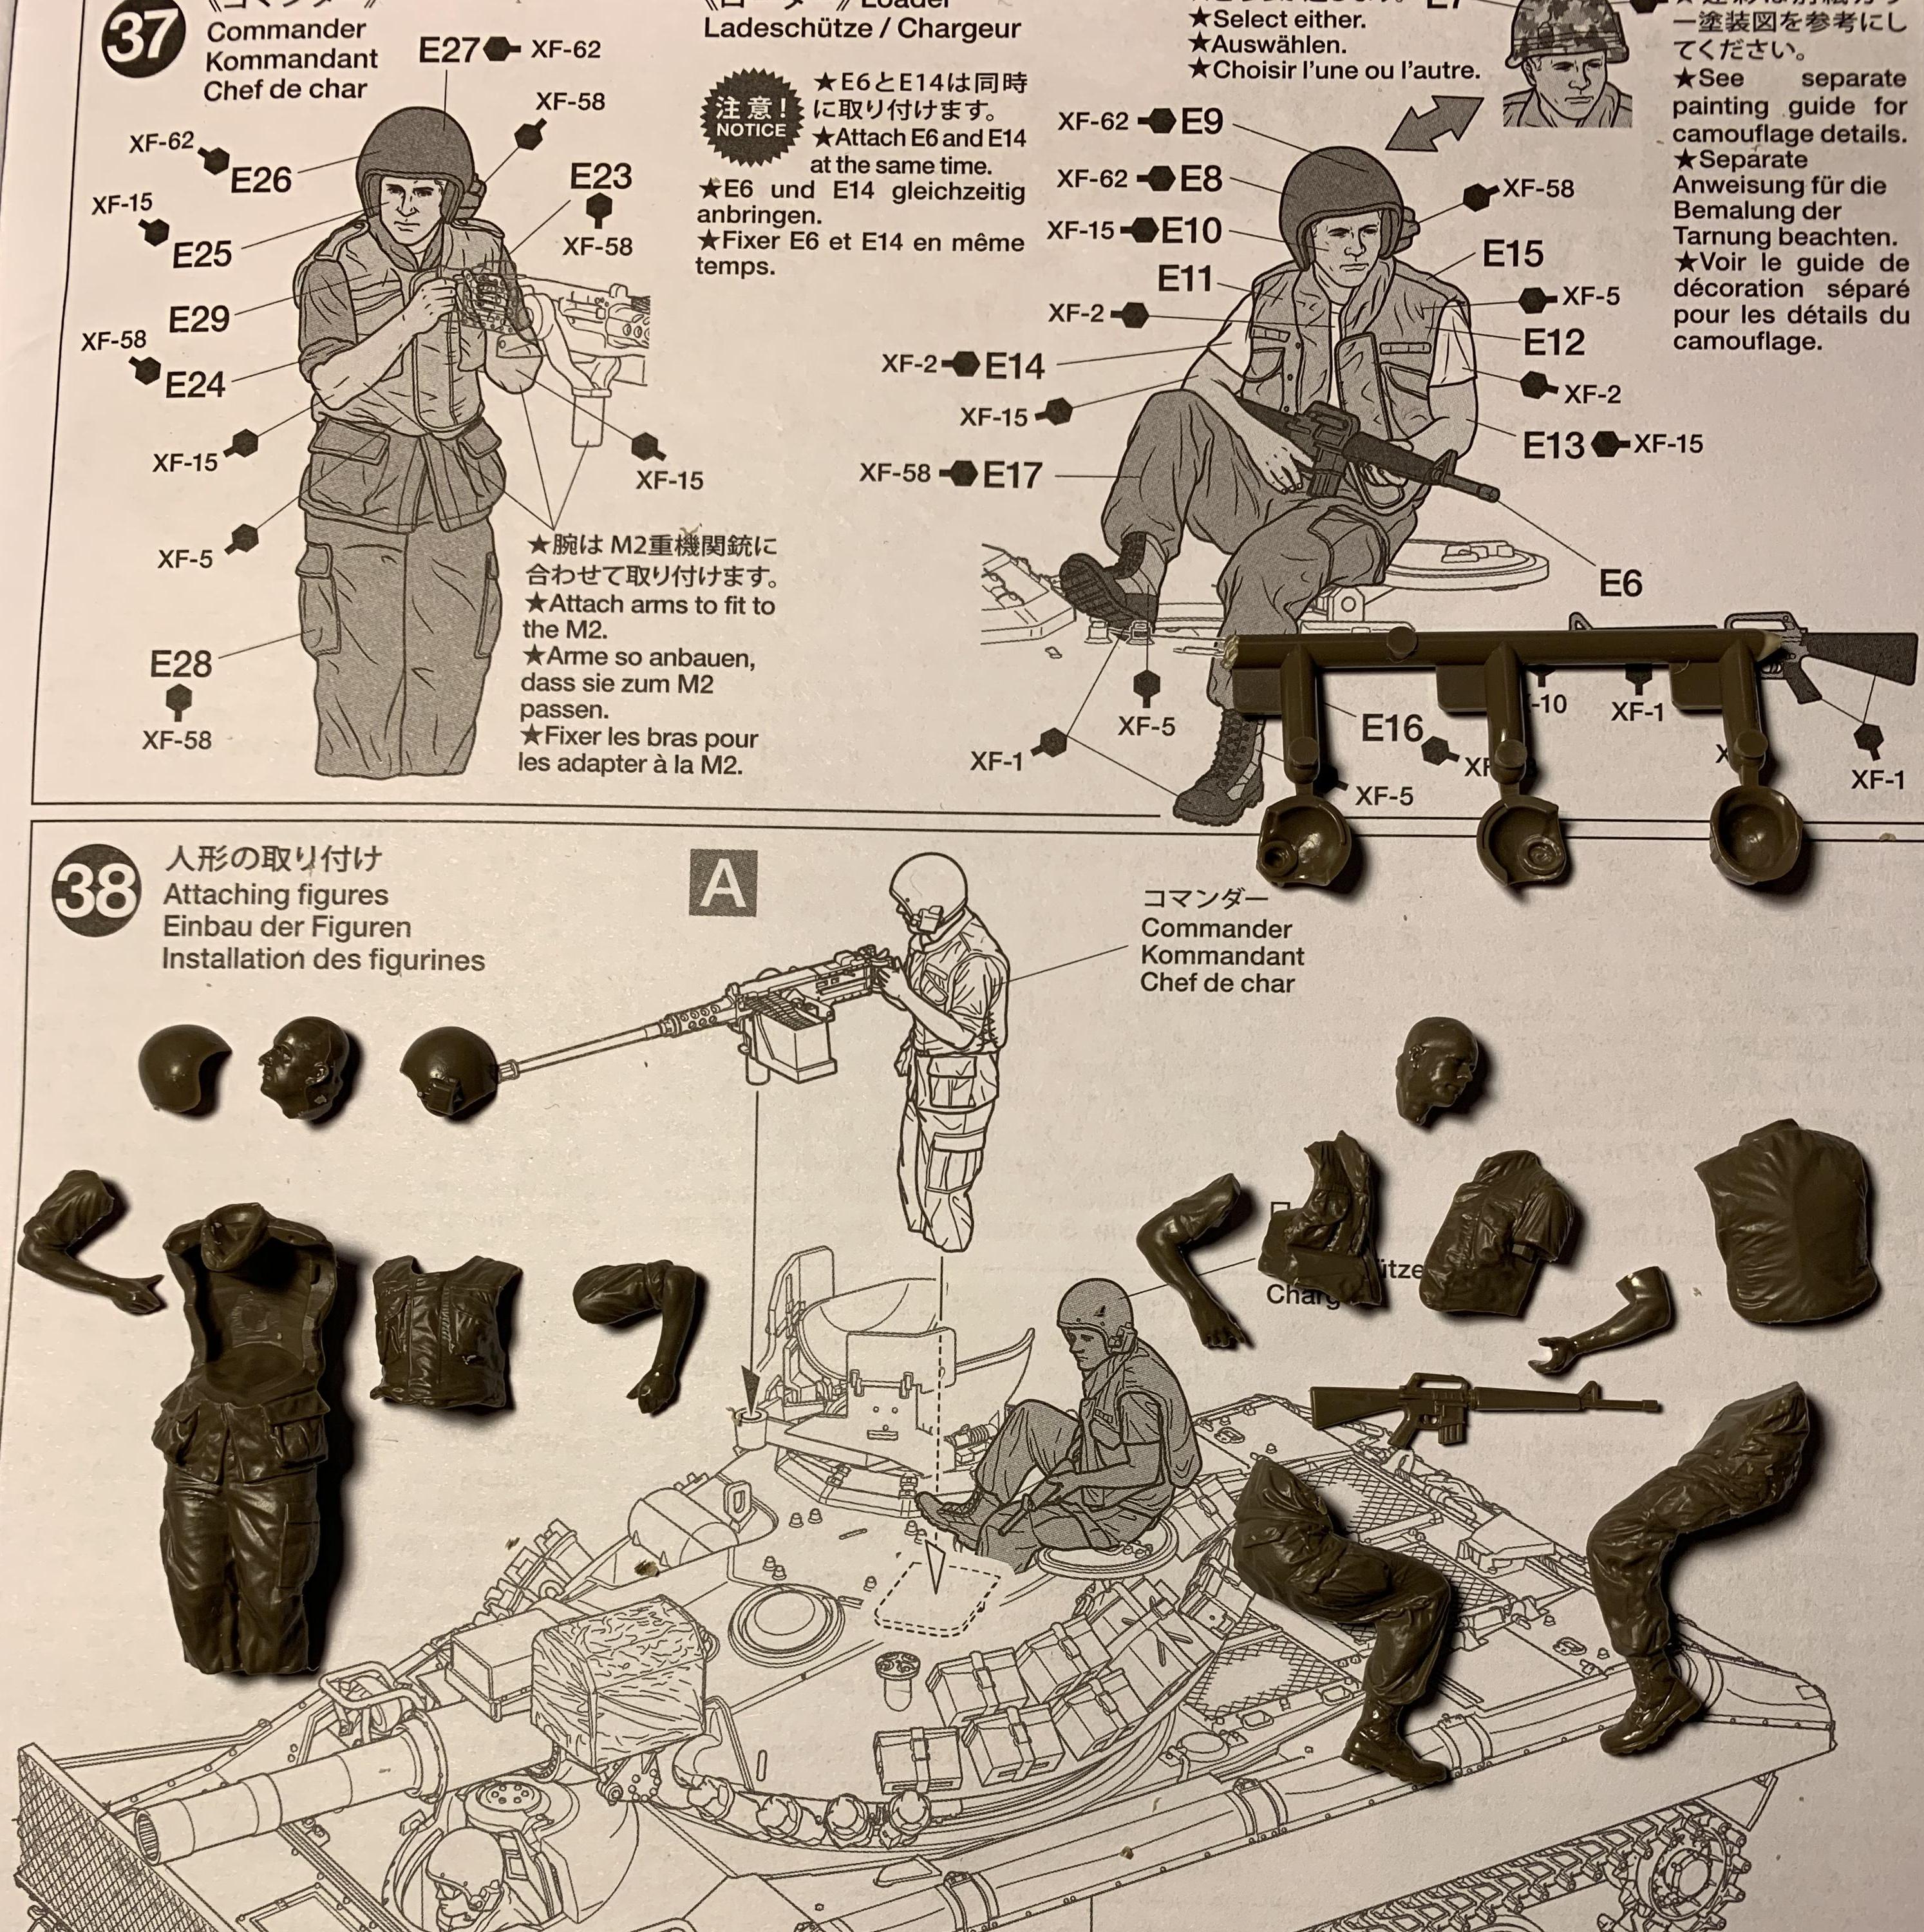
Steps 37 and 38
Building the rest of the crew. You might be able to see the minimal interior detailing in the tanker helmets. The loader has a choice of the bone dome or steel pot. If you're trying to replicate the famous photo of Hard Core 7, who Tamiya based the figures on, use the steel pot on the loader.
Kevlar06
Washington, United States
Joined: March 15, 2009
KitMaker: 3,670 posts
Armorama: 2,052 posts
Joined: March 15, 2009
KitMaker: 3,670 posts
Armorama: 2,052 posts
Posted: Saturday, March 02, 2019 - 07:33 AM UTC
Sherb,
Thanks for posting this build. I've been torn between buying this kit and waiting for the RFM kit, and your build has focused my thoughts a little better on this kit. It's a huge improvement over the 1970's era Tamiya kit, and the later Academy kit, but at the same time, I'm a little disappointed in the shortcuts Tamiya has taken and in the detail. I guess they've chosen to balance the cost and "buildability" over some of the detail-- It looks like it's going to be somewhat easy to build, with acceptable accurate detail, but, it also has some things I wouldn't expect-- like drilling your own holes, abbreviated driver's compartment, turret details, etc. I like where you are going with this article and I'll be following. I may buy one for a quick build myself if I can get it at a good price. Keep it up!
VR, Russ
sherb
New York, United States
Joined: August 25, 2004
KitMaker: 752 posts
Armorama: 378 posts
Joined: August 25, 2004
KitMaker: 752 posts
Armorama: 378 posts
Posted: Saturday, March 02, 2019 - 09:46 AM UTC
Quoted Text
Sherb,
Thanks for posting this build. I've been torn between buying this kit and waiting for the RFM kit, and your build has focused my thoughts a little better on this kit. It's a huge improvement over the 1970's era Tamiya kit, and the later Academy kit, but at the same time, I'm a little disappointed in the shortcuts Tamiya has taken and in the detail. I guess they've chosen to balance the cost and "buildability" over some of the detail-- It looks like it's going to be somewhat easy to build, with acceptable accurate detail, but, it also has some things I wouldn't expect-- like drilling your own holes, abbreviated driver's compartment, turret details, etc. I like where you are going with this article and I'll be following. I may buy one for a quick build myself if I can get it at a good price. Keep it up!
VR, Russ
Hi Russ, I tend to agree with your assessment. I've always thought of Tamiya kits as quick builds (when done OOTB) with a fair compromise between detail and build-ability. I don't mind drilling the holes so you can add or leave off optional items such as the surf board (there are plenty of 'Nam photos without them), belly armor and ammo cans. However, I do find it frustrating to have to drill holes after removing a solid grab handle such as on the loader's hatch or on the engine deck. I don't think build ability would be compromised by adding a couple plastic handles. This day in age, we should be beyond the solid grab handles.
M4A1Sherman
New York, United States
Joined: May 02, 2013
KitMaker: 4,403 posts
Armorama: 4,078 posts
Joined: May 02, 2013
KitMaker: 4,403 posts
Armorama: 4,078 posts
Posted: Saturday, March 02, 2019 - 12:34 PM UTC
Quoted Text
Quoted TextSherb,
Thanks for posting this build. I've been torn between buying this kit and waiting for the RFM kit, and your build has focused my thoughts a little better on this kit. It's a huge improvement over the 1970's era Tamiya kit, and the later Academy kit, but at the same time, I'm a little disappointed in the shortcuts Tamiya has taken and in the detail. I guess they've chosen to balance the cost and "buildability" over some of the detail-- It looks like it's going to be somewhat easy to build, with acceptable accurate detail, but, it also has some things I wouldn't expect-- like drilling your own holes, abbreviated driver's compartment, turret details, etc. I like where you are going with this article and I'll be following. I may buy one for a quick build myself if I can get it at a good price. Keep it up!
VR, Russ
Hi Russ, I tend to agree with your assessment. I've always thought of Tamiya kits as quick builds (when done OOTB) with a fair compromise between detail and build-ability. I don't mind drilling the holes so you can add or leave off optional items such as the surf board (there are plenty of 'Nam photos without them), belly armor and ammo cans. However, I do find it frustrating to have to drill holes after removing a solid grab handle such as on the loader's hatch or on the engine deck. I don't think build ability would be compromised by adding a couple plastic handles. This day in age, we should be beyond the solid grab handles.
Ahh, but TAMIYA's newer 1/48 scale Aircraft are SUPERB, and I'm a "detail nut", so I speak from experience...
I WILL however, AGREE with what Sherb and Russ are saying about today's 1/35 subject matter; the details in 1/35 shouldn't be much of a problem any more, what with CAD and slide-mold technology, etc. But there again, that's why we have such a HUGE A/M selection out there for "options". PLASTIC model companies will just NOT spend the money on "details" or certain subject matter if they don't feel the need to do so. Aircraft are a whole different ball-game altogether, ESPECIALLY in the smaller scales like 1/48 and 1/72...
Kevlar06
Washington, United States
Joined: March 15, 2009
KitMaker: 3,670 posts
Armorama: 2,052 posts
Joined: March 15, 2009
KitMaker: 3,670 posts
Armorama: 2,052 posts
Posted: Saturday, March 02, 2019 - 03:40 PM UTC
Dennis, I have to disagree just a little, as some of the new Meng, Takom and RFM kits have a lot of detail packed into the box. I'm hoping the RFM Sheridan will follow the pattern they've set with some of the German gear they've marketed lately. I can't help but feel Tamiya is trying to satisfy a different niche with this model-- a quicker build, with some details simplified, at a cheaper price point. But, it's head and shoulders above previous models of the M551. It just disturbs me there are no tie downs or brackets on the turret, some of the details around the hatches are soft, the armor plate on the TCs cupola has simplified detail around the hinges, and the splash guard is not separate--not to mention the shortcut with the screening material. But I think it's ok for the price point. We'll see how RFM does with these details I guess. I should caviat my statements by revealing I'm an old Sheridan crew member, so perhaps it's just that I was just expecting more. I'm still tempted by this kit though as there are some nice features.
VR, Russ
VR, Russ
M4A1Sherman
New York, United States
Joined: May 02, 2013
KitMaker: 4,403 posts
Armorama: 4,078 posts
Joined: May 02, 2013
KitMaker: 4,403 posts
Armorama: 4,078 posts
Posted: Sunday, March 03, 2019 - 12:11 AM UTC
Quoted Text
Dennis, I have to disagree just a little, as some of the new Meng, Takom and RFM kits have a lot of detail packed into the box. I'm hoping the RFM Sheridan will follow the pattern they've set with some of the German gear they've marketed lately. I can't help but feel Tamiya is trying to satisfy a different niche with this model-- a quicker build, with some details simplified, at a cheaper price point. But, it's head and shoulders above previous models of the M551. It just disturbs me there are no tie downs or brackets on the turret, some of the details around the hatches are soft, the armor plate on the TCs cupola has simplified detail around the hinges, and the splash guard is not separate--not to mention the shortcut with the screening material. But I think it's ok for the price point. We'll see how RFM does with these details I guess. I should caviat my statements by revealing I'm an old Sheridan crew member, so perhaps it's just that I was just expecting more. I'm still tempted by this kit though as there are some nice features.
VR, Russ
Hi, Russ!
I think that you're basically saying the same thing that I said in different words, when I mentioned that "model manufacturers don't want to spend the extra money"... Of course, you know more about M551s than I do, or probably ever will, simply because you LIVED IN THEM!
Let me explain what I meant a little further:
The fine tooling that would be required for the much more refined details and features that you described would probably have pushed the retail price of this new M551 UP by $10.00-$20.00 per kit, if not MORE. TAMIYA PROBABLY wanted to keep the MSRP of these kits down at reasonable levels in order to get the "average" modeler to buy them. The finer details and extra features of ANY new model kit these days is going to drive the cost of said kits UP exponentially, because the slide-molds that are producing these kits are pretty complicated and very intricately tooled.
Slide-molding involves molds that are made up of MULTIPLE components, rather than just TWO HALVES that come together to mold the parts-sprues. The two mold halves come together, and then the actual molding process begins. The styrene is pre-heated to a near-liquid state prior to being injected into the mold. Nearly simultaneously, compressed air-pressure is also injected into the mold to ensure that this near-liquified styrene fills all of the mold cavities. Sometimes, this doesn't quite happen as it should, and that's how we sometimes wind up with "shorts". Coolant/water is then injected into the mold to cool things down and after a few seconds, the mold halves open to release the sprue(s), which are helped along by what we called "knock-outs". This is the tooling which sometimes leaves those unsightly little circles or "pins" in/on the parts right where we modelers don't need them to be. This whole process is TIMED by the molding machine, which in turn, is set up by the technicians when they are changing out one mold for another. The molds themselves are very heavy- They need to be, because the whole molding process is based on VERY high air-pressure that is necessary to inject the pre-heated plastic into the mold cavities during molding process, AND for the two mold-halves to come together and STAY together. Otherwise, as has happened in some cases, if the mold-halves were to separate while the pre-heated plastic was being injected, there would be a hell of a mess to clean up... Expensive repairs may also be in order...
As I mentioned earlier, slide-molding is a much more complicated process, in that instead of the molds being in two simple halves, there are MULTIPLE components that come into play by sliding together WITHIN the molds in order to make those beautiful parts that we "ooh" and "ahh" over, today. These complicated, multi-part molds ARE HIDEOUSLY EXPENSIVE TO TOOL, AND because of their complexity, they are more labor-intensive to maintain which in the end, is reflected in the retail price of the kit. In addition, it could require up to at least a half-dozen different molds in order to produce the various sprues for the "average" model kit. Now if you're building a TRACKED vehicle, consider all of the extra engineering, implementation and actual machining to produce the slide mold that is required just to produce a single sprue of Indy Links!!!
And it's not just the molds that are expensive. This kind of manufacturing carries a very high overhead- UTILITIES, Research and Development, engineering, maintenance, EMPLOYEES, (How much does the average Japanese factory-worker earn as compared to a Chinese worker doing the same job..?), the molding materials themselves, i.e styrene, vinyl, (Which are petroleum-based materials- Expensive, yes?), PE, etc. Then there are the various insurances, and the list just goes on and on. Overhead in the 21st Century is a killer... You guys all have an idea of how much the prices of utilities ALONE have jumped over the last few years. Consequently, the prices of retail products will always GO UP, unless certain of these products themselves don't sell very well, so then the retailers put on these "BOGO-sales" which we see every so often...
Now, consider this:
Just that tiny, little hole at the "business end" of a 1/35 .50 cal for example, will necessarily involve extra slide-tooling within the confines of that single sprue cavity, within that single slide-mold! This, in turn, will involve an additional ton-and-a-half of extra engineering and machining to produce that particular slide-mold. THAT tiny, little hole ALONE, CAN and WILL drive the price of the mold up by thousands of US dollars, so go ahead and convert that kind of money into Yen... Consider also that the bigger and more complicated the mold, the more it costs to design and manufacture it. That is also why we sometimes see a small extra sprue for weapons, packs, helmets and canteens, etc...
In addition, I need to stress that you are ABSOLUTELY RIGHT in that these models should have had the details and features which you so ably outlined in your post. Having said that, remember that the more complicated ANY manufacturing process is, the more the consumer will PAY. Also bear in mind that these TAMIYA kits are not made in China, (like TRUMPETER, HOBBY BOSS, MENG, TAKOM, RFM, etc). They are manufactured in JAPAN, where pricing for ANYTHING and EVERYTHING IN THAT COUNTRY borders on the insane... Re-read the little passage that I wrote about keeping the cost of this new M551 kit down to "affordable"-levels for the "average" modeler... Why do you suppose that TAMIYA manufactures so many R/C products and 1/24 "curbside" cars as opposed to 1/24 cars that contain detailed engine bays, engines, transmissions, etc..? THIS kind of stuff offsets the money that is involved in TAMIYA producing some of their more detailed models...
Speaking for myself, I would pay that extra $10.00 to $20.00, (or more), per kit and have the details and features that you mentioned. But let me also say that many times, an A/M manufacturer can and will incorporate MORE and FINER detail into their resin and/or PE upgrades than is possible to mold in plastic, even with the latest in slide-mold technology...
Hope I wasn't being too pedantic...
Kevlar06
Washington, United States
Joined: March 15, 2009
KitMaker: 3,670 posts
Armorama: 2,052 posts
Joined: March 15, 2009
KitMaker: 3,670 posts
Armorama: 2,052 posts
Posted: Sunday, March 03, 2019 - 03:37 AM UTC
Dennis,
Yep, we’re on the same sheet of music here. I understand what Tamiya is doing. But I’m still a little disappointed. It’s not the plastic I’d expected, but the price is right for what’s In the box. At the same time, I think I’ll wait for what looks like the more detailed version (and no doubt more pricey) from RFM before I run out to buy a new one. I do think it’s nice that Tamiya and others (Airfix for one) are updating their old catalog items. And since this is a Vietnam version, it definitely fills a niche in its own right.
VR, Russ
Scarred
Washington, United States
Joined: March 11, 2016
KitMaker: 1,792 posts
Armorama: 1,186 posts
Joined: March 11, 2016
KitMaker: 1,792 posts
Armorama: 1,186 posts
Posted: Sunday, March 03, 2019 - 05:51 AM UTC
Quoted Text
Quoted TextI also have the kit, my negative comment on all Tamiya kits is why in the world don’t they provide the damn PE sets with the kit?
A) It's not their marketing model. They make simple, well-engineered kits. I think all of their tank-sized kits can be built in a weekend.
B) There are enough slavish adherents to the company that they know the omission won't measurably affect the sales of the kit or their PE set. There are still those who will pass up a more detailed kit of a subject in the hope that Tamiya will make one.
No matter what amount of PE they add there will always be many people complaining that it's too little, too much, too simple, too complex, or just wrong. They've chosen to go toward the low end and appear to be happy with their choice.
KL
I have the Tamiya M51 #25180, that's the kit with all the Aber photo etch, there's enough aftermarket parts in the box to send a M51 junkie to nirvana. Perhaps they should do more kits that include aftermarket parts in the box like a Panther with lotsa Aber kits.
LonCray1
United States
Joined: November 28, 2018
KitMaker: 55 posts
Armorama: 42 posts
Joined: November 28, 2018
KitMaker: 55 posts
Armorama: 42 posts
Posted: Monday, March 04, 2019 - 02:03 AM UTC
Every model is a compromise in some way. Tamiya's compromise is slightly less detail - but the engineering on them is first rate. AFV Club (for example) has great detail - but the engineering is insane, esp. with great numbers of tiny parts. I'm really enjoying Meng models; they aren't quite the box shakers that a Tamiya kit is, but their tiny-parts count is less than AFV Club.
sherb
New York, United States
Joined: August 25, 2004
KitMaker: 752 posts
Armorama: 378 posts
Joined: August 25, 2004
KitMaker: 752 posts
Armorama: 378 posts
Posted: Monday, March 04, 2019 - 04:33 AM UTC
Sounds like a lot of us are on the same page regarding this kit and Tamiya in general. I think Russ hit it on the head when he suggested Tamiya appeals to a certain "niche" market.
I happened to pull out the Academy Sheridan, man are these two kits on the opposite end of the spectrum....with Tamiya being way more detailed. I'll have to get some comparison shots.
sherb
New York, United States
Joined: August 25, 2004
KitMaker: 752 posts
Armorama: 378 posts
Joined: August 25, 2004
KitMaker: 752 posts
Armorama: 378 posts
Posted: Monday, March 04, 2019 - 04:43 AM UTC
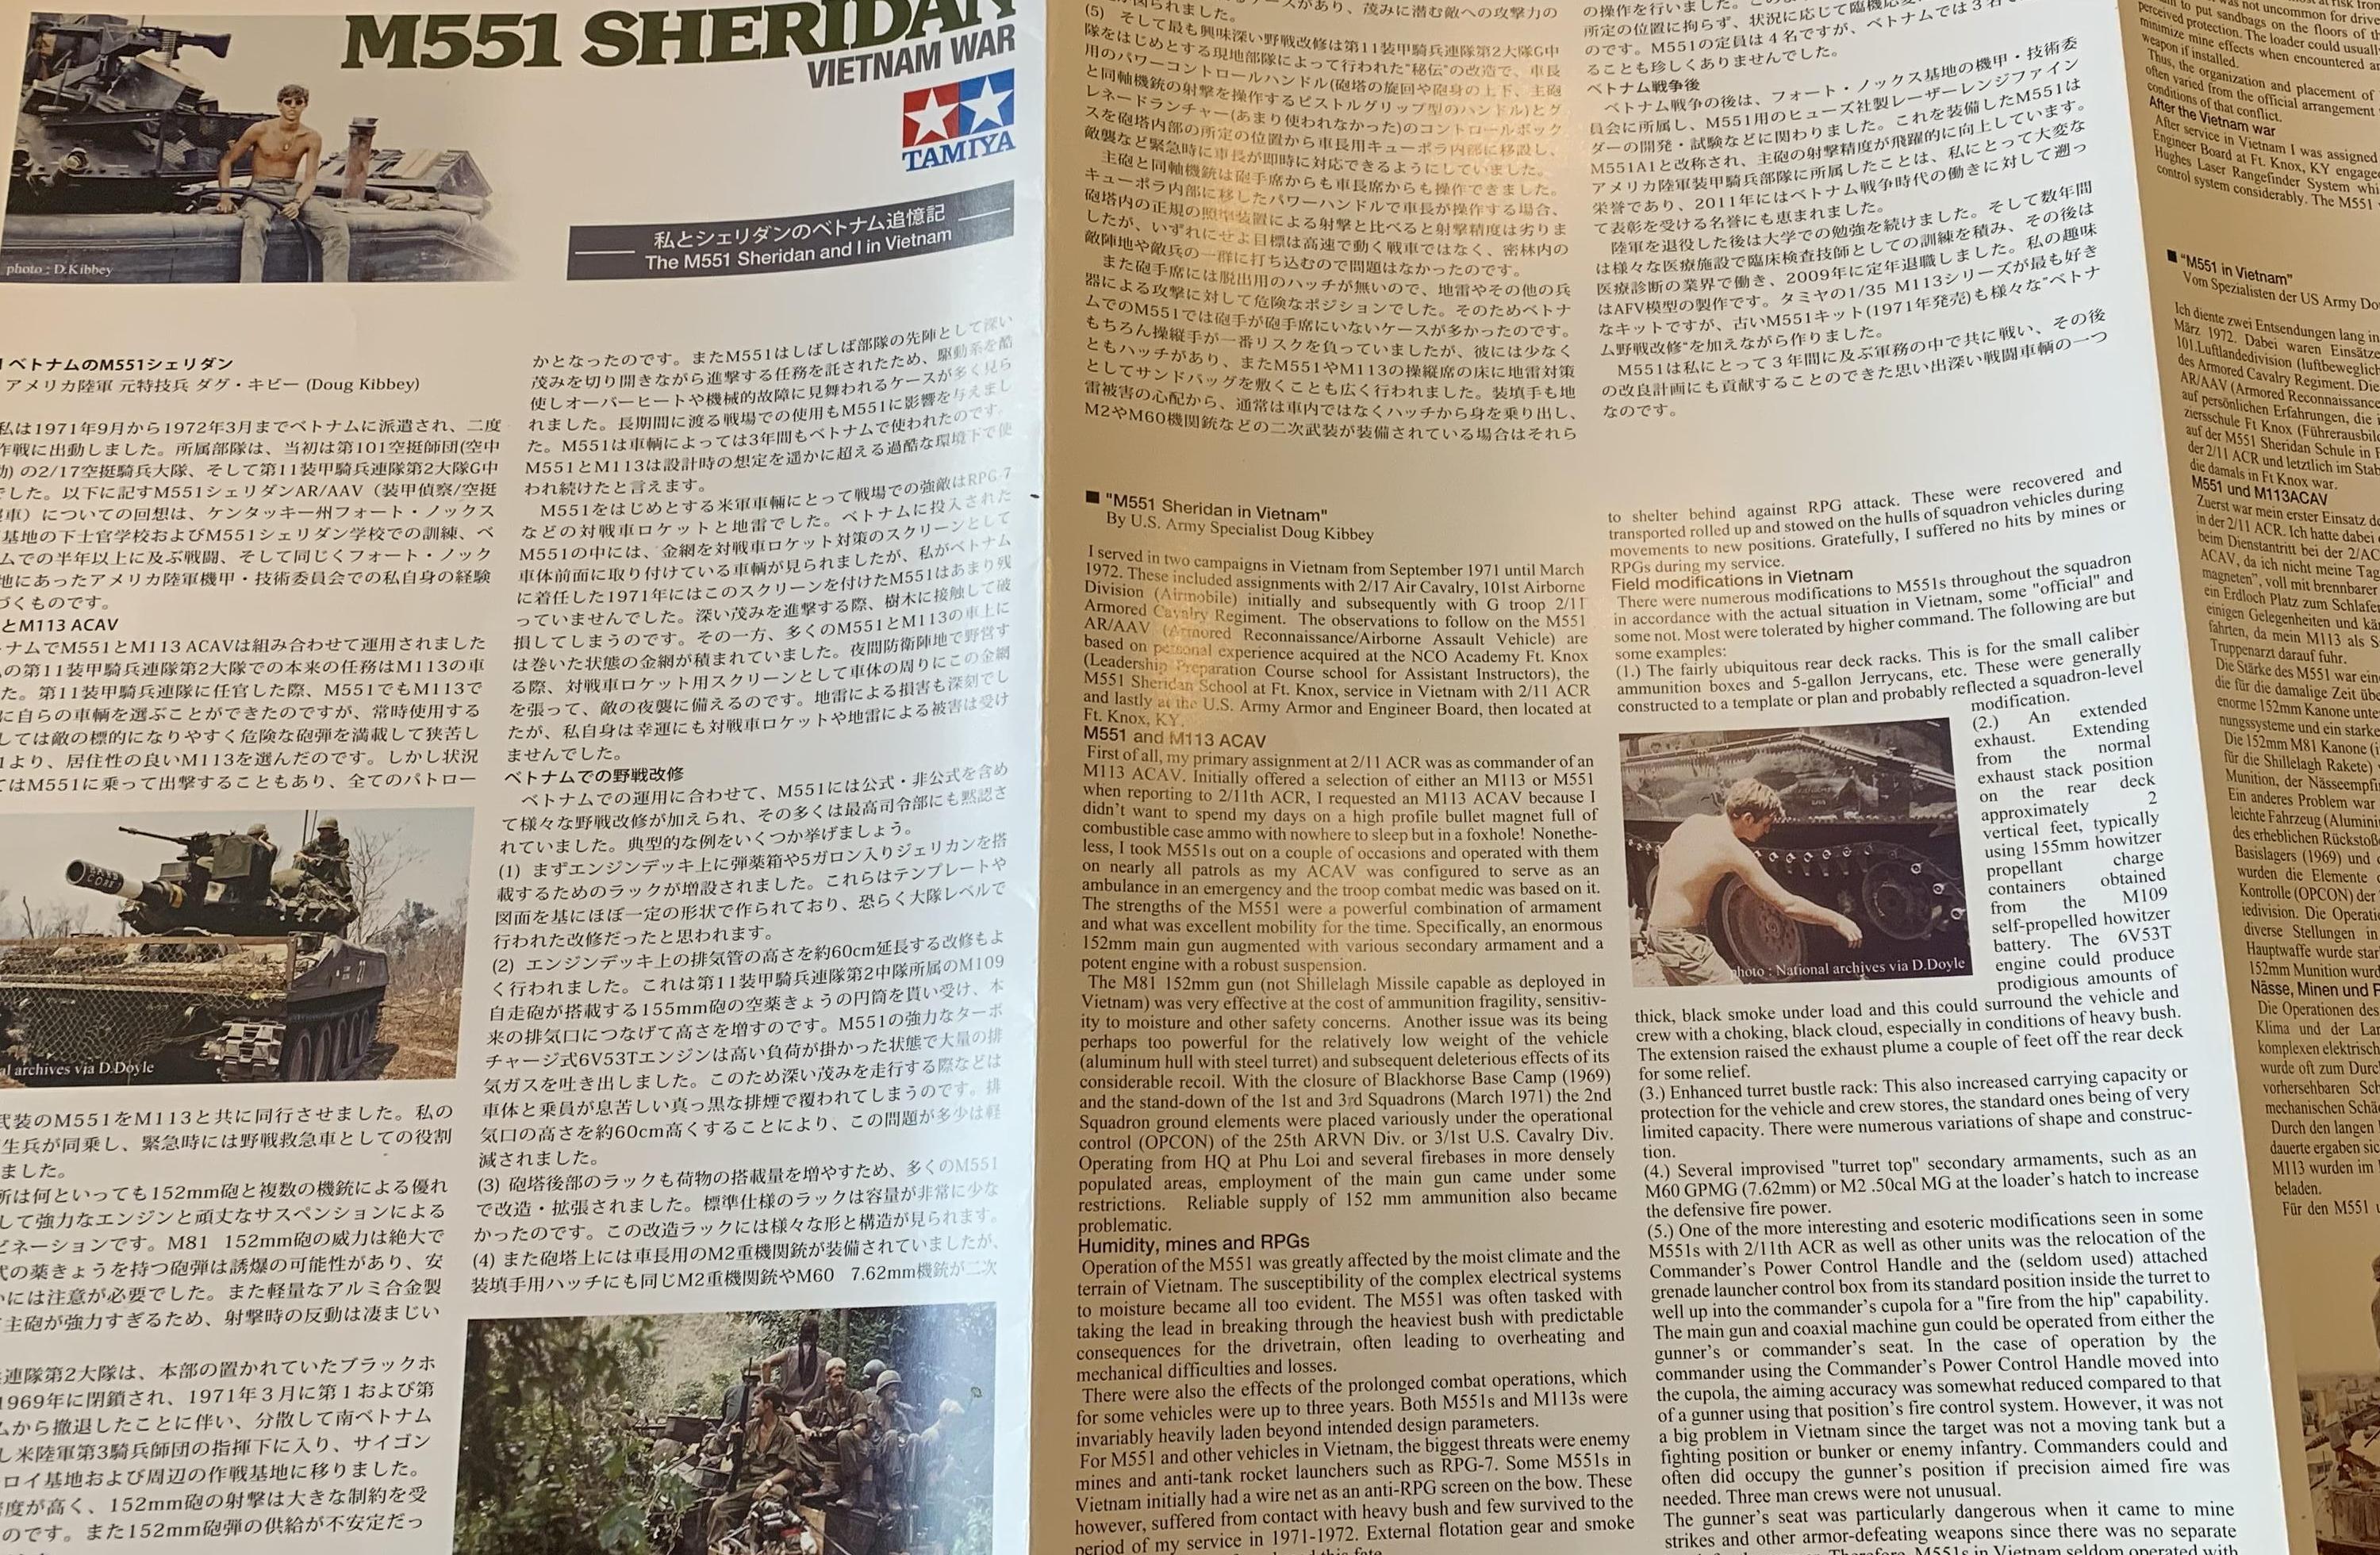
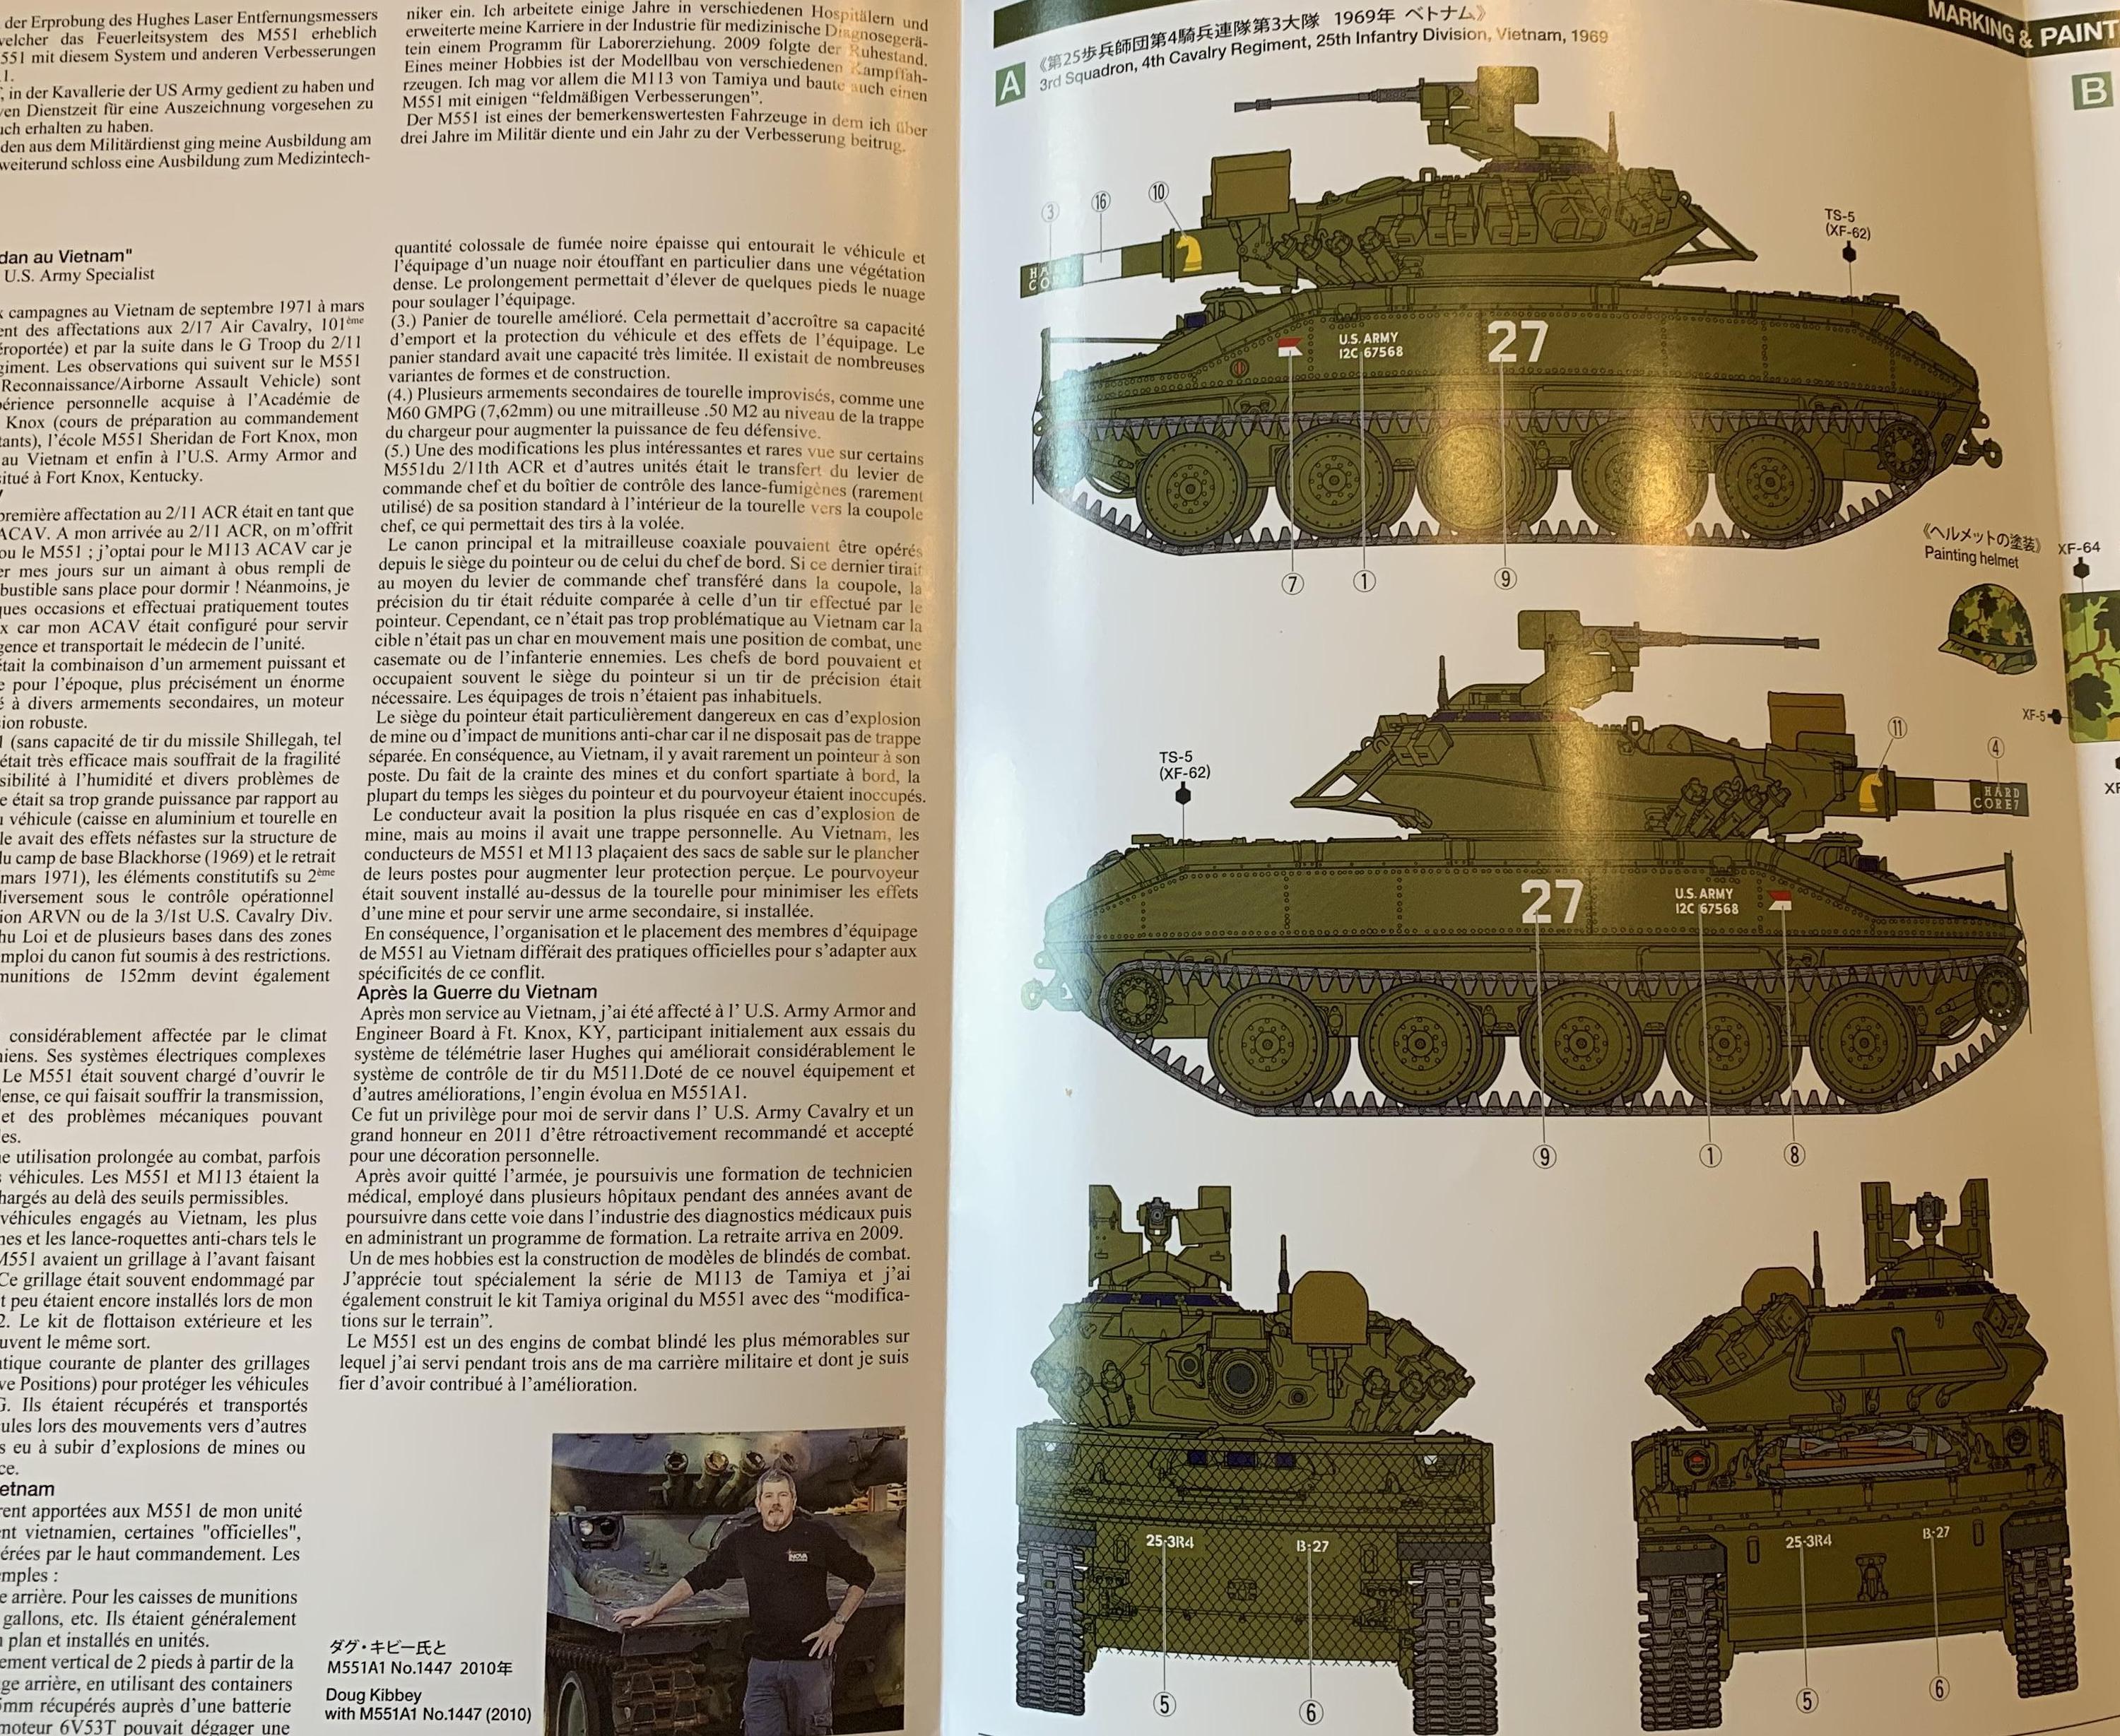
At this point the build per the instructions is pretty much over. It's worth noting that Tamiya included 6 page color reference sheet with paint schemes (both OD) and several actual photos along with text by Vietnam Vet, Doug Kibbey.
They also include the now standard(?) four back black and white reference sheet. Some partial shots of the color pages:
sherb
New York, United States
Joined: August 25, 2004
KitMaker: 752 posts
Armorama: 378 posts
Joined: August 25, 2004
KitMaker: 752 posts
Armorama: 378 posts
Posted: Monday, March 04, 2019 - 05:09 AM UTC
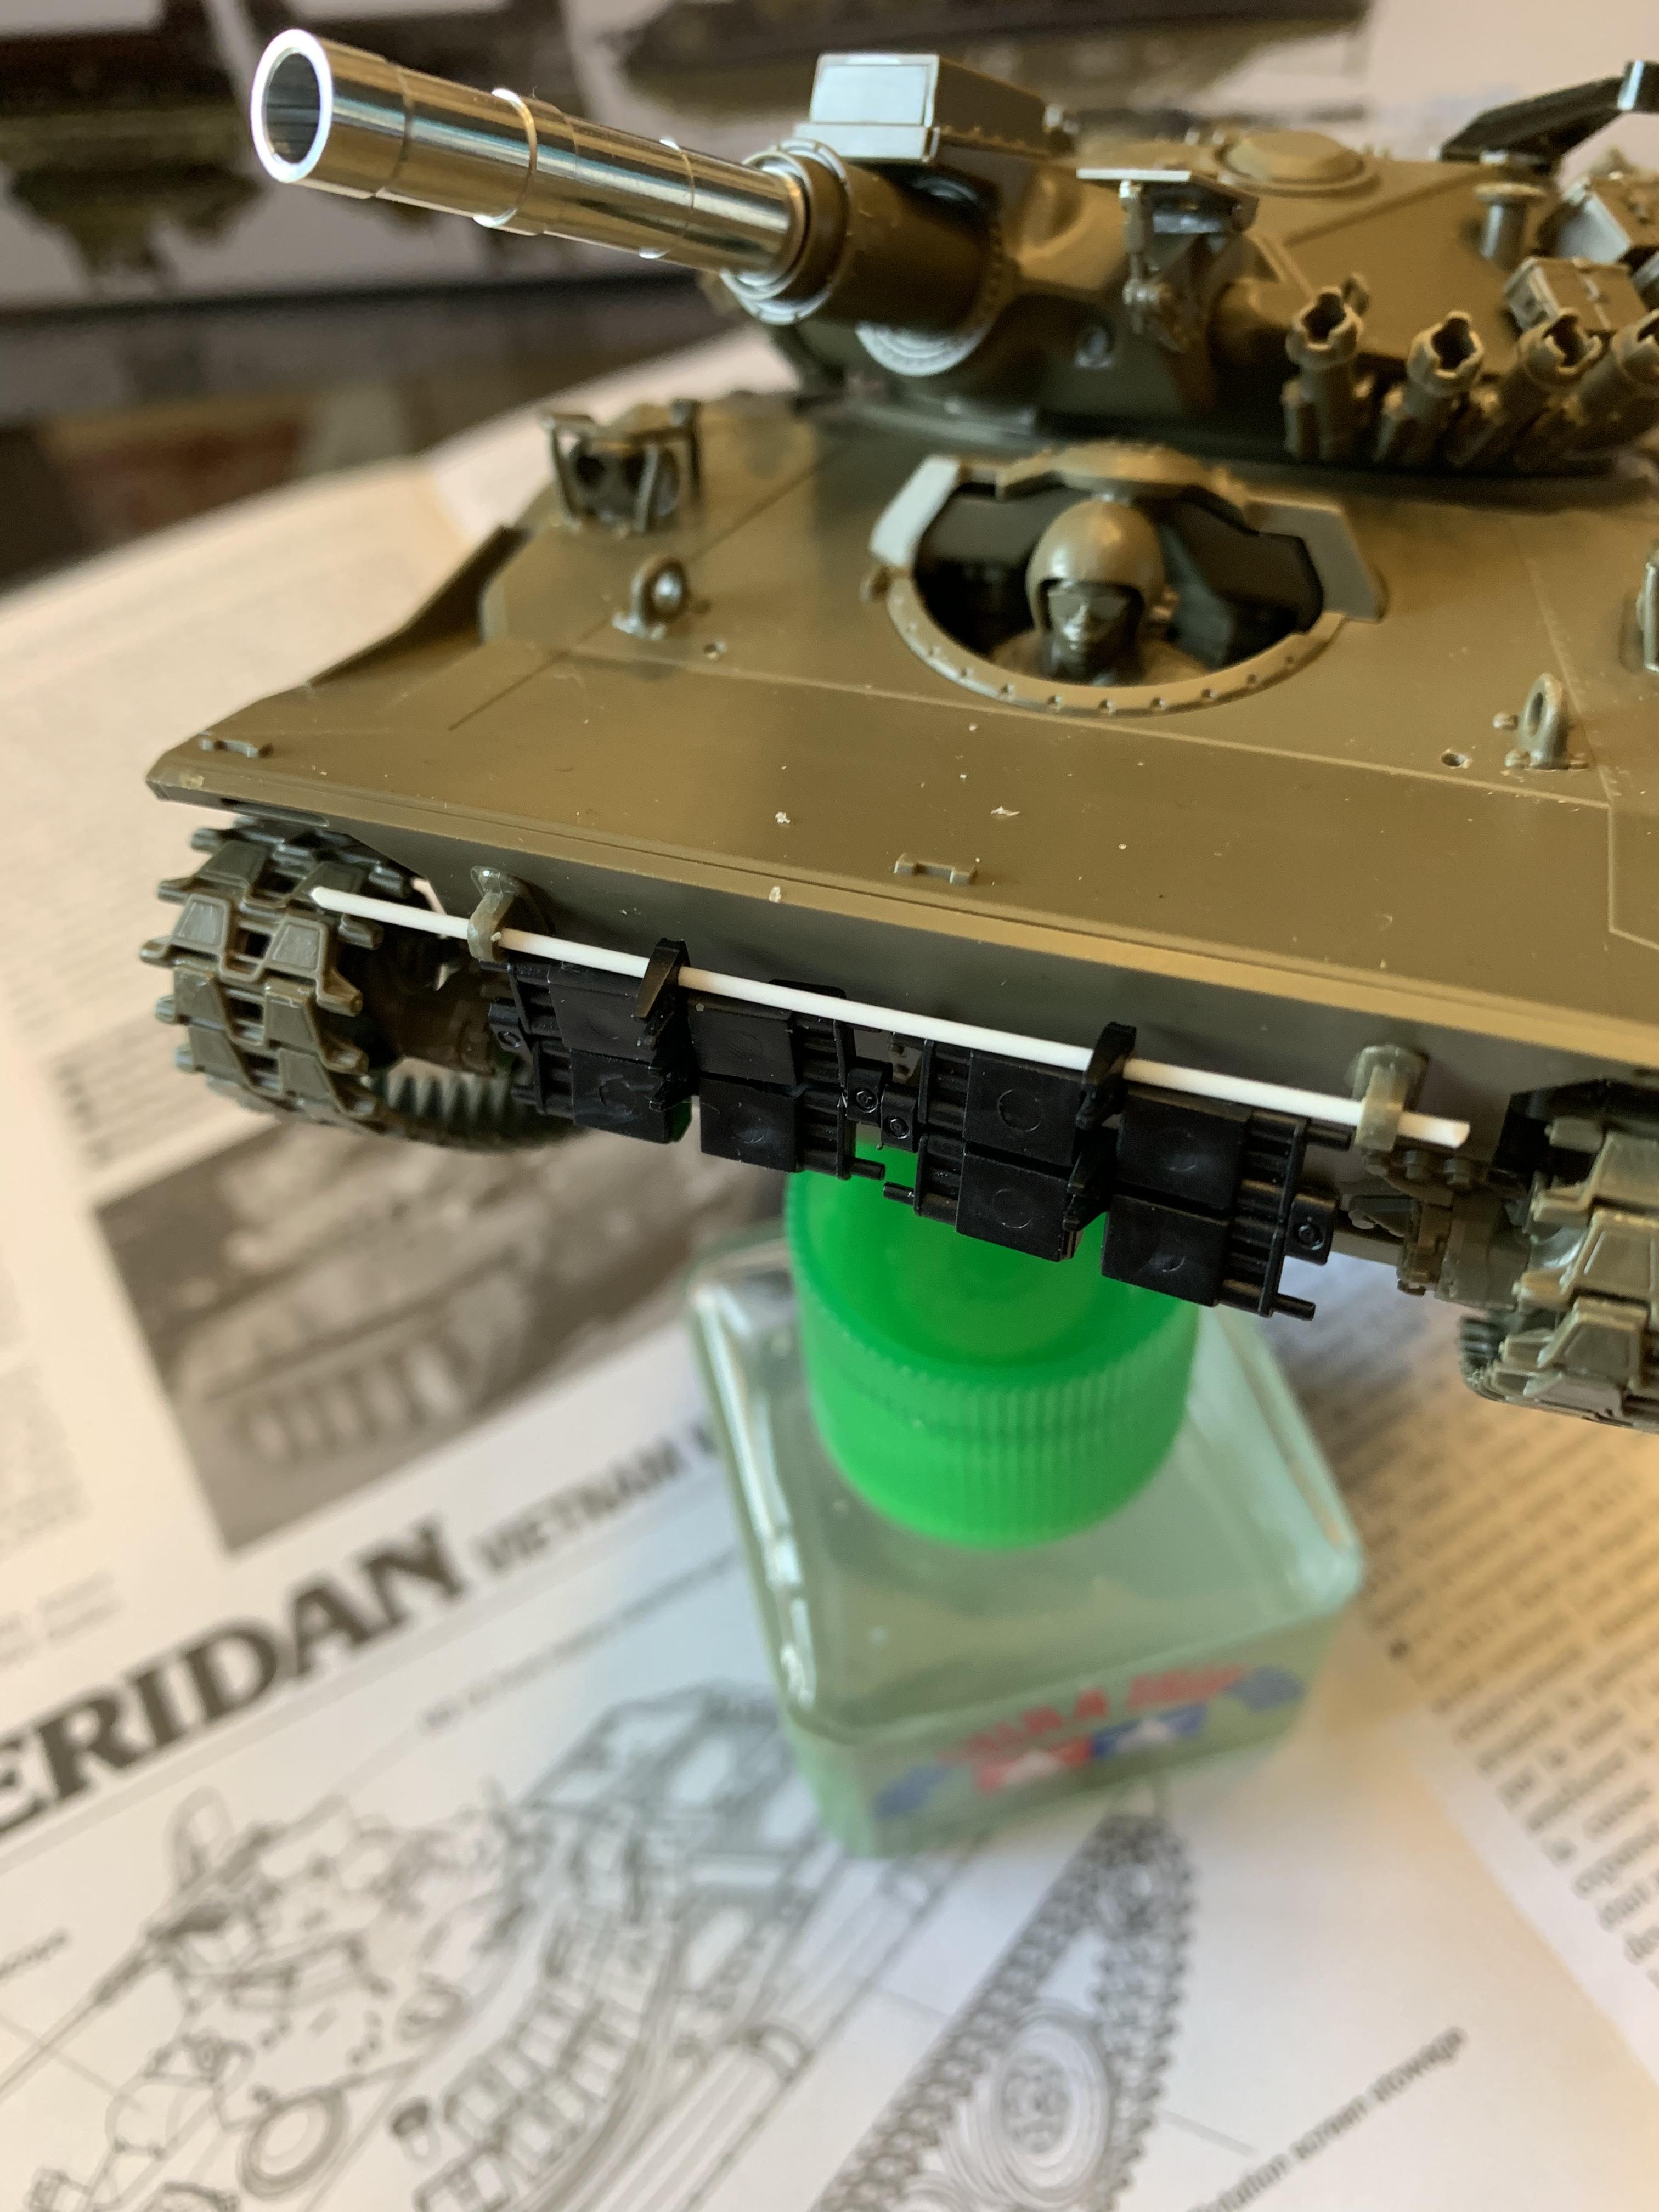
My Sheridan is going to be a composite of two or three actual vehicles from A Troop, 3/4 Cav.
An interesting modification I found using four M48 tracks:
They're not glued in place yet and the "pipe" will be trimmed back.
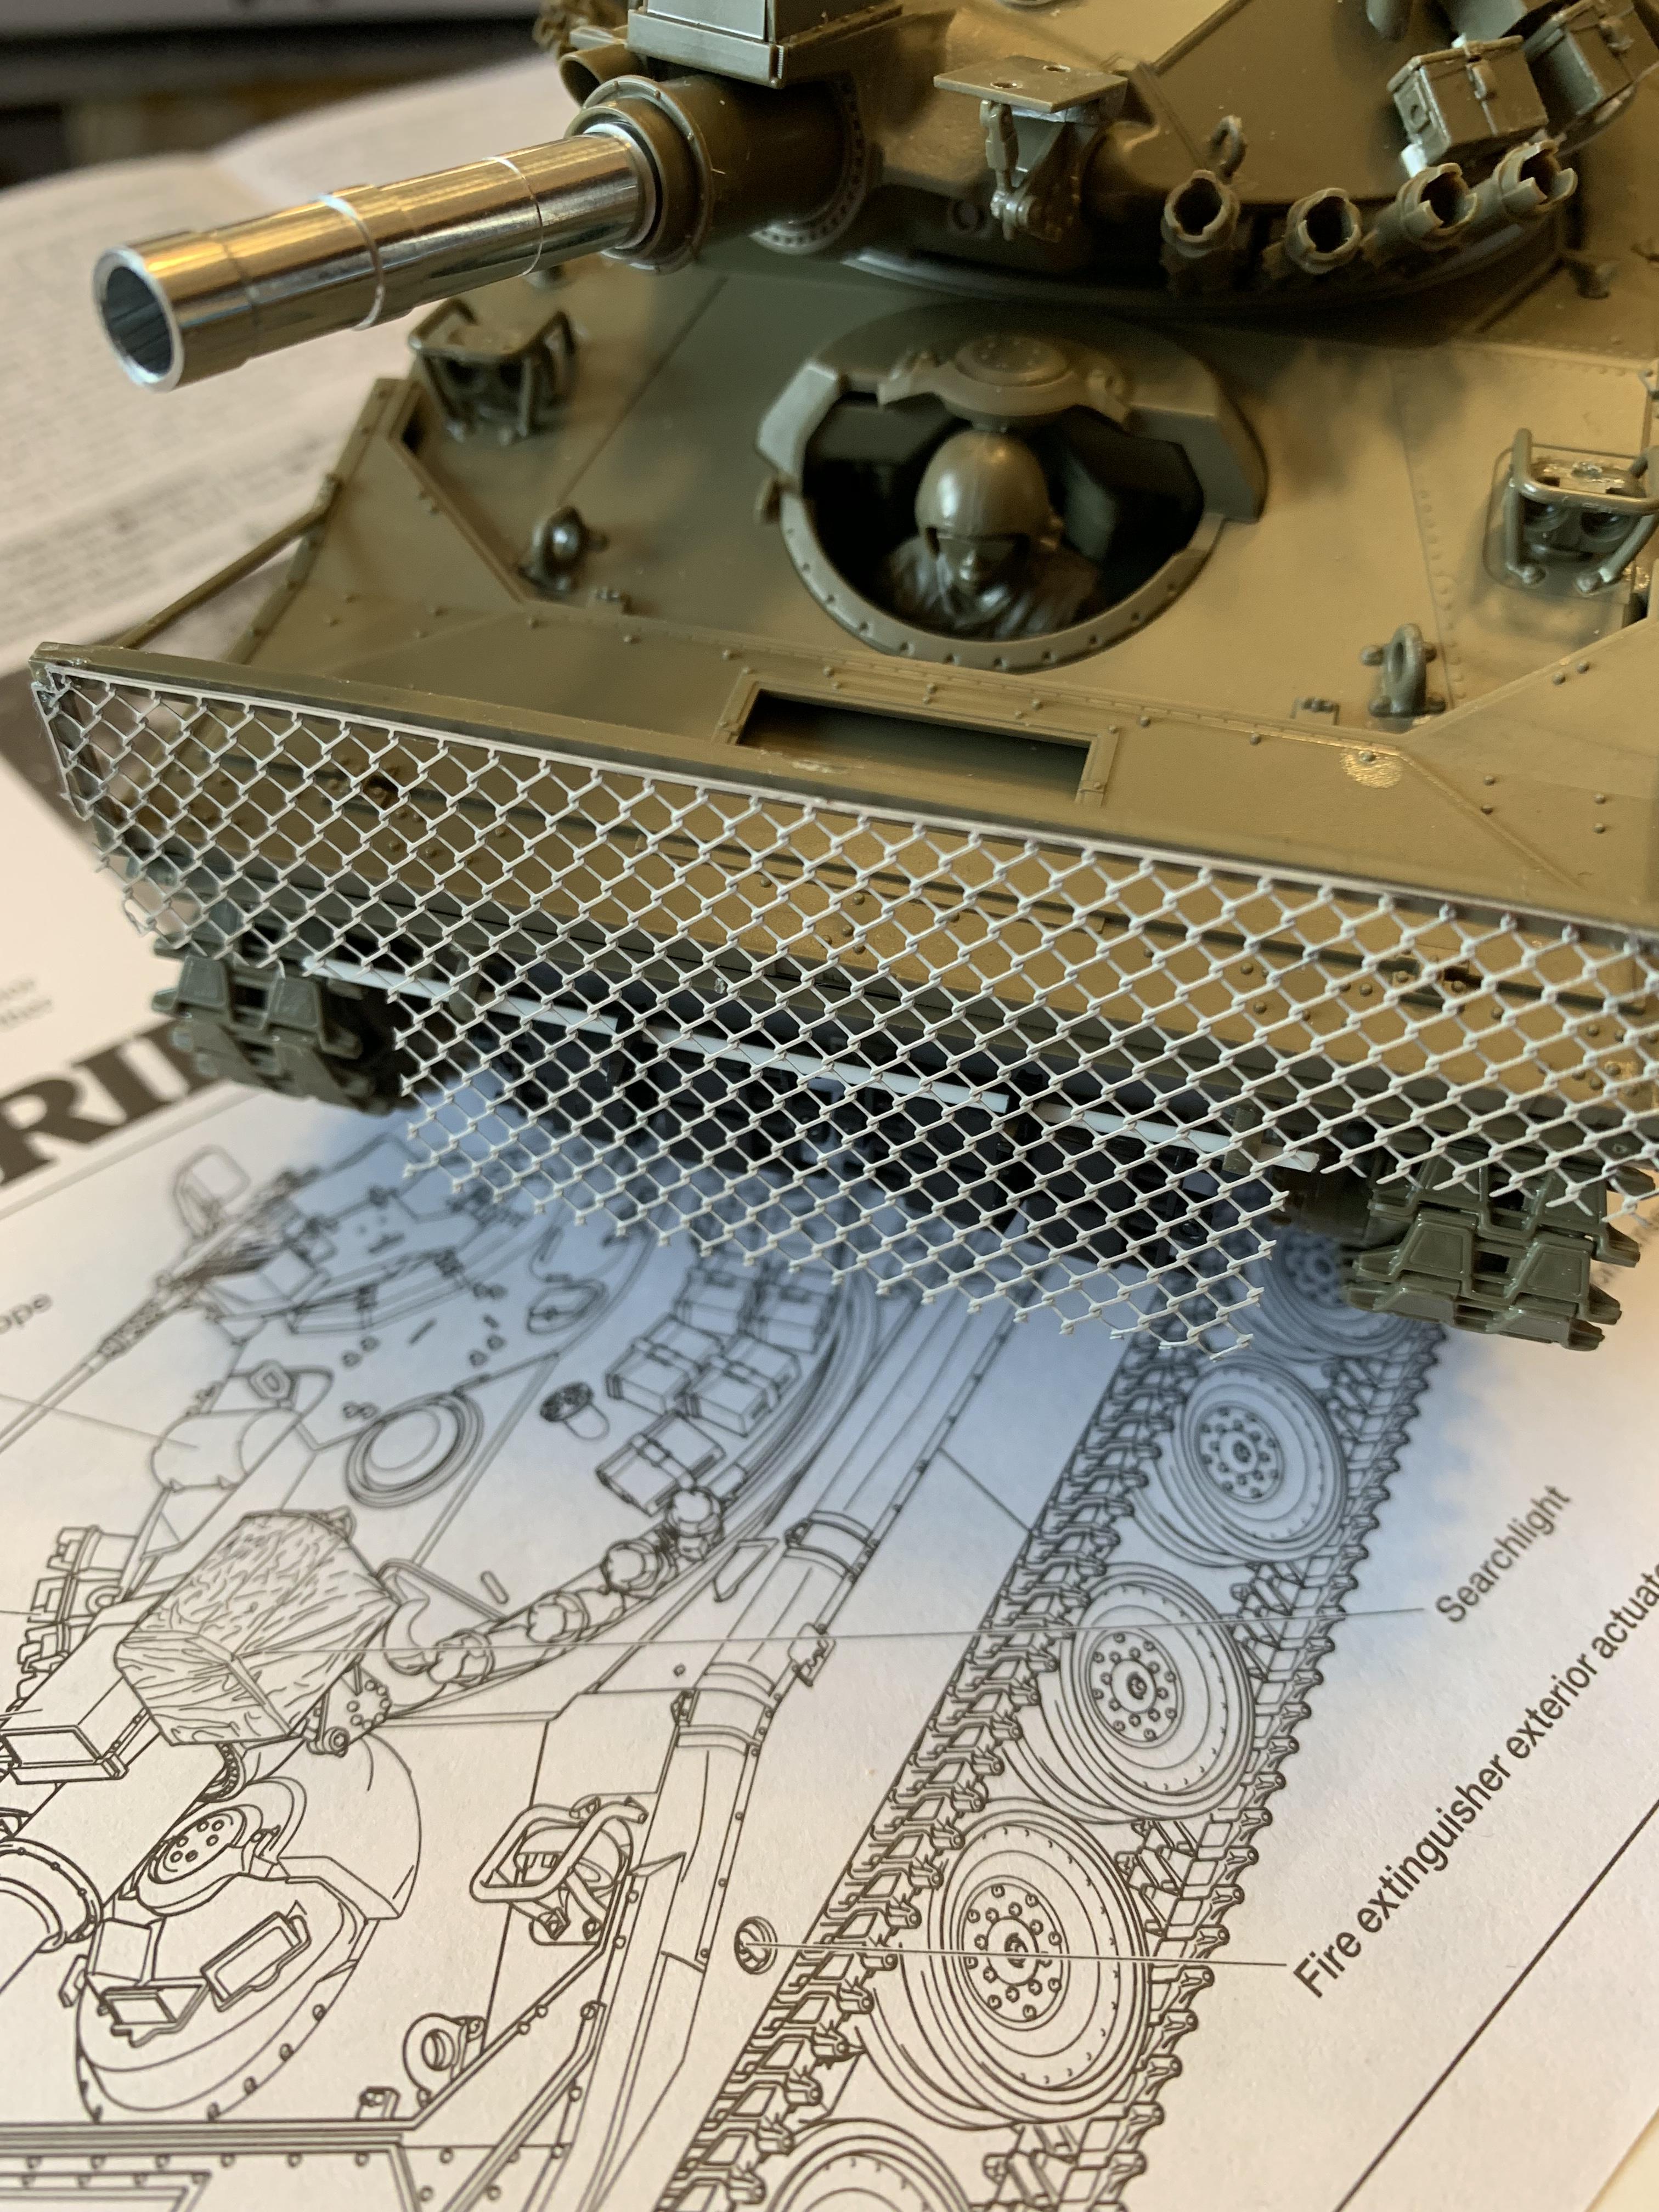
Reference to Actual Vehicle
With the screen and surfboard temporarily in place.
Note the 3D texture to the cyclone fence.
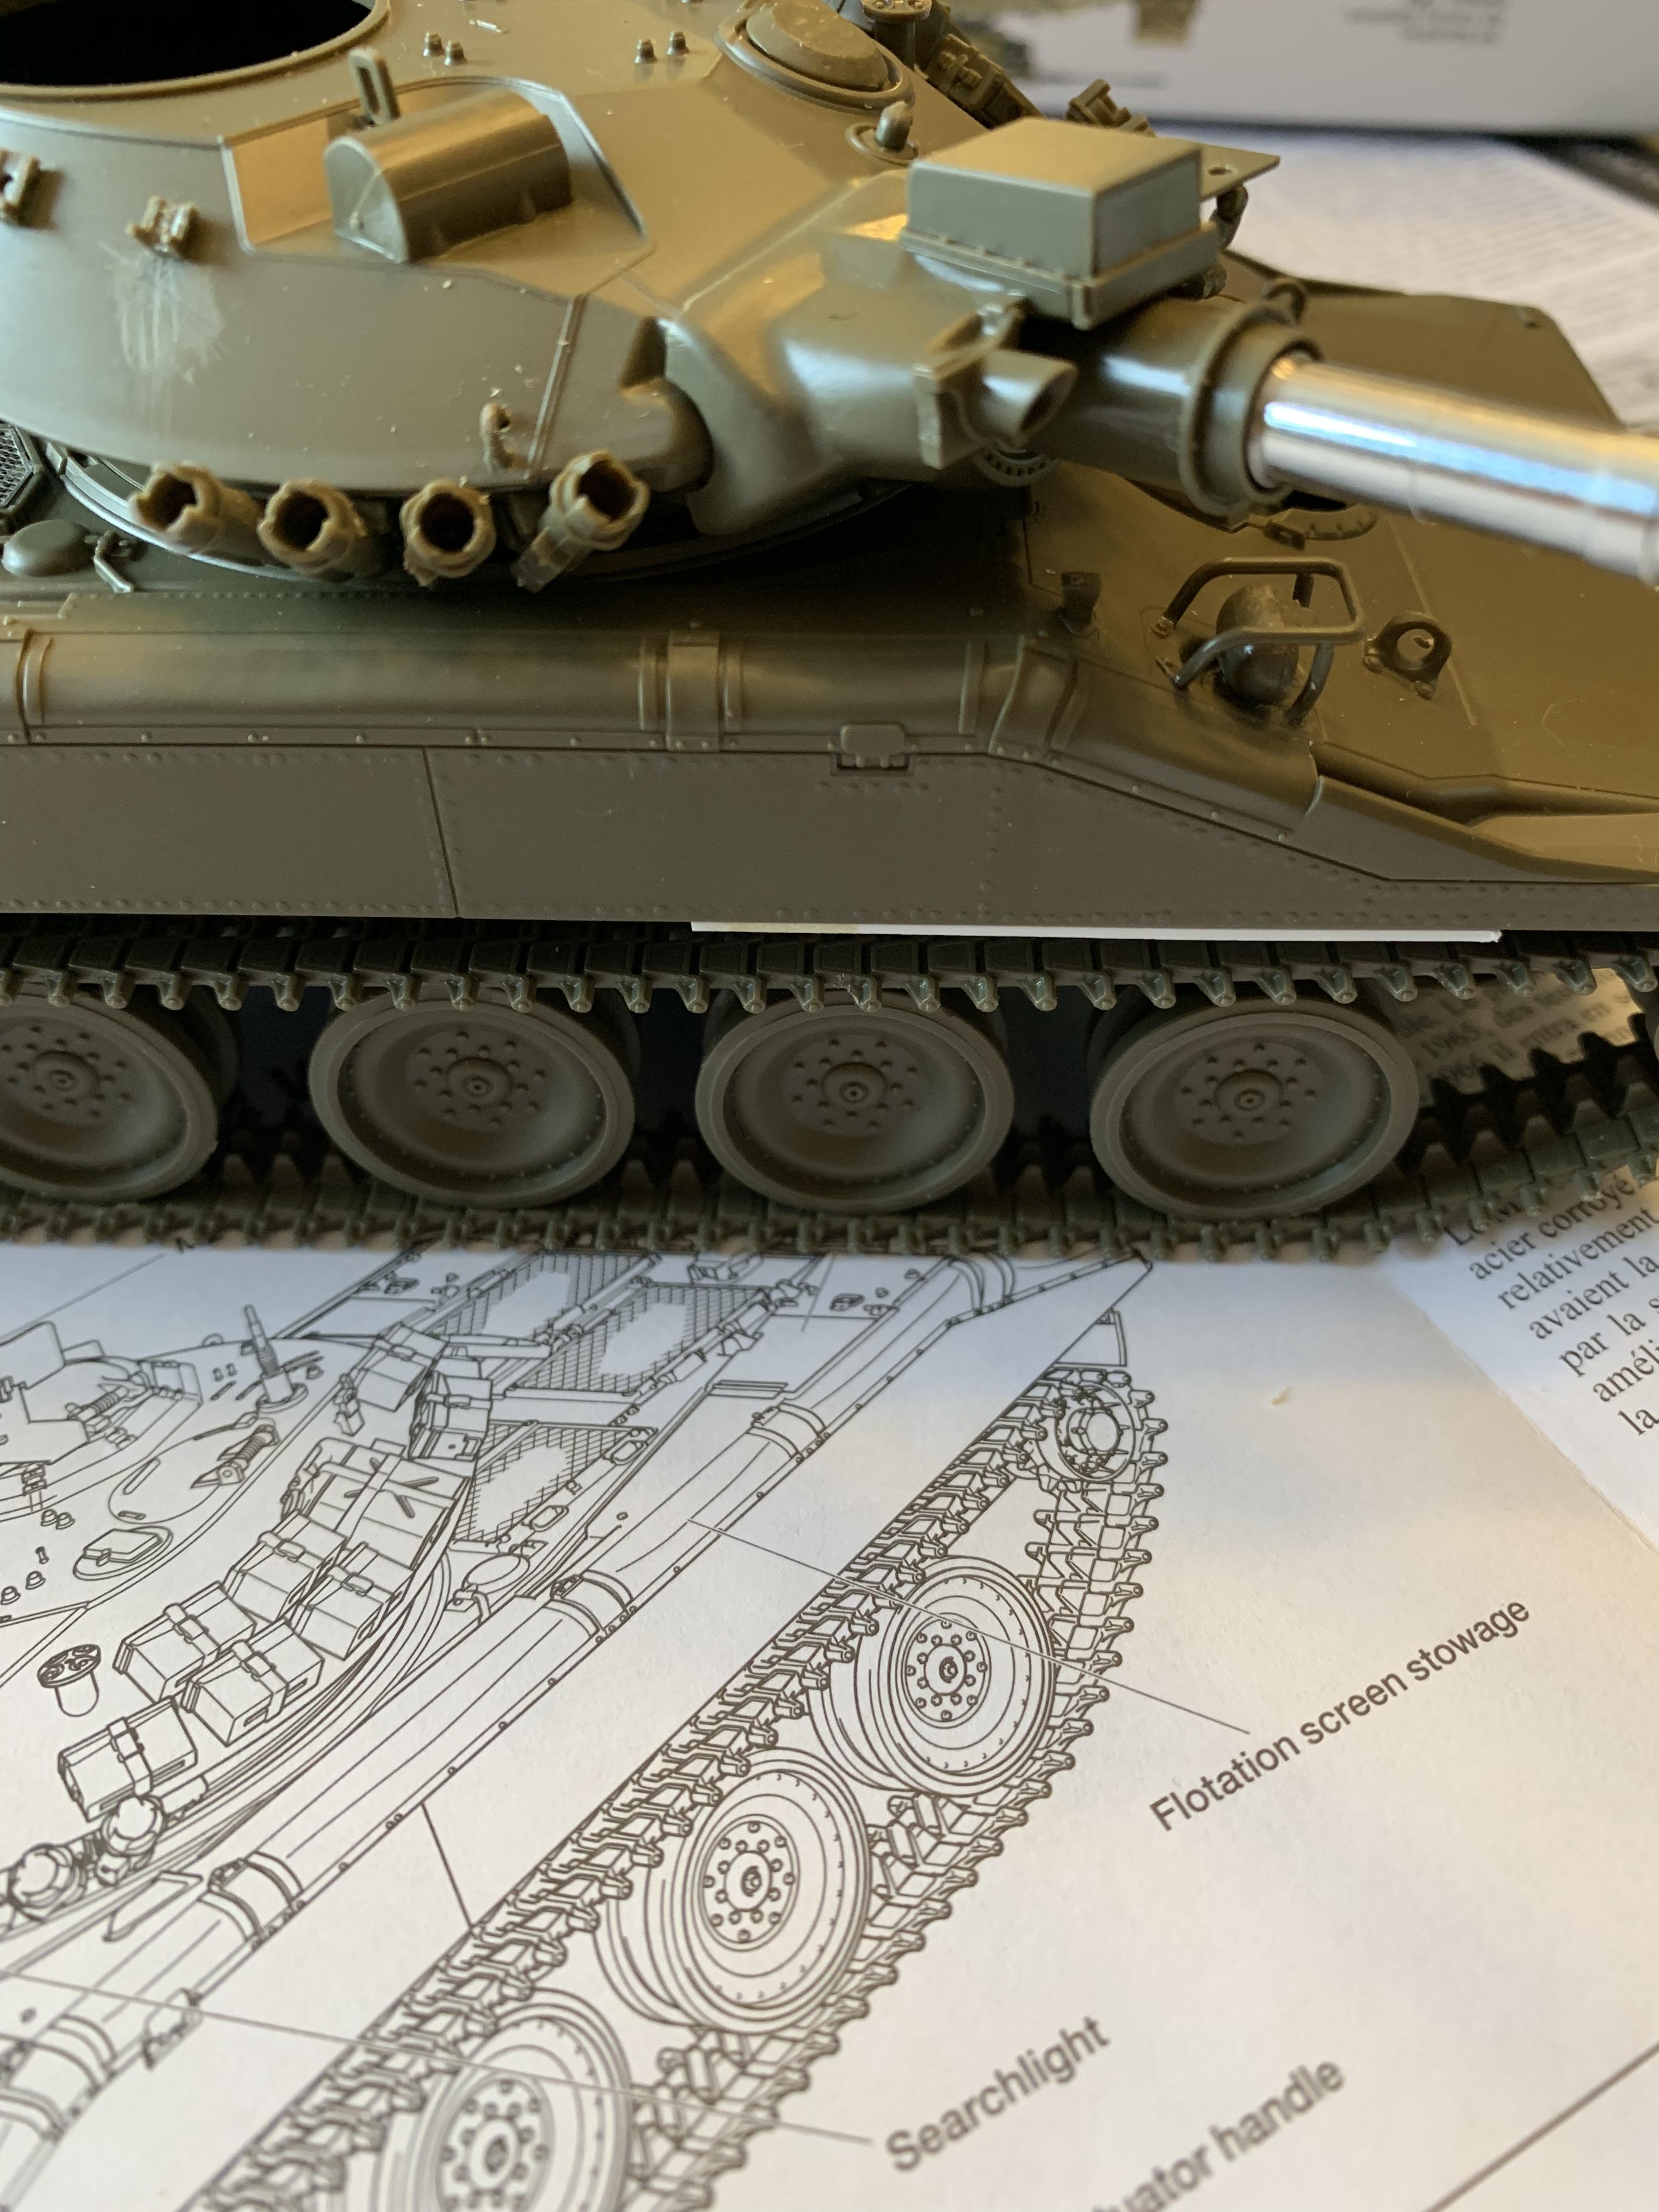
Several Sheridan photos showed some sponson armor(?).
In addition to the turret stowage baskets, another interesting distinction between the 3/4 Cav and 11th Cav Sheridans is the field modified ammo rack. It's not a hard an fast rule but based on photo references, the 3/4 Cav racks appear to be double rows of .50 cal cans, parallel to the ground. The 11th Cav racks were usually parallel to the upper rear and contained the larger 40mm ammo cans, C-ration boxes and water cans.
A much smaller version of this 11th Cav Sheridan is in the Tamiya Color reference sheet. Lots of interesting things to take note of such at the powder canister exhaust extension, also done by the 3/4 Cav. 11th Cav Rack
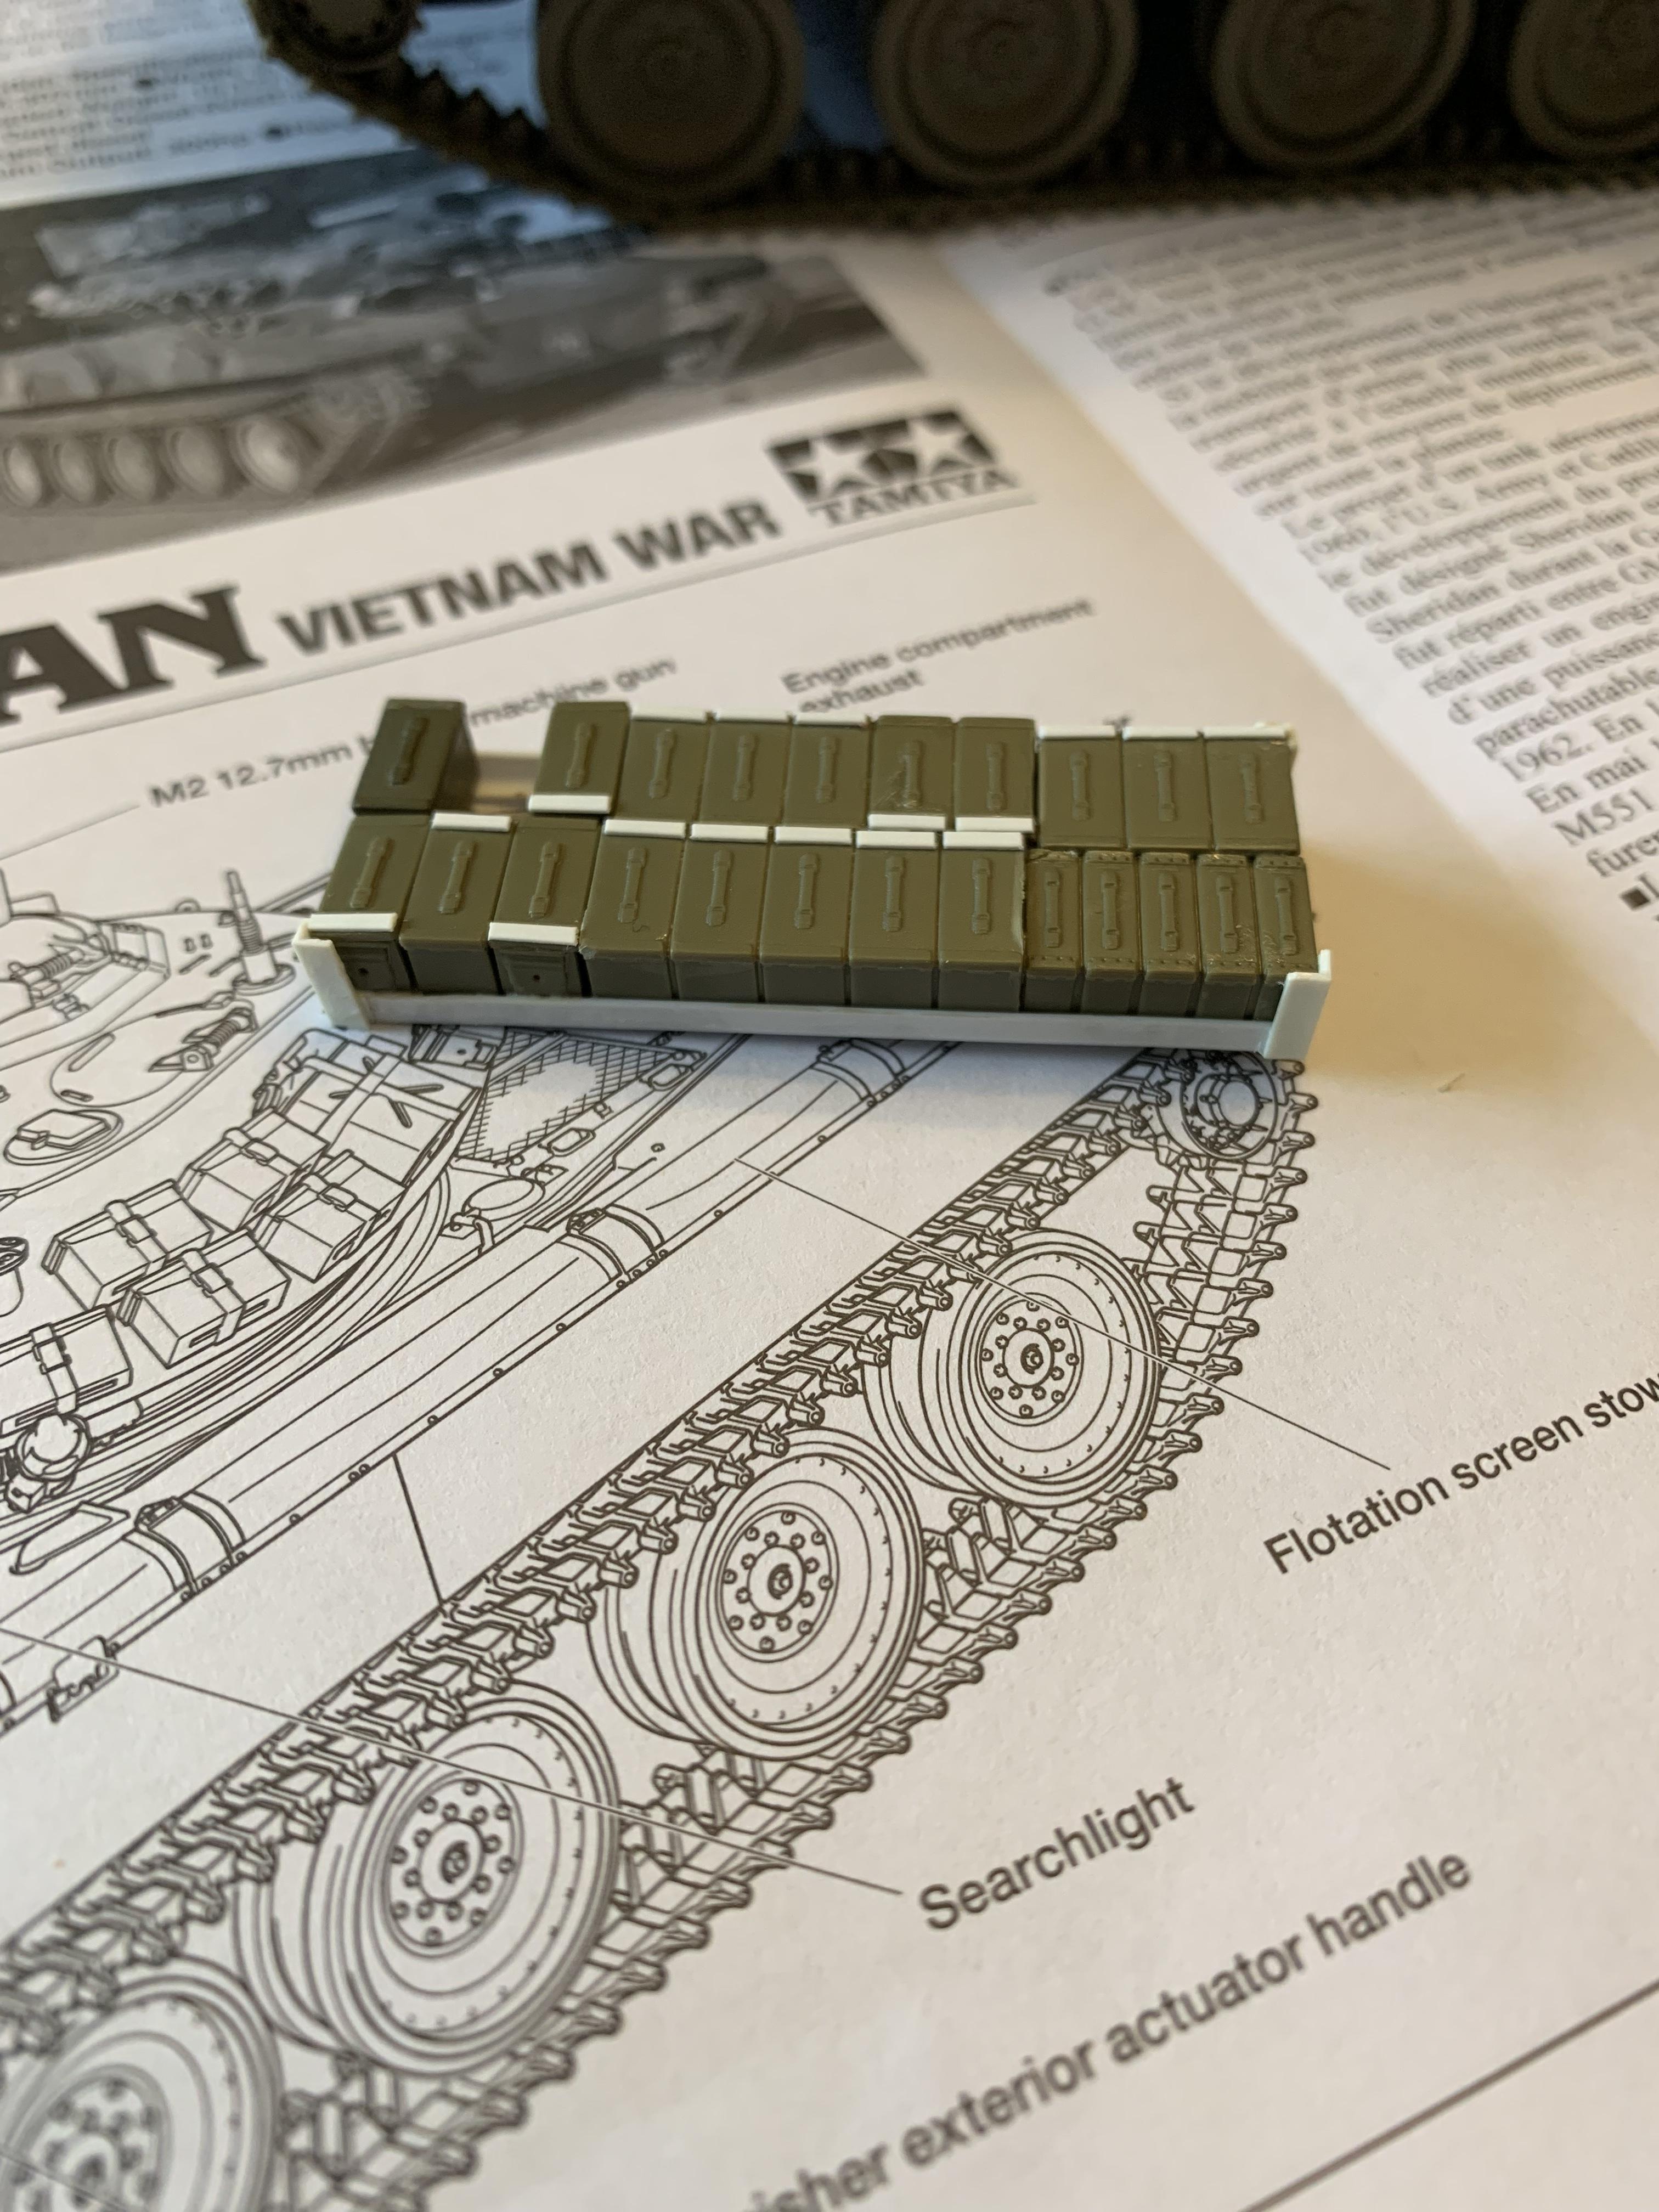
Anyway, here is my ammo rack using AFV Club ammo cans.
Frenchy
Rhone, France
Joined: December 02, 2002
KitMaker: 12,719 posts
Armorama: 12,507 posts
Joined: December 02, 2002
KitMaker: 12,719 posts
Armorama: 12,507 posts
Posted: Monday, March 04, 2019 - 08:37 AM UTC
Quoted Text
Several Sheridan photos showed some sponson armor(?).
The sponson armor plates are parts of the Mine Protective Kit (along with the floor protective plate). You can see what they look like here (page 3-128)
H.P.
cameraflage
United States
Joined: April 13, 2012
KitMaker: 5 posts
Armorama: 5 posts
Joined: April 13, 2012
KitMaker: 5 posts
Armorama: 5 posts
Posted: Monday, March 04, 2019 - 09:07 AM UTC
Lurker here. I just finished this kit, and I agree, it's much better than the old Academy offering and the even older Tamiya kit from the '70s. I thought the tracks were very well done, and the figures were outstanding.
The Sheridan was special to me because it was the first actual tank I got to climb around on as a kid. The local Ohio National Guard armory in Bainbridge had a squadron from the 107th Armored Cavalry, and would bring a few vehicles to the county fair every year.
If I get around to it, I'll post a few photos of mine...I did it in the MASSTER camouflage pattern from the mid-70s (I did the best I could, seeing as I could only find a few images of a Sheridan in that pattern.)
Again, excellent write up.
M4A1Sherman
New York, United States
Joined: May 02, 2013
KitMaker: 4,403 posts
Armorama: 4,078 posts
Joined: May 02, 2013
KitMaker: 4,403 posts
Armorama: 4,078 posts
Posted: Monday, March 04, 2019 - 10:13 PM UTC
Quoted Text
Lurker here. I just finished this kit, and I agree, it's much better than the old Academy offering and the even older Tamiya kit from the '70s. I thought the tracks were very well done, and the figures were outstanding.
The Sheridan was special to me because it was the first actual tank I got to climb around on as a kid. The local Ohio National Guard armory in Bainbridge had a squadron from the 107th Armored Cavalry, and would bring a few vehicles to the county fair every year.
If I get around to it, I'll post a few photos of mine...I did it in the MASSTER camouflage pattern from the mid-70s (I did the best I could, seeing as I could only find a few images of a Sheridan in that pattern.)
Again, excellent write up.
Hi, People!
Just from reading what you guys have all been saying about the NEW TAMIYA M551 as compared to the OLD TAMIYA kit and the ACADEMY kit, confirms what I said earlier about the benefits of "slide-molding" that are being passed on to us, the builders. "Apples to apples" though, aren't the RYE FIELD M551s supposed to be -A1s, as opposed to the TAMIYA kits being 'Nam-vintage "slicks"???
Kevlar06
Washington, United States
Joined: March 15, 2009
KitMaker: 3,670 posts
Armorama: 2,052 posts
Joined: March 15, 2009
KitMaker: 3,670 posts
Armorama: 2,052 posts
Posted: Tuesday, March 05, 2019 - 05:44 AM UTC
Quoted Text
Quoted TextLurker here. I just finished this kit, and I agree, it's much better than the old Academy offering and the even older Tamiya kit from the '70s. I thought the tracks were very well done, and the figures were outstanding.
The Sheridan was special to me because it was the first actual tank I got to climb around on as a kid. The local Ohio National Guard armory in Bainbridge had a squadron from the 107th Armored Cavalry, and would bring a few vehicles to the county fair every year.
If I get around to it, I'll post a few photos of mine...I did it in the MASSTER camouflage pattern from the mid-70s (I did the best I could, seeing as I could only find a few images of a Sheridan in that pattern.)
Again, excellent write up.
Hi, People!
Just from reading what you guys have all been saying about the NEW TAMIYA M551 as compared to the OLD TAMIYA kit and the ACADEMY kit, confirms what I said earlier about the benefits of "slide-molding" that are being passed on to us, the builders. "Apples to apples" though, aren't the RYE FIELD M551s supposed to be -A1s, as opposed to the TAMIYA kits being 'Nam-vintage "slicks"???
Dennis, that's correct-- the RFM kit is an A1/A1TTS kit. But several folks in different forums have been considering converting the Tamiya kit into the later versions. Which wouldn't be too hard (with either creative scratchbuilding or the help of the aftermarket). The CAD shots of the RFM kit also show several options Tamiya doesn't offer (if CAD shots can be trusted). There are also many more folks who served on A1/A1TTS versions than there were on the slick, and the variety of camouflage and paint schemes is much wider than the options for a slick (OD, MASSTER, MERDC, Desert, 82nd ABN, etc). So I think while the Tamiya offering is great, the RFM offers a lot more options. I haven't seen any manufacturer offering a true slick though-- which would have the early bore evacuation system-- everyone seems to be offering the modified barrel CBSS, or the new CBSS guns. Many of the old M551s with the older bore evacuation system served in Vietnam. The current offerings with the ring around the barrel were mods of the old system, and the A1/A1TTS should be straight barrels.
VR, Russ
TankSGT
New Jersey, United States
Joined: July 25, 2006
KitMaker: 1,139 posts
Armorama: 946 posts
Joined: July 25, 2006
KitMaker: 1,139 posts
Armorama: 946 posts
Posted: Thursday, March 07, 2019 - 08:10 AM UTC
Well this thread persuaded me to buy the kit. It is on the way from Squadron plus a lot of paint. I plan to do a MASTR cammo. As far as gun barrels go when I was in the 11th ACR in 77 my platoon of 6 M551A1s had all 3 barrels. The Army did not dump a gun tube if it still had useful life. The A1s had the TC laser so the only thing you have to add to make a USAREUR A1 is the laser on the TC hatch and the power supply boxes in the rear gun shield. No anti mine armor. My track (it was never considered a tank by the Army)had 3 Jerry cans on the left turret side 10 weight oil, 30 weight oil and water. We never carried ammo cans on the outside.
I do not have a current picture posting site so sorry no pictures.
Tom
I do not have a current picture posting site so sorry no pictures.
Tom
trickymissfit
Joined: October 03, 2007
KitMaker: 1,388 posts
Armorama: 1,357 posts
KitMaker: 1,388 posts
Armorama: 1,357 posts
Posted: Thursday, March 07, 2019 - 09:14 AM UTC
Guess I'm he oddman out! I like most of their later armor kits, and this build certainly catches my eye. Yet I honestly think the new guys make a better kit. Still nothing wrong with Tamiya armor.
I will build one or maybe two of the Tamiya Sheridan's, but will also do a couple of the RFM kits ( could be as many as four). That leaf catcher on the front seriously limits usage, and from what I hear it wasn't thought well of. Some Sheridans had the add on armor kit, but I most in I-CORP were too far down the food chain to get it. There were two and maybe three different styles of shields in use. Plus some early delivery Sherdans didn't even have the acav style fifty setup.
One thing I noticed about the Tamiya kit was that the use the later styled extruded metal shielding for the engine grates!! That's a big plus. I have road on the back too many times, but can't remember what was used. Yet the photo etch is appropriate for at least a Europe issued track.
Glt
bmowery5308
North Carolina, United States
Joined: July 24, 2014
KitMaker: 16 posts
Armorama: 16 posts
Joined: July 24, 2014
KitMaker: 16 posts
Armorama: 16 posts
Posted: Thursday, March 07, 2019 - 09:49 AM UTC
Quoted Text
Quoted TextQuoted TextLurker here. I just finished this kit, and I agree, it's much better than the old Academy offering and the even older Tamiya kit from the '70s. I thought the tracks were very well done, and the figures were outstanding.
The Sheridan was special to me because it was the first actual tank I got to climb around on as a kid. The local Ohio National Guard armory in Bainbridge had a squadron from the 107th Armored Cavalry, and would bring a few vehicles to the county fair every year.
If I get around to it, I'll post a few photos of mine...I did it in the MASSTER camouflage pattern from the mid-70s (I did the best I could, seeing as I could only find a few images of a Sheridan in that pattern.)
Again, excellent write up.
Hi, People!
Just from reading what you guys have all been saying about the NEW TAMIYA M551 as compared to the OLD TAMIYA kit and the ACADEMY kit, confirms what I said earlier about the benefits of "slide-molding" that are being passed on to us, the builders. "Apples to apples" though, aren't the RYE FIELD M551s supposed to be -A1s, as opposed to the TAMIYA kits being 'Nam-vintage "slicks"???
Dennis, that's correct-- the RFM kit is an A1/A1TTS kit. But several folks in different forums have been considering converting the Tamiya kit into the later versions. Which wouldn't be too hard (with either creative scratchbuilding or the help of the aftermarket). The CAD shots of the RFM kit also show several options Tamiya doesn't offer (if CAD shots can be trusted). There are also many more folks who served on A1/A1TTS versions than there were on the slick, and the variety of camouflage and paint schemes is much wider than the options for a slick (OD, MASSTER, MERDC, Desert, 82nd ABN, etc). So I think while the Tamiya offering is great, the RFM offers a lot more options. I haven't seen any manufacturer offering a true slick though-- which would have the early bore evacuation system-- everyone seems to be offering the modified barrel CBSS, or the new CBSS guns. Many of the old M551s with the older bore evacuation system served in Vietnam. The current offerings with the ring around the barrel were mods of the old system, and the A1/A1TTS should be straight barrels.
VR, Russ
It's also looking like the Rye Field kit is also going to be the goto kit to make the opfor vismod conversions, as the wading curtains on the upper hull are molded separately.
Kevlar06
Washington, United States
Joined: March 15, 2009
KitMaker: 3,670 posts
Armorama: 2,052 posts
Joined: March 15, 2009
KitMaker: 3,670 posts
Armorama: 2,052 posts
Posted: Thursday, March 07, 2019 - 06:39 PM UTC
Quoted Text
Well this thread persuaded me to buy the kit. It is on the way from Squadron plus a lot of paint. I plan to do a MASTR cammo. As far as gun barrels go when I was in the 11th ACR in 77 my platoon of 6 M551A1s had all 3 barrels. The Army did not dump a gun tube if it still had useful life. The A1s had the TC laser so the only thing you have to add to make a USAREUR A1 is the laser on the TC hatch and the power supply boxes in the rear gun shield. No anti mine armor. My track (it was never considered a tank by the Army)had 3 Jerry cans on the left turret side 10 weight oil, 30 weight oil and water. We never carried ammo cans on the outside.
I do not have a current picture posting site so sorry no pictures.
Tom
Tom, are you sure 1st Squadron had the non-CBSS tubes in 77? I got to H Company, then F Troop in 77, and all we had were CBSS conversion tubes (they had a ring around the tube like the Tamiya kit does) and the new straight tube--as I understand it, most of the old tubes were replaced in rebuild programs. I thought the only place the old tubes were used extensively was in Vietnam, and most of those tracks went through a re-build upgrade program before showing up in Europe, but I suppose some old tracks could have been passed down. The 14th CAV was the 11th Cav predecessor in Europe, but I don't think they had any M551s, but I could be wrong. The 11th came in direct from Vietnam, and I thought they fell in on "new" rebuild equipment when they got to Germany. Maybe they brought some of those old tracks with them, but the only place I saw an active non-CBSS tube was at Knox in 76-- and that was an old track at the MOC. I think the gunners sight on the turret roof was also a different shape from the Tamiya kit, and the IR signal box on the tube was a different shape too. Like you, my platoon also never carried ammo cans on the turret, but like yours, we carried two cans of oil and one of water-- I think that was a Regimental load plan. However, my tracks had the tie down straps, and occasionally two or three ammo cans would be carried filled with "oddiments" (nuts, bolts washers etc., and the extra straps for the ammo can loops). We did have load plans for the .50 and 7.62 ammo cans on the turret, but the only place I ever saw them partially employed was at Graf, or during ARTEPS and training with partial ammo issues when we picked up blank ammo. There was one live fire we did at Wildflecken were we loaded up the turret with almost a full load of .50 cans-- because the Ammo Dump was trying to get rid of WWII and Korean War ammo (about 1/4 were duds and the rest had greatly reduced range-- but that's another story). I think if we'd drawn combat loads, you'd have seen them on the outside of the turret. One other interesting detail often overlooked was the "cartrige cover bags" we used to cover the smoke grenade launchers-- the conventional round had a rubber bag that covered the expendable paper cartridge-- it was peeled off before loading and we used to save those bags to cover the grenade launcher openings-- which were notorious for collecting dirt, debris and small twigs, and were difficult to clean out. I don't see many builds with that detail-- but it was often seen on Sheridans in Europe-- I think they were always loaded in 'Nam, so they didn't worry much about it. One other item often overlooked is a white "half arrow" we painted on the top-side end of the barrel-- as an aid to the TC when laying the gun for the gunner-- it was about 18" long. All our tracks were named, beginning with the first letter of the Troop on the both sides of the tube. My track was "Formld'hyde " ( that's the way we liked to spell it). My Platoon Sergeants track was Foxy II. Some other names I remember were "Freaky" "Fearless" and oddly-- Fahrtsack (a play on what we called a sleeping bag and German for "drive"). I've forgotten the last one now. As crews rotated, the names would often change. you can't say we didn't have a sense of humor!
VR, Russ