Tamiya Vietnam M551 Sheridan build/review
New York, United States
Joined: August 25, 2004
KitMaker: 752 posts
Armorama: 378 posts
Posted: Friday, March 01, 2019 - 04:04 AM UTC
Got some new plastic....
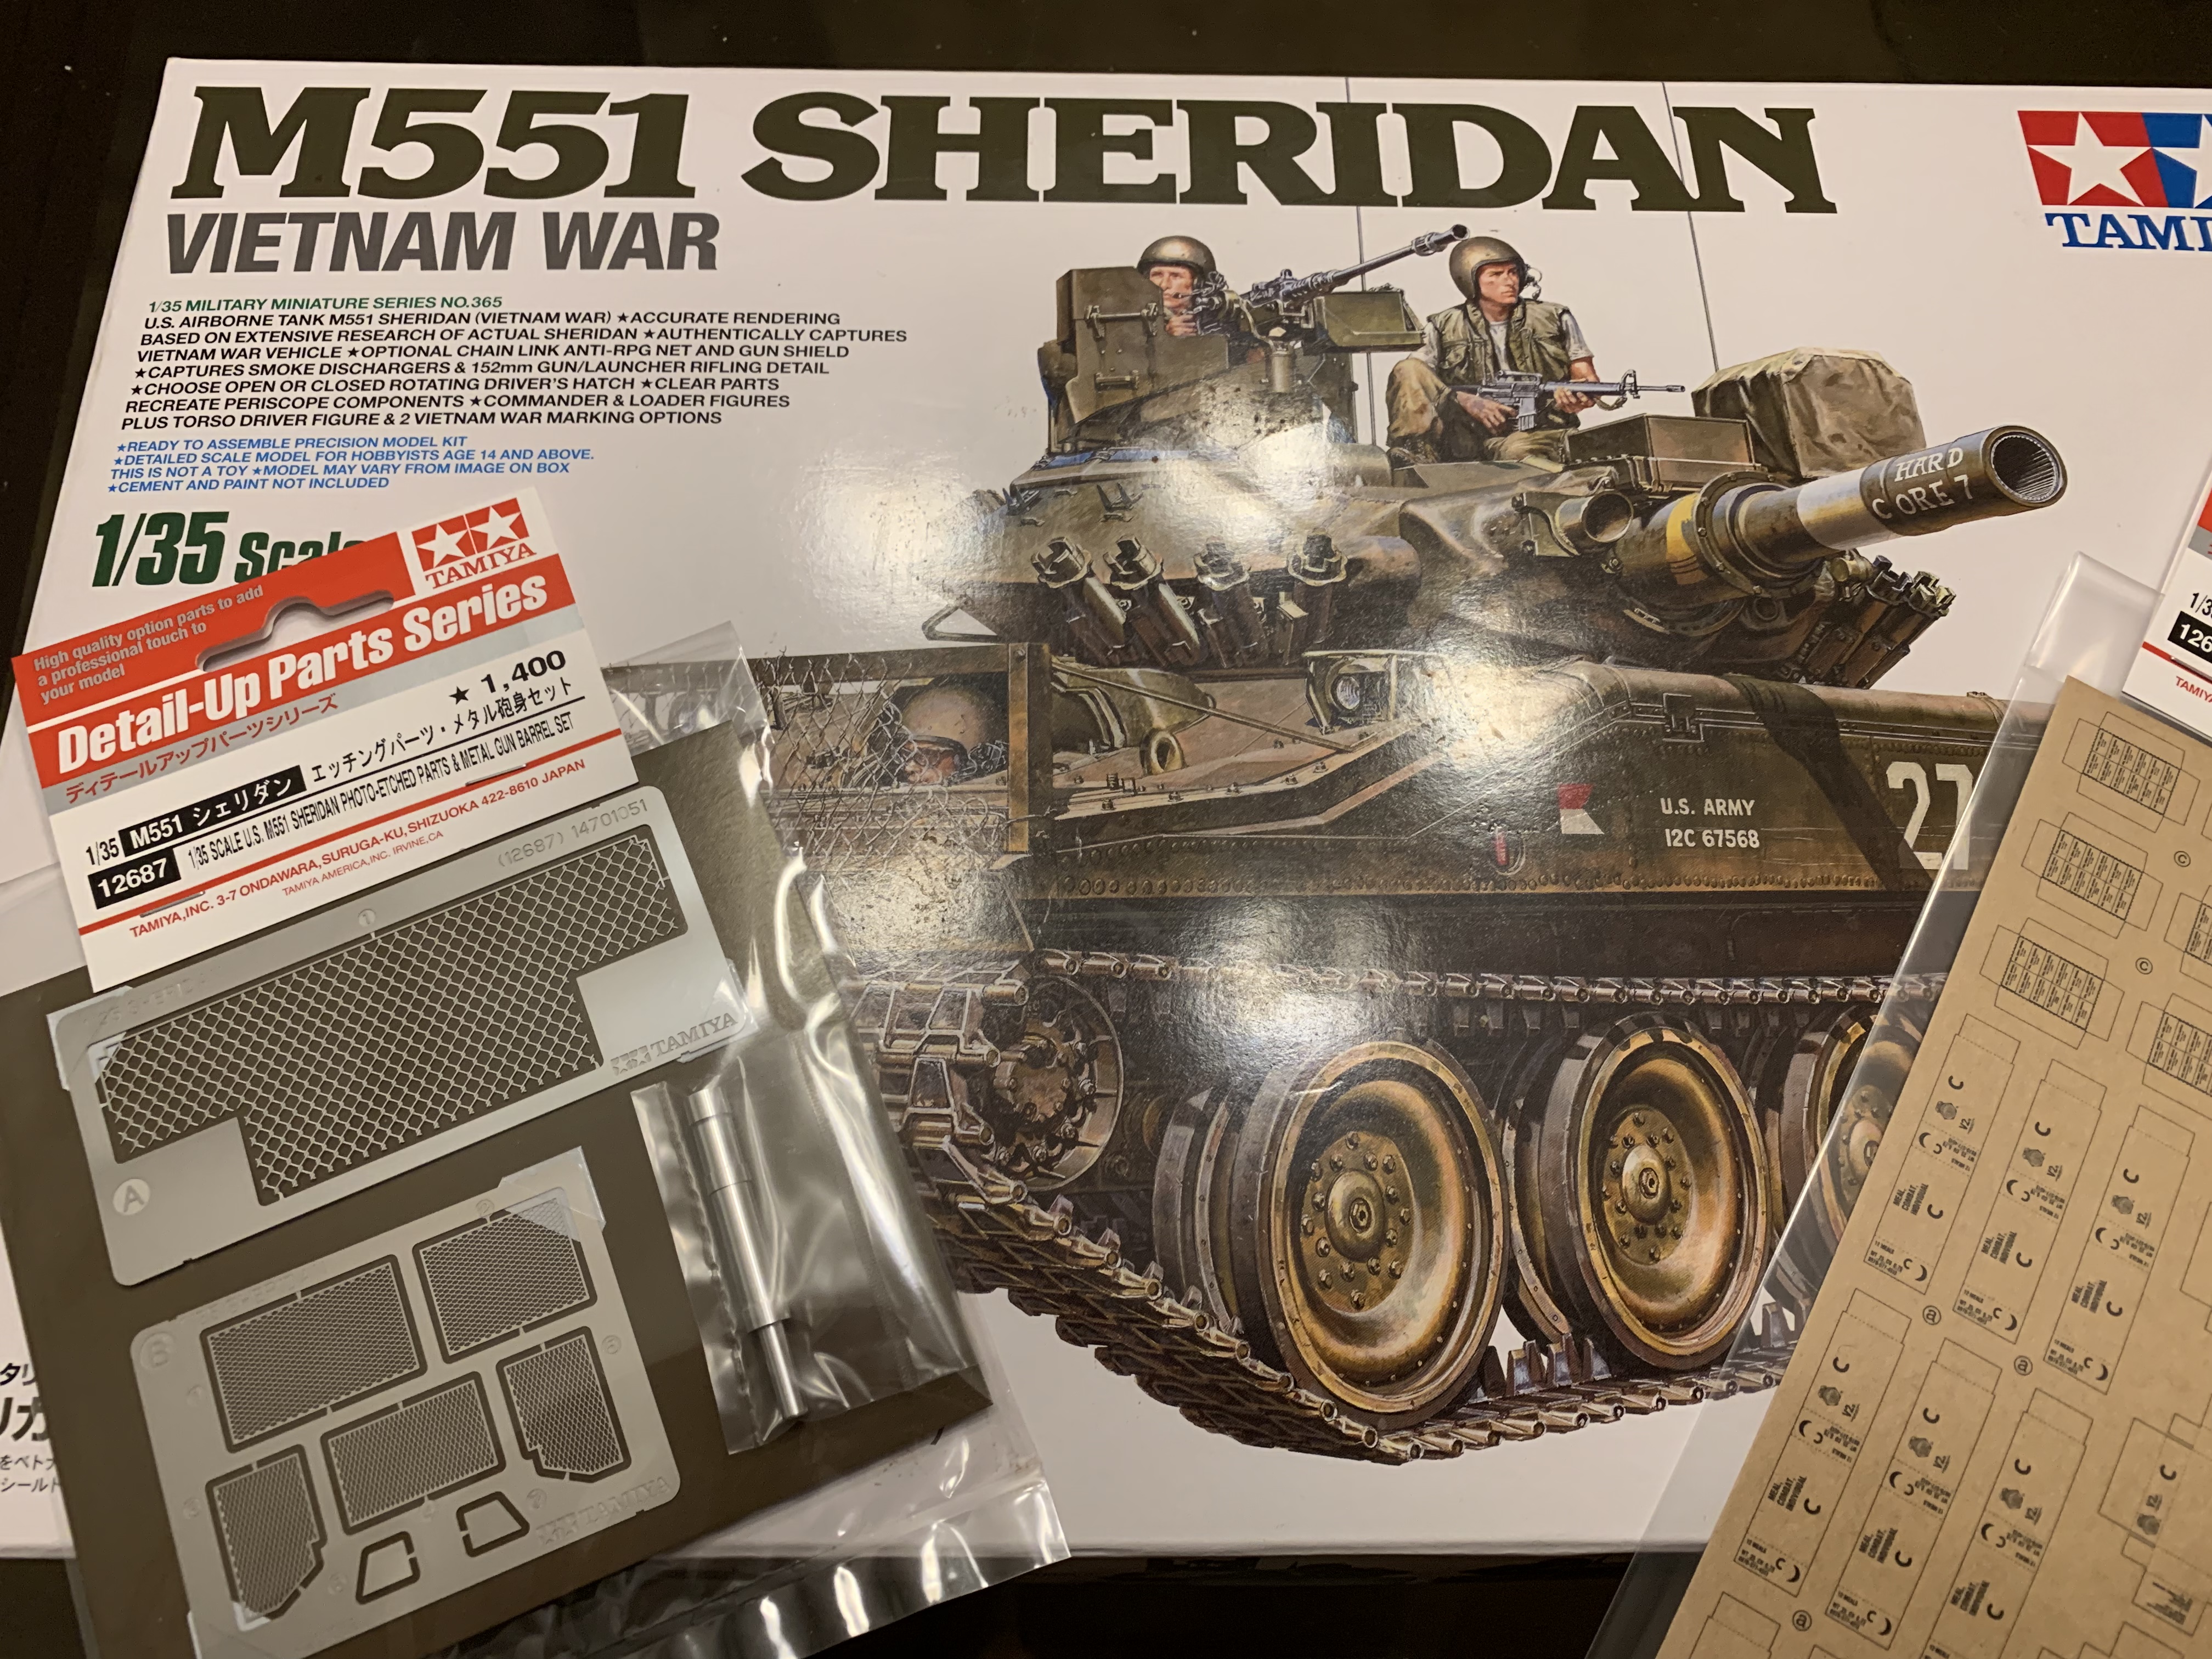
Iíve been taking some photos as the build has progressed but Iím just now getting around to posting.
New York, United States
Joined: August 25, 2004
KitMaker: 752 posts
Armorama: 378 posts
Posted: Friday, March 01, 2019 - 04:18 AM UTC
Steps 1 and 2
Assembling the hull and addind the tie downs.
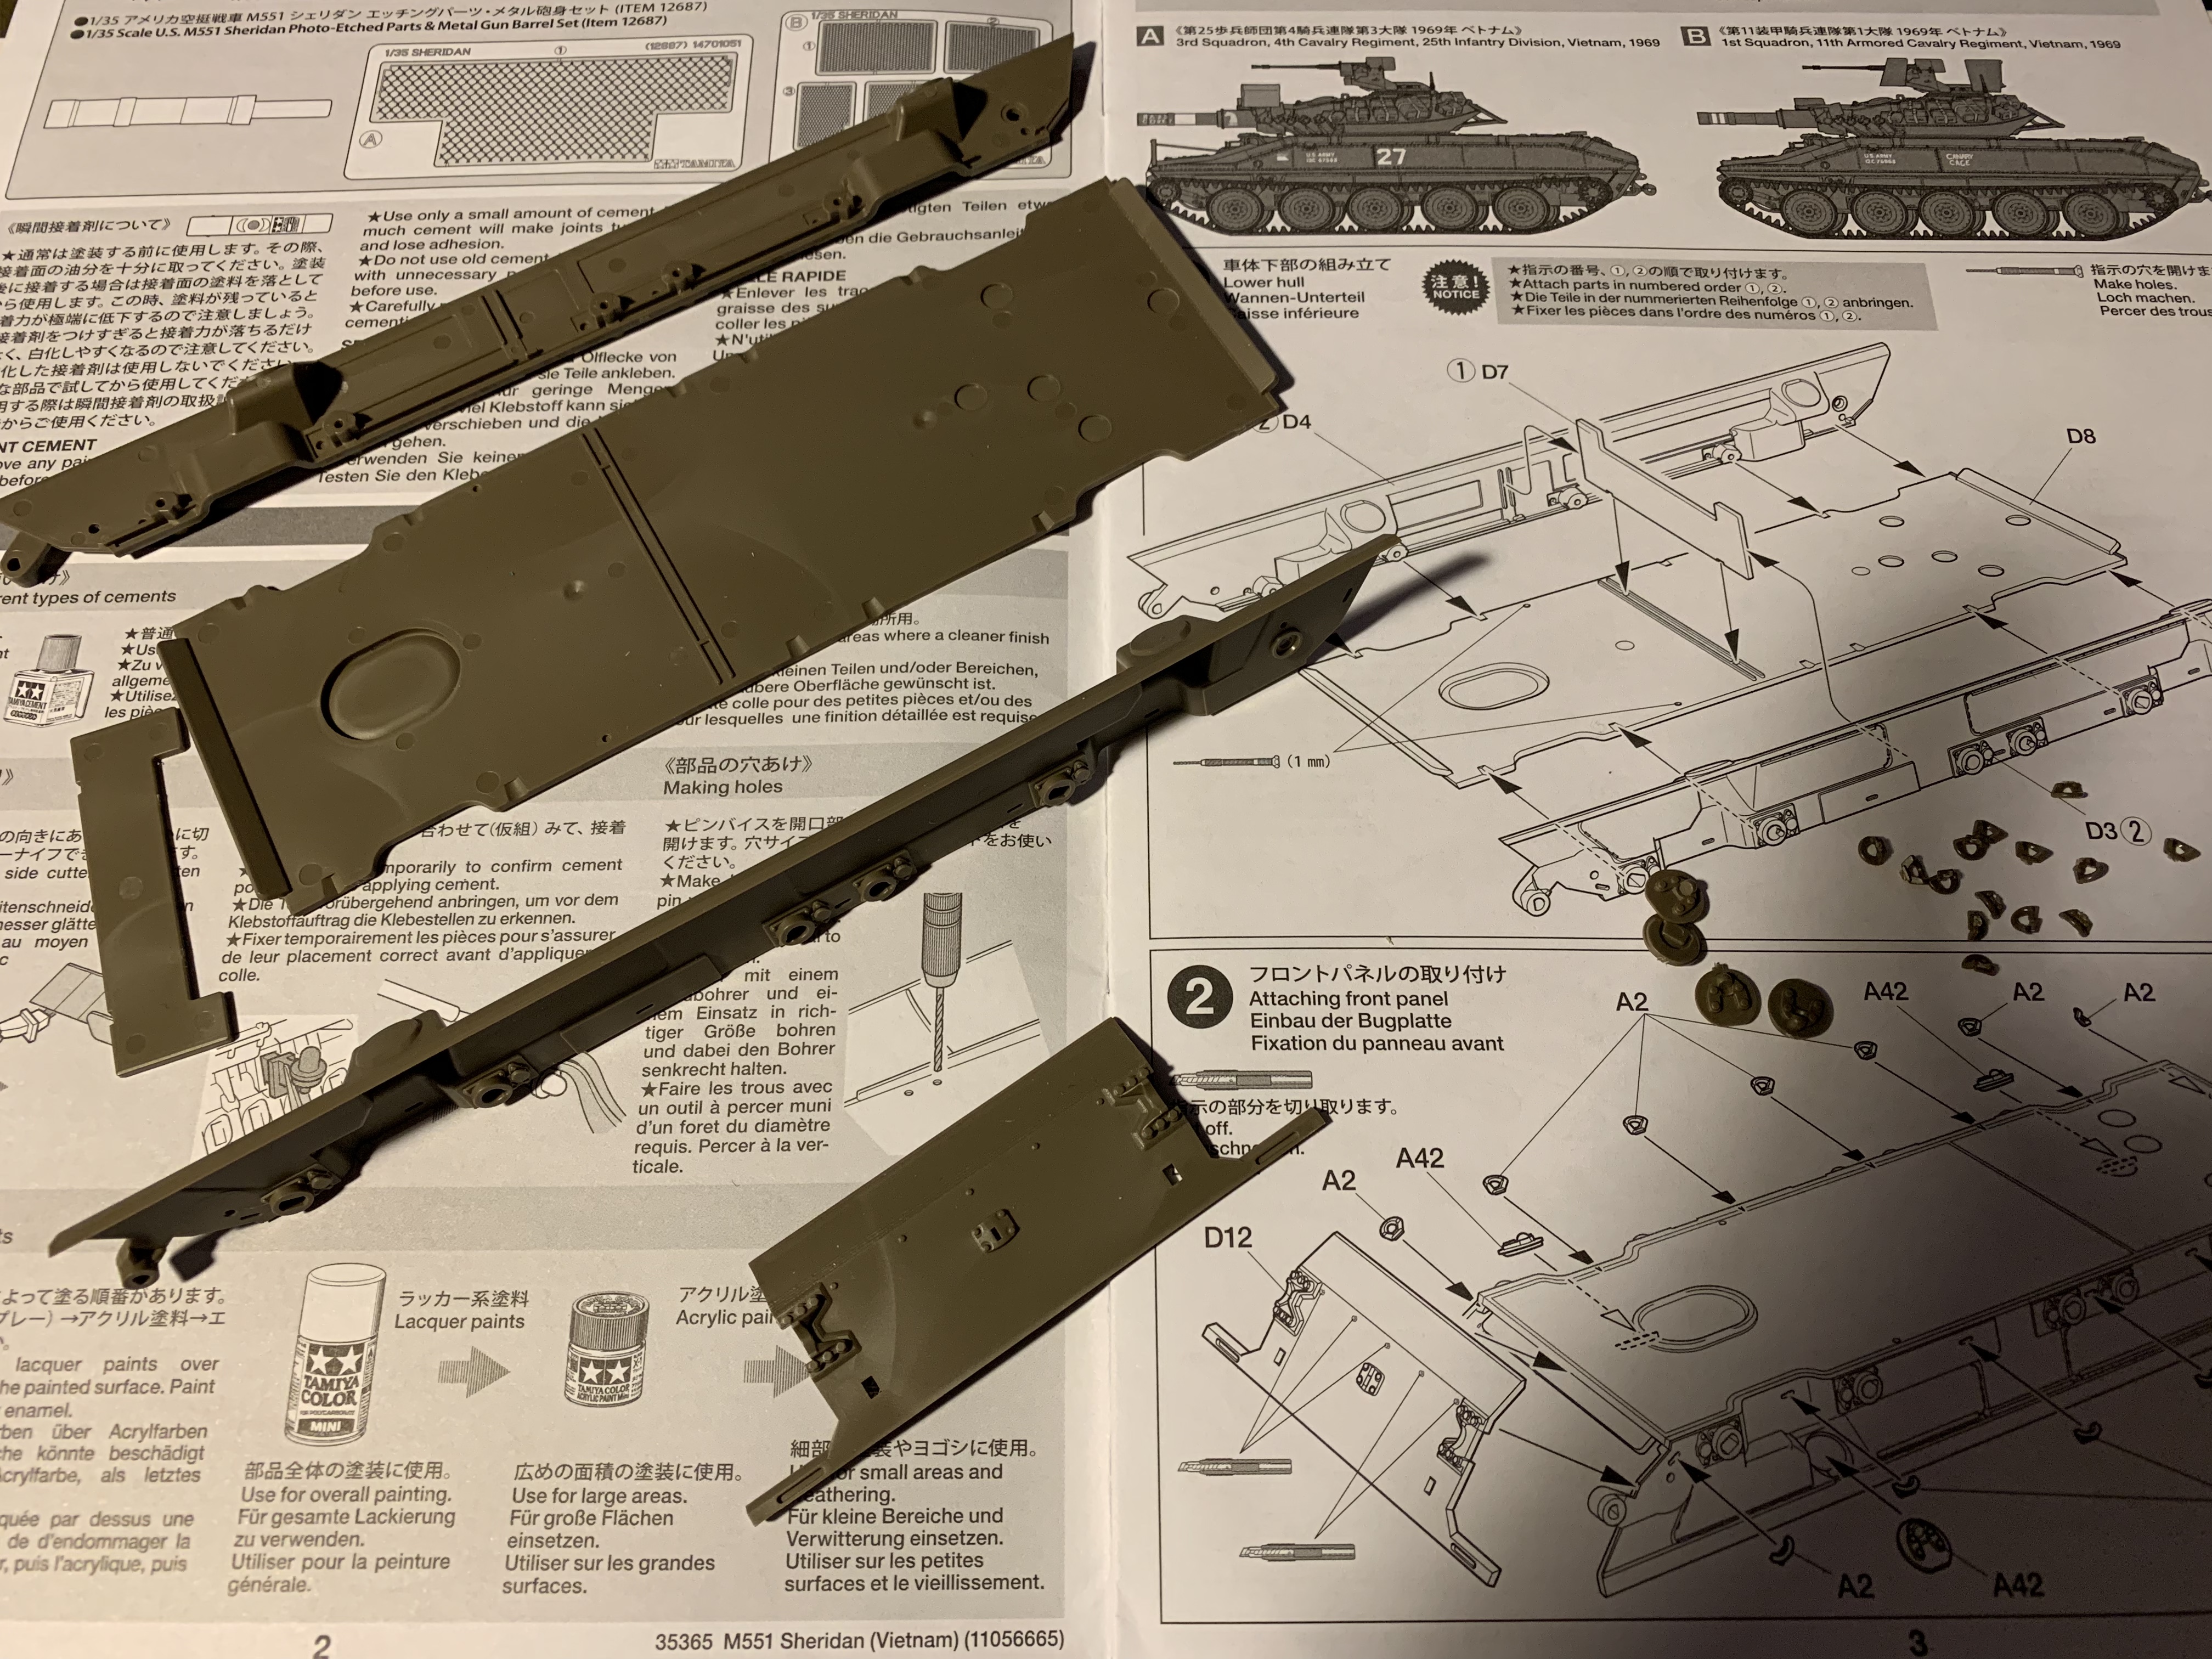
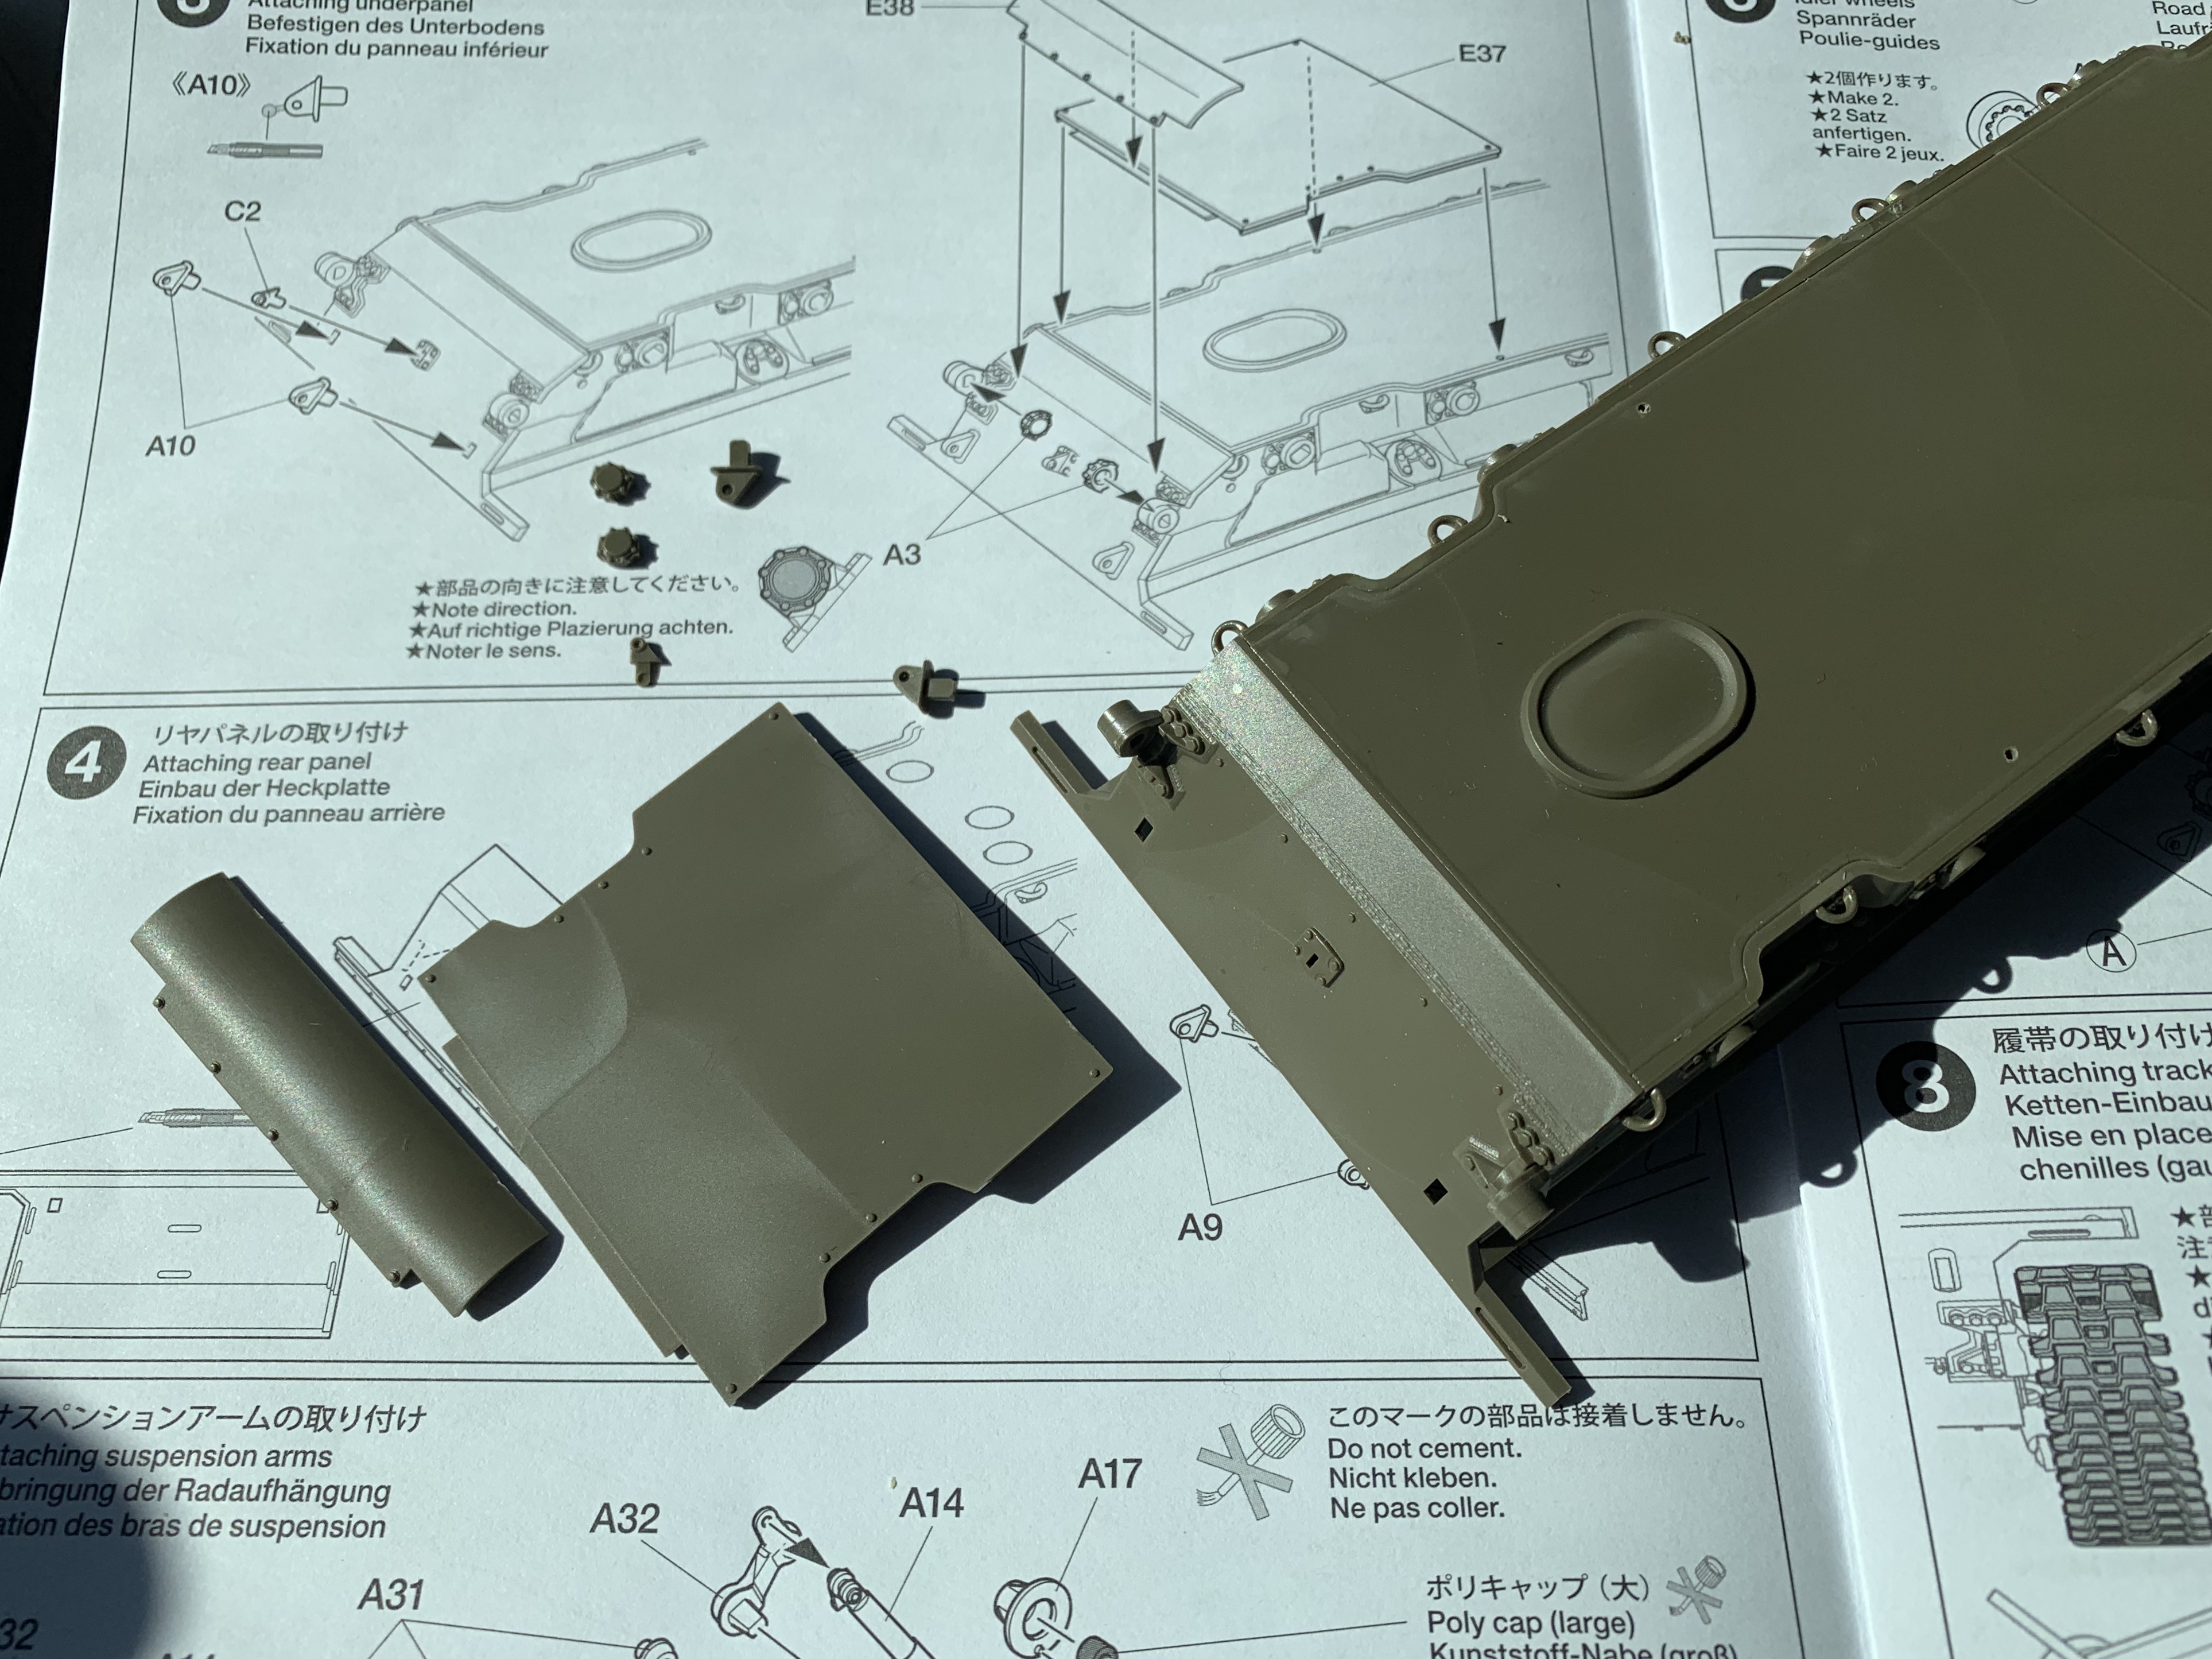
Step 3
Adding the belly armor. You have to drill two small holes to fit the large panel.
New York, United States
Joined: August 25, 2004
KitMaker: 752 posts
Armorama: 378 posts
Posted: Friday, March 01, 2019 - 04:19 AM UTC
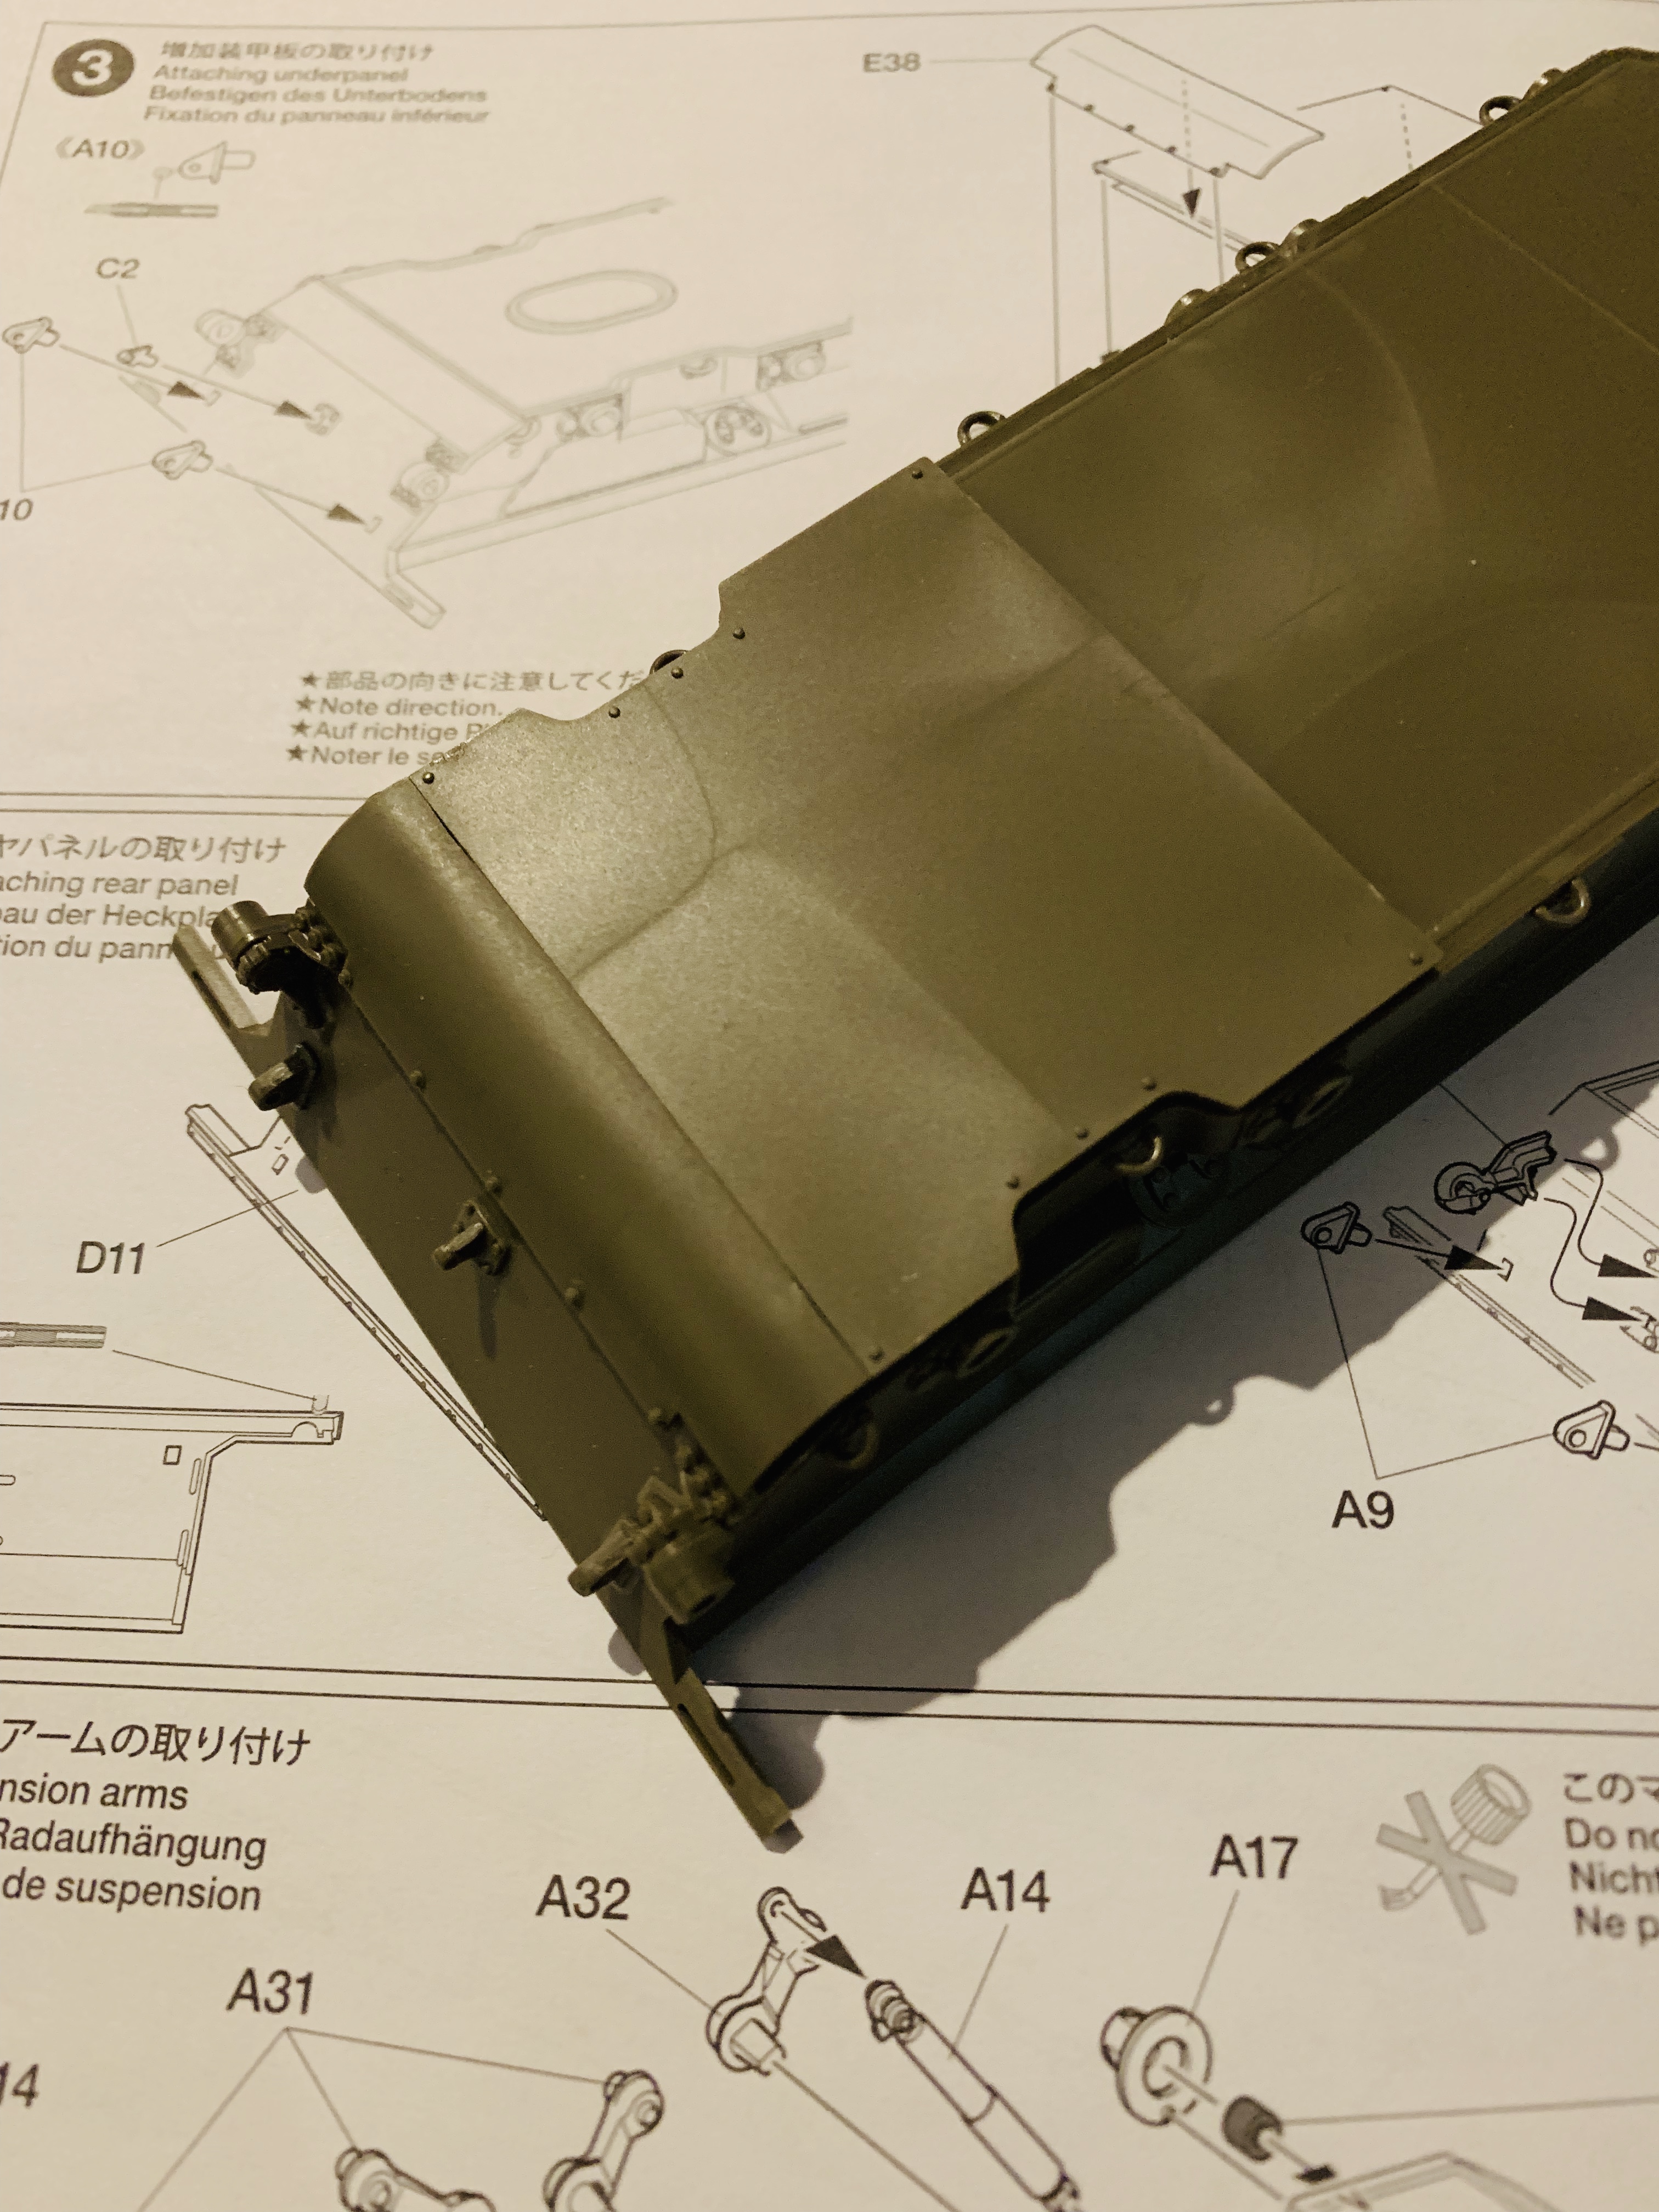
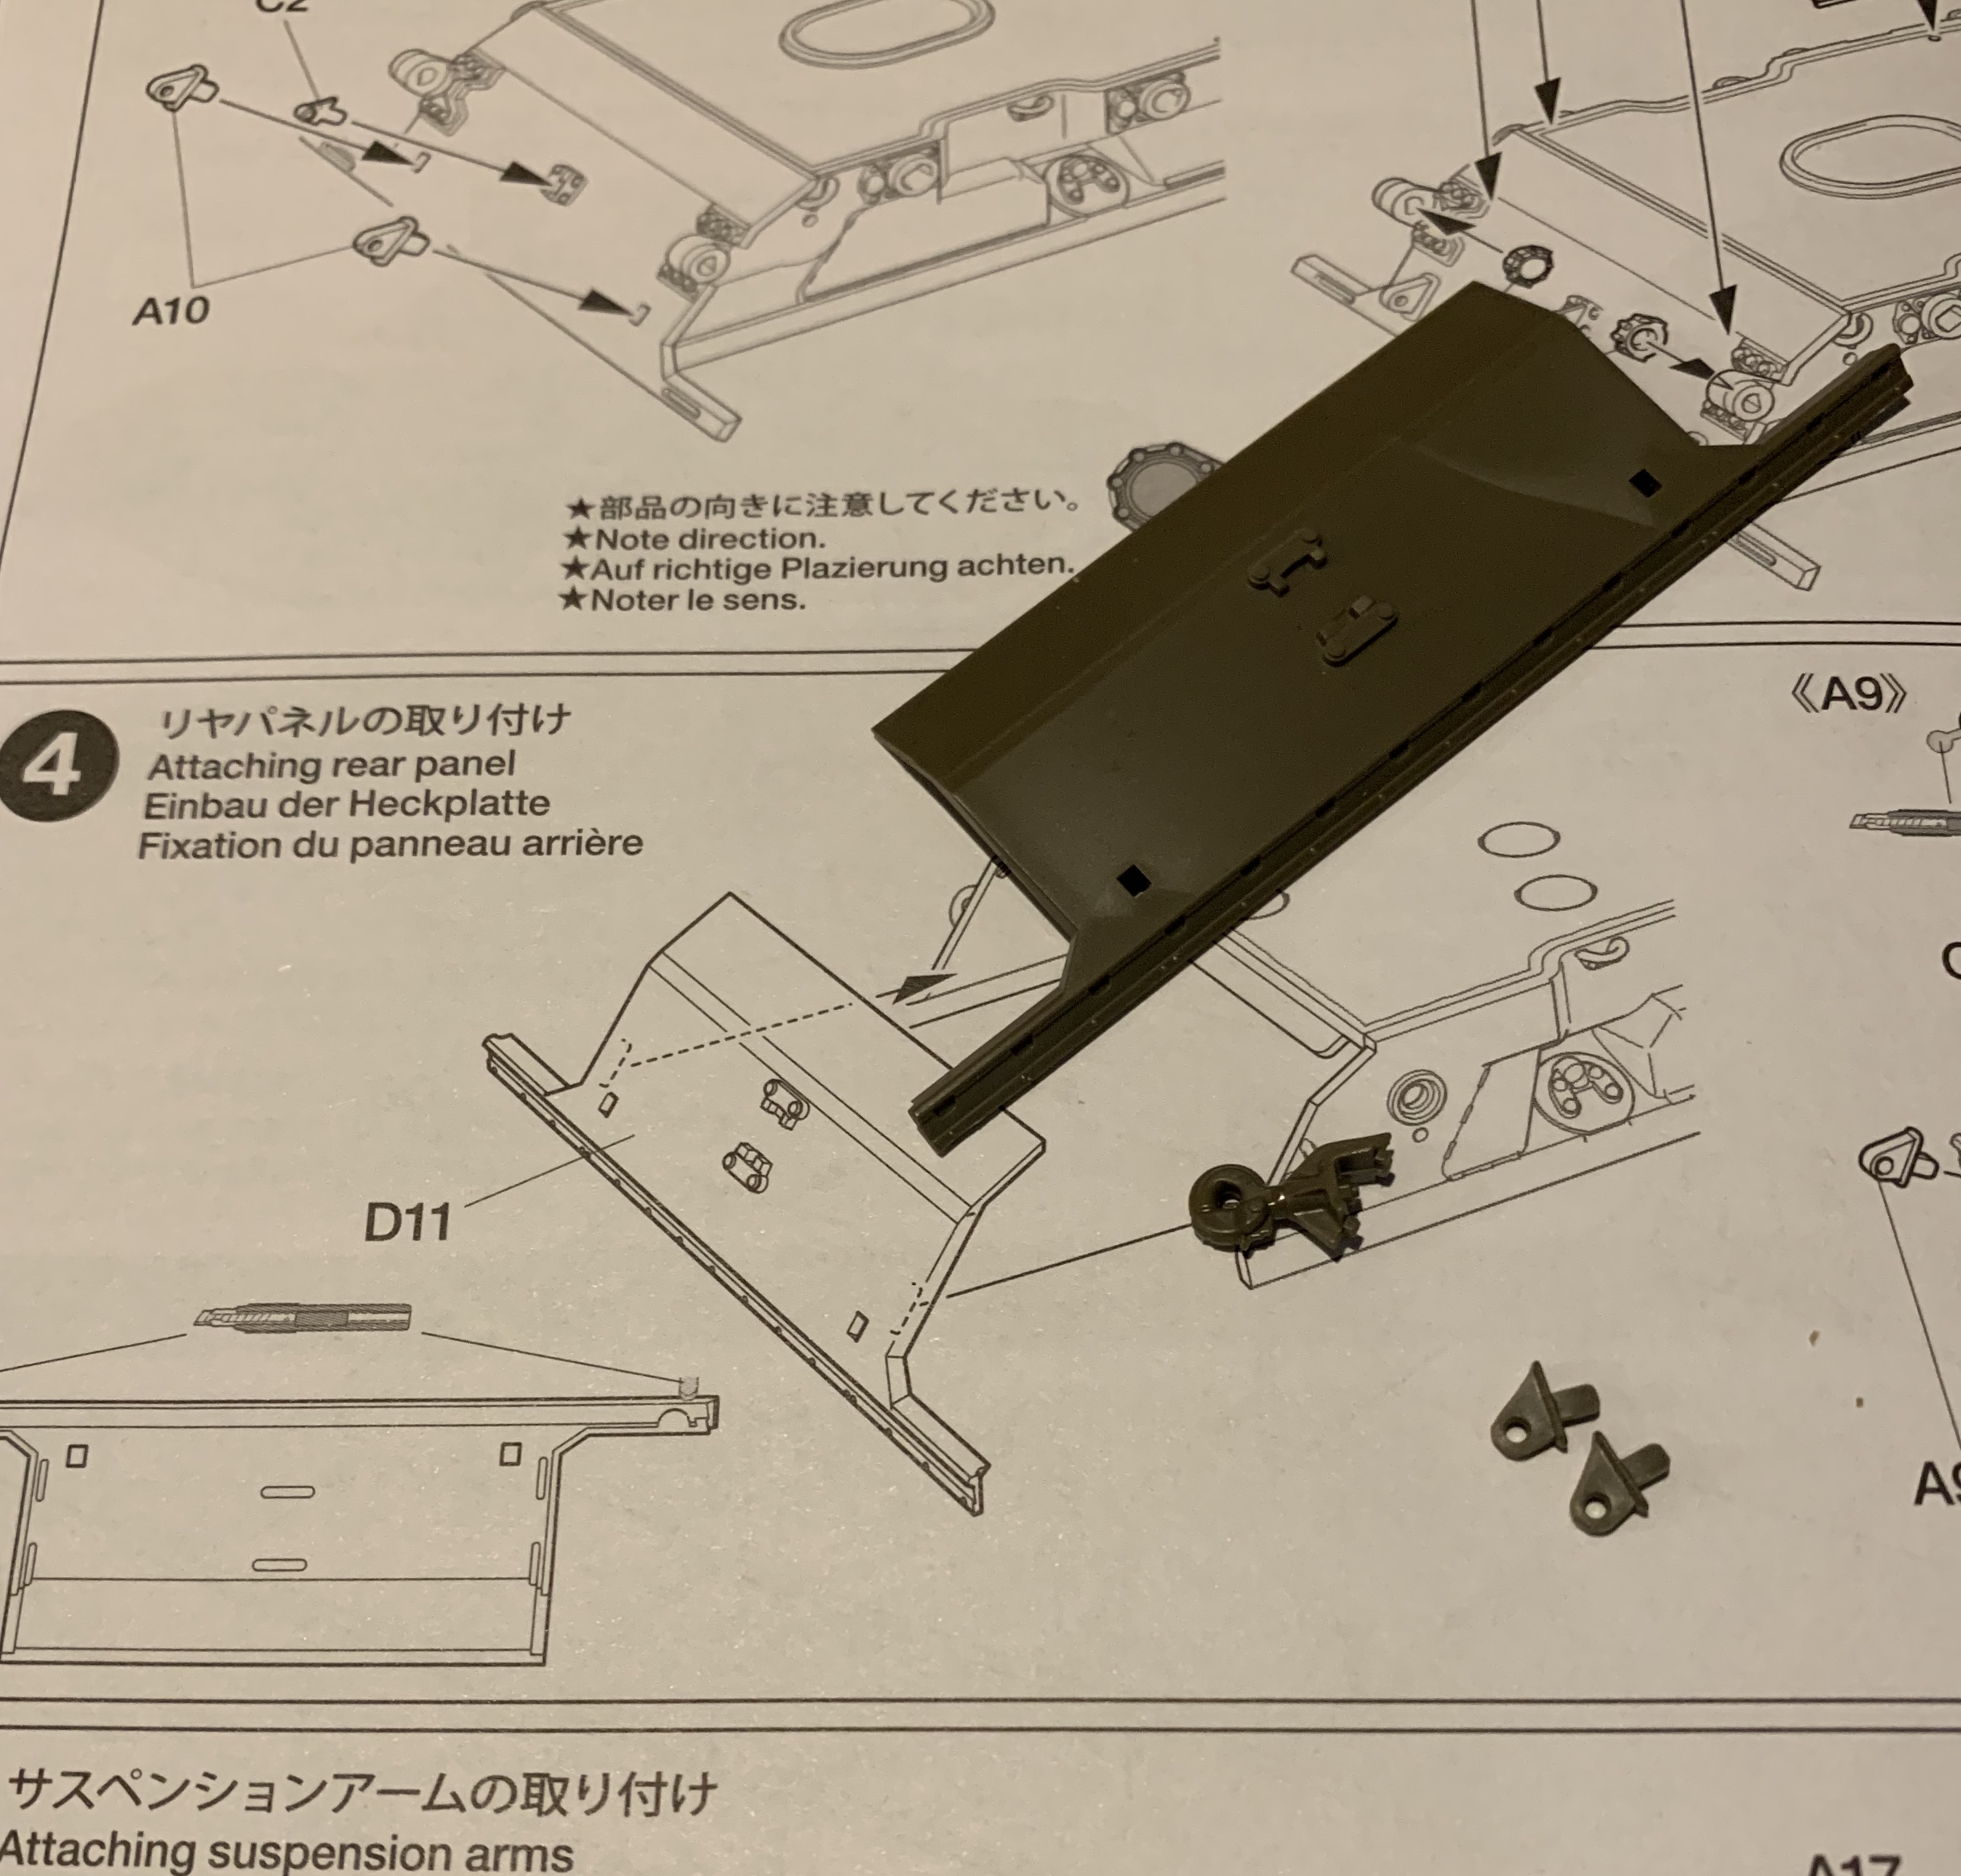
Step 4
rear hull panel.
Iowa, United States
Joined: November 06, 2007
KitMaker: 585 posts
Armorama: 557 posts
Posted: Friday, March 01, 2019 - 09:28 AM UTC
I havent started on my one yet but it does look like a pretty decent kit. My only negative comment is, I really wish Tamiya had provided a rear turret basket rather than the gimmicky 'convertible' driving position which to my mind is pointless.
My short term memory is getting really bad....and so is my short term memory.

#384
Nevada, United States
Joined: August 23, 2005
KitMaker: 1,426 posts
Armorama: 1,316 posts
Posted: Friday, March 01, 2019 - 10:08 AM UTC
Quoted Text
I havent started on my one yet but it does look like a pretty decent kit. My only negative comment is, I really wish Tamiya had provided a rear turret basket rather than the gimmicky 'convertible' driving position which to my mind is pointless.
I also have the kit, my negative comment on all Tamiya kits is why in the world donít they provide the damn PE sets with the kit?


California, United States
Joined: July 20, 2002
KitMaker: 666 posts
Armorama: 661 posts
Posted: Friday, March 01, 2019 - 01:54 PM UTC
Overall, a good kit, with the best looking Tamiya figures I've seen to date.
Yes, the PE would be better served as part of the actual kit, not as an AM item. The AM includes a metal that really does not serve to improve on the plastic kit item. But, hey, I needed the engine screens, so I bought the set..... The chain link screen looks good, but was not a piece that was going to be used.
As far as the turret basket, the included one appears to be the standard "issue" item, which was quickly determined to be not near enough to hold anything more than a case of C-rations. Since units were pretty accomplished at devising more efficient baskets, there wasn't a lot of similarity. This, I believe, is why Tamiya provides the model maker with the basic "original issue" kit, leaving modifications to the purchaser as they deem fit.
Oh, BTW i changed out the tracks for Fruils from an older Academy Sheridan build I did. Kit pieces were fine tho.
My $0.02 worth.

New York, United States
Joined: August 25, 2004
KitMaker: 752 posts
Armorama: 378 posts
Posted: Friday, March 01, 2019 - 03:51 PM UTC
Quoted Text
I havent started on my one yet but it does look like a pretty decent kit. My only negative comment is, I really wish Tamiya had provided a rear turret basket rather than the gimmicky 'convertible' driving position which to my mind is pointless.
Well, the 12-year-old me who would "play" with the models and figures loves the convertible driving position. The present day modeler in me says I'll make a choice (opened hatch with the driver figure or a closed hatch) and stick with it.
The larger turret baskets were primarily a field modification of the 11th Cav. The stock one in the kit is correct for a 3/4 Cav Sheridan (Such as Hard Core 7 on the box art) though they were also subject to field modifications, usually a boxed structure around the rack with cyclone fencing.
New York, United States
Joined: August 25, 2004
KitMaker: 752 posts
Armorama: 378 posts
Posted: Friday, March 01, 2019 - 03:53 PM UTC
Quoted Text
I also have the kit, my negative comment on all Tamiya kits is why in the world donít they provide the damn PE sets with the kit? 

Agreed, at a minimum the engine screens really should be in there. The included mesh just doesn't cut it.
New York, United States
Joined: August 25, 2004
KitMaker: 752 posts
Armorama: 378 posts
Posted: Friday, March 01, 2019 - 04:12 PM UTC
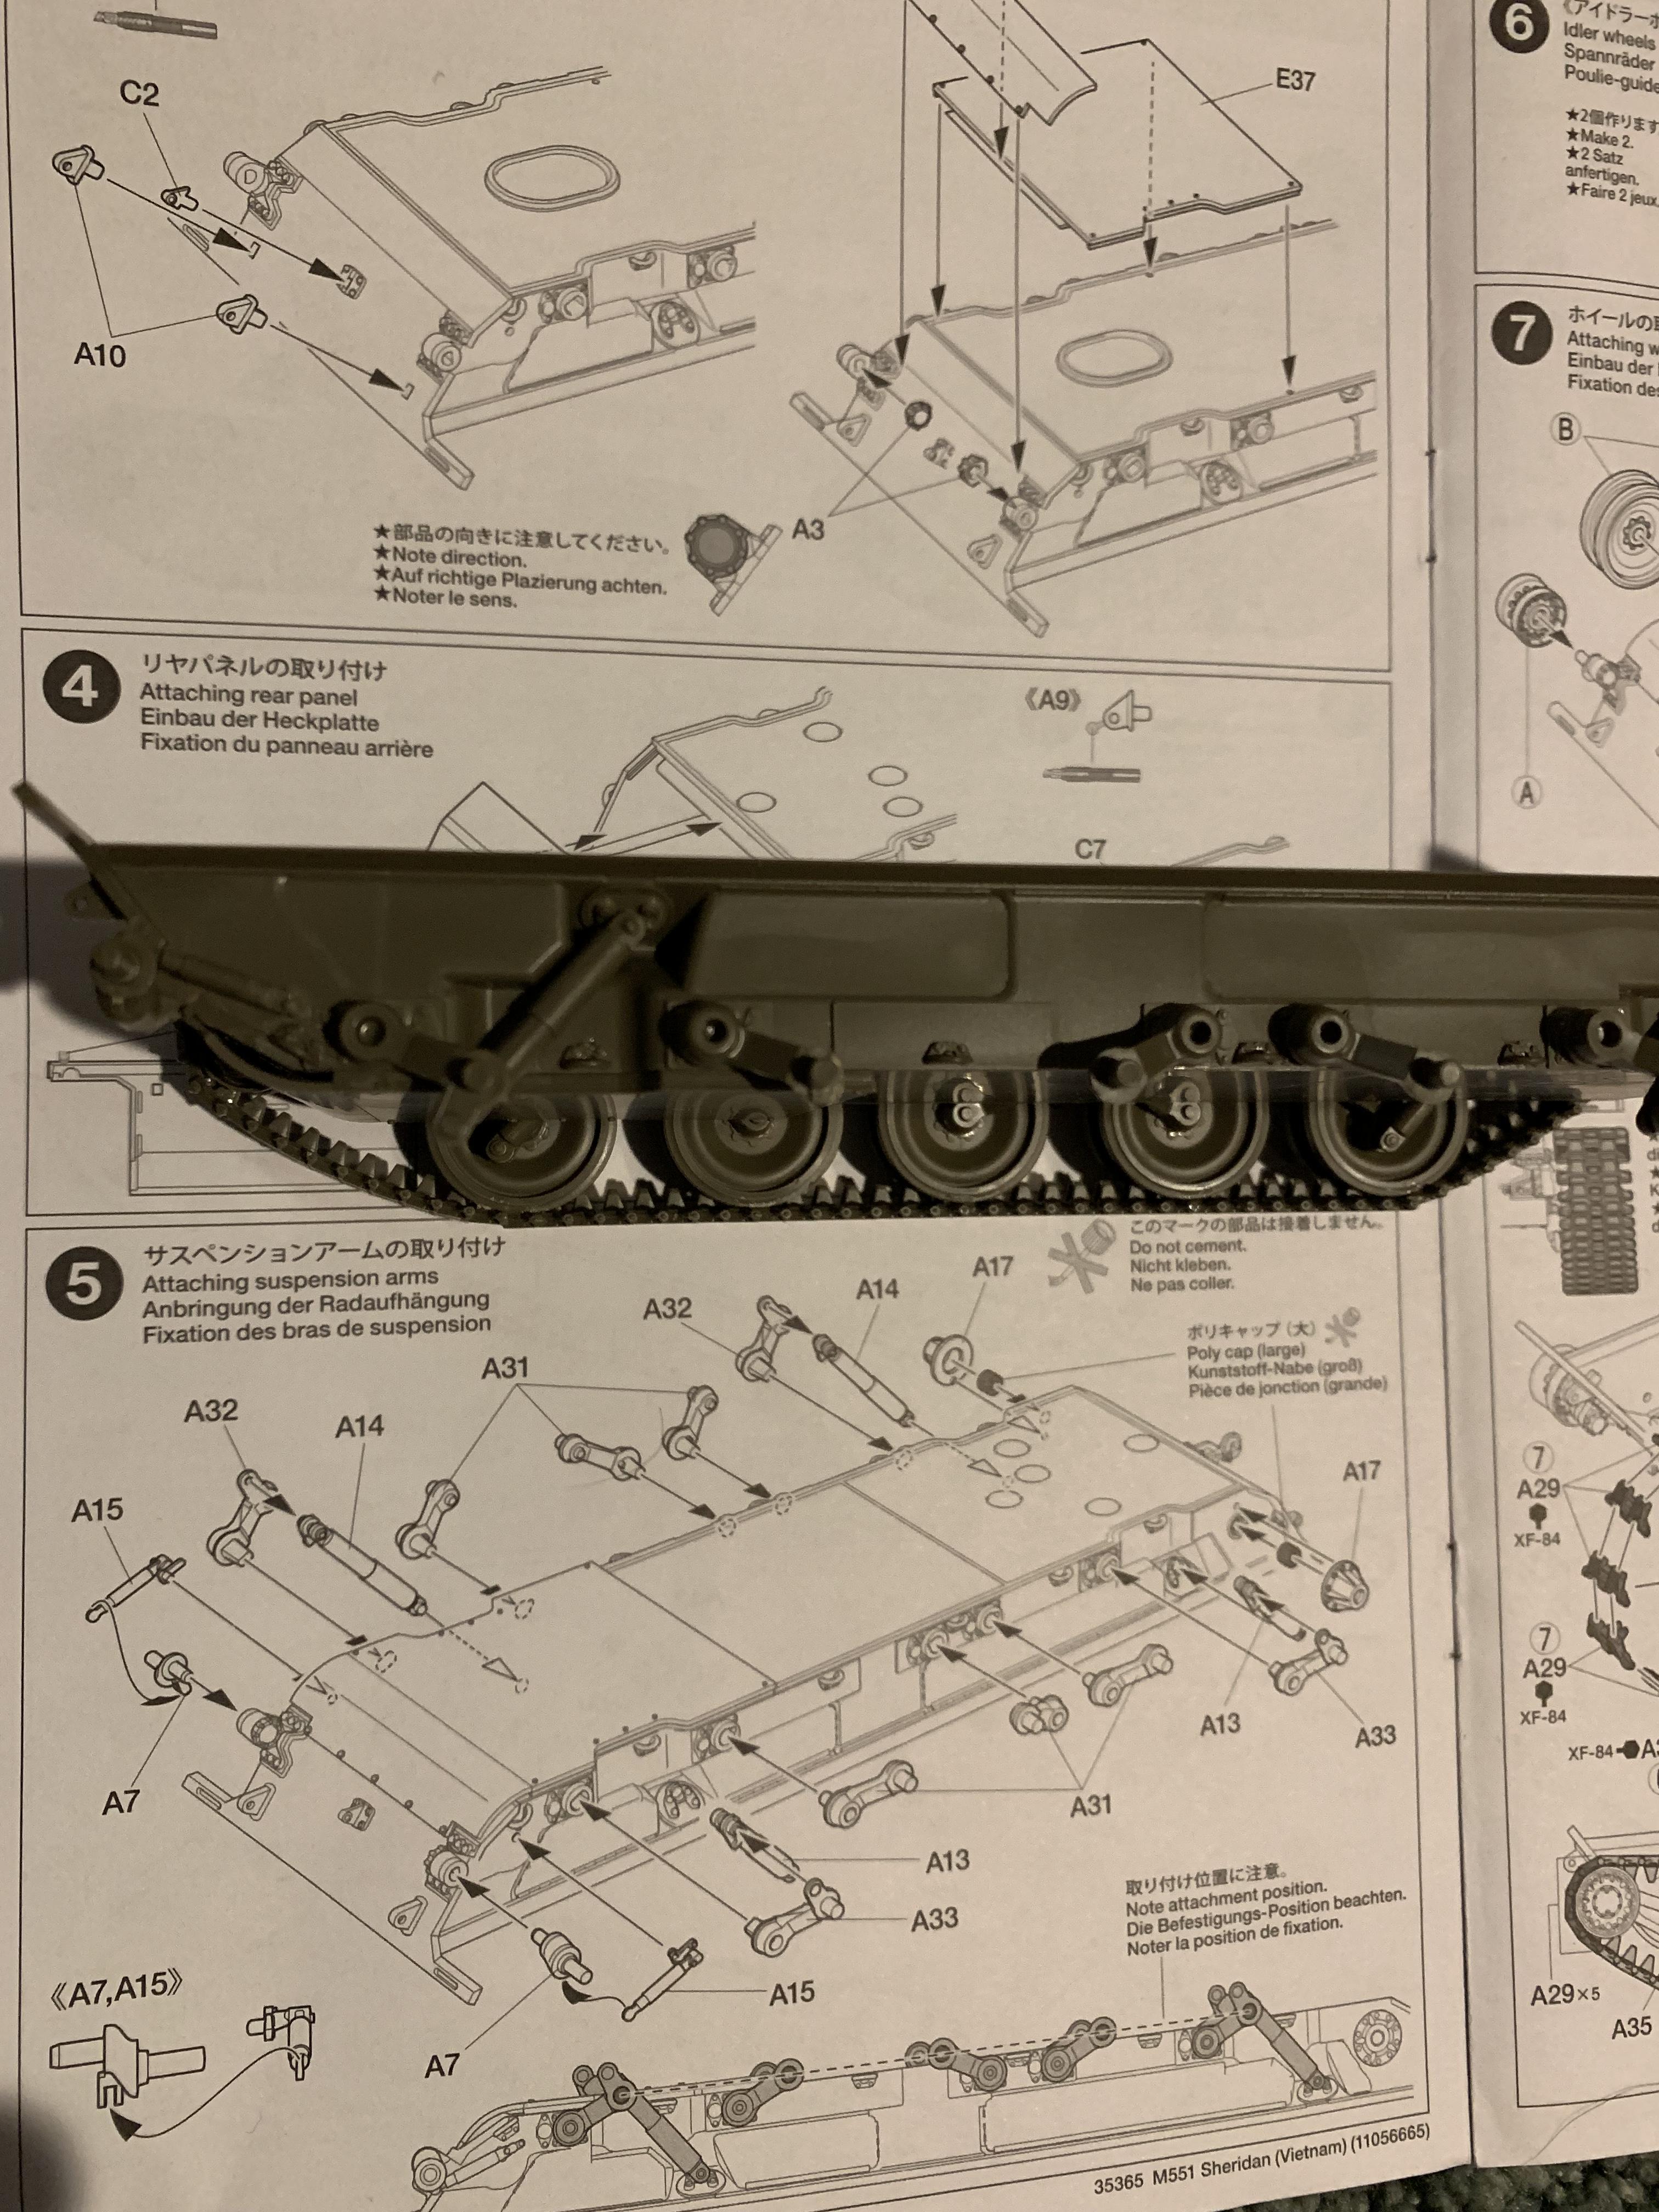
Step 5
Adding the suspension arms. Don't forget to add the polycap behind part A17
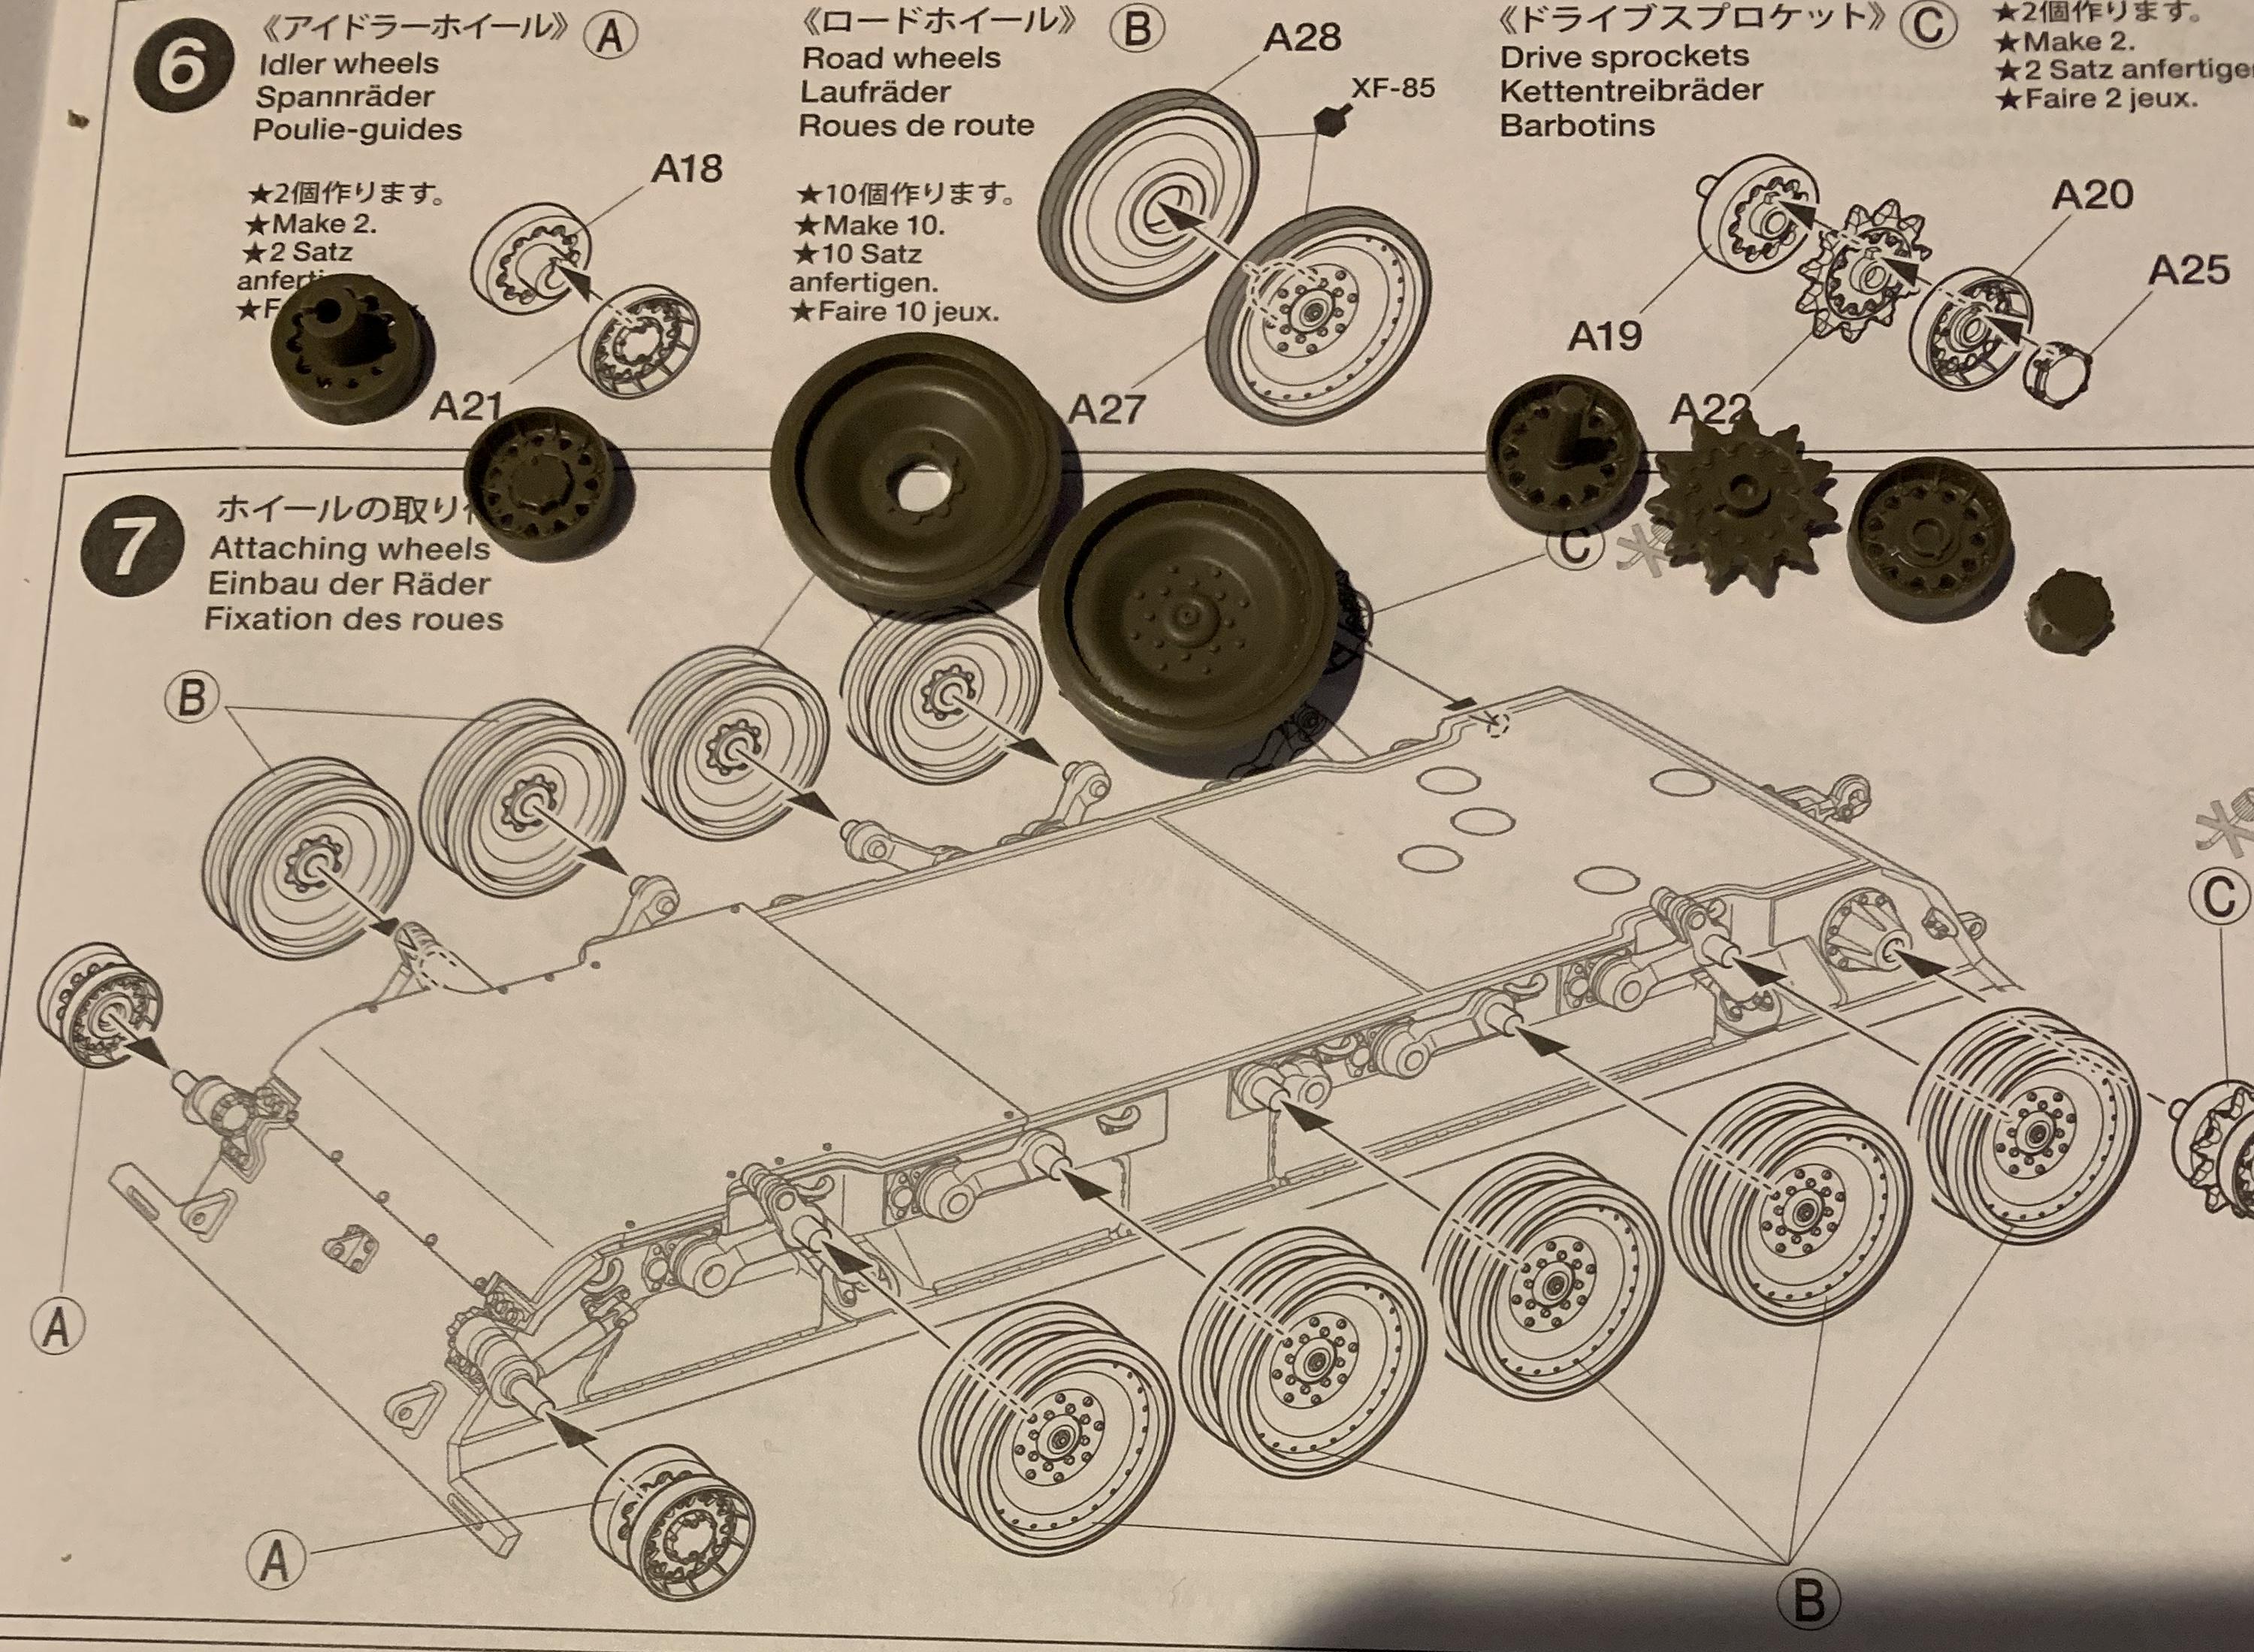
Steps 6 and 7
Building and installing the idlers, road wheels and drive sprockets. No polycaps here.
New York, United States
Joined: August 25, 2004
KitMaker: 752 posts
Armorama: 378 posts
Posted: Friday, March 01, 2019 - 04:15 PM UTC
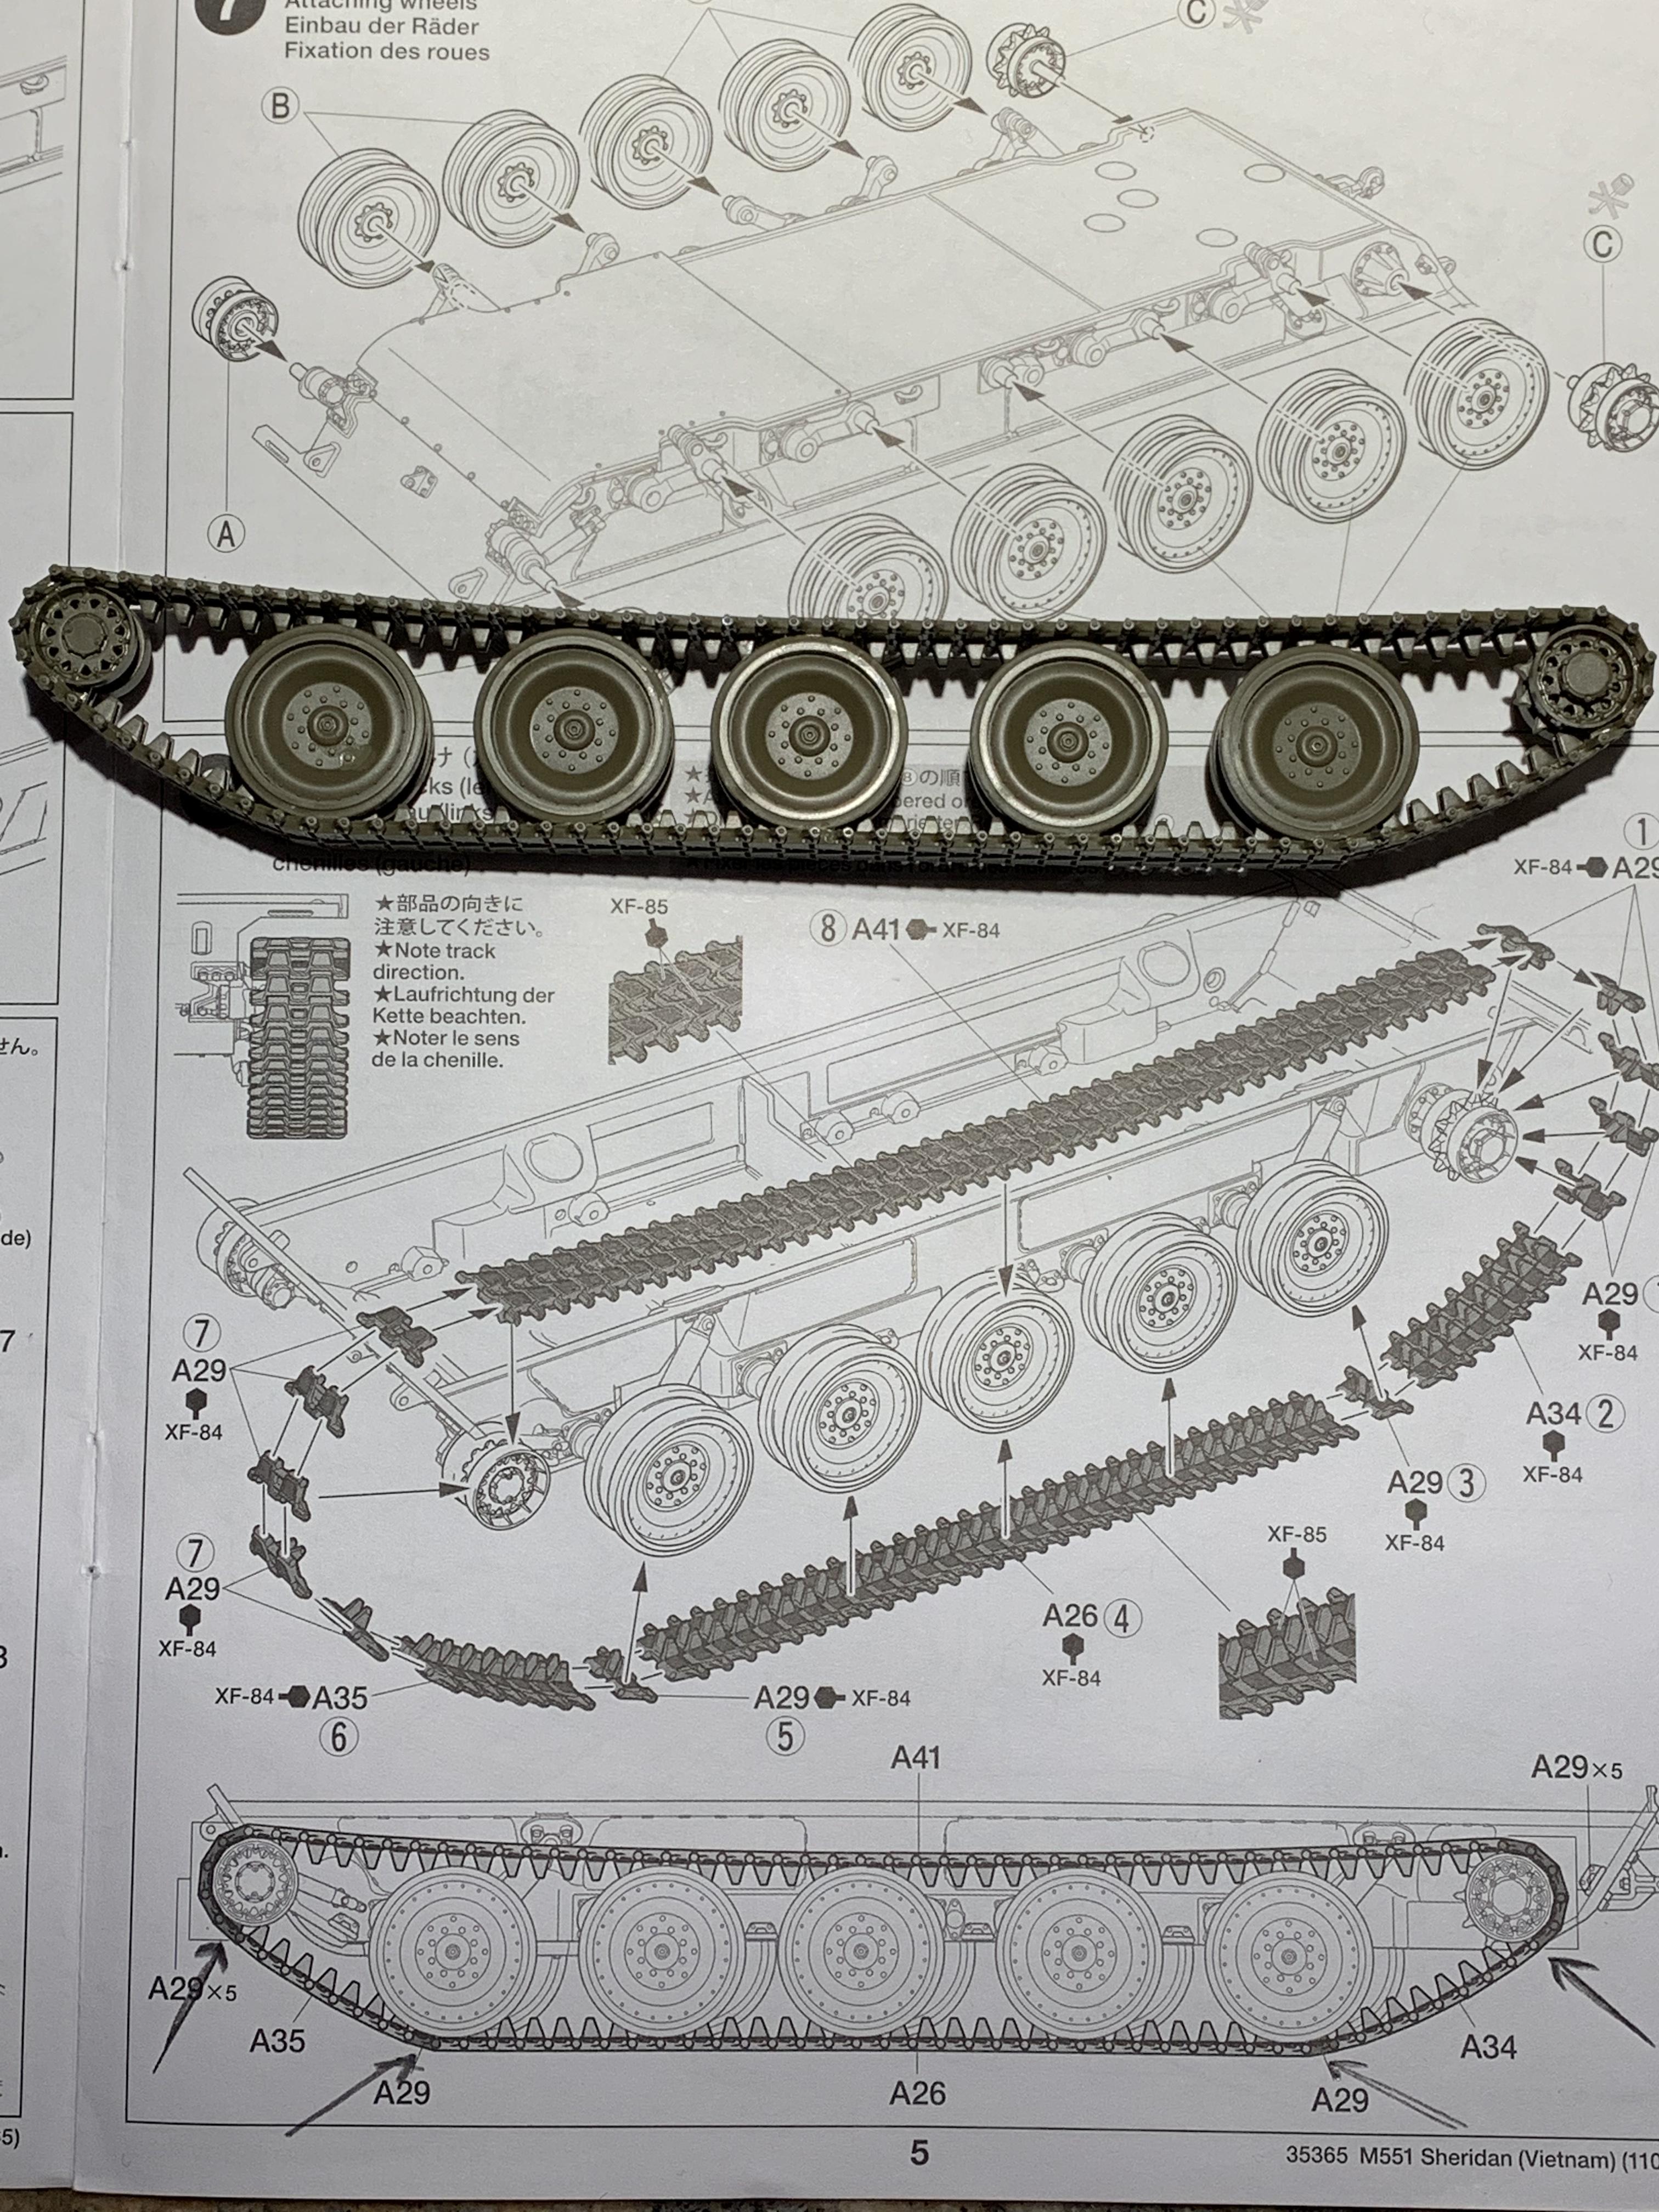
The tracks and link and length. While not the greatest pic, you can see the track sag on the upper run and the curve on the two shorter runs that extend downward from the idler wheels and sprockets.
New York, United States
Joined: August 25, 2004
KitMaker: 752 posts
Armorama: 378 posts
Posted: Friday, March 01, 2019 - 04:34 PM UTC
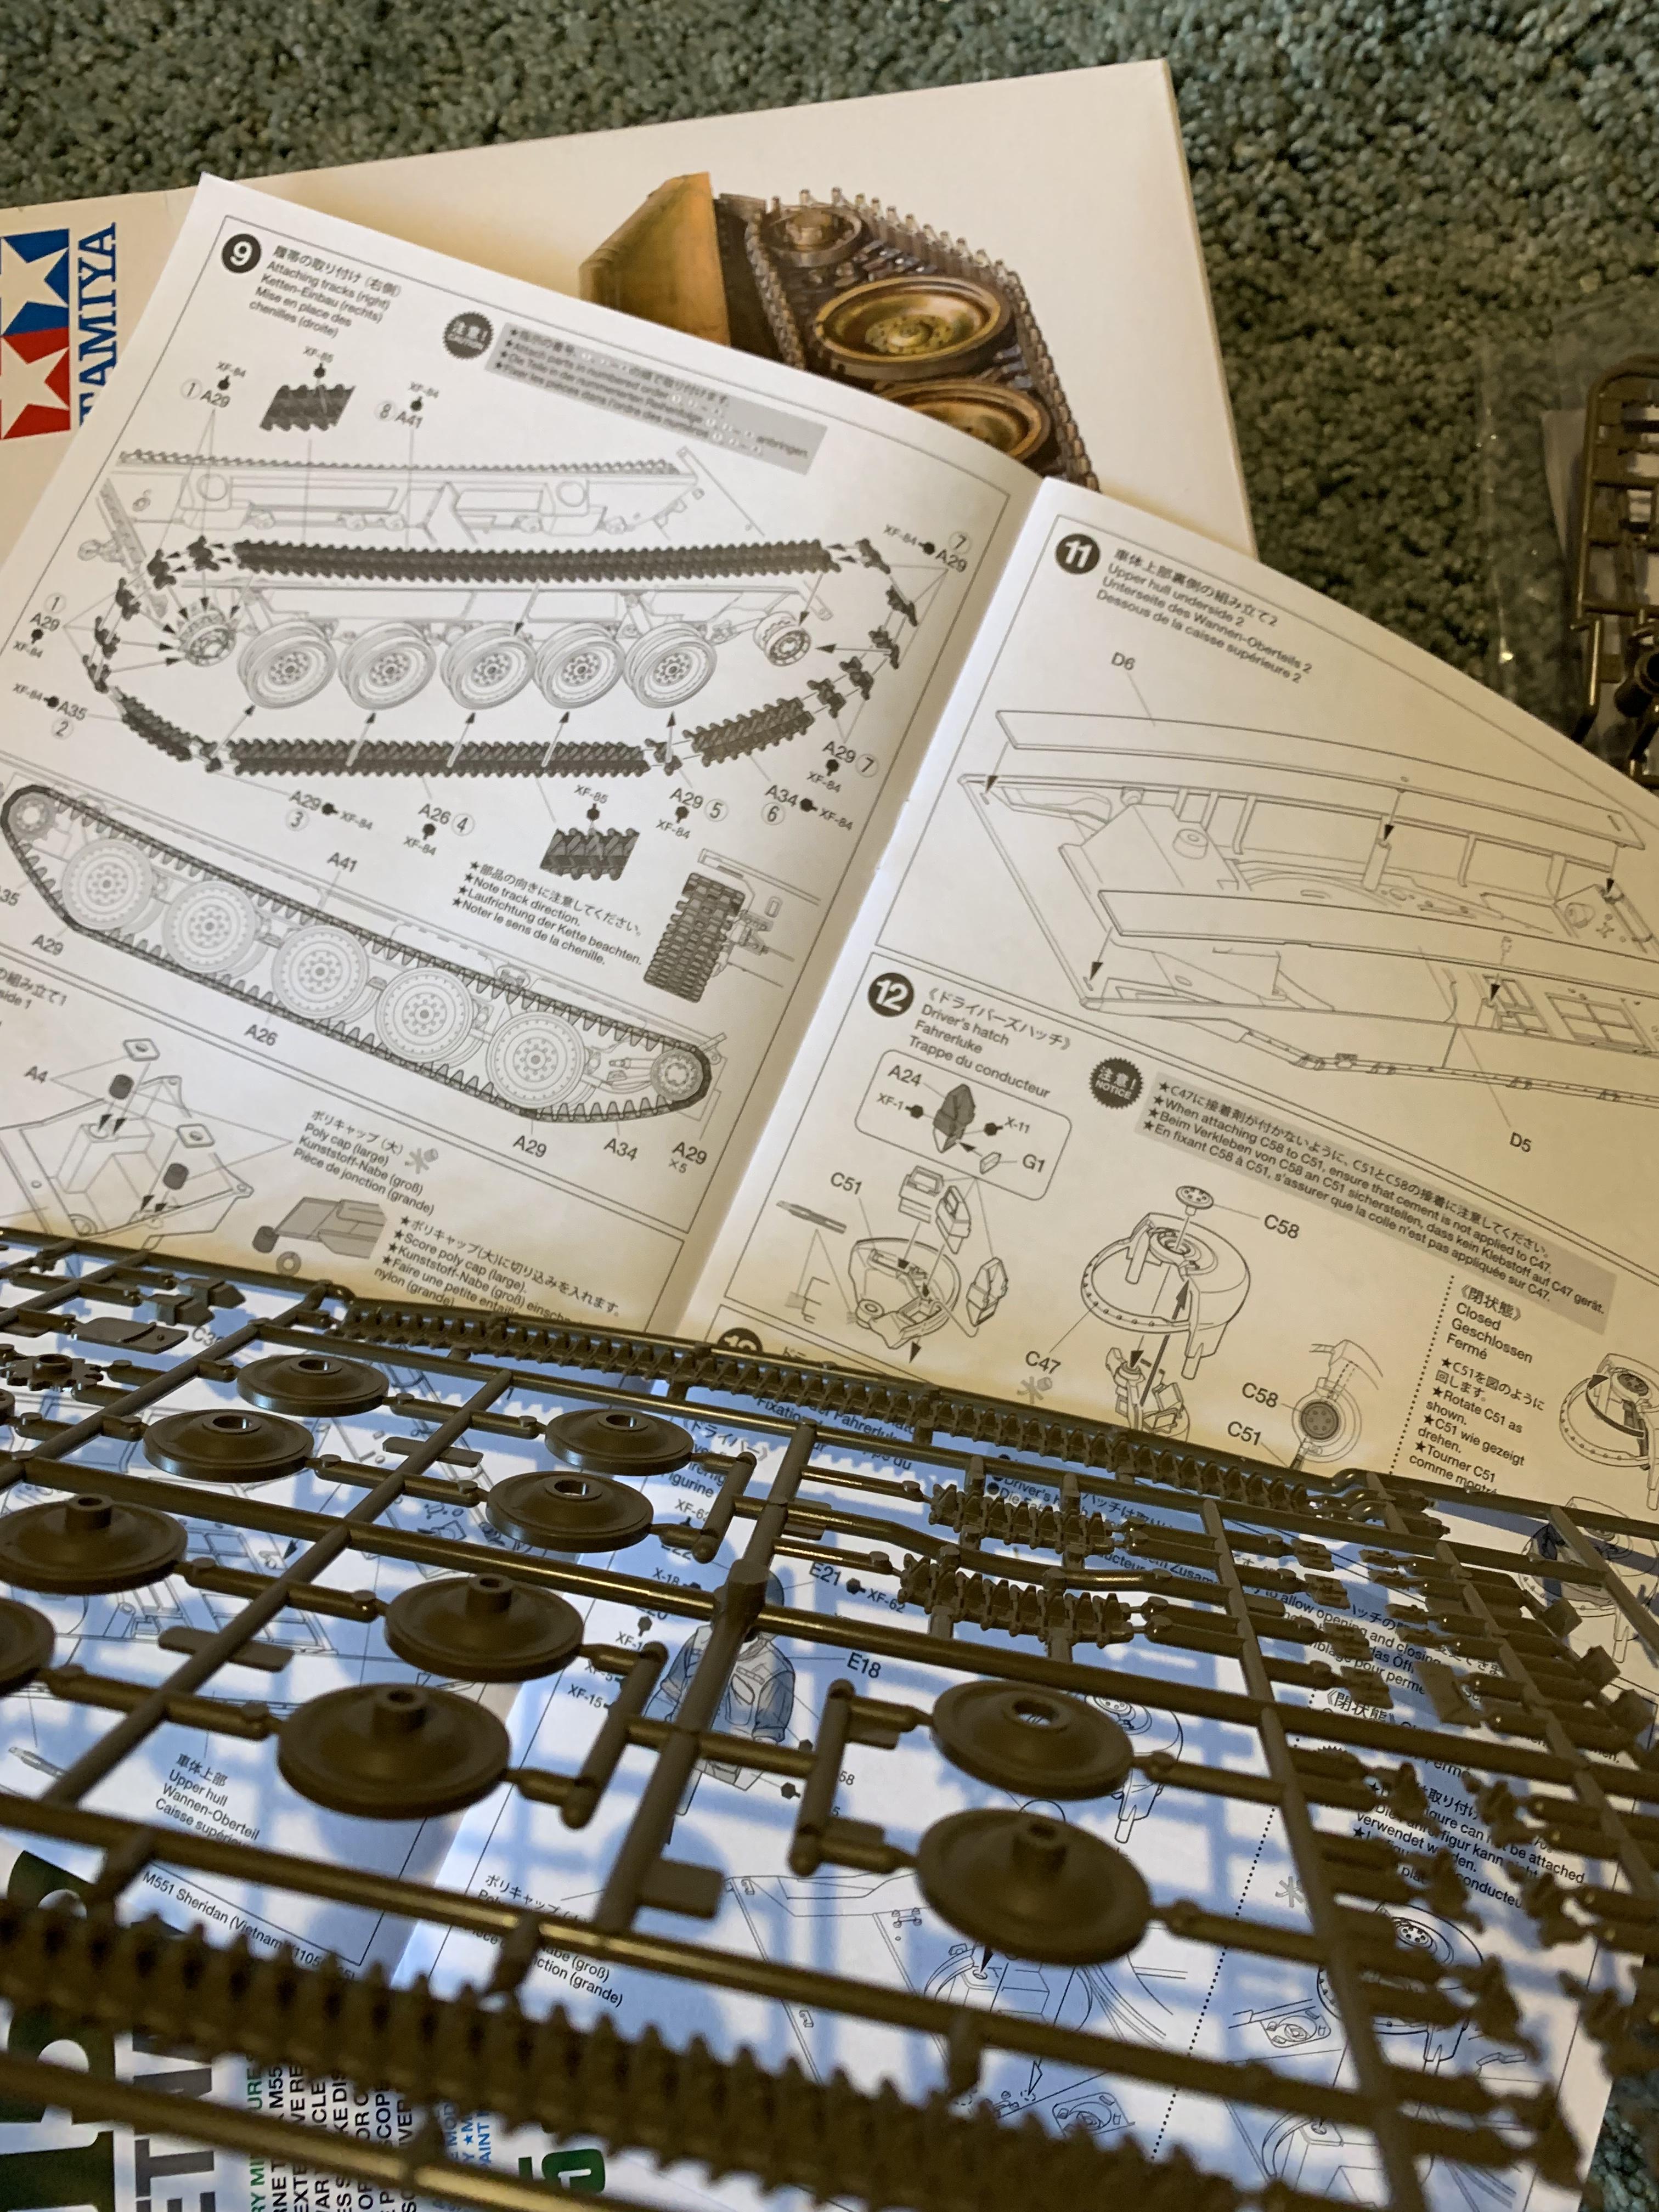
Steps 8 and 9
Installing the tracks. There are 5 individual links (part A29) that go around the idler wheel and 5 that go around the sprocket. There is also a single individual link that goes on each end of the straight lower run. Follow the instructions carefully, they have you start with the five links that wrap the sprocket and the move forward, up and over and ending with the sagged top run.
If you take a look at the bottom of the page, I marked the instruction with four arrows that correspond to four of the individual links. You don't want to attach these links flush to the wheels, they should start angling towards the shorter end runs, parts A34 and A35.
As you can see, I didn't glue the wheels in place so that they could be removed with the tracks for painting.
Step 9 is the opposite side, everything still applies.
New York, United States
Joined: August 25, 2004
KitMaker: 752 posts
Armorama: 378 posts
Posted: Friday, March 01, 2019 - 04:38 PM UTC
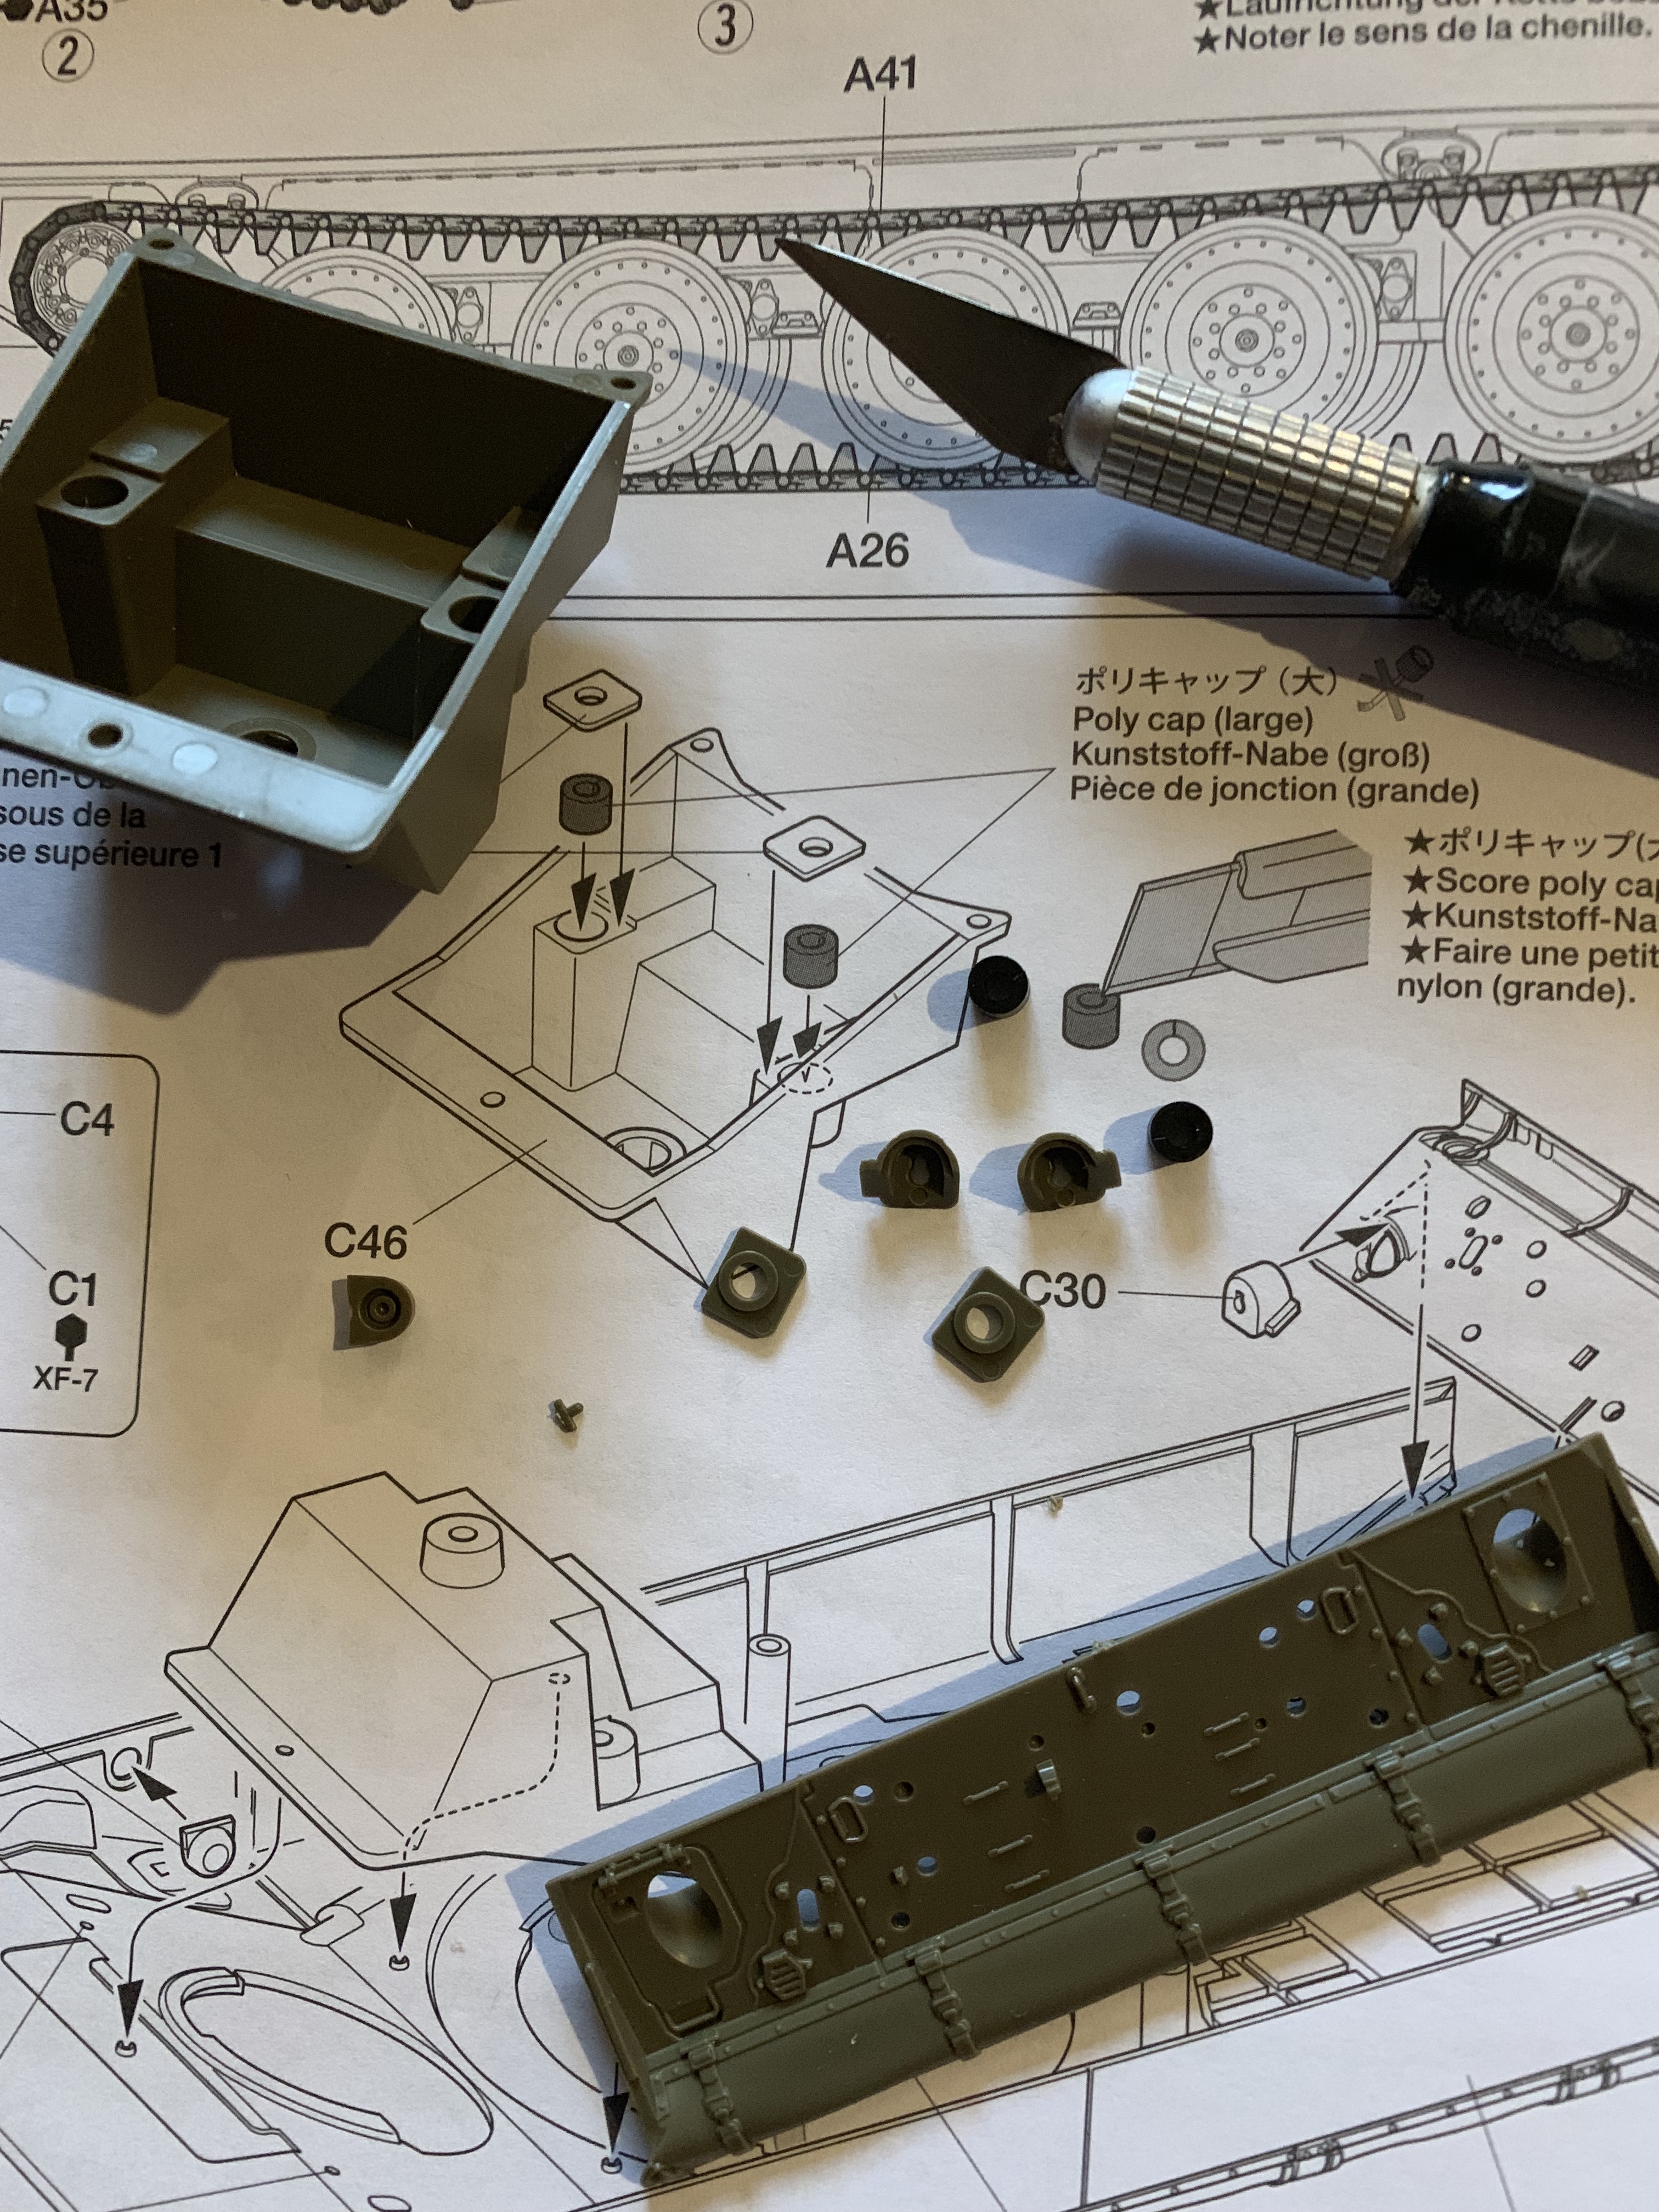
Step 10
The drivers tub and a nicely detailed rear end. Make sure the carpet monster doesn't eat the pull handle for the fire suppression system.
There are also two holes that need to be drilled out for the swim barrier which will be attached in step 15...or will it?
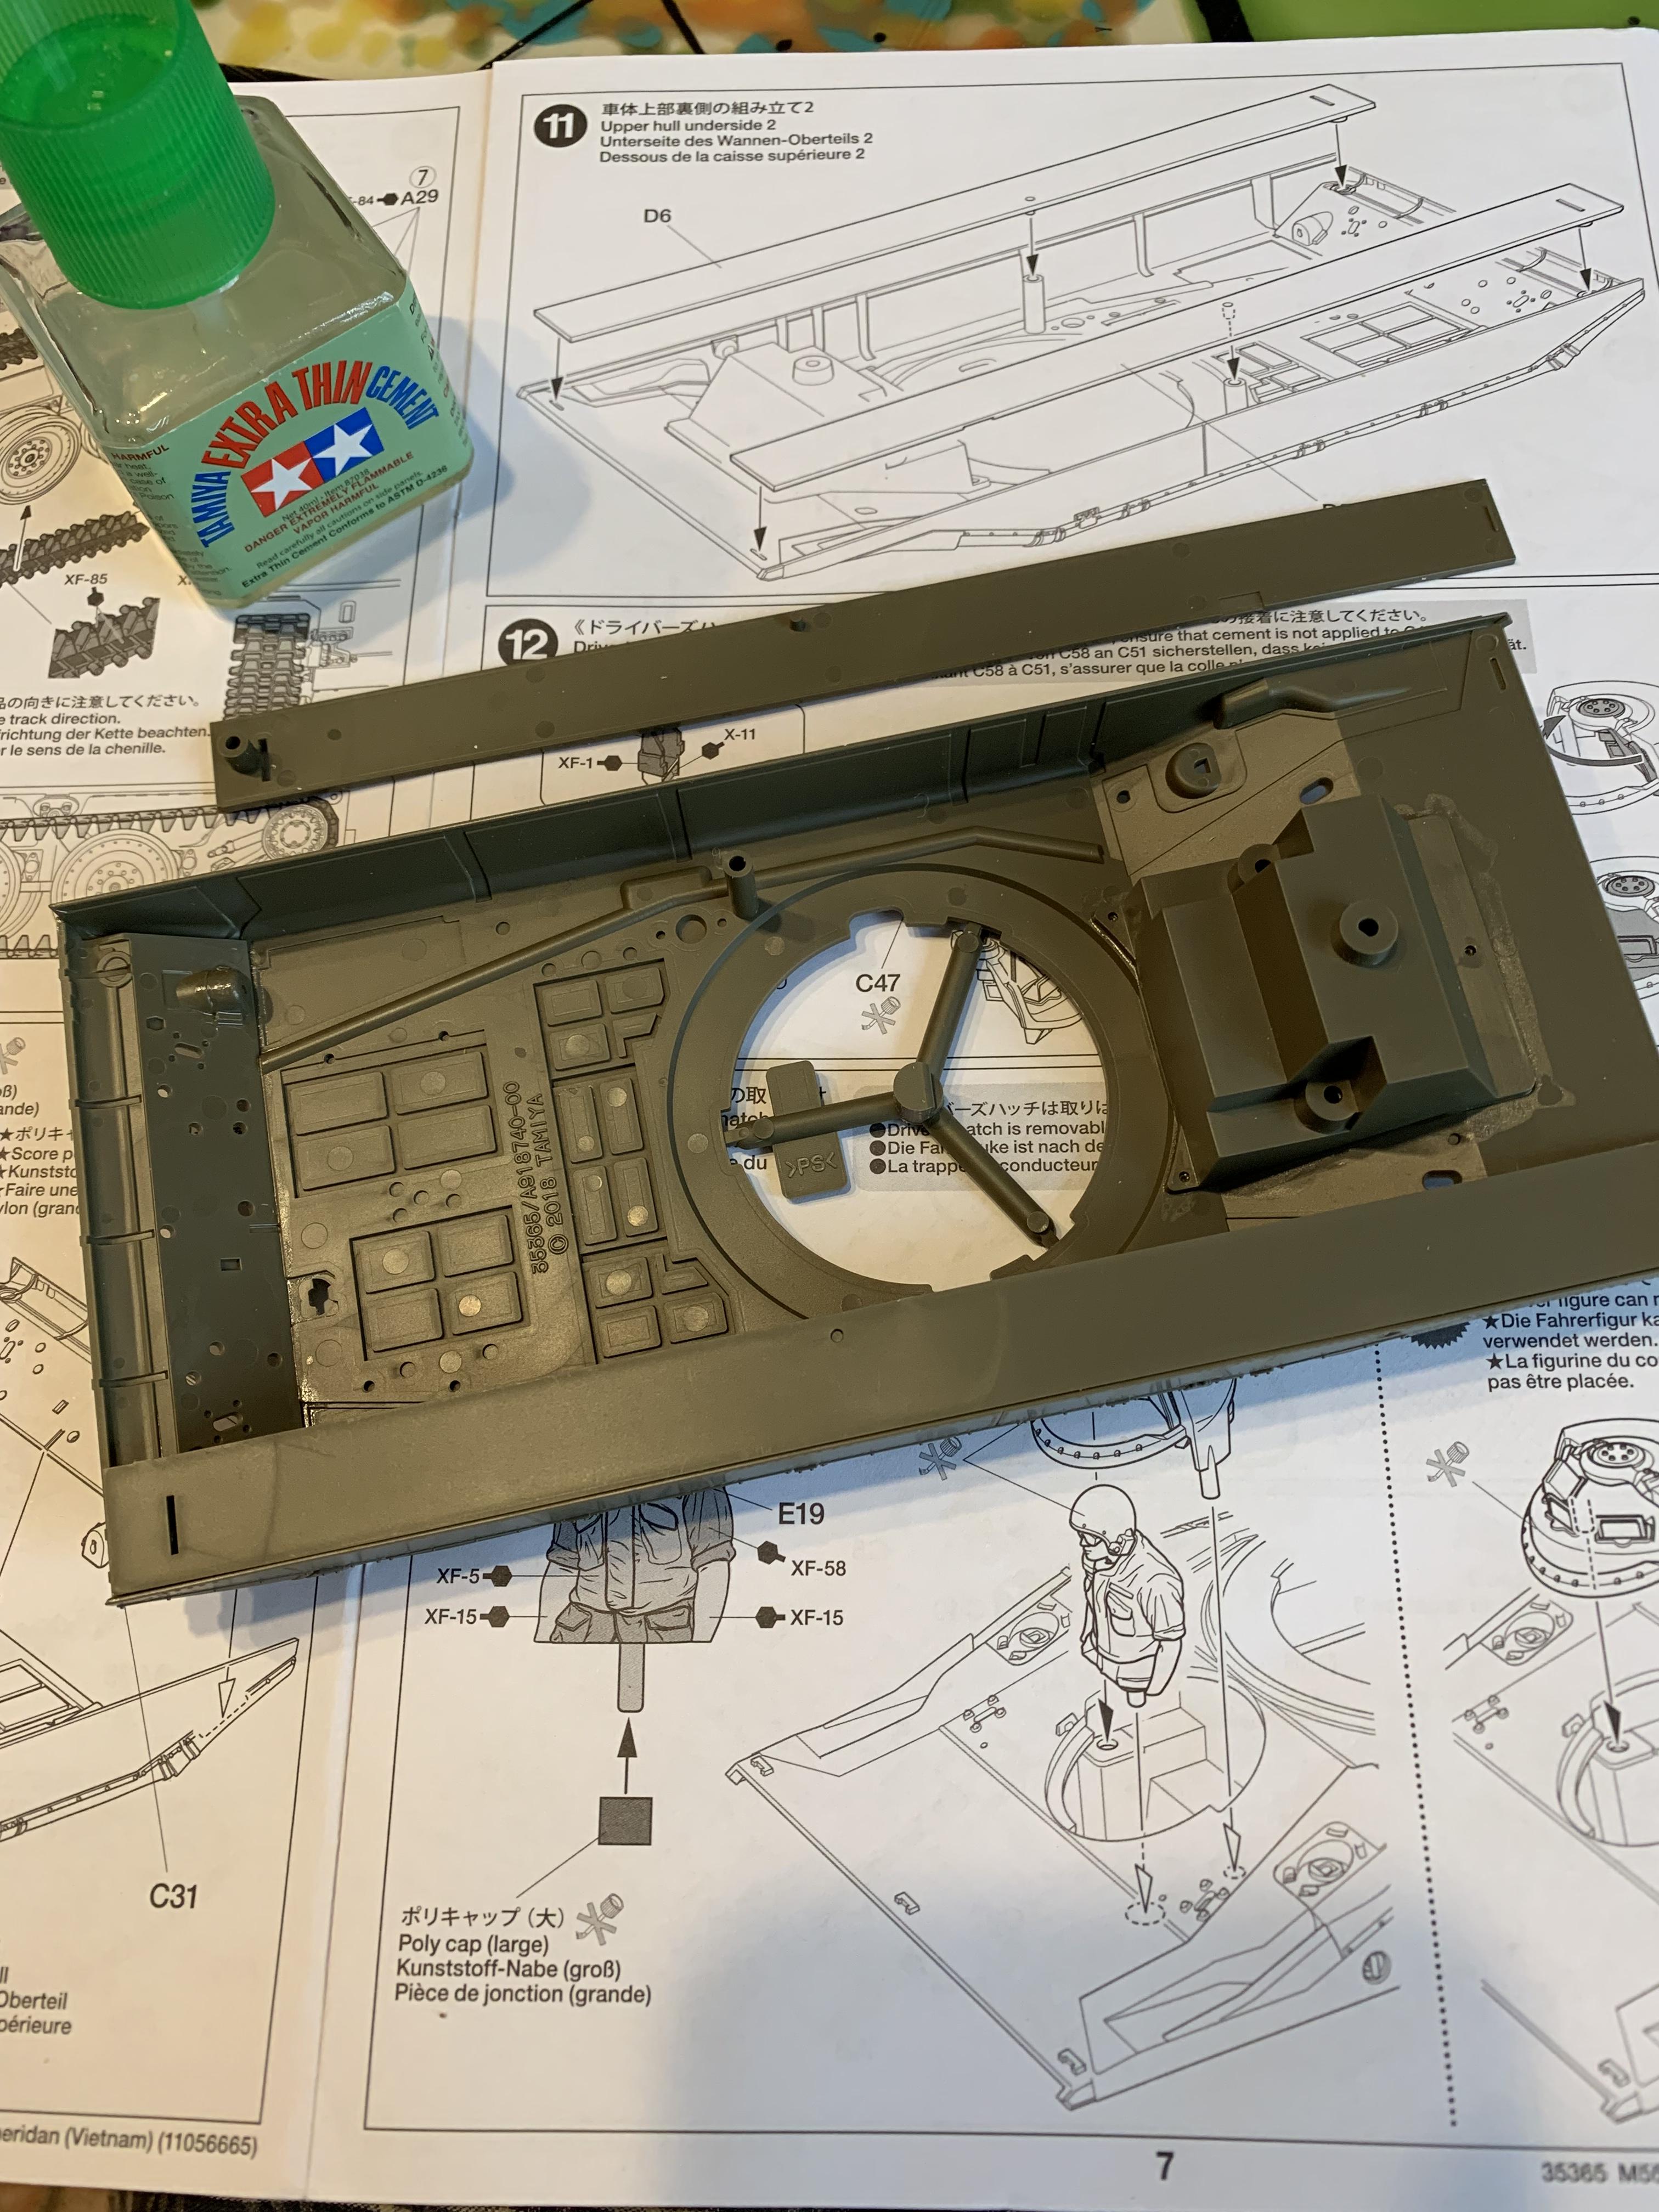
Step 11
Hull sponson covers.
New York, United States
Joined: August 25, 2004
KitMaker: 752 posts
Armorama: 378 posts
Posted: Friday, March 01, 2019 - 04:46 PM UTC
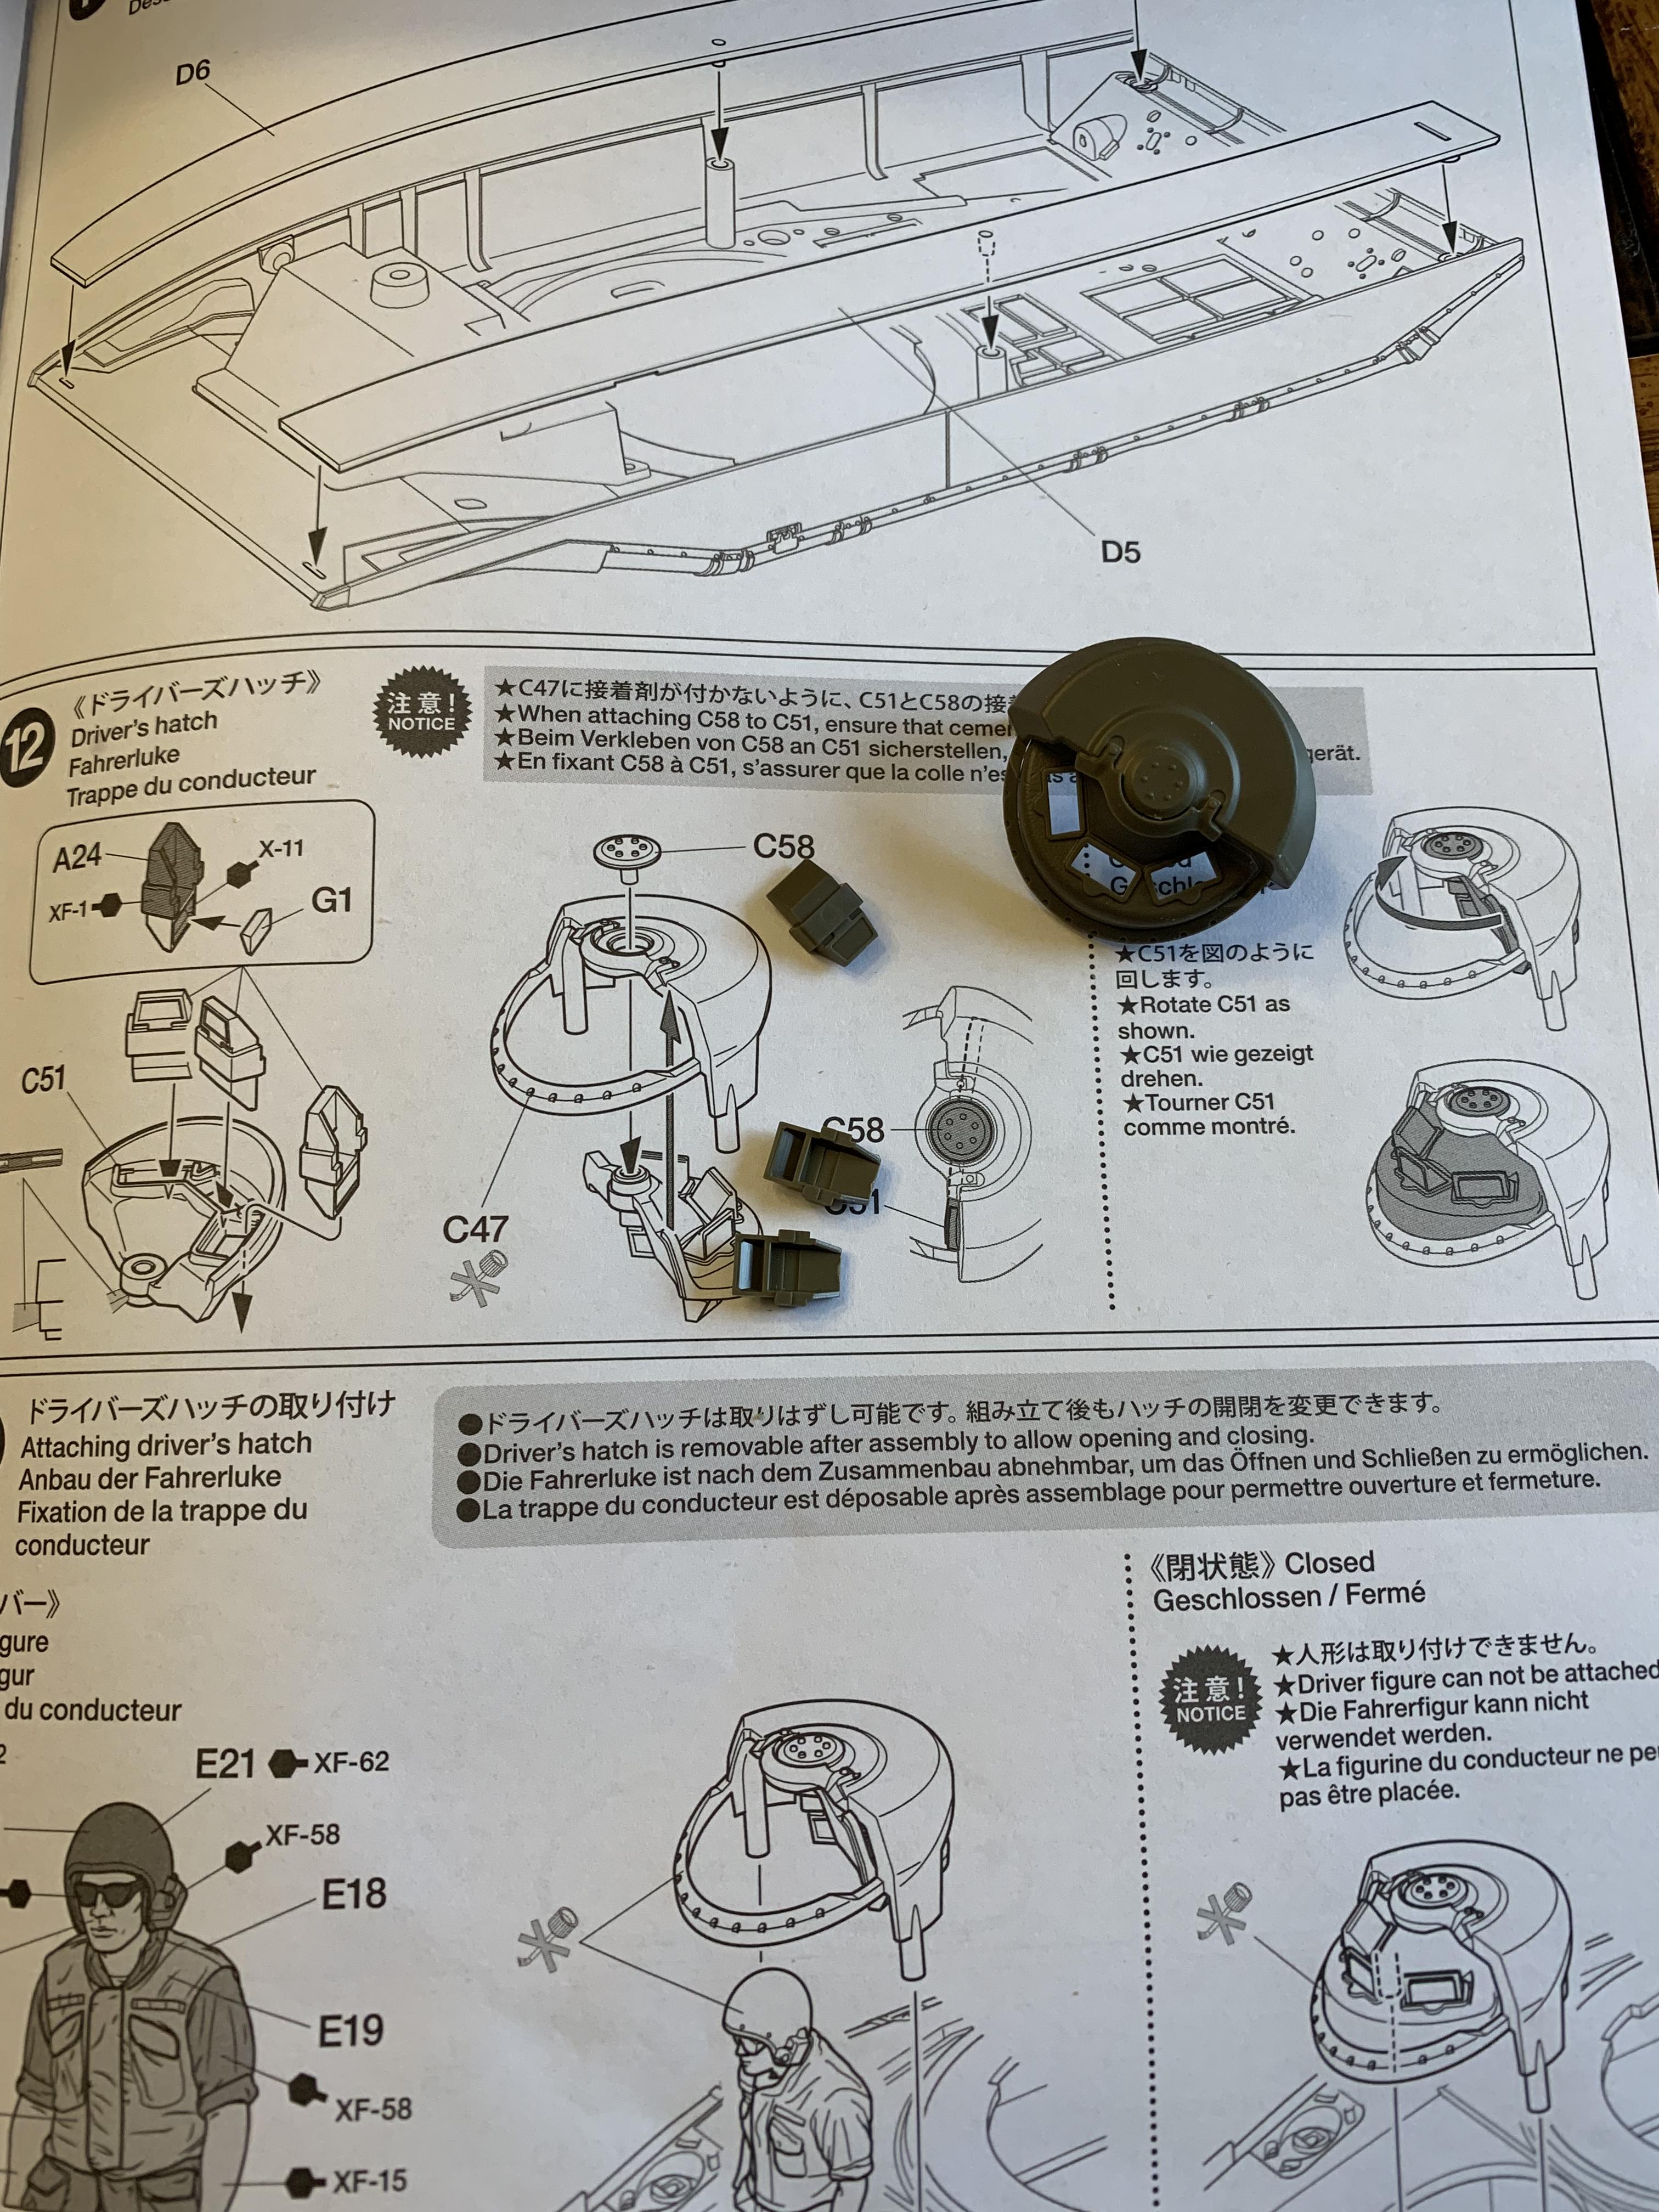
Step 12
The rotating drivers hatch. There are three small,
clear periscope lenses that I'm leaving off until after everything is painted.
Step 13
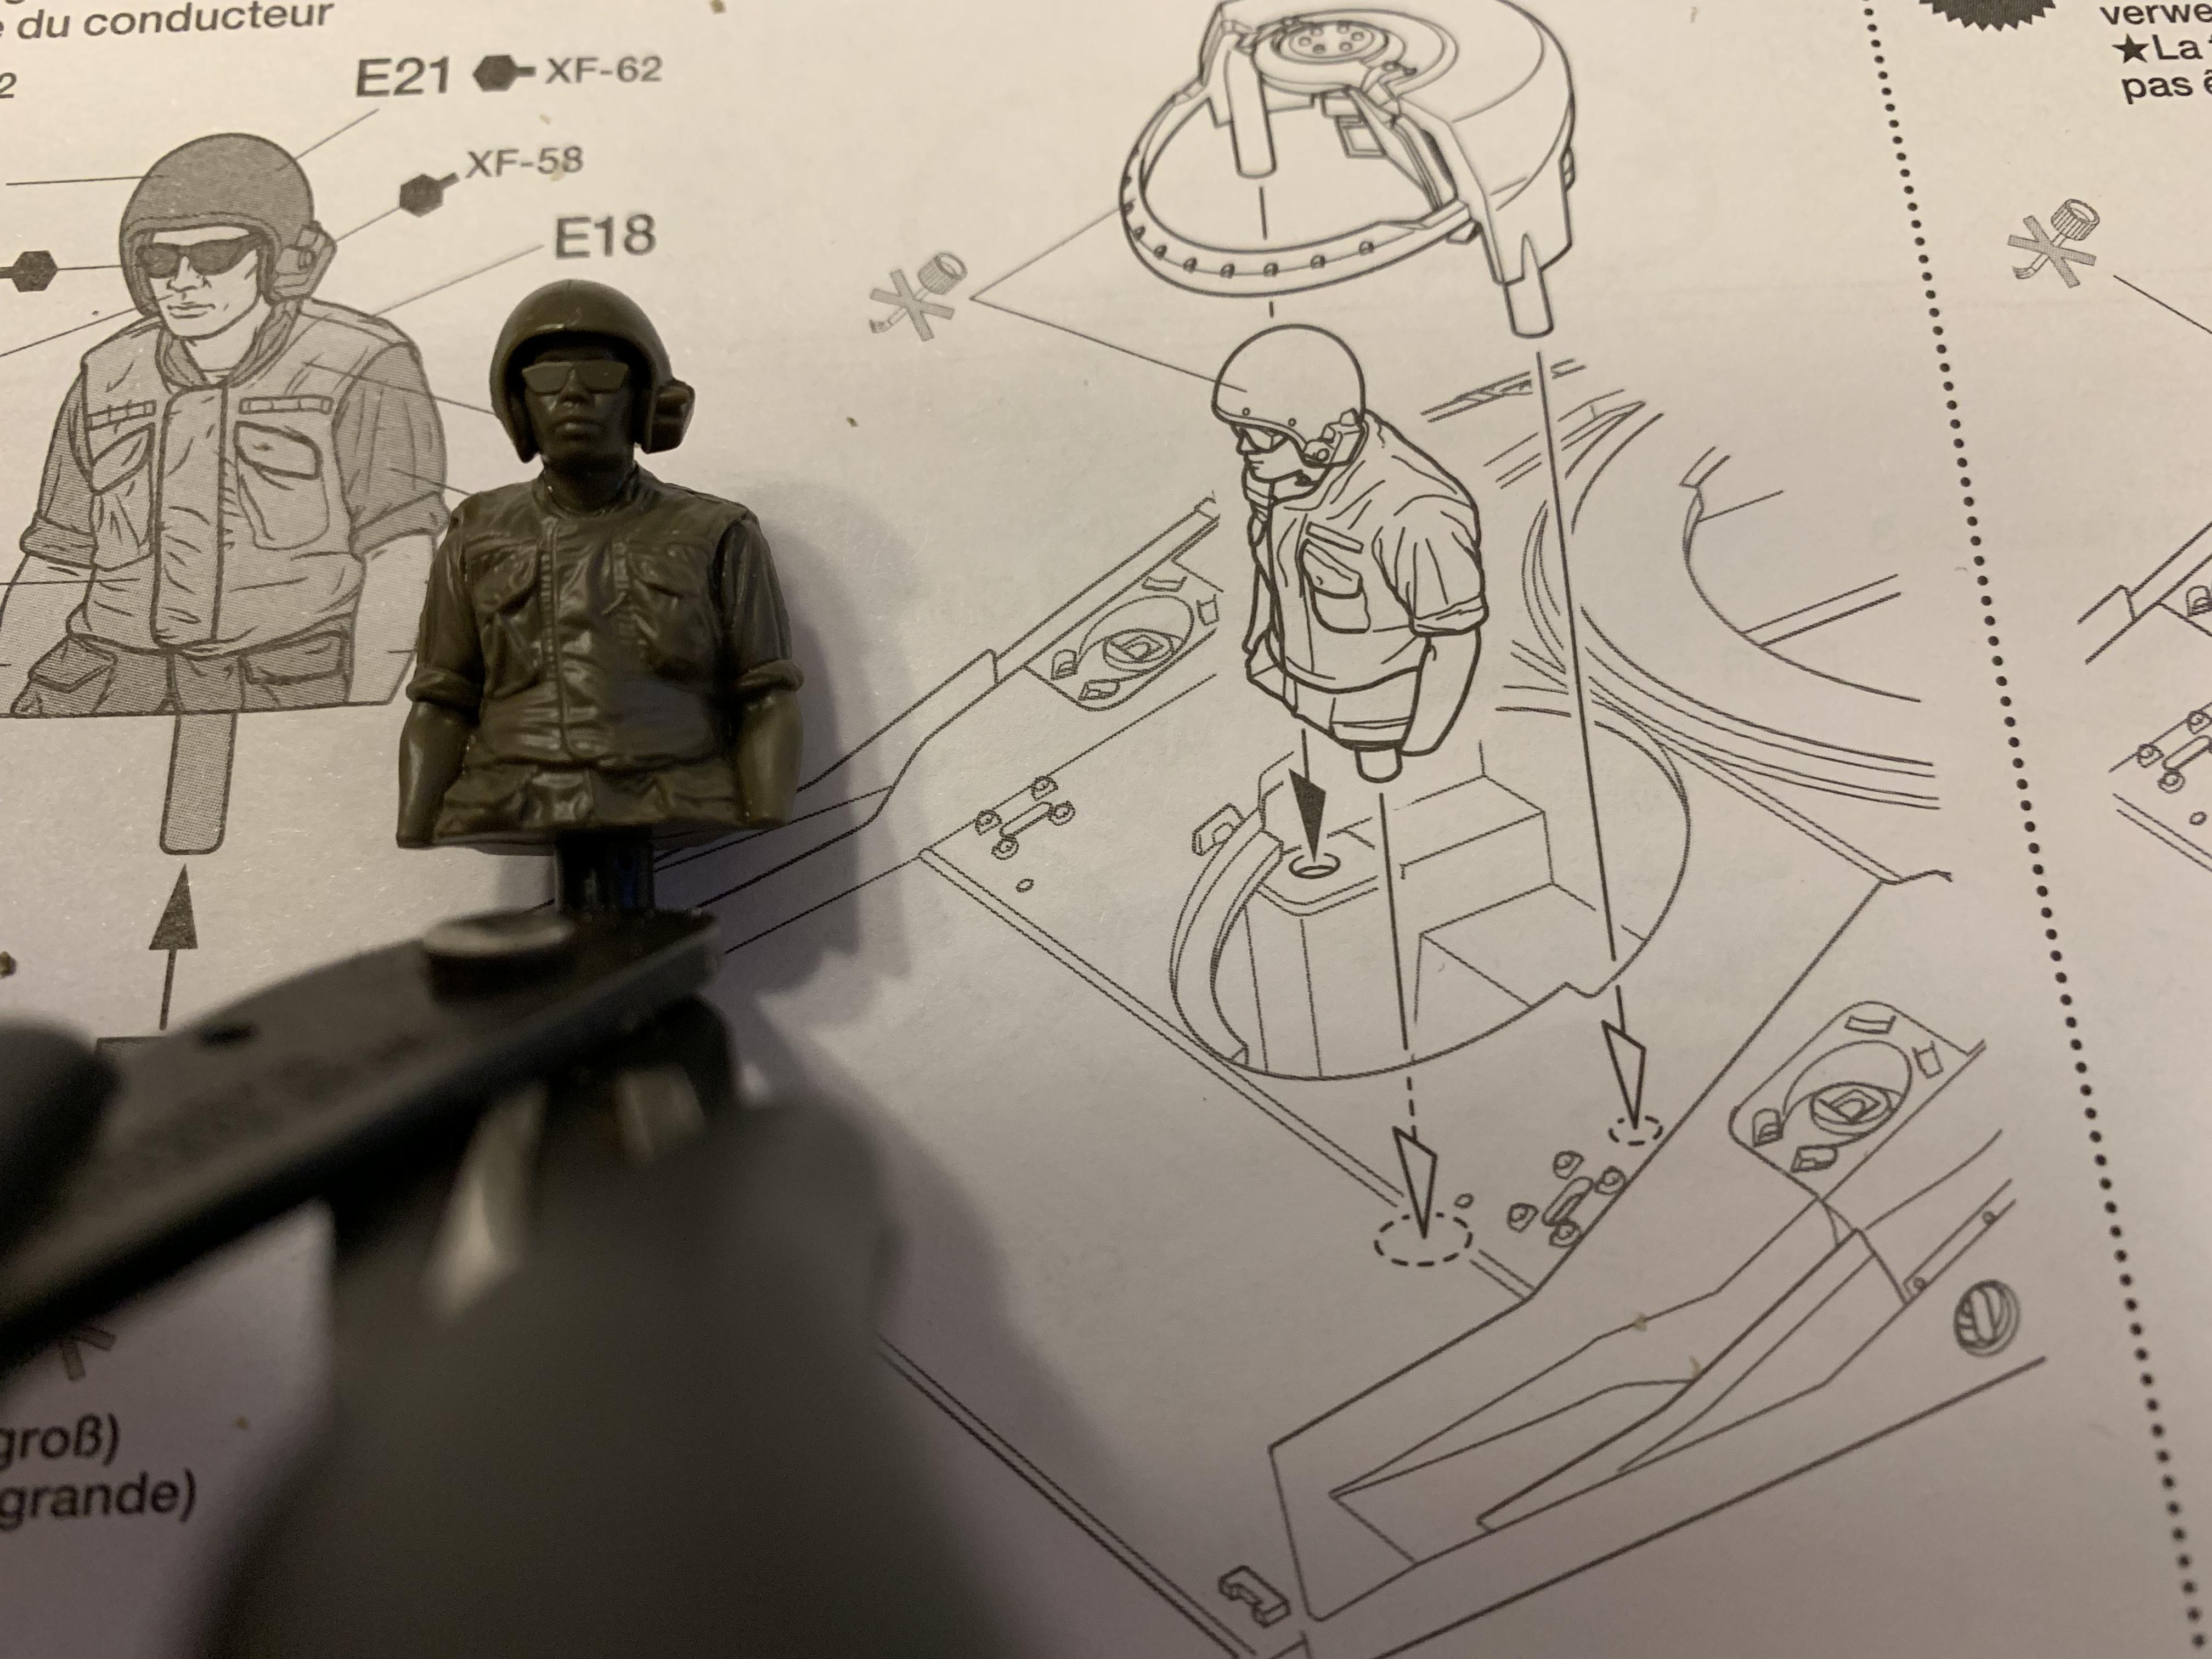
The five part driver. The three figures in this kit are highly detailed. I like the use of the polycap to attached the driver to the tub. The driver's hatch assembly is removable should you desire to open and close the hatch and/or remove and reinsert the driver.
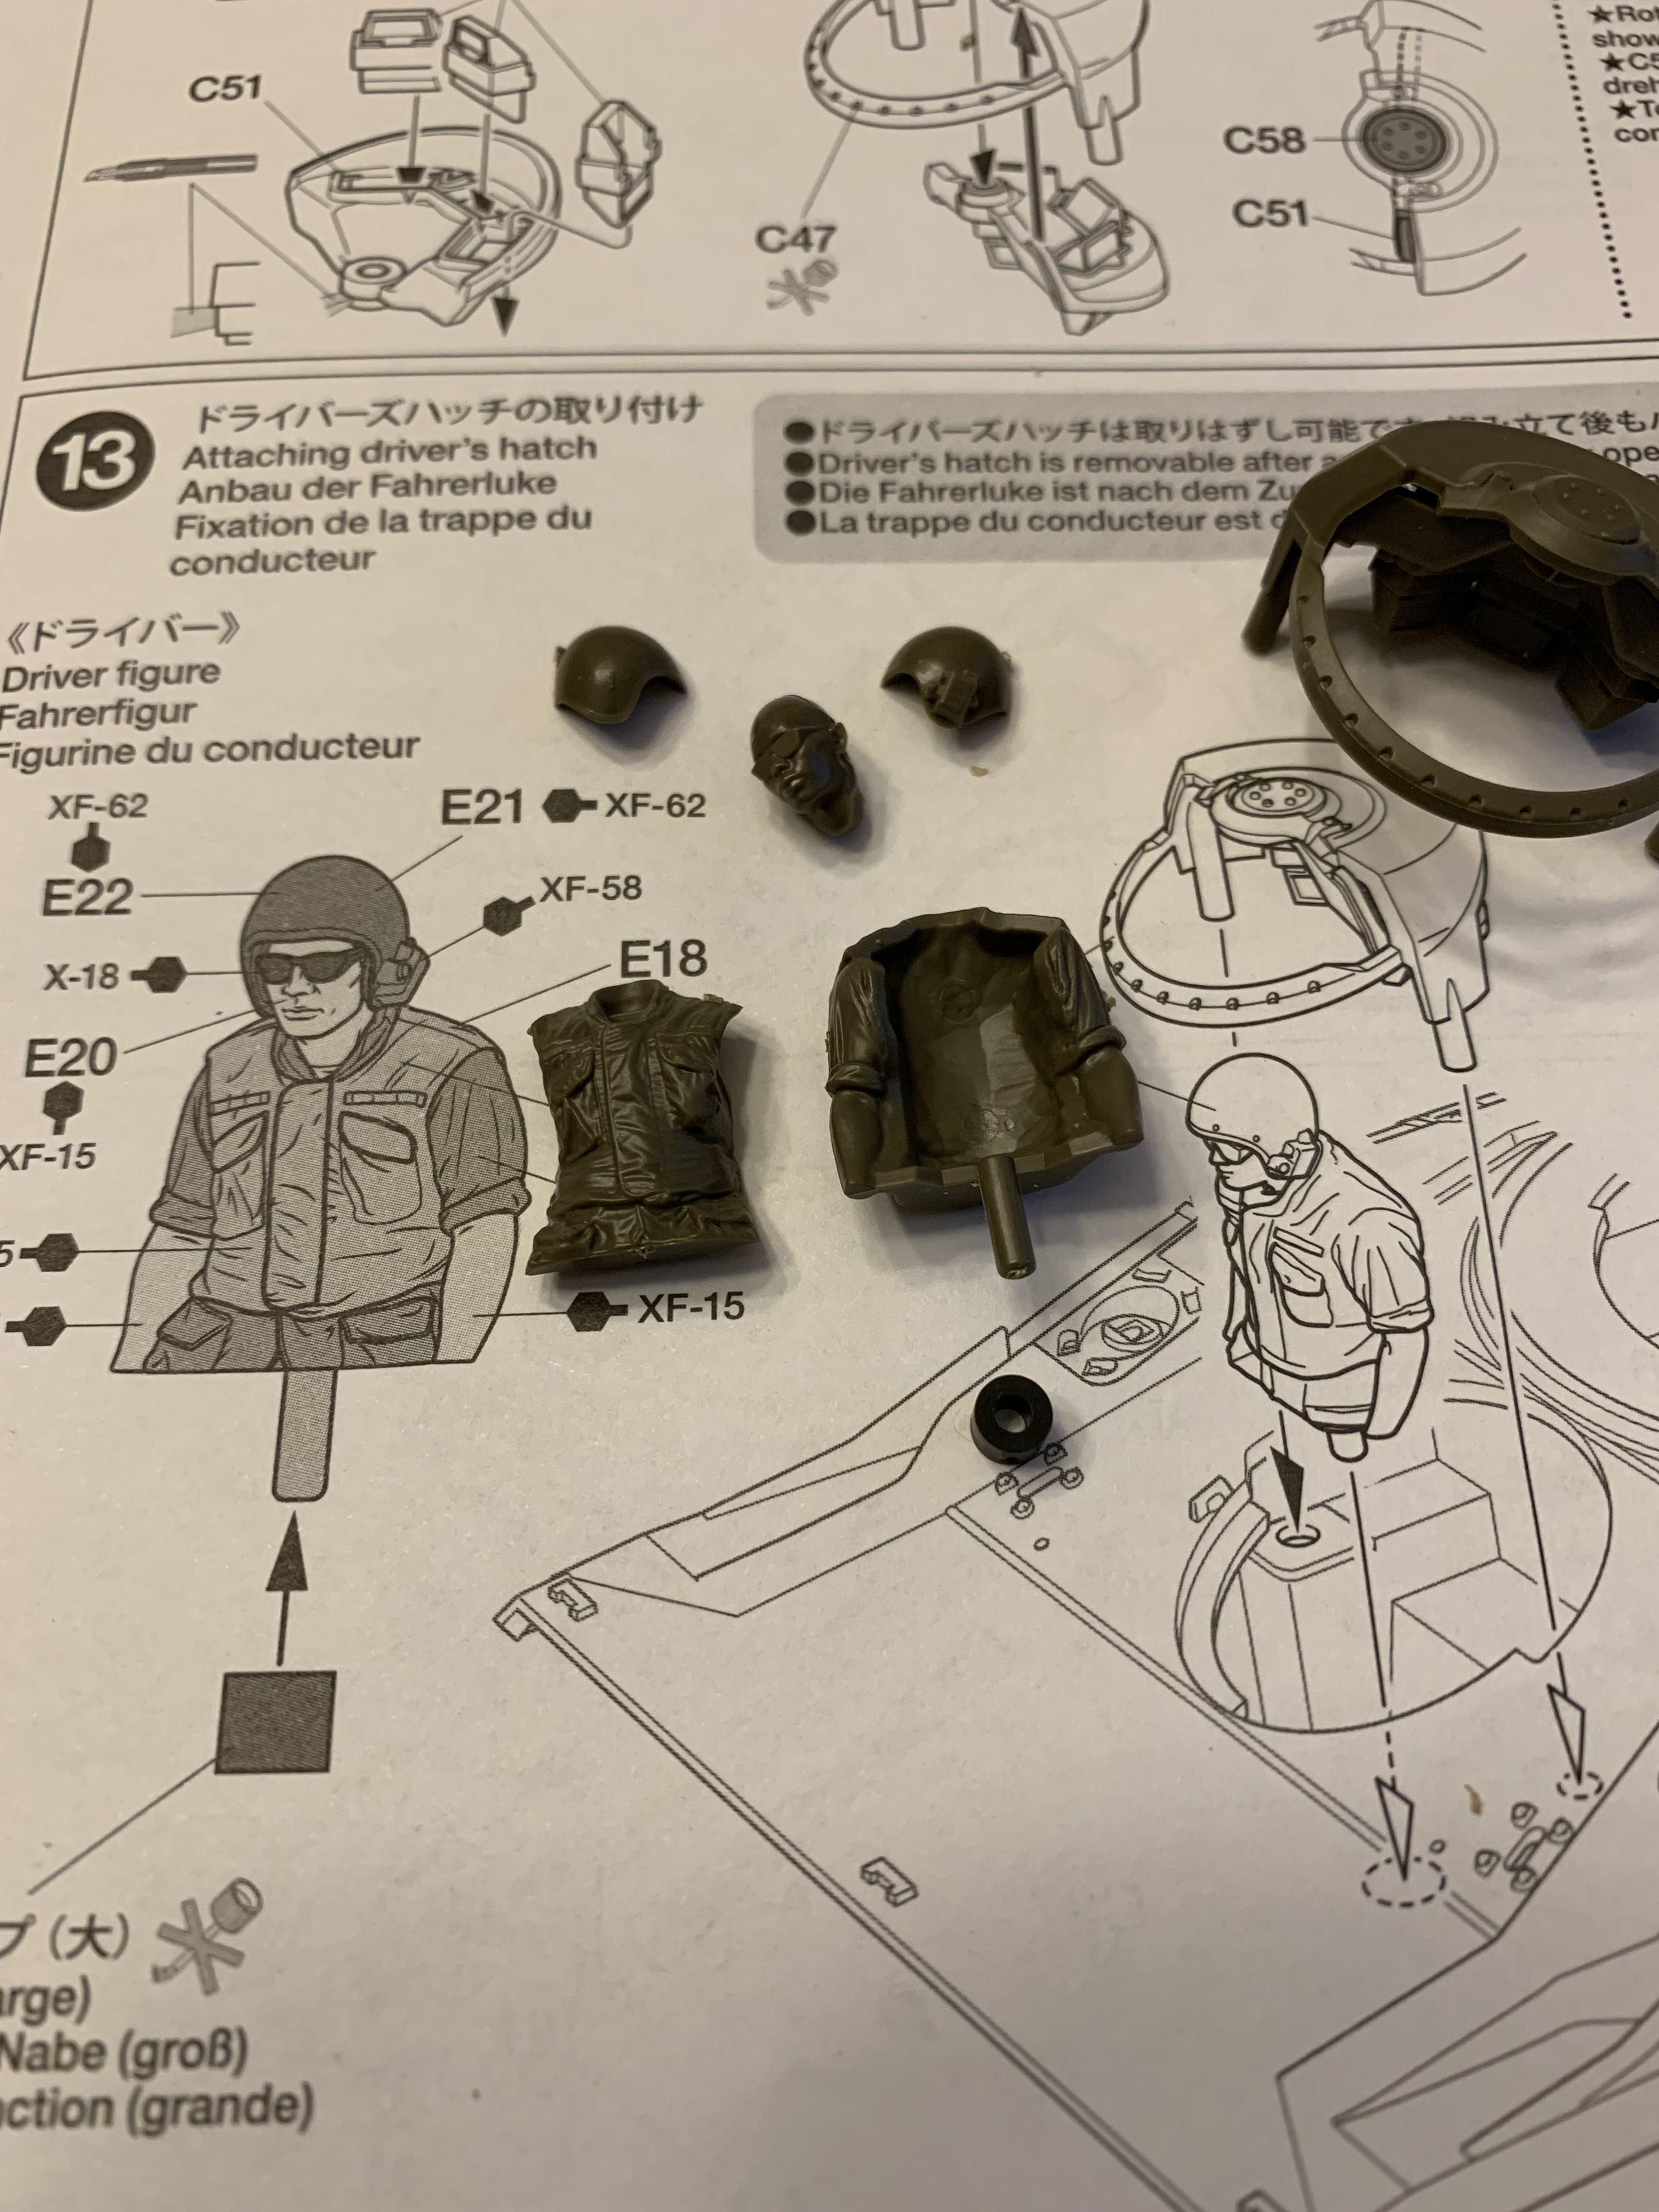
All that is missing is a mic boom. I'll be using some from the Royal Model set.
New York, United States
Joined: August 25, 2004
KitMaker: 752 posts
Armorama: 378 posts
Posted: Friday, March 01, 2019 - 04:58 PM UTC
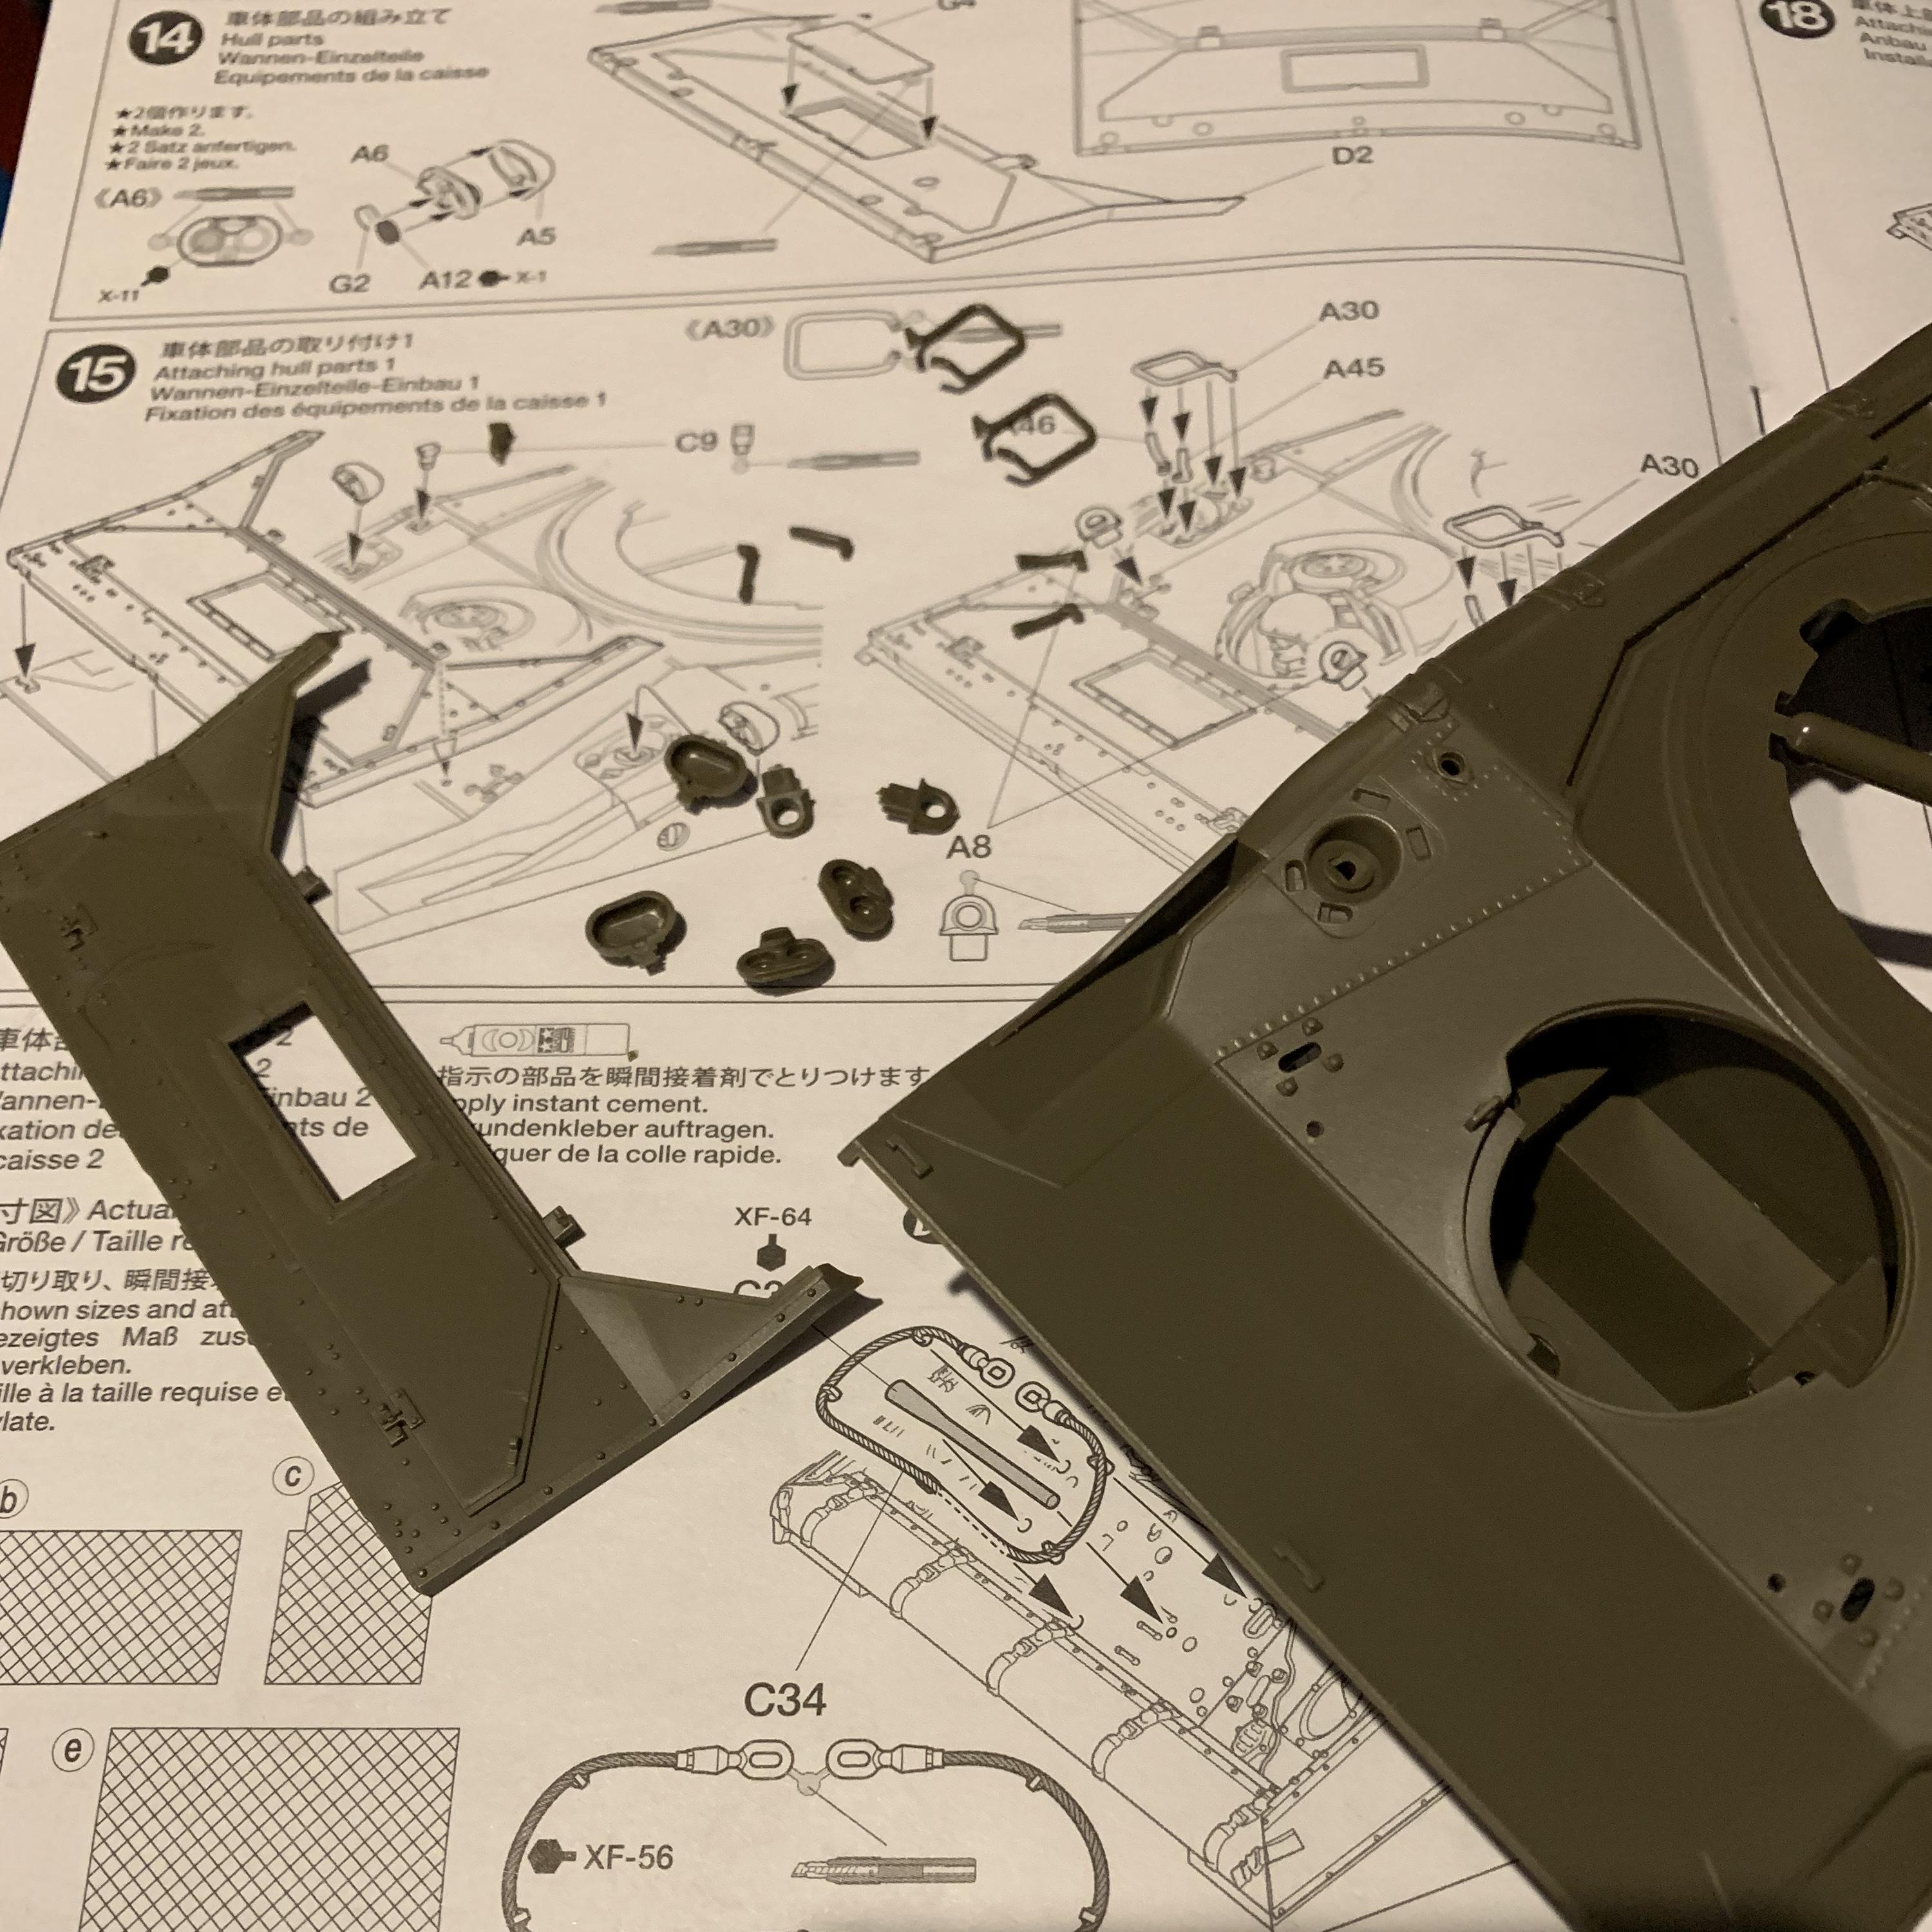
Steps 14 and 15
The front end. The multi angled headlight guards are made up of three parts which fit surprisingly well.
I decided not to glue the swim barrier (part D2) in place at this time as it has a clear window (part G4) that is inserted from the bottom. I'll get everything painted and then glue in the window and finally glue the barrier in place.
If you're building on the 3/4 Cav Sheridans with the screening in front (Option A in the instructions) you're going to want to drill two small holes in part D2 for the supports.
As I mentioned before, you should have already drilled out two holes to attach D2.
New York, United States
Joined: August 25, 2004
KitMaker: 752 posts
Armorama: 378 posts
Posted: Friday, March 01, 2019 - 05:09 PM UTC
Steps 16 and 17
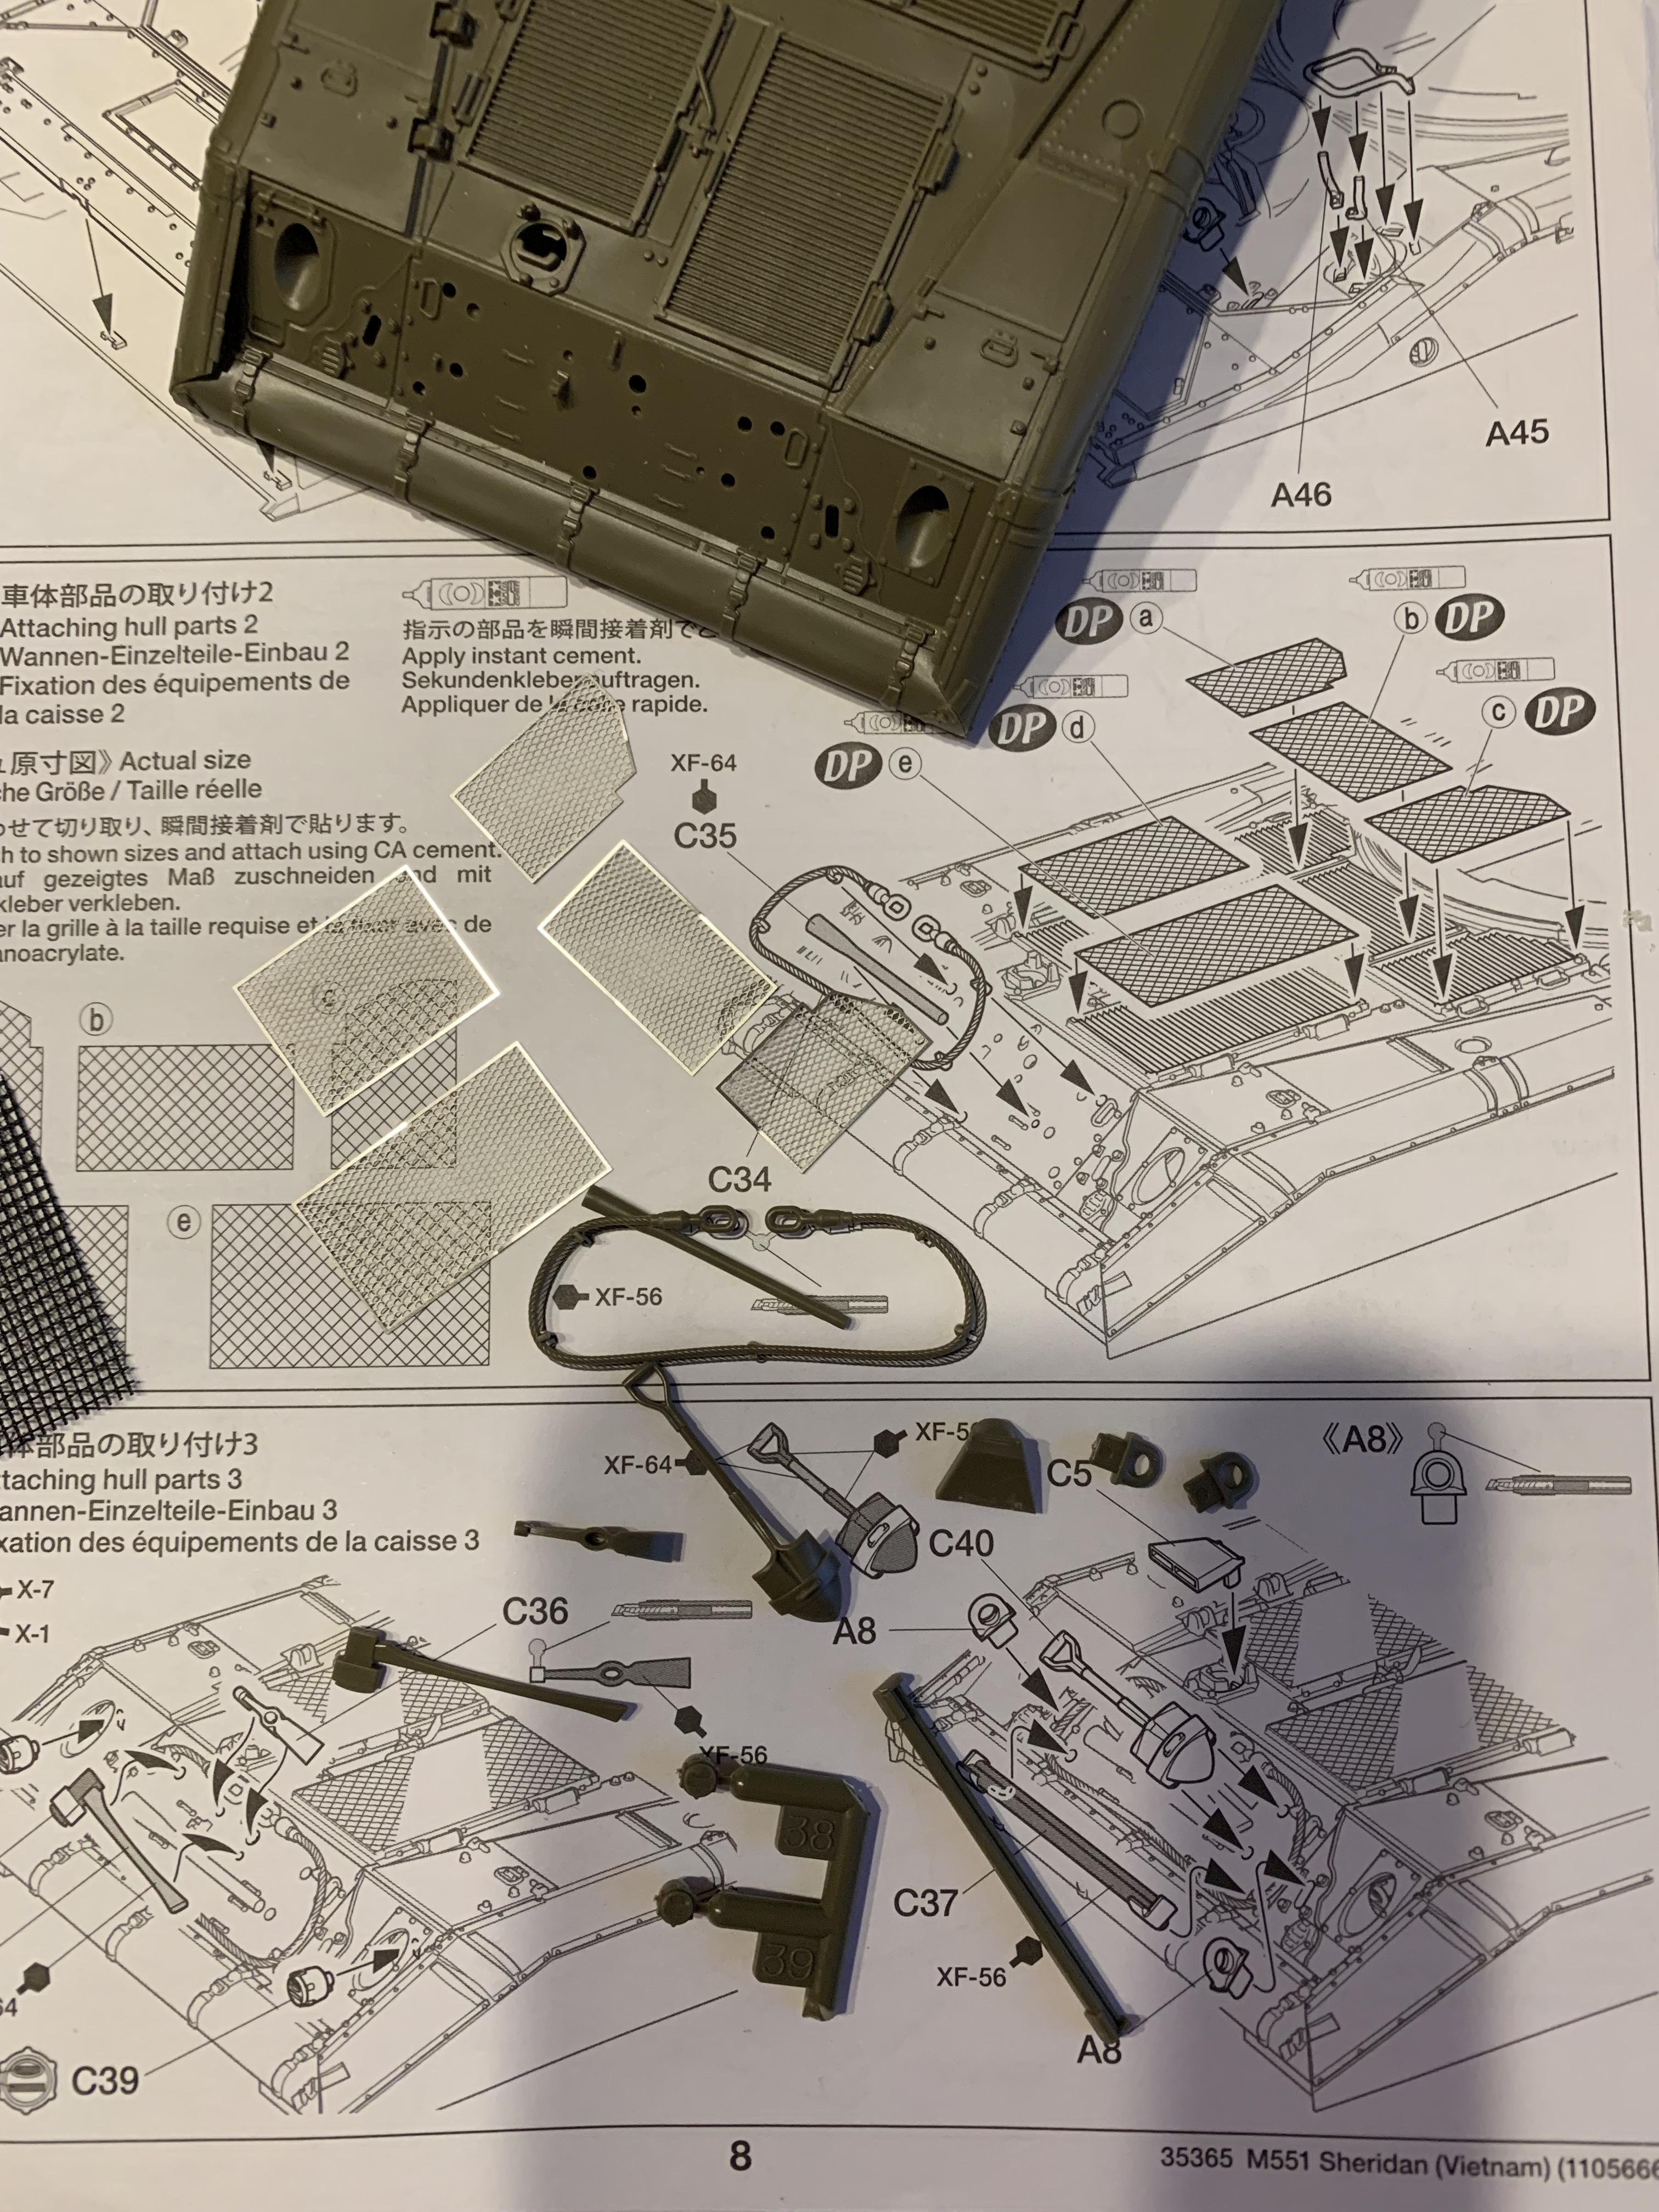
Time to pull out the PE "Detail Up" set, #12687.
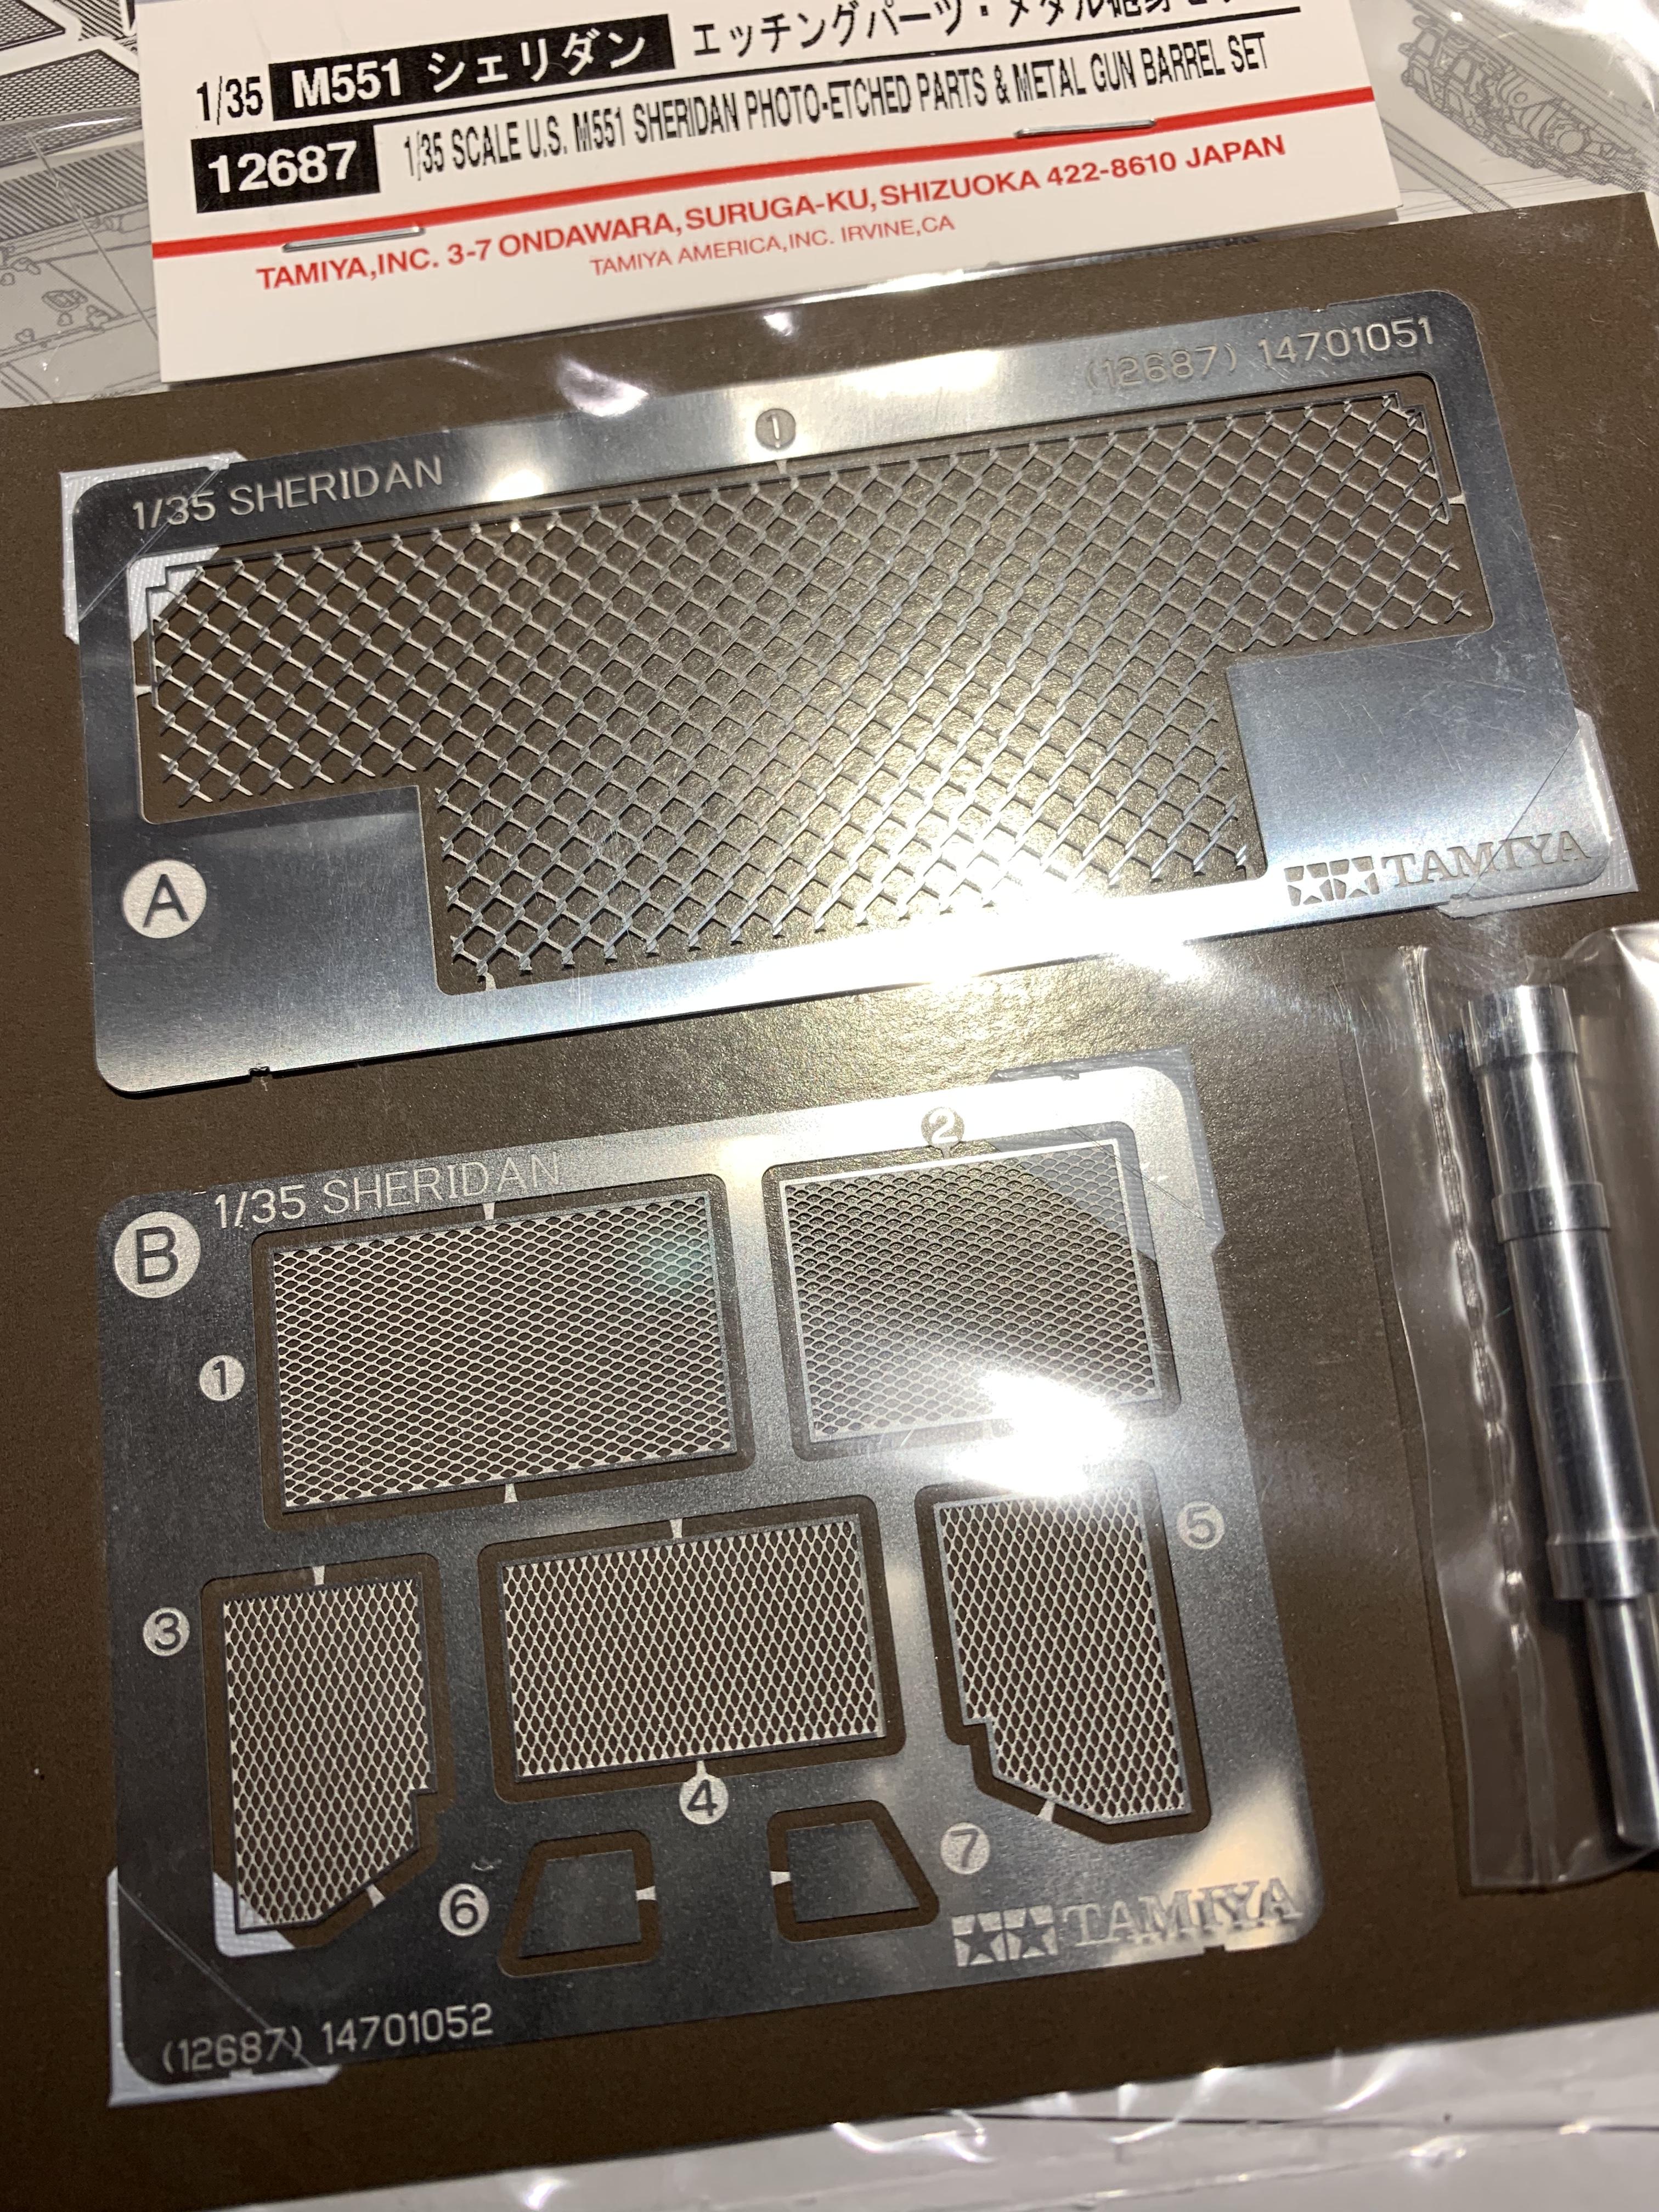
Here are the screens and the pioneer tools. I piece of the kit included mesh is shown on the left.
Make sure to install the tools in order, step 16 and then in step 17 go from left to right. I had to remove the shovel to make room to install the axe.
Step 18
Attaching the upper and lower hulls and adding the mud flaps. I didn't get around to this step yet.
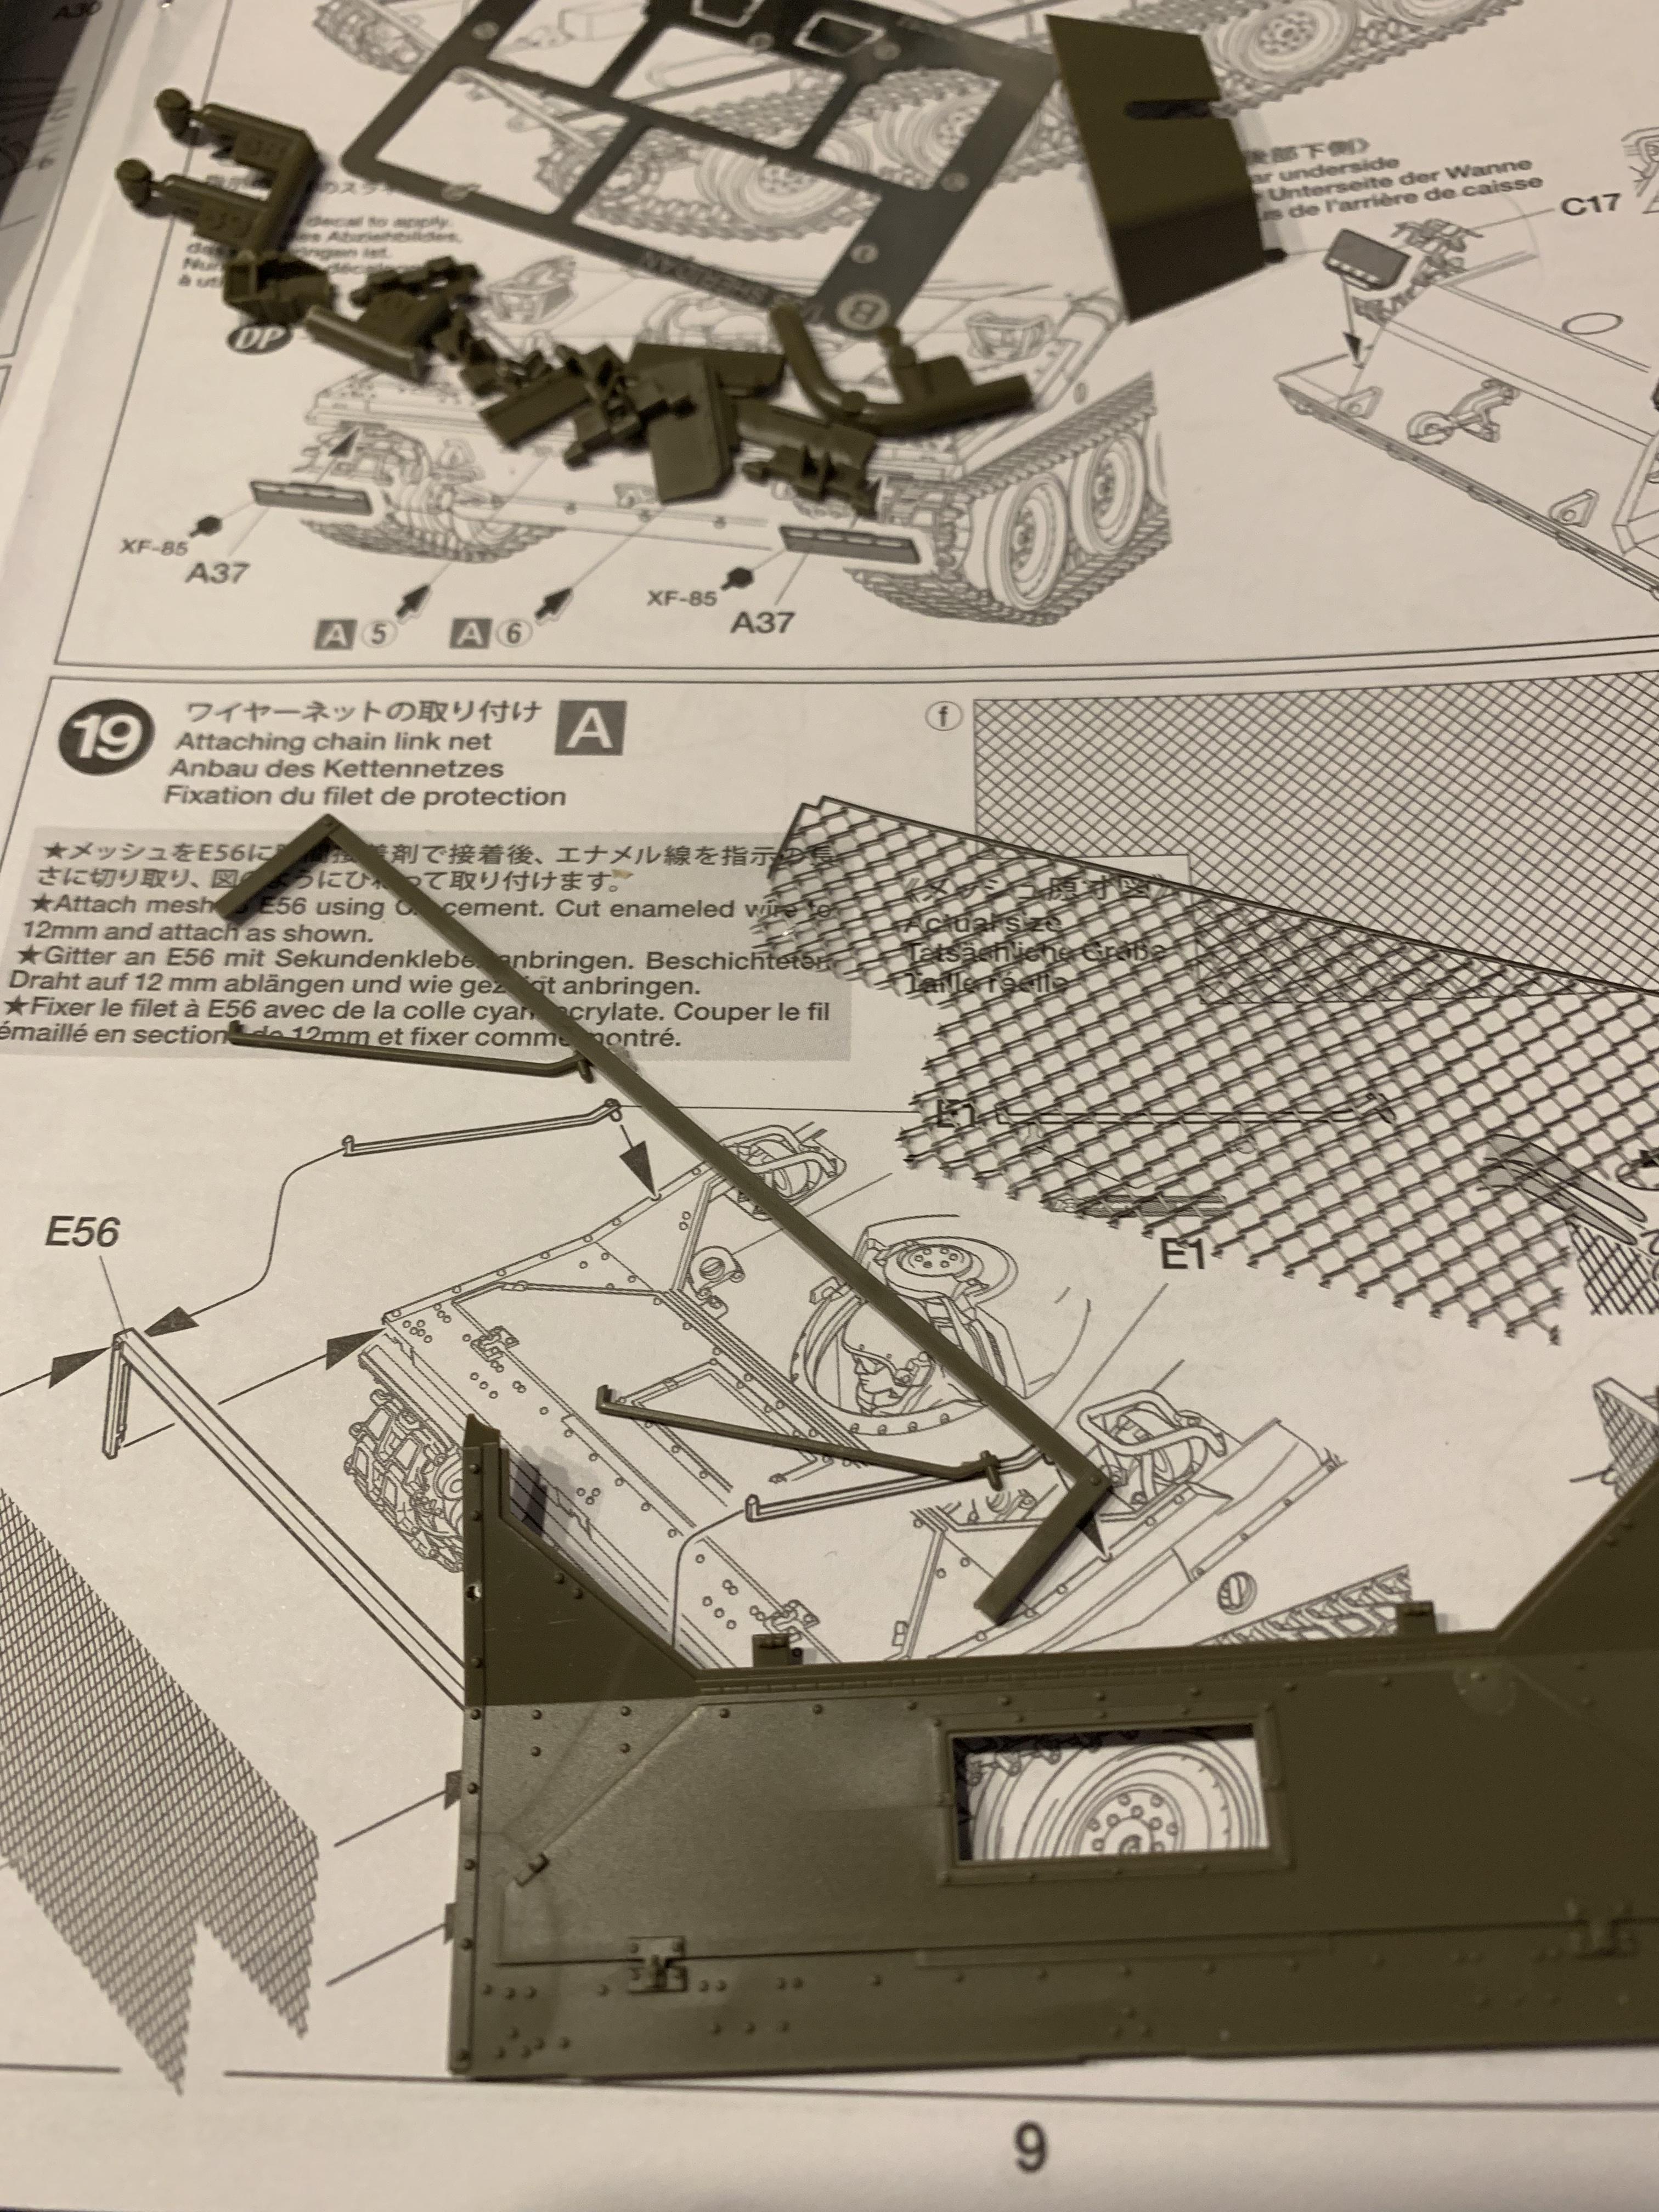
Step 19
Parts for the 3/4 Cav screen. I'll have to get a better shot of the cyclone fencing. It's nicely detailed on both sides and looks the part.
New York, United States
Joined: August 25, 2004
KitMaker: 752 posts
Armorama: 378 posts
Posted: Friday, March 01, 2019 - 05:29 PM UTC
Quoted Text
Overall, a good kit, with the best looking Tamiya figures I've seen to date.
Yes, the PE would be better served as part of the actual kit, not as an AM item. The AM includes a metal that really does not serve to improve on the plastic kit item. But, hey, I needed the engine screens, so I bought the set..... The chain link screen looks good, but was not a piece that was going to be used.
As far as the turret basket, the included one appears to be the standard "issue" item, which was quickly determined to be not near enough to hold anything more than a case of C-rations. Since units were pretty accomplished at devising more efficient baskets, there wasn't a lot of similarity. This, I believe, is why Tamiya provides the model maker with the basic "original issue" kit, leaving modifications to the purchaser as they deem fit.
Oh, BTW i changed out the tracks for Fruils from an older Academy Sheridan build I did. Kit pieces were fine tho.
My $0.02 worth. 
Hey Jim,
Yes, the figures are some of the best I've seen in plastic. I'm thinking of using my second set in an M113. I'm happy having the smaller "stock" cargo rack. In fact, it was one of the things I wished the Academy kit had. The actual ones where made from I shaped metal stock.
If you're not planning to use the front fencing screen I'd be happy to take it off your hands or swap you something for it.
Any issues getting the Fruil tracks or sprocket to fit?
New York, United States
Joined: May 02, 2013
KitMaker: 4,403 posts
Armorama: 4,078 posts
Posted: Friday, March 01, 2019 - 10:54 PM UTC
Quoted Text
Quoted Text
Overall, a good kit, with the best looking Tamiya figures I've seen to date.
Yes, the PE would be better served as part of the actual kit, not as an AM item. The AM includes a metal that really does not serve to improve on the plastic kit item. But, hey, I needed the engine screens, so I bought the set..... The chain link screen looks good, but was not a piece that was going to be used.
As far as the turret basket, the included one appears to be the standard "issue" item, which was quickly determined to be not near enough to hold anything more than a case of C-rations. Since units were pretty accomplished at devising more efficient baskets, there wasn't a lot of similarity. This, I believe, is why Tamiya provides the model maker with the basic "original issue" kit, leaving modifications to the purchaser as they deem fit.
Oh, BTW i changed out the tracks for Fruils from an older Academy Sheridan build I did. Kit pieces were fine tho.
My $0.02 worth. 
Hey Jim,
Yes, the figures are some of the best I've seen in plastic. I'm thinking of using my second set in an M113. I'm happy having the smaller "stock" cargo rack. In fact, it was one of the things I wished the Academy kit had. The actual ones where made from I shaped metal stock.
If you're not planning to use the front fencing screen I'd be happy to take it off your hands or swap you something for it.
Any issues getting the Fruil tracks or sprocket to fit?
Hi, Sherb!

I've been following your Build/Review of this new TAMIYA M551 with GREAT INTEREST. I've now decided that I will indeed make at least one of these, possibly two, as part(s) of my collections.
I want to THANK YOU for your very explicit attention to the parts, the instructions, and how this all comes together in the actual assembly of this kit...
GREAT WORK!!!

barkingdigger
 Associate Editor
#013
England - East Anglia, United Kingdom
Joined: June 20, 2008
KitMaker: 3,981 posts
Armorama: 3,403 posts
Posted: Saturday, March 02, 2019 - 01:02 AM UTC
Hi Sherb,
Great build log! I picked one of these up last weekend at a show and am most of the way through assembly. I did my tracks differently, as an upper and lower run to be added after everything is painted - with all those loose wheels it took more than the standard complement of fingers! Did you paint the driver's bucket before installing? I brushed mine black since there's no detail to see. You also need to paint the hull front before adding the surfboard at the front, thanks to the clear window.
I am building mine based on photos of a tank without the turret ammo boxes, so I had to add the footman loops and corner angles from Plastruct stock - otherwise everything seems to fall together in the best of Tamiya tradition! Anyone wanna buy an unbuilt Academy M551?...
[EDIT: Forgot to mention I didn't get the PE, but added my screens from plastic wedding doilies (table decorations) I picked up in HobbyCraft years ago - it looks right in 1:35 and is glue-able with plastic cement. The kit mesh material is hopeless...]
"Glue, or Glue Not - there is no Dry-Fit" - Yoda (original script from Return of the Jedi...)
New York, United States
Joined: August 25, 2004
KitMaker: 752 posts
Armorama: 378 posts
Posted: Saturday, March 02, 2019 - 01:20 AM UTC
Quoted Text
Hi, Sherb! 
I've been following your Build/Review of this new TAMIYA M551 with GREAT INTEREST. I've now decided that I will indeed make at least one of these, possibly two, as part(s) of my collections.
I want to THANK YOU for your very explicit attention to the parts, the instructions, and how this all comes together in the actual assembly of this kit...
GREAT WORK!!! 
Hi Dennis,
Thanks for the kind words. It makes me feel it's all worth doing. I'm not the greatest builder but I always enjoy seeing how kits go together so I thought this format would be helpful to others. The majority of the books in my reference library are "in action" style books so unless something really jumps out at me, I won't be commenting on the accuracy of the hull shape or road wheel size etc. etc.
There are some neat building techniques (such as how the driver and his hatch attach as well as how the main gun elevates) so I wanted to highlight that. I wonder if Tamiya will cut me a check for the kits you'll be picking up?

New York, United States
Joined: August 25, 2004
KitMaker: 752 posts
Armorama: 378 posts
Posted: Saturday, March 02, 2019 - 01:29 AM UTC
Quoted Text
Hi Sherb,
Great build log! I picked one of these up last weekend at a show and am most of the way through assembly. I did my tracks differently, as an upper and lower run to be added after everything is painted - with all those loose wheels it took more than the standard complement of fingers! Did you paint the driver's bucket before installing? I brushed mine black since there's no detail to see. You also need to paint the hull front before adding the surfboard at the front, thanks to the clear window.
I am building mine based on photos of a tank without the turret ammo boxes, so I had to add the footman loops and corner angles from Plastruct stock - otherwise everything seems to fall together in the best of Tamiya tradition! Anyone wanna buy an unbuilt Academy M551?...
[EDIT: Forgot to mention I didn't get the PE, but added my screens from plastic wedding doilies (table decorations) I picked up in HobbyCraft years ago - it looks right in 1:35 and is glue-able with plastic cement. The kit mesh material is hopeless...]
Hi Tom, thanks for stopping in. Interesting technique with the tracks. You're absolutely right, you need some extra hands and fingers. More than once I had to start over with everything. I was thinking of using some sticky tack (a removable "putty" that you can use to hang posters) to keep the wheels in place I just just couldn't find what my kids did with it.
Gotta admit, I didn't think about painting the driver's compartment. Arghhh!

It would have been easy enough to add after painting. I did leave the surf board off due to the window.
Lastly, if you have any extra buyers for your Academy Sheridan, send them my way!
New York, United States
Joined: August 25, 2004
KitMaker: 752 posts
Armorama: 378 posts
Posted: Saturday, March 02, 2019 - 01:48 AM UTC
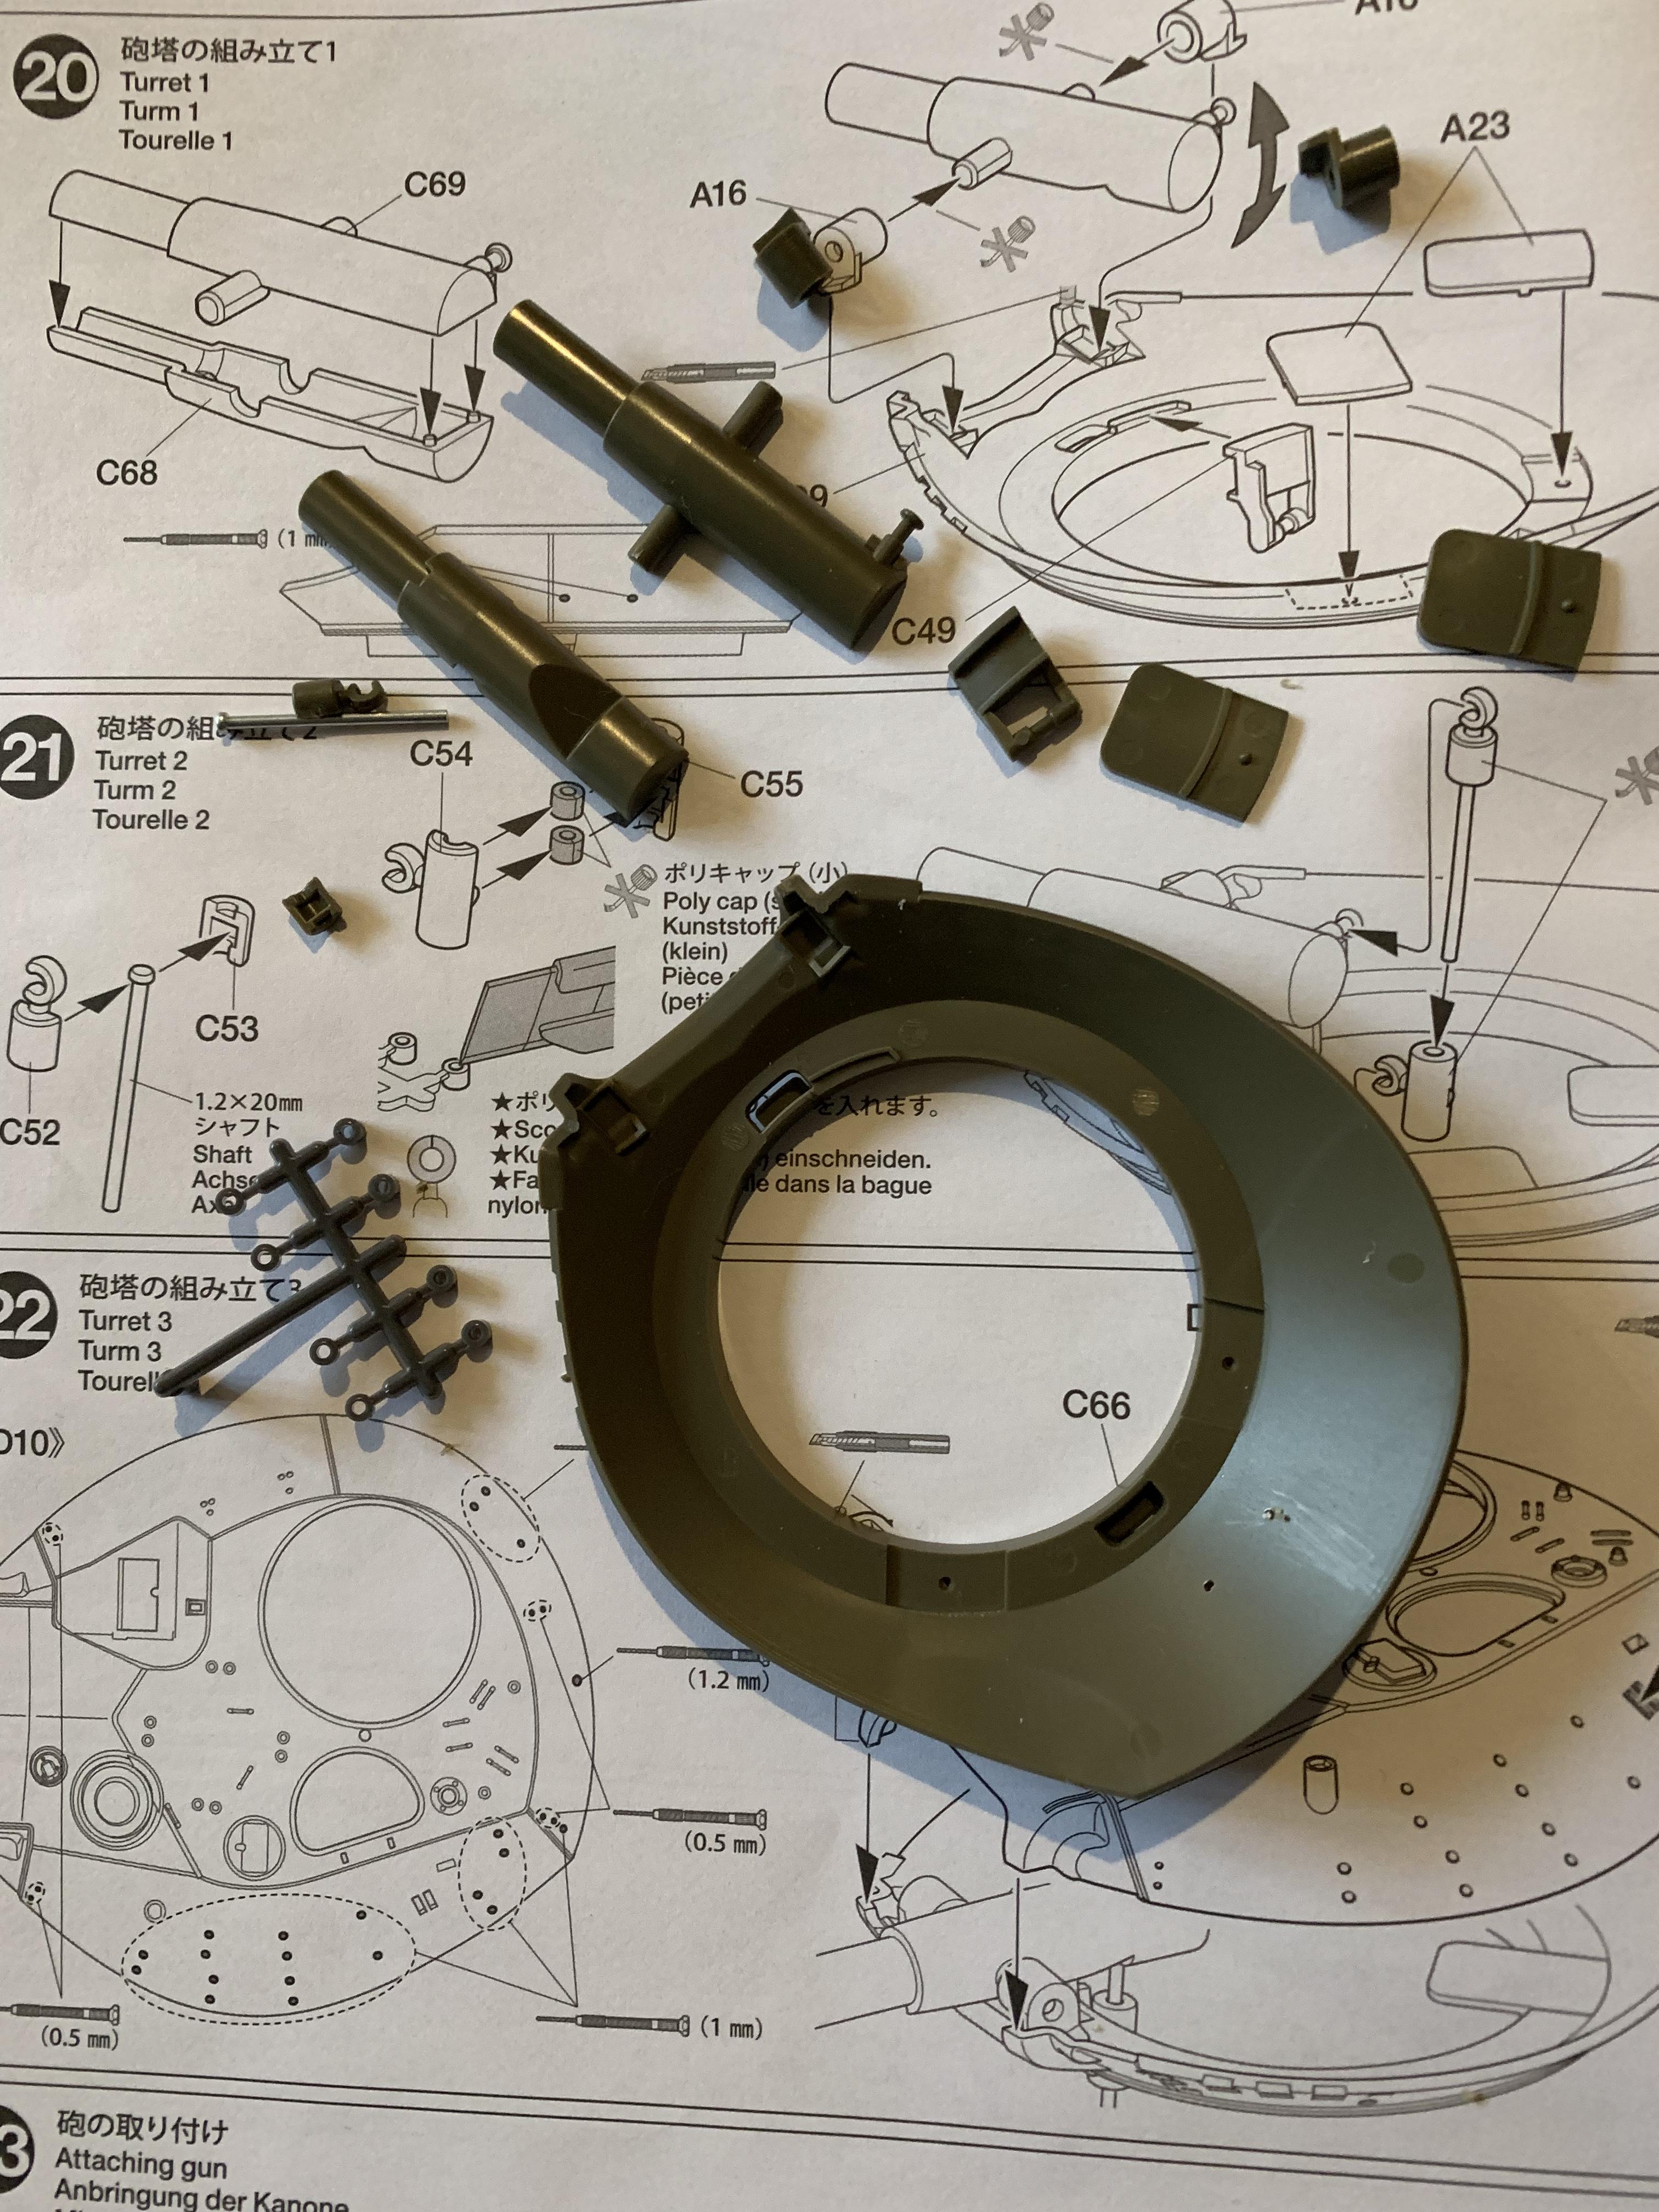
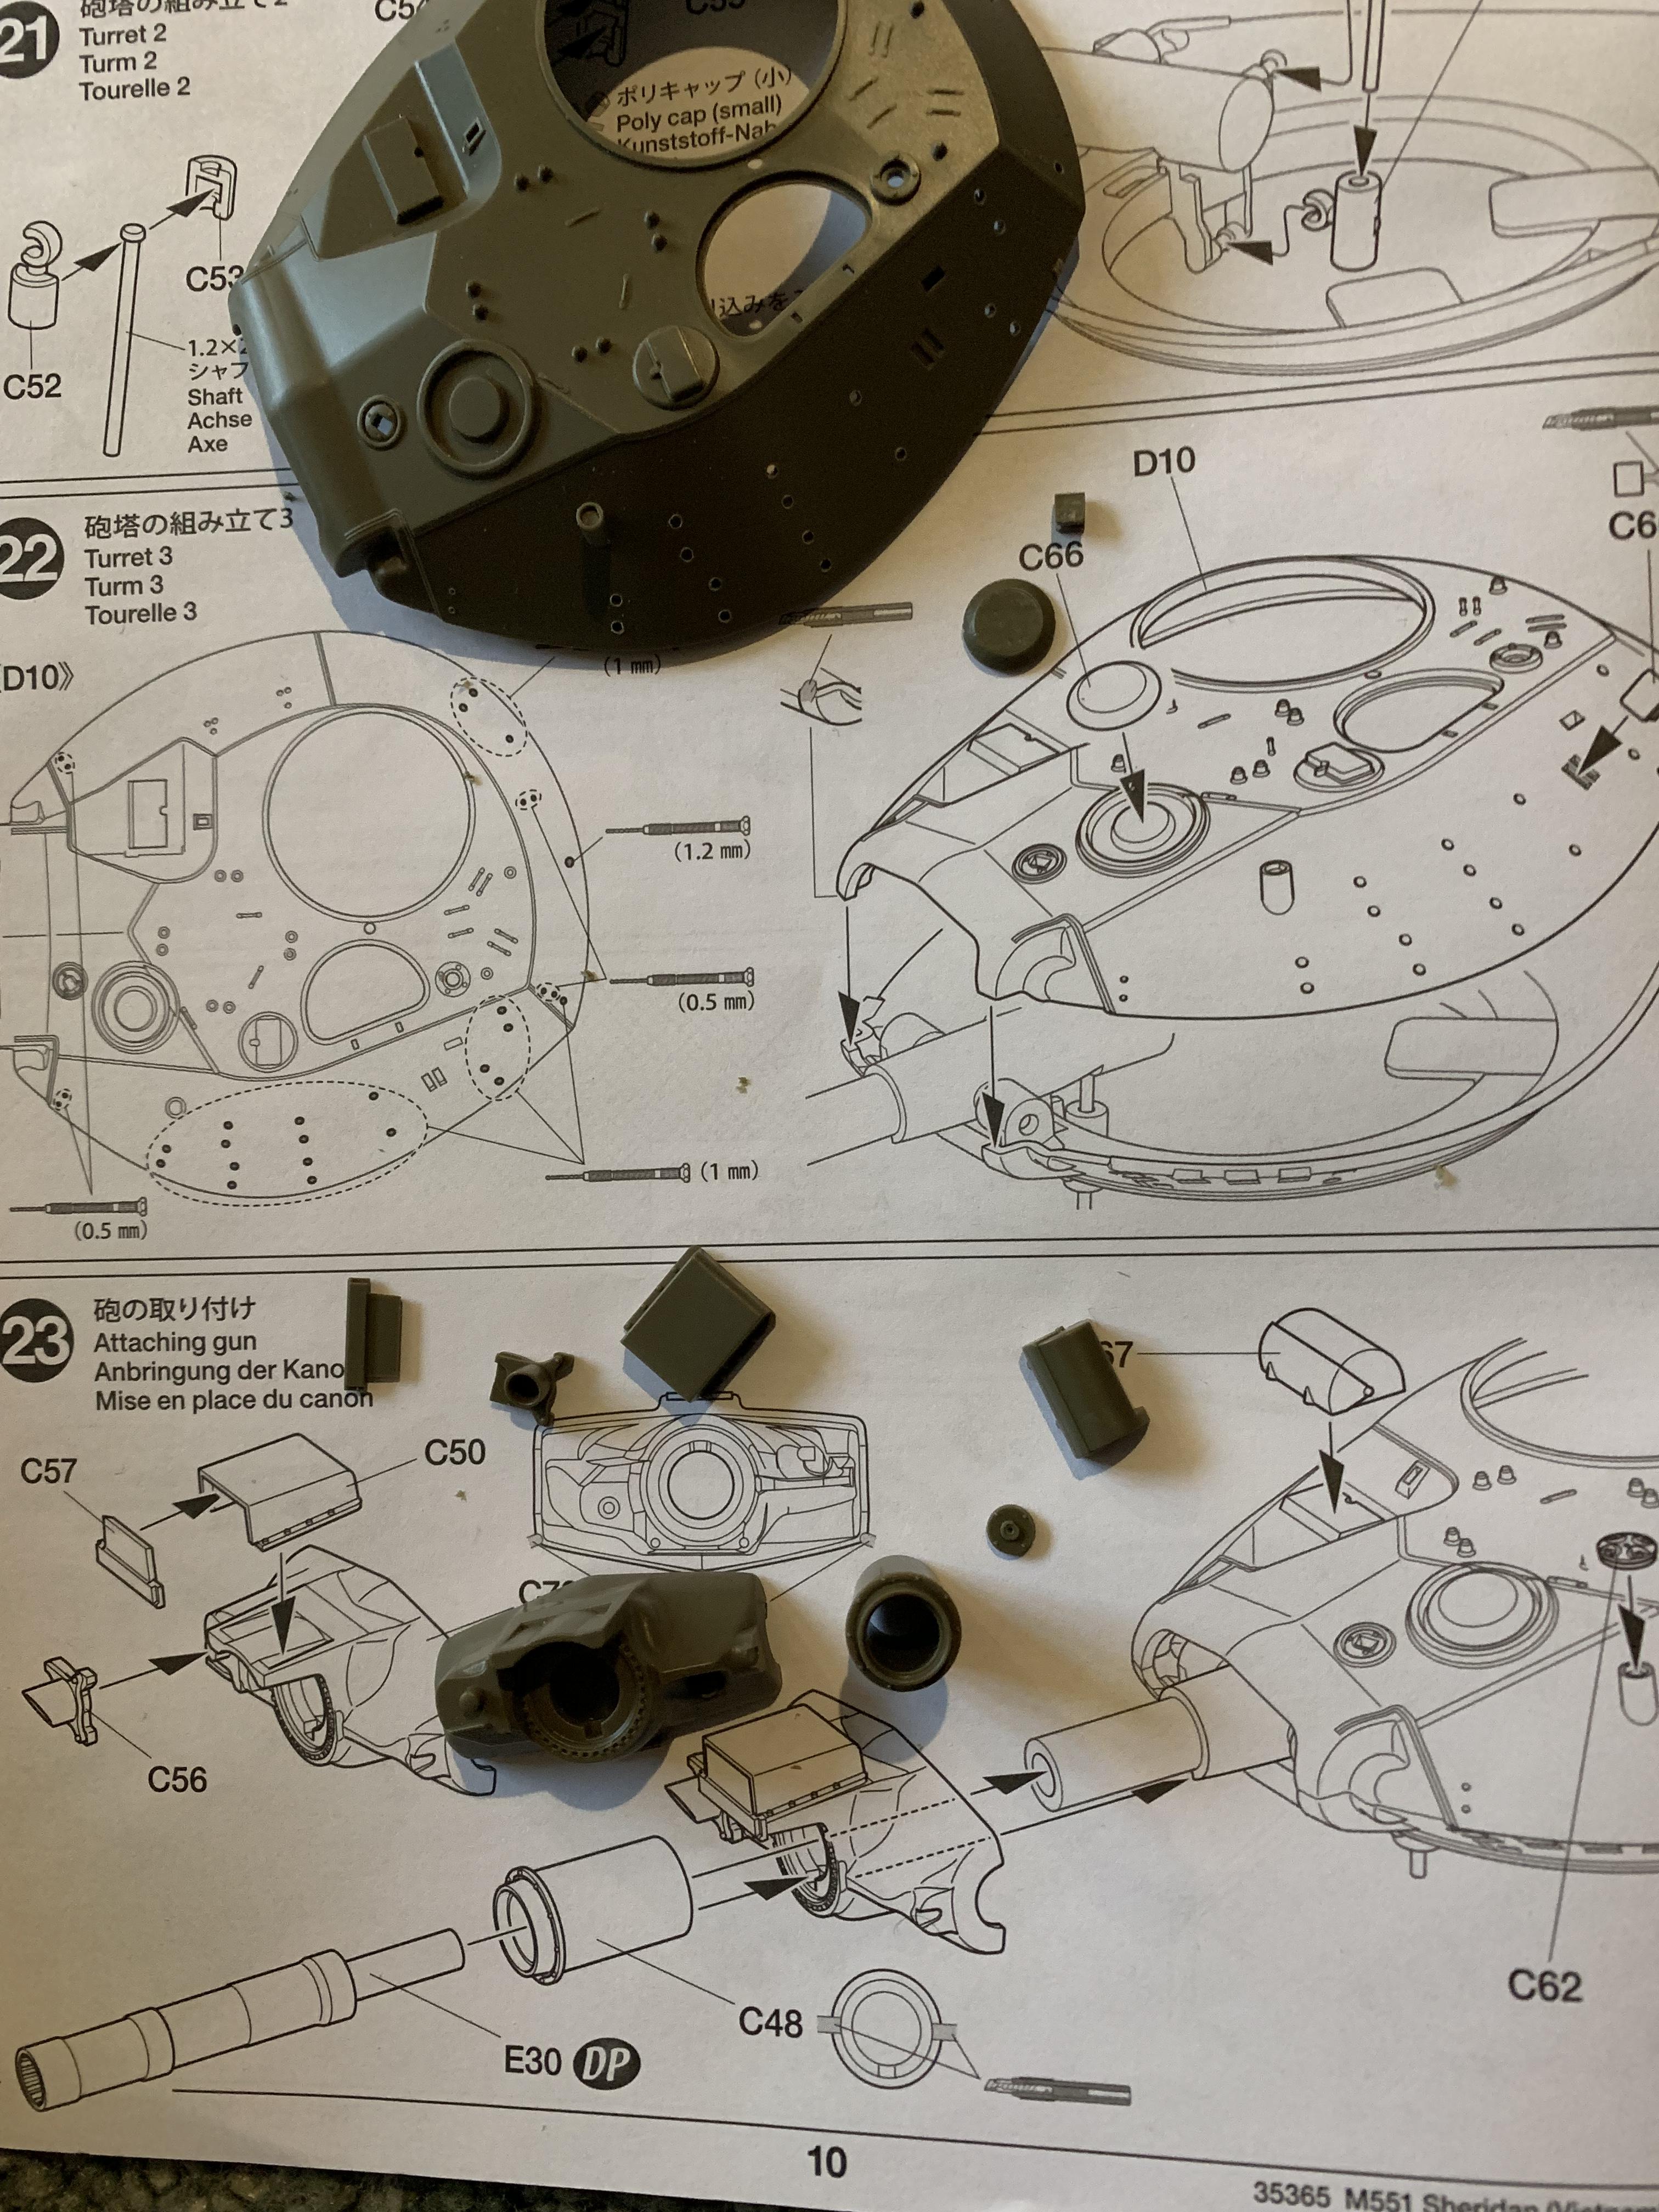
Steps 20 and 21
The lower turret and the gun breach.
There are two holes that need to be drilled in the rear of the lower half of the turret for attaching the stowage rack. Rather than the old method of adding polycaps to the trunnions, step 21 has you building and attaching a "piston" to elevate the main gun. It holds it's elevation quite well but given that it's held in place by plastic clips, I wouldn't play around much with it.
Step 22
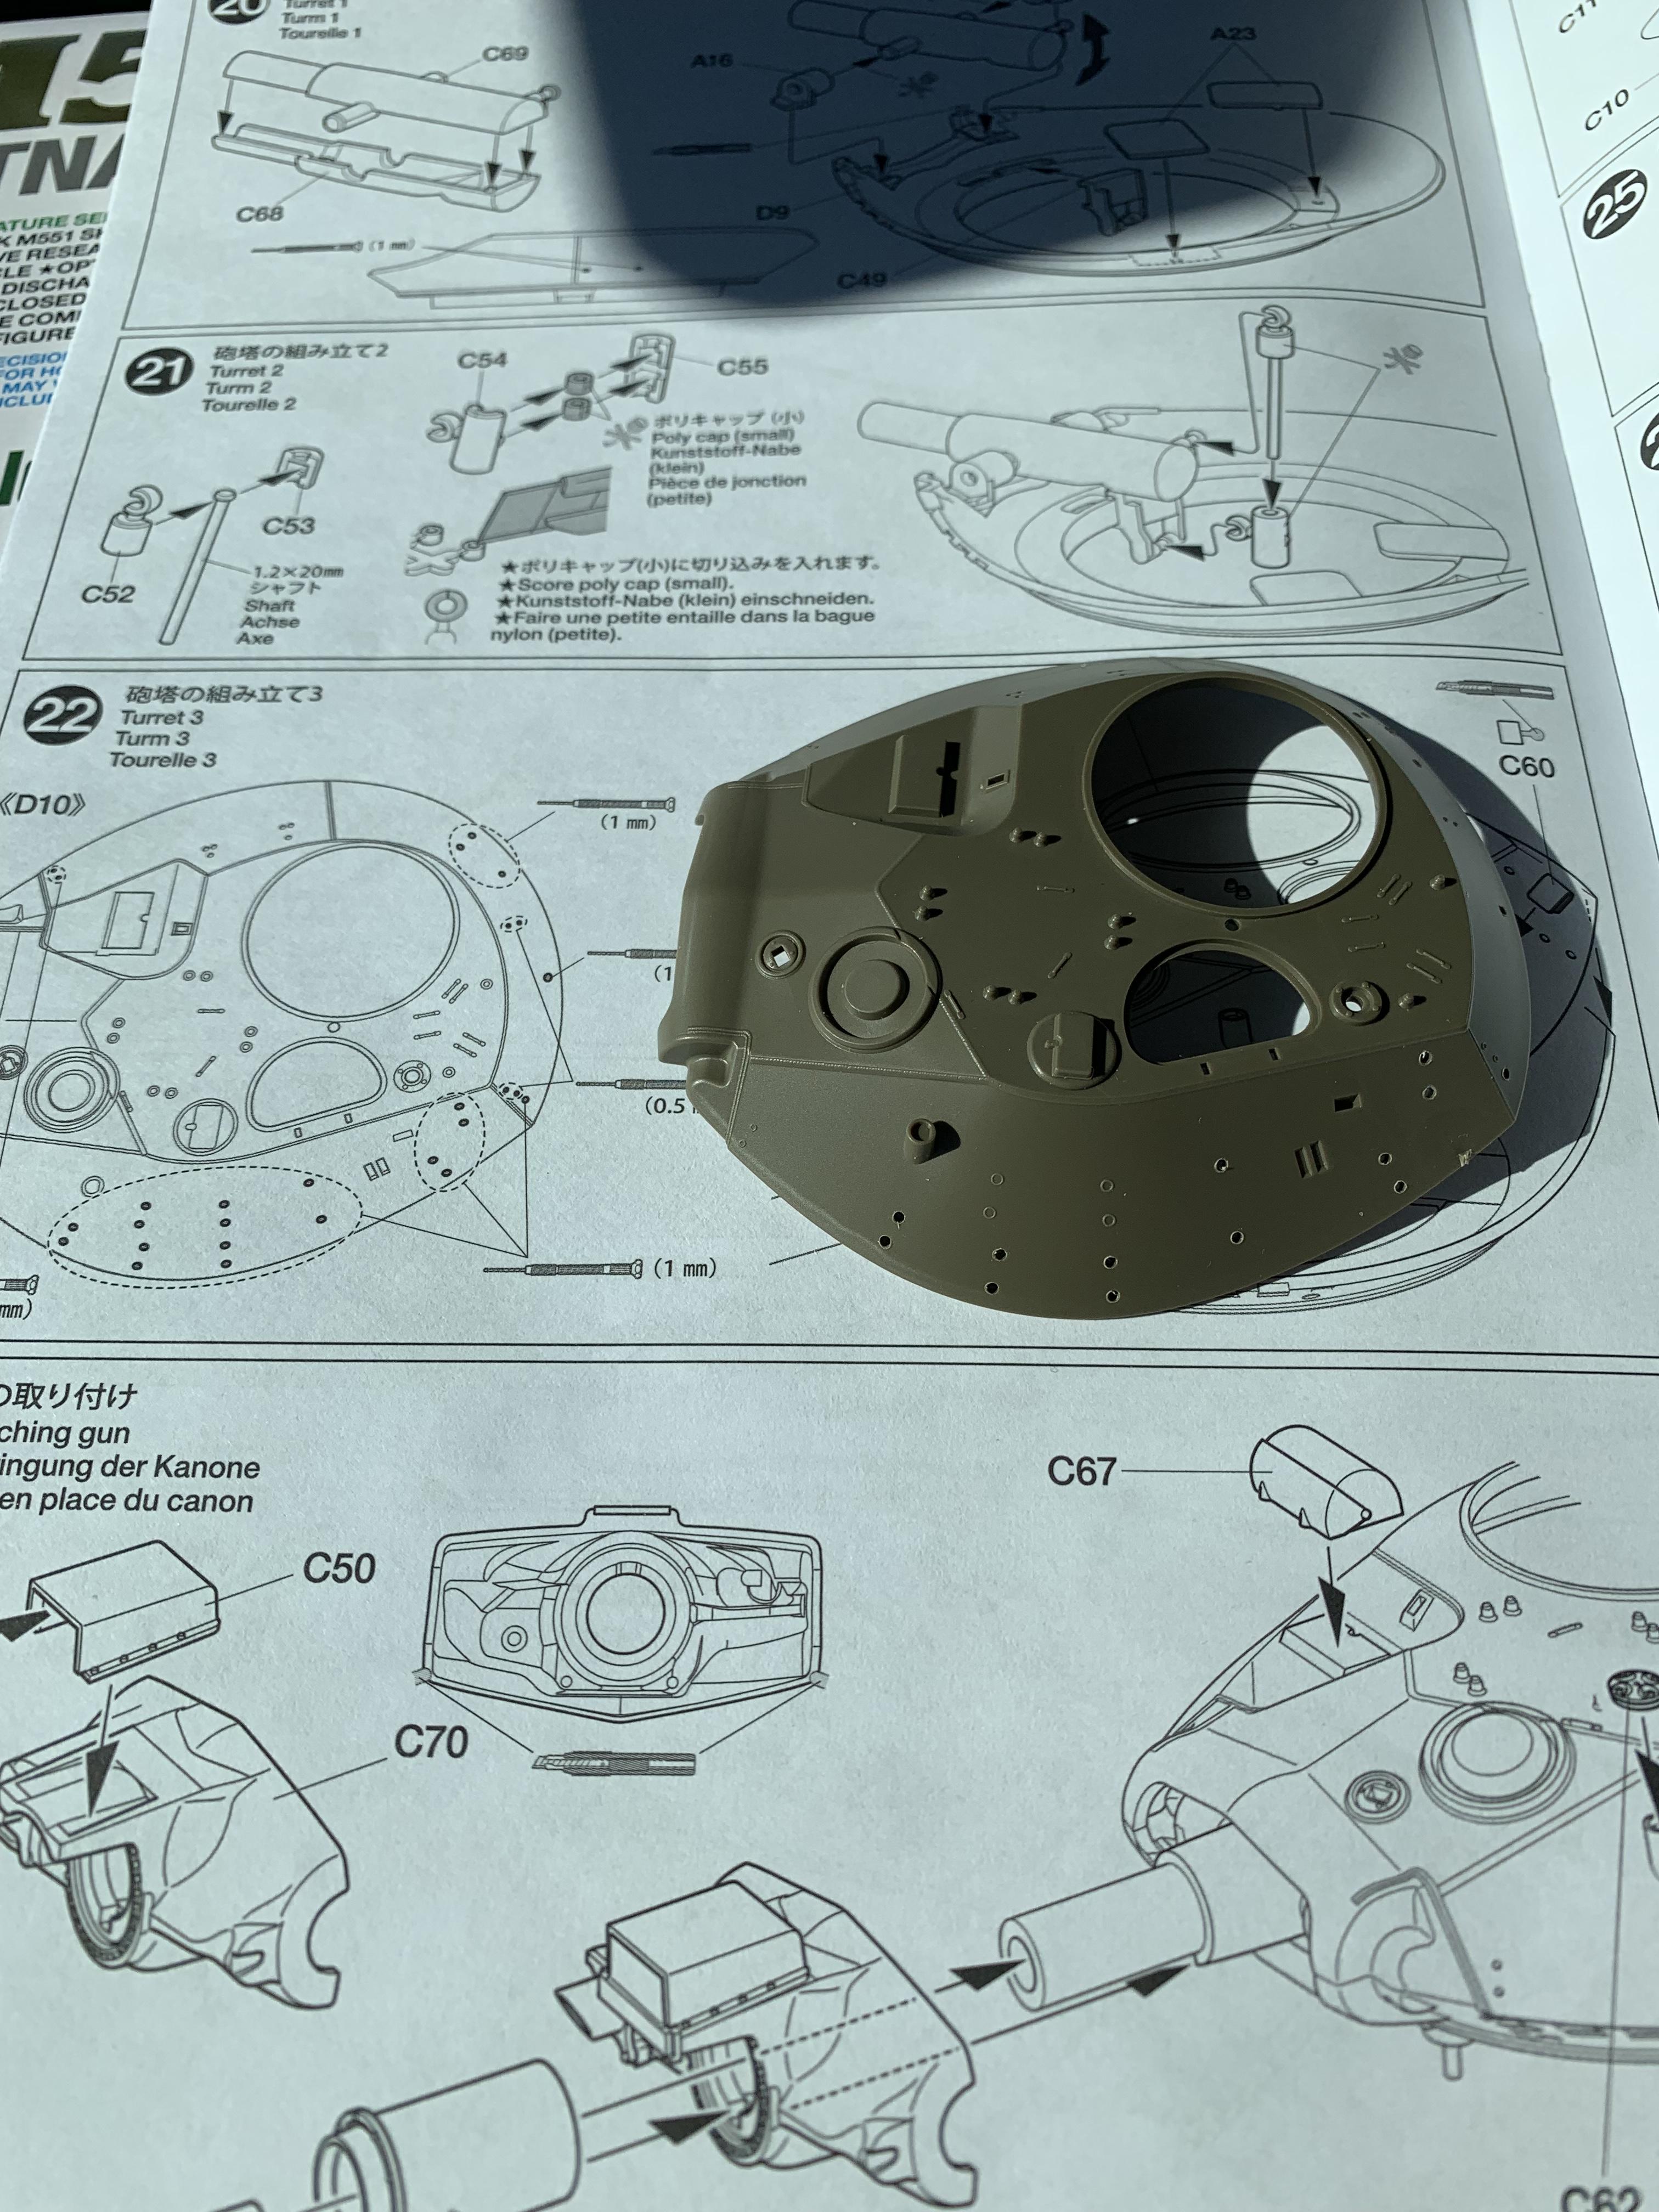
Upper Turret.
Get ready to drill! The instructions call for .5 mm, 1 mm and 1.2 mm bits.
The locations are marked on the outside of the turret with raised circles. These holes are for the ammo cans, jerry can, lifting loops and the rear rack. If you're planning to leave off the ammo cans, you'll want to pay close attention and read ahead in the instructions. The nice thing about having the marks on the outside is that you can always decide later to open a hole up.
Step 23
Attaching the gun.
New York, United States
Joined: August 25, 2004
KitMaker: 752 posts
Armorama: 378 posts
Posted: Saturday, March 02, 2019 - 02:08 AM UTC
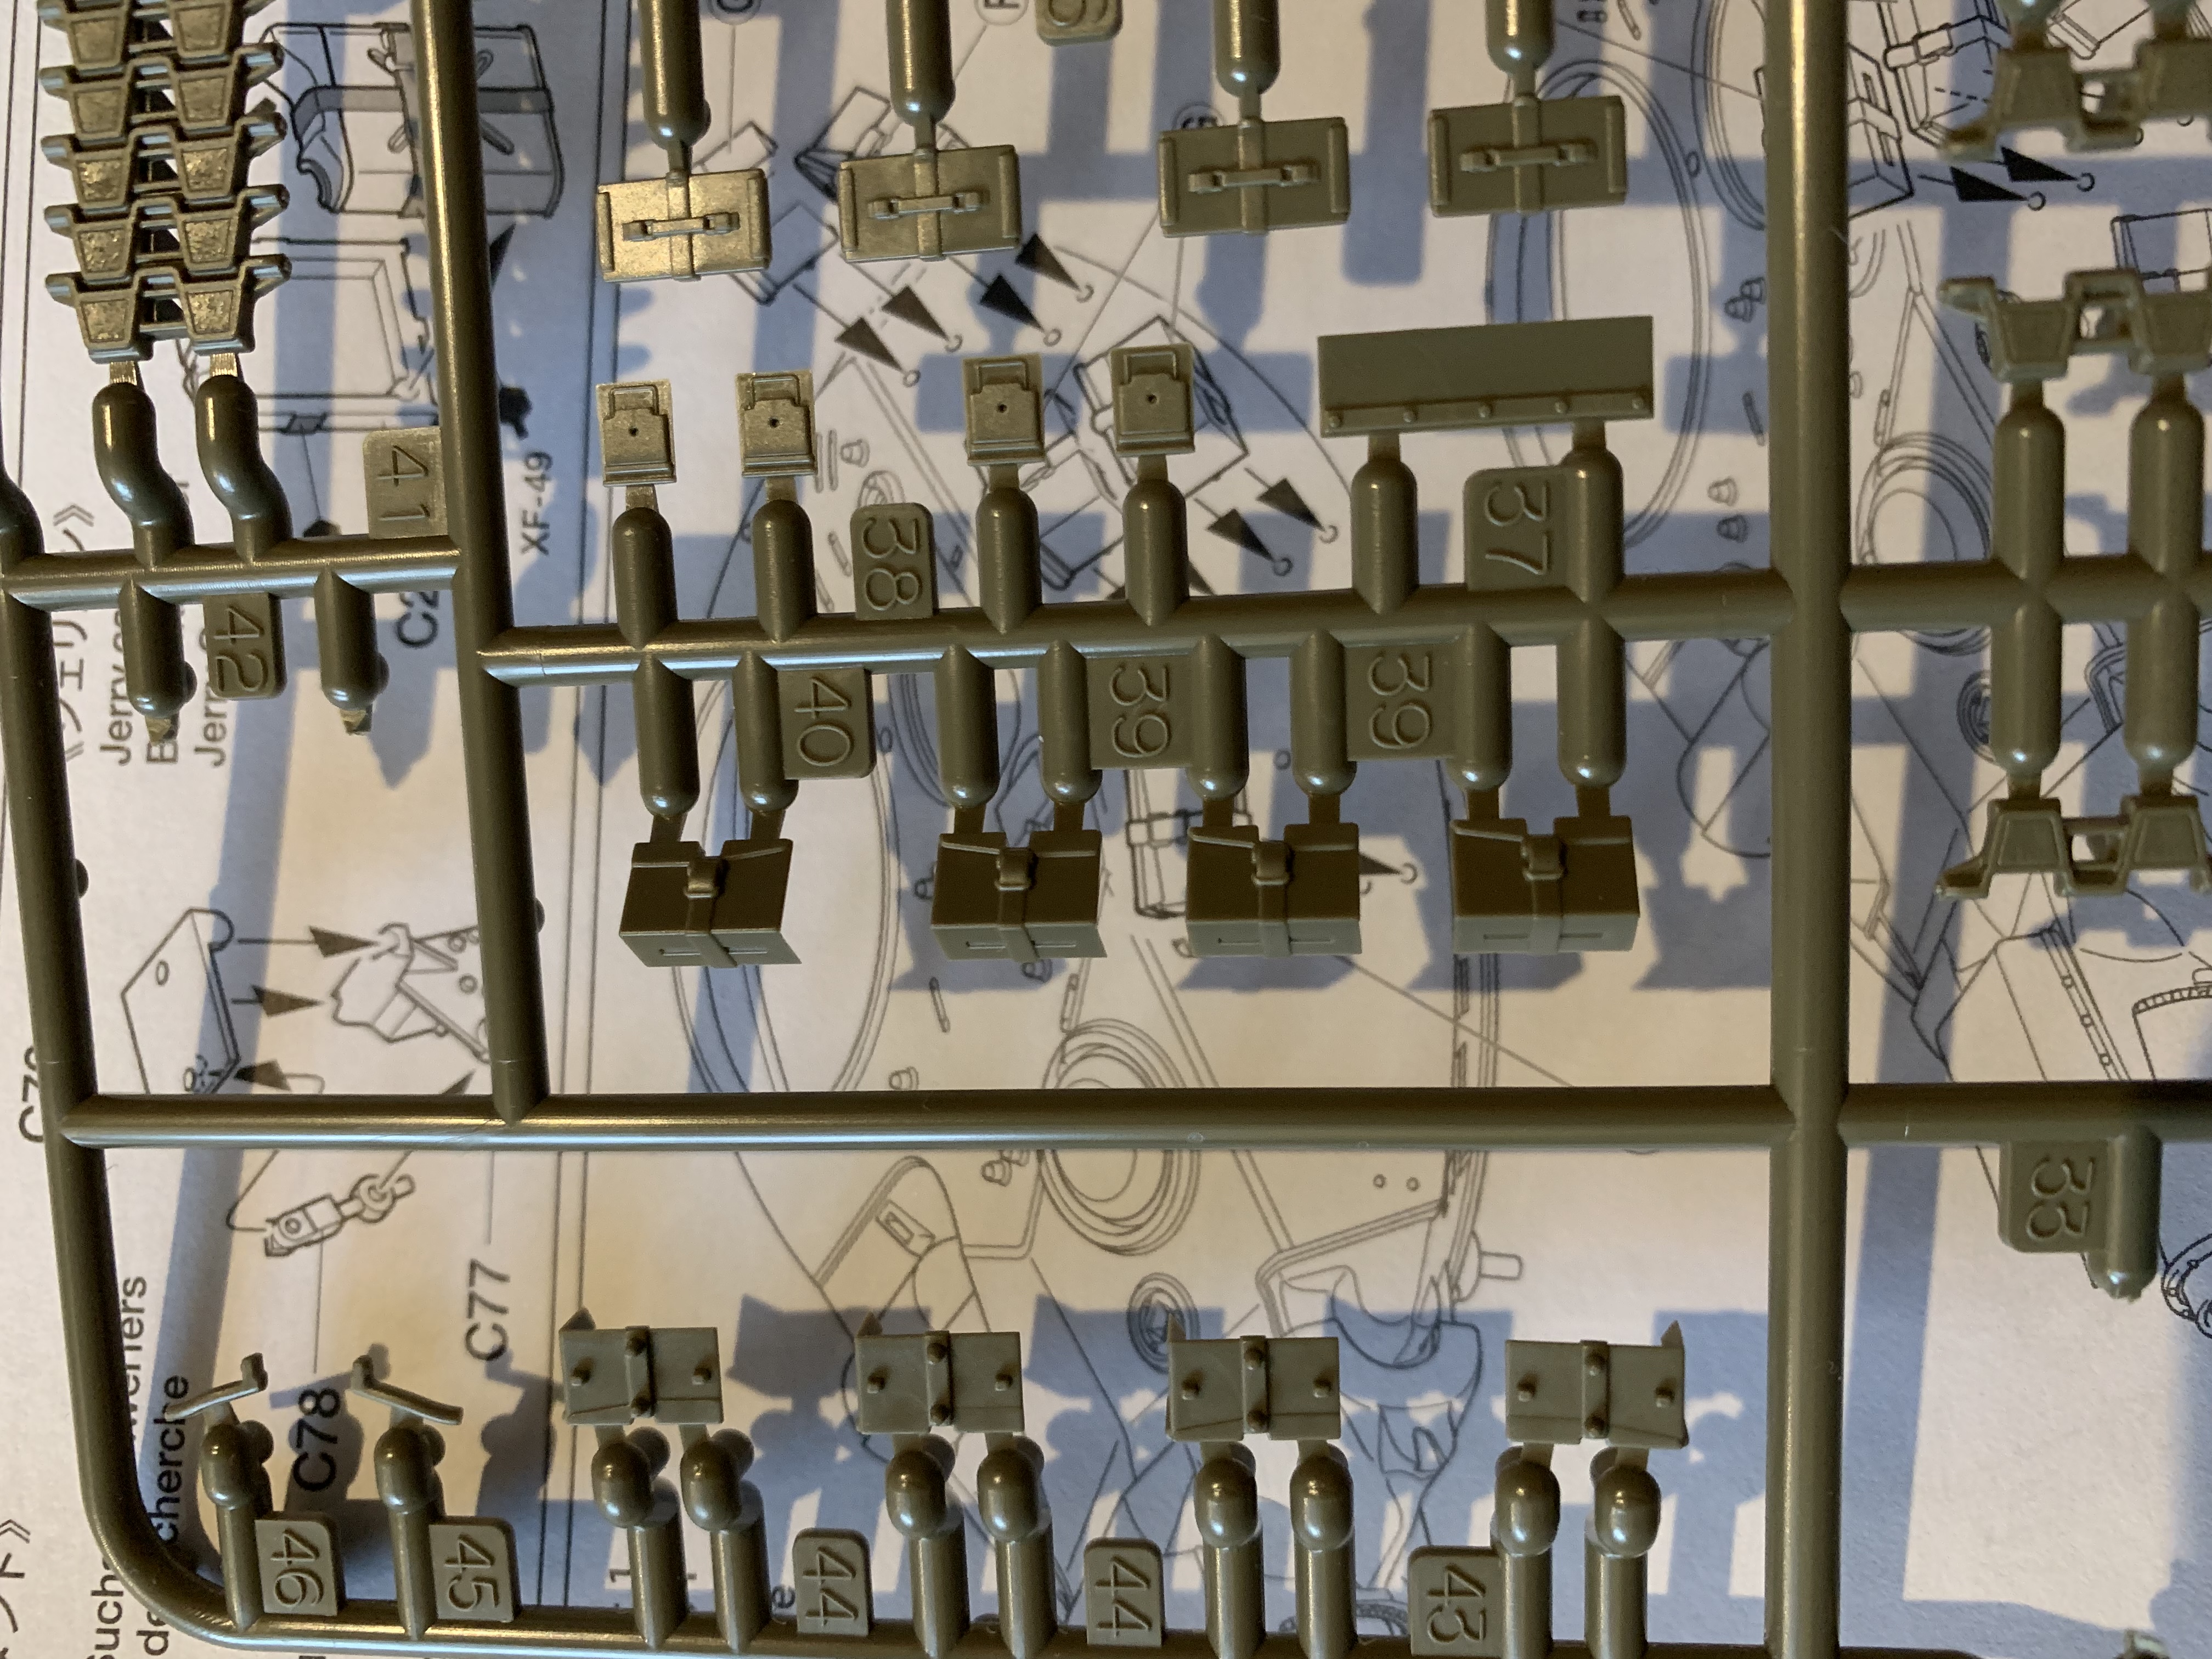
Step 24
The ammo cans. One of the distinguishing features of the Sheridan was that ammo can covered side of the turret. The kit comes with a total of eight .50 cal cans (nine if you count the one on the .50) and one 7.62 can. Each can is made up of four pieces. There is some nice detailing on all the sides including the grove on the bottom of the can. Another nice touch is that Tamiya has two of the of the .50 cans being mounted in the opposite direction so you can get a little variety.
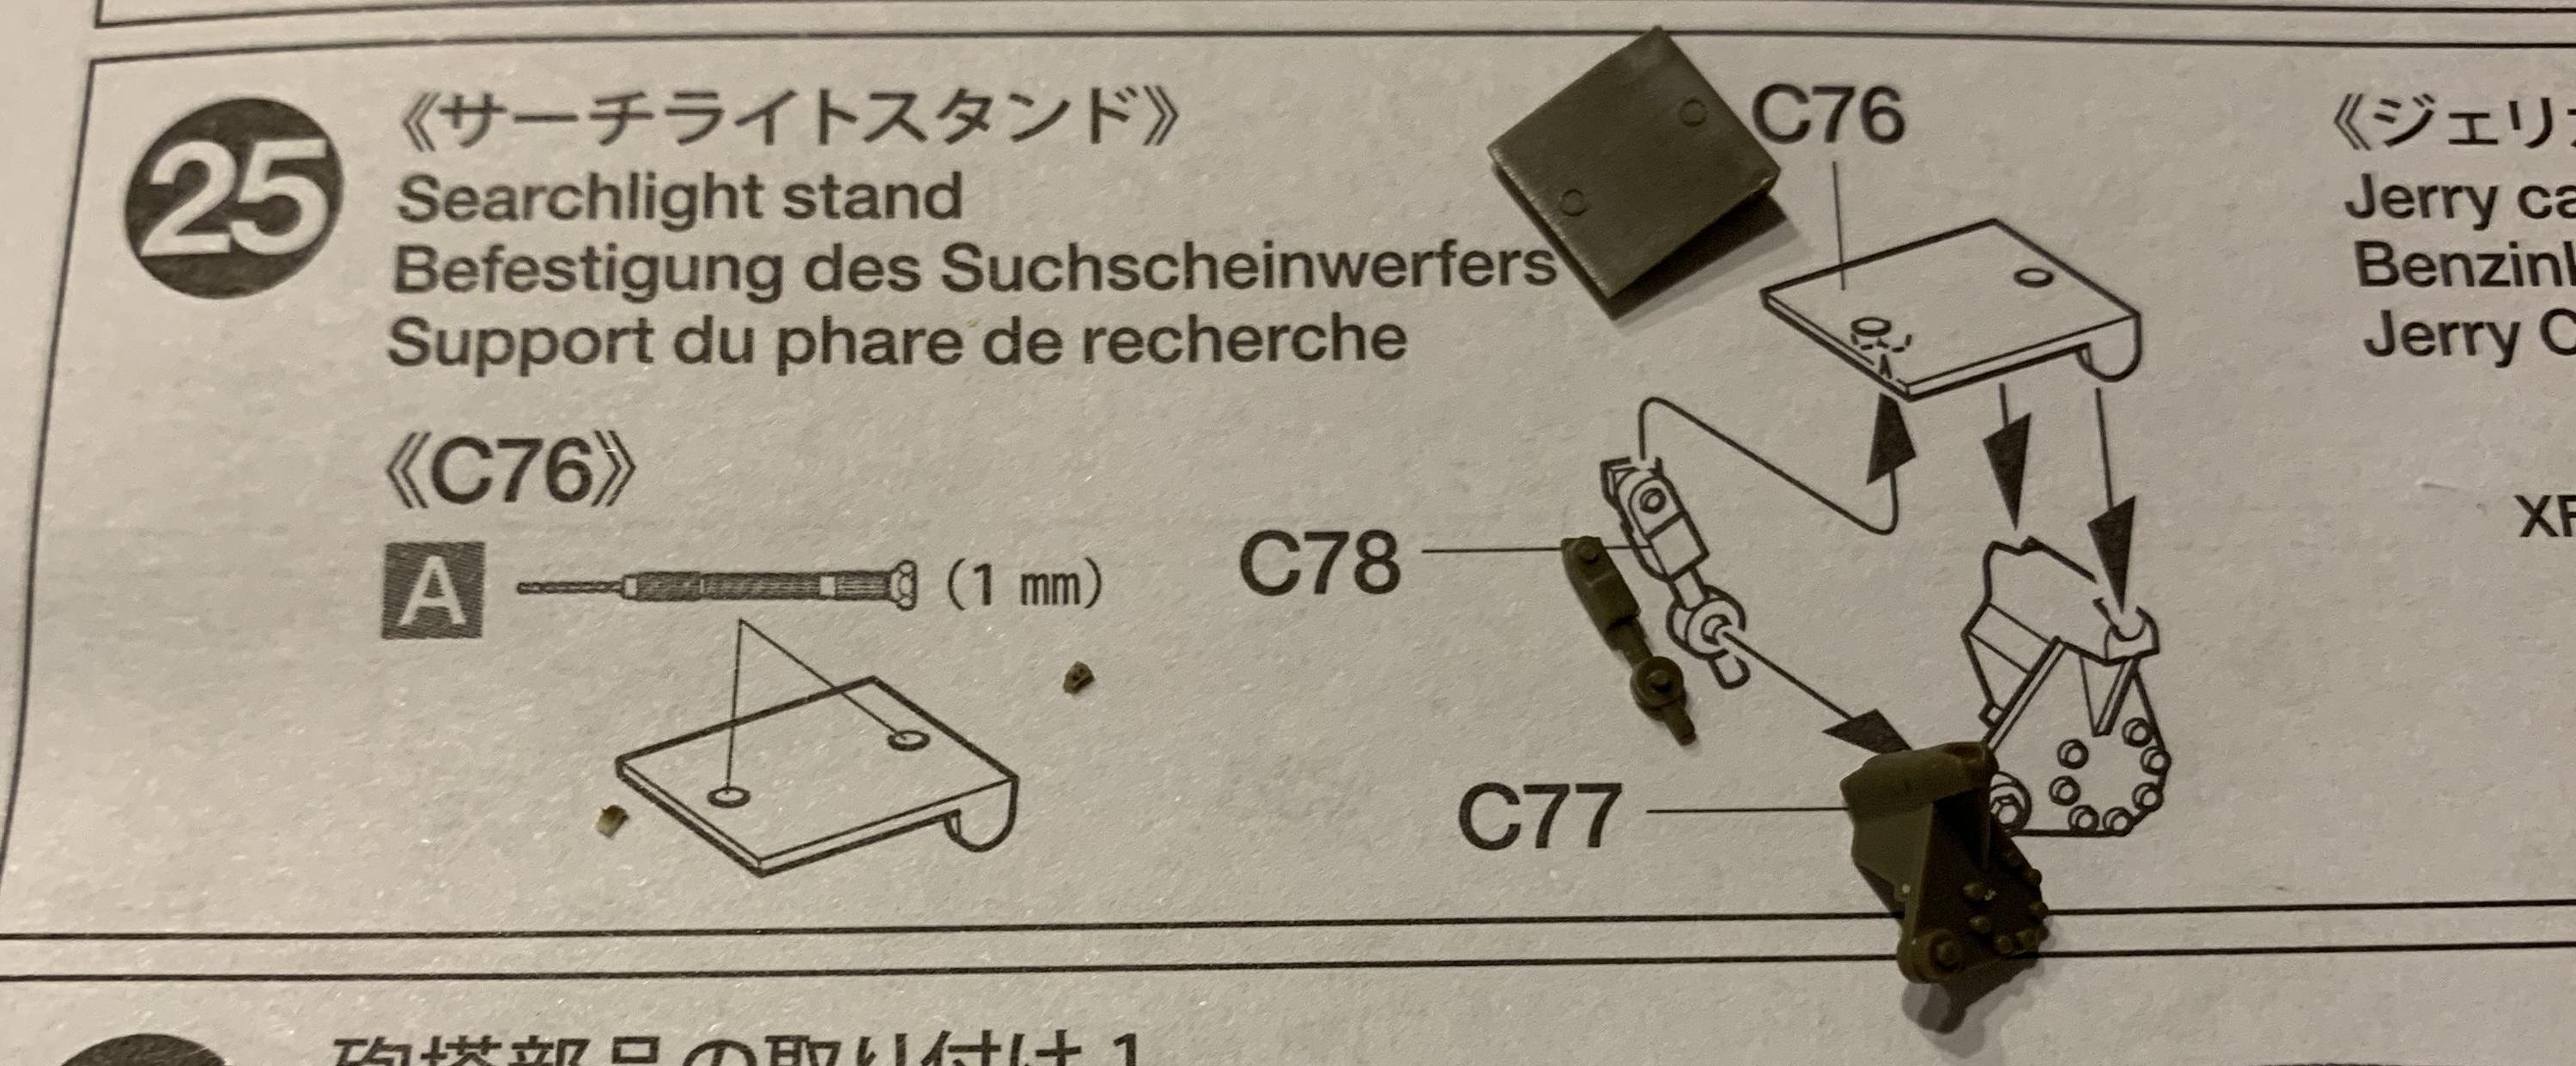
Step 25
I had two issues with this step.
The kit gives you three options, no searchlight, a covered searchlight or an uncovered searchlight. When I drilled out the two holes on the searchlight stand, they didn't line up with the pins on the covered searchlight. It may have been my fault but I enlarged the holes and the issue was solved.
My other issue is with the jerry can, which, in this case, is supposed to represent a water can. Unfortunately they just give you a round lid without any added detail for the flip top lid latch.
New York, United States
Joined: August 25, 2004
KitMaker: 752 posts
Armorama: 378 posts
Posted: Saturday, March 02, 2019 - 02:45 AM UTC
Step 26
Slapping everything on the side of the turret.
I guess you also get a sneak preview of a couple things to come, such as the extra .50 cal mount from an M113 (it's not permanently attached yet).
You'll also notice that I added the mounting brackets for the .50 cal cans from some Plastistruct angles.
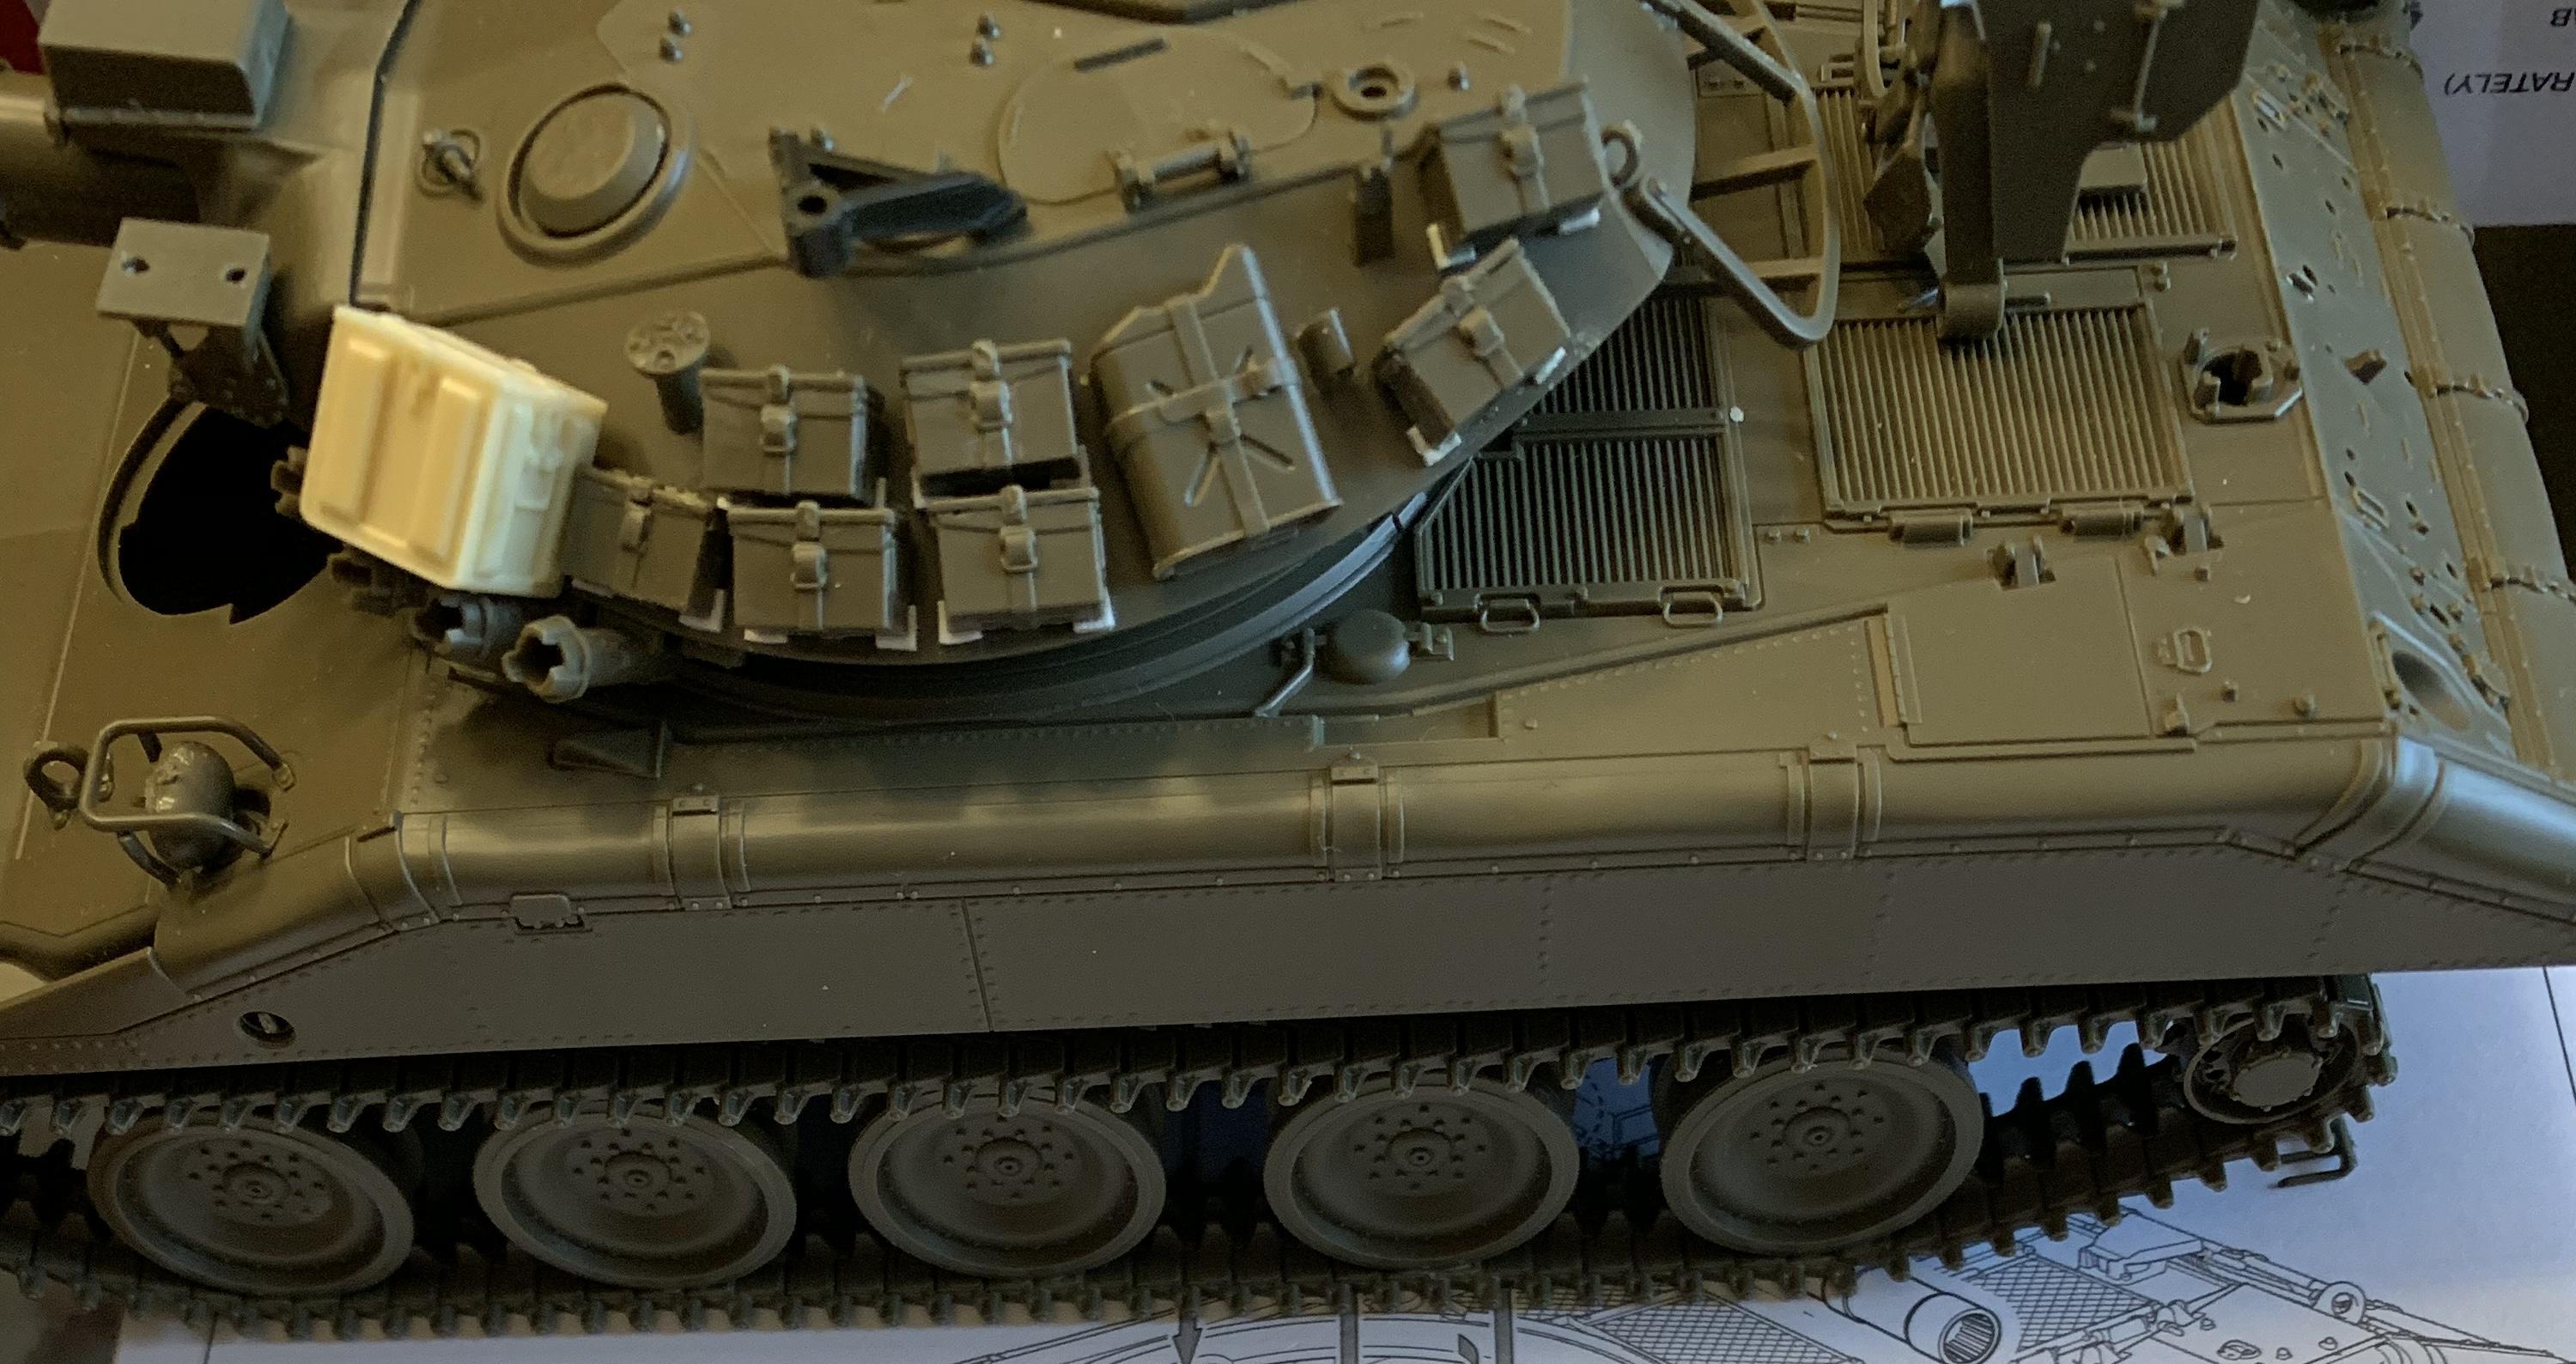
Admittedly, the angles are a little oversized and, as luck would have it, once everything was glued in place, I found some slightly smaller stock I could have used sitting on the bench. Regardless, it's an easy detail to add and essential if you're leaving the cans off.
Pennsylvania, United States
Joined: January 18, 2003
KitMaker: 2,402 posts
Armorama: 2,377 posts
Posted: Saturday, March 02, 2019 - 02:56 AM UTC
Quoted Text
I also have the kit, my negative comment on all Tamiya kits is why in the world donít they provide the damn PE sets with the kit? 

A) It's not their marketing model. They make simple, well-engineered kits. I think all of their tank-sized kits can be built in a weekend.
B) There are enough slavish adherents to the company that they know the omission won't measurably affect the sales of the kit or their PE set. There are still those who will pass up a more detailed kit of a subject in the hope that Tamiya will make one.
No matter what amount of PE they add there will always be many people complaining that it's too little, too much, too simple, too complex, or just wrong. They've chosen to go toward the low end and appear to be happy with their choice.
KL
New York, United States
Joined: August 25, 2004
KitMaker: 752 posts
Armorama: 378 posts
Posted: Saturday, March 02, 2019 - 03:01 AM UTC
Step 27
Seems I didn't take any photos.
In this step you'll be adding ten clear periscope lenses along with the cargo rack. Parts C65 and C64, which attach to the commander's side of the turret, at the mounts for the .50 cal. It would be stowed here if the Sheridan was to be air dropped.
Step 28
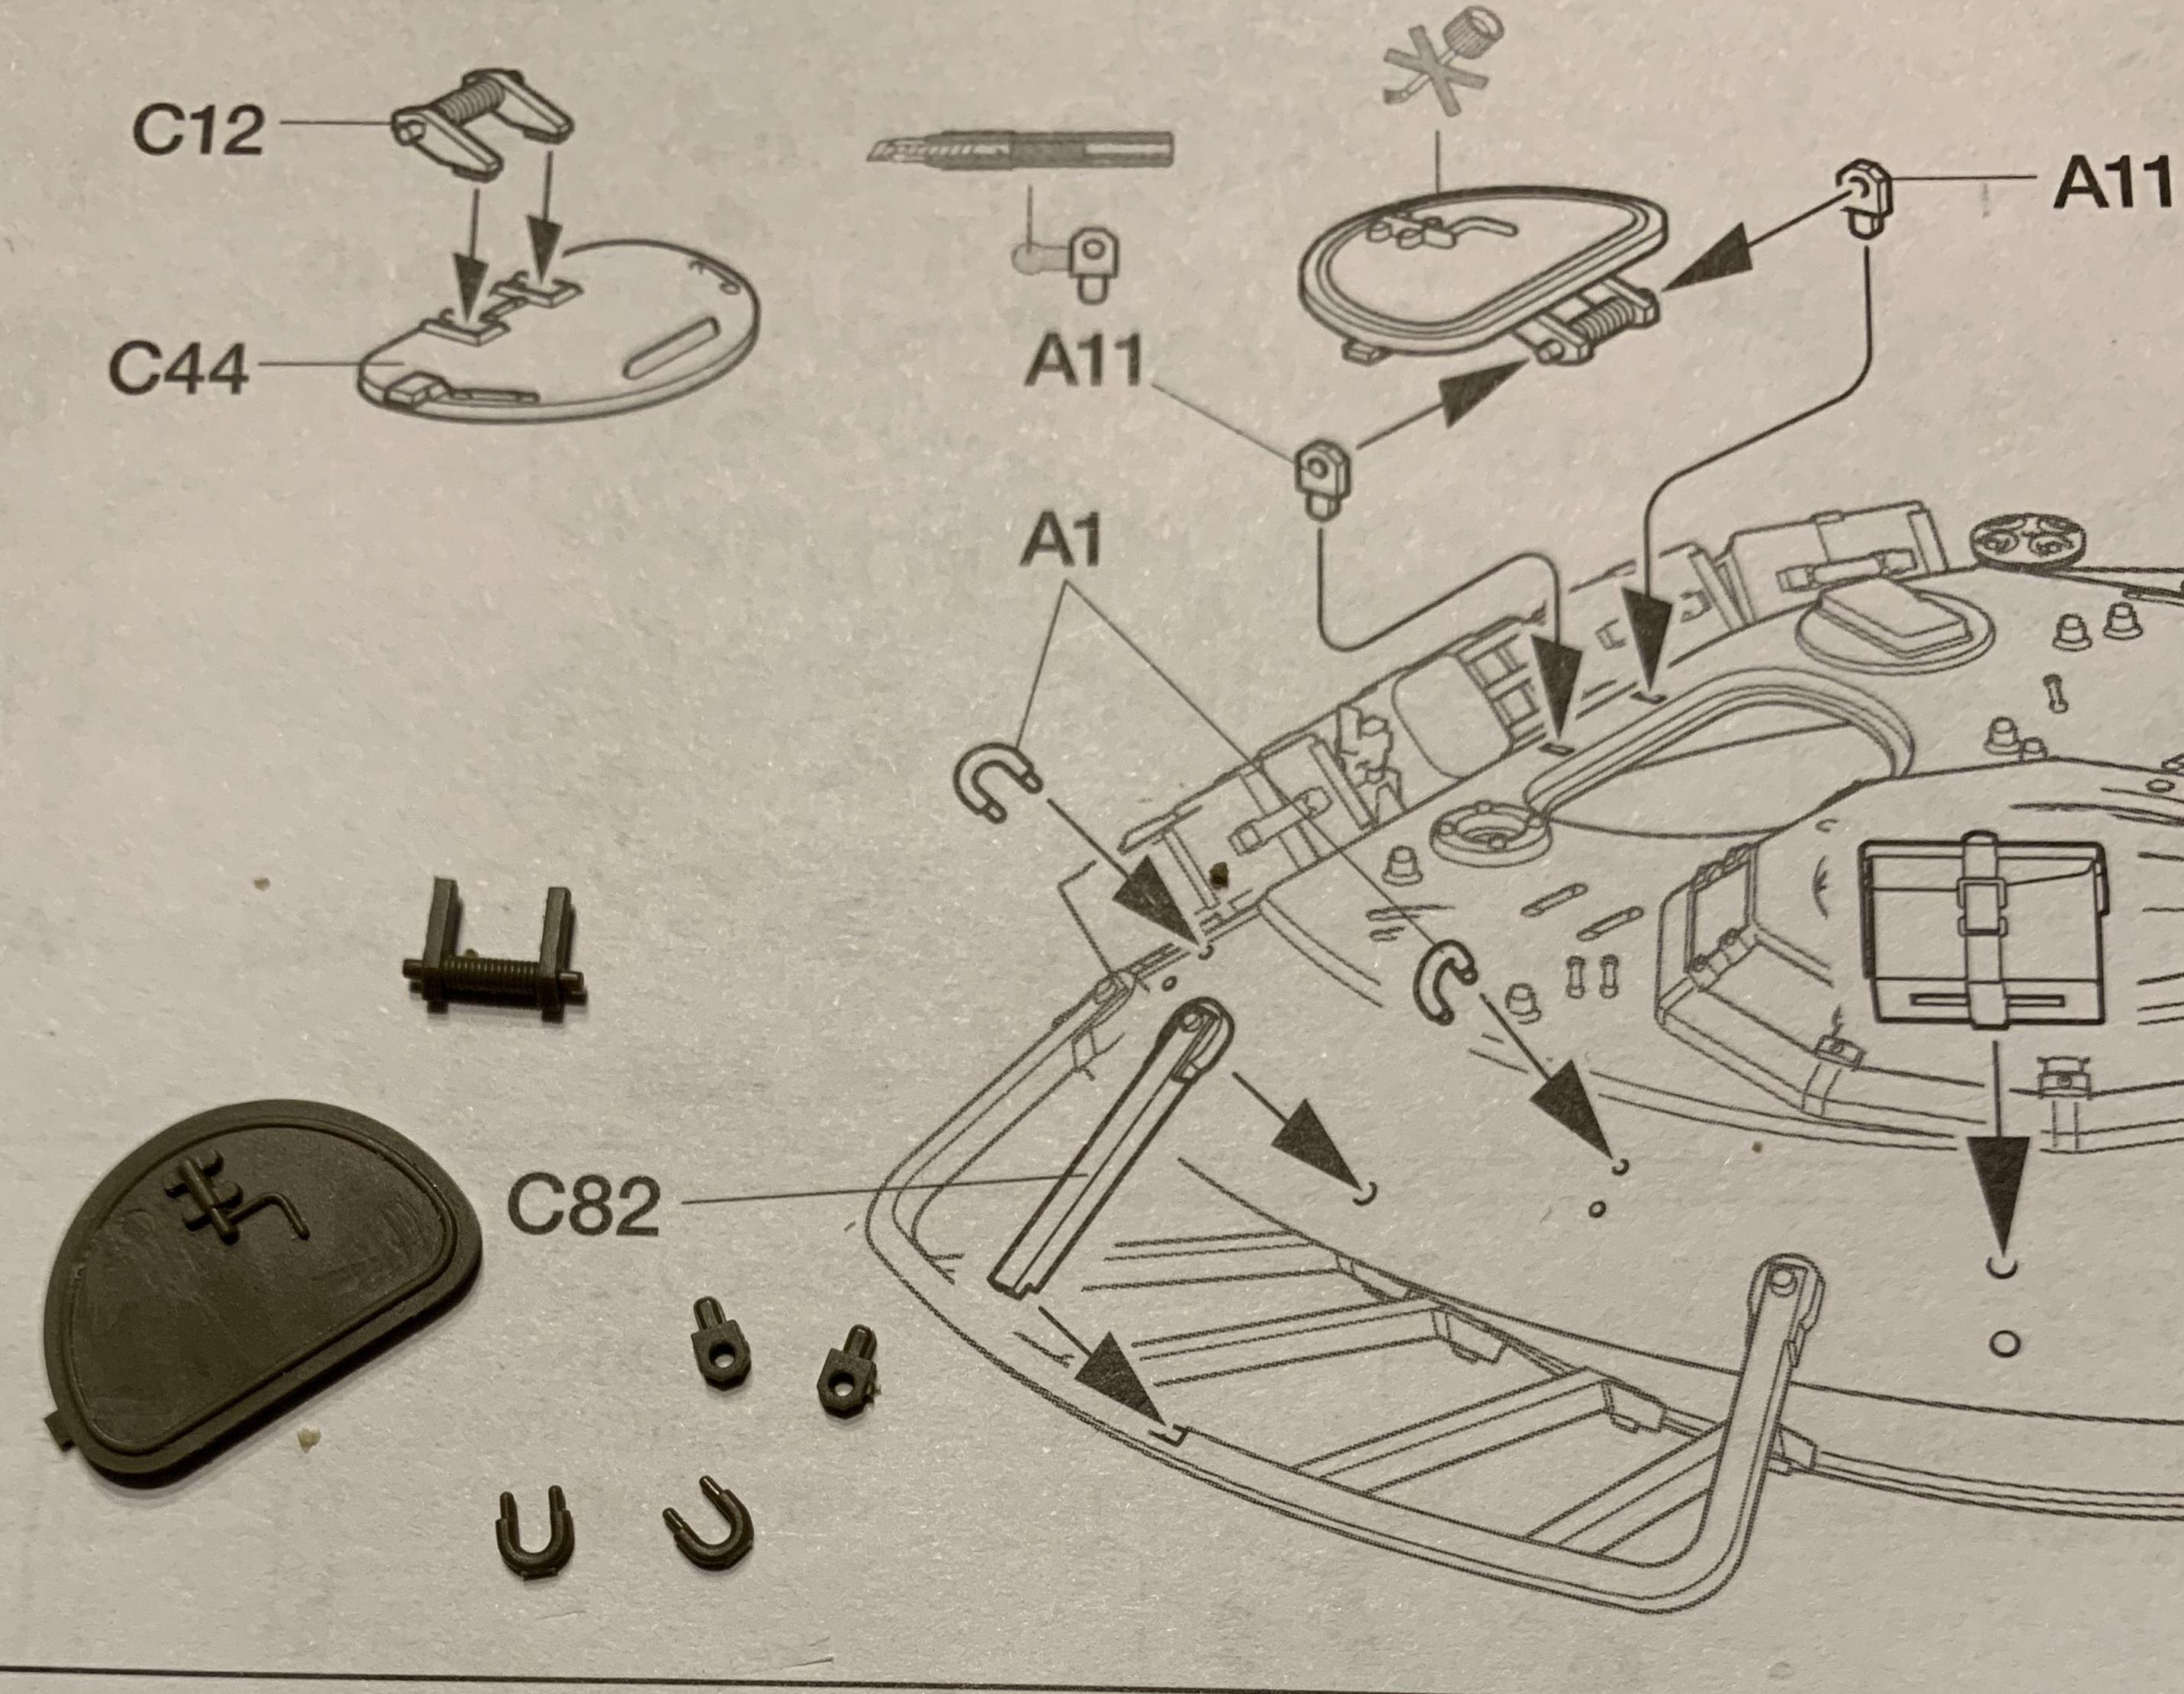
The loaders hatch is functional. There is some interior latch detail along with three knock-out marks to remove. Add another ammo can, some lifting loops and a support (C82) for the cargo rack.
If you didn't drill your holes in exactly the right spots, the support may create a slight gap when attached to the rack. If that ends up being the case, mount it snuggly to the rack and remove the mounting pin on the other end.


 It would have been easy enough to add after painting. I did leave the surf board off due to the window.


