Pennsylvania, United States
Joined: January 18, 2003
KitMaker: 2,402 posts
Armorama: 2,377 posts
Posted: Wednesday, July 10, 2019 - 04:12 PM UTC
Quoted Text
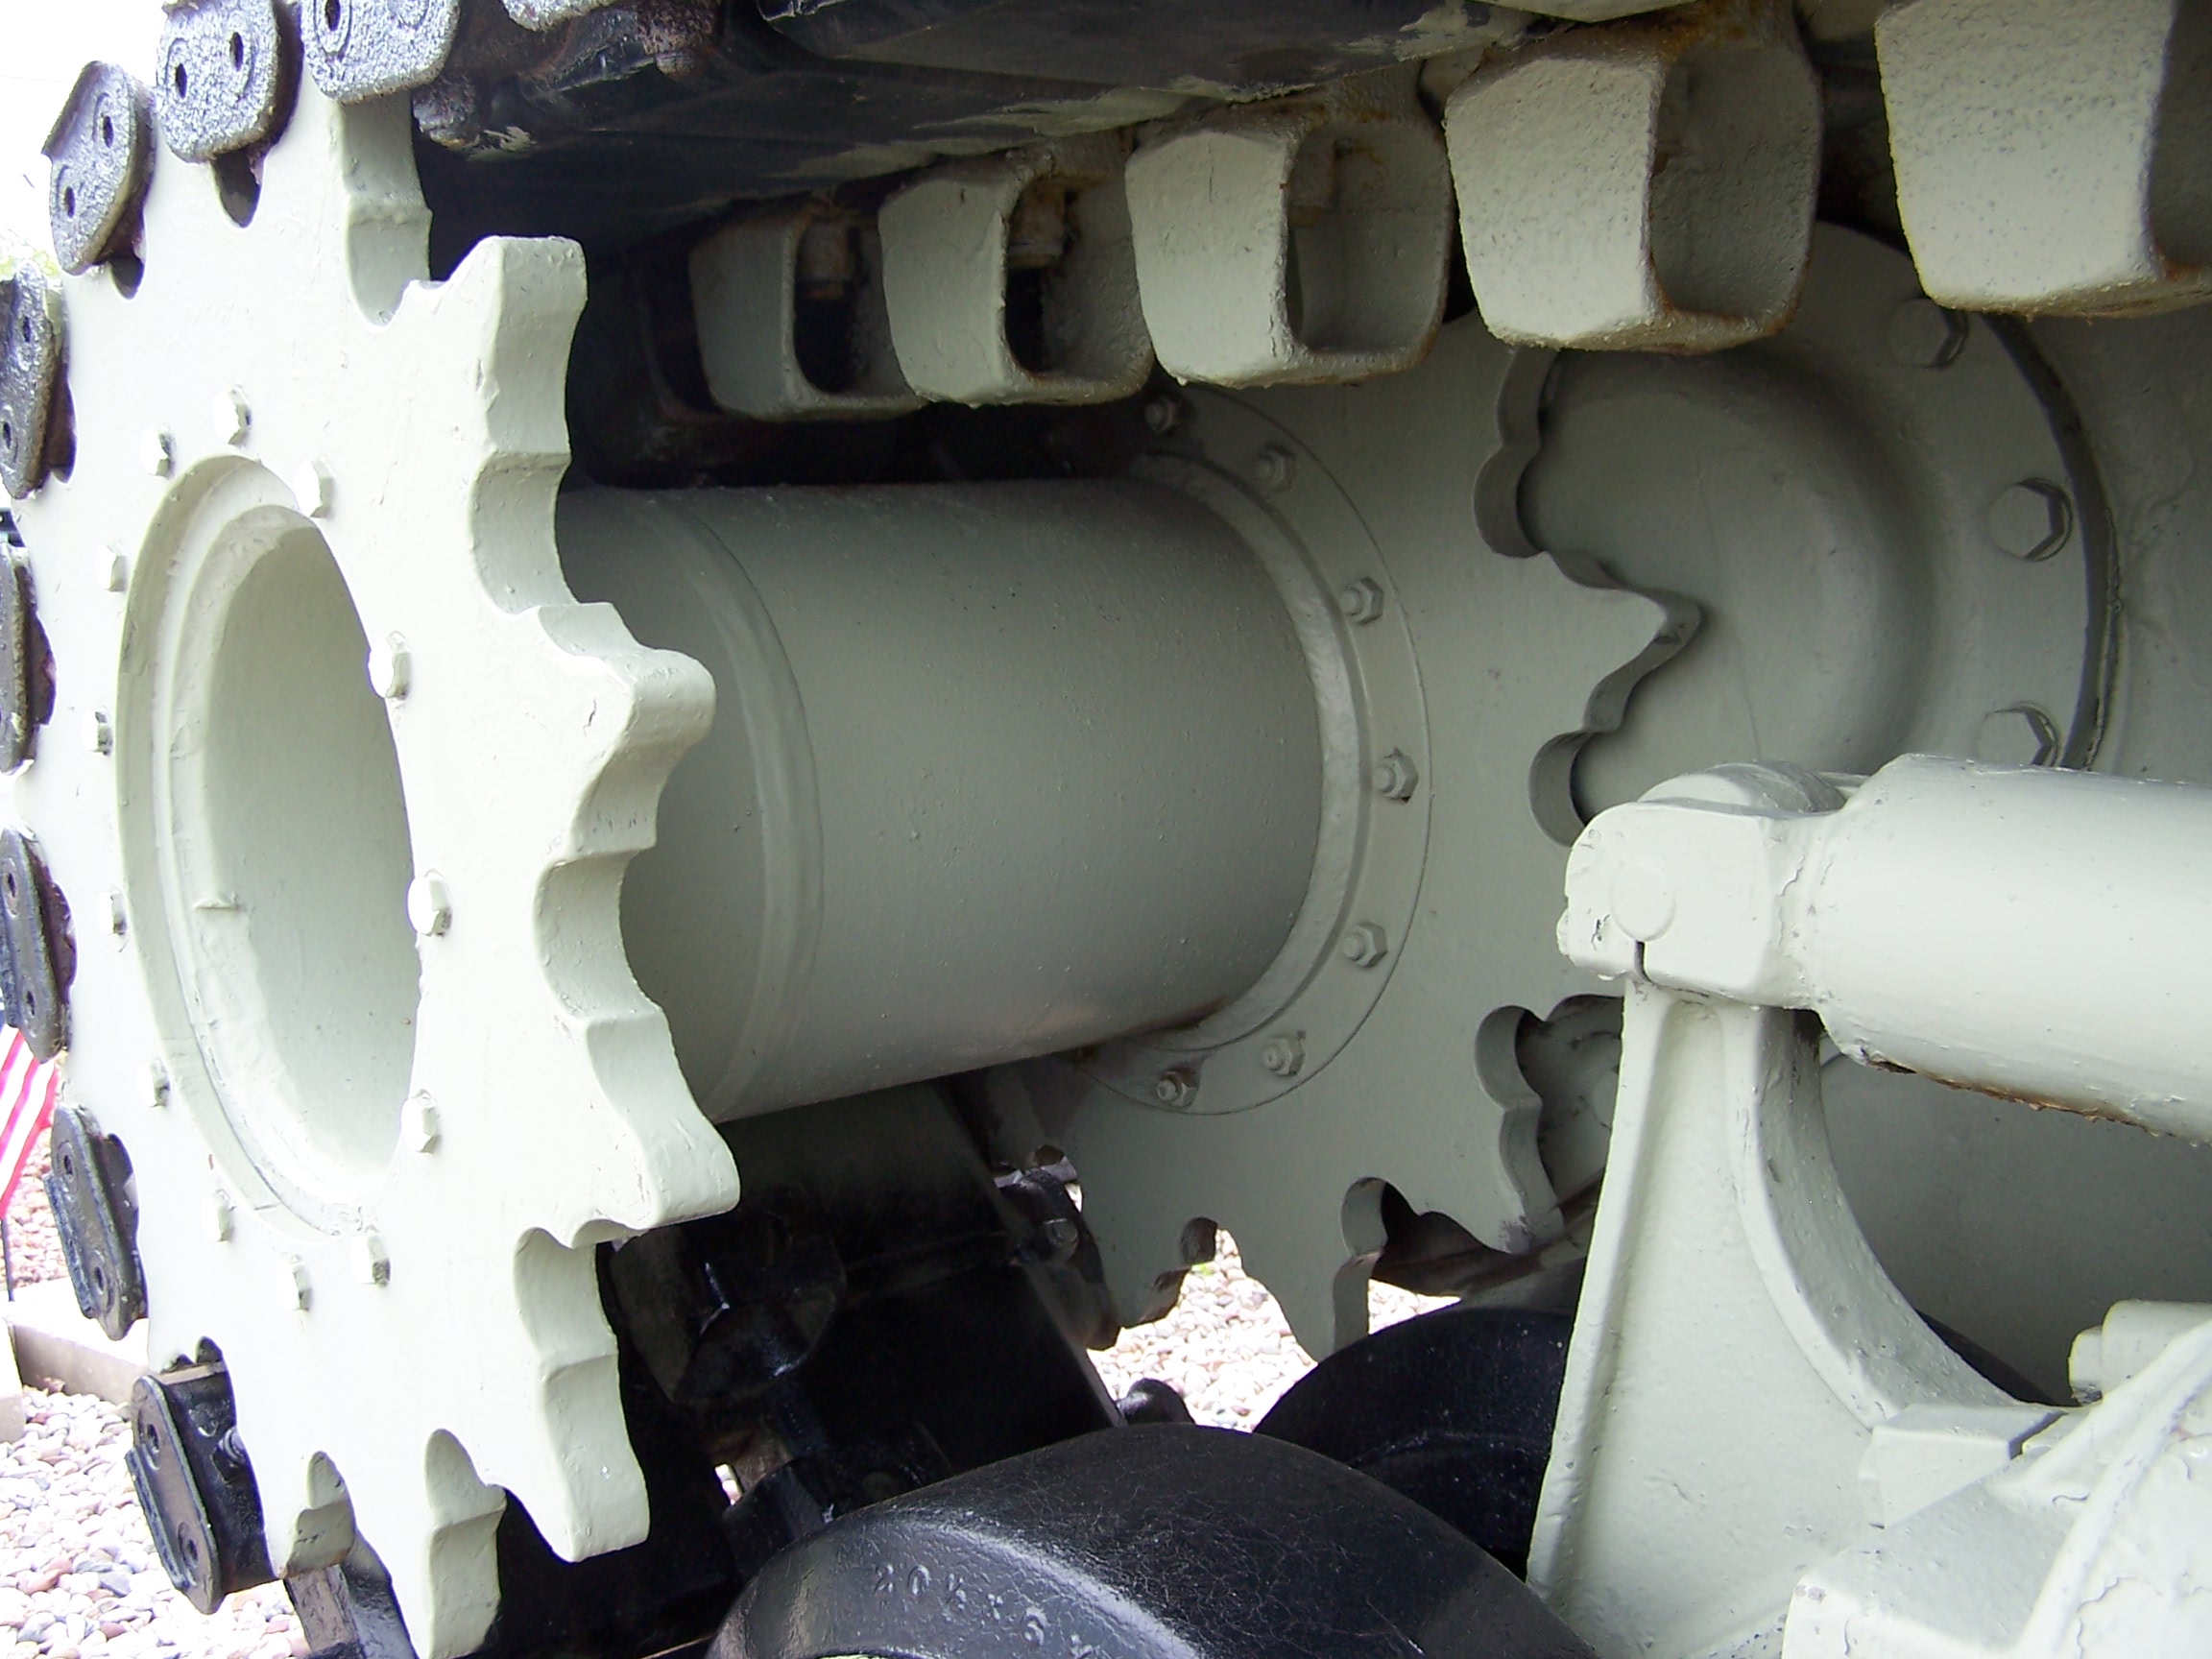
The seam in the Sprockets will need filling, you can see it.
The gap should be filled but there were some that used a two-piece welded drum with a raised weld seam in that location.

KL
Pennsylvania, United States
Joined: January 18, 2003
KitMaker: 2,402 posts
Armorama: 2,377 posts
Posted: Wednesday, July 10, 2019 - 04:26 PM UTC
Quoted Text
With the interior detailing could an interior be far off?
There is one exceedingly minute goof visible in photo 18. The bottom 3 bolts of the vertical set attaching the differential housing on the left side were set with the nut on the outside of the tank because when they were placed like the others the end of the bolt and nut caught the driver's left foot. On some tanks, especially those rebuilt after the war, the whole vertical set on that side was "nut out".
KL
United States
Joined: October 14, 2012
KitMaker: 2,663 posts
Armorama: 2,649 posts
Posted: Wednesday, July 10, 2019 - 09:18 PM UTC
Quoted Text
Quoted Text
There's a lot of nice weld detail.

![]() src="https://5z7jww.bn.files.1drv.com/y4mD1zFYeX2wWS6Y1xwfW6x0kbc2sBxFvUYexCRQckbRuf2w5-DUhFBrGsBwRrT9sZsPtXGt2fZf2PTYEVxpydQUmYh0URKEGJhb3pQlcSnmrxX8MOCR3jpv7RxQtUO8s4mV5eVHctZCljATZCTZjByXJa1DUli48KXtKcKbvQzigqgsbFNRqioRb343sBdf_Y72dmhiyutt9t80QQpDs0Opw?width=660&height=495&cropmode=none" width="660" height="495" />
src="https://5z7jww.bn.files.1drv.com/y4mD1zFYeX2wWS6Y1xwfW6x0kbc2sBxFvUYexCRQckbRuf2w5-DUhFBrGsBwRrT9sZsPtXGt2fZf2PTYEVxpydQUmYh0URKEGJhb3pQlcSnmrxX8MOCR3jpv7RxQtUO8s4mV5eVHctZCljATZCTZjByXJa1DUli48KXtKcKbvQzigqgsbFNRqioRb343sBdf_Y72dmhiyutt9t80QQpDs0Opw?width=660&height=495&cropmode=none" width="660" height="495" />
Finished for now.
Donald
G'day Donald
Looking good. Just a small suggestion - drill out the ring at the top of the handle on the tow hook where your arrow is pointing.
Regards
Rob
You have to look realy close, the Pic. #05 shows it molded open, it just doesn't show so clearly in this color plastic.
Donald
Texas, United States
Joined: June 12, 2007
KitMaker: 1,866 posts
Armorama: 1,696 posts
Posted: Thursday, July 11, 2019 - 10:11 AM UTC
Donald, thanks for taking the time to post this, I for one am reading every word, studying every picture.
I saw this kit at King's in Austin the other day and wondered to myself what it was like, and if it was worth the roughly $50. I think it is, and I think I need one......
United States
Joined: October 14, 2012
KitMaker: 2,663 posts
Armorama: 2,649 posts
Posted: Saturday, July 13, 2019 - 01:01 AM UTC
Quoted Text
Donald, thanks for taking the time to post this, I for one am reading every word, studying every picture.
I saw this kit at King's in Austin the other day and wondered to myself what it was like, and if it was worth the roughly $50. I think it is, and I think I need one......
It's worth every penny so-far.
Of course if you can get it cheaper that's even better.
Donald
United States
Joined: October 14, 2012
KitMaker: 2,663 posts
Armorama: 2,649 posts
Posted: Saturday, July 13, 2019 - 01:06 AM UTC
I finally had some time to do some more work.
Now i'll be finishing the Wheels and assembling the Trucks.
Here I added a little Silver Pencil to the rub areas of the Wheels.

The assembled and painted Trucks, note the area that was masked off, this saves a lot of paint scraping.

I assembled the Idler wheels on the smooth part of a #42 Drill bit.
Just slide them on and glue them together. The Drill bit keeps them straight and the hole open.


United States
Joined: October 14, 2012
KitMaker: 2,663 posts
Armorama: 2,649 posts
Posted: Saturday, July 13, 2019 - 01:15 AM UTC
The same goes for the Lower Hull.

The Dual Return Roller have been added.

I'm finished for now, I'll have more as soon as possible.
Donald
California, United States
Joined: January 30, 2013
KitMaker: 537 posts
Armorama: 531 posts
Posted: Sunday, July 14, 2019 - 04:25 AM UTC
Wow, you are building it fast! Nice work and all that detail you make it look easy and it’s not. Thanks for putting all this up here

United States
Joined: October 14, 2012
KitMaker: 2,663 posts
Armorama: 2,649 posts
Posted: Sunday, July 14, 2019 - 04:37 AM UTC
Quoted Text
Wow, you are building it fast! Nice work and all that detail you make it look easy and it’s not. Thanks for putting all this up here 
You'r Welcome, It's nice to be to get your comments .
More coming .
Donald
United States
Joined: October 14, 2012
KitMaker: 2,663 posts
Armorama: 2,649 posts
Posted: Sunday, July 14, 2019 - 04:41 AM UTC
Today I'll be installing the Trucks & other lower hull parts.
Firstly You should trim down the locating pins on the back of the trucks, or drill out the locating holes , the Trucks don't sit flat as shown here.


For the Sprockets, insert the Hubs .

Then install and glue on the Sprocket of your choice, they give you 3 different ones.

United States
Joined: October 14, 2012
KitMaker: 2,663 posts
Armorama: 2,649 posts
Posted: Sunday, July 14, 2019 - 04:52 AM UTC
The Idler is next, it is adjustable so you can adjust the Track tension later.
First insert the fitting into the Wheel, as shown.

Install the retaining disc with a touch of glue in the center only.

Easy on the glue install the cover.

United States
Joined: October 14, 2012
KitMaker: 2,663 posts
Armorama: 2,649 posts
Posted: Sunday, July 14, 2019 - 04:58 AM UTC
The Idler mounts need to be reamed out with a #42 Drill bit, this will make installing & adjusting the Idler Wheel easier.

And here it is.

United States
Joined: October 14, 2012
KitMaker: 2,663 posts
Armorama: 2,649 posts
Posted: Sunday, July 14, 2019 - 05:04 AM UTC
Next I'll be starting the Track.
I'll be doing this a little diferently than I usually do it.
Since this Track is supposed to go together without Glue, I'm going to paint the parts first then assemble them.
You get 4 of these Sprue.

I trimmed off the small pieces of Sprue between the pads, this hopefully will mean less touch up later.

Here I glued the Guide Horns to the centers of the Conectors.

They want you to install these after the Pads are in place , I thing it will be easier painting this way.
Next the painting.
Regards.
Donald
Florida, United States
Joined: March 30, 2006
KitMaker: 3,736 posts
Armorama: 3,697 posts
Posted: Sunday, July 14, 2019 - 11:33 AM UTC
The plate style of drive sprocket was standard at Fisher, but the only "Easy Eights" they built were the M4A3 75 (W) HVSS, a rare type that nearly missed the war entirely, and the M4A2 76 (W) HVSS for the Soviets, though very few were received before war's end.
Chrysler used the scalloped, "Fancy" style drive sprocket, and this was seen on M4A3 76 (W) HVSS, M4A3 105 HVSS, and M4 105 HVSS. This build uses the correct sprocket, of course--just offering a head's up for those less familiar with Sherman minutiae.
Postwar, any type could be seen, as all the sprocket rings had the same part number, and were regarded as interchangeable when the sprocket needed replacement.
United States
Joined: October 14, 2012
KitMaker: 2,663 posts
Armorama: 2,649 posts
Posted: Monday, July 15, 2019 - 09:51 AM UTC
I have them Painted.

Donald
United States
Joined: October 14, 2012
KitMaker: 2,663 posts
Armorama: 2,649 posts
Posted: Wednesday, July 17, 2019 - 08:53 AM UTC
I have all the Track parts separated & the paint touched up.
The assembly went as I expected it to Here is it step by step.
First the Parts breakdown.

The Tracks for this kit are Handed, the connectors have an inside edge and an outside edge.


United States
Joined: October 14, 2012
KitMaker: 2,663 posts
Armorama: 2,649 posts
Posted: Wednesday, July 17, 2019 - 08:58 AM UTC
The assembly jig is useless

They have you place the chevron bottoms in the jig like so.

Then you lay in the connectors wich way depending on which side you want outside.

Then you are suposed to press them down, but you can't without removing the parts joining them together.

United States
Joined: October 14, 2012
KitMaker: 2,663 posts
Armorama: 2,649 posts
Posted: Wednesday, July 17, 2019 - 09:08 AM UTC
If you could add 12 dabs of glue and then 12 rubber pads before the glue sets this may work.

It Doesn't
The Instructions

So I did it My way.
Install 1 Chevron pad being careful of its orientation add a drp of glue.

United States
Joined: October 14, 2012
KitMaker: 2,663 posts
Armorama: 2,649 posts
Posted: Wednesday, July 17, 2019 - 09:14 AM UTC
Then install the rubber pad I worked down one side thed up the other.

This is the results.

I just have to remove the edge parts & touch up the paint.

It's very flexable.

I just did 1 section for testing & to show you how it goes together, I have a lot more to do and it's going to take some time.
Donald
Massachusetts, United States
Joined: March 28, 2007
KitMaker: 1,169 posts
Armorama: 1,067 posts
Posted: Wednesday, July 17, 2019 - 11:34 AM UTC
Those look really good Donald, thanks for showing the process (and how it compares with the kit instruction method). Very useful post!
Pennsylvania, United States
Joined: January 18, 2003
KitMaker: 2,402 posts
Armorama: 2,377 posts
Posted: Wednesday, July 17, 2019 - 03:30 PM UTC
Quoted Text
The assembly jig is useless
. . .
Then you are supposed to press them down, but you can't without removing the parts joining them together.
??? - And the instructions say to do just that I don't think it is fair to say the jig is useless when you didn't follow the instructions for using it.
KL
Michigan, United States
Joined: October 28, 2002
KitMaker: 4,021 posts
Armorama: 3,947 posts
Posted: Wednesday, July 17, 2019 - 11:31 PM UTC
Thanks for the pics of your build. I got mine about ten days ago and poured a lot of time into building most of the assemblies. If I can add a few things:
1) I had no issues with the flush mounting of the HVSS vertical plates (A34) to the lower hull side. It was an exacting fit, but I didn't need to remove the 2 guide tabs. Mine fit great.
2) Part A37 of the HVSS is the bar which engages the springs. You should ensure a careful clean up of the end which faces outward. Indeed, most photos I've seen show a small hole at its center. I was careful to sand the outer end flush and added a hole. Even if you want to omit the drilling of the hole, please be sure to sand it flush.
3) My kit sample had a defect. The outer end of HVSS support arm A31 was a short shot. It required my making six shims so it could attach to outer securing part A30. I corresponded with Terry Ashley and none of his three kits had this defect. Donald's seems fine too. Only one other person I spoke with (Don Frandsen) had the defect. Not a big issue but an annoyance.
4) When attaching the engine grate props (A44 in step 13), know that RFM has at 0°, complete vertical, from the side. They should be perpendicular to the slant of the corner engine deck itself. I cut a small wedge off the bottom of A44 and fitted the parts correctly. If you're unsure of what I'm describing, just consider that the opened engine grate doors would rest on the tops of A44. Thus A44 needs to be flush with the open doors. As RFM would have you do it, only a corner of A44 would be propping the open engine grate. Incorrect.
5)Although I'm not done, some final thoughts: it's a great kit and in whole, has more finesse than the Asuka kit (which previously, I couldn't imagine being surpassed). However, the features included in the kit limit one's finishing choices, if only building out of the box. "Paper Doll" in photos had the T66 tracks, not the T80s of the RFM kit. Also, the armored exhausts are extremely rare in WW2 photos. Most have the thin sheet metal exhausts louvers. Asuka's kit gives you both options for the exhaust louvers.
For a more common WW2 tank, you'll need to secure the more common exhaust louvers. For a more common Korean war tank, you'll need to secure a First Aid box, rear telephone, newer gun tube lock and often, the engine hatch torsion bars. I have a deep spares box so I can mix and match. Ultimately, I'm planning on making the RFM kit into a Korean war tank -- this is just a heads up on an otherwise marvelous job by RFM.
As I stated earlier, I thought the Asuka kits were the ultimate version of this 1/35 subject. I'm happy to say I'm mistaken.
Roy Chow
Join AMPS!
www.amps-armor.org
United States
Joined: October 14, 2012
KitMaker: 2,663 posts
Armorama: 2,649 posts
Posted: Thursday, July 18, 2019 - 01:09 AM UTC
Quoted Text
Thanks for the pics of your build. I got mine about ten days ago and poured a lot of time into building most of the assemblies. If I can add a few things:
1) I had no issues with the flush mounting of the HVSS vertical plates (A34) to the lower hull side. It was an exacting fit, but I didn't need to remove the 2 guide tabs. Mine fit great.
2) Part A37 of the HVSS is the bar which engages the springs. You should ensure a careful clean up of the end which faces outward. Indeed, most photos I've seen show a small hole at its center. I was careful to sand the outer end flush and added a hole. Even if you want to omit the drilling of the hole, please be sure to sand it flush.
3) My kit sample had a defect. The outer end of HVSS support arm A31 was a short shot. It required my making six shims so it could attach to outer securing part A30. I corresponded with Terry Ashley and none of his three kits had this defect. Donald's seems fine too. Only one other person I spoke with (Don Frandsen) had the defect. Not a big issue but an annoyance.
4) When attaching the engine grate props (A44 in step 13), know that RFM has at 0°, complete vertical, from the side. They should be perpendicular to the slant of the corner engine deck itself. I cut a small wedge off the bottom of A44 and fitted the parts correctly. If you're unsure of what I'm describing, just consider that the opened engine grate doors would rest on the tops of A44. Thus A44 needs to be flush with the open doors. As RFM would have you do it, only a corner of A44 would be propping the open engine grate. Incorrect.
5)Although I'm not done, some final thoughts: it's a great kit and in whole, has more finesse than the Asuka kit (which previously, I couldn't imagine being surpassed). However, the features included in the kit limit one's finishing choices, if only building out of the box. "Paper Doll" in photos had the T66 tracks, not the T80s of the RFM kit. Also, the armored exhausts are extremely rare in WW2 photos. Most have the thin sheet metal exhausts louvers. Asuka's kit gives you both options for the exhaust louvers.
For a more common WW2 tank, you'll need to secure the more common exhaust louvers. For a more common Korean war tank, you'll need to secure a First Aid box, rear telephone, newer gun tube lock and often, the engine hatch torsion bars. I have a deep spares box so I can mix and match. Ultimately, I'm planning on making the RFM kit into a Korean war tank -- this is just a heads up on an otherwise marvelous job by RFM.
As I stated earlier, I thought the Asuka kits were the ultimate version of this 1/35 subject. I'm happy to say I'm mistaken.
I quite agree
Donald
United States
Joined: October 14, 2012
KitMaker: 2,663 posts
Armorama: 2,649 posts
Posted: Thursday, July 18, 2019 - 01:12 AM UTC
Quoted Text
Quoted Text
The assembly jig is useless
. . .
Then you are supposed to press them down, but you can't without removing the parts joining them together.
??? - And the instructions say to do just that I don't think it is fair to say the jig is useless when you didn't follow the instructions for using it.
KL
Maby I didn't quite explain it clearly.
This might help.


United States
Joined: October 14, 2012
KitMaker: 2,663 posts
Armorama: 2,649 posts
Posted: Thursday, July 18, 2019 - 01:15 AM UTC


