And good to see your KV-85 being worked on again, Phil!
Those KV tanks usualy took a lot of heavy battering.
What a nice way to keep your sanity, David!
On a side note-I was sure the trailer won't stay unattended for...
KdoGer.40 construction is finished:
I had some troubles gluing the wheels to the suspension arms- while these joints carry the entire load of the model, Bronco designed contact surfaces that are too small.
I used some clamps to align and hold the joints tight while the glue was curing, but if they fail again I'll resort to CA and wire insets.
KdoGer.40 coupled to the towing vehicle(MB 4500S):
Next I'll spray some primer/paints and will start building KdoGer.40 accessories,
Take care
And keep Bronco-building!
Campaigns
Where Armorama group builds can be discussed, organized, and updates posted.
Hosted by Darren Baker, Richard S.
Bronco Campaign 2020 - Active
Posted: Wednesday, June 10, 2020 - 06:11 AM UTC
petbat
Queensland, Australia
Joined: August 06, 2005
KitMaker: 3,353 posts
Armorama: 3,121 posts
Joined: August 06, 2005
KitMaker: 3,353 posts
Armorama: 3,121 posts
Posted: Wednesday, June 10, 2020 - 08:55 AM UTC
Good to see some progress Phil. Looking forward to seeing more.
Very sweet build there Angel.
phil2015
Illinois, United States
Joined: July 27, 2015
KitMaker: 502 posts
Armorama: 325 posts
Joined: July 27, 2015
KitMaker: 502 posts
Armorama: 325 posts
Posted: Wednesday, June 10, 2020 - 09:21 AM UTC
Thanks guys!
Interesting that you say that about the wheels on your model. The connection of the road wheels to the rest of the KV is pretty flimsy. There is enough surface area, but the "axle" that goes into the hole on the suspension arm is pretty loose. Hopefully I glued it well enough on all of them, but it took multiple passes on 3 or 4 of them. The return rollers and drive sprockets are fine, the idlers are also a little flimsy.
roman
Slovakia
Joined: July 20, 2004
KitMaker: 99 posts
Armorama: 95 posts
Joined: July 20, 2004
KitMaker: 99 posts
Armorama: 95 posts
Posted: Wednesday, June 10, 2020 - 06:36 PM UTC
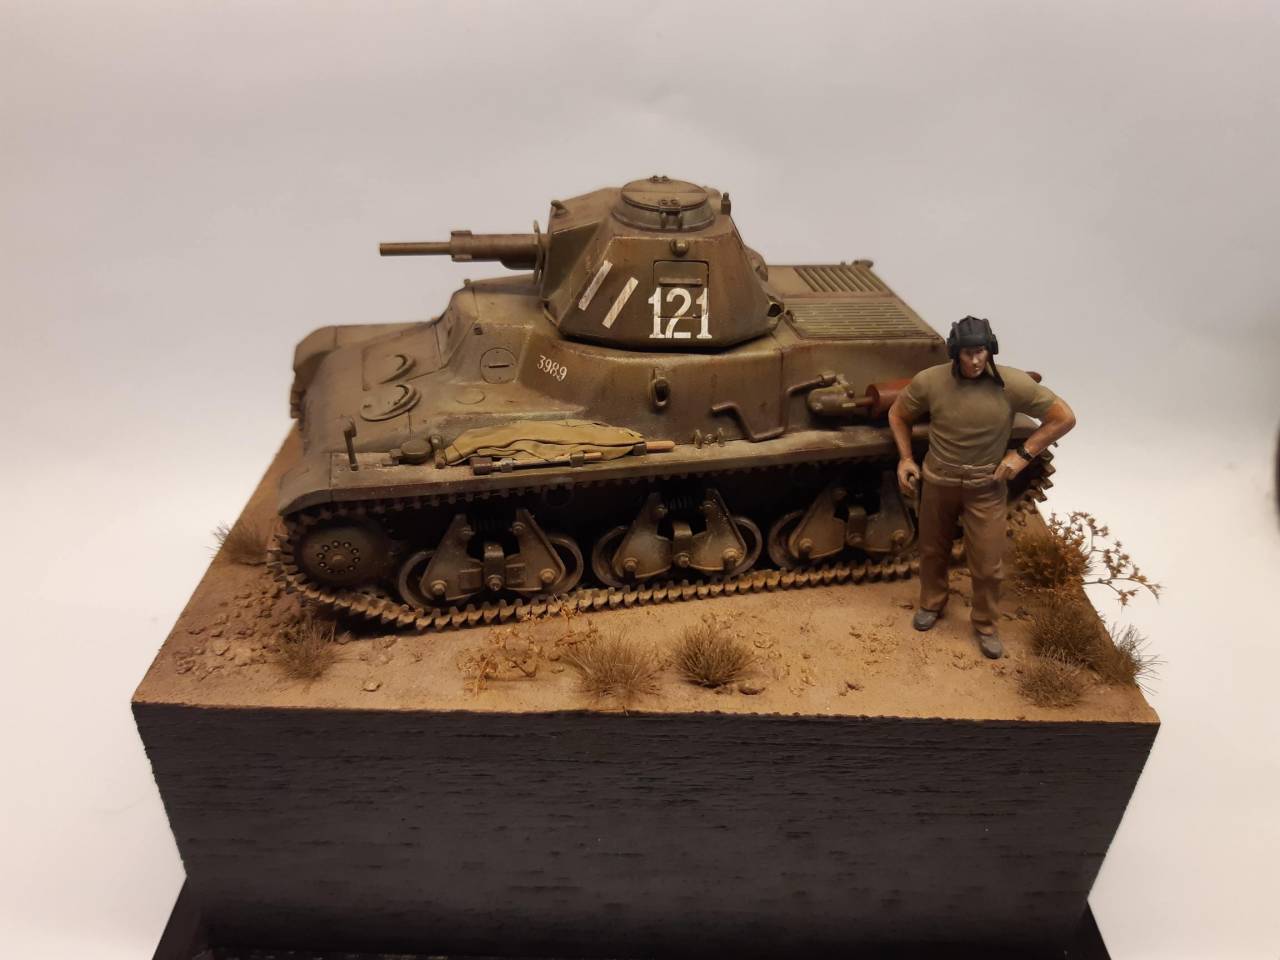
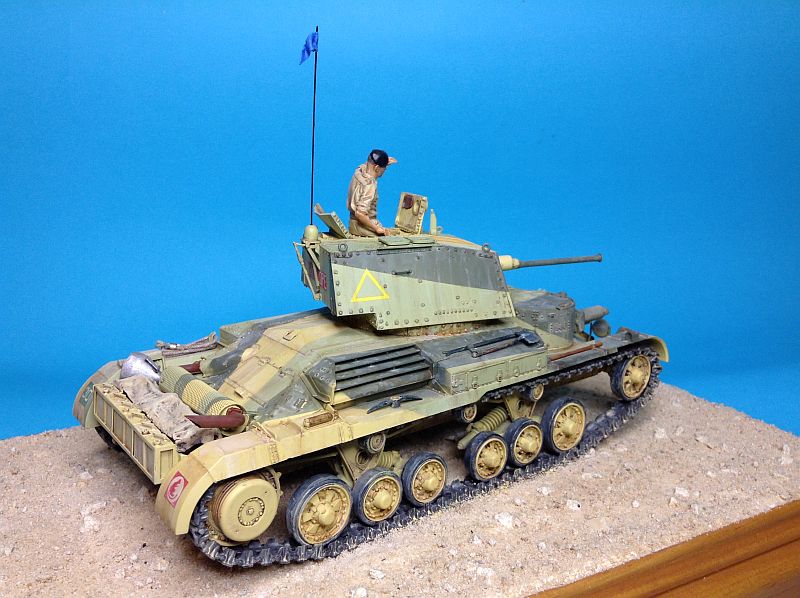
finished
petbat
Queensland, Australia
Joined: August 06, 2005
KitMaker: 3,353 posts
Armorama: 3,121 posts
Joined: August 06, 2005
KitMaker: 3,353 posts
Armorama: 3,121 posts
Posted: Wednesday, June 10, 2020 - 10:15 PM UTC
Love it Roman. A real little gem. The figure really sets off the whole effect very nicely.
justsendit
Colorado, United States
Joined: February 24, 2014
KitMaker: 3,033 posts
Armorama: 2,492 posts
Joined: February 24, 2014
KitMaker: 3,033 posts
Armorama: 2,492 posts
Posted: Thursday, June 11, 2020 - 03:09 AM UTC
Roman, Really nice composition. Painting and weathering are spot-on and the tanker is a most welcome inclusion.🍺
—mike
—mike
phil2015
Illinois, United States
Joined: July 27, 2015
KitMaker: 502 posts
Armorama: 325 posts
Joined: July 27, 2015
KitMaker: 502 posts
Armorama: 325 posts
Posted: Thursday, June 11, 2020 - 04:41 AM UTC
That is beautiful, Roman. I love the figure.
Posted: Thursday, June 11, 2020 - 05:50 AM UTC
Thumbs up for your finished entry, Roman!
Vehicle, diobase and (that dodgy) tanker come together so well...
Wonderfull job!
Thanks for joining in and I realy appreciate our participation in this Campaign,
Vehicle, diobase and (that dodgy) tanker come together so well...
Wonderfull job!
Thanks for joining in and I realy appreciate our participation in this Campaign,
phil2015
Illinois, United States
Joined: July 27, 2015
KitMaker: 502 posts
Armorama: 325 posts
Joined: July 27, 2015
KitMaker: 502 posts
Armorama: 325 posts
Posted: Monday, June 15, 2020 - 01:49 PM UTC
Has anyone here built the Bronco KV-85? I'm cruising along again with it now that I've got my weathering materials. But looking at it - it looks like the turret gets pressed into the turret ring, and my guess is once that is done it's not coming out. I'm just wondering if anyone here can confirm that?
petbat
Queensland, Australia
Joined: August 06, 2005
KitMaker: 3,353 posts
Armorama: 3,121 posts
Joined: August 06, 2005
KitMaker: 3,353 posts
Armorama: 3,121 posts
Posted: Monday, June 15, 2020 - 03:02 PM UTC
PM Colin Key aka ColinEDM and ask him.
https://armorama.kitmaker.net/modules.php?op=modload&name=Messages&file=replypmsg&send=1&uname=ColinEdm
He did a review here:
http://armorama.com/review/11377
Colin is an Associate Editor here and is a great guy. I have had some offline discussions with him in the past. I am sure he would answer your question asap.
Cheers
phil2015
Illinois, United States
Joined: July 27, 2015
KitMaker: 502 posts
Armorama: 325 posts
Joined: July 27, 2015
KitMaker: 502 posts
Armorama: 325 posts
Posted: Saturday, June 20, 2020 - 02:06 PM UTC
The KV-85 is all assembled and almost entirely painted. It's time to start weathering it. I weathered the lower hull before I put the fenders on, and then used foil to keep from getting paint on the finished parts. I'm not quite sure what to do about weathering on the top half - that's a pretty solid wall of green. The green is considerably darker than in the photos - I lightened the pics up to see some of the details of the running gear.
This kit has been a blast to build. There were only a couple of issues on the rear deck:
- the screens are a multilayer assembly. I thought they looked pretty awful before paint but they're kinda ok now, though I apparently got some glue in the screens. I guess one wouldn't store something like a tarp on top of those screens?
- I need to figure out a strategy for doing grab rails. The ones in the kit are nice, but oh so fragile. I thought about replacing with brass wire but I will need a plan for how to add the small supports that hold them up from the hull. I imagine it's a plan that will involve a jig and solder....
V2Phantom
United States
Joined: December 26, 2008
KitMaker: 288 posts
Armorama: 92 posts
Joined: December 26, 2008
KitMaker: 288 posts
Armorama: 92 posts
Posted: Sunday, June 21, 2020 - 02:49 AM UTC
Angel - Your KdoGer.40 looks fantastic! I can really appreciate the work and skill you put into this by seeing it before the paint and weathering step.
Roman - Congratulations on your great build! I especially like the way you presented the finished model on the base. Well done!
Have fun modeling!
Mike
Roman - Congratulations on your great build! I especially like the way you presented the finished model on the base. Well done!
Have fun modeling!
Mike
petbat
Queensland, Australia
Joined: August 06, 2005
KitMaker: 3,353 posts
Armorama: 3,121 posts
Joined: August 06, 2005
KitMaker: 3,353 posts
Armorama: 3,121 posts
Posted: Sunday, June 21, 2020 - 03:05 PM UTC
Looking nice indeed Phil. I guess you solved the mystery of whether the turret can be removed or not.
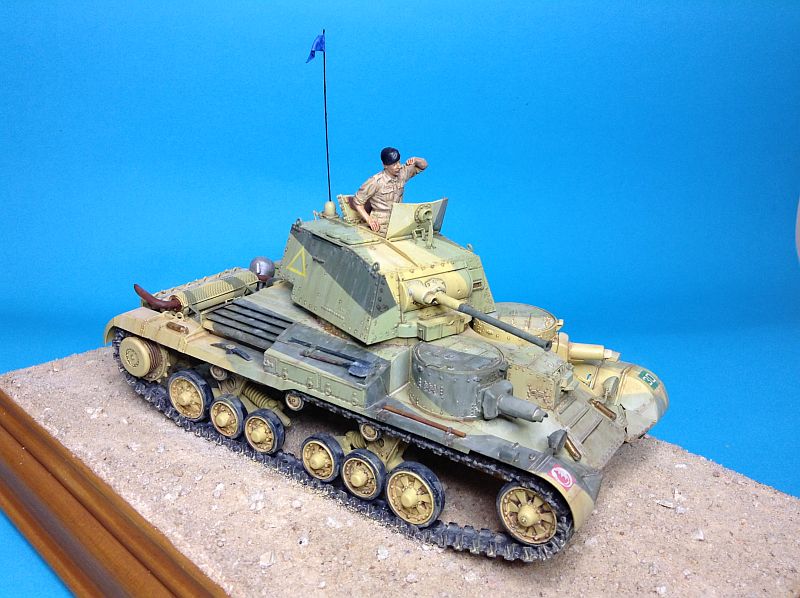
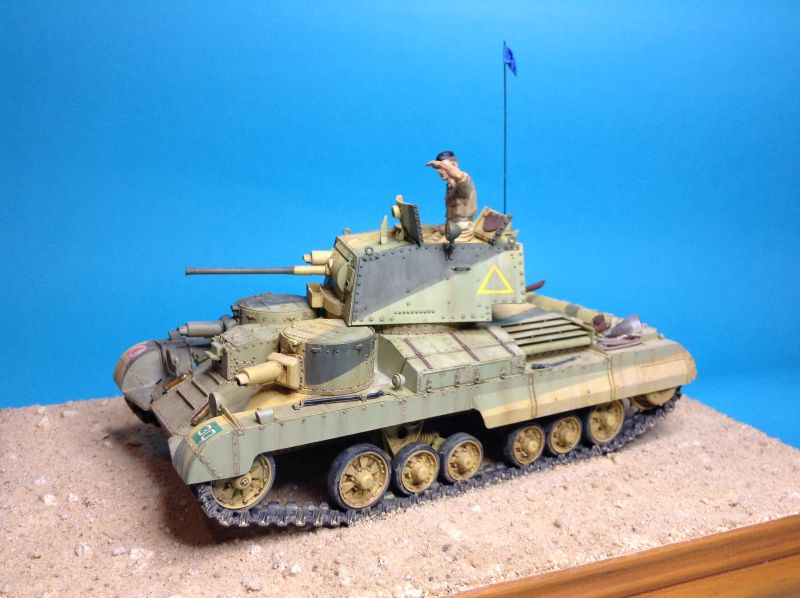
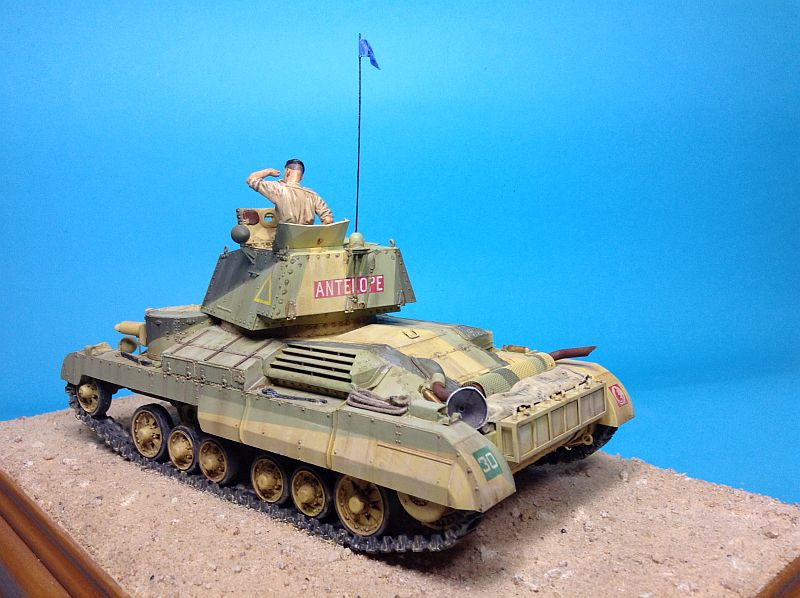
Well, A9 is just about finished. Doing the last stages of painting the stowage then I will post the result....
Posted: Monday, June 22, 2020 - 03:30 AM UTC
Thanks Peter and Mike(V2Phantom)!
Looking good Phil!
I guess your KV-85 will undergo some weathering, right?
Keen to see your A9, Peter!
Not exactly Bronco stuff, but I've built the KdoGer.40 batteries cage and am struggling with the generator, that charged them(it's of a type I haven't seen earlier, so a lot of guess-work):
Looking good Phil!
I guess your KV-85 will undergo some weathering, right?
Keen to see your A9, Peter!
Not exactly Bronco stuff, but I've built the KdoGer.40 batteries cage and am struggling with the generator, that charged them(it's of a type I haven't seen earlier, so a lot of guess-work):
Klaus-Adler
Campaigns Administrator
Scotland, United Kingdom
Joined: June 08, 2015
KitMaker: 1,505 posts
Armorama: 840 posts
Joined: June 08, 2015
KitMaker: 1,505 posts
Armorama: 840 posts
Posted: Monday, June 22, 2020 - 03:55 AM UTC
Painting is fully under way now of the british army quad bike.
Petro
Connecticut, United States
Joined: November 02, 2003
KitMaker: 984 posts
Armorama: 846 posts
Joined: November 02, 2003
KitMaker: 984 posts
Armorama: 846 posts
Posted: Monday, June 22, 2020 - 04:11 AM UTC
I just started assembly of the PZ III a kit. I bought it in March and went back to work in may. Lost my Mojo and had to finish 2 kits before starting.
Hope to be able to finish this campaign.
petbat
Queensland, Australia
Joined: August 06, 2005
KitMaker: 3,353 posts
Armorama: 3,121 posts
Joined: August 06, 2005
KitMaker: 3,353 posts
Armorama: 3,121 posts
Posted: Monday, June 22, 2020 - 06:57 AM UTC
Looks like the struggle is well worth the effort Angel.
Okay, A9 finished. After test fitting the additional stowage, I decided it looked off, so just the home made funnel and tow rope added. Not as impressive as your battery cage and genny though!
phil2015
Illinois, United States
Joined: July 27, 2015
KitMaker: 502 posts
Armorama: 325 posts
Joined: July 27, 2015
KitMaker: 502 posts
Armorama: 325 posts
Posted: Monday, June 22, 2020 - 07:09 AM UTC
That's incredible, Peter! There are so many things on it where I want to know how you did it!
SpeedyJ
Bangkok, Thailand / ไทย
Joined: September 17, 2013
KitMaker: 1,617 posts
Armorama: 1,150 posts
Joined: September 17, 2013
KitMaker: 1,617 posts
Armorama: 1,150 posts
Posted: Tuesday, June 23, 2020 - 02:07 AM UTC
Well here we go with the actual Brronco kit for this campaign.
Looks like some modern composition with al kinds rubber band and clips, but for sure the plastics are Bronco.
Now the fiddly parts come with some etch and then we're off to build the cradle.
Looks like some modern composition with al kinds rubber band and clips, but for sure the plastics are Bronco.
Now the fiddly parts come with some etch and then we're off to build the cradle.
Posted: Thursday, June 25, 2020 - 06:30 AM UTC
Very nice paintwork on your Quad Bike, David!
I hope 3 months will be more than enough for finishing your planned build, Marc. Plus-there might be some extension
Excellent job on the A-9, Peter!
Quality of build, additional detailing and subtle weathering come together so well, like in a masterpiece!
Well done, mate!
Robert,
Looking at your in-progress pictures, my first thought- probably because of all the missiles in the background- was you're building a F-117 with (sci-fi) variable geometry wings
Looking forward to see you tackling the PE parts on your 8.8 cm Flak 41 basement,
petbat
Queensland, Australia
Joined: August 06, 2005
KitMaker: 3,353 posts
Armorama: 3,121 posts
Joined: August 06, 2005
KitMaker: 3,353 posts
Armorama: 3,121 posts
Posted: Thursday, June 25, 2020 - 07:27 AM UTC
Thanks guys.
Off to a good start Robert. A very unusual angle to take the pic. At first glace, at the angle, etc, I thought that pic was of a frame for a robot!
House
Virginia, United States
Joined: May 06, 2003
KitMaker: 55 posts
Armorama: 53 posts
Joined: May 06, 2003
KitMaker: 55 posts
Armorama: 53 posts
Posted: Thursday, June 25, 2020 - 09:54 AM UTC
The QuadBike is looking good, David!
Klaus-Adler
Campaigns Administrator
Scotland, United Kingdom
Joined: June 08, 2015
KitMaker: 1,505 posts
Armorama: 840 posts
Joined: June 08, 2015
KitMaker: 1,505 posts
Armorama: 840 posts
Posted: Monday, June 29, 2020 - 02:37 AM UTC
Quoted Text
The QuadBike is looking good, David!
i've been painting the rubber tyres that come with the kit and i don't have any pictures to show for my efforts as my mobile is on charge right now.
i'm trying to work out if it is easier to attach the upper and lower hull sections and then add the front shock absorbers or should i try to fit them before fixing the two hull sections?
House
Virginia, United States
Joined: May 06, 2003
KitMaker: 55 posts
Armorama: 53 posts
Joined: May 06, 2003
KitMaker: 55 posts
Armorama: 53 posts
Posted: Monday, June 29, 2020 - 05:11 AM UTC
Quoted Text
Quoted TextThe QuadBike is looking good, David!
i've been painting the rubber tyres that come with the kit and i don't have any pictures to show for my efforts as my mobile is on charge right now.
i'm trying to work out if it is easier to attach the upper and lower hull sections and then add the front shock absorbers or should i try to fit them before fixing the two hull sections?
David,
The shock absorbers connect relatively easily. I would get them in place and glued to the frame first. Make sure you drill out the locating holes and trim the top of the shocks nicely (the pins have an ungainly shape from the sprue connection points)There are a few things happening at once, so great patience and some nice tweezers will be helpful. I did find I had to use a fine flat gouge to clean up the recess where the frame had to attach to the body to make it fit snugly. The mold left a slight bevel that kept the frame and body from fitting tightly. Mike
Posted: Monday, June 29, 2020 - 07:17 AM UTC
Bit more from my KdoGer.40 generator build.
I found the engine that drives it- it was produced by DKW and was used to drive various generators(with DKW KL100-a.k.a.DKW C1- being the most common).
Here is my rendition:
Next I'll build the Verteilerkasten(signal distribution box),
I found the engine that drives it- it was produced by DKW and was used to drive various generators(with DKW KL100-a.k.a.DKW C1- being the most common).
Here is my rendition:
Next I'll build the Verteilerkasten(signal distribution box),