_GOTOBOTTOM
Armor/AFV: Axis - WWII
Armor and ground forces of the Axis forces during World War II.
Hosted by Darren Baker
1/35 sd.kfz 251/16 flammpanzerwagen
thefngreek
Visit this Community
Connecticut, United States
Joined: November 12, 2012
KitMaker: 115 posts
Armorama: 111 posts
Posted: Wednesday, November 13, 2019 - 02:08 PM UTC
Hello everybody! This is my 2nd attempt on german armor and I am going to need some guidance.


I am pretty much going to build this straight out of the box since there are no aftermarket upgrades for this it seems... Unless there is something creative I can come up with. (ideas and suggestions are more than welcome)!

cheers
thefngreek
Visit this Community
Connecticut, United States
Joined: November 12, 2012
KitMaker: 115 posts
Armorama: 111 posts
Posted: Wednesday, November 13, 2019 - 02:14 PM UTC
One more thing... how do I upload photos from wix?
KBalczo
Visit this Community
Indiana, United States
Joined: November 16, 2018
KitMaker: 27 posts
Armorama: 25 posts
Posted: Wednesday, November 13, 2019 - 03:12 PM UTC
Looking forward to your build. Do you have Panzer Tracts 15-3?
TopSmith
Visit this Community
Washington, United States
Joined: August 09, 2002
KitMaker: 1,742 posts
Armorama: 1,658 posts
Posted: Wednesday, November 13, 2019 - 03:26 PM UTC
There are some upgrades available. Look for the Sdk...251 upgrades. Because that is the vehicle the kit is based on, many of the things in the aftermarket kit might still apply.
RobinNilsson
Staff MemberTOS Moderator
KITMAKER NETWORK
Visit this Community
Stockholm, Sweden
Joined: November 29, 2006
KitMaker: 6,693 posts
Armorama: 5,562 posts
Posted: Wednesday, November 13, 2019 - 06:48 PM UTC

Quoted Text

One more thing... how do I upload photos from wix?


If you click the edit-button on your first post you will see what the link to the image looks like. To use a photo from wix you will need to find a link to the image and then copy-paste it between the pair of square brackets.
I do not know if wix gives you access to such a direct link to the image.

/ Robin
thefngreek
Visit this Community
Connecticut, United States
Joined: November 12, 2012
KitMaker: 115 posts
Armorama: 111 posts
Posted: Thursday, November 14, 2019 - 01:29 PM UTC
Thank you to everyone for the replies. I did find some aftermarket items for the sd kfz 251 but nothing really worth it. I did find a MG42 mount and gun shield from Liveresin, but the one in the kit is not bad at all. Anyways back to the build... I finally got the boring part over with. Everything went together pretty well.

thefngreek
Visit this Community
Connecticut, United States
Joined: November 12, 2012
KitMaker: 115 posts
Armorama: 111 posts
Posted: Thursday, November 14, 2019 - 01:32 PM UTC
I am not sure what this contraption does and the instructions were not very clear on how it goes so I took a guess... If what I did was wrong please let me know... my feelings wont be hurt

thefngreek
Visit this Community
Connecticut, United States
Joined: November 12, 2012
KitMaker: 115 posts
Armorama: 111 posts
Posted: Thursday, November 14, 2019 - 01:37 PM UTC
When I go into my wix and open the edit window on a picture... There is a Link box... but inside the box it says "enter a URL here"... whatever that means
thefngreek
Visit this Community
Connecticut, United States
Joined: November 12, 2012
KitMaker: 115 posts
Armorama: 111 posts
Posted: Thursday, November 14, 2019 - 01:49 PM UTC
Well, I ran into a problem... It could have been me but I am pretty sure I installed everything correctly. I noticed the piece shown on the instructions is a little different than the piece supplied in the kit. There is a clear gap about 1/16" to 1/8" between the floor piece and the back opening. Could I have missed something?


KBalczo
Visit this Community
Indiana, United States
Joined: November 16, 2018
KitMaker: 27 posts
Armorama: 25 posts
Posted: Thursday, November 14, 2019 - 02:39 PM UTC
That contraption is not really visible, so I leave it off my SdKfz 251 builds. The floor of SdKfz 251/8 is flush with the threshold of the rear door. For the other ones, the floor is below.
thefngreek
Visit this Community
Connecticut, United States
Joined: November 12, 2012
KitMaker: 115 posts
Armorama: 111 posts
Posted: Thursday, November 14, 2019 - 03:45 PM UTC
Those pictures show the floor is away from the door threshold, not sitting below it. That dark area is a gap, not a shadow
Hohenstaufen
Visit this Community
England - South East, United Kingdom
Joined: December 13, 2004
KitMaker: 2,192 posts
Armorama: 1,615 posts
Posted: Friday, November 15, 2019 - 12:31 AM UTC
The mystery piece looks like some sort of damper for the suspension on the last station. These are quite common on German wartime AFVs, the panzers all seem to have a similar arrangement. I don't know why it's only on the last station, presumably it has some relevance to track alignment.
As regards the floor, it should be flush with the rear plate. Check the front isn't too far forward. I've actually made this kit (Sdkfz251/16 Ausf C)in a previous incantation, but I kitbashed it with a Tamiya Ausf D, as Dragon didn't make one at the time. Shortly after DML brought their Ausf D out! Oh well...
TimReynaga
Staff MemberAssociate Editor
MODEL SHIPWRIGHTS
Visit this Community
California, United States
Joined: May 03, 2006
KitMaker: 2,500 posts
Armorama: 297 posts
Posted: Friday, November 15, 2019 - 02:01 AM UTC

Quoted Text

I am not sure what this contraption does and the instructions were not very clear on how it goes so I took a guess... If what I did was wrong please let me know... my feelings wont be hurt


This looks to be a cool project, I look forward to watching it progress. By the way, if you remove the "/thumbs" part of the url when you post your pictures they won't appear as miniscule "thumbs". We'd all like to be able to see your work!


panzerbob01
Visit this Community
Louisiana, United States
Joined: March 06, 2010
KitMaker: 3,128 posts
Armorama: 2,959 posts
Posted: Friday, November 15, 2019 - 06:08 AM UTC
The "contraption" is a suspension damper - a shock-absorber and stop set. Tracked vehicles typically have some version of shocks and / or enhanced springs at the lead and trail ends of road-wheel runs - these ends take the major beating of encountering objects that the run and suspension will presumably climb up and over. In the case of the Sd.Kfz. 251.... the rear shock assembly serves to protect and buffer the suspension when backing up - as that last roadie becomes the functional lead roadie. There isn't one on the front end because the engineers felt that the front wheels serve as the initial contact and so a first-roadie shock set wasn't needed. Probably saved some money somewhere!

Somehow I doubt that most of us ever actually see it located as it is behind the wheels, so leaving it off probably does not matter so far as the build you will see.

It's an interesting mechanical detail, far as I see it: Because the suspension is mounted on this shallow slab-sided tub with sloped hull sides above, there apparently isn't sufficient room to mount a vertical shock with enough travel (such as, for instance, seen on your typical Pz. III suspension) - so the engineers apparently felt it more effective to build a horizontal transfer linkage then to cut a hole in the sloped hull wall and build a vertical mount therein... So, because I just LOVE the realizations of all the quirky details and greatly appreciate the D for including them, I do put these on, even if I won't see them (unless I really search! ). I do draw the line, however, at putting in those fuel tank bits which sit inside the tub and get fully-covered by the hull floor....

Cheers! Bob

PS:, The -/16 was one of many variants built on the standard Sd.Kfz. 251. The -251 came in 4 basic flavors - Ausf. a, b, c, and d. Unless there was some specific and well-documented reason for changing floor-height between variants within any one Ausf., I suspect that all -251 of a given Ausf. had the same floor... It is entirely possible, I think, that floor-heights could have differed BETWEEN Ausf., as the Ausf. denote assembly changes. As some were welded hulls and others riveted, that variation could, I presume, also have resulted in floor-height differences... So, when comparing floor heights between -251 kits, perhaps keep this in mind?

panzerbob01
Visit this Community
Louisiana, United States
Joined: March 06, 2010
KitMaker: 3,128 posts
Armorama: 2,959 posts
Posted: Friday, November 15, 2019 - 06:23 AM UTC
Regards "upgrades":

Sd.Kfz. 251, like about every other kit subject, were just full of wonderful details that don't show up in kits or in after-market detail sets. The best way to see and learn about the myriad missing details (mostly interior stuff) is of course to spend near-endless hours scouring the internet for photos and doing book research into the type. Fun, but time- and potentially money-costly!

Dressing up and enhancing one's builds beyond the box is, of course, the essence of modeling. There are many relatively straight-forward enhancements one can do on this subject - I wire up the radio sets to better match photos of such sets, I replace molded-on grab-handles with wire handles, I identify the clunky and overly-thick molded details which can be simply thinned or replaced with cut sheet styrene (things like gun-shields and the like) and thin edges and / or replace them with sheet-styrene if I can do so simply and easily. I add ammo belts to mounted MG (there are good AM kits for this, but one can make good belts from scratch with a little work), and add slings to stowed rifles. Tool clamps are a nice detail to enhance, too.

The list can go on and on, of course! But I like to get done with a build so keep my mods simple and limited. To maximize the outcome, I like to focus mods on a few things which, if improved, could greatly enhance the pop of the build. Spending a lot of effort on virtually unseen tiny bits is pretty anal to me - not that I haven't done that! So, my advice, for what it's worth, is to look things over and try to pick out a few things which look pretty visible AND look like they could stand some improvement. A few fixes can make any kit pop!

Cheers! Bob
thefngreek
Visit this Community
Connecticut, United States
Joined: November 12, 2012
KitMaker: 115 posts
Armorama: 111 posts
Posted: Saturday, November 16, 2019 - 08:56 AM UTC
Panzerbob! thank you for those scratch built ideas and the info about that damper thing/contraption Anyways I took apart the walls and the floor, reassembled them and there is still a gap between the floor and the rear door threshold I dont know what else to do so I gonna move on... I'm ready to paint the interior now. German armor was painted factory red first, then the color of theater they were going into next, Like spring would be dunkelgelb? or did they come out of the factor in panzer gray then painted on the field? I will post some pictures tonight
DT61
Visit this Community
Ontario, Canada
Joined: September 18, 2005
KitMaker: 1,226 posts
Armorama: 819 posts
Posted: Saturday, November 16, 2019 - 10:18 AM UTC
https://armorama.kitmaker.net/review/1273

Eduard Photoetch 1:35 - Sd.Kfz.251/16 Ausf.D Flammpanzerwagen (Dragon) - EDP35923
panzerbob01
Visit this Community
Louisiana, United States
Joined: March 06, 2010
KitMaker: 3,128 posts
Armorama: 2,959 posts
Posted: Saturday, November 16, 2019 - 10:48 AM UTC
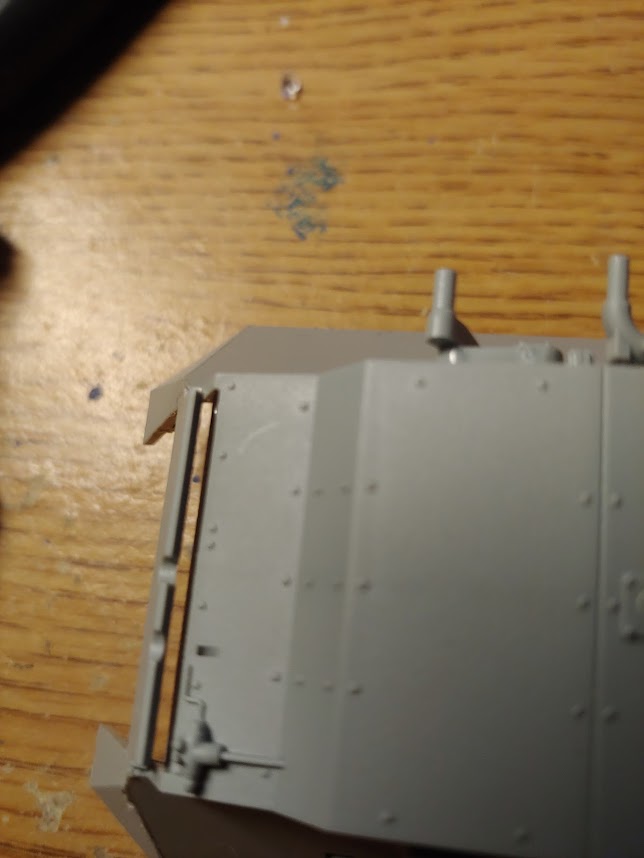
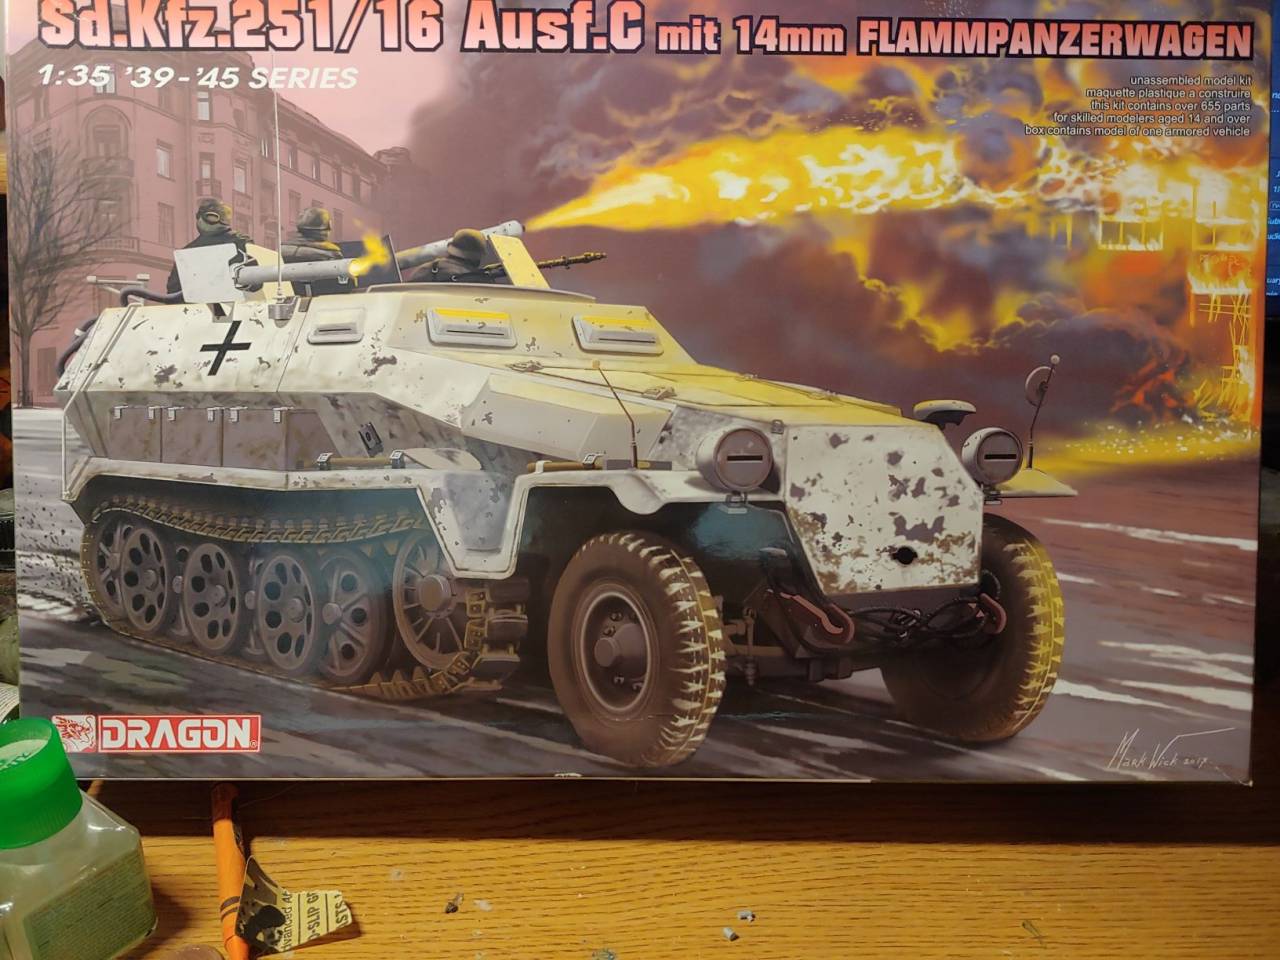
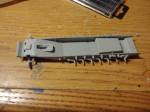
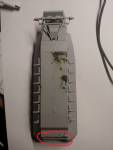
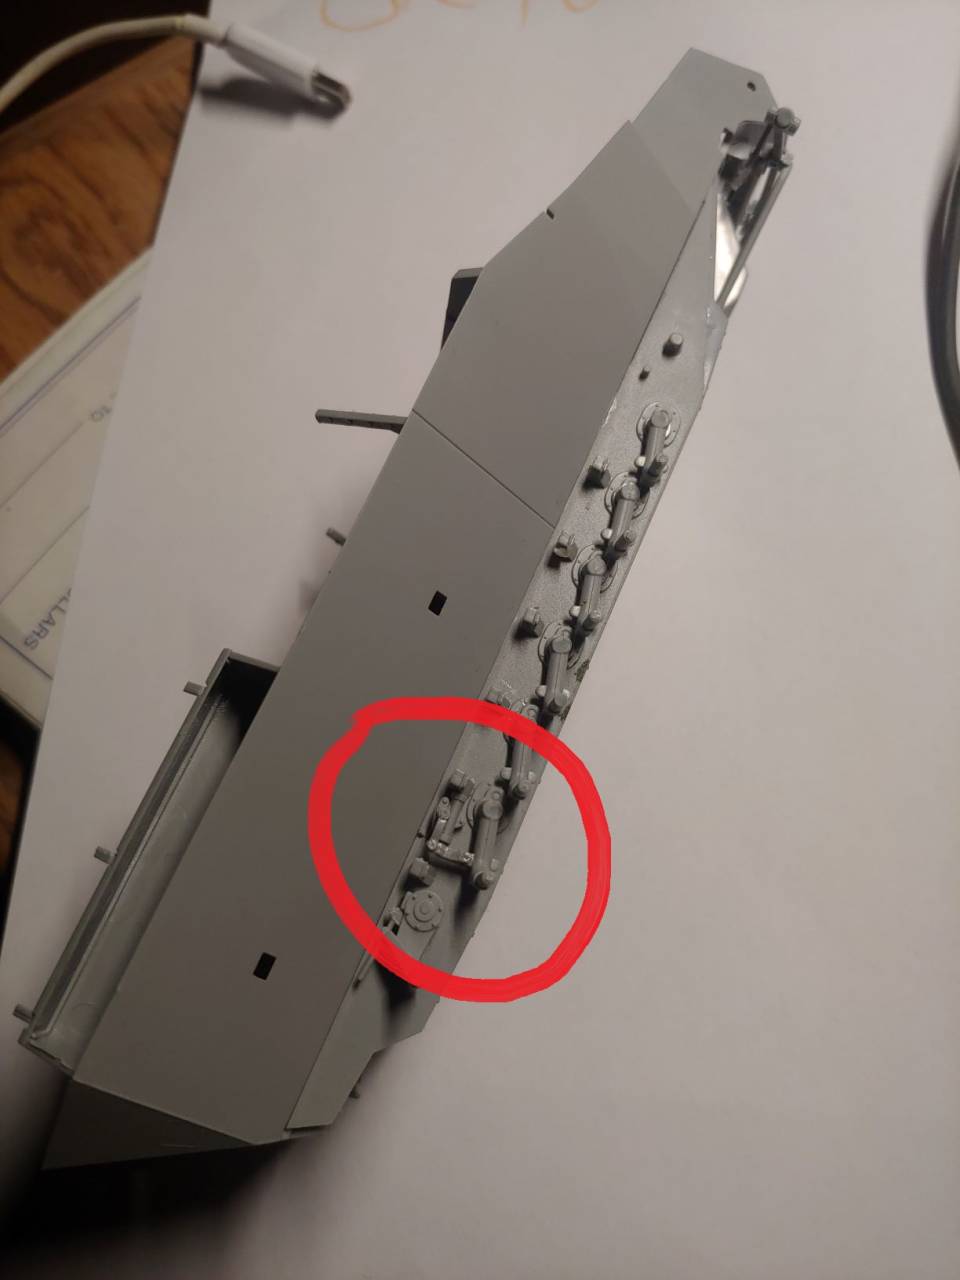
Regards that gap between the floor-end and the rear hull plate where the doors are...

It looks to me like the floor plate is simply a little bit short - its been years since I did one of these Dragon -251 kits, and I don't recall seeing such a gap - or maybe I just filled it or otherwise covered it up... Which is pretty much what I suggest is your "fix" for this: Just fill the gap with putty or a strip of styrene sheet and make the floor plate extend fully to the rear hull plate.

Regards paint colors... You have CHOICES and guide-lines...!

GENERALLY SPEAKING, German armor vehicles were primed in the well-discussed "Rot-oxid" or red-oxide primer, followed by factory painting in whatever the regulation base-coat color was AT THE TIME of manufacture. The choice of base-coat was purely by regulation - NOT by any seasonality.

So, IF your 'track was built between 1940 and Feb 1943, the typical regulation base-coat was the dark grey "Dunkelgrau". Starting in late Feb - early Mar of 1943, the regulation base-coat color changed to the mustard-brown color generally called "dunkelgelb" (dark yellow).

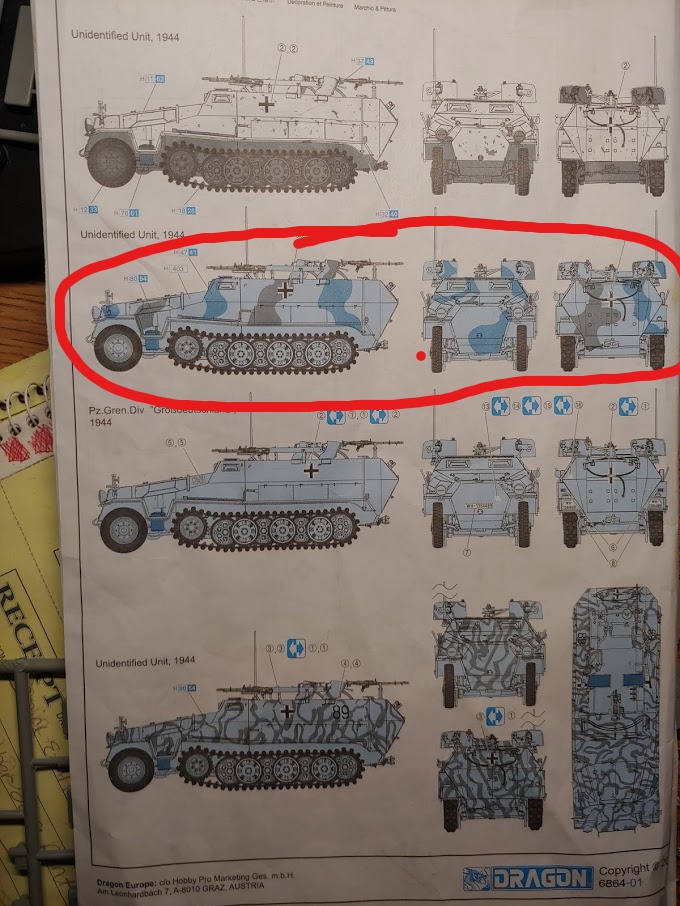
Regulations from July 1940 through Feb '43 prescribed that all vehicles would be a solid dunkelgrau. No official added camo color was regulation-prescribed for European theater / Russian theater vehicles - but many units and crews actually painted on camo colors obtained from various sources. From Feb, 1943, the reg base-coat was the mentioned dunkelgelb - and for most of the remaining 2 years of war, regs prescribed 2 general camo colors (a dark green and a dark red-brown) to be applied over the dunlekgelb - by units and / or crew in the field. The camo colors were provided from central stores and applied "at whim" by crew or at unit shops - hence the huge variation in camo schemes seen on German stuff in 1943 - '45. From Mar, 1943, older vehicles were repainted dunkelgelb and generally camo'd in brown, green, or both B abd G.

So... First determine whether you have / want a vehicle in service before Mar 1943 - IF SO, it will be all dunkelgrau (unless it is sent off to Africa - in which case it would be one of maybe 3 general "DAK - type" paint-schemes) exterior with MAYBE some added camo - which could be any of several colors (NONE of which were actually "regulation-prescribed" before 1943). IF a 1943 / '43+ vehicle, it will be base-coated in dunkelgelb, and may or may not be camo-painted over that (not every tank or 'track was actually camo-painted).

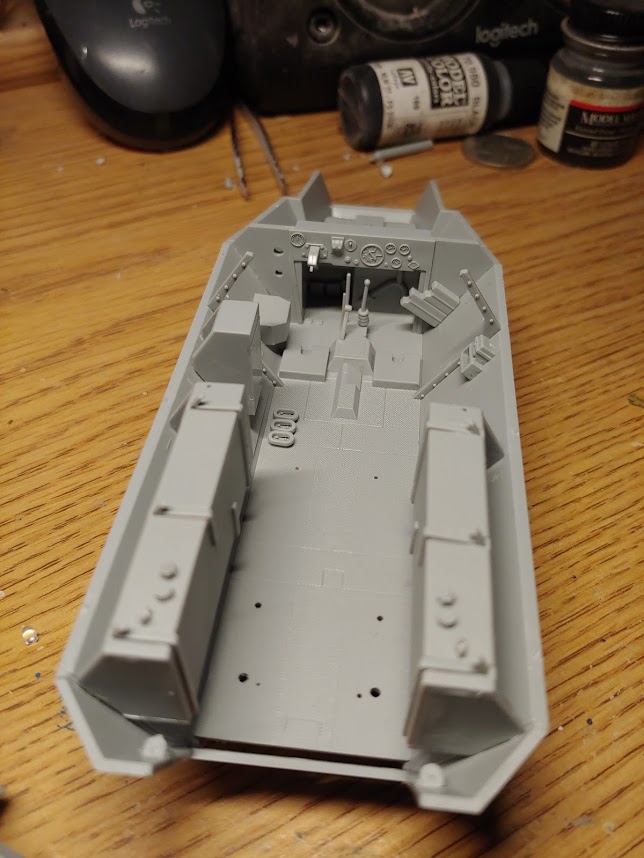
Note: There has been quite a bit of discussion on several sites regarding how to paint German open-top armor... In general, all the typically-visible interior should be the same color as the exterior base-coat. Folks vary about whether the driver's compartment would be painted in the typical German "elfinbein" off-white used in closed-top armor, and of course there are also discussions about the floor being maybe a different color (dark green, or...) then the interior hull-sides. I'm in the elfinbein driver's interior and dark green floor "school".

My suggestion is to spend a little while looking over -251 builds on the web, and / or reading some of these many threads discussing painting such builds over the years. Depending on your interests in "accuracy" versus build-appearance, form up your paint-scheme taking into acct whatever parts of those other builds and discussions you wish to consider. There is certainly the "right way", and any of many "good ways" to go! Of course, if you are REALLY MOTIVATED, there are many publications and oodles of web-discussions about these topics - but maybe you don't want to spend your life doing research over actually getting a build done! But its out there if you want it!

Cheers! Bob
KBalczo
Visit this Community
Indiana, United States
Joined: November 16, 2018
KitMaker: 27 posts
Armorama: 25 posts
Posted: Saturday, November 16, 2019 - 11:02 AM UTC
Based upon your photographs, the lower hull assembly looks correct. I am at a loss on why there is a gap between the floor and the wall of the rear door.

I suggest that you dry fit the upper hull and the instrument panel to the lower hull/floor. Just to see if any other pieces are not fitting.

Soon, you will at the track assembling phase. Dragon's SdKfz 251 tracks, if assembled "gingerly", can be flexible. I use a jig constructed from two pieces of plastic strip taped to a ruler. They are sized and placed far enough apart for the width and depth of the track's guide tooth. The track pieces lock together and the pad holds the track together. Only us a very small drop of glue when attaching the pads. Make sure that no glue gets into the joint between the tracks. The pins on the track pads only go one way. There are 55 track links on the left side and 56 on the right.

SdKfz 251/16 ausf C went into production in January 1943. Therefore, your painting scheme is not limited to only dunkelgrau or dunkelgelb.
thefngreek
Visit this Community
Connecticut, United States
Joined: November 12, 2012
KitMaker: 115 posts
Armorama: 111 posts
Posted: Saturday, November 16, 2019 - 12:25 PM UTC
you guys are awesome! and ken thanks for the heads-up on the tracks I took in your suggestions and honestly I think its the rear wall of the hull is the wrong piece because everything lines up perfectly.


thefngreek
Visit this Community
Connecticut, United States
Joined: November 12, 2012
KitMaker: 115 posts
Armorama: 111 posts
Posted: Saturday, November 16, 2019 - 12:26 PM UTC


The pictures worked!!
thefngreek
Visit this Community
Connecticut, United States
Joined: November 12, 2012
KitMaker: 115 posts
Armorama: 111 posts
Posted: Saturday, November 16, 2019 - 12:32 PM UTC
I found some pieces that will not be used in the kit that I hid the gap with. This is the interior so far before I prime it


Im going with this version which is a 1944 version with some camo lines applied to it so I am gonna guess it came out of the factory dunklegleb so the chips will be done in the primer red. If i want... can i do the entire model panzer grey and use the same decals?

KBalczo
Visit this Community
Indiana, United States
Joined: November 16, 2018
KitMaker: 27 posts
Armorama: 25 posts
Posted: Saturday, November 16, 2019 - 06:00 PM UTC
Glad to help.

If you paint exterior in dark grey, then the interior should also be painted dark grey. But, I would recommend using a slightly lighter shade of dark grey for the interior. So, interior is not lost in shadows.

Decals look to be generic. So, they appear to not be time or location sensitive.

When you assemble the tracks, don't use a thin cement. This type floods the area through capillary action and will compromise the potential workable tracks. I use Testor in black container with a spout, similar to an old-fashioned oil can. It has better control than cement applied with a toothpick.

Dry fit the top hull. In my SdKfz 251 ausf D construction experience, I find that the instrument panel acts like a fulcrum which prevents the front and rear of the top hull from sitting properly. Ultimately, I end up having to shave, rather extensively, the instrument panel, so front and rear sit properly.
panzerbob01
Visit this Community
Louisiana, United States
Joined: March 06, 2010
KitMaker: 3,128 posts
Armorama: 2,959 posts
Posted: Saturday, November 16, 2019 - 06:41 PM UTC
IF you are modeling a "1944" vehicle, the base-coat "WILL BE" dunkelgelb, by regulation (if you wish even modest accuracy in paint-schemes). Likely only a few of Ausf C were actually painted with the dunkelgrau (dark grey or "panzer grey" by some) base-coat. And if they survived longer then a couple - 3 months, they almost certainly were repainted with the dunkelgelb base-coat.

Your base-coat options really are limited to the dunkelgrau (for the earliest production Ausf C - Jan or Feb 1943), or the dunkelgelb (for ALL post-Feb 1943 Ausf C production vehicles) - unless you are trying to depict a "tropisch" scheme for one of the few vehicles "ear-marked" (and so painted) for shipment to Africa. The D-grau and D-gelb were the prescribed regulation base-coat colors covering all armor from 1940 through to early 1945.

For any vehicle base-coated in dunkelgelb, your camo options are pretty broad. Regs from 03-1943 prescribed that armored vehicles get camo-painted with the brown and green over the base dunkelgelb. Not every AFV actually got done up with the camo colors... Let documented photos guide you if you are uncertain.

Interestingly, IF you were modeling one of the early production -C from Jan or Feb 1943, you have the (to me) super-interesting option of base-coating the exterior in dunkelgelb while painting the main-cabin interior dunkelgrau - to depict a 1943 repainted vehicle! Repainting of pre-Feb 1943 production open-top armored vehicles (those painted in dunkelgrau base-coats inside and out) to meet the post-Feb dunkelgelb exterior base-coat regs did not apparently require units or shops to repaint the hull-interiors in dunkelgelb... So some formerly dunkelgrau 'tracks and Marder-type spgs and AT vehicles got dunkelgelb exteriors but retained dunkelgrau interiors. Just a thought!

Ideally, you will find, in fit-checking, that the floor plate may actually need to be repositioned rear-ward to fit correctly, thus eliminating that gap. But, if, after fit-checking, you find that the part fits correctly elsewhere and that gap remains... Just putty it over or cover it with a small styrene strip. The gap should not be there when you are done!

Cheers! Bob
thefngreek
Visit this Community
Connecticut, United States
Joined: November 12, 2012
KitMaker: 115 posts
Armorama: 111 posts
Posted: Sunday, November 17, 2019 - 12:20 PM UTC


This is exactly what I am looking to do! Where can I find the decals? I have been looking all day at other kits and peddinghous decals but nothing. You guys have great suggestions Because I want to do a panzer gray outside what lighter gray should I go with on the inside that wont be too light and also wont get lost in the shadows? I also gotta do that other 1943 pattern with the dunkleglb paint over on another model
 _GOTOTOP