Marek, that is a nice choice of build. Looking forward to see how that works out.
Campaigns: Active Campaigns
Campaigns that are either in planning or underway should be grouped here.
Campaigns that are either in planning or underway should be grouped here.
Hosted by Richard S.
Build a Photo Campaign - Active
Posted: Sunday, March 08, 2020 - 12:38 AM UTC

Buckeye198

Joined: May 02, 2010
KitMaker: 596 posts
Armorama: 265 posts

Posted: Monday, March 09, 2020 - 11:52 AM UTC
Peter: I'm clearly game for bending campaign rules, but unfortunately it's not my shot to call either. I hope that you get the okay for that build, it looks like a great plan!
Marek: there's nothing quite like needing a kit in order to build your kit, eh? Best of luck!
I'm finally ready to give some pictures. First the obligatory unbuilt shot. This is Trumpeter's 1/72 scale kit. I wanted a quick build so I could work more on the painting and finishing aspect of my craft.

As promised, the bulk of the kit went together in ~20 pieces. The only fixing necessary was at the glacis-hull joint and just a touch on each missile.

Wouldn't be too difficult to mod it in the stowed configuration, but the picture of the parade shows all firepower at the ready...sun's out, guns out!

Primed all pieces, now for step one of painting. I mixed a color that I'm calling "aggressive school bus yellow".

I bought a tin of Mig's airbrushing putty at the recommendation of some other modelers on this forum; we'll see next time how good it is when it's time to spray the salmon-pink coat!
Marek: there's nothing quite like needing a kit in order to build your kit, eh? Best of luck!
I'm finally ready to give some pictures. First the obligatory unbuilt shot. This is Trumpeter's 1/72 scale kit. I wanted a quick build so I could work more on the painting and finishing aspect of my craft.

As promised, the bulk of the kit went together in ~20 pieces. The only fixing necessary was at the glacis-hull joint and just a touch on each missile.

Wouldn't be too difficult to mod it in the stowed configuration, but the picture of the parade shows all firepower at the ready...sun's out, guns out!

Primed all pieces, now for step one of painting. I mixed a color that I'm calling "aggressive school bus yellow".

I bought a tin of Mig's airbrushing putty at the recommendation of some other modelers on this forum; we'll see next time how good it is when it's time to spray the salmon-pink coat!
Posted: Monday, March 09, 2020 - 08:20 PM UTC
You chose the right name for that paint!! My eyes almost hurt 

It will be a cool camouflage although I am not sure it will hide anything.


It will be a cool camouflage although I am not sure it will hide anything.


Buckeye198

Joined: May 02, 2010
KitMaker: 596 posts
Armorama: 265 posts

Posted: Sunday, March 15, 2020 - 01:10 PM UTC
Next color is on! My initial paint was more like a Crayola Tickle-Me-Pink...oops.

I reworked my ratios and mixed up a redder paint. I sprayed the lower track and left the upper one pink as a comparison. The picture doesn't quite do it justice, it really is more red than pink now.

In keeping with my tradition of stupid paint names, this paint will be affectionately known as bashful salmon.

At first glance, the Mig airbrushing putty seems to be doing its job. Unlike poster tack, this stuff is like an extremely viscous near-liquid which allows it to sink gently into crevices without much prodding. It sticks well to surfaces, and from the minute adjustments I've made while mapping out the camo, it seems to detach easily and without pulling up the paint. All as advertised so far!
Hope everyone is staying safe and healthy during this pandemic...maybe this will give us all some extra time at the workbench!

I reworked my ratios and mixed up a redder paint. I sprayed the lower track and left the upper one pink as a comparison. The picture doesn't quite do it justice, it really is more red than pink now.

In keeping with my tradition of stupid paint names, this paint will be affectionately known as bashful salmon.

At first glance, the Mig airbrushing putty seems to be doing its job. Unlike poster tack, this stuff is like an extremely viscous near-liquid which allows it to sink gently into crevices without much prodding. It sticks well to surfaces, and from the minute adjustments I've made while mapping out the camo, it seems to detach easily and without pulling up the paint. All as advertised so far!
Hope everyone is staying safe and healthy during this pandemic...maybe this will give us all some extra time at the workbench!

Posted: Tuesday, March 17, 2020 - 09:22 AM UTC
Robbi, Bashful Salmon! 

Anyway, I have been thinking of entering this Campaign for a while, and as all my other builds are right now at a point where I can't do anything with them tonight.....its time to start on this.
Photographic inspiration of my subject, an F-16C Block 50 of the 85th Test & Evaluation Squadron flying over Alaska in 2017. This aircraft is wearing the (then) experimental Have Glass V camouflage. This paint scheme is now being rolled out across the F-16 fleet for units with a SEAD role.

Here is the kit I will be using, the fantastic Tamiya 1/48 Viper. I recently finished one that had languishing for 5 years and was determined to build another as soon as.

I will be using the decal sheet "Test Vipers" from Speed Hunter Graphics, and for the Have Glass paint I will be using Hataka lacquers.

I also need to pick up the AMK "Modern US weapons" set at some point, as it comes with the correct instrumentation pod. At this moment in time I'm not planning on scratchbuilding the mountains


Anyway, I have been thinking of entering this Campaign for a while, and as all my other builds are right now at a point where I can't do anything with them tonight.....its time to start on this.
Photographic inspiration of my subject, an F-16C Block 50 of the 85th Test & Evaluation Squadron flying over Alaska in 2017. This aircraft is wearing the (then) experimental Have Glass V camouflage. This paint scheme is now being rolled out across the F-16 fleet for units with a SEAD role.

Here is the kit I will be using, the fantastic Tamiya 1/48 Viper. I recently finished one that had languishing for 5 years and was determined to build another as soon as.

I will be using the decal sheet "Test Vipers" from Speed Hunter Graphics, and for the Have Glass paint I will be using Hataka lacquers.

I also need to pick up the AMK "Modern US weapons" set at some point, as it comes with the correct instrumentation pod. At this moment in time I'm not planning on scratchbuilding the mountains


Buckeye198

Joined: May 02, 2010
KitMaker: 596 posts
Armorama: 265 posts

Posted: Tuesday, March 17, 2020 - 01:37 PM UTC
Neil I'd love to see some mountain sculpting, or at least a touch of photoshop when you're done 
The last coat is on -- a color I'll call "logical green" -- and I have to call Mig's putty a resounding success! No residue, easy to work with, works its way into crevices, on and on praise. The only downside is that if you leave it overnight, it WILL droop. Some places more than others, but my word of warning is to always check the masking before spraying to make sure there aren't any new protrusions through the putty. I guess that's just good practice for any masking material...anyway.
Overall the scheme turned out very well, even with the SUPER preliminary dry fitting. Just a few illogical areas (eg: the front-left corner of the missile rack should be red) and a few spots where the mask over- or under-covered. But I'm very happy with the sharpness of the borders, and really that was the main skill I was working on for this build.


The saying goes "Excellence is the enemy of Good Enough" and that's where I am now. There are certainly tiny areas to touch up, but my gut says there's too much yellow and not enough green or red. Given how well the masking putty works, I wonder if I can (re, SHOULD) try to mod the camo scheme ever so slightly. Thoughts? Do I adjust or just push forward with "Good Enough"?


The last coat is on -- a color I'll call "logical green" -- and I have to call Mig's putty a resounding success! No residue, easy to work with, works its way into crevices, on and on praise. The only downside is that if you leave it overnight, it WILL droop. Some places more than others, but my word of warning is to always check the masking before spraying to make sure there aren't any new protrusions through the putty. I guess that's just good practice for any masking material...anyway.
Overall the scheme turned out very well, even with the SUPER preliminary dry fitting. Just a few illogical areas (eg: the front-left corner of the missile rack should be red) and a few spots where the mask over- or under-covered. But I'm very happy with the sharpness of the borders, and really that was the main skill I was working on for this build.


The saying goes "Excellence is the enemy of Good Enough" and that's where I am now. There are certainly tiny areas to touch up, but my gut says there's too much yellow and not enough green or red. Given how well the masking putty works, I wonder if I can (re, SHOULD) try to mod the camo scheme ever so slightly. Thoughts? Do I adjust or just push forward with "Good Enough"?

petbat

Joined: August 06, 2005
KitMaker: 3,353 posts
Armorama: 3,121 posts

Posted: Tuesday, March 17, 2020 - 03:13 PM UTC

Robby, now that model is a statement!!
Looking good.... I think....
petbat

Joined: August 06, 2005
KitMaker: 3,353 posts
Armorama: 3,121 posts

Posted: Friday, March 27, 2020 - 10:50 AM UTC
Hi Guys
Just throwing up a suggestion for the award ribbon:

Just throwing up a suggestion for the award ribbon:

Posted: Saturday, March 28, 2020 - 08:02 AM UTC
Nice ribbon, Peter. I like it a lot.
petbat

Joined: August 06, 2005
KitMaker: 3,353 posts
Armorama: 3,121 posts

Posted: Saturday, March 28, 2020 - 08:35 AM UTC
Thanks Jesper
Posted: Thursday, April 02, 2020 - 10:26 AM UTC
Robby! That paint scheme is crazy cool. Can't wait to see it completed.
Got some more work done on mine. Detail painting still to do, and a dot filter above the fenders. Hull and back deck still dry fit.


Got some more work done on mine. Detail painting still to do, and a dot filter above the fenders. Hull and back deck still dry fit.
Posted: Thursday, April 02, 2020 - 12:26 PM UTC
John,
The Panther is coming along nicely! I've been following from the shadows on this one and went back and looked at the first posts you guys added. I noticed you said something about not having the trench coated figure. I imagine you have already checked this out but the old Dragon "Advance to the Rhine" set has a nice trench coated fellow that might work. I'd send you the one I have but he is already standing on a muddy road on my shelf. PM me your address and I will see what I can dig up over the next couple of days if you are still planning on incorporating the figure.
Cheers,
Rick
petbat

Joined: August 06, 2005
KitMaker: 3,353 posts
Armorama: 3,121 posts

Posted: Thursday, April 02, 2020 - 01:06 PM UTC
Looking great Guy. Coming along very nicely
Posted: Friday, April 03, 2020 - 08:36 AM UTC
Quoted Text
Looking great Guy. Coming along very nicely
Thank you Peter!

Johnnych01

Joined: June 29, 2019
KitMaker: 604 posts
Armorama: 506 posts

Posted: Friday, April 03, 2020 - 08:42 PM UTC
You are doing great work there Guy, its looking really good.
Rick, thanks for the heads up, and very kind offer, that Dragon set was proving nearly impossible to find but thankfully Tom (Barkingdigger) very kindly donated a trench coat wearing G.I he had which was a great relief as that is a real focal point of the pic, so, drama averted ... yay ... and thanks for the words about the build.
Hopefully this week I can start on the Panther again as I have been busy with the Golden memories and Tank destroyer campaigns and work has been very mad with everything else going on.... John
Posted: Saturday, April 04, 2020 - 09:07 AM UTC
Thanks for the positive comments on earlier pictures.
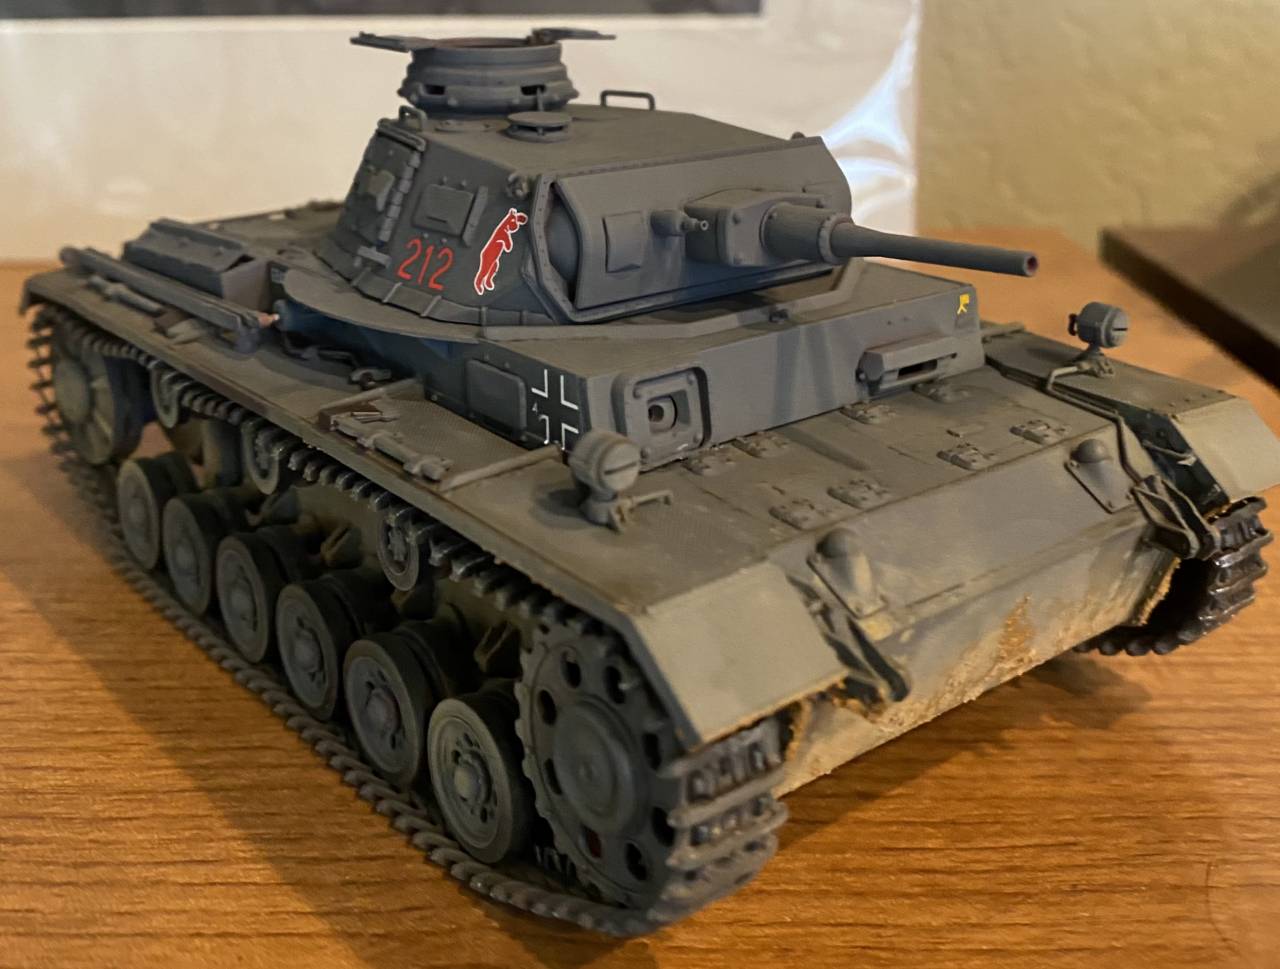
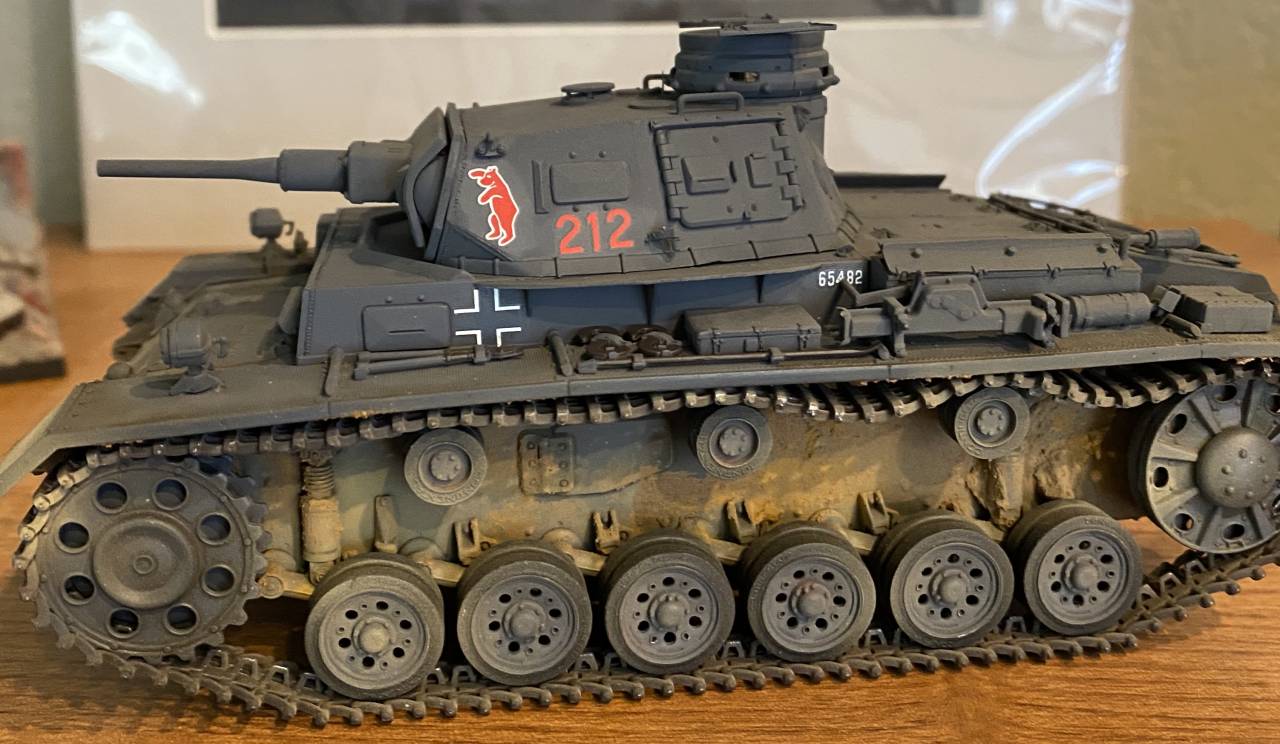
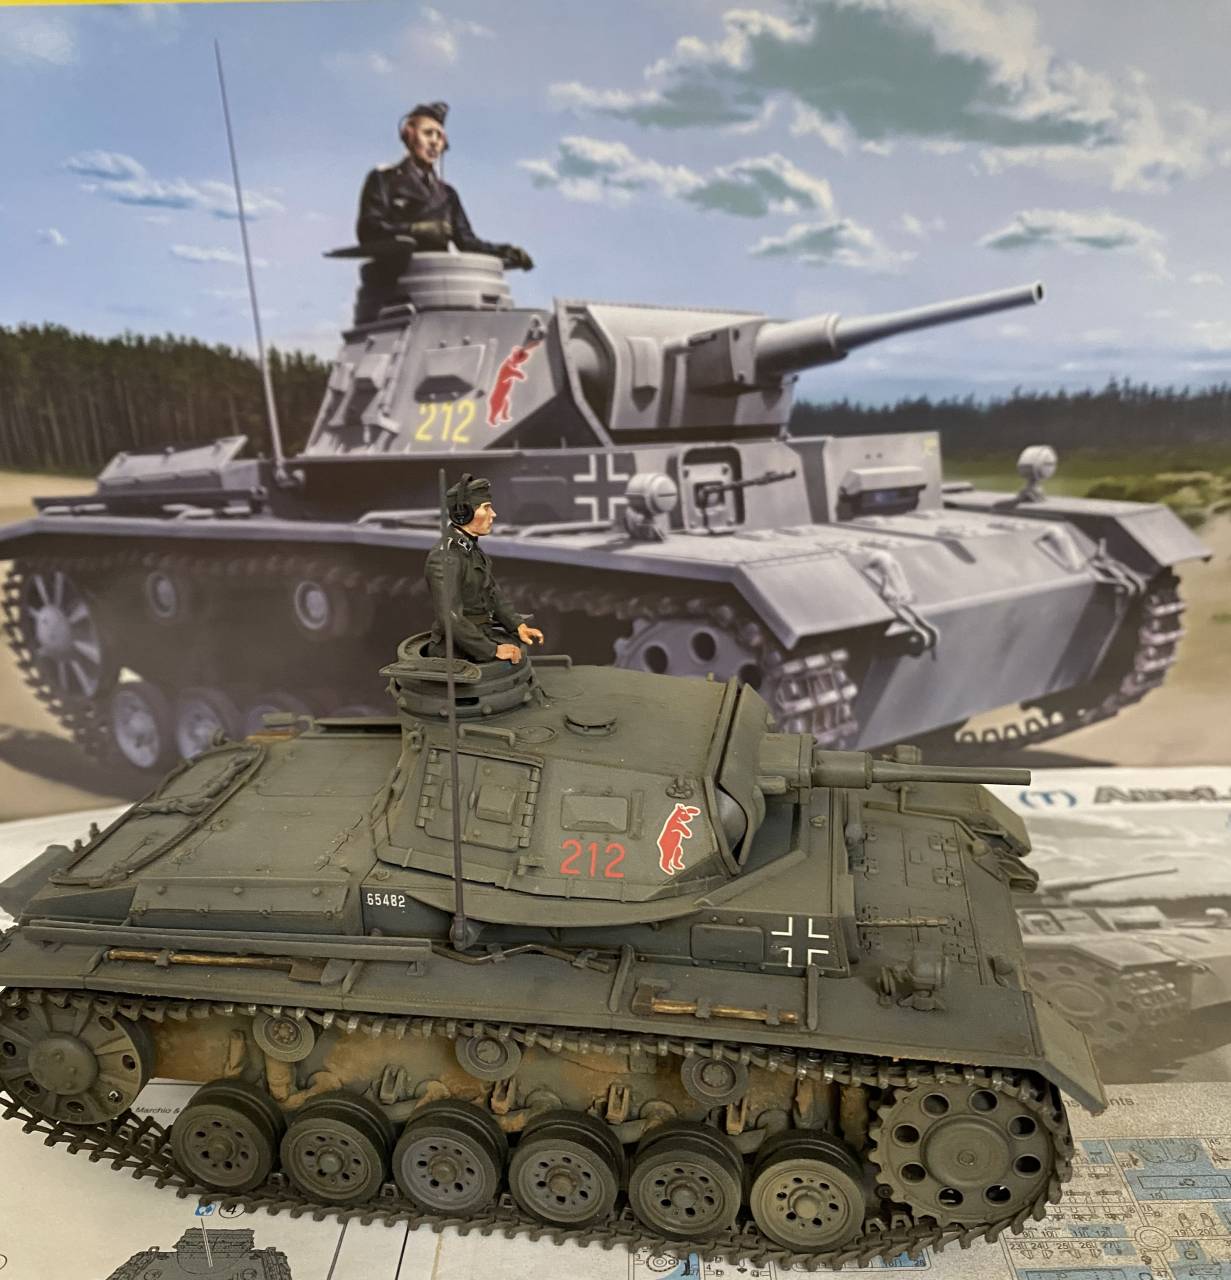
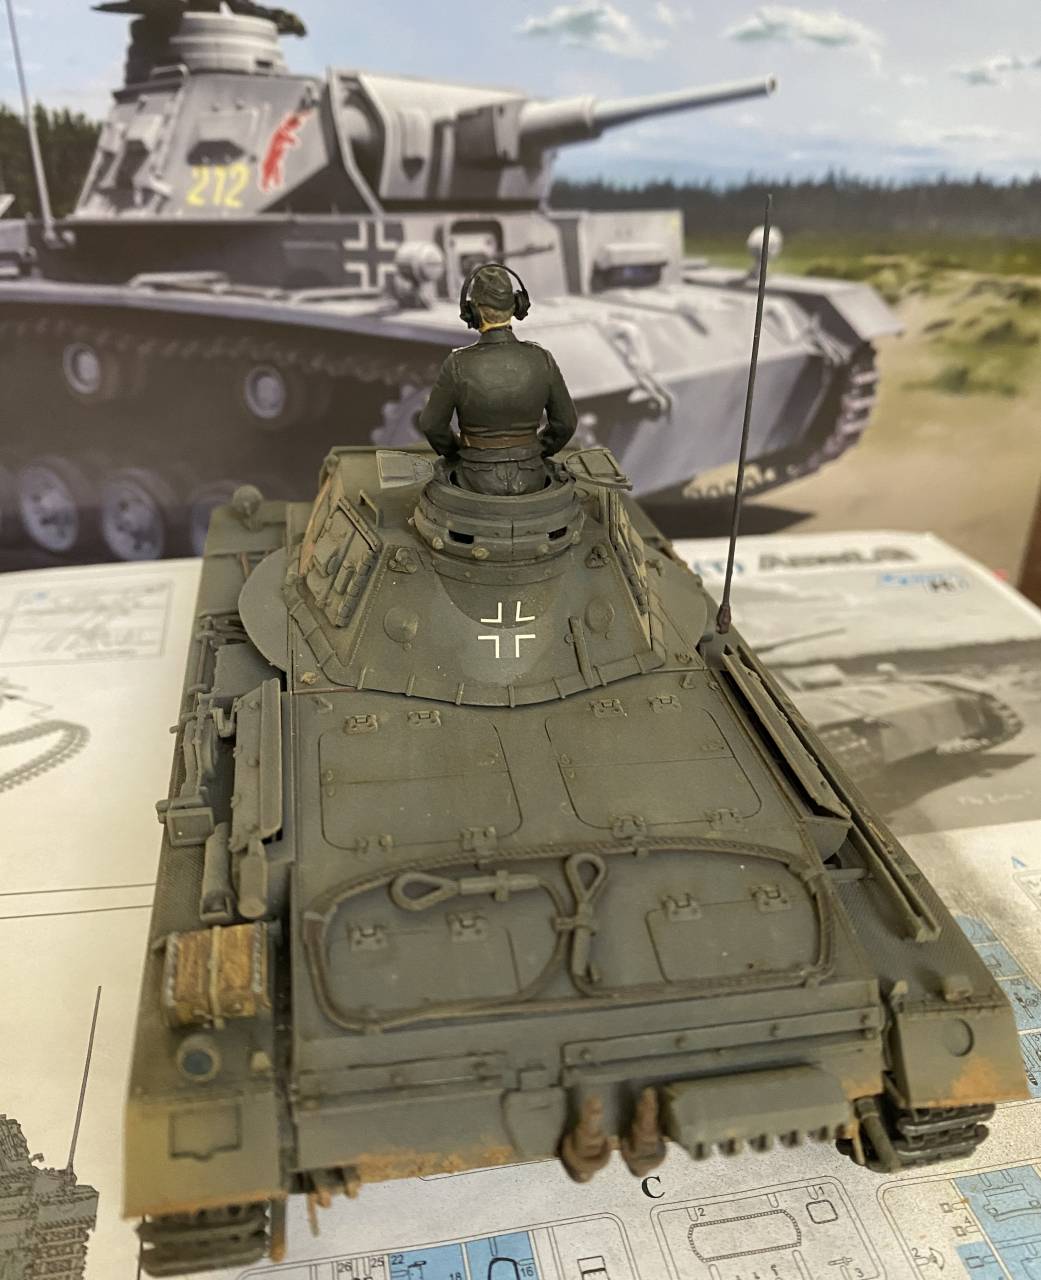
Calling this ne done. Fun build, but If I do another I definitely learned a few things I'd do differently.
With the Source Photo

With the box top art. Don't know if the turret numbers should be yellow, like the box art, or the red that came with the kit. Since we are building to the photo, and not the box art I went with the kit supplied decals.

Heading off to the next build! Great campaign, thanks guys!

Calling this ne done. Fun build, but If I do another I definitely learned a few things I'd do differently.
With the Source Photo

With the box top art. Don't know if the turret numbers should be yellow, like the box art, or the red that came with the kit. Since we are building to the photo, and not the box art I went with the kit supplied decals.

Heading off to the next build! Great campaign, thanks guys!

Posted: Sunday, April 05, 2020 - 11:34 PM UTC
That's a nice little Panzer Guy
Posted: Monday, April 06, 2020 - 12:13 AM UTC
Nice build, Guy. Looks very cool!
Congrats on finishing
Congrats on finishing

Posted: Monday, April 06, 2020 - 12:21 AM UTC
Guy,
Sweet looking Panzer III.
Mark
Sweet looking Panzer III.
Mark

Posted: Monday, April 06, 2020 - 03:02 AM UTC
Mark, Jesper, and Neil
thanks gents! I appreciate it. I love the DML Panzer 3's. thanks for a fun campaign!
thanks gents! I appreciate it. I love the DML Panzer 3's. thanks for a fun campaign!


k_mero4

Joined: November 26, 2017
KitMaker: 393 posts
Armorama: 369 posts

Posted: Monday, April 06, 2020 - 07:42 AM UTC
Guy, congratulations on the job well done.
Kalin
Kalin
Posted: Monday, April 06, 2020 - 07:44 AM UTC
Quoted Text
Guy, congratulations on the job well done.
Kalin
thank you sir!
petbat

Joined: August 06, 2005
KitMaker: 3,353 posts
Armorama: 3,121 posts

Posted: Monday, April 06, 2020 - 09:15 AM UTC
Sweet build Guy. Really well done.
Johnnych01

Joined: June 29, 2019
KitMaker: 604 posts
Armorama: 506 posts

Posted: Monday, April 06, 2020 - 06:10 PM UTC
Well done Guy, you have captured that Pzr 3 brilliantly, and great weathering on it, looks spot on.
Posted: Tuesday, May 05, 2020 - 07:51 AM UTC
I am finally getting ready to start my build for this campaign. The kit feels a bit old, but will hopefully go together well.
More to follow

More to follow


 |


