Can you still turn heads at your age?
Pennsylvania, United States
Joined: April 10, 2011
KitMaker: 7,941 posts
Armorama: 7,934 posts
Posted: Sunday, March 01, 2020 - 01:43 AM UTC
Quoted Text
Jerry,
Where is the helmet and liner from?
Thanks, Dan
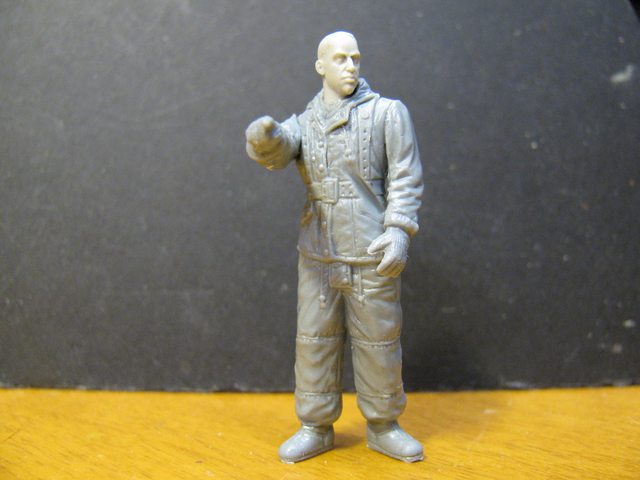
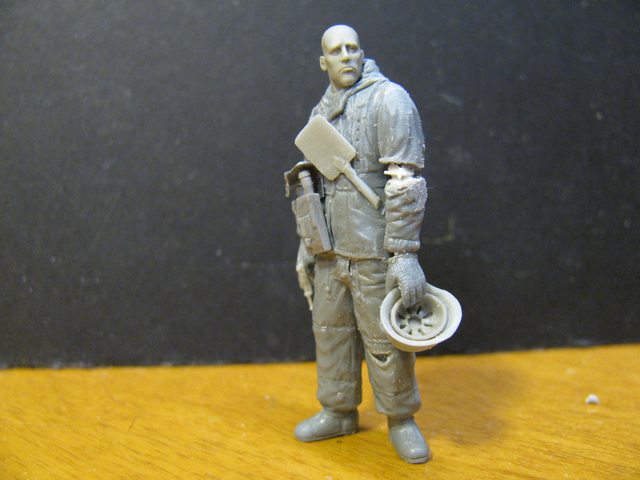
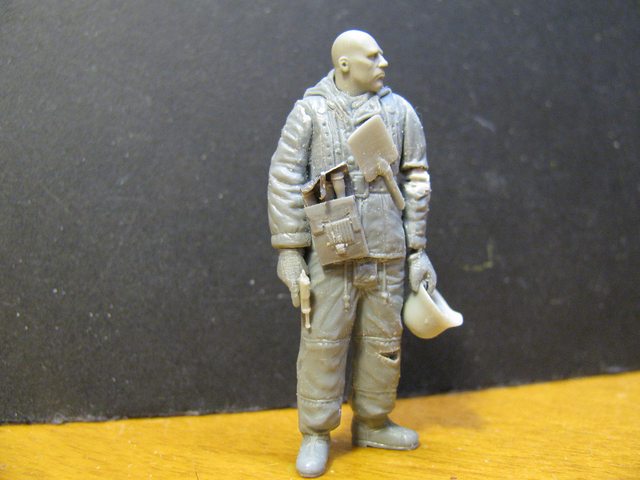
Helmet is from a Dragon kit,which I dremeled out with a rotary bit. The insert is from LiveResin.They make outstanding helmets as well but it is hard to find the regular size ones. The Dragon GenII helmets are very nice,just need thinning around the edge.
J
Pennsylvania, United States
Joined: April 10, 2011
KitMaker: 7,941 posts
Armorama: 7,934 posts
Posted: Sunday, March 01, 2020 - 01:45 AM UTC
Quoted Text
Quoted Text
Jerry, your tutorials are always great, but I have to admit I was intrigued by the title of this post more than anything else— due to it’s double meaning. While I appreciate very much your method of “turning heads”, my first thought was that at my age it’s getting more difficult to turn my head anymore, and secondly, at my age, the girls don’t quite turn their heads to look at me the same way they used to. All is not lost though—- I can still use your excellent technique to turn a few heads. 
VR, Russ
Heheheh sorry John,
No lack of that subject matter all over the interwebs though. That's what I am told anyway,
J
Yea, I tuned in because of the 'head (line)', (pun intended)...thinking I was going to view some tank porn! 
Clever!
:)
Minnesota, United States
Joined: July 20, 2004
KitMaker: 1,513 posts
Armorama: 1,449 posts
Posted: Sunday, March 01, 2020 - 04:19 AM UTC
Thanks Jerry,
Is there a certain size Live Resin liner that you use?
D
Looking to meet other MN Armor modellers. I live in Buffalo.
Pennsylvania, United States
Joined: April 10, 2011
KitMaker: 7,941 posts
Armorama: 7,934 posts
Posted: Sunday, March 01, 2020 - 04:34 AM UTC
Quoted Text
Thanks Jerry,
Is there a certain size Live Resin liner that you use?
D
I don't remember. Either regular or large.
J
Joined: October 24, 2005
KitMaker: 88 posts
Armorama: 85 posts
Posted: Sunday, March 01, 2020 - 05:55 AM UTC
As I mentioned to Jerry on FB, this is why I still love plastic figures from Tamiya/Dragon/Masterbox, etc. They are a stock pile of available figure parts waiting until something strikes your fancy. Even if one of these kits can only make one nice figure, (with addition of detailing, resin, putty, etc.), you'll have a figure that is your own and different from the 1,000 other guys who got a stock resin figure and painted it.
Pennsylvania, United States
Joined: April 10, 2011
KitMaker: 7,941 posts
Armorama: 7,934 posts
Posted: Sunday, March 01, 2020 - 07:22 AM UTC
Quoted Text
As I mentioned to Jerry on FB, this is why I still love plastic figures from Tamiya/Dragon/Masterbox, etc. They are a stock pile of available figure parts waiting until something strikes your fancy. Even if one of these kits can only make one nice figure, (with addition of detailing, resin, putty, etc.), you'll have a figure that is your own and different from the 1,000 other guys who got a stock resin figure and painted it.
What HE said !
J
Illinois, United States
Joined: March 18, 2006
KitMaker: 2,362 posts
Armorama: 2,005 posts
Posted: Sunday, March 01, 2020 - 09:36 AM UTC
https://www.youtube.com/watch?v=6vQpW9XRiyMCouldn't help but be reminded of this song.
New Jersey, United States
Joined: January 05, 2005
KitMaker: 2,185 posts
Armorama: 1,813 posts
Posted: Tuesday, March 03, 2020 - 08:48 AM UTC
Valuable info and info is knowledge . Great walkthrough Jerry !!
Joined: October 24, 2005
KitMaker: 88 posts
Armorama: 85 posts
Posted: Tuesday, March 03, 2020 - 08:55 AM UTC
Jerry, what is that on the left arm where the elbow joint is? Just sheet plastic?
Pennsylvania, United States
Joined: April 10, 2011
KitMaker: 7,941 posts
Armorama: 7,934 posts
Posted: Tuesday, March 03, 2020 - 10:03 AM UTC
Thanks Cheyenne and Chazman for the excellent comments.
The elbow was shimmed with plastic bits when I re-posed the arm. I use this method a lot. After I am satisfied I add putty to fill it in and then shape to my liking.
J
Pennsylvania, United States
Joined: April 10, 2011
KitMaker: 7,941 posts
Armorama: 7,934 posts
Posted: Friday, March 13, 2020 - 01:29 AM UTC
I finally got around to slathering paint on this guy. I used Andrea flesh set which is awesome and dead flat. For the cammo I used the AK set for WSS cammo winter/fall and the rest was Valejo.
First 2 pics are intermediate work and last one is a quick set-up for a photo op. It will go in a vignette with 5 more guys eventually.
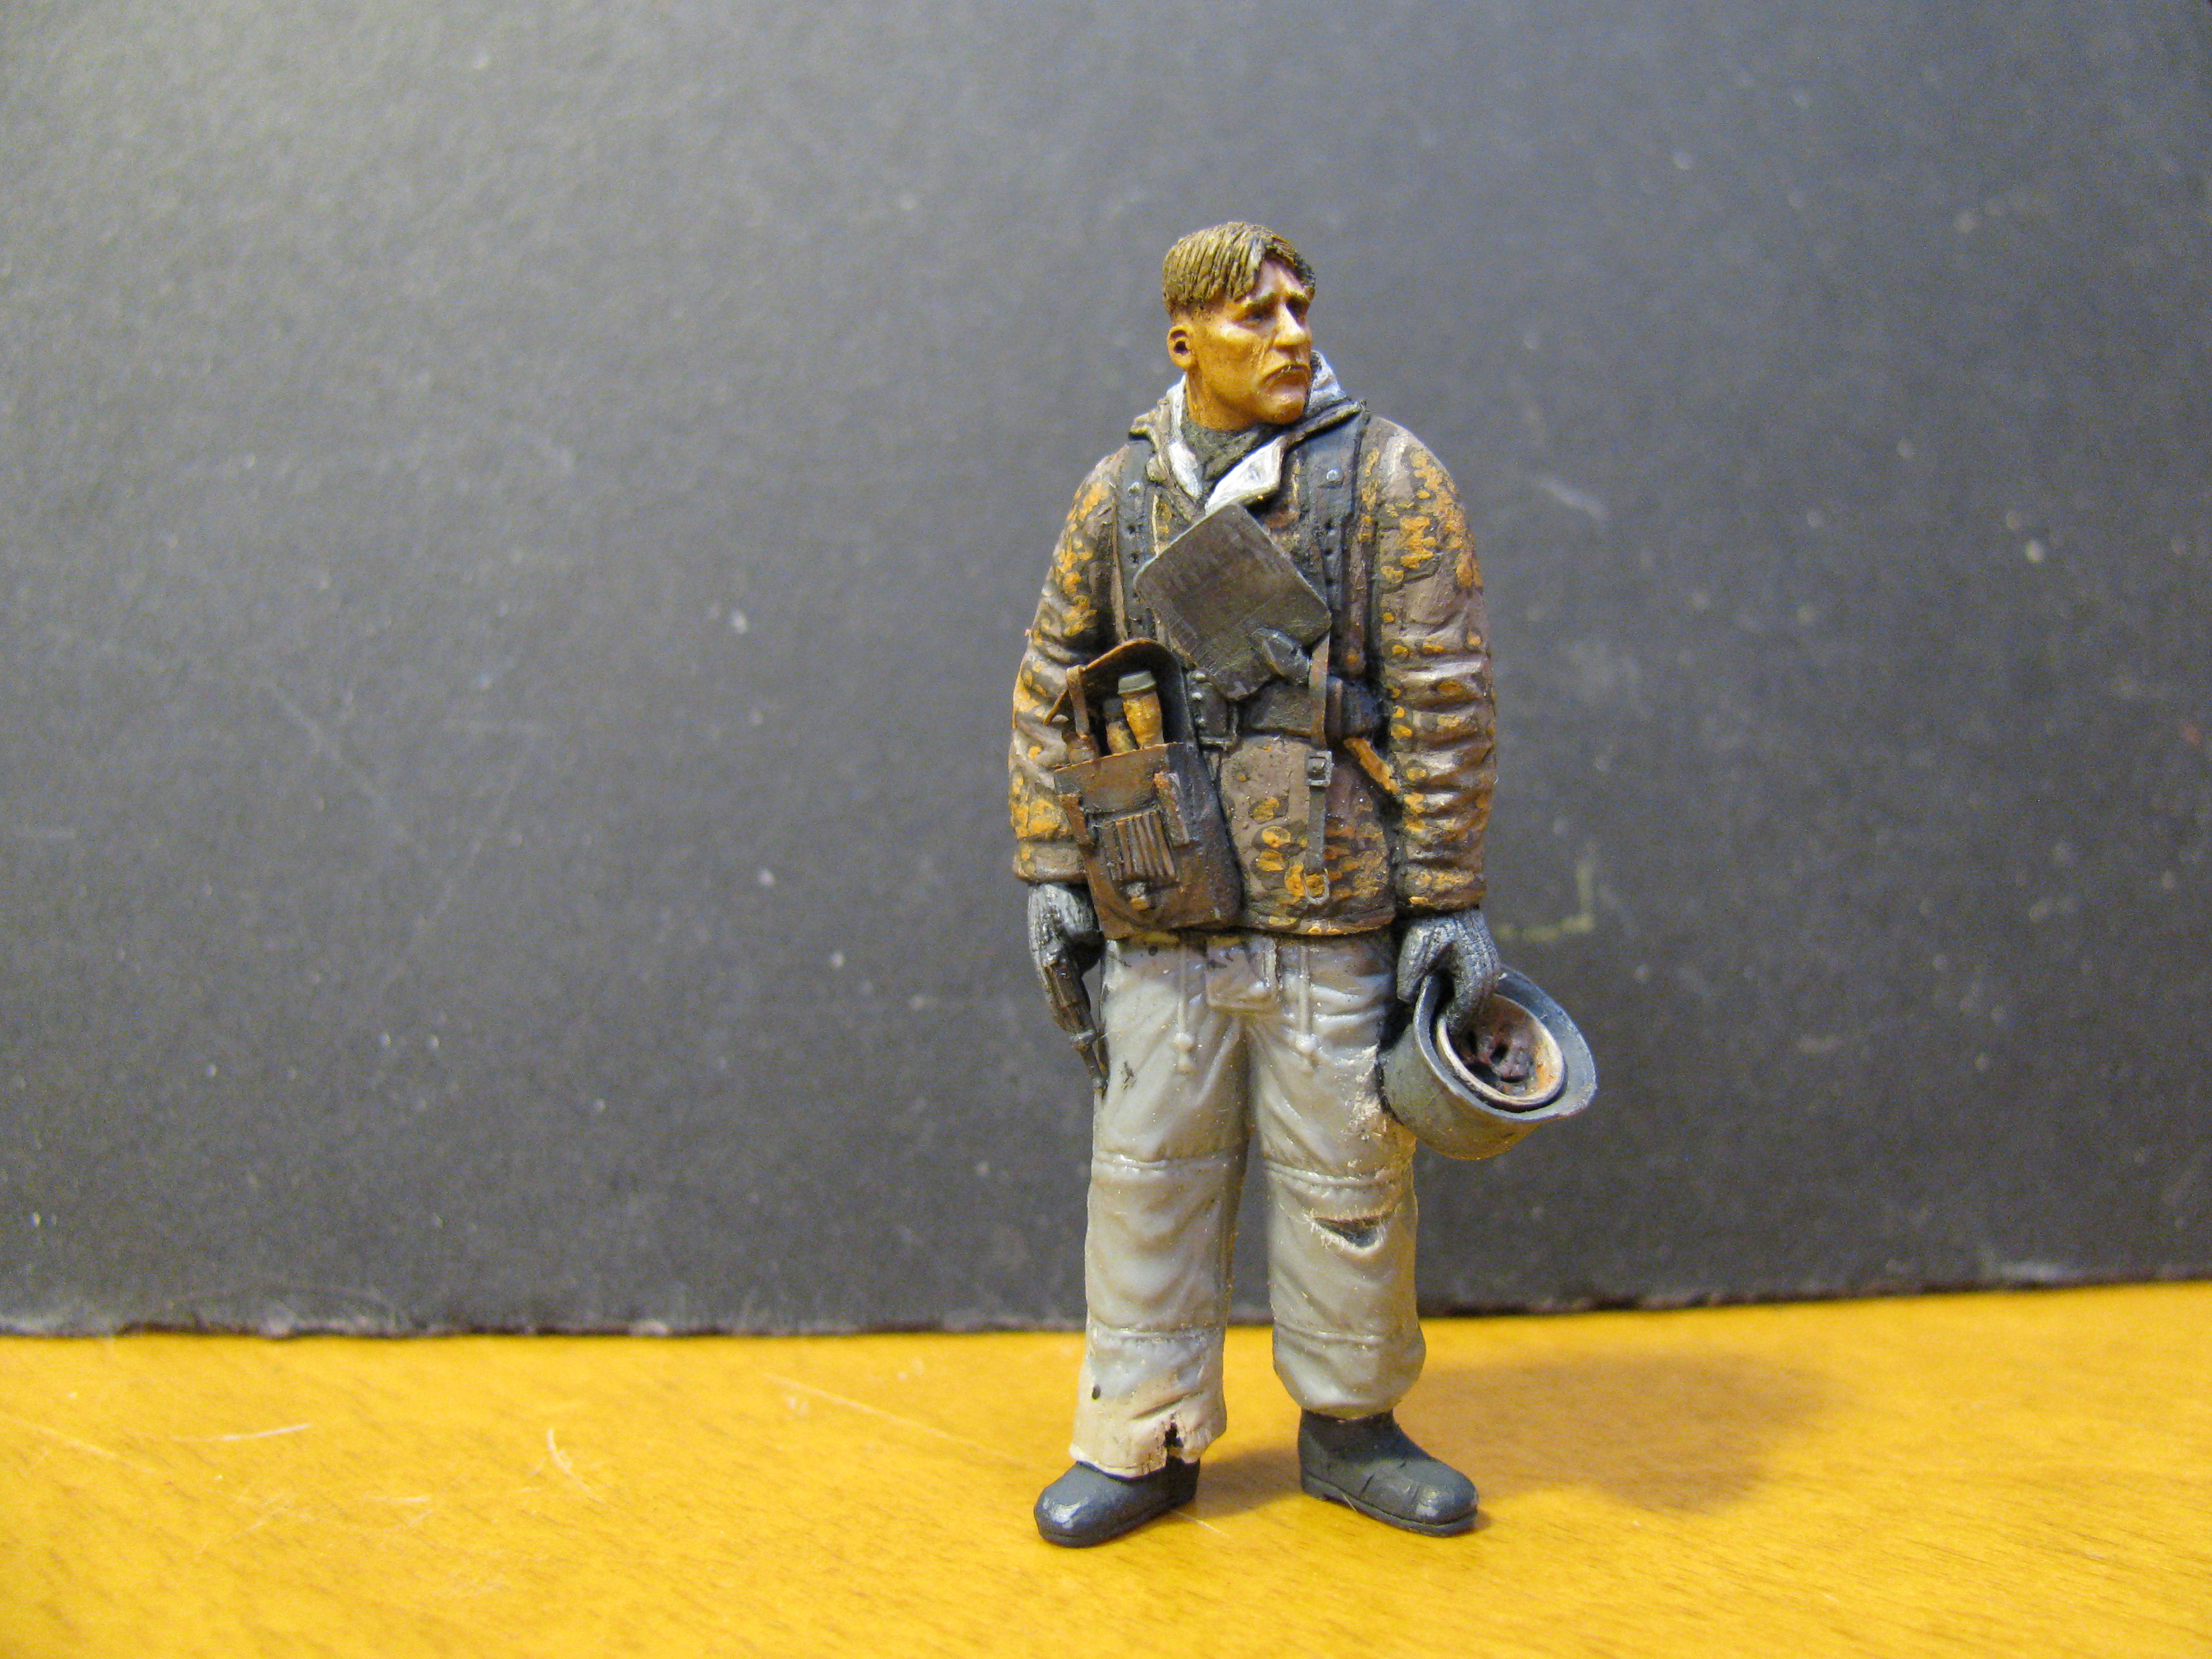
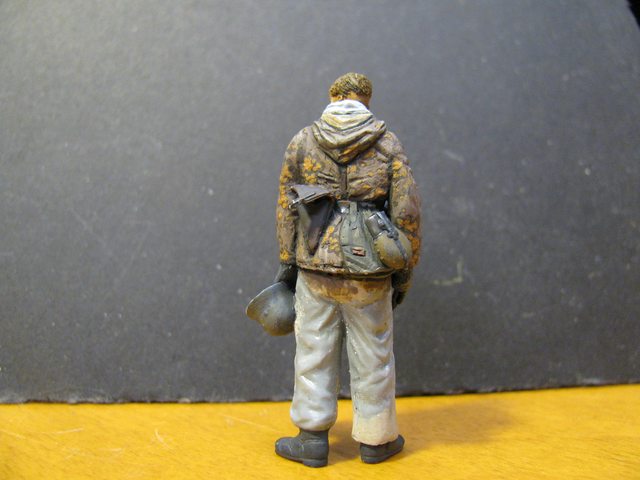
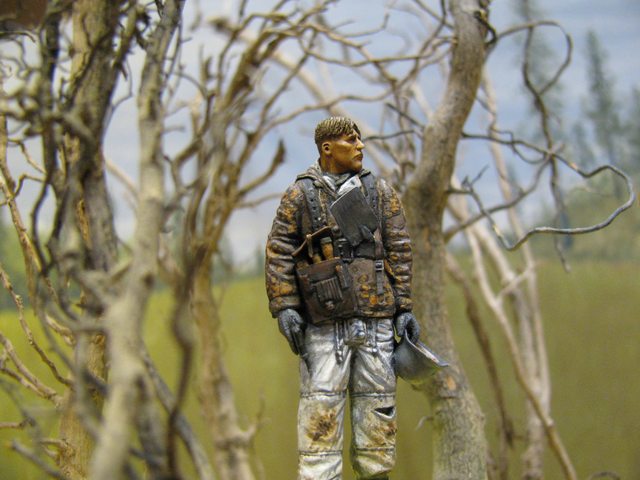
Be glad to entertain any query's as always,
J
Noord-Holland, Netherlands
Joined: October 25, 2002
KitMaker: 1,757 posts
Armorama: 914 posts
Posted: Friday, March 13, 2020 - 02:50 AM UTC
Once more a fantastic figure!!!
Ex- PFC Erwin Leetink, RNLA
Napoleon Bonaparte:
"A soldier will fight long and hard for a bit of colored ribbon."
Pennsylvania, United States
Joined: April 10, 2011
KitMaker: 7,941 posts
Armorama: 7,934 posts
Posted: Friday, March 13, 2020 - 03:33 AM UTC
Quoted Text
Once more a fantastic figure!!!
Thanks buddy! I appreciate the kind words,
J
New Jersey, United States
Joined: January 05, 2005
KitMaker: 2,185 posts
Armorama: 1,813 posts
Posted: Friday, March 13, 2020 - 04:32 AM UTC
Brilliant as always Jerry !! , Just not enough words man .....
Colorado, United States
Joined: February 24, 2014
KitMaker: 3,033 posts
Armorama: 2,492 posts
Posted: Friday, March 13, 2020 - 05:05 AM UTC
He looks a bit haggard. I like this one!
Cheers!🍺
—mike
Pennsylvania, United States
Joined: April 10, 2011
KitMaker: 7,941 posts
Armorama: 7,934 posts
Posted: Friday, March 13, 2020 - 05:15 AM UTC
Thanks Cheyenne and Mike !
Always great to read your input,
J
England - North West, United Kingdom
Joined: February 28, 2018
KitMaker: 38 posts
Armorama: 36 posts
Posted: Friday, March 13, 2020 - 10:34 AM UTC
I really like the way that the positioning of the head has changed the whole look of the figure to being hunched over rather than just looking down at a map as per the original.
Pennsylvania, United States
Joined: April 10, 2011
KitMaker: 7,941 posts
Armorama: 7,934 posts
Posted: Friday, March 13, 2020 - 10:59 AM UTC
Quoted Text
I really like the way that the positioning of the head has changed the whole look of the figure to being hunched over rather than just looking down at a map as per the original.
Thanks Mate.
Yes,you can add a lot of drama and atmosphere just with the changing of little things like that.
J
New South Wales, Australia
Joined: May 04, 2016
KitMaker: 1,476 posts
Armorama: 1,463 posts
Posted: Friday, March 13, 2020 - 09:59 PM UTC
Pennsylvania, United States
Joined: April 10, 2011
KitMaker: 7,941 posts
Armorama: 7,934 posts
Posted: Saturday, March 14, 2020 - 01:34 AM UTC
Thanks Timbo!
I am just trying to keep up with the blistering pace you have set with your innovative process.
This background was just a temp. placement to take a quick happy snap of this dude though. More to follow,
J
Pennsylvania, United States
Joined: April 10, 2011
KitMaker: 7,941 posts
Armorama: 7,934 posts
Posted: Tuesday, August 04, 2020 - 03:21 AM UTC
Bumped this up to hopefully clear things a bit concerning the wonderful Hornet heads,etc.
J
England - South West, United Kingdom
Joined: October 17, 2017
KitMaker: 944 posts
Armorama: 928 posts
Posted: Tuesday, August 04, 2020 - 03:31 AM UTC
Quoted Text
Bumped this up to hopefully clear things a bit concerning the wonderful Hornet heads,etc.
J
Hi Jerry,
Thanks for 'bumping this up', I am always impressed with your figure building skills/technique, and this has come at a very timely point and will help me no end,

.
If you want to suggest that the clothing is wet, e.g. the bottoms of trouser legs, how would you do that?
Cheers,

,
G
An optimist is a pessimist without all the facts.
Pennsylvania, United States
Joined: April 10, 2011
KitMaker: 7,941 posts
Armorama: 7,934 posts
Posted: Tuesday, August 04, 2020 - 03:51 AM UTC
Quoted Text
Quoted Text
Bumped this up to hopefully clear things a bit concerning the wonderful Hornet heads,etc.
J
Hi Jerry,
Thanks for 'bumping this up', I am always impressed with your figure building skills/technique, and this has come at a very timely point and will help me no end,  .
.
If you want to suggest that the clothing is wet, e.g. the bottoms of trouser legs, how would you do that?
Cheers,  ,
,
G
I have found the best way is to get somebody to wear clothing that is similar to what you want to show. In this case,with wet pantleg bottoms and go from there. In your case,you have thick winter clothing probably worn over other clothing and that makes it much harder in my view.
I think the main thing to keep in mind is wet clothing tends to"cling" with large areas conforming to you body,with the other area standing out like ridges. Make sense? That can be done with careful use of a rotary bit on a Dremel tool but I would practice on a spare bit of plastic first or an old unwanted figure?
HTH man. More prop like that will make painting easier. To show wetness just darken your base color for the wet areas but do not use gloss! Wet clothing is almost never glossy.
HTH man,
J
England - South West, United Kingdom
Joined: October 17, 2017
KitMaker: 944 posts
Armorama: 928 posts
Posted: Wednesday, August 05, 2020 - 03:24 AM UTC
Hi Jerry,
Thanks for the explanation, it really does help me, especially as I want to attempt water in my next build project.
Cheers,

,
G
An optimist is a pessimist without all the facts.


