_GOTOBOTTOM
Armor/AFV: Braille Scale
1/72 and 1/76 Scale Armor and AFVs.
Hosted by Darren Baker
Dragon Panther D (#7494)
tread_geek
Visit this Community
Ontario, Canada
Joined: March 23, 2008
KitMaker: 2,847 posts
Armorama: 2,667 posts
Posted: Saturday, July 28, 2012 - 07:37 AM UTC
Greetings all!

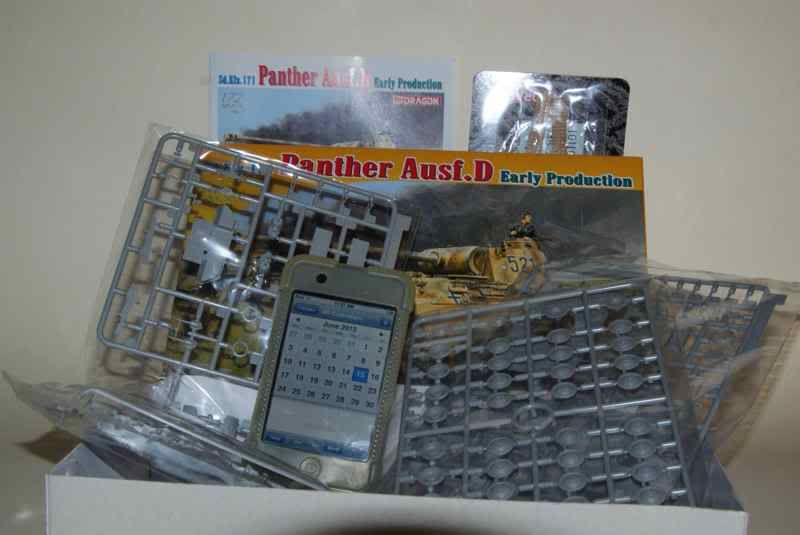
I've wanted to participate in the Panther Campaign on Armorama from the outset but alas, a Panther kit in an acceptable scale proved ellusive. Thanks to a Dragon Panther D review sample coming my way I figured now was as good a time as any. Like I don't have enough things in the works at the moment. The In-Box Review can be found HERE.


Firstly, the required unstarted kit.


It's the Dragon 1/72 Panther D, kit #7494. I just managed a bit of preliminary work, mainly painting the running gear, and started to define the rubber portion of the road wheels.
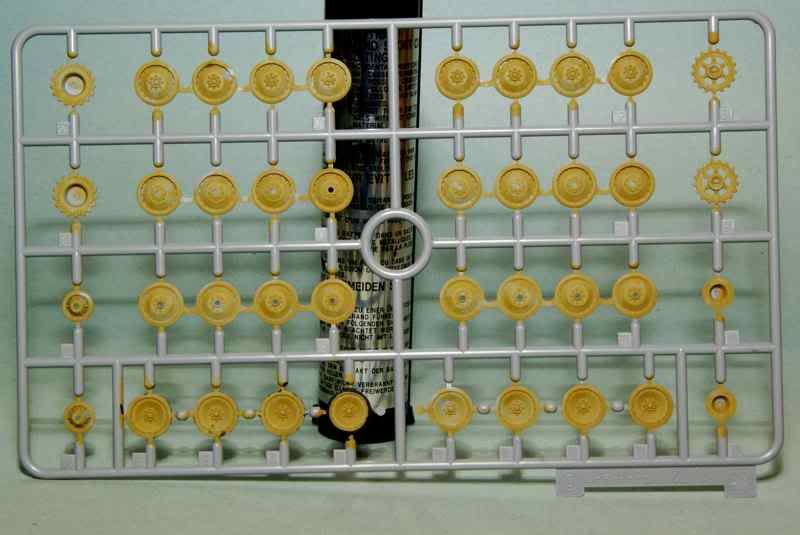
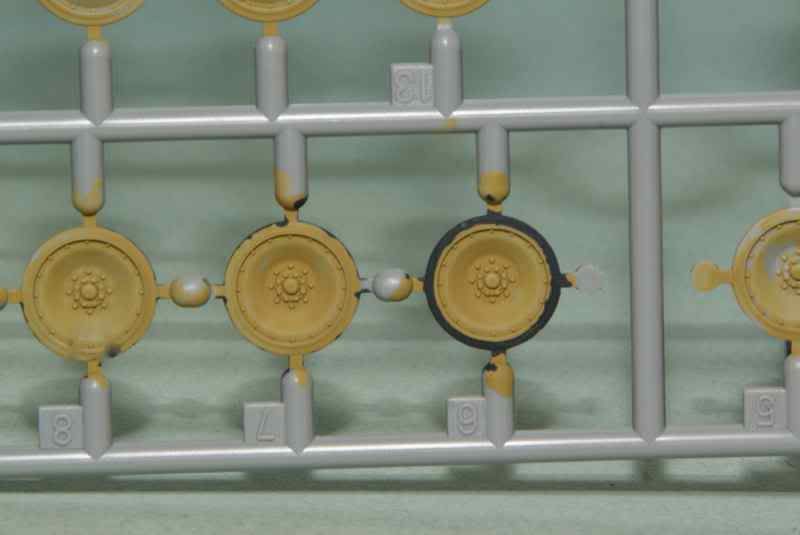


The detail on all the road wheels is superb, considering the scale. It's too bad that most of it won't be seen due to the interleaving nature of the suspension.

The kit is like several newer Dragon kits in that it's a combination of excessive simplification is some respects but with fine and minute detail in certain areas. The nature in general seems rather contradictory.

The first area that needed attention was certain turret details. The kit contains NO PE or even styrene lifting eyes, just these moulded on blobs of plastic. Using a pin-vise and increasing sized drills I bored out the "blobs" to form better representations of these eyes. Here are a couple of images after initial drilling.
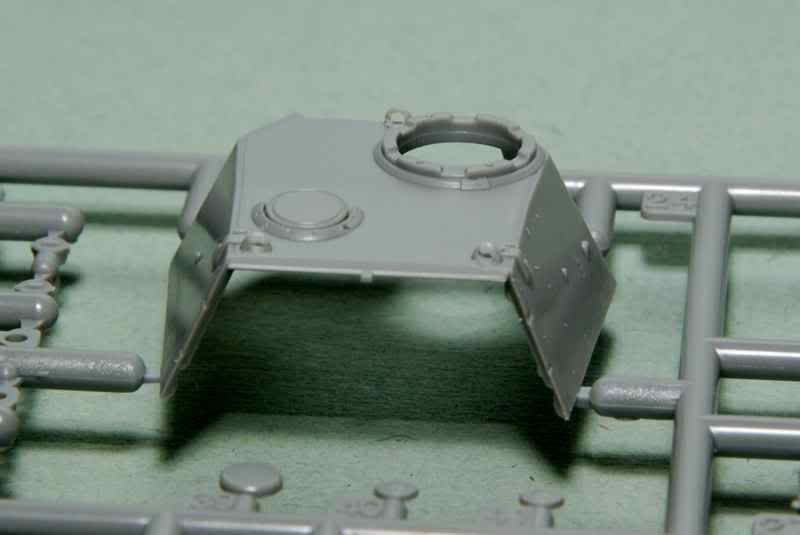
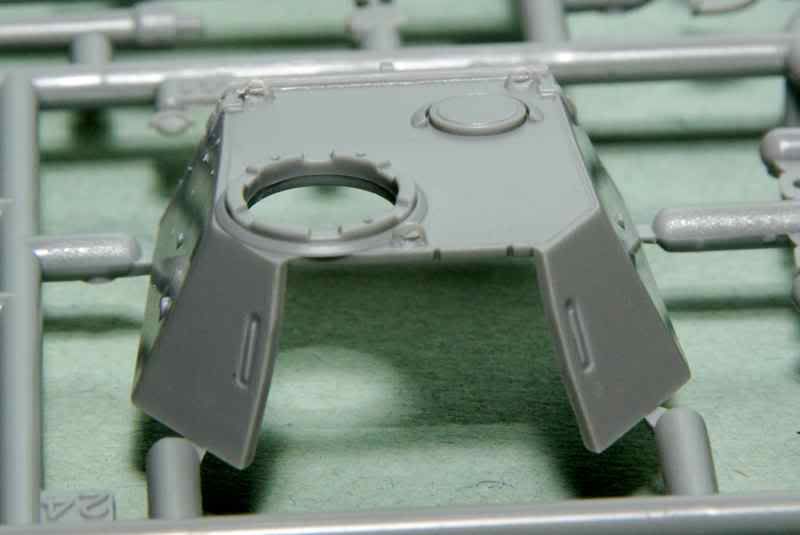


I'll clean them up a bit better later as the build progresses. I've read that the hull hatch handles are in the wrong location for this variant and again they are just moulded on representations. A fine chisel tool was used to remove the offending plastic.
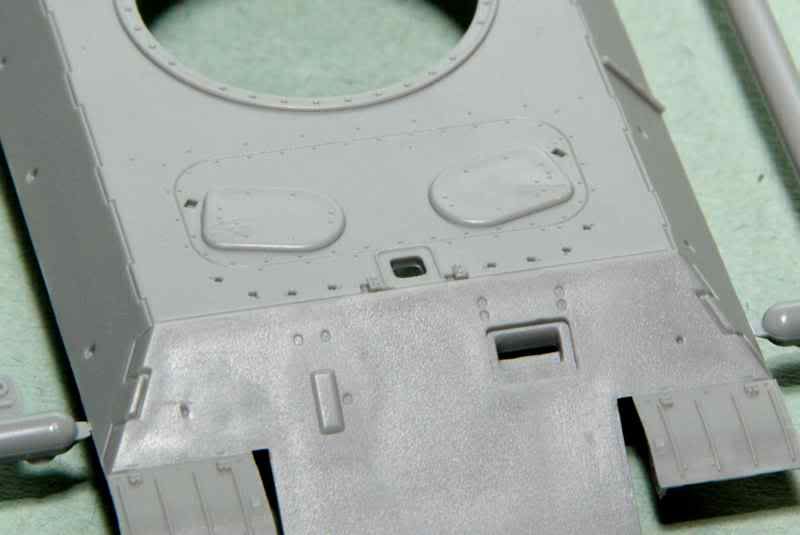


Obviously, this won't be an OOTB as this kit just cries out for attention that Dragon failed to provide. As I have a few other builds in the works at the moment this one will have to share time with them. After looking at the instructions I'll probably concentrate on completing the suspension first which is the first two steps of eight.

Cheers,
Jan
tread_geek
Visit this Community
Ontario, Canada
Joined: March 23, 2008
KitMaker: 2,847 posts
Armorama: 2,667 posts
Posted: Monday, July 30, 2012 - 09:10 AM UTC
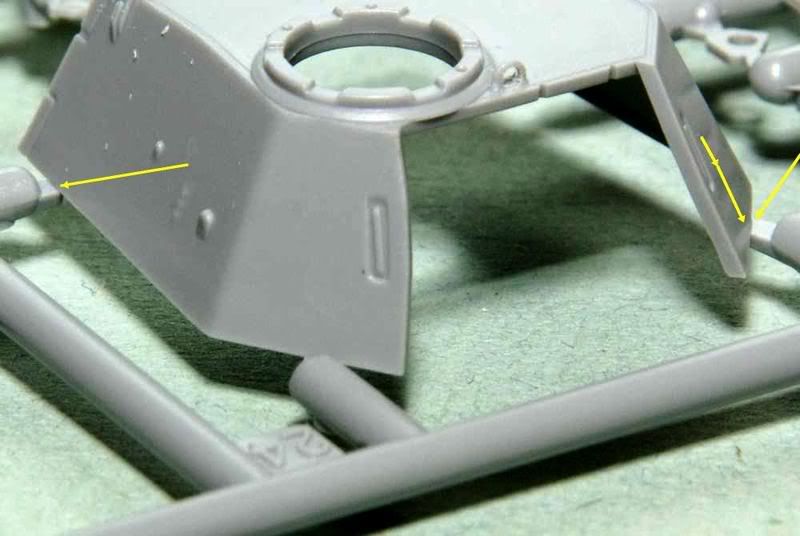
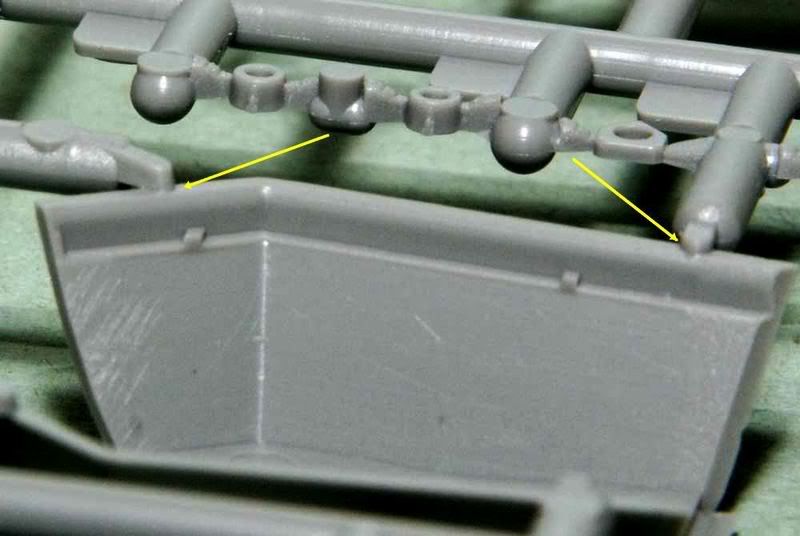
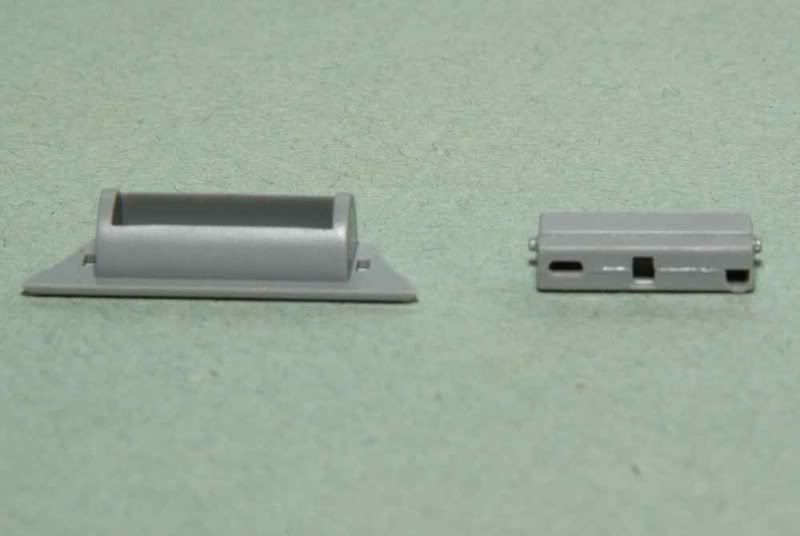
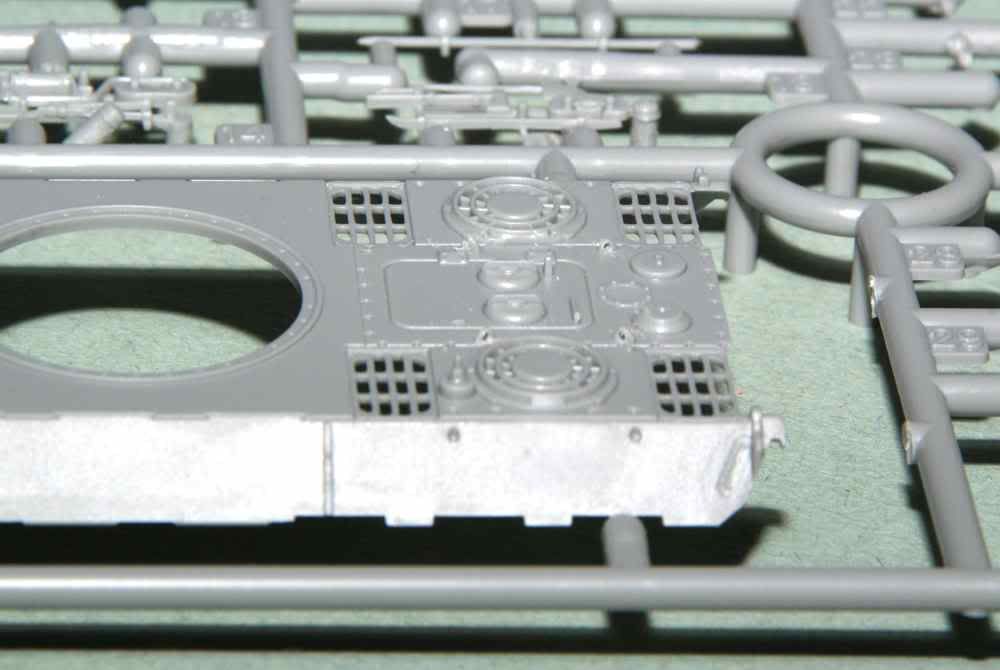
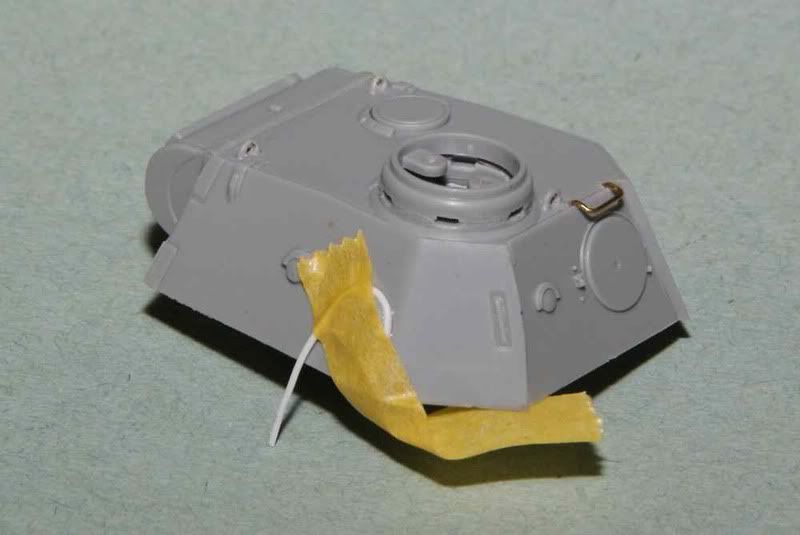
I had some time so I turned my attention to a few minor things and the turret of the Panther. I had left the main turret piece on the sprue as it was easier to handle while drilling out the lifting eyes. It's funny how I didn't notice prior but the sprue gates for the piece are those type that aren't the most convenient to remove. They attach both on the bottom and the side requiring two sides for each joint to be cleaned up. Looking at the sprues further, I found more than a few parts with similar attachment points. In the pictures below I hope you can see what I mean.


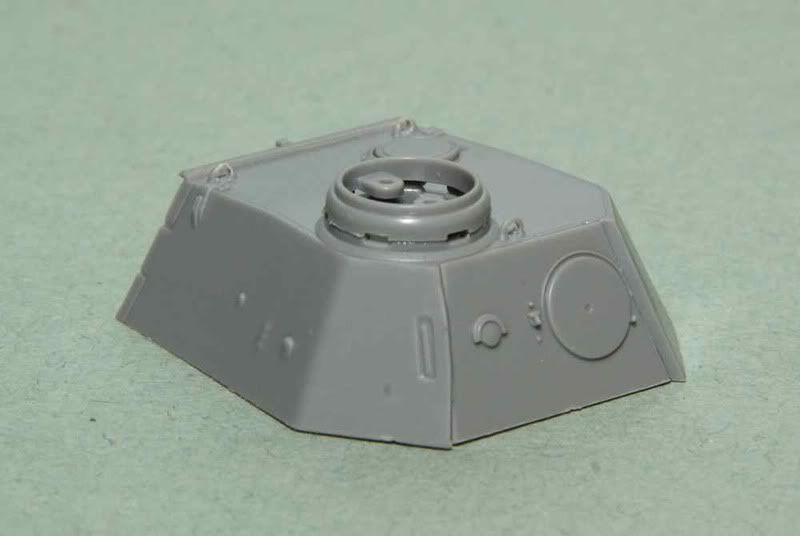
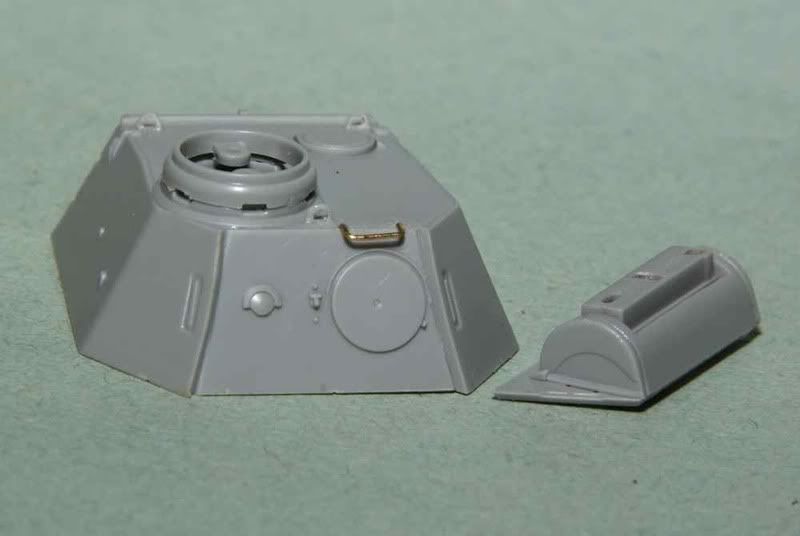
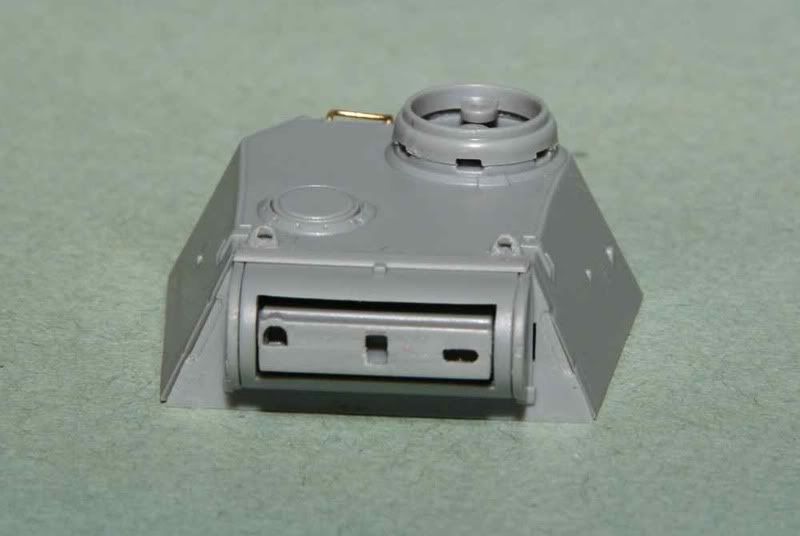
I separated the part and added the cupola and rear armour piece (the Latter most part fit like a dream). The cupola has the annoying gates plus almost non-existent locating pins. I also started on the assembly of the various mantlet pieces (quite a few for the size of the kit).


About 3/4 of the mantlet done, holes drilled and brass wire shaped for the turret rear hatch grab handle.


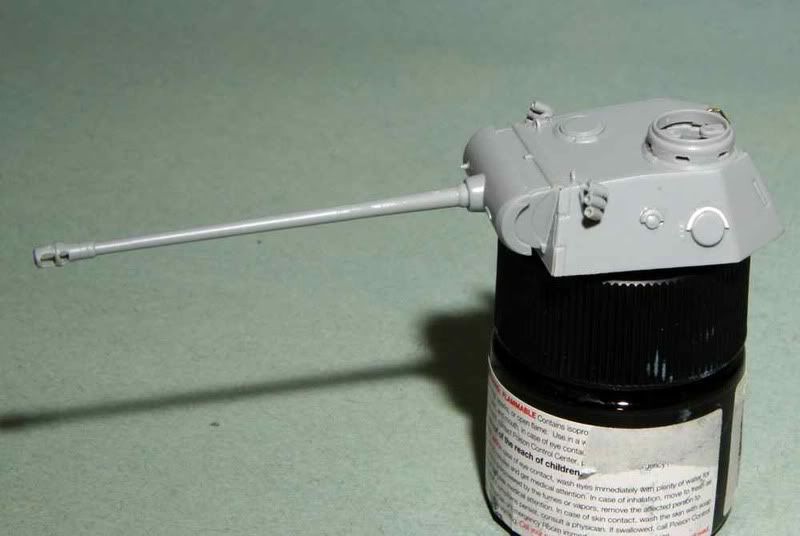
Here's the front turret piece dry fit to the turret.


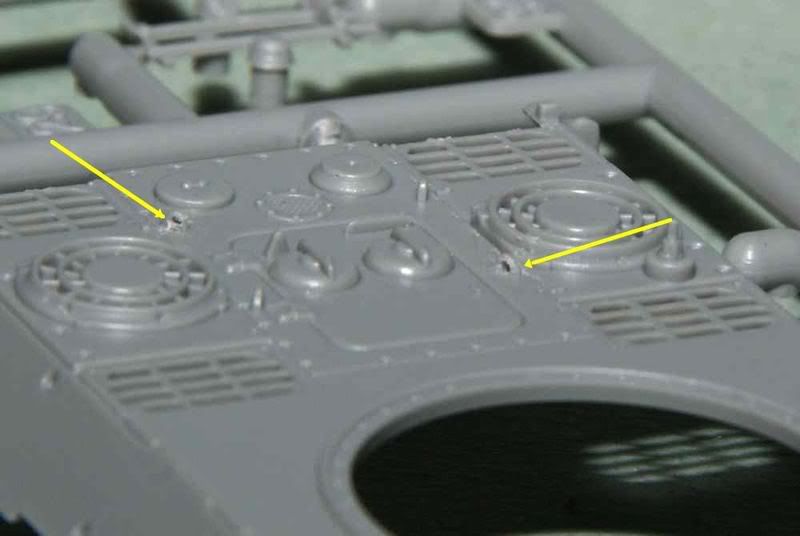
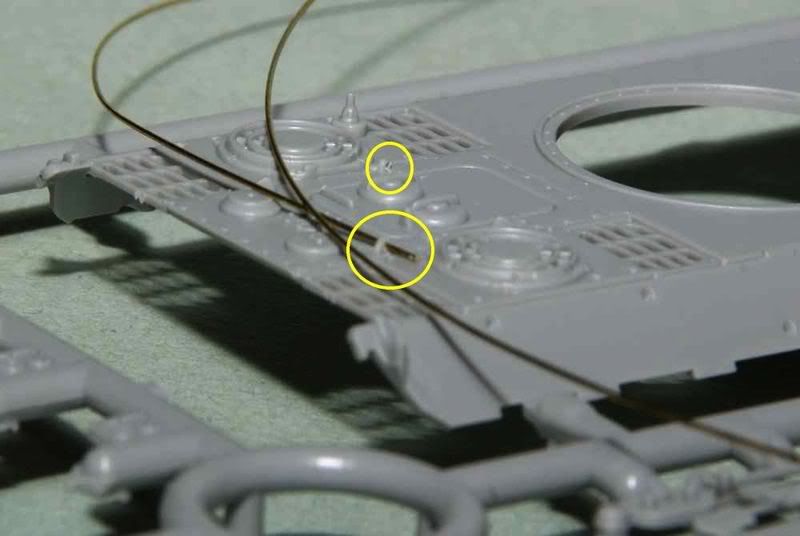
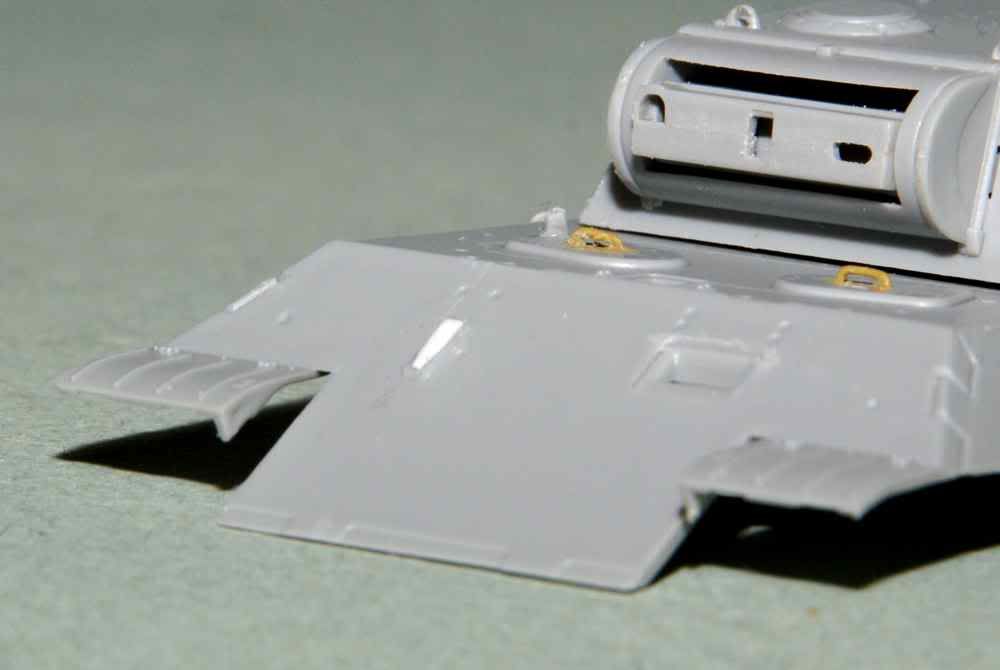
I didn't like the plastic blobs meant to represent engine hatch lifting eyes so I bought a new micro-drill bit (.030" or .8 mm) to see about reshaping them. This also required a new pin-vice to hold the hair thin drill. The arrows below point to a couple of the drilled out holes.


Just for effect I shoved a .0275" (.7 mm) wire through the opening.


Cheers,
Jan
tread_geek
Visit this Community
Ontario, Canada
Joined: March 23, 2008
KitMaker: 2,847 posts
Armorama: 2,667 posts
Posted: Thursday, August 02, 2012 - 05:31 AM UTC
More minor progress on this build but all things considered, something is better than nothing.

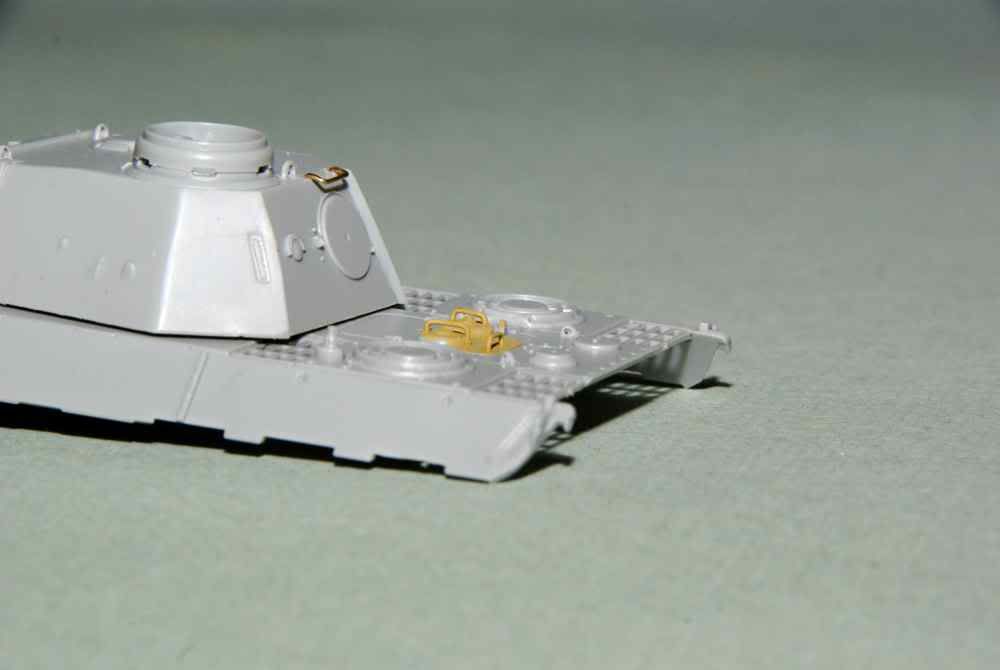
I've drilled out the last two lifting eyes on the engine compartment cover plate. While a small item they are time consuming due to their microscopic size and to an extent, delicacy.


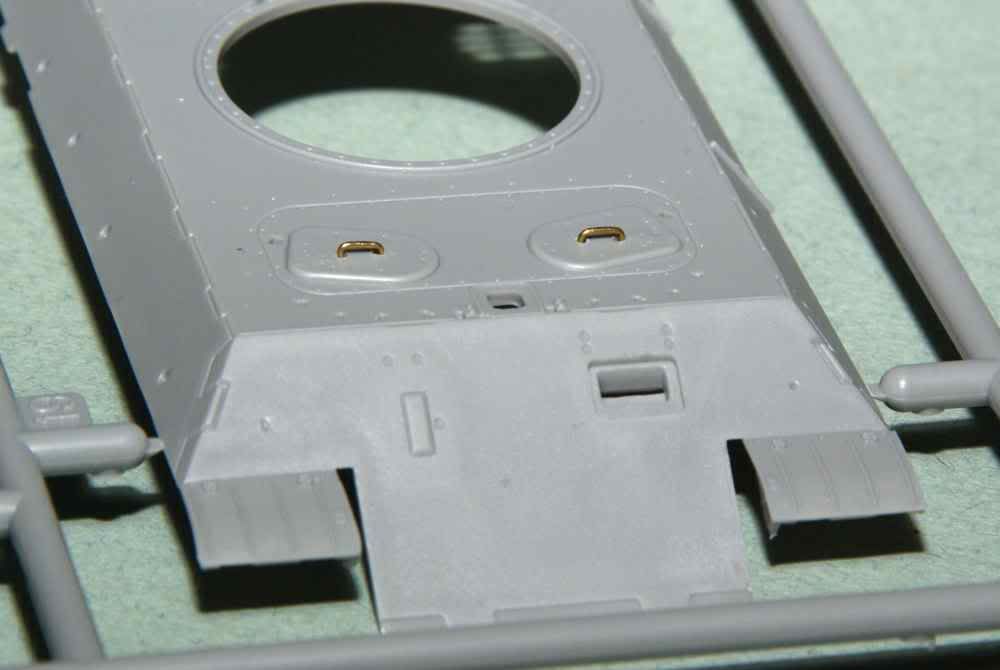
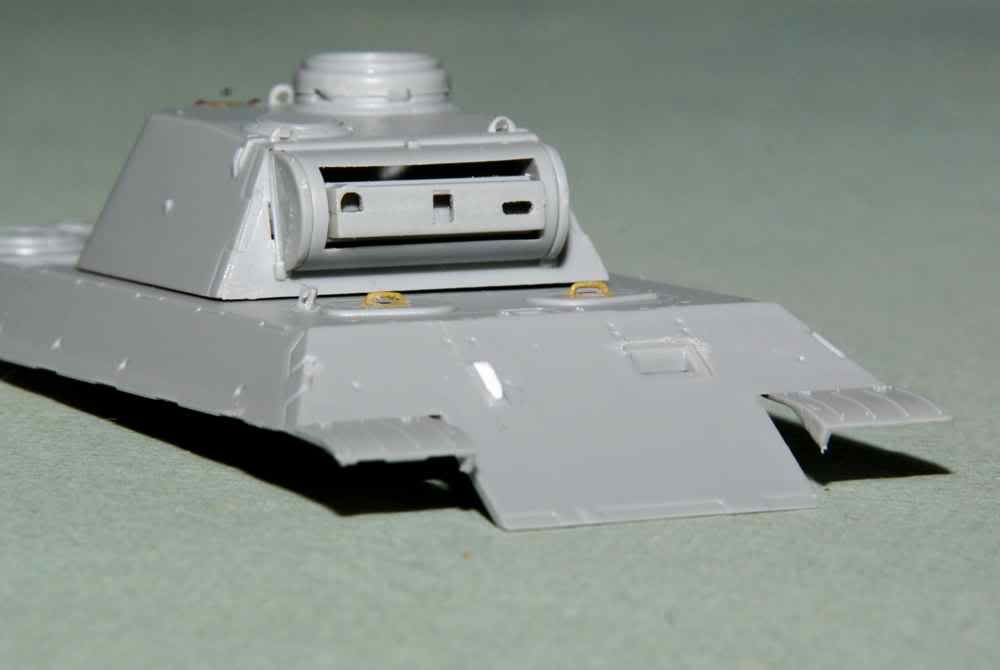
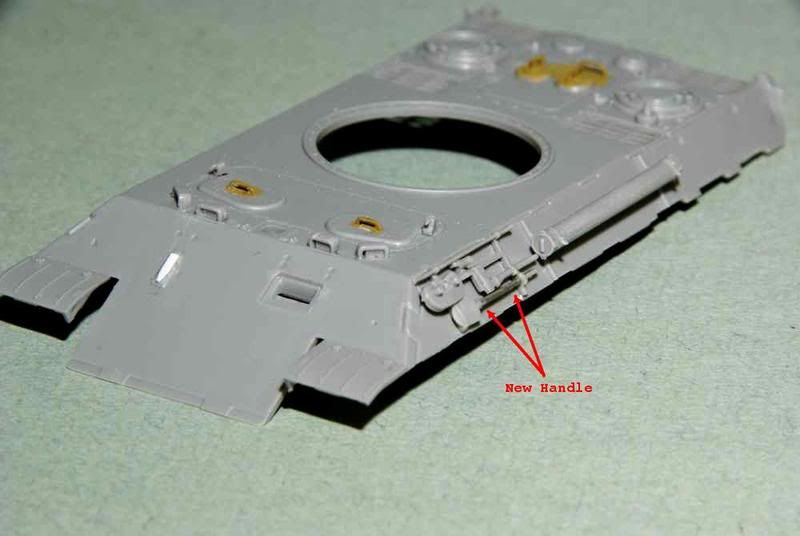
With drill in hand I next attacked the front hull hatch handles. More information that not suggests the majority of the early 'D' Panthers had these handles located more centrally on the hatch. After marking the hole locations I drilled them out and then formed the new handles from brass wire. I think the wire could be thinner but it's still better than the look of the cast on ones.


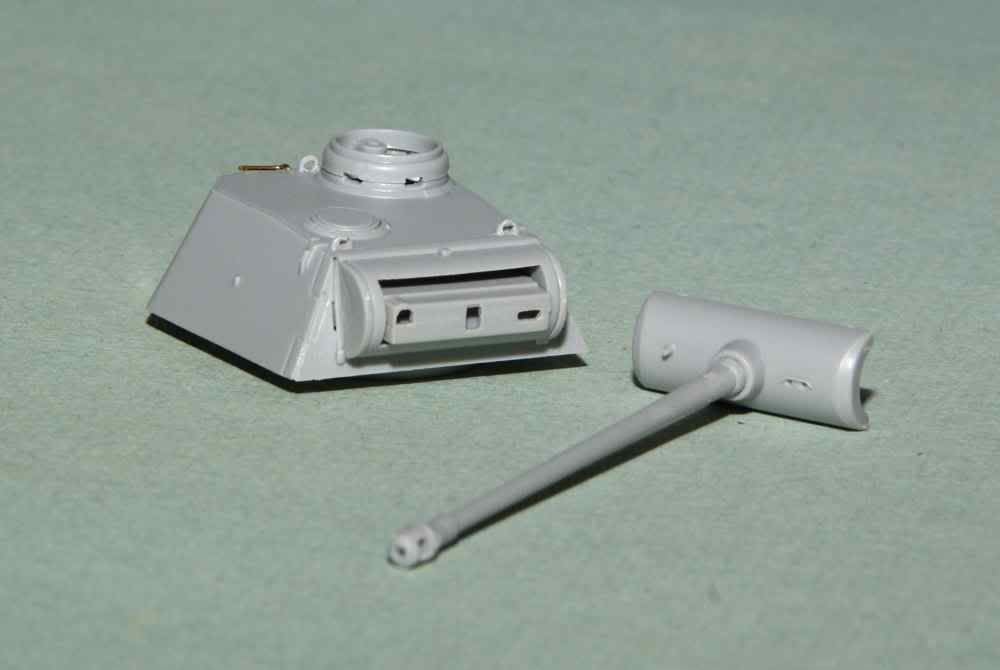
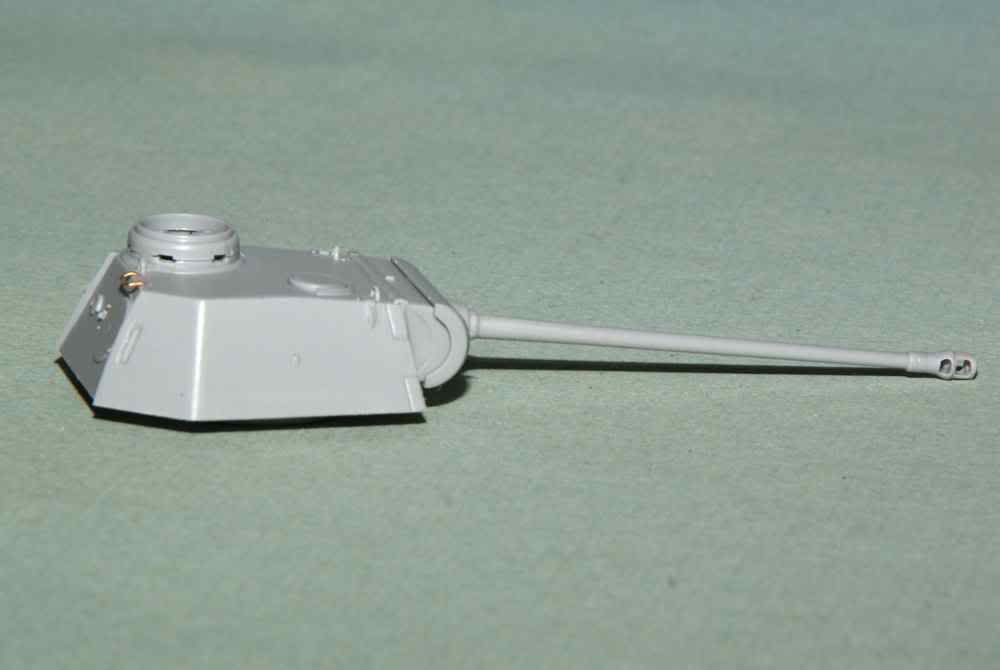
Tired of the body I turned my attention to the turret. For a change the main gun fit into the mantlet snugly and in proper alignment. As I wanted the gun to be posable in elevation after assembly it took some effort with the internal mantlet turret pieces to achieve this. It's a very inefficient arrangement that they used compared to the scores of mantlets that I've built over the years.

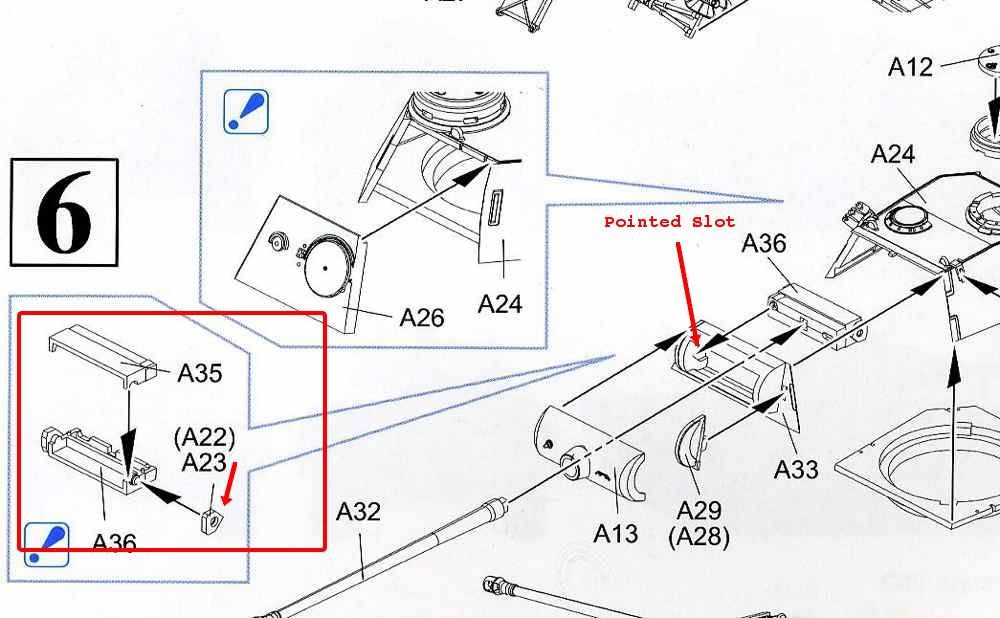
In the red outlined area in the drawing below you can see the two small pieces labelled A22/A23 are meant to fit on the pegs on part A36. This combination is then to be inserted into the turret front A33 and in turn fit into similarly shaped recesses or slots to the shape of A22/A23.


I managed to finally to get this assembly into place and used gap-filling CA glue to tack down the exposed ends of A22/A23 thus allowing the gun to elevate. After this the turret front was glued in place.


Here's an images with the gun and mantlet dry fit.


Meanwhile, I'm still toiling away on painting the rubber portions of the road wheels.

Cheers,
Jan
weathering_one
Visit this Community
Ontario, Canada
Joined: April 04, 2009
KitMaker: 458 posts
Armorama: 456 posts
Posted: Thursday, August 02, 2012 - 07:41 AM UTC
WOW, and another super detailed build log! Jan, it looks like you are pulling out all the stops with this one and I'm sorry I didn't know about it earlier.

I've looked for the review of this kit but I can't seem to find it on Armorama. I'd like to ask 20 questions but I'd rather read the review first. I've read one other review about this kit on another site and you seem to be doing some of the same things detailing wise. However, this blog seems to be a bit more specific and informative than the other. I;ll be following this with great interest.

Regards,
AJ
tread_geek
Visit this Community
Ontario, Canada
Joined: March 23, 2008
KitMaker: 2,847 posts
Armorama: 2,667 posts
Posted: Saturday, August 04, 2012 - 05:09 AM UTC
@AJB - Thanks for taking the time to comment and I really do appreciate it. The changes and additions that I am making to this build are somewhat akin to another site's article but I have confirmed them from other sources. As for the review, I am still working on finishing it up and hope to have it submitted within a week. I'm in a dilemma over weather to make it an In-Box, a Build or something in between with a link to this thread in it. I am leaning towards the latter most.

-----------------------------------------------------------------------------------

It's too hot today to do too much outside so I chipped away at the Panther. I can only take so much with painting the wheel rims so I get diverted to working on the main body.

I cut and sanded down a strip of Evergreen styrene to roughly mach the shape of the hull MG's cover shot deflector. It needed a bit more shaping after gluing but I think it's okay.


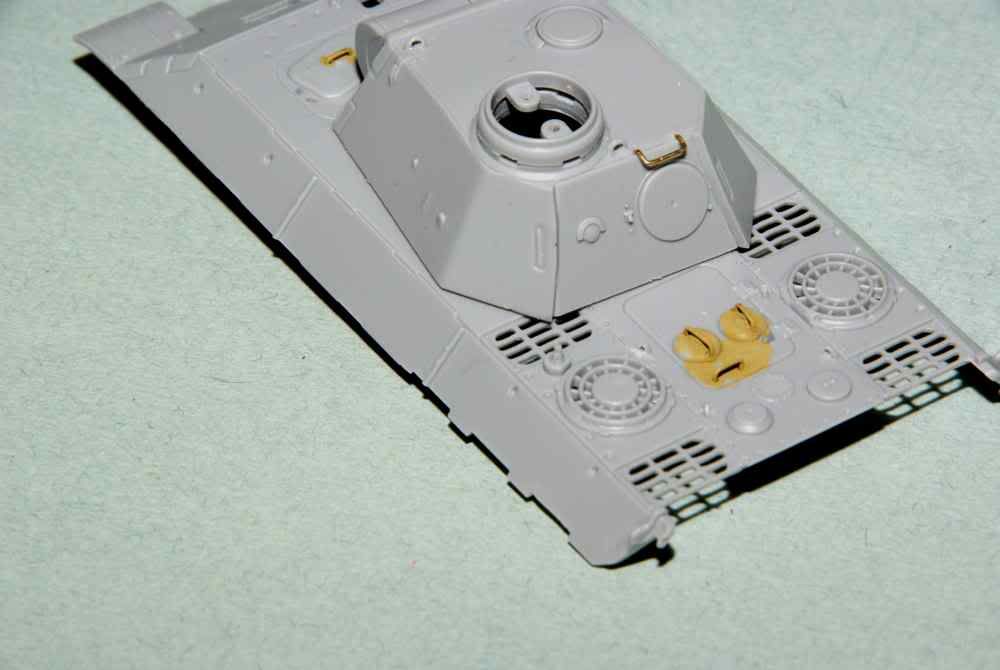
Marked out the position of the last grab handles on the engine deck, got the pin vice and drill out and bored out the holes. Used the same brass wire as for the other handles as that's all I have.


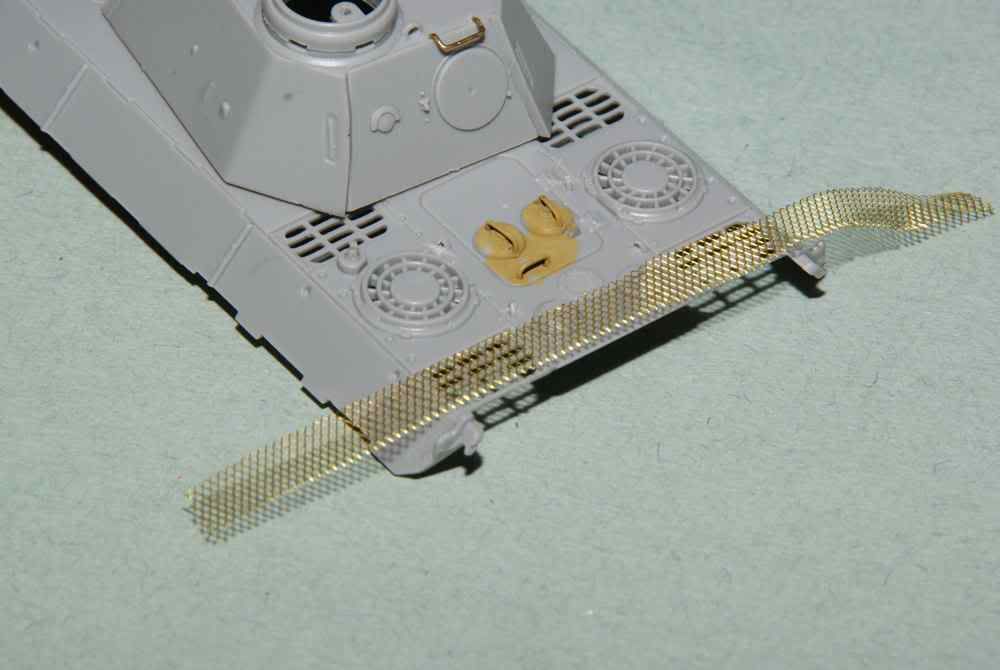
Finally, I found some brass mesh material at a LHS that looked promising. It's by a company called Scale Scenics and is labelled Brass Micro-Mesh (#652-3501). Here's a picture of a strip that I cut off on the engine deck.


I've seen enough pictures of Panthers without any screening on the engine louvres so I may not cover the ones on this build. The openings are large enough though, that I'll need to scratch radiators and something like a fan for under the circular ones. The real sad thing is that almost all earlier Dragon 1/72 Panthers and Jagdpanthers came with full engine compartment pieces.

Cheers,
Jan
clovis899
#155
Visit this Community
California, United States
Joined: May 05, 2002
KitMaker: 774 posts
Armorama: 605 posts
Posted: Saturday, August 04, 2012 - 05:38 AM UTC
Jan,

Looks really nice. Don't know how you guys do this, 1/35 seems small to me and 1/72 is just eye-boggling! Looking forward to watching your progress, it may even inspire me to give small scale a try if I can find the super close-up lenses for my opti-visor!

Cheers,
Rick
tread_geek
Visit this Community
Ontario, Canada
Joined: March 23, 2008
KitMaker: 2,847 posts
Armorama: 2,667 posts
Posted: Saturday, August 04, 2012 - 07:03 AM UTC
@clovis899 - Rick, very nice to have you drop in and have a look. I seriously hope that these Blogs will inspire others to give 1/72 a try. It takes up less space, uses less resources and less drain on the wallet.

As for size, it's a relative thing and one should look at each scale having its particular facets. With new technology we are seeing detail that matches much larger scales. That's not to say that Braille doesn't have its challenges but again, technology can overcome many. I have always worn corrective lenses but find that supplementing them with an Opti-visor makes things a bit easier. I use the 5x version as with my glasses it gives a fair focal distance of about 10 to 12 inches. I know one Braille builder in my club that uses a 10x but the focal length means his nose is almost touching the part he's working on (no, his nose isn't that big!).

Please feel free to drop by, comment or ask any question you might have. There is no such thing as a silly question other than a question not asked!

Cheers,
Jan
weathering_one
Visit this Community
Ontario, Canada
Joined: April 04, 2009
KitMaker: 458 posts
Armorama: 456 posts
Posted: Sunday, August 05, 2012 - 01:54 PM UTC
Jan, you're doing a super job and I am enjoying each segment. But, with these changes I have to wonder if a Revell kit might be more accurate in general. That screen material looks super and I vote that you use it. As for your review, since you've stated the build I vote for the hybrid version. Can't wait to see more.

Regards,
AJ
tread_geek
Visit this Community
Ontario, Canada
Joined: March 23, 2008
KitMaker: 2,847 posts
Armorama: 2,667 posts
Posted: Monday, August 13, 2012 - 07:42 AM UTC
@AJB - Thanks for taking the time to comment but I have no idea what the Revell kit is like. Besides, I can't even remember the last time I saw a 1/72 Panther at any local hobby shops.

--------------------------------------------------------------------------------------------

Obviously, I'm not in the biggest rush to get this thing done. As I mentioned earlier, I've got a few other projects in the works and am rationing time to each.

I deliberated over how to make the rain gutter over the communications hatch. My eventual choice was to use Evergreen pre-formed strip for the purpose. I chose their .020" ( .5 mm) hex shaped material. I pre-bent it around a jewellers file's handle before attaching the first half above the hatch. Using liquid cement I gradually worked my way around where I wanted it.


After that I decided to attach smoke dischargers and the gun and mantlet. The Dischargers needed some filing to sit properly and the mantlet ended up needing gap filling CA glue as the attachment points were rather vague.


On the body the front hatch supports/rests were glued, as well as the periscopes. Fit was fair but the parts are rather small. The gun cleaning rod tube was next constructed and attached. Be forewarned that it has extremely vague locating features. I also attached the right side tool rack but broke the shovel handle in the process of removing it from the sprue. Far too many attachment points for such a small part.


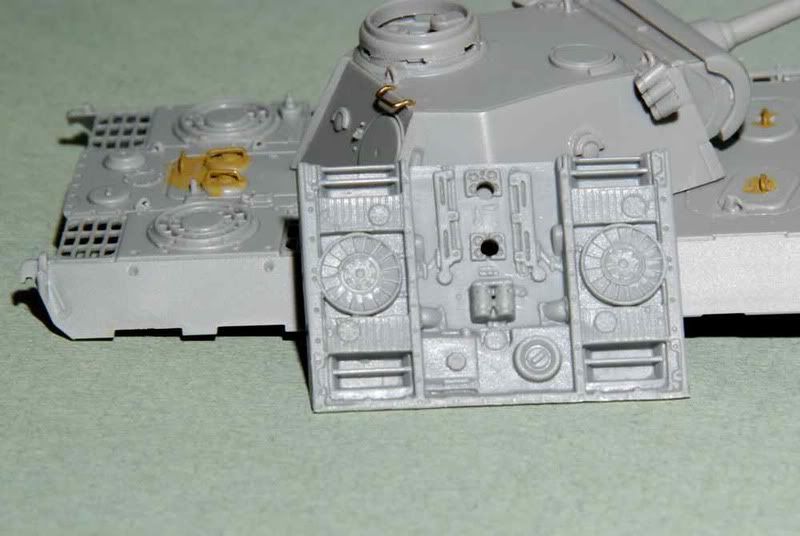
Lastly, the dilemma of the empty engine compartment was solved after a friend from a local IPMS club provided one from a Panther G kit that he had in his spares box. Thanks, Nate!


Cheers,
Jan
tread_geek
Visit this Community
Ontario, Canada
Joined: March 23, 2008
KitMaker: 2,847 posts
Armorama: 2,667 posts
Posted: Friday, August 17, 2012 - 08:58 AM UTC
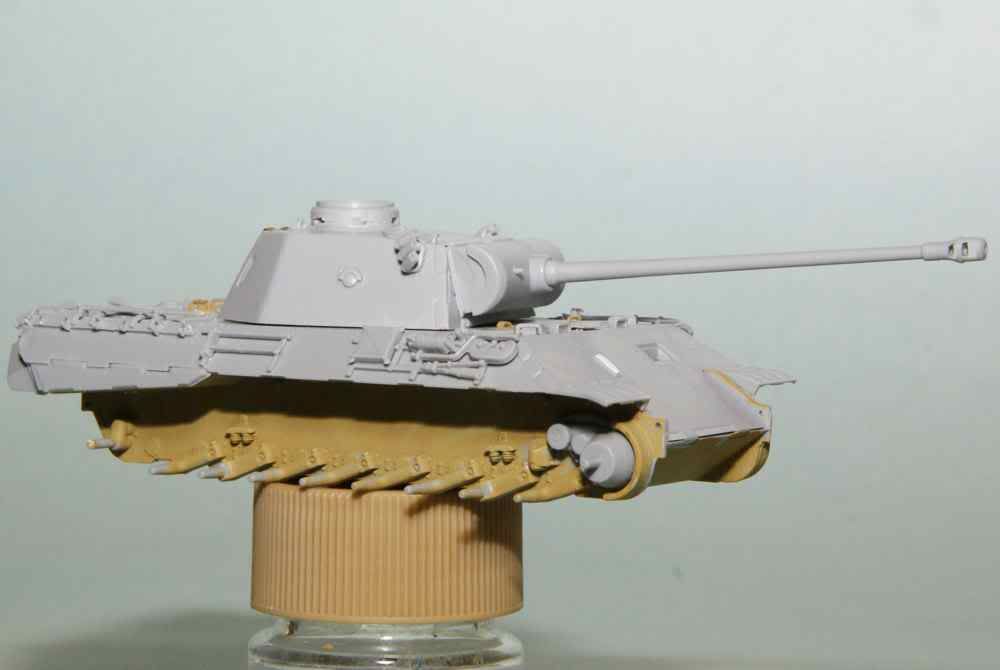
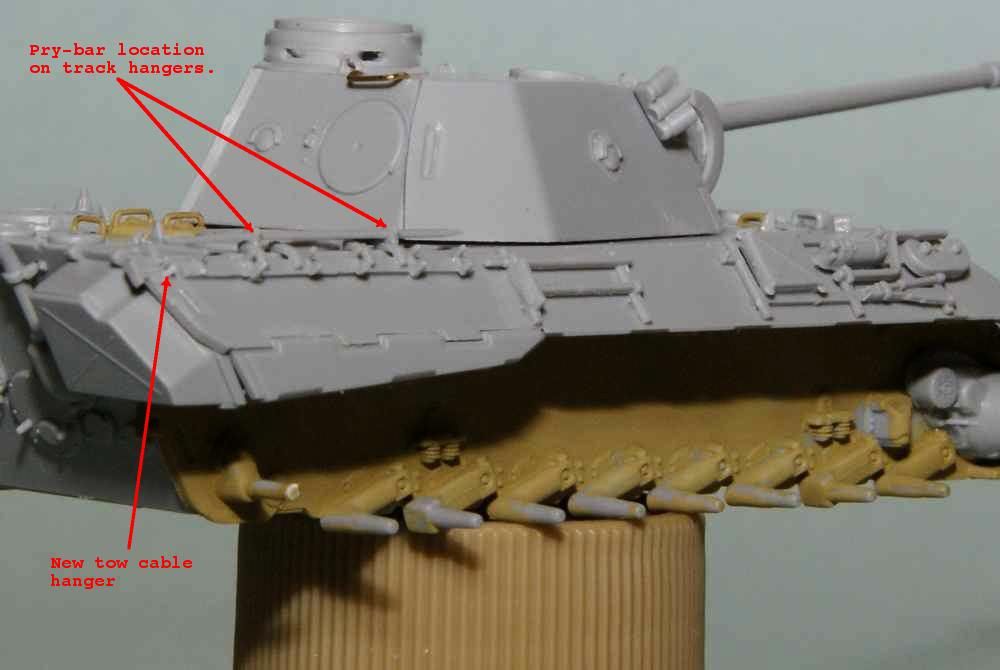
More progress on the body of the Panther. All the tools and spare track hangars are now in place and all of them have the undersized locating pins so care needs to be taken with positioning. In the following pictures the rear plate and hull top are just dry fitted.


In the following you can see the location of a pry-bar on the hangar rack and the new tow cable hangar. The latter required some trimming and use of a small .020" (.5 mm) peg.


I've also got the multi-piece rear idlers together (seriously over engineered for this scale) and have started the sprockets. Can't fit any more suspension components on until they are all painted.

Cheers,
Jan
woltersk
Visit this Community
Utah, United States
Joined: May 27, 2003
KitMaker: 1,026 posts
Armorama: 654 posts
Posted: Friday, August 17, 2012 - 03:13 PM UTC
Jan,
Very impressive! Can't wait to see what other surprises you have in store for us on this one.

I second the motion for using the engine grille screen. Cool looking details should always trump historical accuracy, otherwise no one would ever have coined the term "artistic license".

Keith
tread_geek
Visit this Community
Ontario, Canada
Joined: March 23, 2008
KitMaker: 2,847 posts
Armorama: 2,667 posts
Posted: Sunday, August 19, 2012 - 09:02 AM UTC
@woltersk -Keith, thanks for dropping by and leaving your thoughts. As for the screens on the engine deck, we'll see. I'm not totally happy with the openings in the current screen material as they seem a bit too large. I've been looking at something smaller in the HO railway section of hobby shops but haven't found anything yet.

-----------------------------------------------------------------------------------------

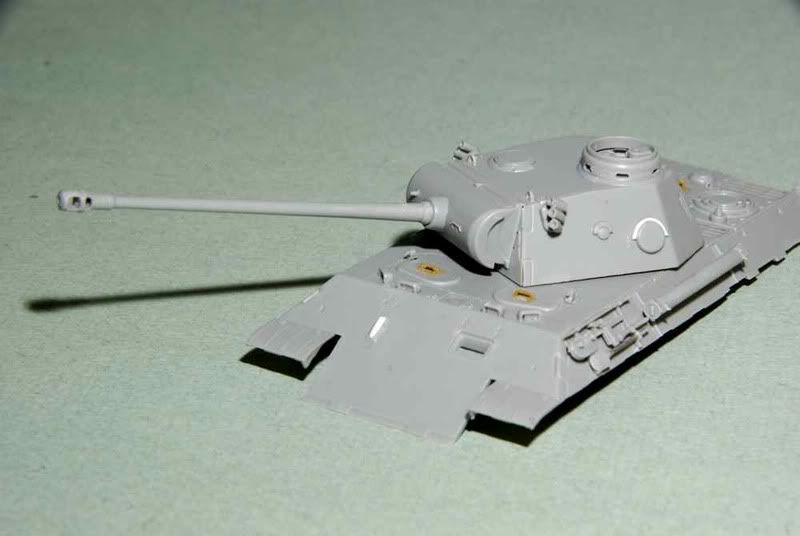
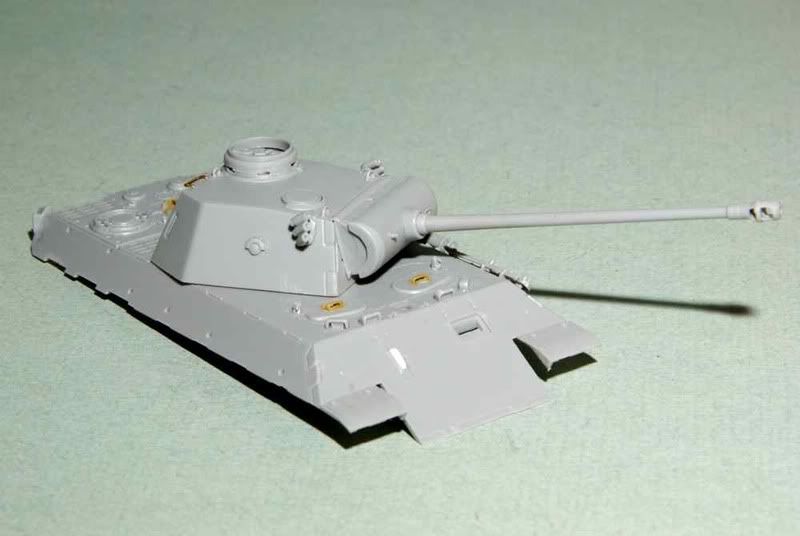
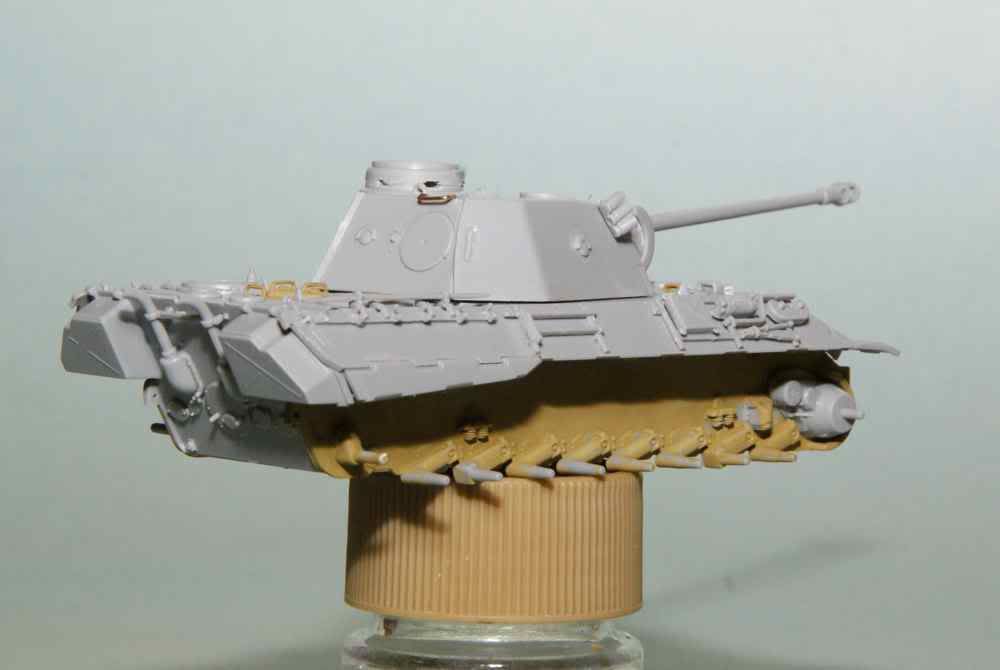
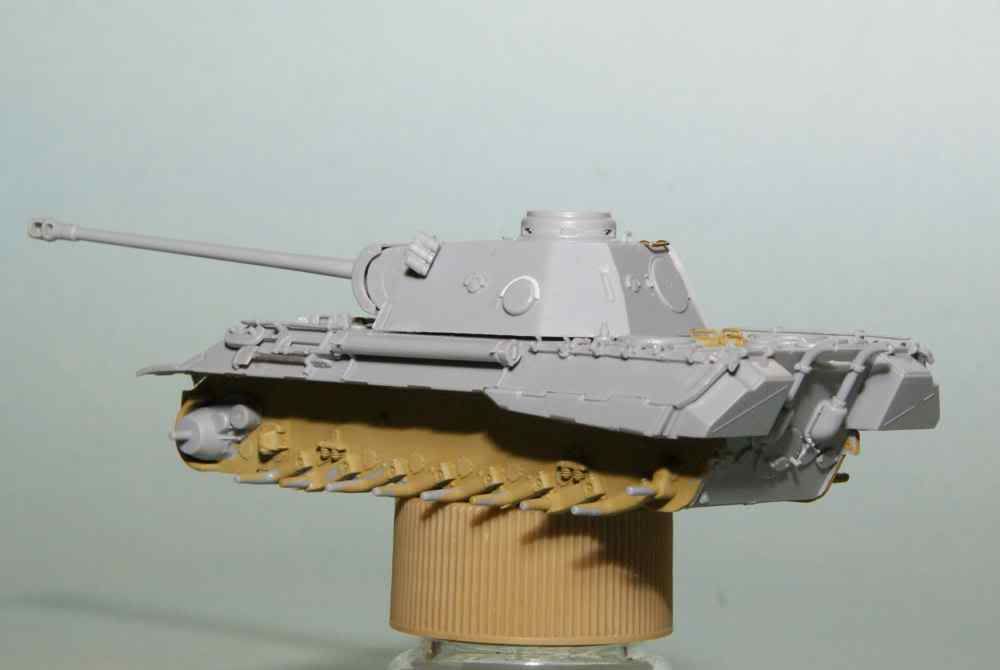
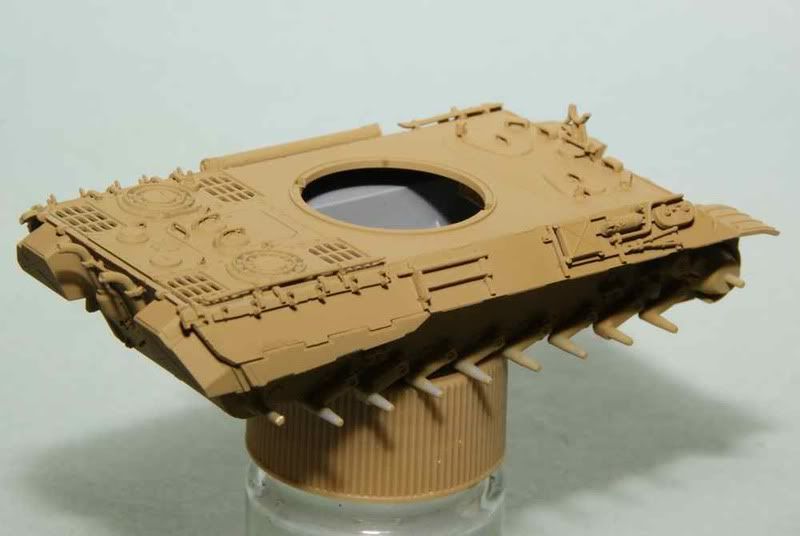
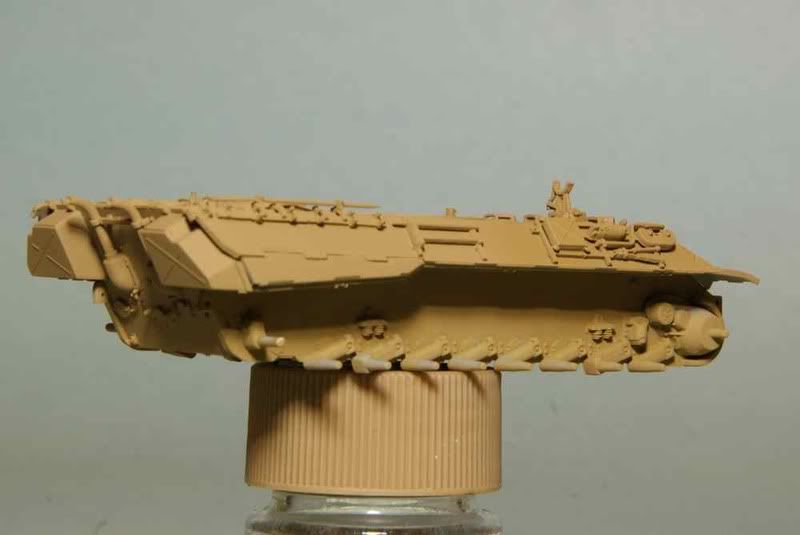
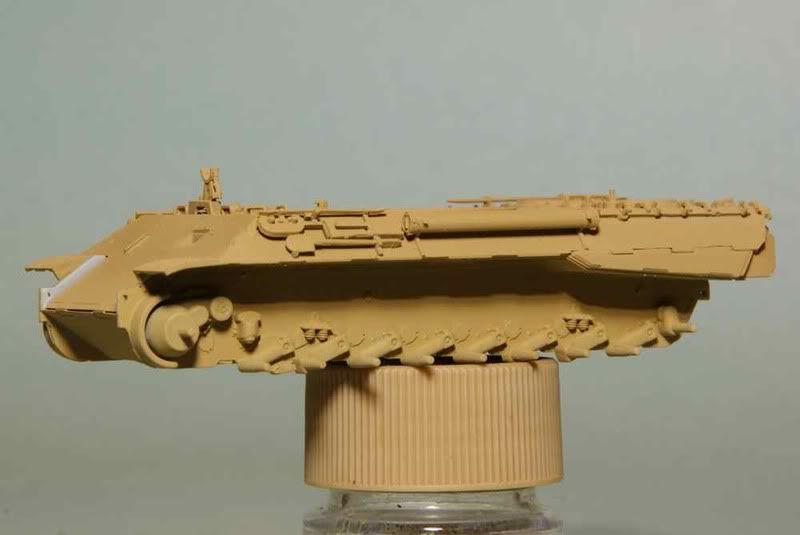
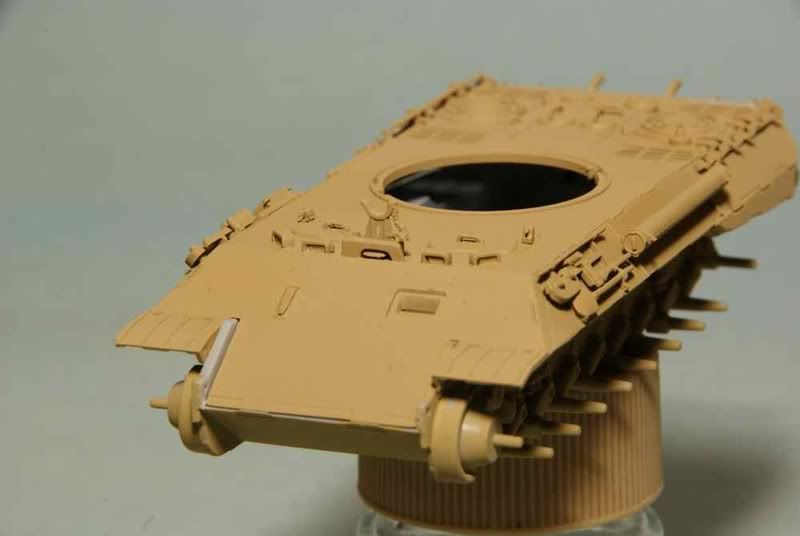
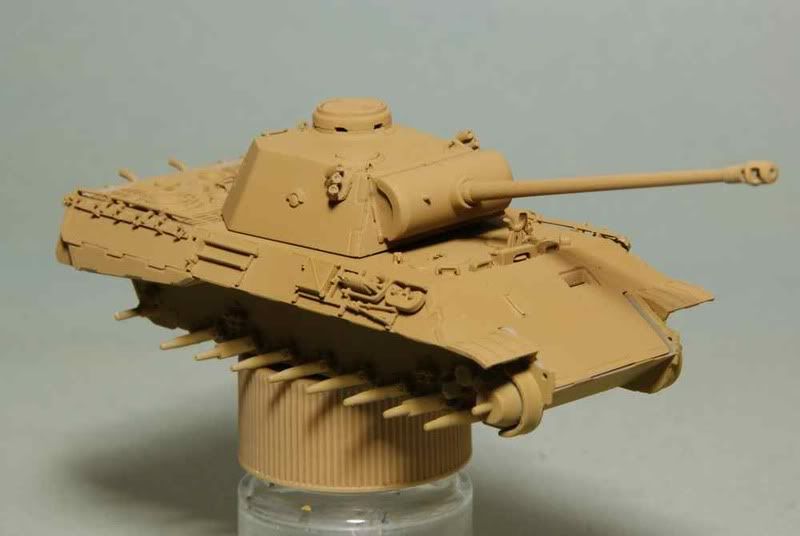
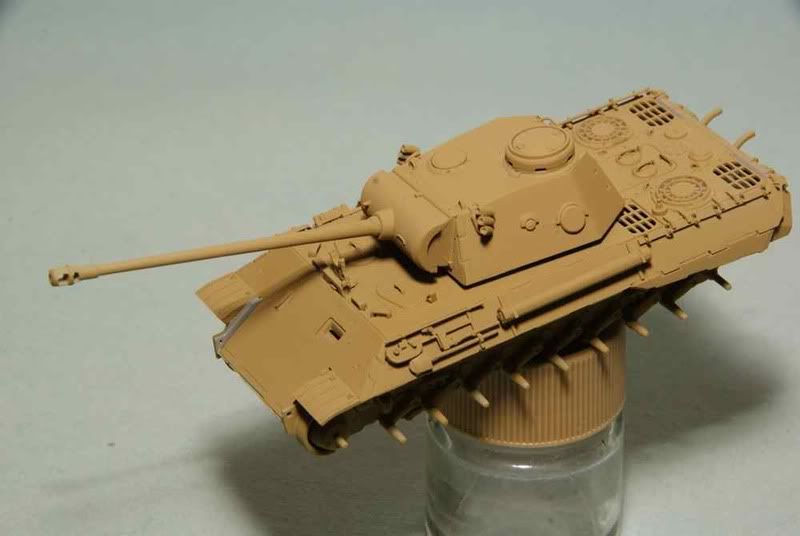
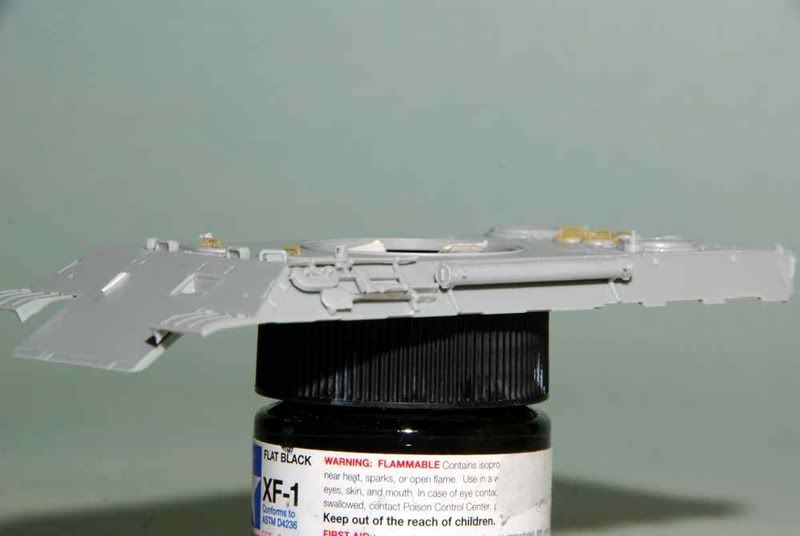
Well today proved to be useful and I got the first base coat of Dark Yellow on my beast. I usually prefer two lighter coats to one heavier one. Obviously I missed a couple of spots but that's fine as this is just a preliminary to make flaws stand out. The upper hull is pretty much complete with the travel lock on.

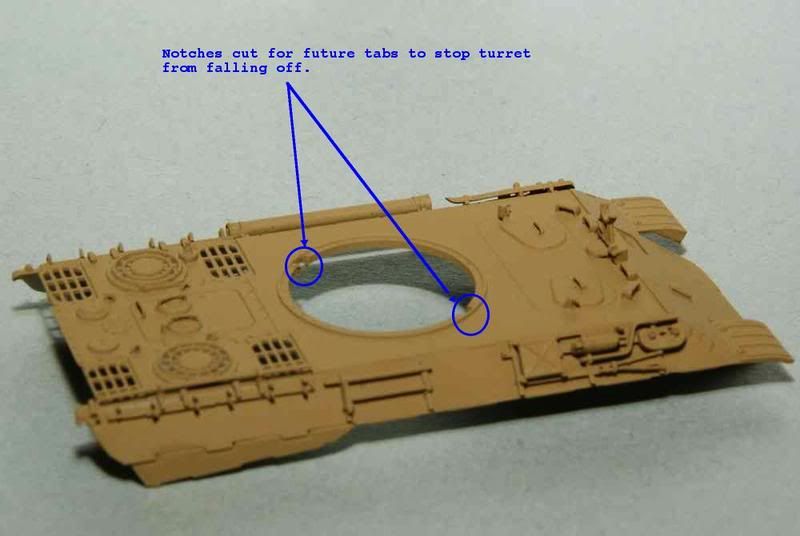
One major issue for those that want the turret on this one to be posable is that there were none of the slots and tabs that stop the turret from falling off. The turret is just meant to rest in the turret ring or more precisely be glued in place. There were obvious marks in the mould for the slots so I used them as a guide to cut them out. Next up will be to fashion and attach lugs to the turret base.


In the following images all the pieces are just dry fit.


Unfortunately, I lost the part A7 that is used to have the drivers observation port displayed open. I am trying to scratch-build another from Evergreen stock. It should be noted that this part is not referenced nor its use shown in the instructions!!! Good old Dragon.

Cheers,
Jan
Snorri23
Visit this Community
Ontario, Canada
Joined: March 25, 2010
KitMaker: 514 posts
Armorama: 261 posts
Posted: Sunday, August 19, 2012 - 10:09 PM UTC
Years ago when I got back into modelling on a more consistent basis. I converted a Tamyia panther into a D using a resin turret.Added missing set of wheels, trans case,filled in sponsons, ect. Had a few reference books to help guide me. Turned out fairly well. Surprised at how the industry has changed. The amount of detail and the prices. Enjoying your build.
tread_geek
Visit this Community
Ontario, Canada
Joined: March 23, 2008
KitMaker: 2,847 posts
Armorama: 2,667 posts
Posted: Monday, August 20, 2012 - 04:30 AM UTC
@Snorri23 - Trevor, happy that you can find this build interesting and thanks for taking the time to leave a comment. . As far as prices go, they are getting a bit crazy lately for 1/72. This one seems to be going for between $18 and $23! Supposedly you can still find the older release Panthers at some shops for $12 to $15.

-------------------------------------------------------------------------------------

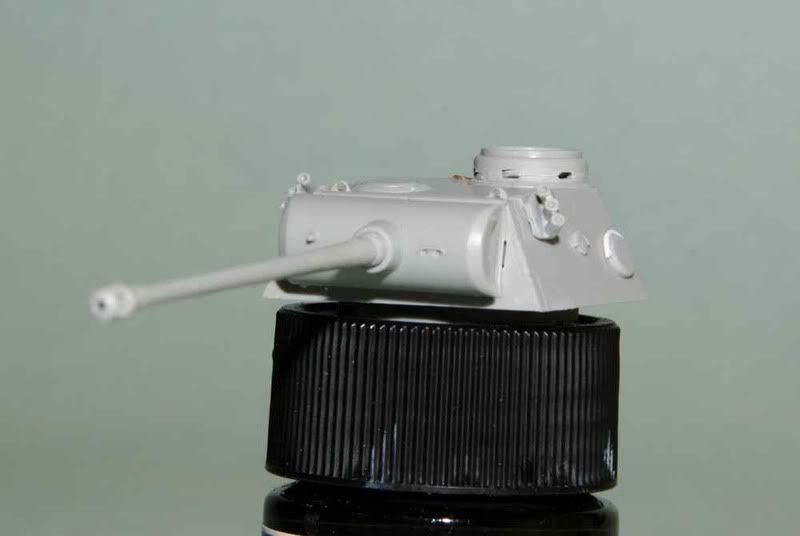
The following is a supplement to my last post. At the time I took those pictures the turret was still drying so here's a couple of pictures with the turret in place.


The commanders hatch is now in place so build wise the turret is finished. :-) Time to get going and concentrate on the rest of the suspension

Cheers,
Jan
weathering_one
Visit this Community
Ontario, Canada
Joined: April 04, 2009
KitMaker: 458 posts
Armorama: 456 posts
Posted: Monday, August 20, 2012 - 02:42 PM UTC
That Panther is seriously coming together despite the suspension but the base coat made it really stand out. The rain gutter you made looks as it was always part of the kit and those periscopes look nicely detailed. Almost has me wanting to get either this or a previous release.

Regards,
AJ
Braille
#135
Visit this Community
California, United States
Joined: August 05, 2007
KitMaker: 1,501 posts
Armorama: 1,485 posts
Posted: Tuesday, August 21, 2012 - 05:53 AM UTC
@tread_geek – Jan,

Your doing a great job on the kit! Providing us a solution for the shortcomings on the kit during your build is top notch! This build will definitely come in handy when I do go and build this vehicle. Nice that Dragon has elected to produce a well-detailed set of tool racks for the hull sides along with the tools but it appears that they have not included any spare track links? Is this correct?

I have to agree with AJB ‘weathering_one’ about the detailed periscopes. I do like that they have chosen to provide the periscopes together with their guards as separate pieces unlike some of their earlier releases where these items are integrally molded with the hull and looking much like bricks just sitting on top of the vehicles turret and hull. (Boy, you better hush your mouth )

~ Eddy
woltersk
Visit this Community
Utah, United States
Joined: May 27, 2003
KitMaker: 1,026 posts
Armorama: 654 posts
Posted: Tuesday, August 21, 2012 - 06:17 AM UTC
Jan,
If that mesh is too course for that scale what about a cloth type material? I've heard of folks using bridal veil(?) for such applications. Apply a coat of white glue as a stiffener?

She's coming along fine, and again with your 1/72 builds, it could be mistaken for 1/35.

Keith
PedroA
Visit this Community
Valencia, Spain / España
Joined: December 27, 2010
KitMaker: 324 posts
Armorama: 322 posts
Posted: Sunday, August 26, 2012 - 04:01 AM UTC
Thanks for this interesting step by step. Has the model vinyl tracks?

Best regards. Pedro.
tread_geek
Visit this Community
Ontario, Canada
Joined: March 23, 2008
KitMaker: 2,847 posts
Armorama: 2,667 posts
Posted: Sunday, August 26, 2012 - 09:06 AM UTC

Quoted Text

The rain gutter you made looks as it was always part of the kit and those periscopes look nicely detailed...


Thanks AJ, the gutter did turn out quite well and yes, the periscopes are quite well done and you'll have to be careful as one side definitely faces the front and one the back.


Quoted Text

...Nice that Dragon has elected to produce a well-detailed set of tool racks for the hull sides along with the tools but it appears that they have not included any spare track links? Is this correct?


Eddy, the tool racks are beautifully moulded but may still present a problem when painting for some modellers. However, if done carefully they should look fine. Sadly, as with their Panzer III that shows spare tracks on the box cover, there are no spare tracks with this kit. As for the periscopes, they are a thousand times better than the moulded on "blobs" that we often see.


Quoted Text

If that mesh is too course for that scale what about a cloth type material? I've heard of folks using bridal veil(?) for such applications. Apply a coat of white glue as a stiffener?

She's coming along fine, and again with your 1/72 builds, it could be mistaken for 1/35.


Keith, Despite all the pressure, I'm still not sure about the screens. However, I have heard that they make some pretty fine ones for model trains and my search continues. As for the scale, it's all relative as a good mould can make a good model with the proper care. It's just too bad that they cut corners with certain aspects of this one.


Quoted Text

Thanks for this interesting step by step. Has the model vinyl tracks?


Pedro, thanks for dropping in and commenting. I should have another update shortly and the review of the kit is almost ready. As for the tracks, they are the Dragon DS plastic and not their older vinyl. If you haven't worked with it, it is like a soft styrene that is quite flexible and glues with all normal styrene cements.

Again, my thanks to all who commented and had questions. Blogs are meant for sharing but it's nice to know that somebody is looking at them. :-)

Cheers,
Jan
tread_geek
Visit this Community
Ontario, Canada
Joined: March 23, 2008
KitMaker: 2,847 posts
Armorama: 2,667 posts
Posted: Monday, September 03, 2012 - 04:56 AM UTC
Just a quick note to all that are following this thread, the review of this kit has been published and you can read it in the Panther D Review. The review has more pictures of of the kit and in particular sprue shots and some parts detail images.

Cheers,
Jan
nikon1
Visit this Community
Kansas, United States
Joined: April 11, 2005
KitMaker: 622 posts
Armorama: 605 posts
Posted: Monday, September 03, 2012 - 02:24 PM UTC
Nice build you have going on Jan. Have you considered using lift rings made by Detail Associates for HO scale diesel locomotives? Live rings by Alco locomotives should work on the top of the turret and for EMD locomotives for the engine deck.
Charlie
ChaosXVI
Visit this Community
Metro Manila, Philippines
Joined: October 24, 2009
KitMaker: 128 posts
Armorama: 126 posts
Posted: Monday, September 03, 2012 - 09:58 PM UTC
Cant wait to see this done. I

I tried drilling holes on an old build to see if i could simulat rings too. Good thing it was an old kit. Hehe I need a pointier drill bit...
tread_geek
Visit this Community
Ontario, Canada
Joined: March 23, 2008
KitMaker: 2,847 posts
Armorama: 2,667 posts
Posted: Tuesday, September 04, 2012 - 03:39 AM UTC
@Nikon1 - Charlie,

I've been perusing the two local train shops lately for useable details and it's surprising with what you can find. Most pleasant is the fact that most of the stuff is priced far lower than similar items specifically marketed as being for 1/72 vehicles. So far I found the screening that I show earlier in this build, perfectly scaled chain in various thickness, tread plates and even "jewels" that can be used for headlights. That's just the tip of the proverbial iceberg. Unfortunately, with these local shops, their wares are anything but organized so trying to find something appropriate becomes a time consuming affair. As I had appropriate drills it wasn't too difficult a process to drill out the lifting eyes on this kit. I will keep your suggestion in mind for the future and see if I can get a stock of different sized rings to keep on hand.

@ChaosXVI - Toby,

Thanks for dropping in and what I find invaluable is a set of fine miro-drills. I have a set of six different sizes ranging all the way down to a #80 (0.0135 in/0.343 mm). Use a needle or pin to make a depression where you want the hole to be and then start with a undersized small drill. Once you have that hole drilled, use the next larger sized drill to open it up to the size you desire. One important thing is to not apply too much pressure; let the drill do the work. Too much pressure can split the ring you are opening.

Cheers,
Jan
tread_geek
Visit this Community
Ontario, Canada
Joined: March 23, 2008
KitMaker: 2,847 posts
Armorama: 2,667 posts
Posted: Sunday, September 16, 2012 - 03:10 AM UTC
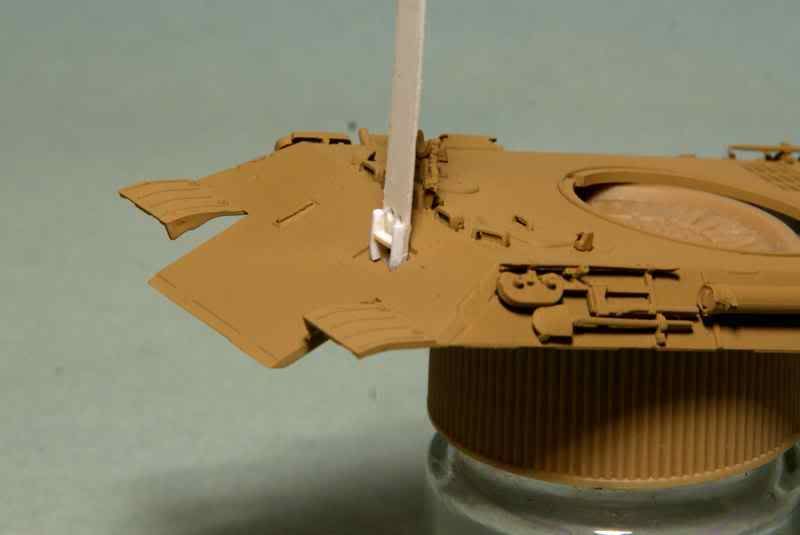
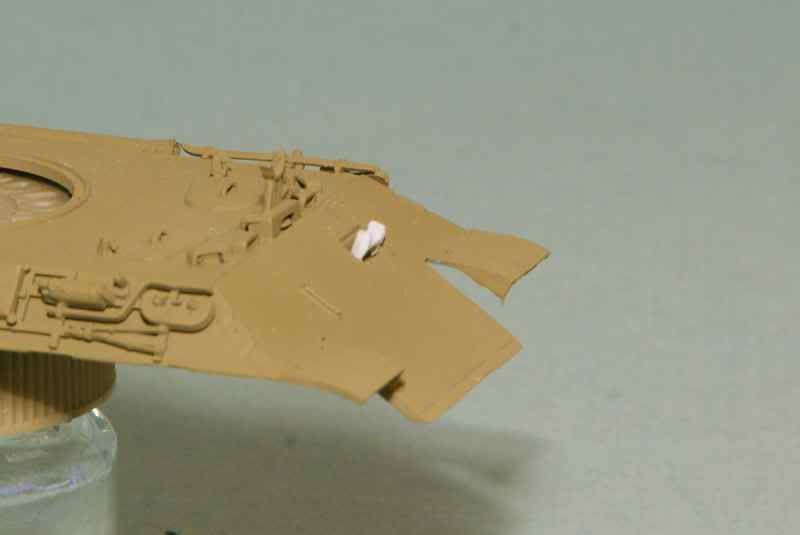
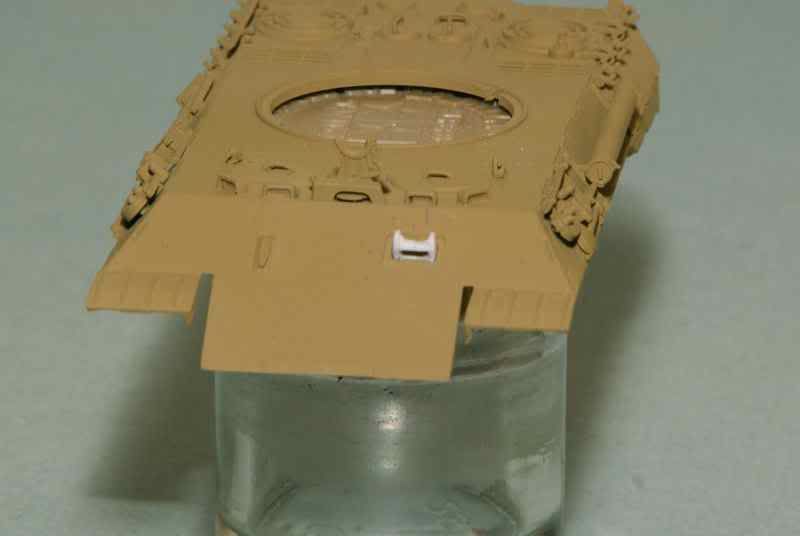
It's been a while but I haven't forgotten about the Panther. Despite sweeping the floor and crawling on hands and knees several times searching for the missing driver's visor support (A7), I sadly must admit that the modelling gremlins have achieved victory and the part has made its way to that great disappearing parts bin in the the sky (or wherever it is).

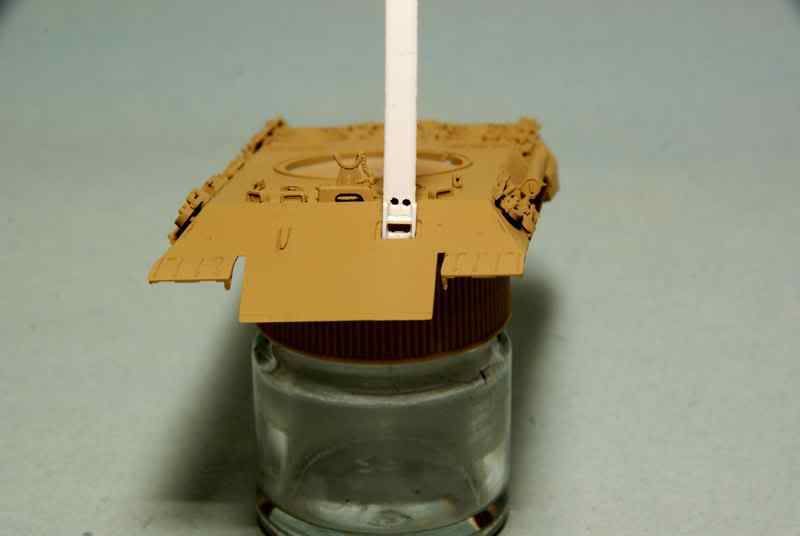
As I really want to depict the visor (armoured cover) open, I have had to resort to scratch building a reasonable facsimile. With the part being barely .138" (3.5mm) wide and having unique contours or details, it's been a slow and frustrating series of trials and mostly errors. Here is the beginnings of trial number five.


The main plastic strip is the proper width as I mentioned above and the rest is made from Evergreen pre-formed strips. Holes are drilled to allow necessary areas to be cut out and then these will be cleaned up with jewellers needle files.

The next images are of "number five" pretty much formed but still a little rough and a tad too thick from front to back.


While trying to thin it down after the pictures were taken, it fell apart, twice! Time for Number Six.

In the mean time, and during this process, I have also been painting the rubber on the road wheels. I've got about half of them done.
Cheers,
Jan
majjanelson
Visit this Community
South Carolina, United States
Joined: December 14, 2006
KitMaker: 1,355 posts
Armorama: 979 posts
Posted: Sunday, September 16, 2012 - 04:30 AM UTC
Jan,

Your Panther D is coming along nicely!

I agree that DML seems to be taking a step backward or something with this kit. I have the earlier Panther G in my stash, and its much more complete with the engine detail piece and the PE fret.

I feel your pain about repeatedly making the Driver's Viewport Bracket over and over. I've made numerous parts for my tiny tigers in 1:144, and it seems they just "disappear". One time I finished a minute item and exhaled, and it was gone.

Keep up the great work!
 _GOTOTOP