Hi Bruce I'm still here, just been a bit lax lately with my posts. Finished up the other track on the 38(t) and ready to install, finish weathering and call her done! Tried something different construction-wise with the tracks which turned into a disaster, so we won't go into that subject. But in the end it should look something like a tank!
Everybodies WIP and finished builds look stunning and I'm honored to be a part of this campaign with such a great group of people
Will post up some progress soon.
Campaigns
Where Armorama group builds can be discussed, organized, and updates posted.
Hosted by Darren Baker, Richard S.
Blitzkrieg
c5flies
California, United States
Joined: October 21, 2007
KitMaker: 3,684 posts
Armorama: 2,938 posts
Joined: October 21, 2007
KitMaker: 3,684 posts
Armorama: 2,938 posts
Posted: Saturday, June 28, 2008 - 08:02 PM UTC
ScottS
California, United States
Joined: March 28, 2007
KitMaker: 81 posts
Armorama: 57 posts
Joined: March 28, 2007
KitMaker: 81 posts
Armorama: 57 posts
Posted: Sunday, June 29, 2008 - 02:21 AM UTC
I'm working on the crew still, havn't done anything with the tank.
Posted: Sunday, June 29, 2008 - 07:23 AM UTC
hello all,
well that is a sitrep from 3 of the 30+people signed up.i am still trying to get the "magic tracks"done for my Pz 1.i hate "magic tracks" .
on the subject of Matt,i know that he has a lot of family medical problems,but i am sure if he is needed,he will show up.i think that the campaign is running along fine and with Adam's help all the questions are being answered ok.
@Ron,sounds like a great dio,please keep us posted with your progress.
@James,i cannot wait to see what you are talking about with the track problem.
@Scott,take your time,have posted any photo's of the figures yet?i do not recall seeing any.
cheers,
Bruce
markm
California, United States
Joined: September 11, 2005
KitMaker: 1,757 posts
Armorama: 1,148 posts
Joined: September 11, 2005
KitMaker: 1,757 posts
Armorama: 1,148 posts
Posted: Sunday, June 29, 2008 - 09:12 AM UTC
Ok Gentlemen, with Matt being MIA I have officially made Bruce the leader of this one. If there are any problems with the change please let me know.
Thanks
Thanks
Posted: Sunday, June 29, 2008 - 10:44 AM UTC
I am still working on the Italeri Panzer 1 that I am building for this campaign. I just haven't done anything with it for a couple of weeks. I have about 98% of the construction completed and the base coat painted. I just need to do the detail painting, finish the last bits of construction, add the decals and dust it up with some pastels and it should be finished.
HARV
HARV
Posted: Sunday, June 29, 2008 - 10:49 AM UTC
Quoted Text
Ok Gentlemen, with Matt being MIA I have officially made Bruce the leader of this one. If there are any problems with the change please let me know.
Thanks
hello MarkM,
can you please keep Matt as the Campaign Leader.he worked hard to get this campaign going,he worked hard to keep it going and it is running fine with him as Campaign Leader.
i have passed messages to him on how the campaign is going,he checks to see if he needs to comment on anything,and he checks on the progress of the builds.he just has not posted.there is no harm or foul in that.
thank you,
Bruce
markm
California, United States
Joined: September 11, 2005
KitMaker: 1,757 posts
Armorama: 1,148 posts
Joined: September 11, 2005
KitMaker: 1,757 posts
Armorama: 1,148 posts
Posted: Sunday, June 29, 2008 - 12:16 PM UTC
Quoted Text
Quoted TextOk Gentlemen, with Matt being MIA I have officially made Bruce the leader of this one. If there are any problems with the change please let me know.
Thanks
hello MarkM,
can you please keep Matt as the Campaign Leader.he worked hard to get this campaign going,he worked hard to keep it going and it is running fine with him as Campaign Leader.
i have passed messages to him on how the campaign is going,he checks to see if he needs to comment on anything,and he checks on the progress of the builds.he just has not posted.there is no harm or foul in that.
thank you,
Bruce
Done, sorry about the mix up. I was not aware that you were in contact with him.
c5flies
California, United States
Joined: October 21, 2007
KitMaker: 3,684 posts
Armorama: 2,938 posts
Joined: October 21, 2007
KitMaker: 3,684 posts
Armorama: 2,938 posts
Posted: Sunday, June 29, 2008 - 01:33 PM UTC
Well Blitzkriegers, I'm calling this one finis! A few problems along the way....... sprockets and 1 sprue of track links were bad in the kit.......but she got together in the end. Tried some new methods on this one, some good, some bad, but all fun. Don't pay attention to the antenna, I think Hans and Fritz were hanging their laundry off it! Let me know what you guys think.......
Thank you Matt for getting this campaign together
Posted: Sunday, June 29, 2008 - 04:17 PM UTC
hello James,
looks good to me,not all things work out.it is a learning experience to us all.thanks for sharing your build and for joining the campaign.
cheers,
Bruce
looks good to me,not all things work out.it is a learning experience to us all.thanks for sharing your build and for joining the campaign.
cheers,
Bruce
Nito74
Lisboa, Portugal
Joined: March 04, 2008
KitMaker: 5,386 posts
Armorama: 4,727 posts
Joined: March 04, 2008
KitMaker: 5,386 posts
Armorama: 4,727 posts
Posted: Monday, June 30, 2008 - 12:13 AM UTC
Panzer II D from Alan.
The wheels were painted after the picsa were taken...
Spiff
Nevada, United States
Joined: September 07, 2002
KitMaker: 807 posts
Armorama: 671 posts
Joined: September 07, 2002
KitMaker: 807 posts
Armorama: 671 posts
Posted: Monday, June 30, 2008 - 07:56 AM UTC
Nice work James! I really need to do a 38(t) in gray!
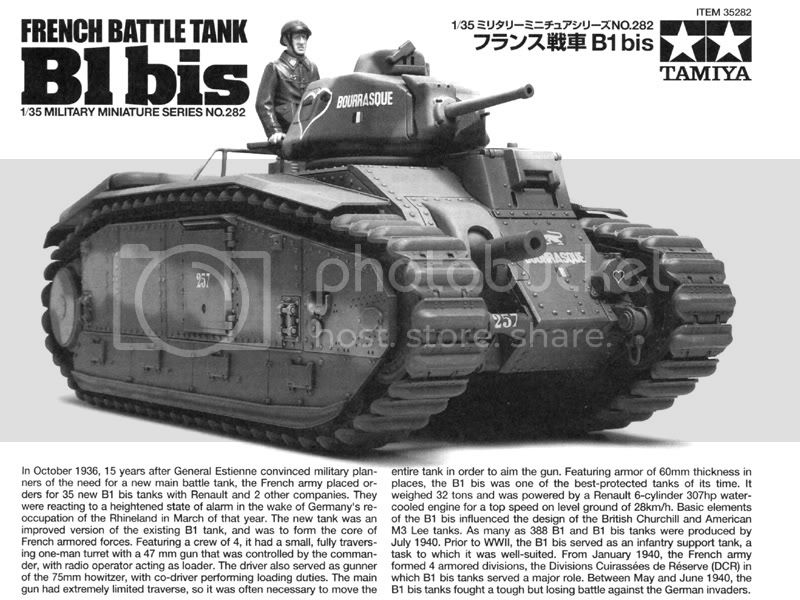
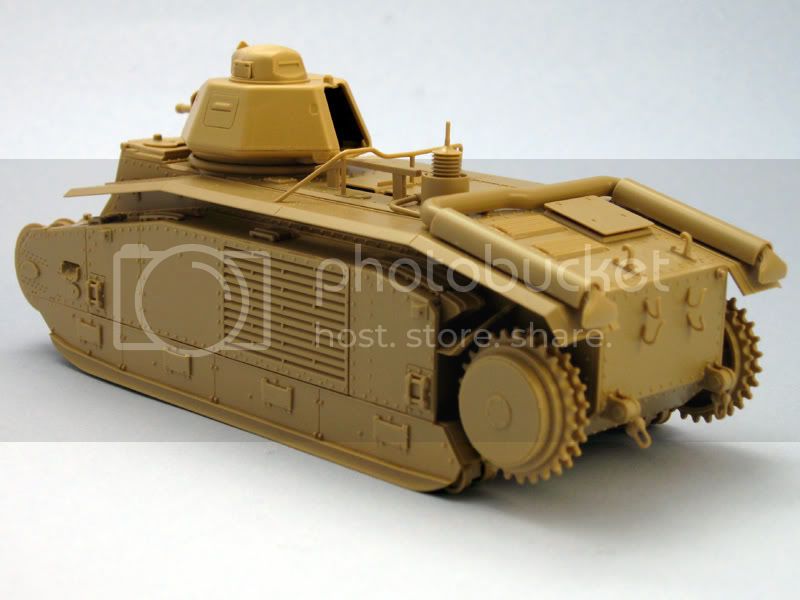
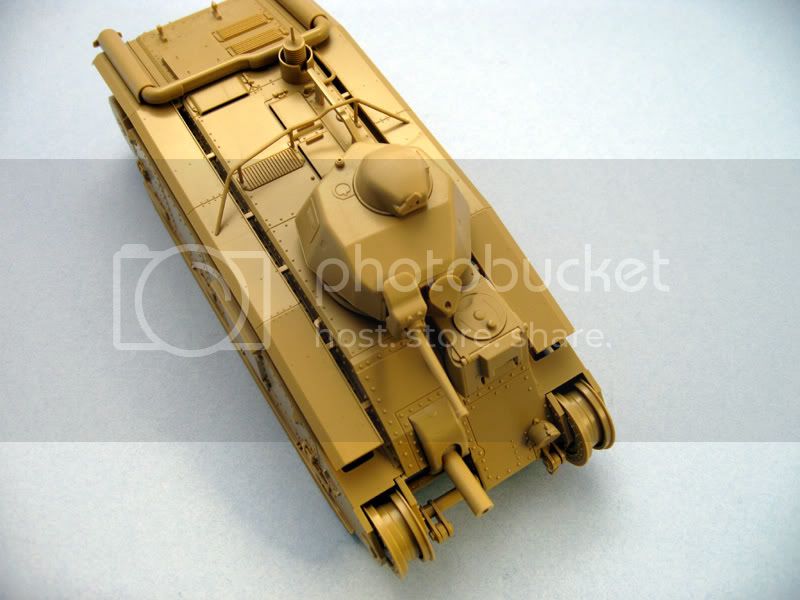
I spent a good part of yesterday working on my 1/35 Tamiya Char B1 bis. So far it's been a very enjoyable kit.
The wheels weren't too difficult. The sprue attachement point on each wheel is right along the edge of the thinnest part. Why they engineered it that way that way I'll never know because it made cleanup a bit tedious as you have to sand the outside of the thin rim, the inside and the outer edge. However....... the wheels are pretty much hidden so you don't have to get too carried away with the cleanup because no one will ever notice. I cleaned them up carefully anyway because... well, I felt like being a bit anal about it and it was good practice.... ya, that's what it was.... LOL
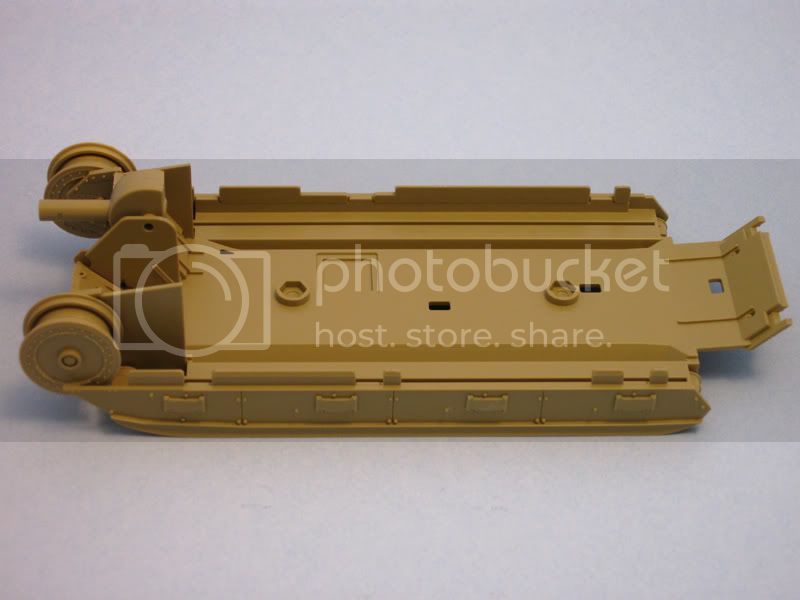
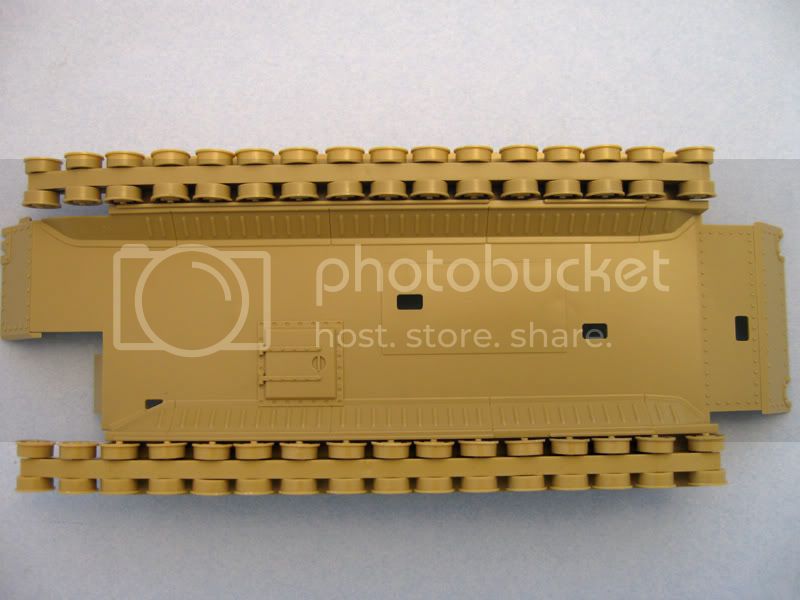
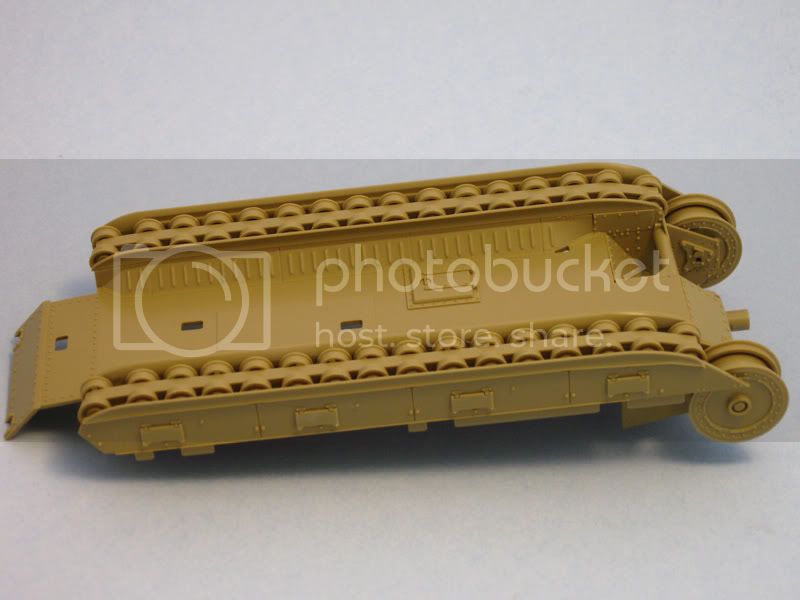
The running gear was a little tricky as you have to set the lower hull section onto the rail just right, then carefully flip it all over so it can be glued. I just slid the folded instruction sheet underneath the wheels/rail to keep them from flying everywhere while carefully holding the lower hull section so the wheels stayed put. To keep it simple I did one side at a time.
The 75mm gun assembly is very simple, but as always, when there are two barrel halves involved there will be seam work. I carefully cemented the barrel halves together being sure to line them up to minimize the sanding work to keep the barrel round. I used Mr. Surfacer applied with a toothpick which I laid along the seam lines, waited for it to dry then carefully worked away to smooth everything out and keep the barrel round.
The gun assembly attaches very positively into the lower hull section so you'd really have to go out of your way to not install it properly. The lower skirts, skids and hatches were attached at this point as well.
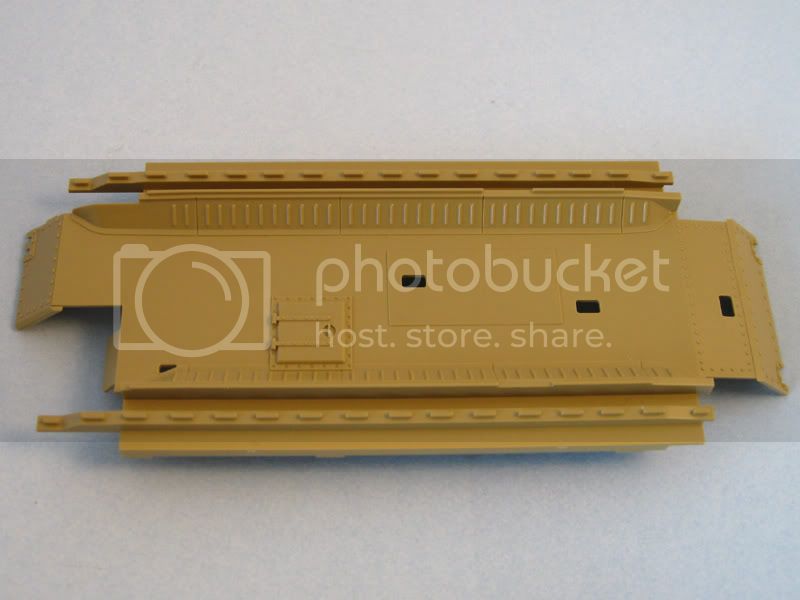
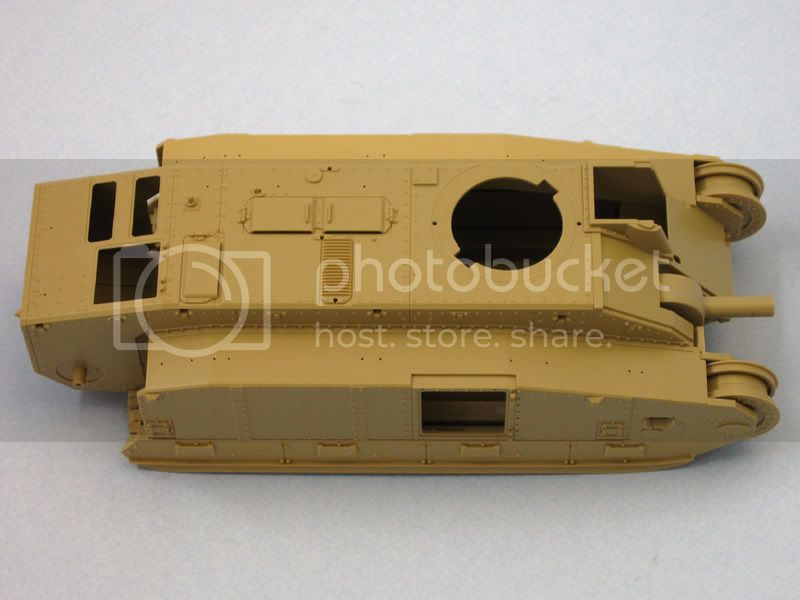
Here are a couple of photos with the hull dry fitted to the lower hull assembly. There are 26 holes that needed to be drilled in the upper hull to provide locating holes for the various parts that will be added in the next steps. If you have a pin vise with a 1mm bit this will go very quickly. There were indentations on the underside of the upper hull section which made it impossible to drill a hole in the wrong place.... in theory.
Posted: Monday, June 30, 2008 - 12:24 PM UTC
hello all,
well we have 2 new build posted,lets give them all the support we can.
@John, good start,please post photo's when you can.
@Scott,now that brings back memories and nightmares.on the drilling out of the holes,please remember that you have to decide which tank you are building.some holes are for 1 tank,some are for others,including which exhaust you use.
cheers,
Bruce
c5flies
California, United States
Joined: October 21, 2007
KitMaker: 3,684 posts
Armorama: 2,938 posts
Joined: October 21, 2007
KitMaker: 3,684 posts
Armorama: 2,938 posts
Posted: Monday, June 30, 2008 - 05:14 PM UTC
Adam.....another great one, keep them coming!
Harv....looking forward to the finished Pz 1, great little tanks
John.....nice detail touches on the Panzer IV D, will be following along on your Panzer II D
Scott......lol, can't say I'm proud of my one day weathering job! I'm going to try some new to me weathering techniques on this one and wanted to get some pics up in case I totally ruin it! If it comes out ok I'll post a 'new & improved' photo.
Looks like you got a lot done already, nice work. Looking forward to your build, as usual.
I've probably missed a few peoples builds, I'll catch up to them soon. Cheers all
Posted: Monday, June 30, 2008 - 08:30 PM UTC
James, Great build for this campaign. I like the subtle weathering and the nice details on the tools. Thanks for participating.
Scott, looks like a promising start on your Char B. It will be interesting to follow your build on this beast.
Nito74
Lisboa, Portugal
Joined: March 04, 2008
KitMaker: 5,386 posts
Armorama: 4,727 posts
Joined: March 04, 2008
KitMaker: 5,386 posts
Armorama: 4,727 posts
Posted: Tuesday, July 01, 2008 - 02:18 AM UTC
Thanks James,
I will keep posting the progress on the Blitz kits
Spiff
Nevada, United States
Joined: September 07, 2002
KitMaker: 807 posts
Armorama: 671 posts
Joined: September 07, 2002
KitMaker: 807 posts
Armorama: 671 posts
Posted: Wednesday, July 02, 2008 - 05:13 AM UTC
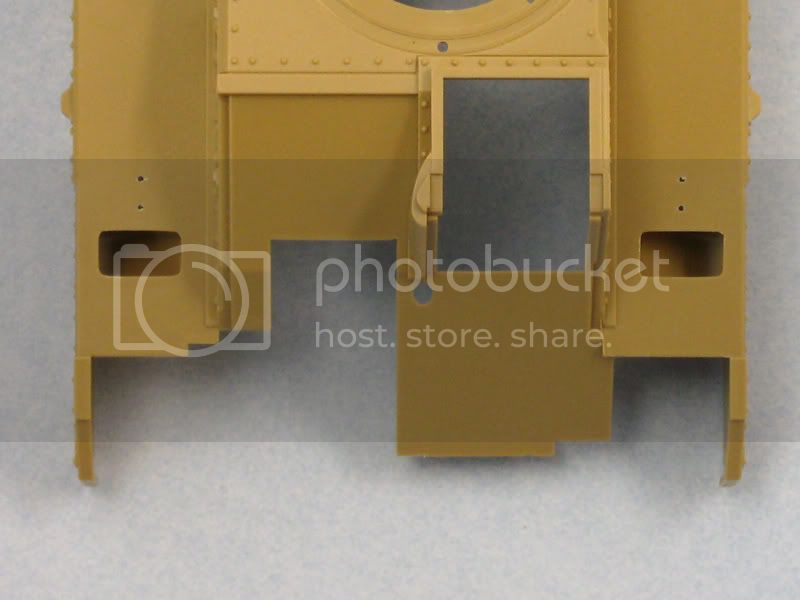
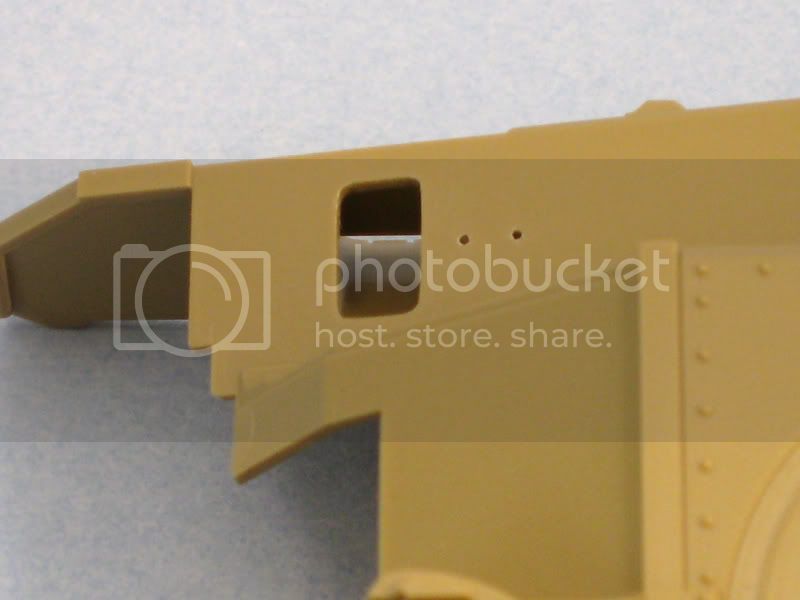
I decided to go ahead and cut out the opening for the mud shoots on the upper housing for the suspension components. I simply used a 1mm bit in my pin vise and used it to create a perforated rectangle slightly smaller than the opening. It was very easy to cut the piece of plastic out with an X-acto knife. I then carefully used flat and rounded files, in addition to sanding sticks to clear the opening right up to edge of its correct shape. I'm glad I did that as it really adds a lot to the look of the mud shoots, in fact you can see right through them now... way cool. I find it odd that Tamiya makes no mention of cutting out the openings, even though the opening is framed on the underside and clearly should be cut out.
I have a lot more progress done, but didn't have time to photograph. I'll post another update this evening.
Nito74
Lisboa, Portugal
Joined: March 04, 2008
KitMaker: 5,386 posts
Armorama: 4,727 posts
Joined: March 04, 2008
KitMaker: 5,386 posts
Armorama: 4,727 posts
Posted: Thursday, July 03, 2008 - 12:40 AM UTC
Some more PII shots
c5flies
California, United States
Joined: October 21, 2007
KitMaker: 3,684 posts
Armorama: 2,938 posts
Joined: October 21, 2007
KitMaker: 3,684 posts
Armorama: 2,938 posts
Posted: Sunday, July 06, 2008 - 06:59 AM UTC
What? No updates? Everybody fall asleep?
Posted: Sunday, July 06, 2008 - 08:40 AM UTC
hello all,
just a quick note to let everyone know that my main system is down and will have to go to the shop for a few days.again
i am using my back up computer,but it is very slow,only 19.9 on dail up.
i am sure that all the builders will keep up the great work they are doing,keep posting on thier builds,and you do not need me here every minute .
i will check as much as i can on the campaign,and i am sure that Adam and James along with Matt will keep an eye on the campaign.
cheers,
Bruce
endrju007
Wojewodztwo Podkarpackie, Poland
Joined: December 05, 2007
KitMaker: 2,435 posts
Armorama: 1,256 posts
Joined: December 05, 2007
KitMaker: 2,435 posts
Armorama: 1,256 posts
Posted: Sunday, July 06, 2008 - 08:36 PM UTC
@ James
I'm not asleep - problem is that neither is my son . Right now all my modelmaking is done during few minutes between the moment when my little son goes to sleep and the moment when my eyes are closing without my will .
I'm almost done with my entry for this camapign, one detail of one of figures has to be painted, diorama needs final check, and the plaquette with diorama's name needs to be finished, but even this is quite difficult for me.
Andrzej
Nito74
Lisboa, Portugal
Joined: March 04, 2008
KitMaker: 5,386 posts
Armorama: 4,727 posts
Joined: March 04, 2008
KitMaker: 5,386 posts
Armorama: 4,727 posts
Posted: Monday, July 07, 2008 - 01:55 AM UTC
The wheels and lower hull are build and painted.
Working on the turret ...
Some pics soon.
Working on the turret ...
Some pics soon.
LSniper
Ontario, Canada
Joined: June 27, 2007
KitMaker: 223 posts
Armorama: 162 posts
Joined: June 27, 2007
KitMaker: 223 posts
Armorama: 162 posts
Posted: Monday, July 07, 2008 - 04:26 AM UTC
Hey everyone I kno its been awhile since I've been on we went camping for 2 weeks then I had to build a deck then I have been sick for a couple of days I just havn't found any time to go on but I'm ok thats all there is
MATT
MATT
Spiff
Nevada, United States
Joined: September 07, 2002
KitMaker: 807 posts
Armorama: 671 posts
Joined: September 07, 2002
KitMaker: 807 posts
Armorama: 671 posts
Posted: Monday, July 07, 2008 - 05:12 AM UTC
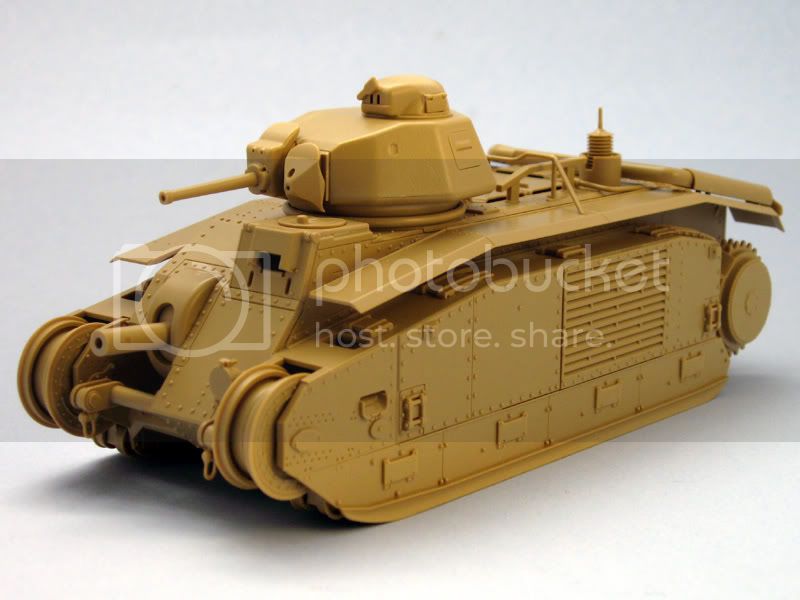
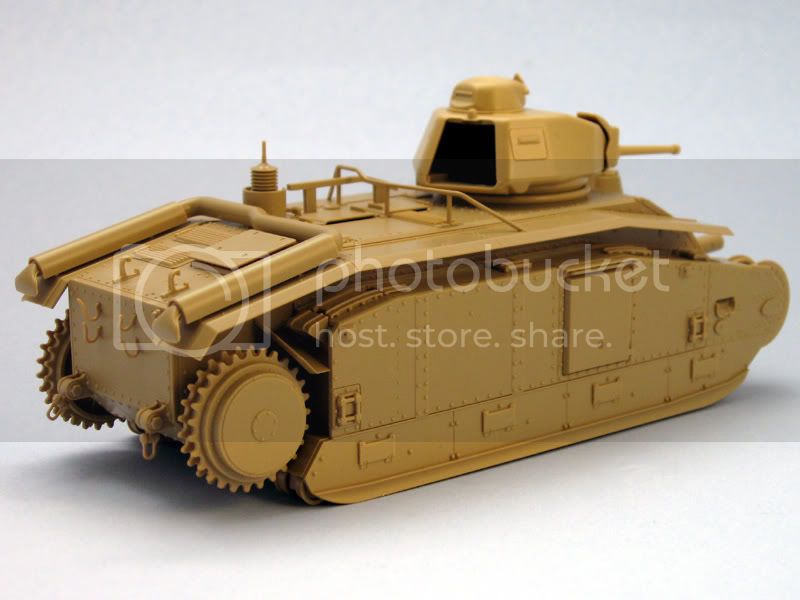
I made a lot of progress on the Char B1 bis this weekend. I took in progress photos but now that most of the assembly is complete it seems a bit redundant to post the earlier photos. There are a few more detail parts to attach, such as the rear turret hatch, jacks, lifting hooks etc. I also need to fix the seam between the turret and the turret ring. The tow chain will be attached later after painting, but before weathering.
LSniper
Ontario, Canada
Joined: June 27, 2007
KitMaker: 223 posts
Armorama: 162 posts
Joined: June 27, 2007
KitMaker: 223 posts
Armorama: 162 posts
Posted: Monday, July 07, 2008 - 12:28 PM UTC
Looks good Spiff
MATT
MATT
c5flies
California, United States
Joined: October 21, 2007
KitMaker: 3,684 posts
Armorama: 2,938 posts
Joined: October 21, 2007
KitMaker: 3,684 posts
Armorama: 2,938 posts
Posted: Monday, July 07, 2008 - 01:42 PM UTC
Excellent, Scott, excellent! The cleanliness of your builds remind me of Bill Plunk's, I really don't think either of you use any glue Looking real sharp.
Glad to see you Matt, hope all is well.