Constructive Feedback
For in-progress or completed build photos. Give and get contructive feedback!
Beginners Build Log: Karl
integraguy95
Visit this Community
Tennessee, United States
Joined: October 02, 2008
KitMaker: 308 posts
Armorama: 304 posts
Posted: Tuesday, January 13, 2009 - 10:21 AM UTC

Quoted Text

Thanks a lot for the congrats! Now I just need to make another major goal to accomplish. Maybe entering a military academy


Rich, thats an excellent goal! Keep up the hard work towards that! M.A's are very very difficult but once you are done, you are the best thing in the Army.

Anyway, back on to the wash....Yes, to wash the hand tools you would thin the paint down alot, perhaps 75-80% also, becareful of what thinner you use, as some with attack the gloss coat that washes are best on. That leads to another point, make sure you have sealed the whole model with a gloss finish first, as this will give washes their best effect. Matte is no good!! So, if you don't have a sealed coat on there to protect the basecoat, the wash will take the basecoat off!!!!!

look here for more info:
http://www.missing-lynx.com/rare_world/rw04.htm

here too:
http://www.perthmilitarymodelling.com/howto/wash.htm

keep up the hard work bud.

P.S. Congrats on the Eagle Scout!!
RSingleton
Visit this Community
Kentucky, United States
Joined: August 26, 2008
KitMaker: 286 posts
Armorama: 273 posts
Posted: Tuesday, January 13, 2009 - 01:39 PM UTC

Quoted Text

Anyway, back on to the wash....Yes, to wash the hand tools you would thin the paint down alot, perhaps 75-80% also, becareful of what thinner you use, as some with attack the gloss coat that washes are best on. That leads to another point, make sure you have sealed the whole model with a gloss finish first, as this will give washes their best effect. Matte is no good!! So, if you don't have a sealed coat on there to protect the basecoat, the wash will take the basecoat off!!!!!


That's what I needed to know to do the wash. Now I just have to wait for a time to get some clear gloss.


Quoted Text

Rich, thats an excellent goal! Keep up the hard work towards that! M.A's are very very difficult but once you are done, you are the best thing in the Army.


I just think I might be getting in a little over my head with that, but I gotta do something, right!?

Thanks for the help and congrats,
Richard
RSingleton
Visit this Community
Kentucky, United States
Joined: August 26, 2008
KitMaker: 286 posts
Armorama: 273 posts
Posted: Tuesday, January 13, 2009 - 01:49 PM UTC
Time for a long needed update:
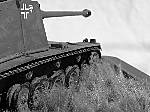
I applied some mud to the suspension and am asking for comments. I know it seems much, but I've been looking around at construction sites and I see vehicles that travel only a short distance but get loaded with mud (even on a semi-dry day) just because of their weight. So I think the tons of mud is mildly appropriate. How does it look with the grass? Do I need to add or take away grass?


Here are some overall pics:


Here is the board the diorama will be on. The position of "Eva" is not yet decided, but you can see I have plenty of space for an AA gun.


Any tips or comments are appriciated. My question is do I need to add pigments to the suspension or just use the mud or use both?

Inquiring minds need to know,
Richard
integraguy95
Visit this Community
Tennessee, United States
Joined: October 02, 2008
KitMaker: 308 posts
Armorama: 304 posts
Posted: Tuesday, January 13, 2009 - 03:53 PM UTC
Hmm, it looks pretty good Rich. I think the amount of mud is quite appropriate. I'd say try to cover the road wheels and the inside of the tracks a bit more, also the mud should be darker, less beige and more brown. I'm not sure about the grass location. It shouldn't be on top of the mud, as the tracks would sink into the mud and churn the grass up into the mud itself, but very good thinking with that. Vary the mud color a bit, fresh mud would be a deep brown where as the dry mud that is caked up in places would be of a lighter shade.

Overall, nice job with the mud. Also keep in mind when you build the diorama to sink "Eva" a bit into the mud to give her "weight."
RSingleton
Visit this Community
Kentucky, United States
Joined: August 26, 2008
KitMaker: 286 posts
Armorama: 273 posts
Posted: Wednesday, January 14, 2009 - 08:33 AM UTC

Quoted Text

Hmm, it looks pretty good Rich. I think the amount of mud is quite appropriate. I'd say try to cover the road wheels and the inside of the tracks a bit more, also the mud should be darker, less beige and more brown. I'm not sure about the grass location. It shouldn't be on top of the mud, as the tracks would sink into the mud and churn the grass up into the mud itself, but very good thinking with that. Vary the mud color a bit, fresh mud would be a deep brown where as the dry mud that is caked up in places would be of a lighter shade.

Overall, nice job with the mud. Also keep in mind when you build the diorama to sink "Eva" a bit into the mud to give her "weight."


Thanks for the help Justin,
I know for a fact I'm going to give "Eva" the weight she needs. (Whether she likes it or not )
I think I might make another smaller batch of the mud in a darker shade and scrape of a little wherever its visible. I tried to base the mud color of photos around Russia. Its just that mud in one place can be different from a place only 100 yards away. I think I may try to make different variations to bring it more life.

Thanks a lot for the help!
Richard
lespauljames
Visit this Community
England - South West, United Kingdom
Joined: January 06, 2007
KitMaker: 3,661 posts
Armorama: 2,764 posts
Posted: Wednesday, January 14, 2009 - 10:26 AM UTC
hey Richard,
going good so far, only comment is the mud is a bit gloopy,
and the grass could be mixed in a lil more but other than that its a winner
M4A2Sherman
Visit this Community
Canada
Joined: December 29, 2008
KitMaker: 316 posts
Armorama: 264 posts
Posted: Wednesday, January 14, 2009 - 12:15 PM UTC
Hey Richard,

Awesome!!! Are you going to do some washes on Eva? I would recommend a dust wash. Your mud looks really cool and so does the weathering you put on Eva's suspension. i just noticed that you have to paint the exhausts(located on both sides just above the tracks in the back of the beast) A hull red rusty colour. Tamiya makes a hull red and I use it. For exhausts I usually lighten it a little with white.
Keep up the awesome work!!!
M4A2Sherman
RSingleton
Visit this Community
Kentucky, United States
Joined: August 26, 2008
KitMaker: 286 posts
Armorama: 273 posts
Posted: Wednesday, January 14, 2009 - 01:21 PM UTC

Quoted Text

hey Richard,
going good so far, only comment is the mud is a bit gloopy,
and the grass could be mixed in a lil more but other than that its a winner


Thanks Jimmy!
I'm going to see if I can improve the mud probably this weekend. Thanks for the help, I need it!

Richard
RSingleton
Visit this Community
Kentucky, United States
Joined: August 26, 2008
KitMaker: 286 posts
Armorama: 273 posts
Posted: Wednesday, January 14, 2009 - 01:32 PM UTC

Quoted Text

Hey Richard,

Awesome!!! Are you going to do some washes on Eva? I would recommend a dust wash. Your mud looks really cool and so does the weathering you put on Eva's suspension. i just noticed that you have to paint the exhausts(located on both sides just above the tracks in the back of the beast) A hull red rusty colour. Tamiya makes a hull red and I use it. For exhausts I usually lighten it a little with white.
Keep up the awesome work!!!
M4A2Sherman


What would be an easy way to do a dust wash? I have some chalk pastels but I don't think thats what you're talking about. As for the exhausts, from the few pics I've seen, it looks like it has little to no rust. Mainly because the thing itself didn't move much. I also think because the crew had loads of down time, they'd make sure there was no rust. But I'd be more than welcome to be proven wrong. Thanks for the advice though, I'll see if I can find something to support it.

Thanks for the help and compliments, I appriciate them.
Richard
dispatcher
Visit this Community
Illinois, United States
Joined: November 04, 2007
KitMaker: 396 posts
Armorama: 325 posts
Posted: Wednesday, January 14, 2009 - 04:26 PM UTC
Richard, great build your doing. Congratulations on your Eagle rank, hope you have some time to get some palms to go with it.
Joe
RSingleton
Visit this Community
Kentucky, United States
Joined: August 26, 2008
KitMaker: 286 posts
Armorama: 273 posts
Posted: Thursday, January 15, 2009 - 08:40 AM UTC

Quoted Text

Richard, great build your doing. Congratulations on your Eagle rank, hope you have some time to get some palms to go with it.
Joe


Thank you very much for the congrats, and yes I have a lot of time to get palms. About two years! I also have enough merit badges already that I can get a full set and then some and just stay active which won't be hard for me. Thank you for the compliments on the build too.

Thanks for looking at my build!
Richard
M4A2Sherman
Visit this Community
Canada
Joined: December 29, 2008
KitMaker: 316 posts
Armorama: 264 posts
Posted: Friday, January 16, 2009 - 11:50 AM UTC
Richard, an easy way to do a nice dust wash is to buy some cheap acrylic craft paints(available at dollar stores and micheals for $1) that are light brown colours (or anything that looks like dust, depending on what front your vehicle is). Thin this with water and apply on the whole vehicle. I use this and I like my results.
Have fun and keep up the good work!
M4A2Sherman
M4A2Sherman
Visit this Community
Canada
Joined: December 29, 2008
KitMaker: 316 posts
Armorama: 264 posts
Posted: Friday, January 16, 2009 - 11:54 AM UTC
A for the rust on the exhausts I was referring to the box art. You said you have dust powders? They work well too.
M4A2Sherman
RSingleton
Visit this Community
Kentucky, United States
Joined: August 26, 2008
KitMaker: 286 posts
Armorama: 273 posts
Posted: Friday, January 16, 2009 - 02:30 PM UTC

Quoted Text

Richard, an easy way to do a nice dust wash is to buy some cheap acrylic craft paints(available at dollar stores and micheals for $1) that are light brown colours (or anything that looks like dust, depending on what front your vehicle is). Thin this with water and apply on the whole vehicle. I use this and I like my results.
Have fun and keep up the good work!
M4A2Sherman


Quoted Text

A for the rust on the exhausts I was referring to the box art. You said you have dust powders? They work well too.
M4A2Sherman


That's the info I needed! I do have the paints to do the dust wash and now I know how. I may only use a little of the dust powders just to experiment with them. I think I have made the decision to just rust a slight bit of the mufflers. I learned from somewhere that when the rust paint is mixed with a little baking soda, it makes a good looking rust. I'll try out the rust and wash on one of my really old models.

Thank you very much for the info I needed!
Richard
RSingleton
Visit this Community
Kentucky, United States
Joined: August 26, 2008
KitMaker: 286 posts
Armorama: 273 posts
Posted: Sunday, January 18, 2009 - 02:42 AM UTC
Now it's time for an update:
"Eva is still the same she is, but hopefully after tomorrow she will be completely finished. I practiced a "wash" to see how it works and now I know why everyone uses it! It makes an old toy look real. I also tried the rust effect I learned about and I think it looks good in real life. It's really grainy with the baking soda, but considiring it's not covering the entire muffler, it's ok.

Anyway here are some pics of the dust wash and the rust. I think the rust is the right colors but does anyone think otherwise? (BTW, this technically was my first model but I didn't make it myself, it a project my dad and I did when I was... 9? So I reeally don't count this one as mine)


I also assembled the figures I'm going to use. I wish I could find out what "Eva's" crew names were. But here are the names I gave them.

Meet Wolfgang:


Dieter:


Ensign Walter:


(On a sidenote. I really hope I don't screw up painting this figure because it has the finest molding I have ever seen on any plastic figure. I wish the pics could do it justice.)

Colonel Kinkelaar (a.k.a.- Colonel Klink )


(On another sidenote. I named this guy after my grandfather. He's always had the nickname "Colonel Klink" so I found his name approriate for the guy yelling the orders.)

Gunnerofizier(I don't think that's a real title but who cares!) Sprink


This is the general layout I'm going to have with the figures. I still haven't found a good driver figure which is really unfortunate on my part. Oh well.


Questions, comments, or snide remarks are welcome.

Thank you everyone for watching and for the gracious help,
Richard
RSingleton
Visit this Community
Kentucky, United States
Joined: August 26, 2008
KitMaker: 286 posts
Armorama: 273 posts
Posted: Monday, January 19, 2009 - 09:23 AM UTC
I made a little progress on "Eva" , but no pics for today. I did a dust wash, but I personally think it is way overdone. I'll have pics most likely Wednsday. Does anyone know how to tone down a wash or am I going to have to live with it?

Richard
M4A2Sherman
Visit this Community
Canada
Joined: December 29, 2008
KitMaker: 316 posts
Armorama: 264 posts
Posted: Tuesday, January 20, 2009 - 03:08 PM UTC
Hey Richard!

I think that the rust and dust looks great. I am glad to help you out! As for toning down the wash, you could try wetting Q-tips and rubbing it off, but try it in a small area or on your practice tank to see if it destroys the basecoat.
Glad to help!
M4A2Sherman
RSingleton
Visit this Community
Kentucky, United States
Joined: August 26, 2008
KitMaker: 286 posts
Armorama: 273 posts
Posted: Friday, January 23, 2009 - 09:54 AM UTC

Quoted Text

Hey Richard!

I think that the rust and dust looks great. I am glad to help you out! As for toning down the wash, you could try wetting Q-tips and rubbing it off, but try it in a small area or on your practice tank to see if it destroys the basecoat.
Glad to help!
M4A2Sherman


I'll try to see if i can do that soon. Thanks a lot for the advice.

Richard
RSingleton
Visit this Community
Kentucky, United States
Joined: August 26, 2008
KitMaker: 286 posts
Armorama: 273 posts
Posted: Friday, January 23, 2009 - 10:13 AM UTC
I know I'm late for the pics I promised but I have been way too busy plaing Bioshock. What an epic game! Anyway here is may attempt at that wash I talked about. It worked for the hull but I think it is way too much on the upper hull. Anyway, I'll let the pics speak for themself. (There's some other pics besides the wash too.)


The right is what I think is the appropriate wash.


In other news: the figures are primed and the base is still not started.

Thanks y'all for watchin' and any comments or criticism is welcome
Richard
integraguy95
Visit this Community
Tennessee, United States
Joined: October 02, 2008
KitMaker: 308 posts
Armorama: 304 posts
Posted: Friday, January 23, 2009 - 04:23 PM UTC
Rich, good job with that wash, makes it look excellent. Dont forget about those ladders too! they need some mud as well. Still waiting for this to take shape my friend.
lespauljames
Visit this Community
England - South West, United Kingdom
Joined: January 06, 2007
KitMaker: 3,661 posts
Armorama: 2,764 posts
Posted: Friday, January 23, 2009 - 06:48 PM UTC
looking good so far,
soldier on Richard!
Pyromaniac
Visit this Community
England - South East, United Kingdom
Joined: January 10, 2009
KitMaker: 375 posts
Armorama: 362 posts
Posted: Saturday, January 24, 2009 - 12:30 AM UTC
very good. the figures look ok, but they're nothing special, so don't worry about messing them up. make sure you remove all mouldin marks and fill all the gaps, which it looks like you're already doing. the positions of the crew look a bit strange though. whats with the two guys leaning over the side? the commander looks like he's leaning odly too but i assume thats cos he's not stuck down. nice wash though. here's my favourite tip for you to try. if possible, get a solid graphite pencil from an artists store, one that looks like a normal pencil but has no wood. if you can't just find a very soft B pencil. then either rub it directly onto the model or rub it on some sandpaper and use your finget to apply it (the better way in my opinion, unless it's hard to get your finger into somewhere). panel edges, rivets, running gear, tracks and tools look great with a metalic sheen to them, it's incredibly convincing. this isn't quite the same, but you'd never believe that this

was once this

http://ultrawerke.blogspot.com/2007/08/rust-painting-tutorial-with-pigments.html
RSingleton
Visit this Community
Kentucky, United States
Joined: August 26, 2008
KitMaker: 286 posts
Armorama: 273 posts
Posted: Monday, January 26, 2009 - 05:04 AM UTC

Quoted Text

Rich, good job with that wash, makes it look excellent. Dont forget about those ladders too! they need some mud as well. Still waiting for this to take shape my friend.


So you don't think it looks overdone? I didn't think about the ladders, I'll make a more concentrated wash for them because they were used so much. Thanks alot for the compliments and especially the help.

Richard
RSingleton
Visit this Community
Kentucky, United States
Joined: August 26, 2008
KitMaker: 286 posts
Armorama: 273 posts
Posted: Monday, January 26, 2009 - 05:04 AM UTC

Quoted Text

looking good so far,
soldier on Richard!


Thanks Lespaul. Any criticism?
Richard
RSingleton
Visit this Community
Kentucky, United States
Joined: August 26, 2008
KitMaker: 286 posts
Armorama: 273 posts
Posted: Monday, January 26, 2009 - 05:17 AM UTC

Quoted Text

very good. the figures look ok, but they're nothing special, so don't worry about messing them up. make sure you remove all mouldin marks and fill all the gaps, which it looks like you're already doing. the positions of the crew look a bit strange though. whats with the two guys leaning over the side? the commander looks like he's leaning odly too but i assume thats cos he's not stuck down. nice wash though. here's my favourite tip for you to try. if possible, get a solid graphite pencil from an artists store, one that looks like a normal pencil but has no wood. if you can't just find a very soft B pencil. then either rub it directly onto the model or rub it on some sandpaper and use your finget to apply it (the better way in my opinion, unless it's hard to get your finger into somewhere). panel edges, rivets, running gear, tracks and tools look great with a metalic sheen to them, it's incredibly convincing. this isn't quite the same, but you'd never believe that this

was once this

http://ultrawerke.blogspot.com/2007/08/rust-painting-tutorial-with-pigments.html


I don't see the images but I did take a look at the website and that site is extremely helpful. The method I'm going to use for the muffler is a combo of all four appearences.

As for the wierd positions for the figures, I trying to go for a relaxing crew inbetween firing. They aren't excactly set yet and it will take me a while to find good placement for them.

I'll try what you said about the graphite pencil, "Eva" probably does need it.

Thanks alot Pyro as this is the stuff I need to improve,
Richard